
I don’t know about you, but I absolutely melt for handmade baby clothes. There’s just something about tiny crocheted garments that store-bought pieces can never match.
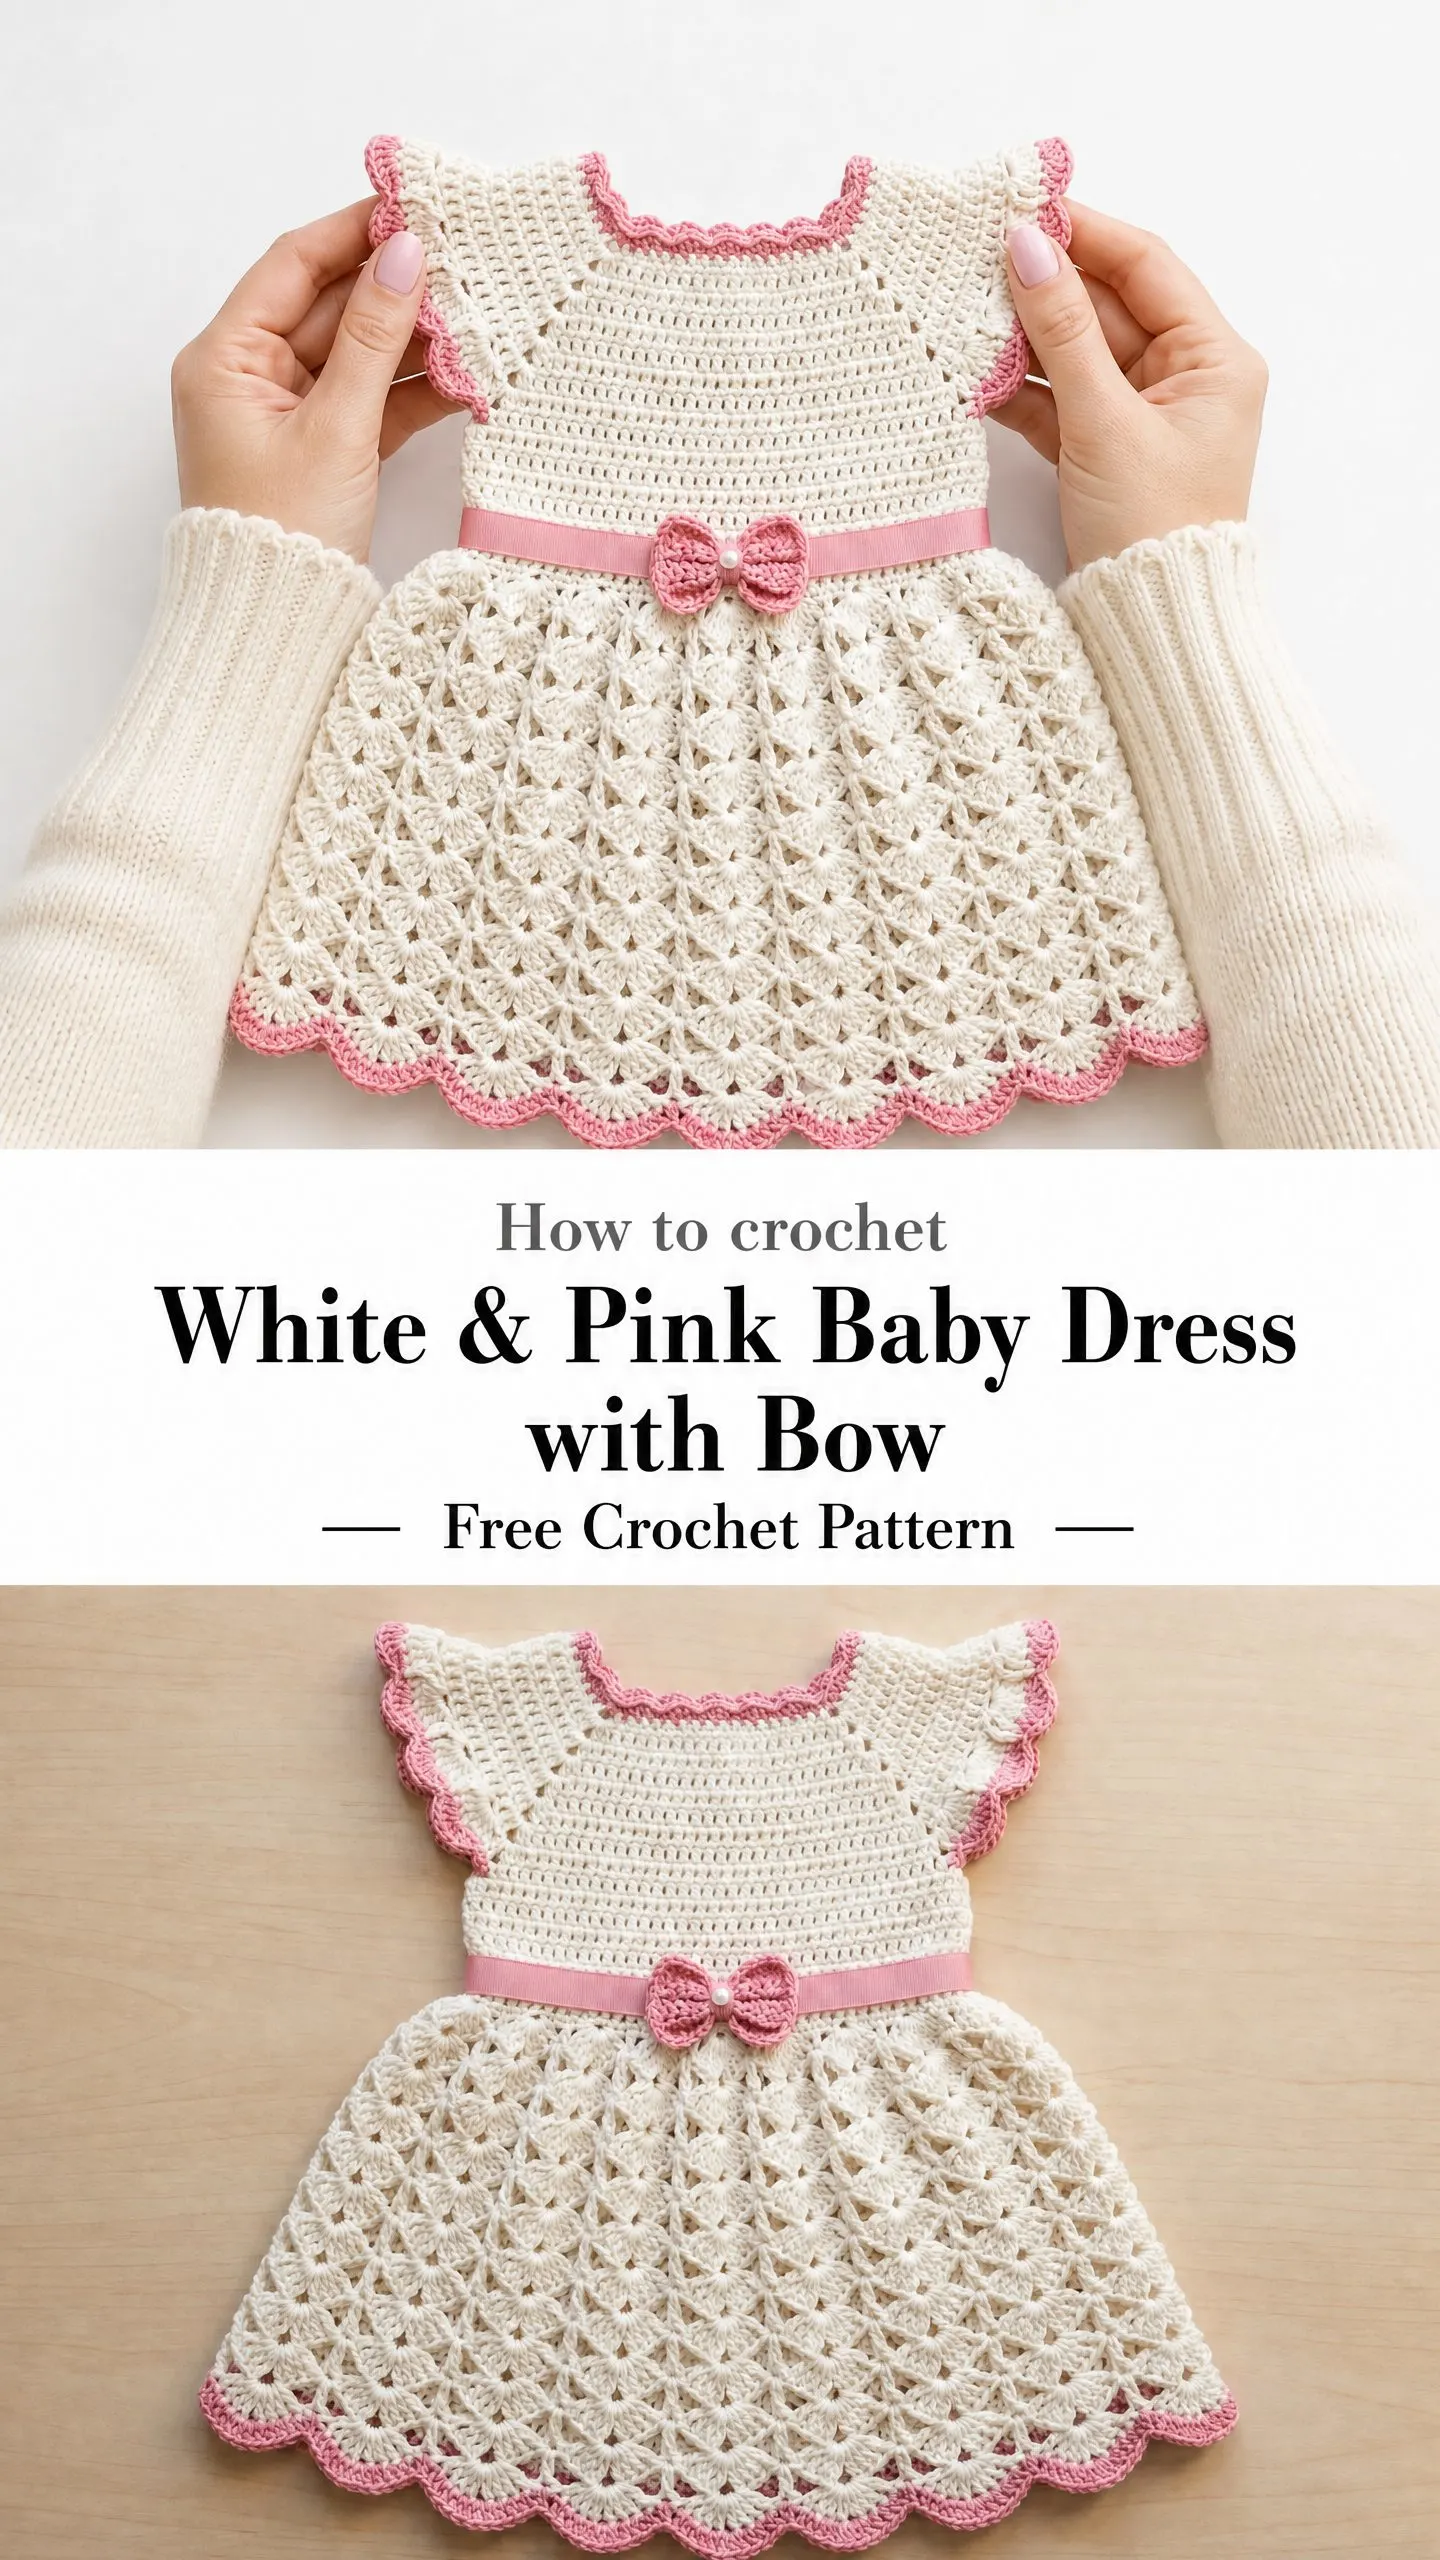
This sweet little dress has been living in my head for months. The combination of a classic fitted bodice, fluttery sleeves, and that gorgeous fan stitch skirt creates the kind of heirloom piece that gets passed down through generations.
Whether you’re making this for a christening, a first birthday, or just because that baby in your life deserves something special, this pattern delivers all the charm with clear instructions to guide you through every stitch.
About This Baby Dress Crochet Pattern
This dress is worked top-down, starting at the neckline and flowing all the way to a scalloped hem. The construction might sound fancy, but I promise it’s more approachable than it looks.
The bodice uses simple double crochet (dc) stitches worked flat with raglan shaping. If you’ve never done raglan increases before, don’t panic. You’re basically just adding stitches at four specific points to create those diagonal seam lines that shape the shoulders naturally.
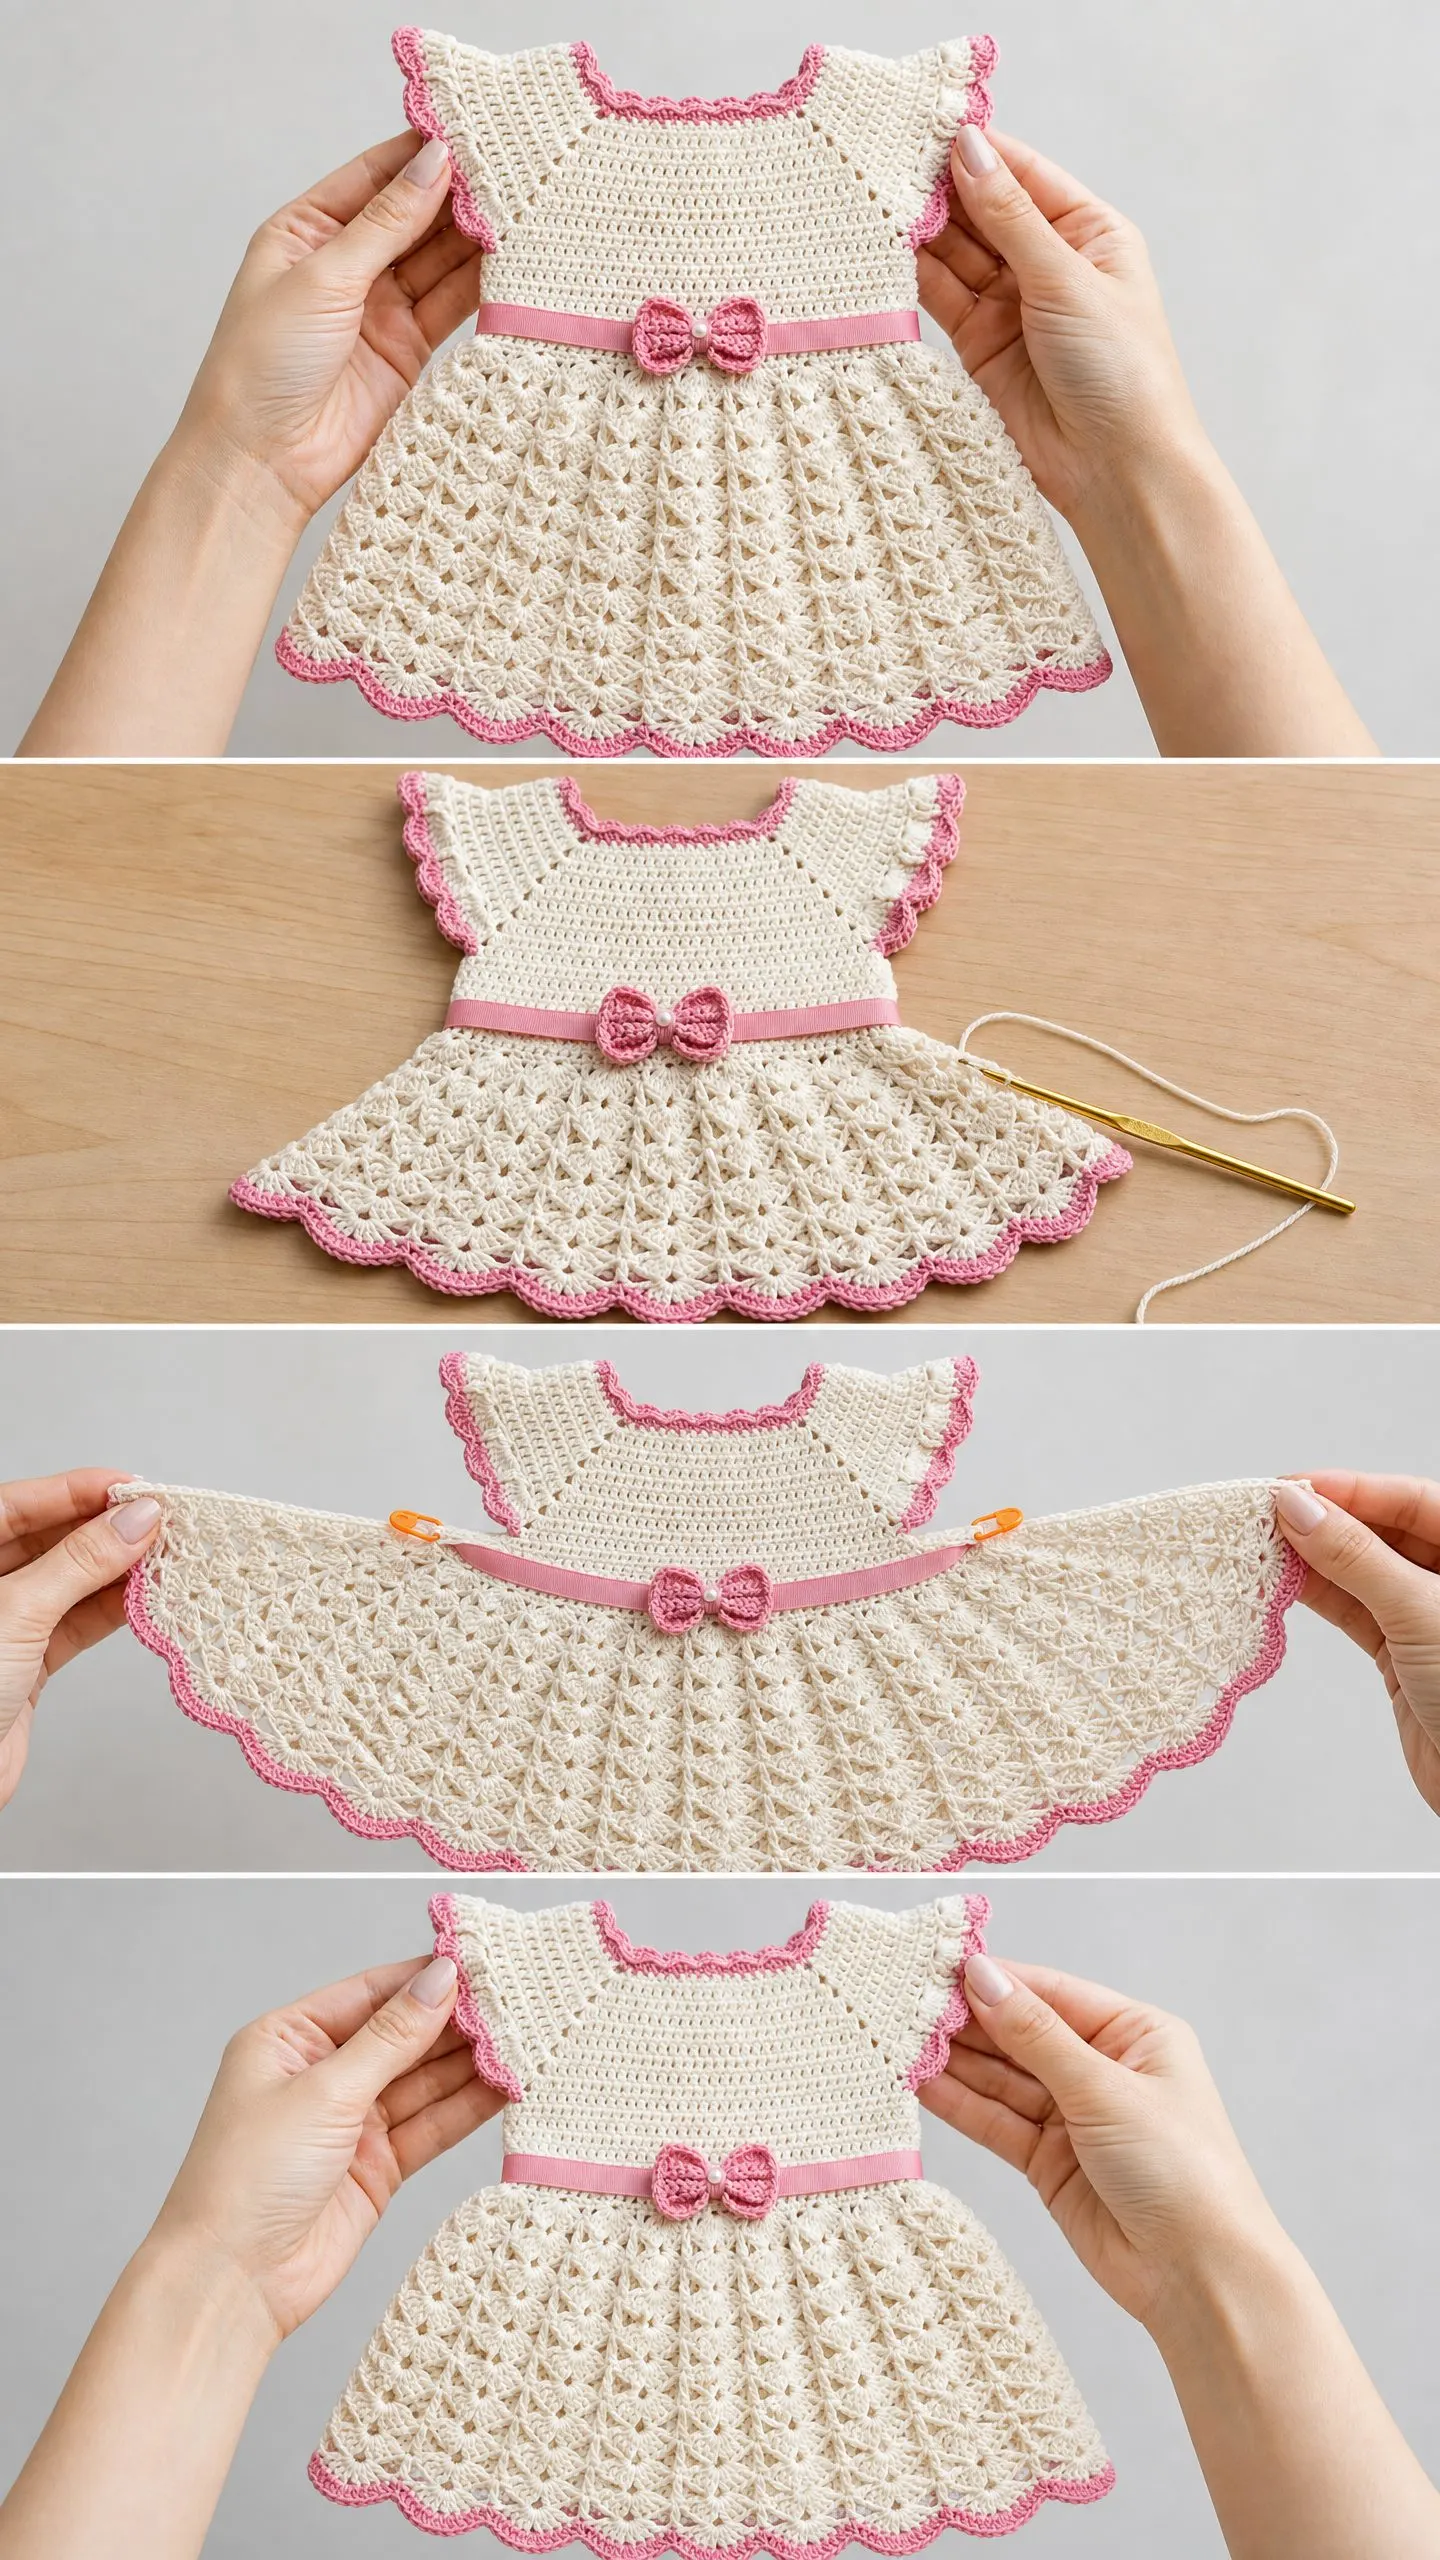
The skirt is where this dress really shines. Once you separate the sleeves and finish the bodice, you’ll join your work into a round and begin the fan stitch pattern. This creates that beautiful shell-like texture you see in the photo. A pink satin ribbon threads through the waistline, and a cute crocheted bow finishes the whole look.
The flutter sleeves and all those pretty scalloped edges get added in the contrasting pink yarn at the end. They frame the dress beautifully without adding bulk.
Finished Size (6 to 12 months):
Skill Level
This pattern is rated intermediate. You should be comfortable working in joined rounds, reading stitch repeat patterns, executing yarn color changes, and working into chain spaces.
If you’ve made a few garments before and understand how raglan construction works, you’ll do great here. The fan stitch skirt requires attention to repeat placement at the join points, but I’ll walk you through it.
Materials You’ll Need
Yarn:
Hook:
Notions:
Yarn Suggestions
Option 1: Paintbox Yarns Simply DK (100% acrylic, 276 yards per 3.5 oz skein). This is widely available, machine washable, and has excellent stitch definition. You’ll need 2 skeins of cream and 1 skein of pink.
Option 2: We Are Knitters The Petite Wool (100% Merino wool, 218 yards per 1.76 oz skein). A premium choice with exceptional drape and softness. Hand wash cold. You’ll need 2 skeins of cream and 1 skein of pink.
Option 3: Lion Brand Yarn Comfy Cotton Blend (52% cotton, 48% polyester, 250 yards per 3.5 oz skein). Breathable and soft, perfect for warmer weather. Machine washable. You’ll need 2 skeins of cream and 1 skein of pink.
Substitution note: Any DK weight yarn that achieves gauge will work. Avoid fuzzy or heavily textured yarns, as they’ll obscure the pretty fan stitch pattern in the skirt.
Gauge
19 dc x 10 rows = 4 inches x 4 inches (10 cm x 10 cm), worked in rows of double crochet using Yarn A and US E-4 hook, blocked.
Fan stitch gauge: 1 fan repeat = approximately 2.25 inches or 5.7 cm wide.
Please make a gauge swatch before starting. Gauge matters for garments, especially baby clothes where fit is important.
Abbreviations and Stitch Definitions
Let me break down every abbreviation you’ll encounter:
Special Stitches
Scallop Border Stitch
This creates those lovely pink edges on the neckline, sleeves, and hem.
With Yarn B, join with slip stitch to designated stitch or chain space.
1. Chain 1, single crochet in same stitch.
2. Skip next 2 stitches or spaces.
3. Work 5 dc in the next stitch or space (this forms one scallop shell).
4. Skip next 2 stitches or spaces.
5. Single crochet in next stitch or space.
Repeat steps 2 through 5 around until all stitches are consumed, ending with slip stitch to first single crochet to close the round.
Note: The stitch count must be a multiple of 6 for the scallop to divide evenly. The pattern adjusts counts before border rounds to achieve this.
Fan Stitch
This creates the gorgeous textured skirt.
1. Work sc in designated stitch or chain space.
2. Chain 2, skip 2 stitches.
3. Work 5 dc in next stitch (the center stitch of the fan group). This is the fan shell.
4. Chain 2, skip 2 stitches.
5. Work sc in next stitch.
The single crochet between fans is shared, meaning you work it once, not twice. Each full fan repeat spans 10 stitches.
Crocheted Bow
Make 2 rectangles:
Chain 16, turn.
Row 1: Single crochet in 2nd chain from hook and in each chain across. (15 sc)
Rows 2 through 5: Chain 1, turn, single crochet across. (15 sc)
Fasten off, leaving a tail for sewing.
Stack both rectangles together, gather at center, and wrap Yarn B tightly around the center 4 to 5 times to cinch. Secure with a knot. Optionally sew a small pearl bead to the center. Sew the bow to the satin ribbon at center front waist.
Pattern Notes Before You Begin
1. The dress is worked top-down, beginning at the neckline.
2. The bodice is worked flat (back and forth in rows) to create an open back. This makes it easy to dress and undress baby.
3. The skirt begins after the bodice is complete and is worked in joined rounds to the hem.
4. In the skirt, all rounds are joined. At the end of each round, join with slip stitch to the top of the turning chain or first dc, then chain 3 to begin the next round. The chain 3 counts as first dc throughout the skirt.
5. Yarn B is used only for the scallop borders and the bow. Everything else uses Yarn A.
6. The satin ribbon threads through chain spaces at the waistline after blocking.
7. Turning chain rules: In dc rows, chain 3 and turn counts as first dc. In sc rows, chain 1 and turn does NOT count as first sc. Work the first sc into the first stitch.
8. The flutter sleeves are worked after the bodice is complete by picking up stitches along the sleeve opening edge.
Step-by-Step Instructions
Neckline and Yoke Setup
With Yarn A and US E-4 hook, chain 62.
Foundation Row (RS): Double crochet in 4th chain from hook and in each chain to end. The chain 3 counts as first dc. (60 dc)
Mark sections with stitch markers as follows:
Section count check: 8 + 10 + 24 + 10 + 8 = 60 dc. Confirmed.
Raglan Yoke Increases
You’ll work 8 increase rows total. Each row adds 10 stitches.
Increase Row Instructions: Chain 3, turn. Work 2 dc in first dc (increase at left edge). Double crochet to 1 dc before Marker A, work 2 dc in next dc (increase). Slip marker. Work 2 dc in next dc (increase). Double crochet to 1 dc before Marker B, work 2 dc in next dc (increase). Slip marker. Work 2 dc in next dc (increase). Double crochet to 1 dc before Marker C, work 2 dc in next dc (increase). Slip marker. Work 2 dc in next dc (increase). Double crochet to 1 dc before Marker D, work 2 dc in next dc (increase). Slip marker. Work 2 dc in next dc (increase). Double crochet to last dc, work 2 dc in last dc (increase at right edge).
Stitch counts after each increase row:
Checkpoint: After 9 rows, your yoke section counts are: Left back 24, Left sleeve 26, Front 40, Right sleeve 26, Right back 24. Total 140 dc. The piece should measure approximately 3.5 inches from neckline chain to bottom of Row 9. The front yoke width should measure approximately 8.5 inches.
Separating Sleeves from Body
Row 10 (RS): Chain 3, turn. Double crochet across 24 left back stitches. Chain 2 (underarm bridge). Skip all 26 left sleeve stitches and remove marker. Double crochet across 40 front stitches. Chain 2 (underarm bridge). Skip all 26 right sleeve stitches and remove marker. Double crochet across 24 right back stitches.
Body stitch count: 24 (left back) + 2 chain stitches + 40 (front) + 2 chain stitches + 24 (right back) = 92 stitches
Bodice
Continue working flat in dc rows across all 92 stitches.
Row 11: Chain 3, turn. Double crochet in each stitch and chain across. (92 dc)
Row 12: Chain 3, turn. Double crochet in each stitch across. (92 dc)
Waistband Channel Row
Row 13 (Ribbon Channel): Chain 3, turn. Double crochet in next dc. Chain 1, skip 1 dc, double crochet in next dc. Repeat from across to last dc, double crochet in last dc.
This creates evenly spaced chain 1 spaces across the waist for threading the ribbon later.
Row 14: Chain 3, turn. Double crochet in each dc and in each chain 1 space across. (92 dc)
Checkpoint: After Row 14, the bodice section should measure approximately 2.5 inches tall. The full piece from shoulder to bottom of bodice should be approximately 6 inches.
Joining for the Skirt
At the end of Row 14, do not turn. The back opening will remain for closure.
Skirt Round 1 (Decrease to multiple of 10): Join Yarn A to bottom of bodice Row 14. Chain 3 (counts as first dc). Work dc around entire bottom of bodice, working dc2tog at 8 evenly spaced positions (approximately every 11th stitch). Join with slip stitch to top of chain 3. (80 dc)
This gives you a multiple of 10 stitches for the fan stitch repeat, creating 8 even fan units around the skirt.
Skirt Fan Pattern
Continue working the fan stitch pattern in joined rounds for the remainder of the skirt, following the fan stitch instructions above. Work until the skirt reaches your desired length, ending with the scallop border in Yarn B.
Flutter Sleeves
Pick up stitches around each armhole opening. Work 2 to 3 rounds of double crochet, then finish with the scallop border stitch in Yarn B.
Finishing
Size Customization Tips
For a smaller size (0 to 3 months), reduce the starting chain and work fewer raglan increase rows. For a larger size (12 to 18 months), add more starting chains and additional increase rows. Always check your gauge and try the bodice on a similarly sized garment for reference.
I really hope you enjoy making this sweet little dress as much as I enjoyed designing it. It’s the kind of project that feels rewarding every step of the way, and the finished piece is absolutely gift-worthy.
If you make this baby dress, I’d love to see it! Save this pattern to your Pinterest boards so you can find it when you’re ready to start, and please leave a comment below to share your finished project or ask any questions. Happy crocheting!
