
I set out to design the kind of baby dress that makes people gasp when they see it. You know the type. The heirloom piece that gets passed down, photographed a hundred times, and carefully stored in tissue paper for the next generation.
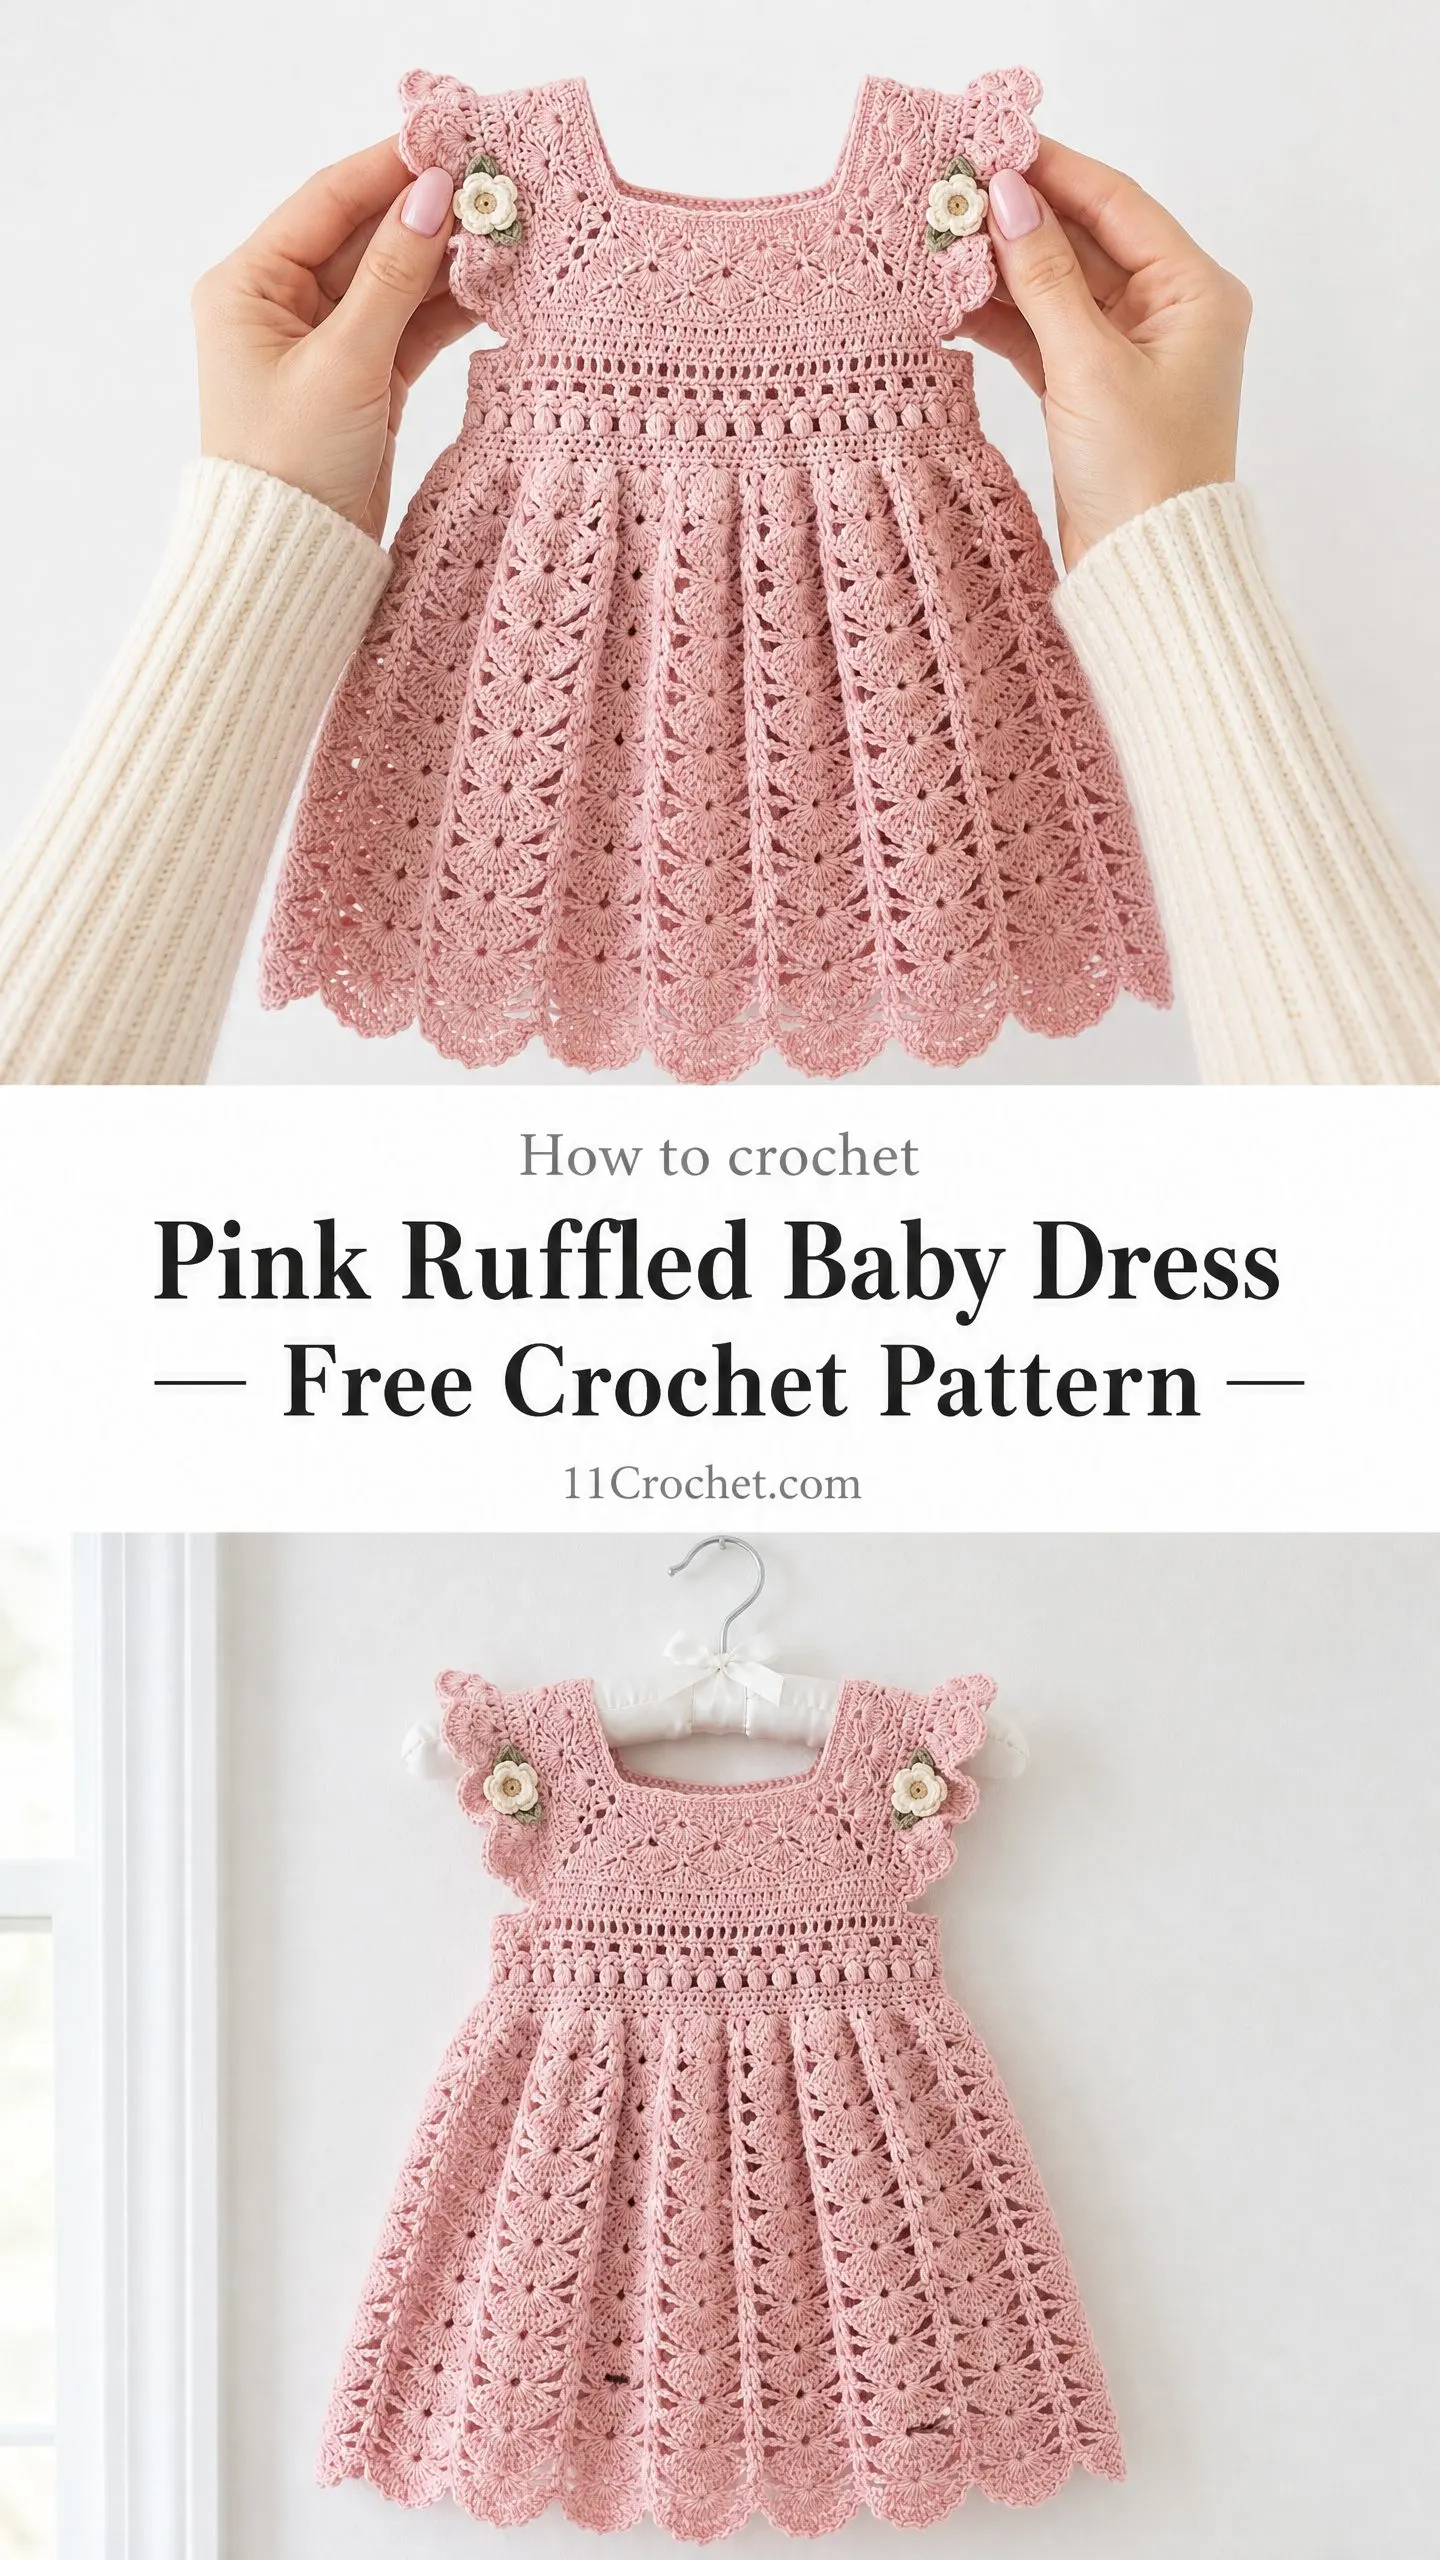
My goals were specific: a square neckline that frames a baby’s sweet face, flutter sleeves that add movement without bulk, and a skirt that cascades in waves of delicate lace. I wanted visible waist definition from a bobble band, tiny flower appliques at the shoulders, and a construction method that actually makes sense when you read through it.
I am SO pleased with how this pink ruffled baby dress turned out. Every single design decision came together beautifully, and I cannot wait to walk you through the entire process.
About This Baby Dress Crochet Pattern
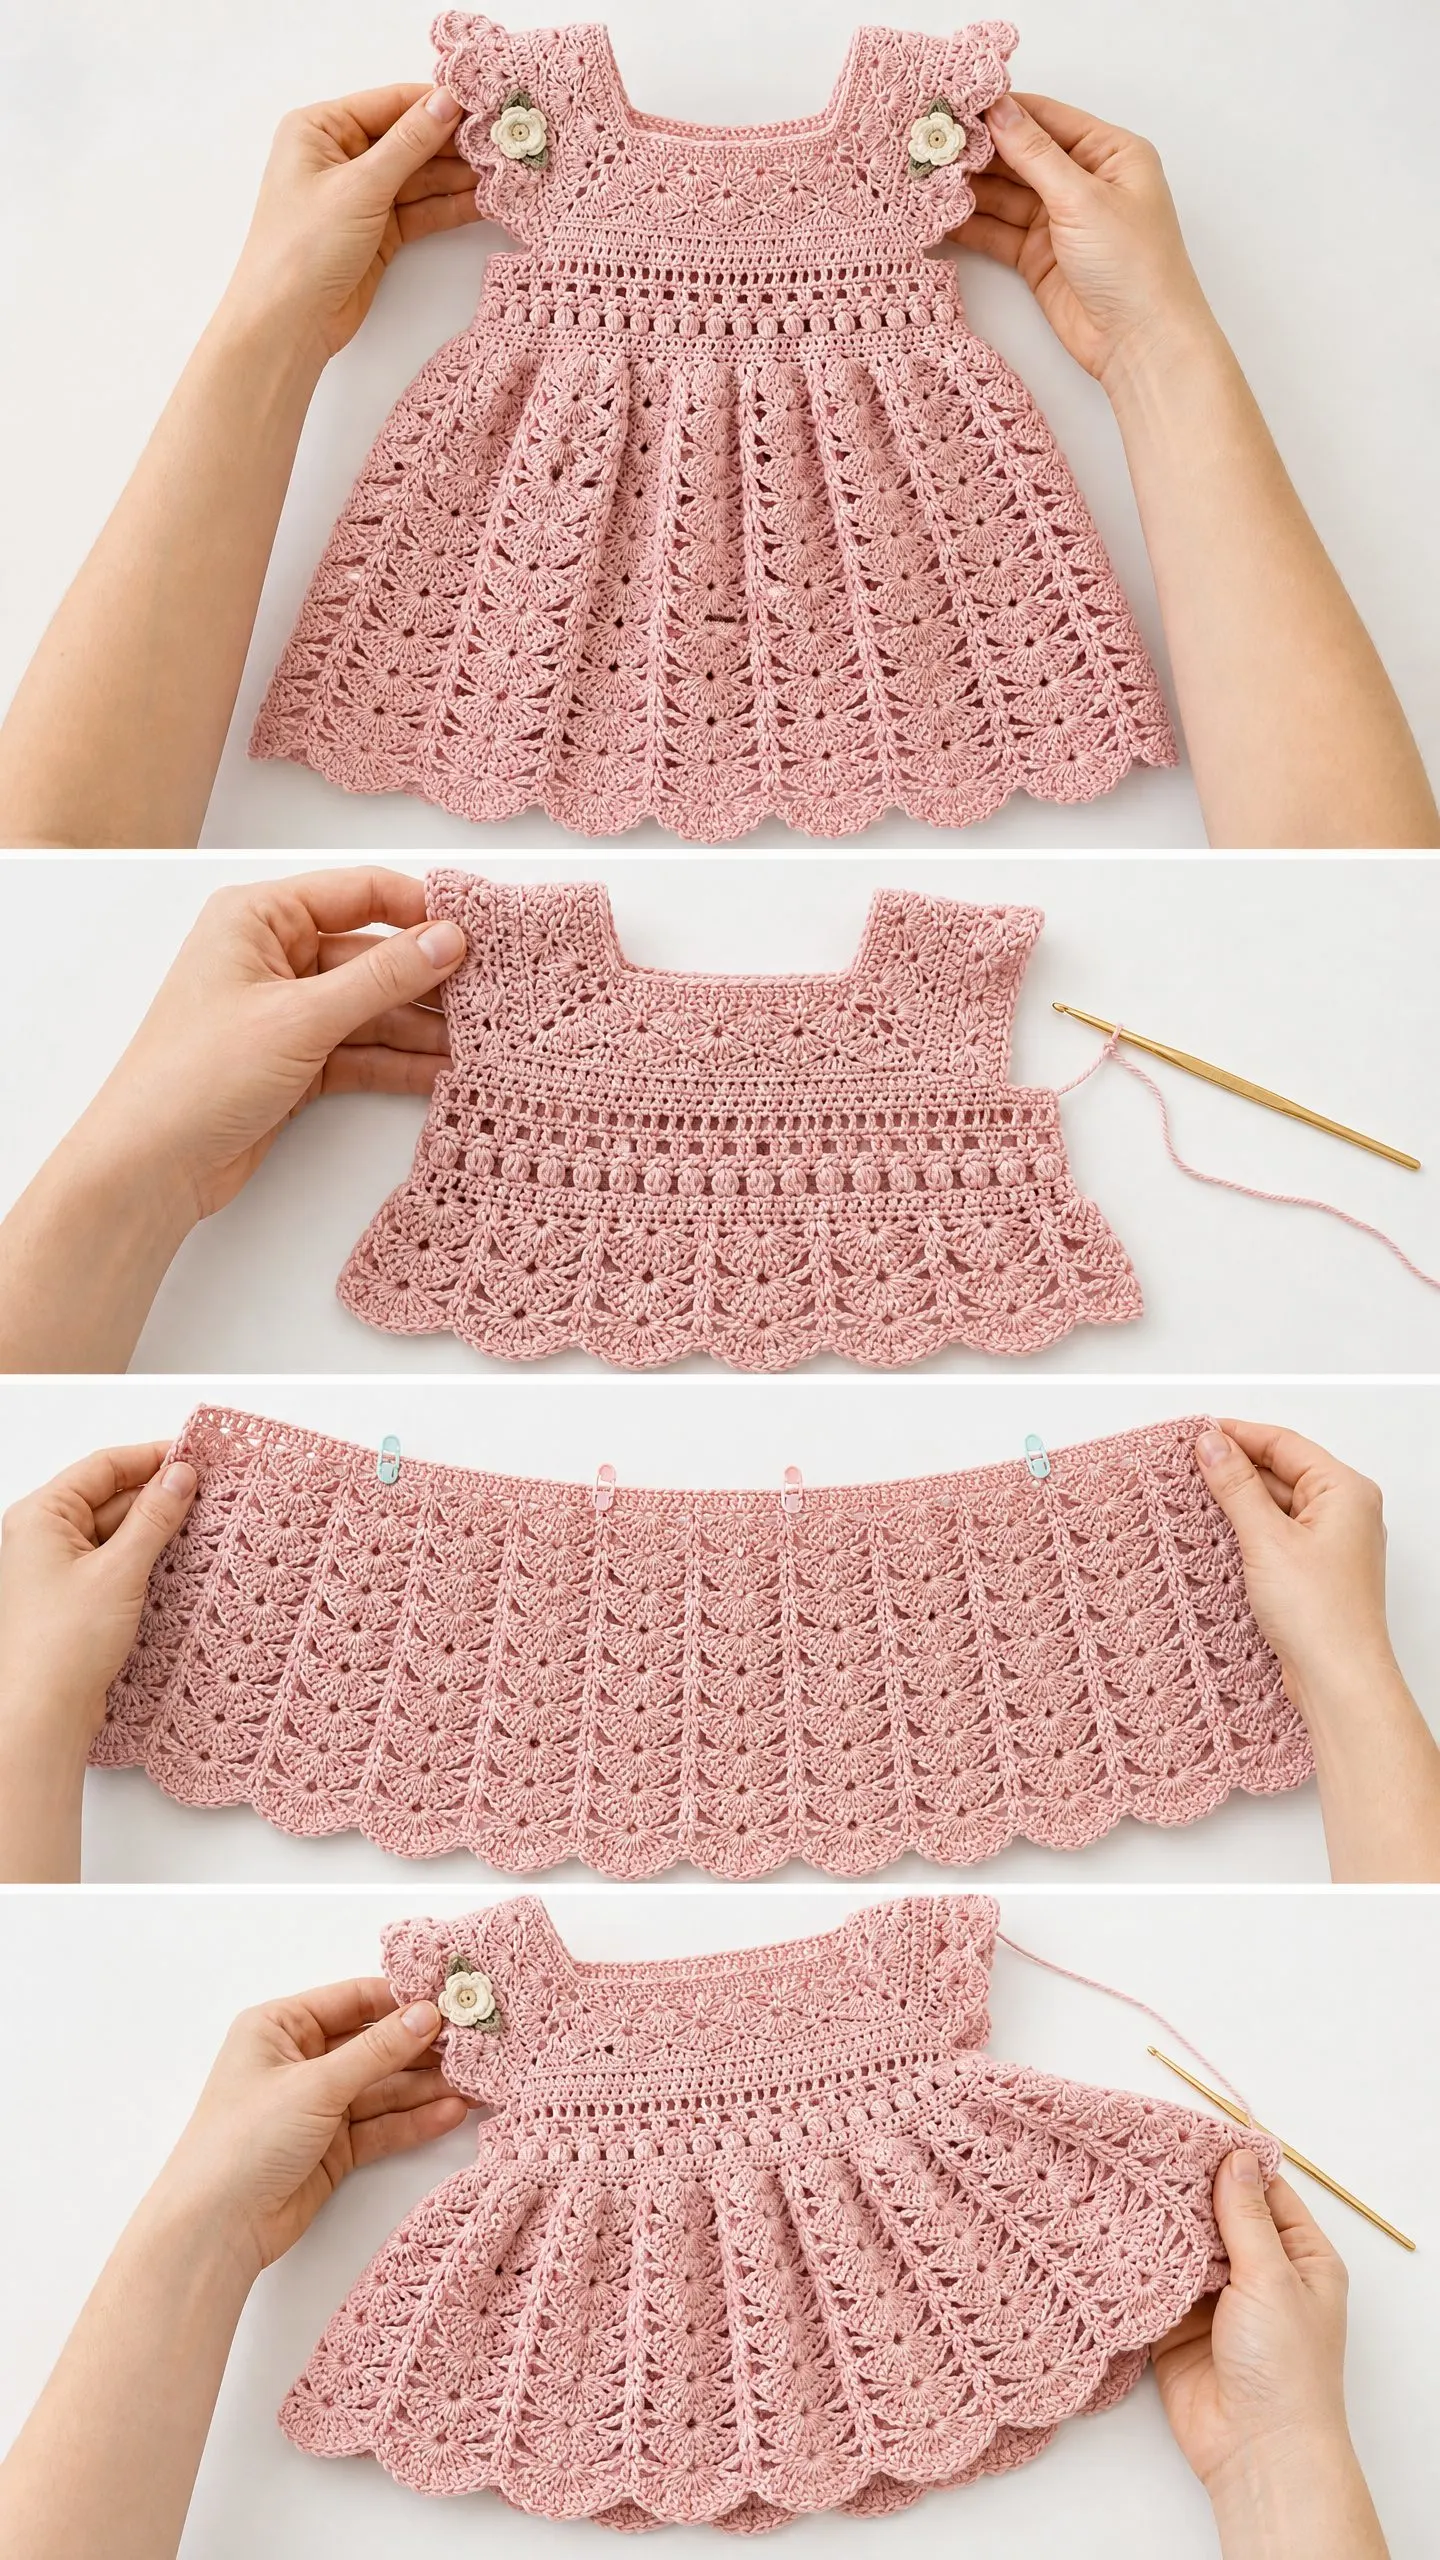
This dress is worked top down, starting with a flat yoke that creates that gorgeous square neckline. You will work the back in two separate panels to allow for a button closure, then join everything together and continue in rounds for the body. The construction flows logically from shoulders to hem.
The bodice features a shell stitch pattern that transitions into a textured bobble waist band. Below that, the skirt opens up into a stunning fan and shell lace motif that repeats in waves down to a deep scallop border. Flutter sleeves get added at the armholes, and sweet crocheted flower appliques finish off the shoulders.
Skill level: Intermediate to Advanced. You should be comfortable working both flat and in the round, reading lace pattern repeats, making bobble stitches, and seaming pieces together. If you have never worked lace before, this might feel challenging. But do not let that scare you away. Take it round by round.
Time estimate: 14 to 22 hours depending on your experience. The skirt lace section takes the most time, but it is also the most meditative and satisfying part.
Finished Measurements
This pattern is written for size 12 months, fitting a baby approximately 18 to 22 pounds.
Size customization tips are included at the end of the instructions if you need to adjust for a different age.
Materials Needed for This Crochet Baby Dress
Yarn: 400 to 450 yards / 365 to 412 meters of DK weight yarn (CYCA 3) in dusty pink or antique rose. A smooth, tightly spun mercerized cotton or cotton blend shows the lace stitch definition beautifully.
Great yarn options include:
Avoid fluffy or loosely plied yarns. They will obscure your gorgeous lace work.
Hook: US size E-4 / 3.5 mm crochet hook
Notions:
Gauge
20 double crochet (dc) = 4 inches / 10 cm
10 rows of dc = 4 inches / 10 cm
In the shell lace pattern for the skirt: one 6 stitch fan repeat plus 2 chain spaces = approximately 1.75 inches / 4.5 cm wide.
Gauge matters here. Your dress needs to fit an actual baby. Take time to make a swatch and adjust your hook size if needed.
To swatch: Chain 30. Row 1: dc in 4th chain from hook and in each chain across. (28 dc) Rows 2 through 10: chain 3, turn, dc in each dc across. (28 dc) Fasten off. Block lightly. Measure 20 stitches in the center. Go up a hook size if your gauge is tight, down if it is loose.
Abbreviations and Stitch Definitions
Let me define every stitch and abbreviation you will encounter. Even if you know these, a quick refresher never hurts.
Special Stitches You Will Use
These special stitches create the texture and lace that make this dress so stunning. Read through them before you start.
Bobble (bo): Yarn over, insert hook in stitch, yarn over and pull up a loop, yarn over and draw through 2 loops. You now have 2 loops on your hook. Repeat this sequence 4 more times in the same stitch until you have 6 loops on your hook. Yarn over and draw through all 6 loops at once. Chain 1 to close. That is one bobble.
Shell (ss): Work 5 dc all in the same stitch or space. Simple but beautiful.
Fan Shell (fs): Work (2 dc, ch 2, 2 dc, ch 2, 2 dc) all in the same stitch or space. This is the main skirt repeat motif that creates those gorgeous waves.
V-stitch (V-st): Work (dc, ch 2, dc) all in the same stitch or space.
Scallop Border: Slip stitch to first stitch, chain 1, work 6 sc in next chain 2 space, slip stitch to next chain 2 space. Repeat around.
Picot: Chain 3, slip stitch in first chain made.
Flutter Ruffle: Join yarn to armhole edge stitch. Chain 1, work 3 sc in same stitch, 3 sc in each stitch around armhole edge, join with slip stitch. Next round: chain 3, work 4 dc in same stitch (counts as first shell), skip 2 stitches, slip stitch in next stitch, skip 2 stitches, 5 dc in next stitch. Repeat around. Join. Fasten off.
Flower Applique: Using cream yarn, chain 4, join with slip stitch to form ring. Round 1: chain 1, work 10 sc into ring, join with slip stitch. (10 sc) Round 2: (chain 3, dc in same stitch, chain 3, slip stitch in next stitch) 5 times. (5 petals) Fasten off. Using sage yarn, attach to center back of flower and work 3 chain loops of 4 chains each to suggest leaves. Fasten off. Weave ends.
Important Pattern Notes
Before you begin, read these notes. They will save you confusion later.
1. The dress is worked top down. The yoke begins as two flat panels for the back and one for the front, worked separately, then joined at the shoulders and continued in joined rounds.
2. The back yoke has a center opening for the button closure. Each back panel is half the width of the front panel.
3. The turning chain 3 at the beginning of dc rows and rounds counts as the first dc throughout. Do not work into the base of the turning chain unless instructed. Work the last dc of each row into the top of the turning chain of the previous row.
4. Stitch counts in parentheses at the end of each row or round represent the total working stitches, not counting turning chains unless otherwise stated.
5. Right side is the outside of the garment.
6. All joining rounds are joined with a slip stitch to the top of the turning chain 3 unless otherwise stated.
7. When working the skirt lace pattern, do not count chain spaces as stitches. Count only the dc clusters and any pivot slip stitches.
8. Block the finished dress before attaching flowers. Cotton and cotton blend yarns open beautifully with wet blocking.
9. Weave ends through the backs of stitches for at least 1 inch in two directions. Do not knot.
10. The three buttons close the center back at the upper yoke. Buttonholes are naturally formed by chain spaces in the lace pattern.
Step by Step Instructions
Back Yoke, Right Panel
The back yoke is worked in two equal panels that together equal the width of the front yoke. Each back panel is 9 dc wide including the turning chain.
Row 1 (RS): Chain 11. Dc in 4th ch from hook and in each ch to end. (9 dc including t-ch)
Row 2: Ch 3, turn. Dc in next 8 dc. (9 dc)
Row 3: Ch 3, turn. Dc in next 8 dc. (9 dc)
Row 4: Ch 3, turn. Dc in next 8 dc. (9 dc)
Row 5: Ch 3, turn. Dc in next 8 dc. (9 dc)
Row 6: Ch 3, turn. Dc in next 8 dc. (9 dc)
Fasten off. This is your right back panel. Set it aside.
Back Yoke, Left Panel
Work exactly as the Right Panel, Rows 1 through 6. Do not fasten off. Leave the working loop live.
Front Yoke Panel
Row 1 (RS): Chain 38. Dc in 4th ch from hook and in each ch to end. (36 dc including t-ch)
Row 2: Ch 3, turn. Dc in each dc across. (36 dc)
Row 3: Ch 3, turn. Dc in each dc across. (36 dc)
Row 4: Ch 3, turn. Dc in each dc across. (36 dc)
Row 5: Ch 3, turn. Dc in each dc across. (36 dc)
Row 6: Ch 3, turn. Dc in each dc across. (36 dc)
Fasten off. Set aside.
The front yoke is 36 dc. The two back panels are 9 dc each, giving 18 dc total for the back. This accounts for the center back opening and button overlap.
Join Yoke Panels at Shoulders
With the right side of all three panels facing you, arrange them like this: Left Back Panel on the left, Front Panel in the center, Right Back Panel on the right.
Join the shoulders by slip stitching or seaming the first 9 stitches of the left edge of the Front Panel to the top of the Left Back Panel. Then seam the last 9 stitches of the right edge of the Front Panel to the top of the Right Back Panel.
The center 18 dc of the Front Panel remain free as the front neck width. The 9 stitches on each side of the back remain free as the back neck opening.
After joining, you have two armhole openings, one on each side, each measuring 9 stitches wide at the shoulder seam point.
Joining Round for Body
With RS facing, attach yarn at the bottom right corner of the right back panel at Row 6.
Rnd 1: Ch 3. Working along the bottom edge of all panels:
Total: 9 + 36 + 9 = 54 dc plus 2 ch-3 bridges. (60 sts total around)
Rnd 2: Ch 3. Dc in each of next 8 dc. Dc in each of 3 chs of right armhole bridge. Dc in each of next 36 dc. Dc in each of 3 chs of left armhole bridge. Dc in each of next 9 dc. Join with sl st. (60 dc)
Rnd 3: Ch 3. Dc in each dc around. Join. (60 dc)
Bodice Shell Pattern
The bodice uses a shell stitch pattern across the 60 dc base.
Rnd 4: Ch 1, sc in same st. (sk 2 dc, ss in next dc, sk 2 dc, sc in next dc) around. 60 sts divided by 6 = 10 repeats exactly. Rep the sequence 10 times total. Join with sl st to first sc. (10 shells, 10 sc pivot points)
Rnd 5: Ch 3, dc in same st (counts as half shell). Sc in center dc of next shell. (ss in next sc, sc in center dc of next shell) rep 9 times. Work 3 dc in last sc to complete the offset shell. Join with sl st to top of ch-3. (10 shells offset)
Rnd 6: Ch 1, sc in same st. (sk 2 dc, ss in next sc, sk 2 dc, sc in center dc of next shell) rep 9 times. Sk 2 dc, ss in next sc, sk 2 dc. Join with sl st. (10 shells, 10 sc)
Rnd 7: Rep Rnd 5. (10 offset shells)
Rnd 8: Rep Rnd 6. (10 shells)
Checkpoint: After completing Rnd 8, the bodice from the joining round to the current row should measure approximately 4 to 5 inches / 10 to 12.5 cm from the top of the yoke. If your measurement is shorter, work 1 to 2 additional rounds in the shell pattern before proceeding.
Waist Bobble Band
Rnd 9: Ch 3. Dc in each st across all shells and sc pivot points to fill out the round as a dc base. Work 1 dc into each dc of each shell (5 dc per shell) and 1 dc into each sc, giving 60 dc. Join. (60 dc)
Rnd 10: Ch 1, sc in same st. (bo in next dc, sc in next dc) rep around, ending with bo in last dc. Join with sl st to first sc. (30 bobbles, 30 sc = 60 sts)
Rnd 11: Ch 3. Dc in each st around, working 1 dc into top of each bobble (through the ch-1 closing loop) and 1 dc into each sc. Join. (60 dc)
Rnd 12: Ch 3. Dc in each dc around. Inc 12 dc evenly spaced (1 extra dc every 5 dc). Join. (72 dc)
To space increases evenly: work 4 dc, then 2 dc in next dc, 12 times around. (4 dc + inc) x 12 = 60 + 12 = 72 dc.
Checkpoint: At this point the piece should measure approximately 6 to 7 inches / 15 to 18 cm from shoulder to current row. The waist should measure approximately 14.5 inches / 37 cm around.
Skirt Setup Round
The skirt uses a Fan Shell lace motif. Each full motif uses 6 stitches. 72 dc / 6 = 12 repeats exactly.
Rnd 13 (Transition Round): Ch 3. Dc in same st. Ch 2. (Sk 2 dc, 2 dc in next dc, ch 2) 23 times. Join with sl st. (24 pairs of dc, 24 ch-2 sps)
This gives 48 dc + 24 ch-2 spaces across 72 base stitches. Each repeat uses 3 base stitches (sk 2, work into 1). 72 / 3 = 24 repeats.
Skirt Fan Pattern
Rnd 14: Sl st into first ch-2 sp. Ch 3, (dc, ch 2, dc, ch 2, dc) in same sp. This is one fan shell top. Sl st into next ch-2 sp. (Fan shell in next ch-2 sp, sl st in following ch-2 sp) 11 times. Join with sl st. (12 fan shells)
Rnd 15: Sl st to first ch-2 sp of fan. Ch 3, (dc, ch 2, dc, ch 2, dc) in same sp. Skip center dc of fan. (dc, ch 2, dc, ch 2, dc) in second ch-2 sp of same fan. Sl st into sl st connector between fans. Rep 11 times. Join. (24 fan half-shells, 12 sl st connectors)
After Rnd 15 each fan has been split into 2, giving 24 sub-fans total.
Rnd 16: Sl st to first ch-2 sp. Ch 3, 4 dc in same sp (5 dc total, shell made). Ch 2. 5 dc in next ch-2 sp. Ch 2. Sl st in sl st connector. (5 dc in ch-2 sp, ch 2, 5 dc in next ch-2 sp, ch 2, sl st) 11 times. Join. (24 shells of 5 dc each, 24 ch-2 sps, 12 sl sts)
Rnd 17: Sl st into space between dc pairs at edge of first shell (above the ch-2 sp of rnd 15). Ch 3, (dc, ch 2, dc, ch 2, dc) in same ch-2 sp below shell center. Work along the fan: dc in last 2 dc of first shell. Ch 1. Dc in first 2 dc of second shell. (dc, ch 2, dc, ch 2, dc) in ch-2 sp below second shell center. Sl st to connector sl st. Rep around. Join.
Rounds 14 through 17 form one complete pattern unit. Continue repeating Rounds 14 through 17 twice more for a total of 3 full pattern repeats (12 rounds of skirt fan pattern).
Skirt Full Instructions (Rounds 14 through 25)
After Rnd 13 you have 24 anchor ch-2 sps.
Rnd 14: (Fan shell in ch-2 sp, sl st in next ch-2 sp) 12 times. Join. (12 fans)
Rnd 15: (Double fan split as described above) 12 times. Join. (24 sub-fans)
Rnd 16: (Shell of 5 dc in ch-2 sp, ch 2, shell of 5 dc in next ch-2 sp, ch 2, sl st) 12 times. Join. (24 shells)
Rnd 17: Work fan shells into each ch-2 space of the expanded pattern. For each pair of shells from Rnd 16, work a (dc, ch 2, dc, ch 2, dc) fan centered in the ch-2 sp beneath each shell, connecting with sl sts between fan groups. You now have 24 fan pivot points as new ch-2 sps for the next repeat. Join. (24 ch-2 sp fan centers)
Repeat Rnds 14 through 17 two more times (Rnds 18 through 21, then Rnds 22 through 25), working each subsequent repeat into the ch-2 sp fan centers established by the previous Rnd 17 equivalent.
After 3 full repeats (12 rounds of fan pattern) the skirt circumference is approximately 34 to 36 inches / 86 to 91 cm at the working edge.
Checkpoint: After completing Round 25, the dress from shoulder to current row should measure approximately 13 to 14 inches / 33 to 35.5 cm. If length is short of target, work one additional pattern repeat before proceeding to the hem border.
Hem Scallop Border
Rnd 26: Sl st to nearest ch-2 sp. Ch 1. (Work 6 sc into ch-2 sp, sl st into next ch-2 sp) around, working into every ch-2 sp at the bottom fan edge. Join with sl st. (24 scallop shells)
The outer fan ring has 48 ch-2 sps. 48 / 2 = 24 scallop shells.
Fasten off and weave in end.
Flutter Sleeves
Locate the stitch markers you placed at the armhole ch-3 bridges earlier. The armhole opening has approximately 21 sts around each armhole.
Rnd 1 of Flutter: Join yarn at underarm center (bridge chain midpoint). Ch 1. Work 1 sc in each st and chain around the armhole opening. Join with sl st to first sc. (21 sc)
Rnd 2: Ch 1. Work 2 sc in each sc around. Join. (42 sc)
Rnd 3: Ch 3, 4 dc in same st (shell). Sk 2 sc. Sl st in next sc. Sk 2 sc. (5 dc in next sc, sk 2 sc, sl st in next sc, sk 2 sc) 6 times. Join with sl st. (7 shells)
Rnd 4: Sl st to center dc of first shell. Ch 3, 4 dc in same st. Sl st in sl st connector. (5 dc in center dc of next shell, sl st in connector) 6 times. Join. (7 shells)
Fasten off.
Repeat for second armhole.
Flower Applique (Make 2)
Using cream yarn:
Rnd 1: Ch 4, join with sl st to form ring. Ch 1, work 10 sc into ring. Join with sl st. (10 sc)
Rnd 2: (Ch 3, dc in same st as ch-3 base, ch 3, sl st in next sc) 5 times. (5 petals)
Fasten off.
Using sage yarn, attach at flower center back. Work 3 small leaf chains: (ch 4, sl st back in first ch) 3 times. Fasten off.
Using a yarn needle, sew one flower to the top of each shoulder at the flutter sleeve join, covering the shoulder seam.
Back Button Closure
Lay the finished dress flat. The two back yoke panels overlap slightly at the center back opening. The right back panel overlaps onto the left back panel by approximately 1 inch / 2.5 cm.
The chain spaces in the lace structure of the right back panel naturally form buttonhole openings. Mark positions for 3 buttons evenly spaced along the left back panel underlap.
Sew 3 buttons to the left back panel. The chain spaces on the right panel serve as the buttonholes.
Size Customization Tips
For Newborn (0 to 3 months): Reduce the starting chain on the front yoke from 38 to 32. Reduce each back panel chain from 11 to 9. Reduce base dc to 54 after join round. Work skirt with 9 fan repeats instead of 12.
For 6 months: Reduce front yoke chain to 35, back panels to 10 chains. Base dc after joining: 57 rounded to 60 for clean shell division. Work 11 fan repeats.
For 18 to 24 months: Increase front yoke chain to 42, back panels to 13 chains. Base dc after joining: 66 rounded to 72. Work 12 fan repeats with one additional repeat before hem.
For 2T to 3T: Increase front yoke chain to 50, back panels to 15 chains. Base dc after joining: 80 rounded to 84. Work 14 fan repeats. Add one additional pattern repeat in skirt for length.
General rule: Keep stitch count at waist divisible by 6 for the fan repeat. Adjust yarn quantity upward by approximately 80 yards per size increase.
Finishing and Blocking Your Baby Dress
1. Weave in all yarn ends securely, threading each end through the backs of stitches in at least 2 directions.
2. Wet blocking is strongly recommended. Fill a basin with cool water. Submerge the dress and gently press out air bubbles. Do not wring.
3. Roll the dress in a clean towel and press to remove excess water.
4. Lay the dress flat on a blocking mat. Pin the hem scallops out to their full depth, the neckline to a square shape, and the flutter sleeves to an open fan shape.
5. Pin the skirt hem to the stated circumference of approximately 36 inches / 91 cm.
6. Allow to dry completely (24 to 48 hours depending on yarn fiber content).
7. Once dry, sew flower appliques to shoulders.
8. Attach buttons to left back panel.
9. Lightly steam press if needed, holding iron 1 inch above fabric. Do not press directly onto crochet fabric.
Care Instructions
Hand wash in cool water with gentle detergent. Do not wring or twist. Lay flat to dry, reshaping as needed. If using an acrylic yarn, the garment may be machine washed on a gentle cycle in a mesh laundry bag and laid flat to dry. Do not tumble dry. Do not iron directly. Store folded, not hung, to prevent the lace from stretching under the weight of the skirt.
You Did It!
Thank you so much for choosing this pattern for your next project. I know there are a lot of steps here, but each one builds on the last, and when you see that finished dress, every bobble and fan shell will have been worth it.
If you make this pink ruffled baby dress, I would absolutely love to see it. Tag me on Instagram or share a photo in my Facebook group. There is nothing better than seeing these patterns come to life in your hands.
Save this crochet pattern to your Pinterest boards so you can find it when you are ready to start. And please leave a comment below if you make one. I read every single comment, and your photos and kind words truly make my day.
