I call this one "Sansevieria Sage," and it has quite the backstory. A few years ago, I sketched this design in an old spiral notebook while sitting in my grandmother’s sunroom. She had the most beautiful snake plants lining her windowsills, and I always loved how they brought life into a space without demanding anything in return. I wanted to capture that same effortless elegance in yarn form. When I finally brought this pattern to life, I knew it had to honor those memories while creating something truly special for fellow plant lovers who might not have a green thumb but definitely have crafty hands.
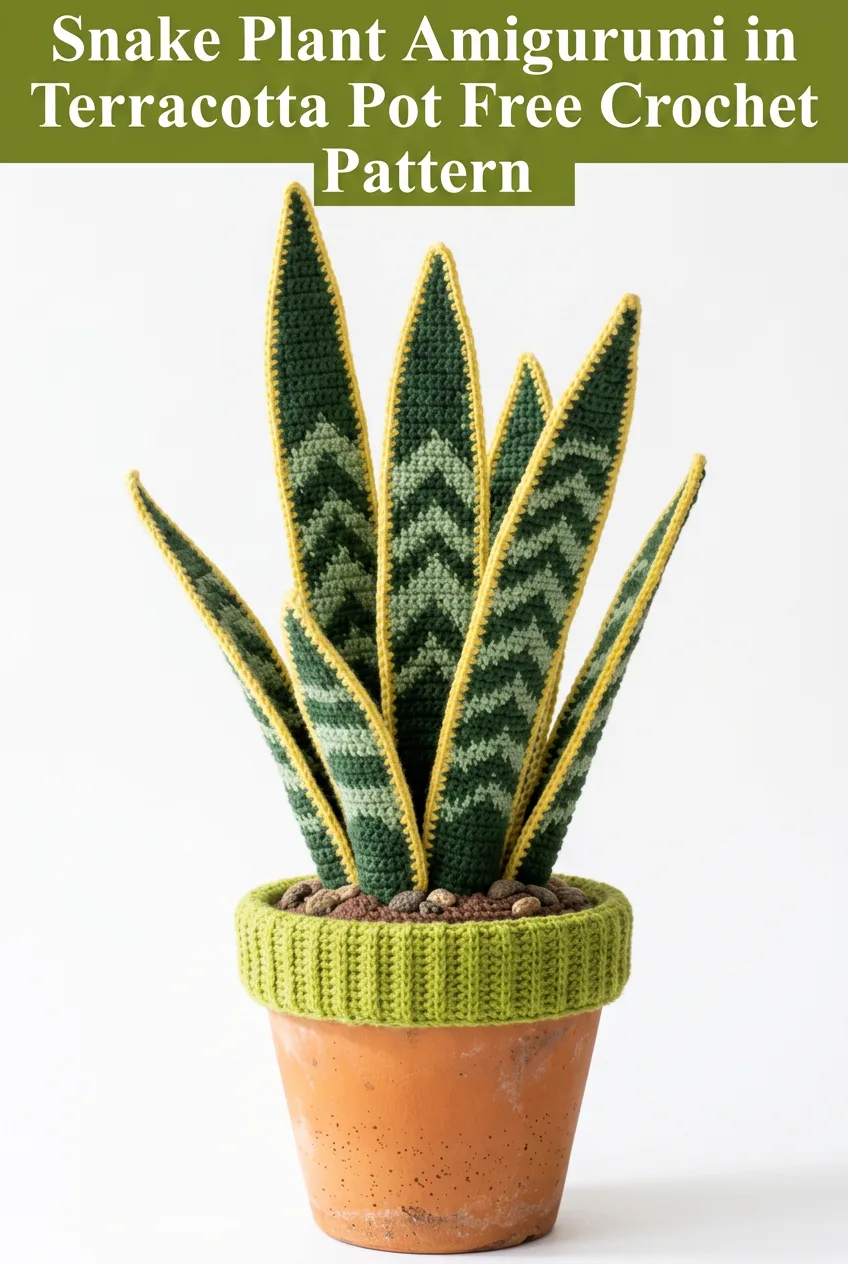
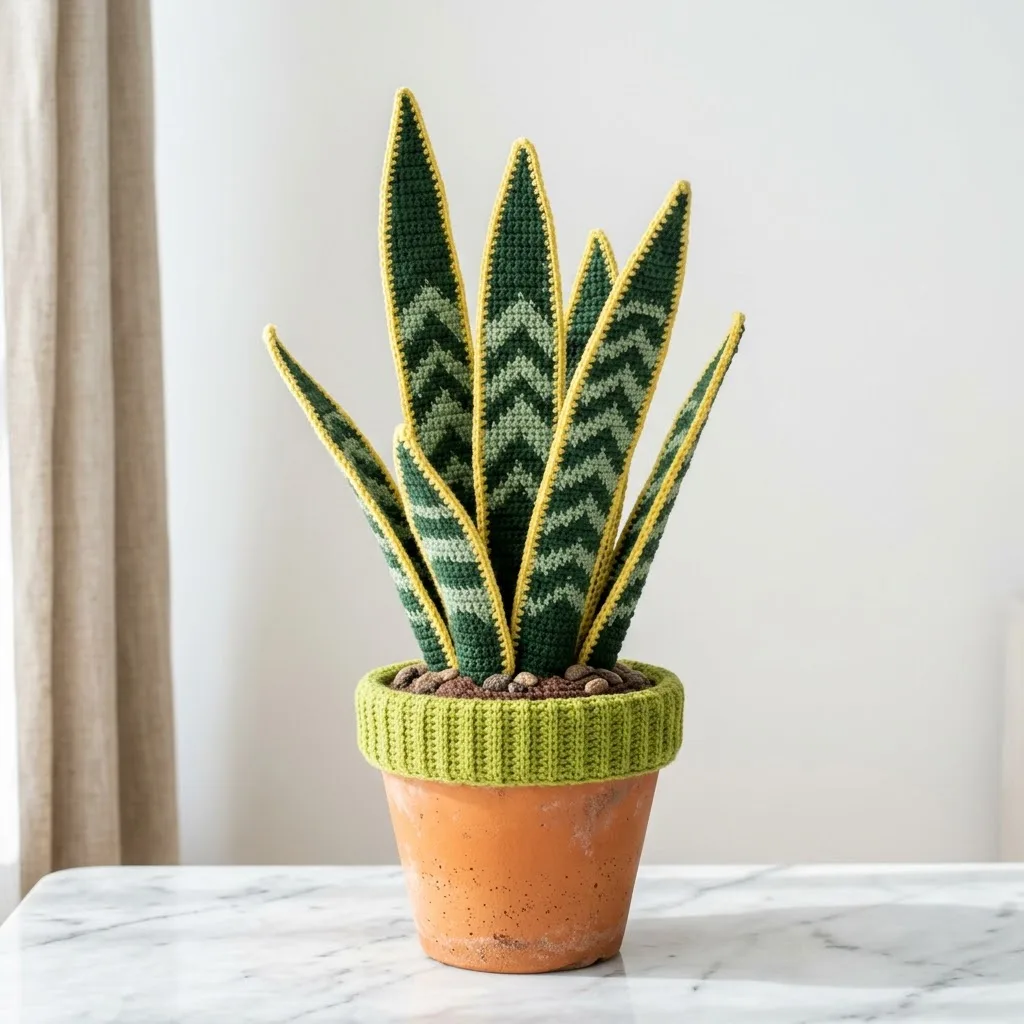
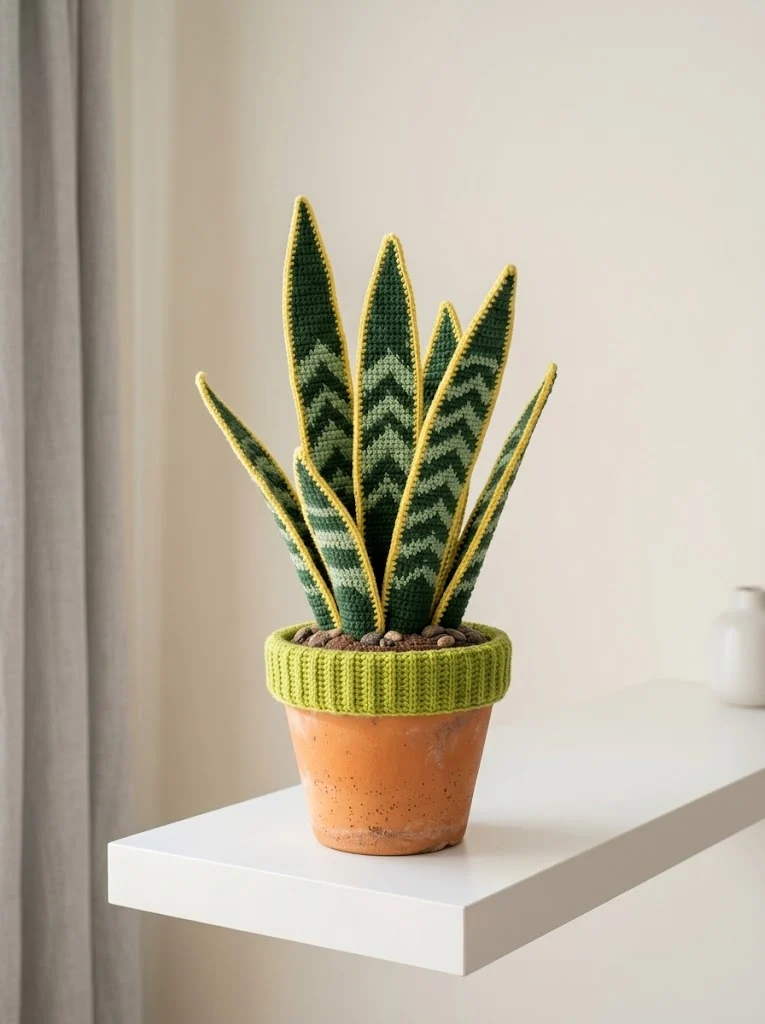
This crochet snake plant amigurumi looks stunning displayed in a real terracotta pot, and honestly, it might be the most realistic houseplant project I have ever designed.
Why You Will Love This Snake Plant Crochet Pattern
Let me tell you why this pattern is worth your time. First, it never needs watering. Second, it will never die on you like that fiddle leaf fig you bought last spring. And third, it makes an absolutely stunning handmade gift for plant lovers, new homeowners, or anyone who wants greenery without the commitment.
The chevron colorwork on the leaves mimics the natural banding pattern found on real snake plants. You will work with multiple shades of green and a lovely golden yellow border that frames each leaf beautifully. The finished piece sits proudly in a terracotta pot with a crocheted soil topper and decorative pebbles.
This crochet tutorial walks you through every step, from creating those gorgeous pointed leaves to assembling everything into a cohesive display piece. Whether you are an experienced amigurumi maker or trying colorwork for the first time, this step by step guide will help you succeed.
Skill Level
Intermediate. This pattern requires comfort with basic stitches, colorwork, increasing, decreasing, and seaming. If you have made a few amigurumi projects before, you are ready for this one.
Do not let the colorwork intimidate you. I will walk you through the chevron technique, and once you get into the rhythm, it becomes quite meditative.
Finished Dimensions
Each leaf measures approximately 10 to 14 inches tall depending on the size variation. The overall arrangement stands about 16 inches tall when displayed in a standard 6-inch terracotta pot.
Materials Needed
Yarn:
– Dark forest green (Color A), approximately 150 yards
– Medium sage green (Color B), approximately 100 yards
– Light mint green (Color C), approximately 80 yards
– Golden yellow (Color D), approximately 120 yards
– Dark brown (Color E), approximately 40 yards
– Light brown (Color F), approximately 25 yards
– Lime green (Color G), approximately 60 yards
I recommend using 100% cotton yarn for this project. Cotton holds its shape beautifully and gives the leaves that slightly stiff, upright appearance that mimics real snake plants. Acrylic works too, but your leaves may be slightly softer.
Tools:
Abbreviations and Stitch Definitions
Before we dive into the pattern, let me define every stitch you will encounter.
Ch = Chain. Wrap yarn over hook, pull through loop on hook. This creates the foundation for most crochet projects.
Sl st = Slip stitch. Insert hook, yarn over, pull through both loops. Used for joining and creating a flat seam.
Sc = Single crochet. Insert hook, yarn over, pull up a loop (2 loops on hook), yarn over, pull through both loops. The most basic and commonly used stitch.
Hdc = Half double crochet. Yarn over, insert hook, yarn over, pull up a loop (3 loops on hook), yarn over, pull through all 3 loops. Slightly taller than single crochet.
Dc = Double crochet. Yarn over, insert hook, yarn over, pull up a loop, yarn over, pull through 2 loops, yarn over, pull through remaining 2 loops. Creates a taller stitch with nice drape.
Inc = Increase. Work 2 stitches in the same stitch. This adds one stitch to your count.
Dec = Decrease (invisible decrease for amigurumi). Insert hook through front loops only of next 2 stitches, yarn over, pull through both, yarn over, pull through remaining 2 loops. This removes one stitch from your count.
BLO = Back loop only. Work into just the back loop of the stitch, leaving the front loop unworked.
FLO = Front loop only. Work into just the front loop of the stitch.
Magic ring = An adjustable starting ring that can be pulled tight to close the center hole. Also called magic circle or adjustable ring.
Pattern Notes
The Snake Plant Leaf Pattern (Make 7 to 9 Leaves)
You will create leaves in three sizes: small, medium, and large. This variety creates a natural, realistic arrangement.
Large Leaf (Make 3)
Front Panel:
Using Color A (dark forest green) and 3.5mm hook.
Row 1: Ch 7, sc in 2nd ch from hook, sc in each ch across, turn. (6 sts)
Row 2: Ch 1, 2 sc in first st, sc in next 4 sts, 2 sc in last st, turn. (8 sts)
Rows 3 to 4: Ch 1, sc in each st across, turn. (8 sts)
Row 5: Ch 1, 2 sc in first st, sc across to last st, 2 sc in last st, turn. (10 sts)
Rows 6 to 8: Ch 1, sc in each st across, turn. (10 sts)
Begin Chevron Colorwork:
Row 9: With Color A, ch 1, sc in first 2 sts. Switch to Color B (sage green), sc in next 2 sts, switch to Color C (mint green), sc in next 2 sts, switch to Color B, sc in next 2 sts, switch to Color A, sc in last 2 sts, turn. (10 sts)
Row 10: Following the established chevron pattern, offset your color placement by one stitch. Work Color A in first st, Color B in next 2 sts, Color C in next 4 sts, Color B in next 2 sts, Color A in last st, turn. (10 sts)
Rows 11 to 30: Continue the chevron pattern, creating diagonal stripes by shifting colors. The pattern naturally creates that beautiful V-shaped banding.
Begin Decreases:
Row 31: Ch 1, dec, work in pattern to last 2 sts, dec, turn. (8 sts)
Rows 32 to 34: Ch 1, sc in pattern across, turn. (8 sts)
Row 35: Ch 1, dec, sc in pattern to last 2 sts, dec, turn. (6 sts)
Rows 36 to 38: Ch 1, sc in pattern across, turn. (6 sts)
Row 39: Ch 1, dec, sc in pattern to last 2 sts, dec, turn. (4 sts)
Rows 40 to 42: Ch 1, sc in pattern across, turn. (4 sts)
Row 43: Ch 1, dec twice, turn. (2 sts)
Row 44: Ch 1, dec. (1 st)
Fasten off.
Back Panel:
Work same as front panel using only Color A (dark forest green) throughout. No colorwork needed on the back.
Medium Leaf (Make 3)
Work same as large leaf but start with Ch 6 (5 sts) and reduce total rows by 8. Your finished medium leaf should be approximately 11 inches tall.
Small Leaf (Make 2 to 3)
Work same as large leaf but start with Ch 5 (4 sts) and reduce total rows by 14. Your finished small leaf should be approximately 8 inches tall.
Leaf Assembly and Border
This is where the magic happens. The golden border brings everything together beautifully.
Step 1: Place front and back panels together with wrong sides facing.
Step 2: Using Color D (golden yellow) and 3.5mm hook, join yarn at the base of the leaf.
Step 3: Working through both layers, sc evenly around the entire perimeter of the leaf. Work 3 sc in the pointed tip to create a nice corner. Place approximately 2 sc for every row along the sides.
Step 4: Before closing completely, stuff the leaf lightly with fiberfill. If you want extra stability, insert a floral wire or pipe cleaner down the center of the leaf before finishing.
Step 5: Complete the border, sl st to first sc, fasten off.
Weave in all ends carefully.
Soil Topper
Using Color E (dark brown) and 4.0mm hook.
Round 1: Create a magic ring, 6 sc in ring. (6 sts)
Round 2: Inc in each st around. (12 sts)
Round 3: *Sc in next st, inc in next st* repeat around. (18 sts)
Round 4: *Sc in next 2 sts, inc in next st* repeat around. (24 sts)
Round 5: *Sc in next 3 sts, inc in next st* repeat around. (30 sts)
Round 6: *Sc in next 4 sts, inc in next st* repeat around. (36 sts)
Round 7: *Sc in next 5 sts, inc in next st* repeat around. (42 sts)
Continue increasing until your circle fits snugly inside the top of your terracotta pot. My 6-inch pot required 60 stitches around.
Fasten off, leaving a long tail for sewing.
Decorative Pebbles (Make 8 to 12)
Using Color F (light brown) and 3.5mm hook.
Round 1: Magic ring, 6 sc in ring. (6 sts)
Round 2: Inc in each st around. (12 sts)
Round 3: Sc in each st around. (12 sts)
Round 4: *Dec* repeat around. (6 sts)
Stuff lightly, close opening.
Make pebbles in varying sizes by adjusting your increase rounds. Some can have just one increase round, others can have two or three.
Pot Rim Cover
Using Color G (lime green) and 4.0mm hook.
Row 1: Ch enough to wrap around the rim of your pot plus 2 (approximately 60 ch for a 6-inch pot). Sc in 2nd ch from hook, sc in each ch across, turn.
Rows 2 to 8: Ch 1, sc in BLO in each st across, turn.
Working in BLO creates those beautiful horizontal ridges you see in the finished piece. This mimics a ribbed fabric texture.
Fasten off, leaving a long tail. Wrap around pot rim and seam together.
Final Assembly
Step 1: Place the pot rim cover around the top edge of your terracotta pot. Secure with a few stitches if needed, or simply tuck it in.
Step 2: Arrange your leaves inside the pot, positioning the largest leaves in the center and back, with smaller leaves toward the front and sides.
Step 3: Place the soil topper over the base of the leaves, tucking it down into the pot.
Step 4: Arrange decorative pebbles on top of the soil.
Step 5: Adjust leaf positions until you are happy with the arrangement.
Helpful Tips for Success
Colorwork Anxiety: If this is your first colorwork project, practice the chevron pattern on a small swatch first. Once you understand the rhythm, it becomes second nature.
Keeping Leaves Upright: The optional floral wire makes a huge difference. Insert it before closing your border, and you can bend and shape your leaves to look more natural.
Pot Alternatives: No terracotta pot? Use any decorative container, basket, or even crochet a pot cover to fit around a plastic nursery pot.
Gift Presentation: This makes an extraordinary housewarming gift. Include a little tag that says "No watering required" for a sweet touch.
Why This Beginner Friendly Pattern Works
Even though I listed this as intermediate, do not let that scare you away if you are a motivated beginner. The individual techniques are straightforward. You are just combining several skills in one project.
Take it one leaf at a time. Finish one complete leaf before starting the next. This way, you can adjust your tension or technique as you learn.
Thank you so much for choosing this pattern and trusting me to guide you through creating something beautiful. I genuinely hope your finished snake plant brings as much joy to your space as designing it brought to me.
If you make this project, I would absolutely love to see it. Tag me on Instagram or share a photo in my Facebook group. Seeing your creations is honestly the best part of sharing patterns.
Save this Snake Plant Amigurumi pattern to your favorite Pinterest board so you can find it whenever you are ready to start. And please drop a comment below if you give it a try. I love hearing how your projects turn out, and your feedback helps other crocheters decide to give it a go too.
