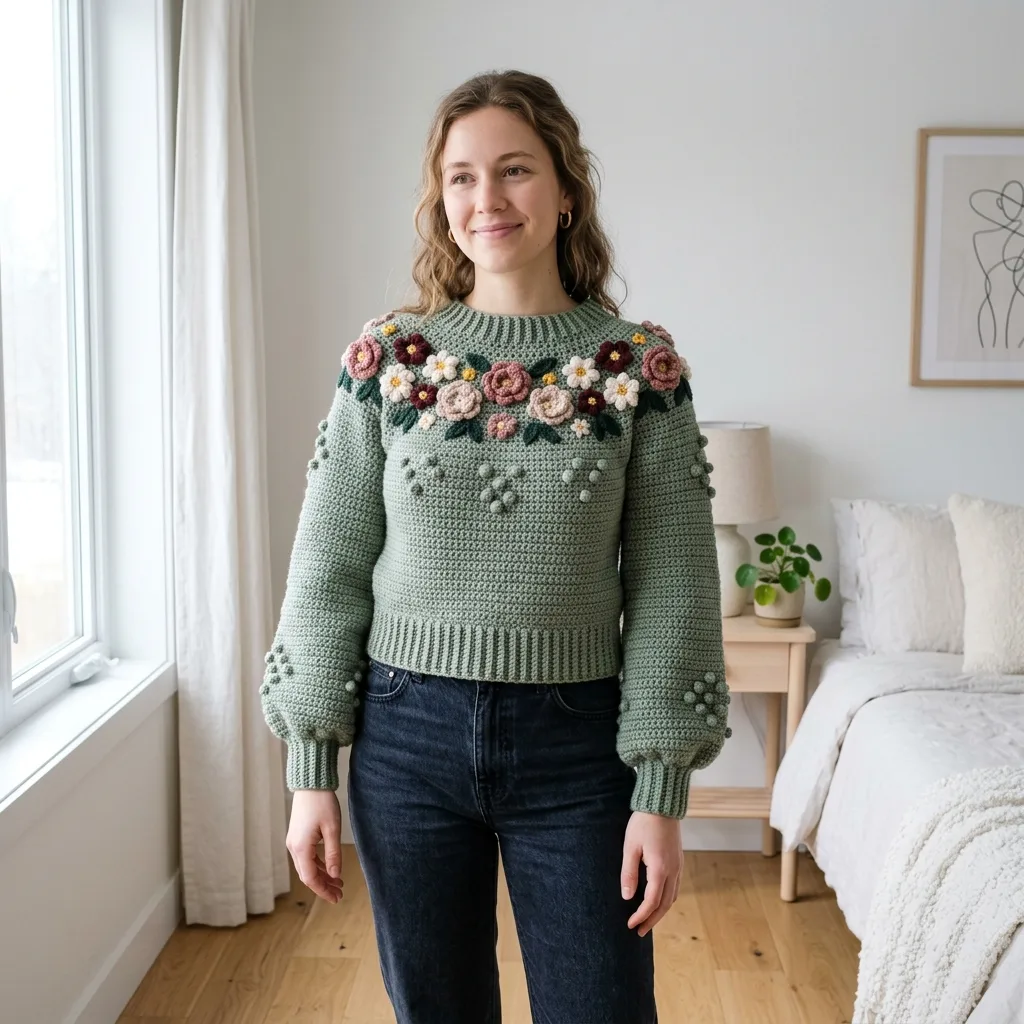
I set out to create a sweater that felt like a wearable garden. Something with soft texture, romantic florals, and that perfectly cropped silhouette that pairs so well with high-waisted jeans. I wanted balloon sleeves that felt modern but not over the top, ribbing that actually stretched the way ribbing should, and dimensional flowers that looked impressive without requiring a degree in advanced crochet. After sketching, swatching, and reworking the yoke layout more times than I care to admit, I am SO pleased with how this Sage Wildflower Textured Pullover turned out!
Get the Ad-Free PDF Pattern
You can find the free pattern below, or you can purchase the ad-free printable PDF from my shop.
Get the Printable PDF →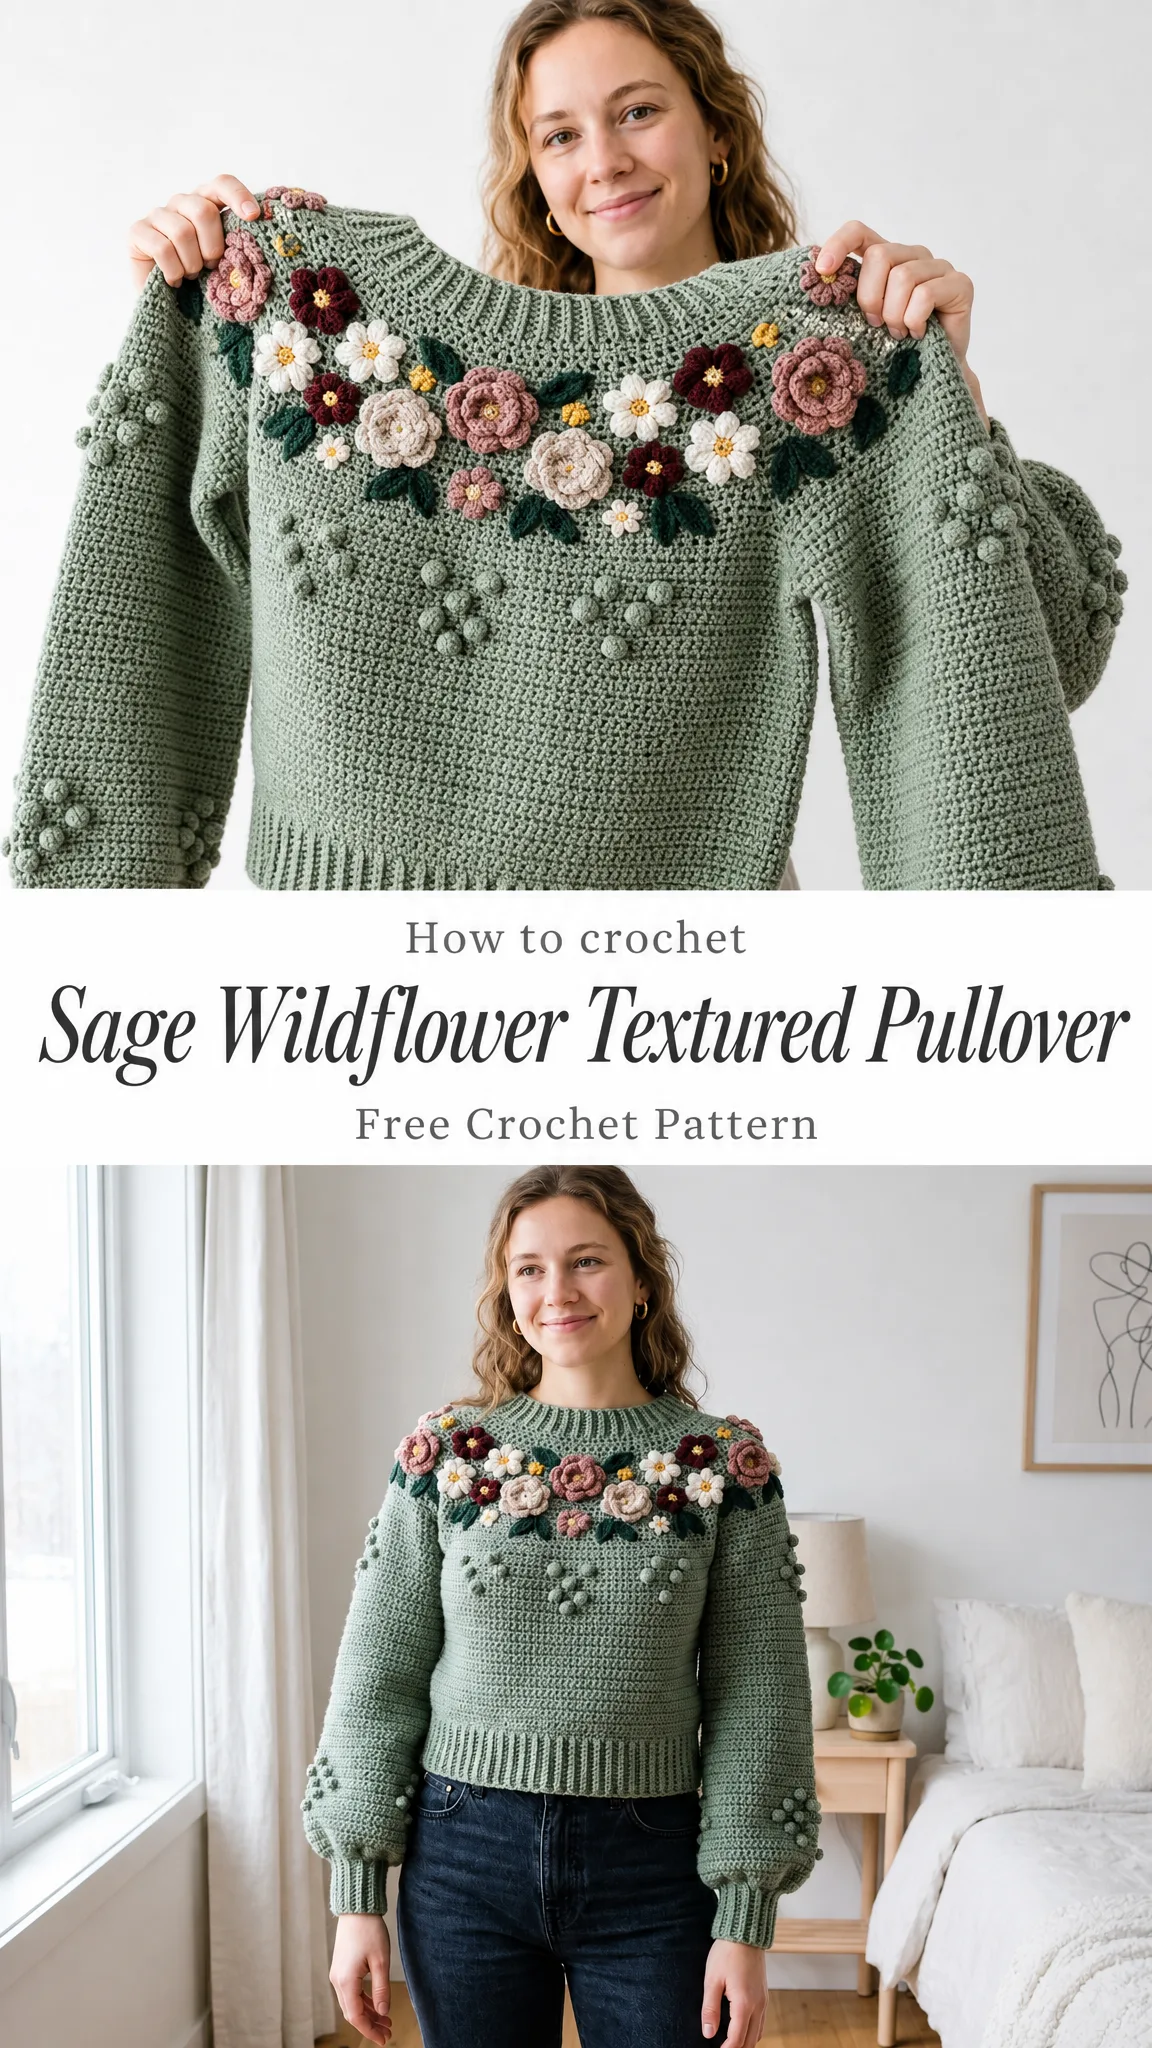
This intermediate-level project combines simple extended single crochet (esc) panels with bobble texture, shaped sleeves, and a stunning collection of sewn-on wildflower appliques. The construction is straightforward once you understand the pieces. You will make two rectangular body panels, two shaped sleeves, then join everything together before adding your flowers and leaves. The floral yoke is where the magic happens, but even that comes together one small motif at a time.
Understanding the Construction
Before diving into the stitches, let me walk you through how this pullover comes together. The body consists of two flat rectangular panels, one for the front and one for the back. Each panel starts with a ribbed hem worked sideways, then you rotate and pick up stitches along the edge to work the main body upward.
The sleeves are also worked flat, starting from a ribbed cuff that gets joined into a tube. From there, you increase gradually to create that gorgeous balloon shape, adding scattered bobbles along the way.
Once all pieces are blocked and seamed, you will pick up stitches around the neckline for a ribbed neckband. The flowers and leaves are made separately, then pinned and sewn to the yoke area. This approach gives you complete control over placement, so you can arrange your floral garland exactly where it looks best on your body.
Materials You Will Need
Yarn:
The pattern suggests Lion Brand Touch of Alpaca, Paintbox Yarns Simply Aran, or Cascade 220 Superwash Merino. A wool or wool-blend yarn will give you the cleanest ribbing and help your dimensional flowers hold their shape beautifully.
Hooks:
Notions:
Gauge Information
Getting gauge right matters tremendously for garment fit. Make a swatch before starting!
Main stitch after blocking: 14 esc x 16 rows = 4 inches (10 cm) using the larger hook
Ribbing: 10 single crochet back loop only (sc-blo) rows = approximately 2.75 inches (7 cm) relaxed using the smaller hook
Create a 6-inch (15 cm) square swatch, block it, then measure the center 4 inches (10 cm). You need to match both stitch gauge and row gauge before beginning your panels.
Finished Measurements and Sizing
This pattern is written for Adult M/L with easy customization options built in.
Finished measurements:
Intended ease: 4 to 6 inches (10 to 15 cm) of positive ease at the bust
Choose this size when your full bust measures approximately 36 to 38 inches (91.5 to 96.5 cm). The customization section at the end explains how to adjust for a looser or smaller fit.
Stitch Abbreviations and Special Stitches
Let me define every stitch you will encounter in this pattern:
Extended Single Crochet (esc)
This stitch creates a fabric slightly taller than regular single crochet with beautiful drape. Here is how to work it:
Insert your hook in the next stitch, yarn over and pull up a loop (2 loops on hook), yarn over and pull through 1 loop only, yarn over and pull through both remaining loops on hook.
Think of it as a single crochet with an extra step in the middle that extends the height.
5-dc Bobble
Bobbles add wonderful texture to the body and sleeves. To create one:
Yarn over, insert hook in stitch, pull up a loop, yarn over and pull through 2 loops. Repeat this sequence 5 times total in the same stitch. You will have 6 loops on your hook. Yarn over and pull through all 6 loops at once. Chain 1 to close if needed. This counts as 1 stitch.
sc-blo Rib
Working single crochet through the back loop only creates a stretchy, knit-look ribbing. Simply insert your hook under only the back loop of each stitch across the row.
Invisible Join
For a seamless finish: cut your yarn, pull the tail through the final stitch, thread your tapestry needle, insert under both loops of the first stitch, then back into the final stitch. Weave in the tail.
Important Maker Notes
Keep these tips in mind throughout your project:
Body Panels
Make one front panel and one back panel. Each panel measures approximately 20 inches (51 cm) wide and 18 inches (45.5 cm) long after blocking, including the hem rib. Chain 1 and turn after every row unless stated otherwise.
Hem Rib
With the smaller hook, chain 11.
Row 1: Single crochet in 2nd chain from hook and across. (10 sc)
Rows 2-70: sc-blo across. (10 sc per row)
Do not fasten off. You should have 70 rib rows measuring approximately 20 inches (51 cm).
Set-up Row
Rotate the rib 90 degrees. With the larger hook, work 1 esc in the end of each rib row across. (70 esc)
Body Rows
Rows 1-10: esc in each stitch across. (70 esc each row)
Rows 11-18: Work bobble texture according to Bobble Map A below, filling all other stitches with esc. (70 stitches each row)
Rows 19-50: esc in each stitch across. (70 esc each row)
Rows 51-62: Continue with esc across. On the front panel only, you may want to place markers for flower placement pins, but no yarn color changes yet. (70 esc each row)
Fasten off, leaving a long seaming tail on one panel. Block both panels to match at 20 x 18 inches (51 x 45.5 cm).
Bobble Map A for Front Panel
Use these bobble positions on the front panel. Each bobble replaces 1 esc, keeping your stitch count at 70.
For the back panel, work a lighter texture by repeating only Rows 11, 15, and 17 bobble placements.
Checkpoint
After Row 62, each panel should have 70 stitches across and measure approximately 15.5 inches (39.5 cm) above the hem rib, with a total length of approximately 18 inches (45.5 cm).
Sleeves
Make 2. Sleeves are worked flat from cuff to upper arm, then seamed. The increases create the soft balloon shape.
Cuff Rib
With the smaller hook, chain 10.
Row 1: Single crochet in 2nd chain from hook and across. (9 sc)
Rows 2-28: sc-blo across. (9 sc per row)
Join the short edges to form the cuff.
Pick Up Round
With the larger hook, working around one cuff edge, pick up and esc 28 stitches. Do not join. Turn after each row. (28 esc)
Sleeve Shaping
Rows 1-3: esc across. (28 stitches)
Row 4: inc in first stitch, esc to last stitch, inc in last stitch. (30 stitches)
Rows 5-55: Repeat the Rows 1-4 pattern. Work 3 straight rows, then one increase row.
Your stitch counts after each increase row will be: 32, 34, 36, 38, 40, 42, 44, 46, 48, 50, 52, 54, 56
Rows 57-64: esc across. (56 stitches each row)
Sleeve Bobbles
On Rows 18, 26, 34, 42, and 50, place bobbles at stitches 9 and 48 when those stitches exist. On smaller counts, use stitch 9 and the second-to-last 9.
Fasten off. Seam the sleeve from cuff to top edge. Repeat for the second sleeve.
Sleeve Checkpoint
Before seaming, each sleeve should measure approximately 16 inches (40.5 cm) wide at the upper edge and 16 inches (40.5 cm) from cuff pick-up to top, plus the cuff depth.
Flowers and Leaves
You will create these motifs separately, then sew them to the yoke.
Motif Counts
Large Rose
Chain 31.
Row 1: 2 sc in 2nd chain and each chain across.
Row 2: *Slip stitch, 5 dc in next stitch, slip stitch in next stitch; repeat along the ruffle.
Spiral the strip into a rose shape and sew the base to secure. Finished size: 2 to 2.5 inches (5 to 6.5 cm).
Five-Petal Flower
Make a magic ring.
*Chain 2, 3 dc, chain 2, slip stitch into ring; repeat 5 times.
Pull the ring tight. Add a contrast center. Finished size: 1.5 inches (4 cm).
Small Blossom
Make a magic ring.
*Chain 1, 2 hdc, chain 1, slip stitch into ring; repeat 5 times.
Finished size: 1 inch (2.5 cm).
Leaf
Chain 9.
Slip stitch in 2nd chain, sc, hdc, dc, dc, hdc, sc, slip stitch. Rotate and work the same sequence on the other side of the chain.
Finished size: 1.5 to 2 inches (4 to 5 cm).
Color Rhythm
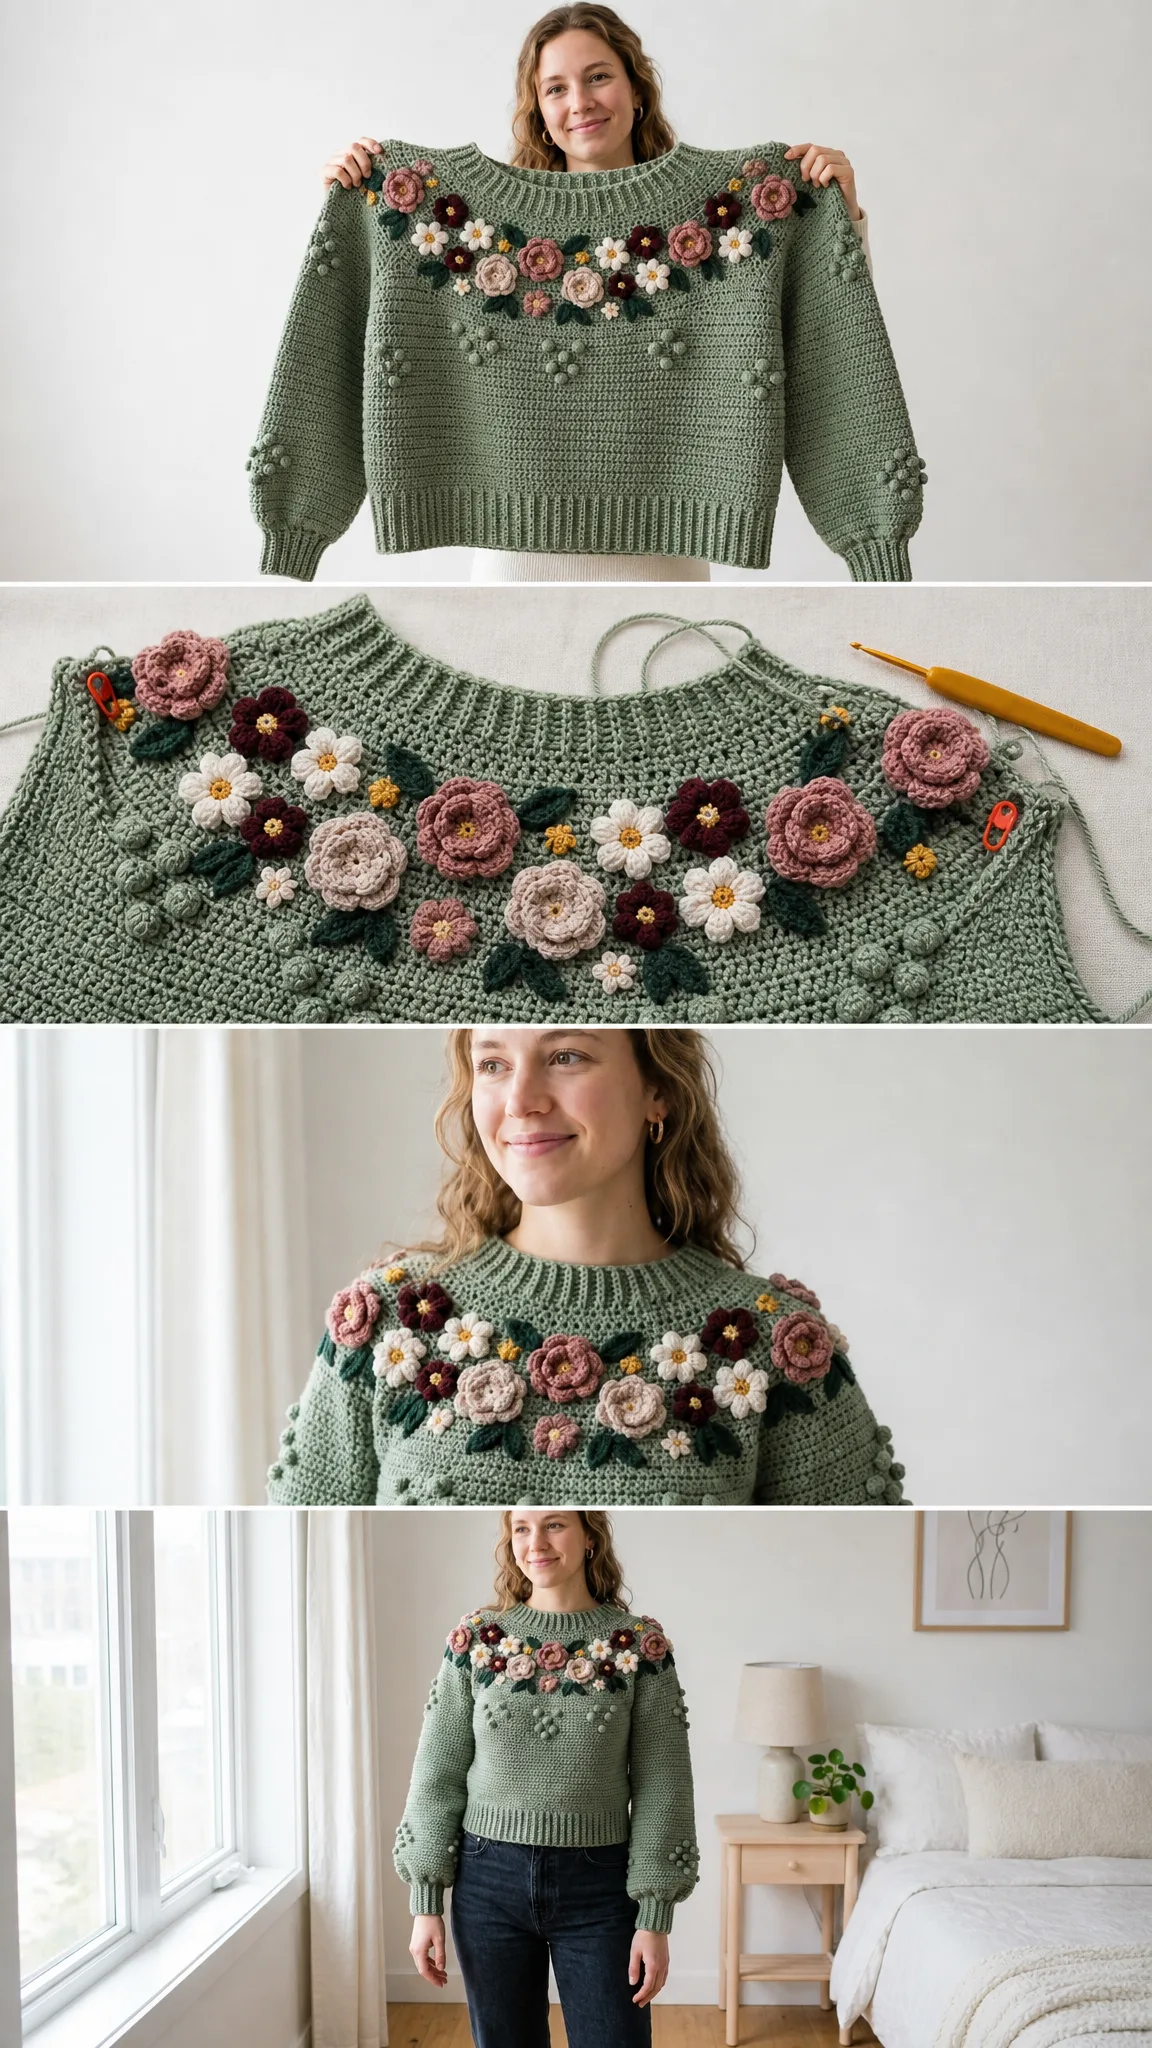
Use dusty rose and blush for roses, cream and burgundy for five-petal flowers, golden yellow for centers, and deep green for leaves. Keep the largest flowers near the shoulders and scatter smaller blossoms toward the center front.
Yoke Layout and Placement
Pin all motifs before sewing. Keep the floral band between the neckline and Row 48 of the body, wrapping over the shoulders and lightly onto the back. Leave the underarm area clear so the sleeve seam stays smooth.
Front yoke: 4 large roses, 5 medium flowers, 4 small blossoms, 16 leaves (densest at center chest and shoulders)
Back yoke: 2 large roses, 3 medium flowers, 2 small blossoms, 10 leaves (keep band slightly flatter than front)
Shoulder caps: 2 large roses, 2 medium flowers, 6 leaves (bridge front to back)
Sleeves: 2 small blossoms per sleeve near upper outer arm, 4 leaves total (optional bobble-only sleeve for simpler wear)
Sewing Tips
Use matching sewing yarn and tiny whipstitches around motif edges. Tack rose centers firmly so the flowers keep their shape during wear. Hide leaf stems under flower edges for a natural garland effect. Steam lightly after sewing, but do not flatten the petals or bobbles.
Assembly and Finishing
Step 1: Block front, back, and sleeves to measurements before seaming. Panels should match exactly.
Step 2: Sew shoulder seams. Seam 20 stitches on each side from the outer edge toward center. Leave the center 30 stitches open on front and 30 stitches open on back for the neckline. (20 shoulder sts + 30 neck sts + 20 shoulder sts = 70 sts)
Step 3: Sew side seams through lower 30 rows. Leave the top 32 rows open for each armhole. Armhole depth is approximately 8 inches (20.5 cm).
Step 4: Set in sleeves. Match the sleeve seam to the side seam, sleeve top center to shoulder seam, and ease evenly around the armhole. Sew 7 sleeve stitches per 8 armhole rows.
Step 5: Neckband. With the smaller hook, join yarn at back neck. Pick up 72 sc evenly around the neckline. Work 6 rounds of sc-blo style rib by alternating front post single crochet (FPsc) and back post single crochet (BPsc), or work 6 rounds of plain sc if preferred. (72 stitches each round)
Step 6: Final edging. Slip stitch around hem, cuffs, and neckline if a firmer edge is desired. Do not tighten the edge.
Size Customization
Width: Add or remove hem-rib rows, then pick up 1 body stitch per rib row. At this gauge, 7 stitches changes width by approximately 2 inches (5 cm).
Length: Add or remove body rows before shoulder seaming. 4 rows changes length by approximately 1 inch (2.5 cm).
Sleeves: Add or remove straight rows after Row 56 for length. Keep both sleeves identical.
Neck: Pick up a multiple of 4 stitches for a ribbed neckband. Use fewer stitches for a snugger crew neck or more for a relaxed opening.
Care Instructions
Hand wash cool with wool wash, squeeze in a towel, reshape flat, and dry away from direct heat. Store folded rather than hanging to protect the yoke and sleeve shape.
Troubleshooting Common Issues
Panel too wide: Go down a hook size or remove rib rows in pairs before picking up body stitches.
Armhole pulls: Reseam using the 7 sleeve stitches per 8 armhole rows ratio.
Neckband ripples: Remove 4 pick-up stitches and try again.
Flowers feel heavy: Use fewer large roses on the back and add extra leaves for coverage.
Final Thoughts on the Sage Wildflower Textured Pullover Crochet Pattern
This pullover is truly a labor of love, but every stitch is worth it when you slip it on and see that gorgeous floral yoke framing your face. The combination of bobble texture, balloon sleeves, and dimensional wildflowers creates something that looks far more complicated than it actually is. Take your time with the motifs, pin everything carefully before sewing, and trust the process.
Whether you make this for yourself or as a stunning handmade gift, the Sage Wildflower Textured Pullover will become a treasured wardrobe piece for years to come. I cannot wait to see your versions!
Thank you so much for choosing this pattern. I truly appreciate you spending your crafting time here with me. If you make this pullover, I would absolutely love to see it! Tag me on Instagram or share in our Facebook group.
If you loved this Sage Wildflower Textured Pullover pattern, please save it to your Pinterest boards so you can find it easily when you are ready to cast on. And if you do make one, drop a comment below. I read every single one and it makes my whole day to see your beautiful creations come to life!
Want a Quick & Easy Printable Version?
Get a clean, beautifully formatted PDF of this pattern — easy to follow step by step, ready to print or save on any device. No scrolling, no distractions, just the pattern.
Get the Printable PDF →