You know that gorgeous skein of plush velvet yarn you’ve been saving for the perfect project? This is it. Dig into your stash and pull out your favorite lavender chenille because we’re making a stunning textured backpack with a curved flap, top handle, tassel charm, and adjustable straps. The construction is surprisingly straightforward. You’ll start with a rectangular base, pick up stitches around it, and work the body upward in joined rounds using the center single crochet (also called the waistcoat stitch) for that beautiful knit-look texture. This pattern is rated confident beginner to intermediate, so if you’re comfortable working in the round and keeping firm tension, you’ve got this.
Get the Ad-Free PDF Pattern
You can find the free pattern below, or you can purchase the ad-free printable PDF from my shop.
Get the Printable PDF →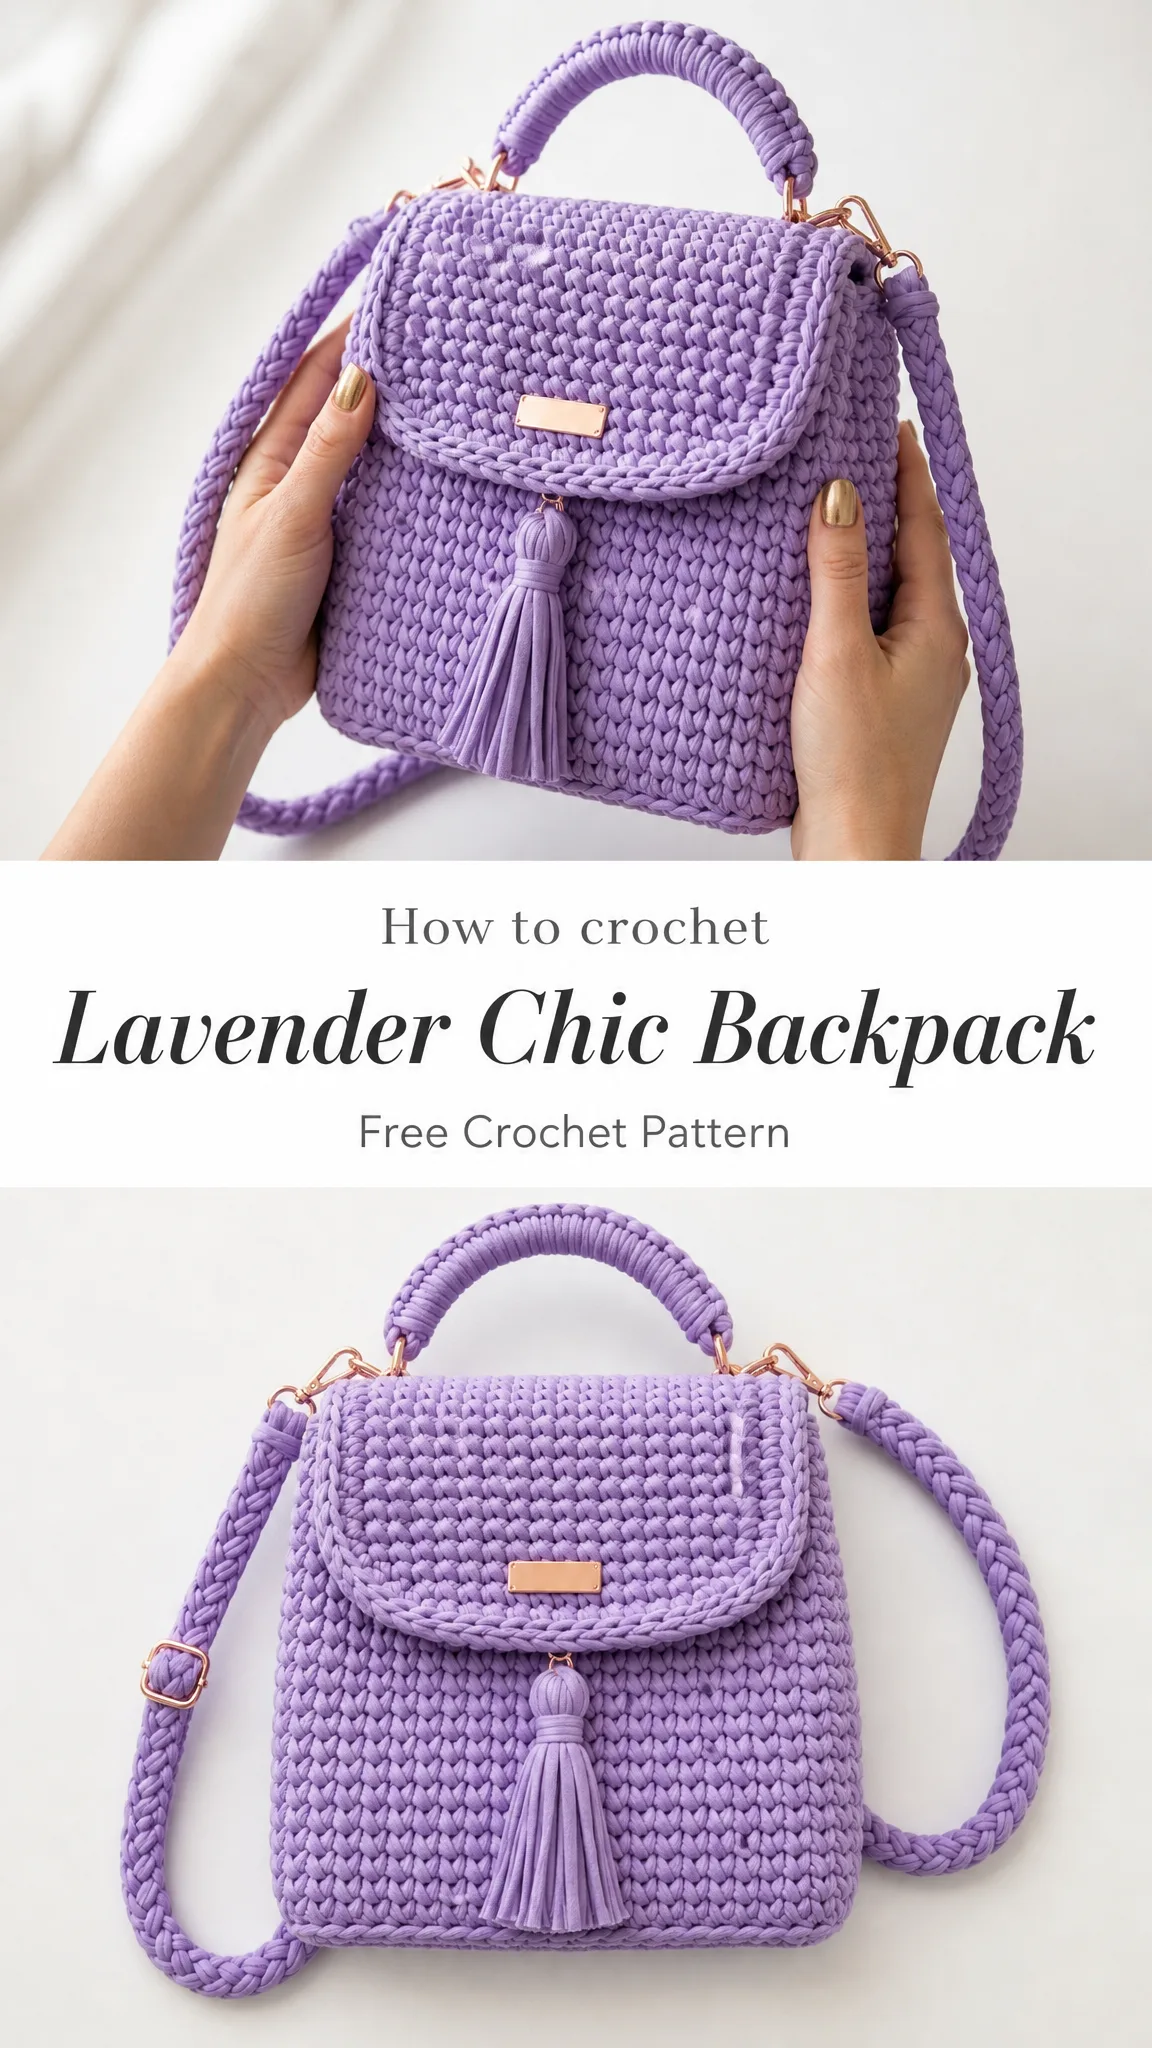
Why You’ll Love This Backpack Pattern
This crochet backpack hits that sweet spot between practical and pretty. The finished bag measures approximately 8.5 inches wide, 9.5 inches tall, and 3.5 inches deep, making it perfect for everyday essentials. Each adjustable strap extends up to 30 inches, so you can customize the fit for any body type.
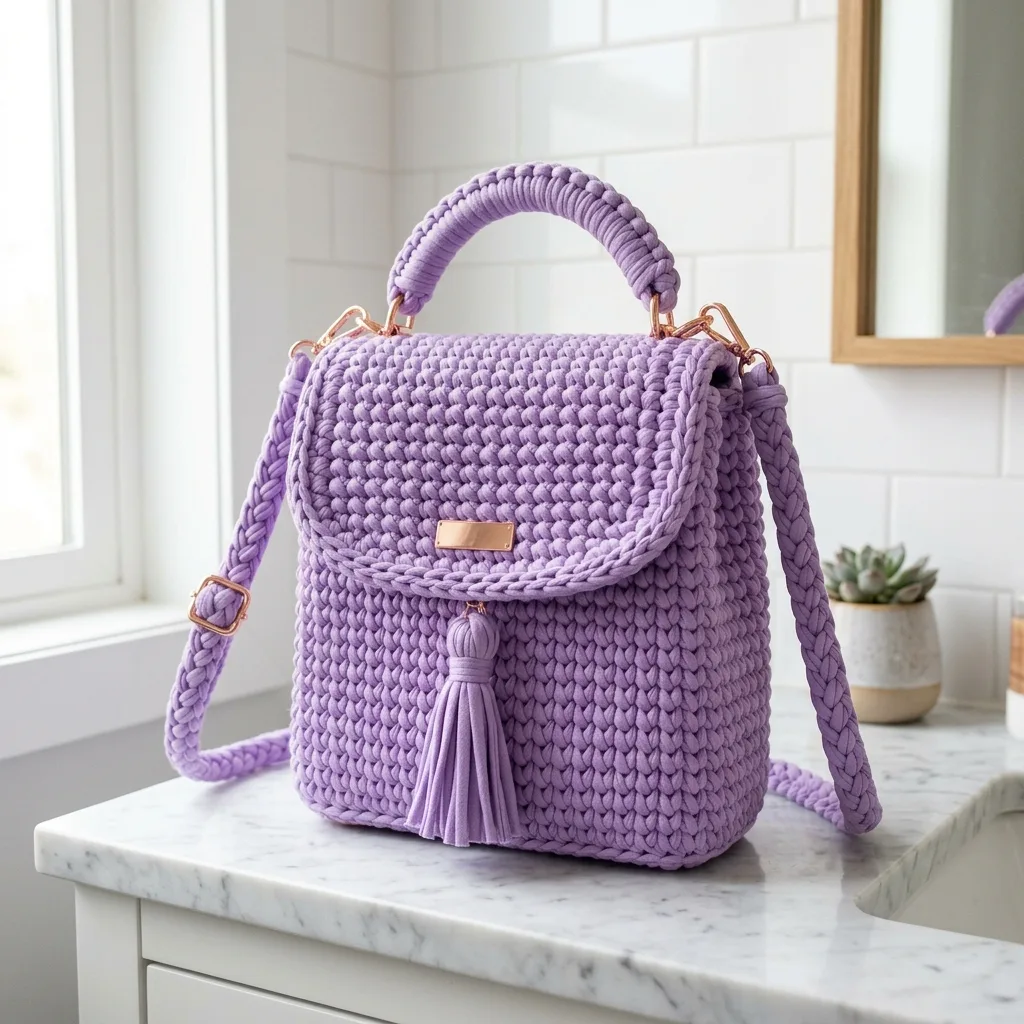
The plush chenille yarn creates a fabric that’s soft to the touch but sturdy enough to hold its shape. Combined with rose gold hardware and a decorative tassel, you’ll have a handmade accessory that looks like it came straight from a boutique.
Time estimate: Plan for 8 to 12 relaxed hours over a weekend. This isn’t a quick project, but every stitch is worth it.
Materials You’ll Need
Before you begin, gather everything on this list. Having all your supplies ready makes the process so much smoother.
| Item | Amount/Detail |
|---|---|
| Main yarn | Super bulky chenille or velvet yarn, about 240 to 300 yards (220 to 275 meters) in lavender |
| Hook | US L/11 (8 mm), or size needed to match gauge |
| Hardware | 2 swivel clasps, 2 D-rings, 1 slider buckle, 1 magnetic snap or sew-on snap, optional metal label |
| Notions | Yarn needle, stitch markers, scissors, pins or clips, optional plastic canvas or bag base insert |
| Lining | Optional fabric lining, 10 x 20 inches (25 x 51 cm) before trimming |
Yarn Suggestions
Not sure which yarn to grab? Here are three options that work beautifully:
Substitution tip: Choose any yarn that creates a firm but flexible fabric at gauge. If your fabric sags, go down a hook size. If your stitches feel too stiff to enter for the center single crochet, go up a hook size.
Gauge
Getting gauge right matters here because your bag dimensions and hardware placement depend on it.
8 center single crochet stitches x 8 joined rounds = 4 inches (10 cm)
Work this in the body stitch with firm tension after gentle smoothing. Swatch at least 5 x 5 inches (13 x 13 cm) and match both stitch and round gauge before starting.
Abbreviations and Special Stitches
Let me walk you through every abbreviation and technique you’ll use.
| Abbreviation | Meaning |
|---|---|
| ch | chain |
| sl st | slip stitch |
| sc | single crochet |
| csc | center single crochet (waistcoat stitch) |
| st(s) | stitch(es) |
| rnd(s) | round(s) |
| RS/WS | right side/wrong side |
| rep | repeat |
| sc2tog | single crochet two together (a decrease) |
Center Single Crochet (csc)
This stitch creates that gorgeous knit-look texture you see in the photos. Here’s how to work it:
Insert your hook into the center V of the next single crochet (sc) from the previous round. You’re going between the two vertical posts of the stitch rather than under the top loops. Yarn over, pull up a loop, yarn over, pull through both loops.
Beginner tip: Keep your loops slightly taller than normal so your hook enters easily on the next round. This is important when working with plush yarn.
Reverse Single Crochet
With the right side facing you, work single crochet (sc) from left to right instead of your usual direction. Insert hook in the stitch to the right, yarn over, pull up a loop, yarn over, pull through both loops. Left-handed crocheters work this motion in the opposite direction.
Invisible Join
This technique gives you a seamless finish. Fasten off, thread your tail on a yarn needle, pass under both loops of the first stitch of the round, then back into the center of the last stitch. Pull gently to mimic a stitch.
Important Notes Before You Start
Instructions: Base and Body
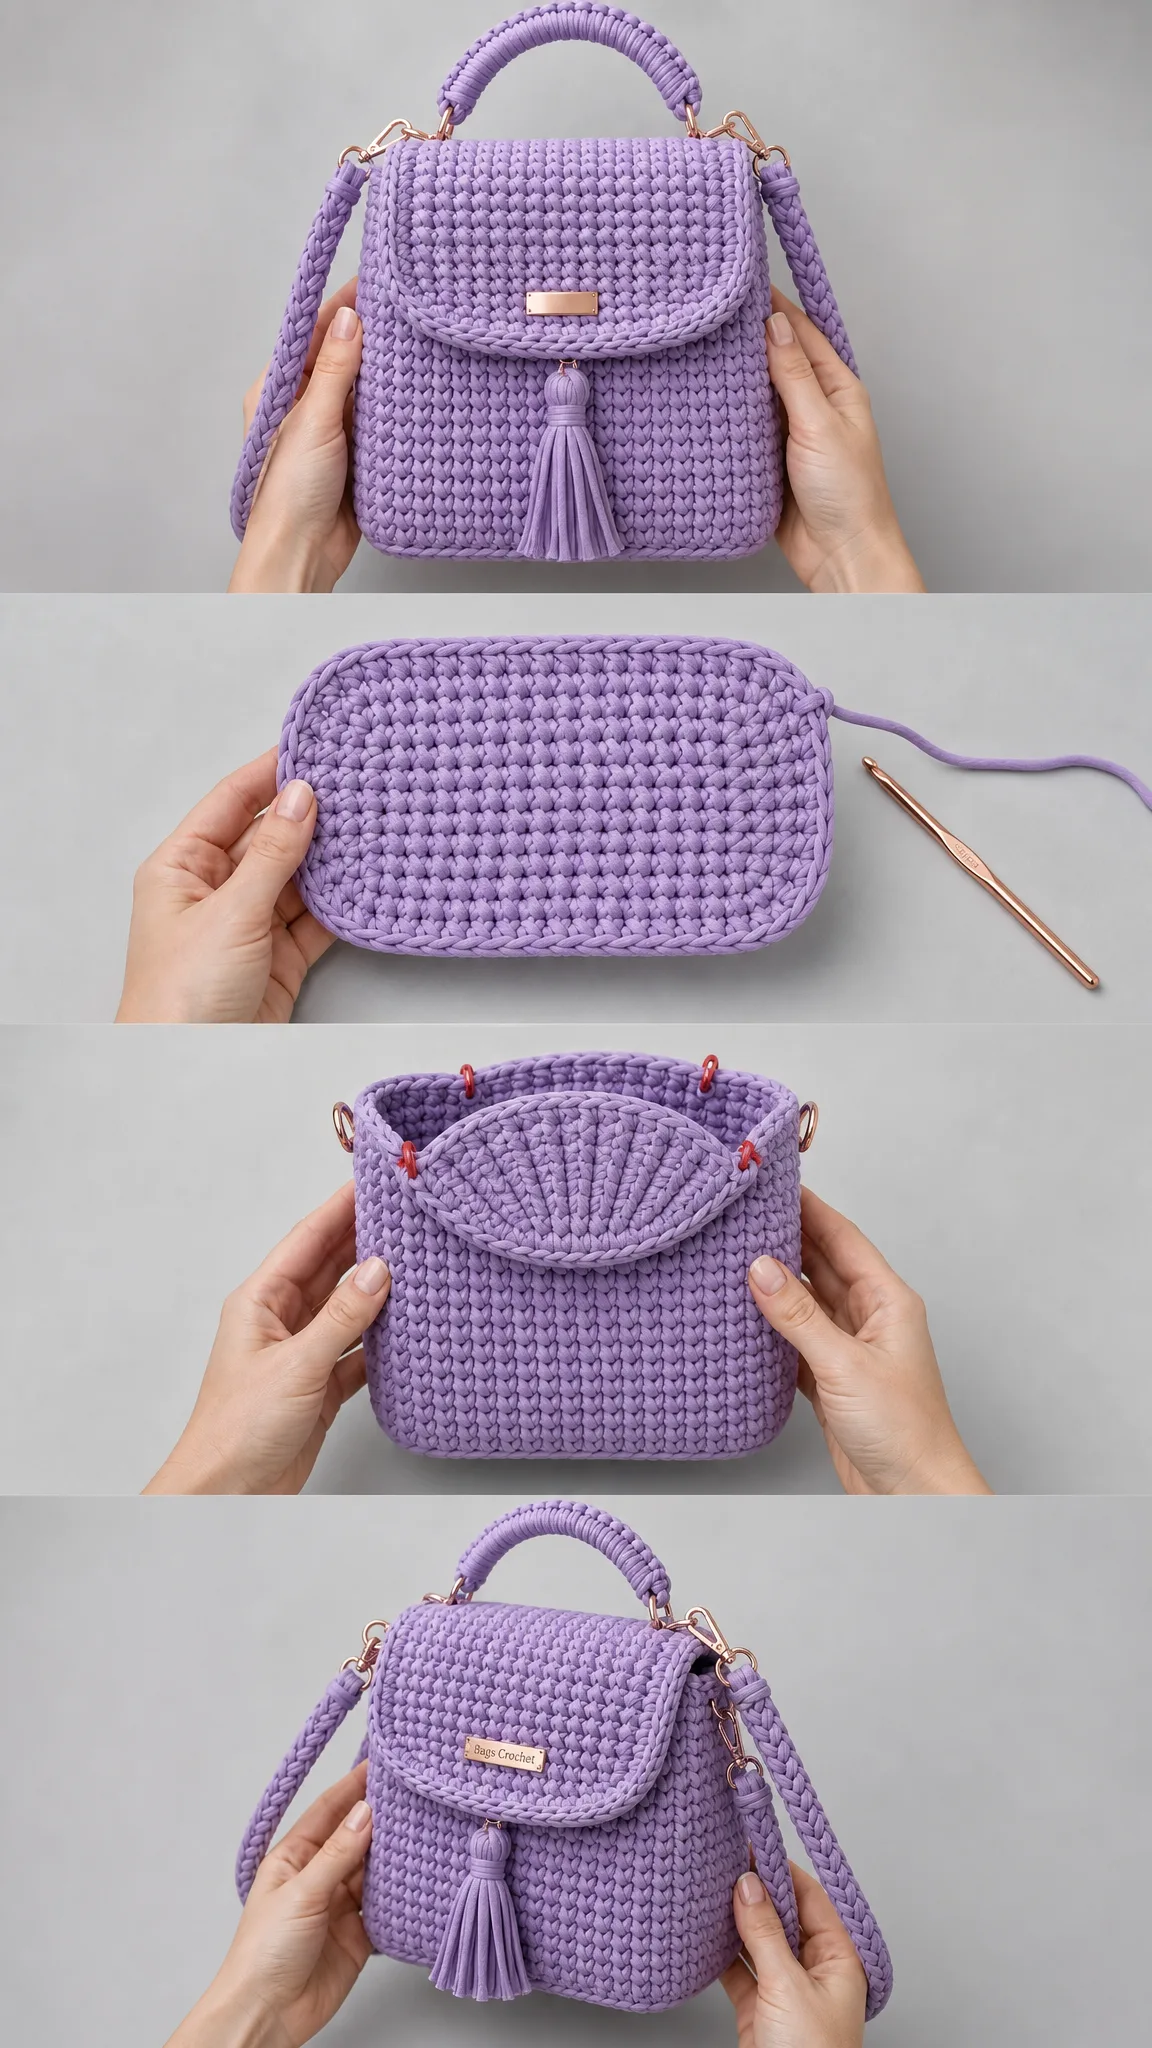
Base Rectangle
| Row | Instruction | Count |
|---|---|---|
| 1 | Ch 18. Sc in 2nd ch from hook and each ch across. Turn. | 17 sc |
| 2-7 | Ch 1, sc in each st across. Turn after Rows 2-6. Do not turn after Row 7. | 17 sc each row |
Checkpoint: Your base should measure about 8.5 x 3.5 inches (21.5 x 9 cm).
Pick Up Around Base
Rnd 1: Ch 1. Sc 17 across the long front edge, sc 7 down the short side, sc 17 across the long back edge, sc 7 up the remaining short side. Join with sl st to first sc. (48 sc)
Body Rounds
| Rnd | Instruction | Count |
|---|---|---|
| 2 | Ch 1, sc in each st around; join. This stabilizes the pick-up round. | 48 sc |
| 3-19 | Ch 1, csc in each st around; join. Keep the seam at one back corner. | 48 csc each rnd |
| 20 | Ch 1, sc in each st around; join. | 48 sc |
| 21 | Reverse sc in each st around. Invisible join. | 48 sts |
Checkpoint: After Rnd 19, your body height from base edge should be about 9.5 inches (24 cm). The top opening should measure about 24 inches (61 cm) around.
Flap and Front Details
Curved Flap
| Row | Instruction | Count |
|---|---|---|
| 1 | Ch 18. Sc in 2nd ch from hook and each ch across. Turn. | 17 sc |
| 2-8 | Ch 1, sc in each st across. Turn. | 17 sc each row |
| 9 | Ch 1, sc2tog, sc 13, sc2tog. Turn. | 15 sc |
| 10 | Ch 1, sc2tog, sc 11, sc2tog. Turn. | 13 sc |
| 11 | Ch 1, sc2tog, sc 9, sc2tog. Turn. | 11 sc |
| 12 | Ch 1, sc2tog, sc 7, sc2tog. Do not turn. | 9 sc |
Flap Edging
Ch 1. Work sc evenly around all flap edges as follows: 17 sc across the top foundation edge, 12 sc down the first side edge, 9 sc across the curved lower edge, 12 sc up the second side edge. Join. (50 sc)
Work 1 round reverse sc in each st. Invisible join. (50 sts)
Attach Flap
Center the foundation edge of the flap across the back top opening, spanning 17 top stitches. Pin with the rounded edge falling toward the front. Sew through the foundation edge and the top back stitches, keeping the flap hinge flat and secure.
Closure and Label
Attach the magnetic snap or sew-on snap so the flap closes at the upper front center. Sew the decorative label to the flap center, about 1.25 inches (3 cm) above the lower curve. Reinforce all hardware by stitching through the lining or an inside patch if using one.
Handle, Straps, and Tassel
Top Handle
| Step | Instruction | Count |
|---|---|---|
| 1 | Ch 26. Sc in 2nd ch from hook and each ch across. Turn. | 25 sc |
| 2-4 | Ch 1, sc in each st across. Turn after Rows 2-3. | 25 sc each row |
| 5 | Fold long edges toward WS around optional cord. Sl st or whipstitch edges together to form a padded tube. | 25 sts long |
Insert a D-ring or connector at each handle end. Sew the handle ends to the top side corners, just inside the strap tabs.
Backpack Straps (Make 2)
| Row | Instruction | Count |
|---|---|---|
| 1 | Ch 66. Sc in 2nd ch from hook and each ch across. Turn. | 65 sc |
| 2-4 | Ch 1, sc in each st across. Turn after Rows 2-3. | 65 sc each row |
| 5 | Fold lengthwise with WS together. Sl st or whipstitch long edge closed. | 65 sts long |
Thread each strap through a slider and swivel clasp. Stitch the ends securely. Attach the upper strap ends to the top side D-rings and the lower ends to back lower corners. Adjust length for comfort.
Tassel Charm
Sizing and Customization
Want to adjust the size? Here’s how:
To change width: Add or subtract chains from the base. Every 2 added base stitches changes width by about 1 inch (2.5 cm) at gauge.
To change depth: Add or subtract base rows. Every 2 base rows changes depth by about 1 inch (2.5 cm).
To change height: Add or subtract body rounds. Every 2 rounds changes height by about 1 inch (2.5 cm).
Keep the photo shape: For a crisp rectangular backpack, maintain a width-to-depth ratio close to 2.4:1 and keep the flap about the same width as the front panel.
Troubleshooting Common Issues
| Issue | Fix |
|---|---|
| Body leans or spirals | Use joined rounds and keep the first-stitch marker at one back corner |
| Hook will not enter csc | Relax the loop height slightly or use a hook 0.5 mm larger for body rounds |
| Bag sags | Add plastic canvas to the base and use a fabric lining |
| Flap curls | Block flat, then add reverse sc edging with relaxed tension |
| Straps stretch | Line the straps with ribbon or grosgrain before sewing closed |
Finishing Checklist
Before calling your backpack complete, work through this list:
Care Instructions
Spot clean when possible. For washable yarn, hand wash gently in cool water, press out moisture in a towel, reshape, and dry flat. Remove or protect metal hardware before washing if it is not rustproof.
You Did It!
Thank you so much for choosing this pattern. I really hope you love your finished Lavender Chic Backpack as much as I loved designing it. This bag gets compliments everywhere it goes, and yours will too.
If you make this crochet backpack pattern, I would absolutely love to see it! Tag me on Instagram or share a photo in my Facebook group. Seeing your creations honestly makes my whole day.
Don’t forget to save this pattern to your Pinterest boards so you can find it again whenever inspiration strikes. And if you have any questions or want to share how yours turned out, drop a comment below. I read every single one and I’m always here to help. Happy crocheting!
Want a Quick & Easy Printable Version?
Get a clean, beautifully formatted PDF of this pattern — easy to follow step by step, ready to print or save on any device. No scrolling, no distractions, just the pattern.
Get the Printable PDF →