Picture this: a sweet grey narwhal with a golden spiral horn, swimming across a snowy white blanket while delicate blue snowflakes drift around it. This Arctic Narwhal Baby Blanket brings together whimsical ocean creatures and winter wonderland vibes in one stunning piece that any baby would be lucky to snuggle.
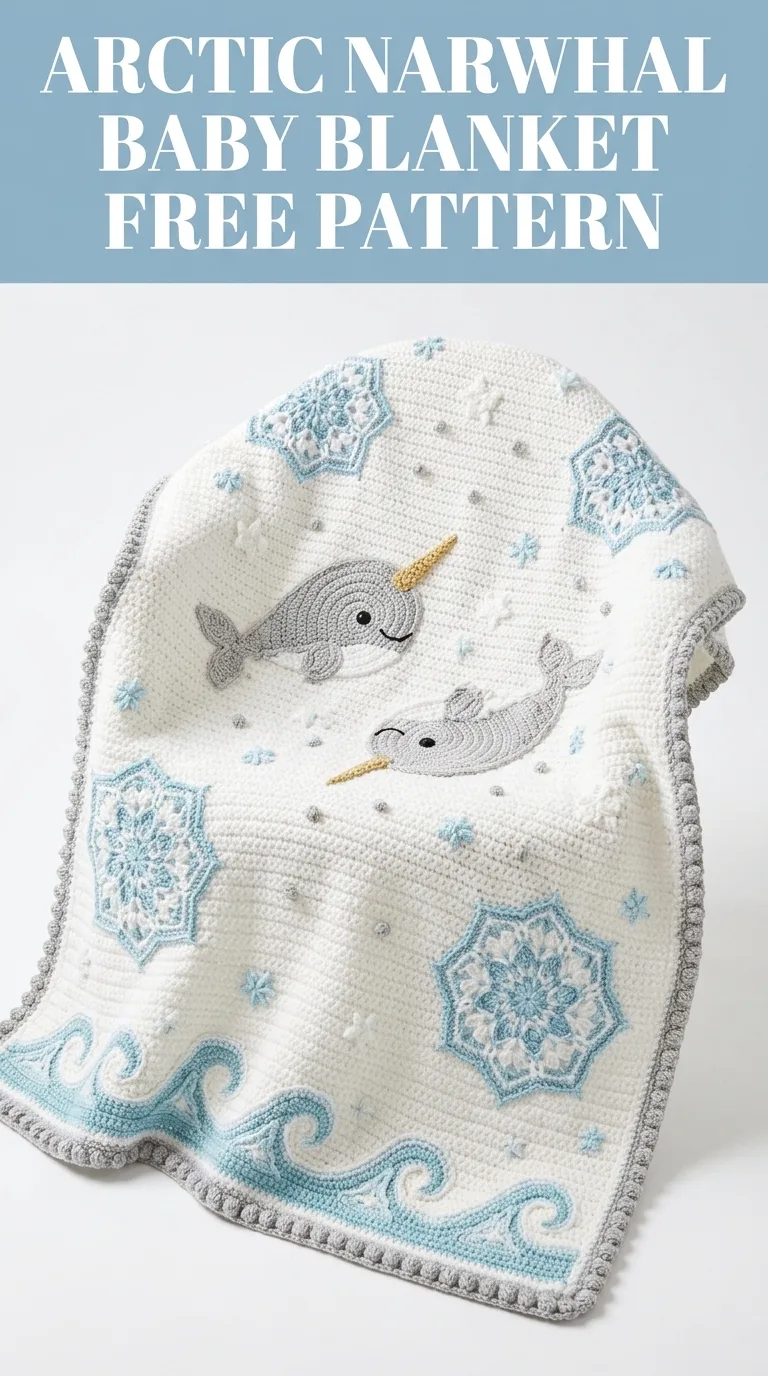
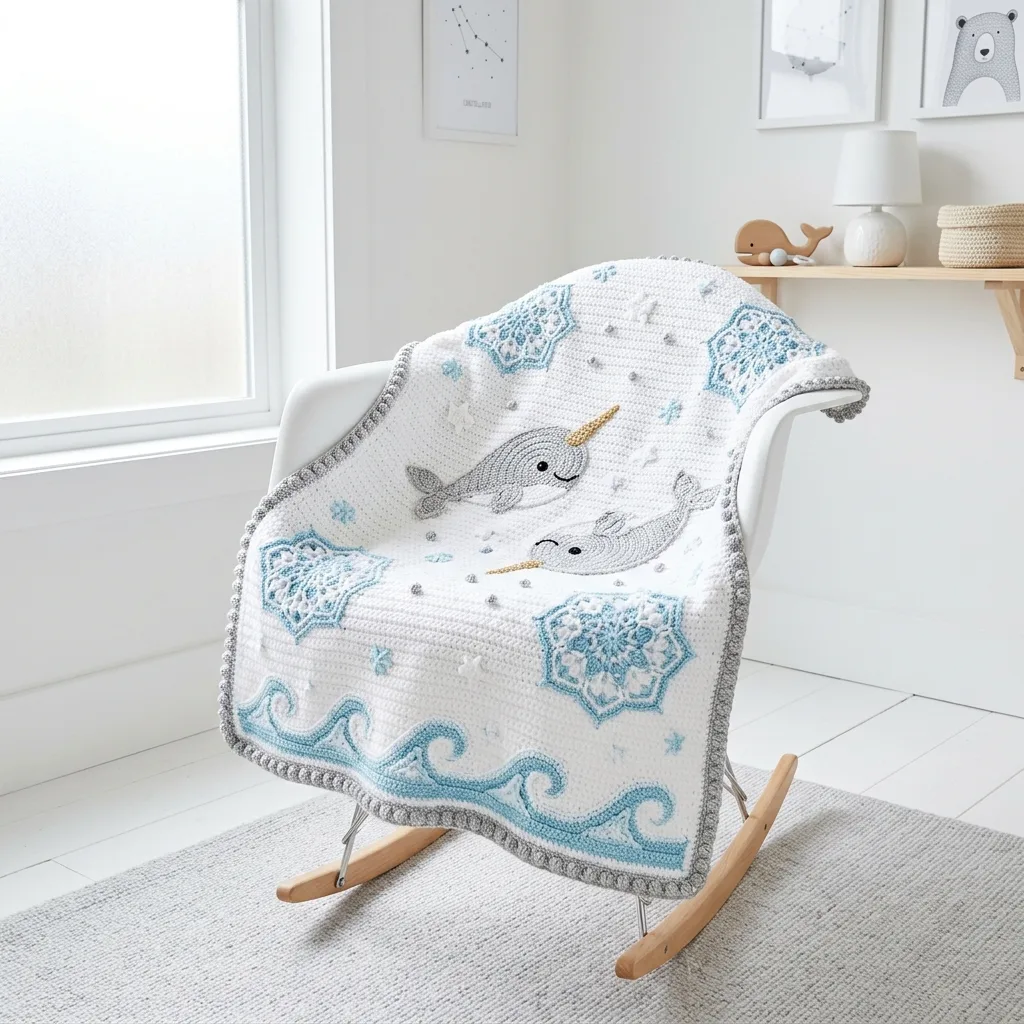
I designed this blanket to be a real showstopper for nurseries, baby showers, or that special little one in your life. The combination of appliqué narwhals, decorative snowflake motifs, curling ocean waves, and a textured bobble border creates a blanket that looks incredibly complex but breaks down into manageable steps. If you can work basic stitches and follow appliqué instructions, you can absolutely make this beauty.
This crochet pattern walks you through every element, from the white base blanket to each decorative detail. The skill level sits at intermediate, but confident beginners who take their time will do just fine. I will explain every technique along the way.
Why This Narwhal Baby Blanket Pattern Works
The magic of this blanket lies in its layered construction. You are not trying to work complicated colorwork into rows. Instead, you create a simple base blanket, then make individual appliqué pieces, then attach everything at the end. This approach gives you complete control over placement and lets you fix mistakes without ripping out the whole project.
The color palette keeps things soft and nursery appropriate. Crisp white forms the background, light grey builds the narwhals, soft blues create the snowflakes and waves, and a medium grey frames everything with that gorgeous bobble border. A touch of golden yellow gives each narwhal its signature horn.
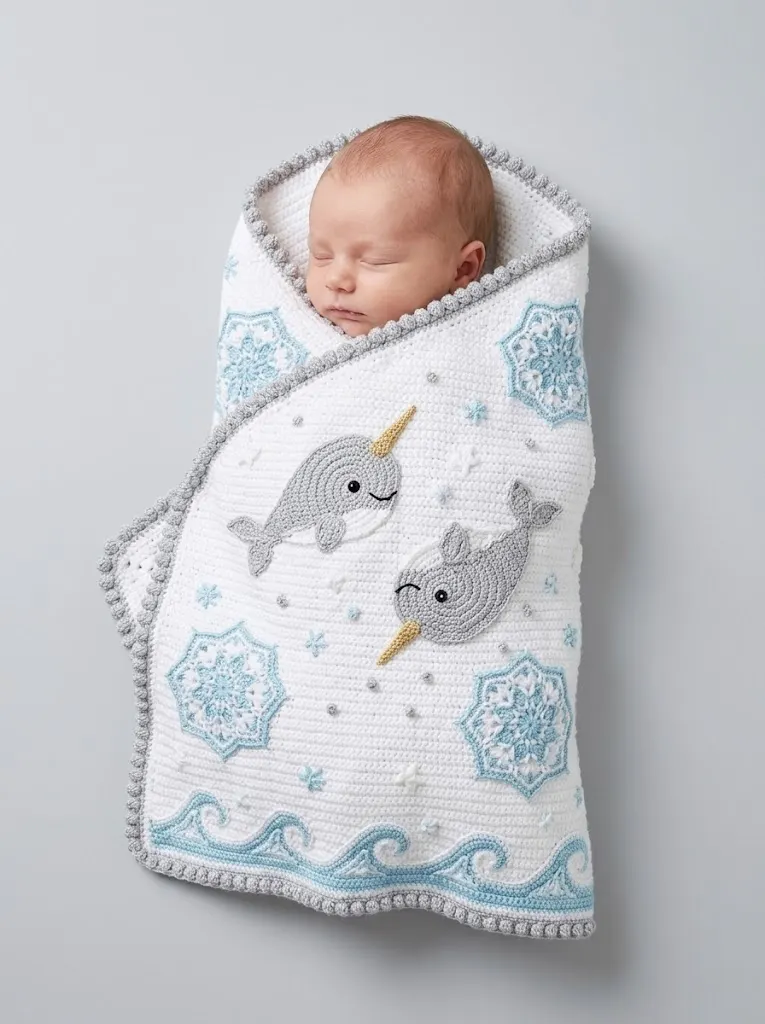
Parents love this blanket because the design works for any baby regardless of gender. The arctic theme feels fresh and modern compared to traditional baby motifs. Plus, the white background photographs beautifully for those inevitable baby pictures.
Materials You Will Need
Yarn:
– White: approximately 800 yards for the main blanket body
– Light Grey: approximately 150 yards for narwhal bodies
– Medium Grey: approximately 200 yards for border and small details
– Light Blue: approximately 180 yards for snowflakes and waves
– Medium Blue: approximately 80 yards for wave accents and snowflake details
– Golden Yellow: approximately 15 yards for narwhal horns
– Black: small amount for eyes
I recommend a soft acrylic or cotton blend that washes well and holds up to baby use. Something like Caron Simply Soft, Lion Brand Vanna’s Choice, or Paintbox Yarns Cotton Aran works beautifully.
Tools:
Finished Dimensions:
Approximately 34 inches wide by 40 inches long, perfect crib or stroller size.
Gauge
Work 14 single crochet (sc) stitches and 16 rows to equal 4 inches square using the 5.0mm hook. Check your gauge before starting. If your gauge runs tight, go up a hook size. If loose, go down. Gauge matters here because it affects your final blanket size and how well your appliqués fit the space.
Abbreviations and Stitch Definitions
Let me break down every stitch you will use in this pattern:
ch = chain: Yarn over, pull through the loop on your hook. This creates the foundation for most crochet work.
sl st = slip stitch: Insert hook, yarn over, pull through both the stitch and the loop on your hook in one motion. Used for joining and creating flat seams.
sc = single crochet: Insert hook into stitch, yarn over and pull up a loop (2 loops on hook), yarn over and pull through both loops. The shortest and tightest basic stitch.
hdc = half double crochet: Yarn over, insert hook, yarn over and pull up a loop (3 loops on hook), yarn over and pull through all 3 loops. Slightly taller than sc with a softer drape.
dc = double crochet: Yarn over, insert hook, yarn over and pull up a loop (3 loops), yarn over and pull through 2 loops (2 loops remain), yarn over and pull through remaining 2 loops. A tall stitch that works up quickly.
tr = treble crochet: Yarn over twice, insert hook, yarn over and pull up a loop (4 loops), [yarn over and pull through 2 loops] three times. Even taller, used for lacier effects.
inc = increase: Work 2 stitches into the same stitch. Adds width to your work.
dec = decrease: Work 2 stitches together as one. For sc decrease (sc2tog), insert hook in first stitch and pull up a loop, insert hook in next stitch and pull up a loop (3 loops on hook), yarn over and pull through all 3 loops.
bobble = A textured bump created by working multiple partial double crochets into one stitch, then completing them together. I will explain the exact technique when we reach the border.
magic ring = An adjustable starting loop that closes completely without leaving a hole. Essential for the snowflakes and narwhals.
Main Blanket Body
The base blanket uses simple single crochet worked in rows. This creates a dense, warm fabric that holds appliqués well and provides excellent stitch definition.
Foundation:
With white yarn and 5.0mm hook, ch 121.
Row 1: Sc in 2nd ch from hook and in each ch across. (120 sts)
Row 2: Ch 1, turn. Sc in each st across. (120 sts)
Rows 3 through 160: Repeat Row 2.
When you finish, your blanket body should measure approximately 34 inches wide by 40 inches long. The rows create subtle horizontal ridges that give the blanket visual texture even before you add appliqués.
Fasten off and weave in ends.
Tip: Place a stitch marker at the beginning of every 20th row. This helps you keep count without constantly recounting from the bottom.
Narwhal Appliqués (Make 2)
These adorable narwhals are the stars of the show. Each one combines a body, tail, flippers, belly patch, horn, and eye. The construction uses basic shaping with increases and decreases.
Narwhal Body
With light grey yarn and 5.0mm hook, make a magic ring.
Round 1: 6 sc into magic ring, pull ring closed. (6 sts)
Round 2: Inc in each st around. (12 sts)
Round 3: [Sc 1, inc] 6 times. (18 sts)
Round 4: [Sc 2, inc] 6 times. (24 sts)
Round 5: [Sc 3, inc] 6 times. (30 sts)
Rounds 6 through 10: Sc in each st around. (30 sts)
Round 11: [Sc 3, dec] 6 times. (24 sts)
Round 12: Sc in each st around. (24 sts)
Round 13: [Sc 2, dec] 6 times. (18 sts)
Rounds 14 through 16: Sc in each st around. (18 sts)
Round 17: [Sc 1, dec] 6 times. (12 sts)
Rounds 18 through 22: Sc in each st around. (12 sts)
Round 23: [Sc 2, dec] 3 times. (9 sts)
Rounds 24 through 26: Sc in each st around. (9 sts)
Sl st to close. Stuff lightly with fiberfill or leave flat depending on how dimensional you want your narwhals. For a blanket, I recommend leaving them mostly flat with just slight padding so baby can lie comfortably.
Narwhal Tail
With light grey yarn, ch 8.
Row 1: Sc in 2nd ch from hook, hdc in next, dc in next 2, hdc in next, sc in next, sl st in last. (7 sts)
Do not turn. Working along the opposite side of the foundation chain, sl st in first, sc in next, hdc in next, dc in next 2, hdc in next, sc in last.
This creates one tail fluke. Make a second fluke and join them at the base with a few slip stitches.
Narwhal Flipper (Make 2 per narwhal)
With light grey yarn, ch 6.
Row 1: Sc in 2nd ch from hook, hdc in next, dc in next 2, 5 dc in last ch (this creates the rounded tip). Working along the opposite side, dc in next 2, hdc in next, sc in last.
Sl st to join. Fasten off, leaving a tail for sewing.
Narwhal Horn
With golden yellow yarn and the smaller 4.5mm hook, ch 12.
Row 1: Sc in 2nd ch from hook and each ch across. (11 sts)
Roll this strip into a tight spiral cone shape and secure with a few stitches through the layers. The spiral gives that classic narwhal tusk look.
Eye
With black yarn, make a magic ring and work 6 sc into it. Pull closed and fasten off, leaving a tail for sewing. You can also use a small black safety eye if you prefer, but embroidered eyes work well for appliqué blankets.
Belly Patch
With white yarn, ch 6.
Row 1: Sc in 2nd ch from hook and each ch across. (5 sts)
Rows 2 through 8: Ch 1, turn, sc across. (5 sts)
Shape into an oval by working a round of sc evenly around the entire rectangle, working 3 sc in each corner to round them.
Snowflake Motifs (Make 6)
These delicate snowflakes add that wintry arctic feel. They use basic stitches arranged in a radial pattern.
With light blue yarn and 5.0mm hook, make a magic ring.
Round 1: Ch 3 (counts as dc), 11 dc into ring, sl st to top of ch-3 to join. (12 dc)
Round 2: Ch 4 (counts as dc plus ch 1), [dc in next st, ch 1] 11 times, sl st to 3rd ch of beginning ch-4. (12 dc, 12 ch-1 spaces)
Round 3: Sl st into ch-1 space, ch 1, sc in same space, *ch 3, sc in next ch-1 space*, repeat from * around, ending with ch 3, sl st to first sc. (12 sc, 12 ch-3 loops)
Round 4: Sl st to center of first ch-3 loop, ch 1, sc in loop, *ch 5, skip next ch-3 loop, sc in next ch-3 loop*, repeat from * around, ending with ch 5, sl st to first sc. (6 points)
Round 5: In each ch-5 loop work: sc, hdc, dc, ch 2, dc, hdc, sc. Sl st to first sc to join.
Round 6 (optional detail round): With medium blue, join in any ch-2 space at point tip. *Ch 4, sl st in same space, sc in next 3 sts, sl st in space between points, sc in next 3 sts*, repeat around all 6 points.
Fasten off and weave in ends. The contrast edging makes each snowflake pop against the white background.
Ocean Wave Border Section
The bottom of the blanket features curling wave shapes in two shades of blue. These create visual movement and ground the arctic ocean theme.
Large Wave (Make 3)
With light blue yarn, ch 25.
Row 1: Sc in 2nd ch from hook and each ch across. (24 sts)
Row 2: Ch 1, turn, sc in first 20 sts, leave remaining 4 sts unworked. (20 sts)
Row 3: Ch 1, turn, sc in first 16 sts. (16 sts)
Row 4: Ch 1, turn, sc in first 12 sts. (12 sts)
Row 5: Ch 1, turn, sc across, then continue working sc evenly down the stepped edge, around the curve, and back to starting point.
This creates one wave crest. With medium blue, work a row of sc along the curved outer edge only to add the contrast detail.
Wave Curl Detail
With medium blue, ch 10.
Row 1: Sl st in 2nd ch from hook, sc in next, hdc in next 2, dc in next 3, hdc in next, sc in last.
This small curl attaches inside each wave for that classic breaking wave look.
Bobble Border
The grey bobble border frames everything beautifully and adds tactile interest for curious baby fingers.
Join medium grey yarn to any corner of the completed blanket.
Round 1: Ch 1, sc evenly around entire blanket, working 3 sc in each corner. Aim for approximately 3 sc for every 4 rows along the sides. Sl st to first sc.
Round 2: Ch 1, sc in first st, *skip 1, 5 dc bobble in next st (yarn over, insert hook, pull up loop, yarn over, pull through 2 loops, repeat 4 more times in same stitch for 6 loops on hook, yarn over and pull through all 6 loops), skip 1, sc in next st*, repeat from * around, adjusting as needed at corners. Sl st to first sc.
Round 3: Ch 1, sc in each st and in top of each bobble around, working 3 sc in corners. Sl st to join.
Round 4: Repeat Round 2.
Fasten off and weave in all ends.
Small Accent Details
Bubbles (Make 8 to 12)
With medium grey or light blue, make a magic ring.
Round 1: 6 sc into ring, sl st to join, pull ring closed.
These tiny circles scatter around the narwhals to suggest underwater bubbles.
Mini Snowflakes (Make 6 to 8)
With light blue, make a magic ring.
Round 1: [Ch 3, sl st into ring] 6 times. Pull ring closed.
These simple star shapes fill empty spaces on the upper portion of the blanket.
Assembly Instructions
This is where everything comes together. Take your time with placement before sewing anything permanently.
Step 1: Lay your completed blanket body flat on a large surface.
Step 2: Position the wave sections along the bottom edge, overlapping slightly. Pin in place.
Step 3: Place the two narwhals in the center area, one slightly higher than the other. Traditionally, one faces left and one faces right, creating a playful swimming scene. Pin securely.
Step 4: Arrange the six large snowflakes in the corners and along the top and bottom areas, avoiding overlap with the narwhals.
Step 5: Scatter the bubbles around the narwhals and the mini snowflakes in open spaces.
Step 6: Take a photo of your layout before sewing. Trust me on this one.
Step 7: Using matching yarn colors and a tapestry needle, whipstitch each piece in place with small, even stitches. Work around the entire edge of each appliqué.
Step 8: Attach the border as described above.
Care Instructions
This blanket washes beautifully on a gentle cycle with cold water. Lay flat to dry or tumble on low. The appliqués stay secure if you have sewn them thoroughly. Avoid bleach, which can yellow the white yarn over time.
Final Thoughts on This Crochet Tutorial
Making this Arctic Narwhal Baby Blanket taught me that impressive results come from patient layering of simple elements. Each piece on its own takes maybe an hour or two. Combined, they create something truly special that any parent would treasure.
This step by step crochet pattern breaks down a complex looking project into totally achievable chunks. Work the base blanket while watching your favorite show. Make one narwhal per evening. Knock out a few snowflakes during lunch breaks. Before you know it, you have all your pieces ready for assembly day.
Whether you are making this for your own little one, a baby shower gift, or a nursery decoration, I hope you enjoy every stitch. The finished blanket has that perfect combination of playful and elegant that works in any modern nursery.
Thank you so much for choosing this pattern for your next project. I genuinely appreciate you being here and trusting me with your crafting time. If you make this blanket, I would absolutely love to see it. Tag me on Instagram or share a photo in my Facebook group. Seeing your finished projects honestly makes my whole week.
If you loved this pattern, go ahead and pin it to your crochet board so you can find it whenever you are ready to start. And please drop a comment below if you make one. I read every single comment and love hearing which colors you chose or who the lucky baby recipient will be.
