
I call this one the "Picnic in Provence" dress. It started as a sketch in one of my old spiral notebooks from years ago, back when I was obsessed with vintage 1950s silhouettes and bold geometric prints. I remember drawing that first checkerboard grid and thinking, "Someday I’ll figure out how to make this work in crochet."
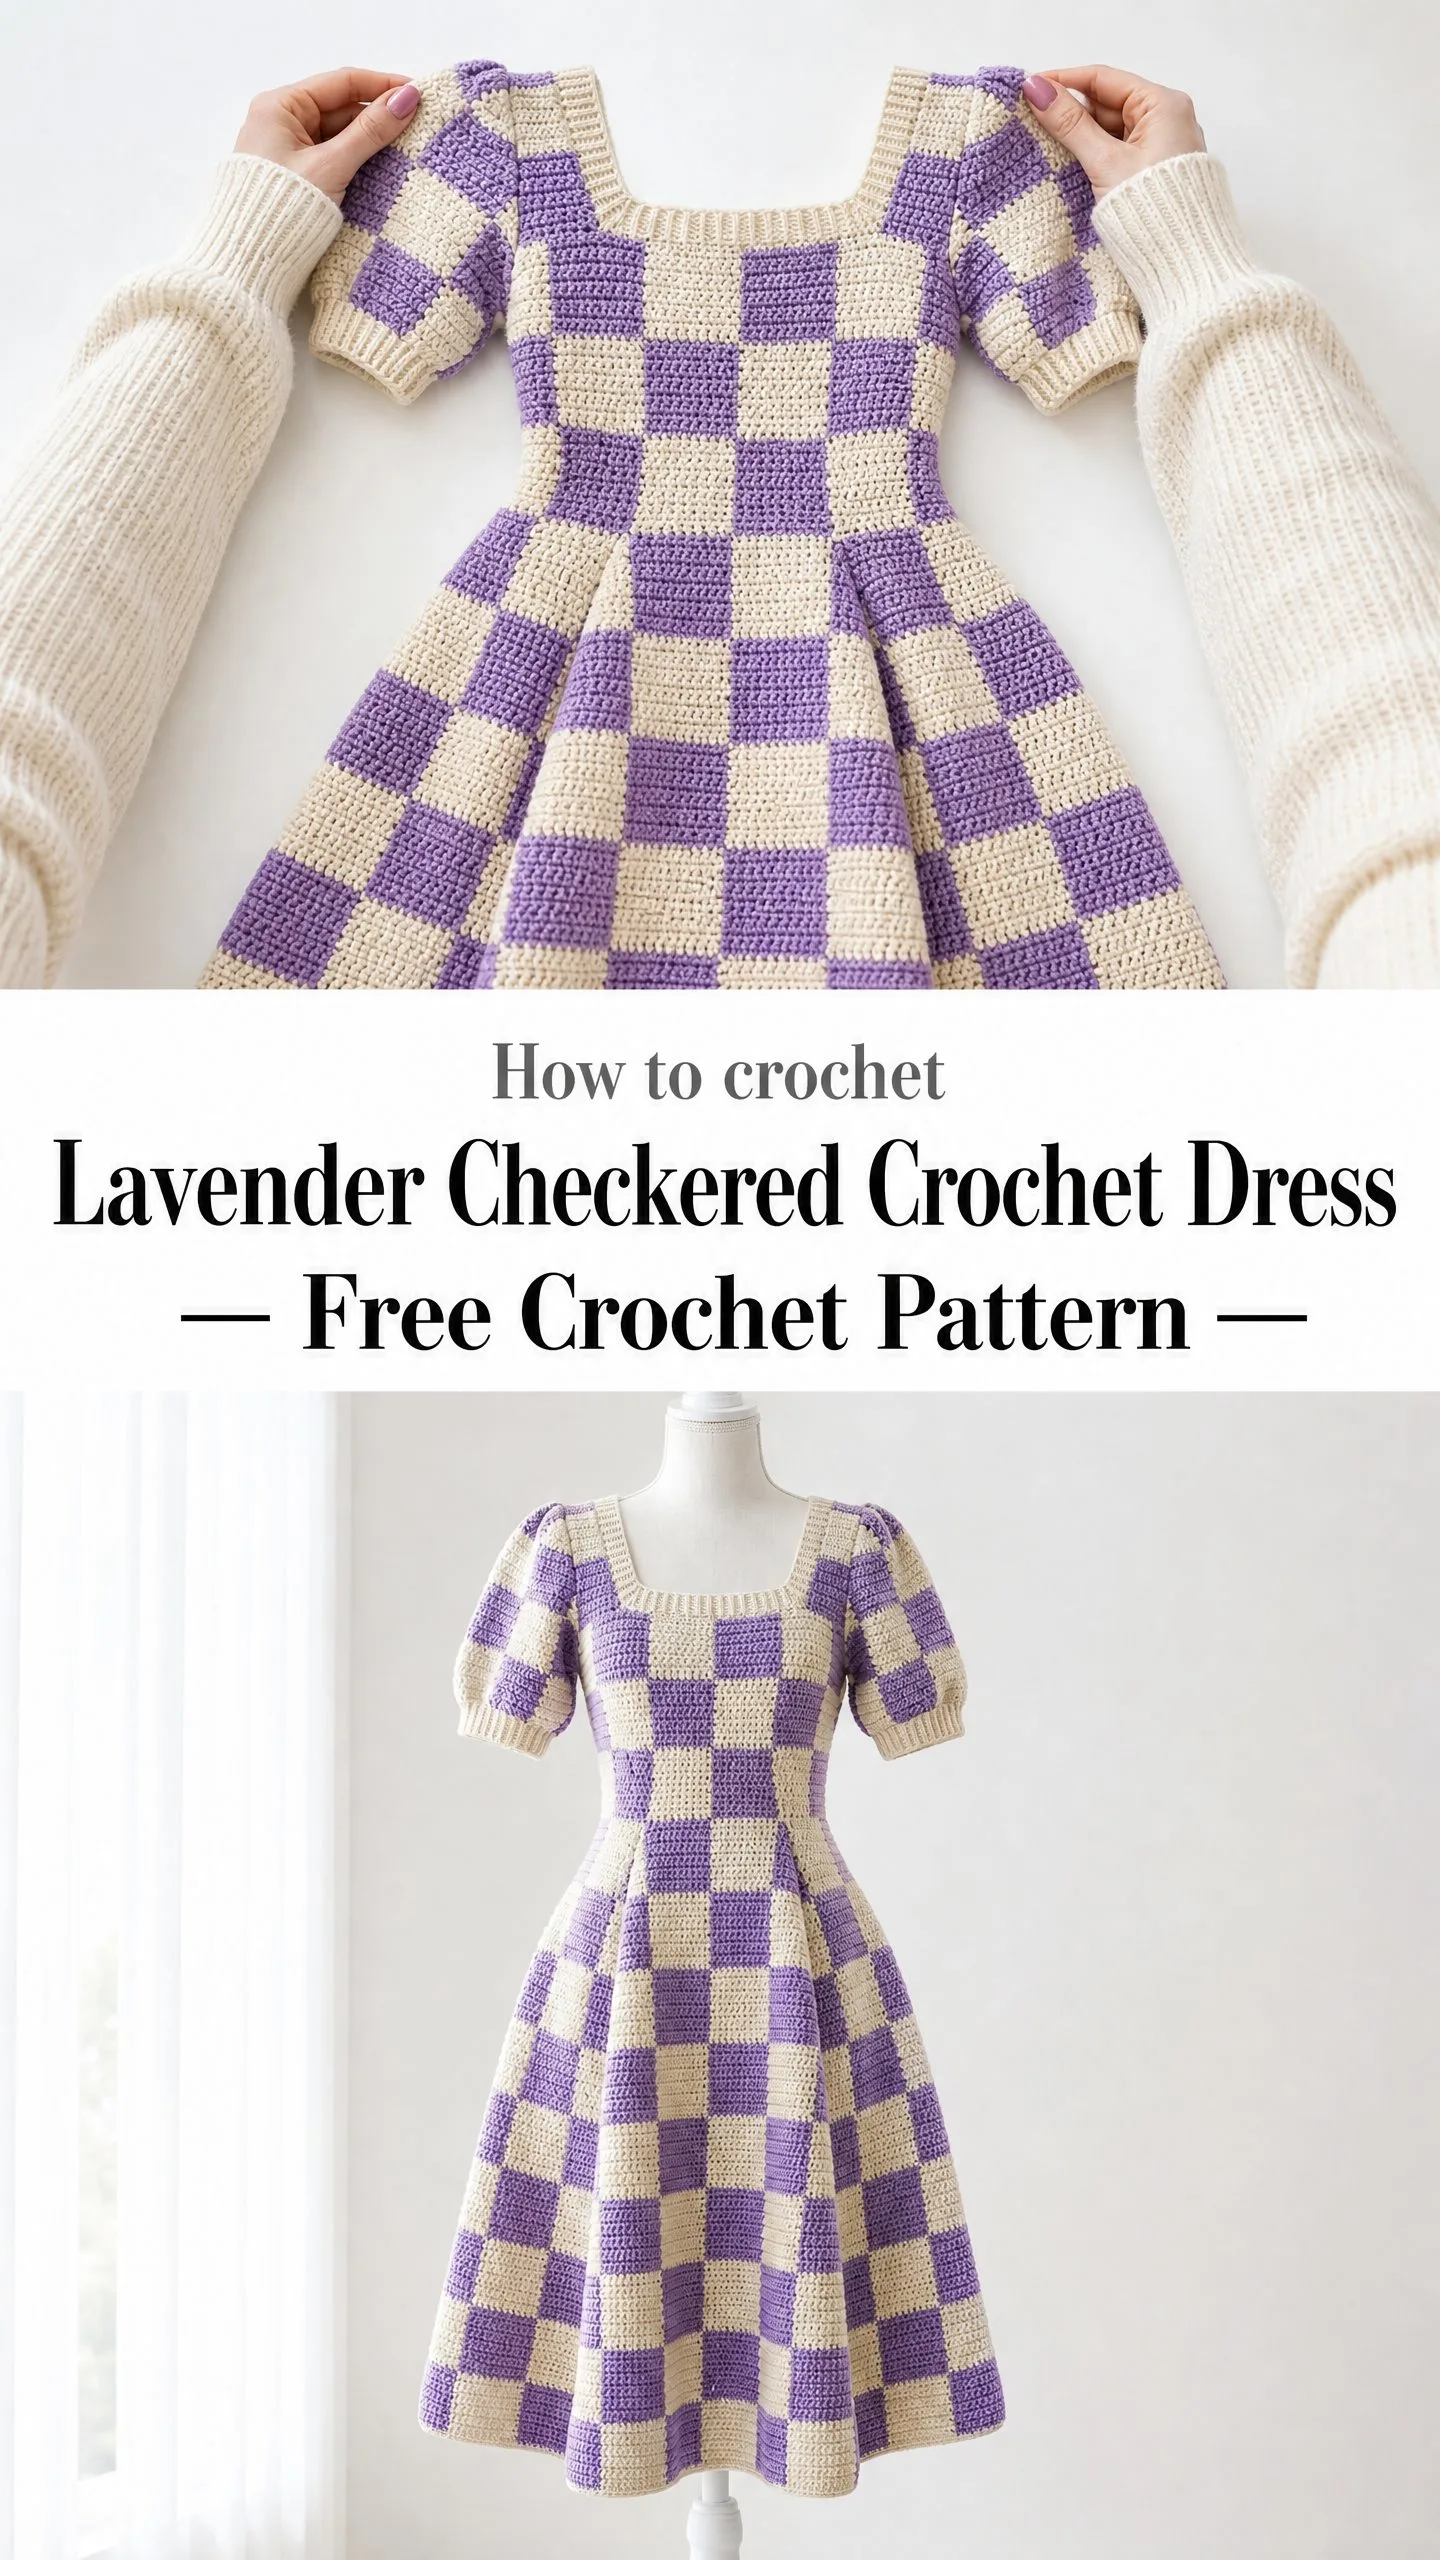
Well, someday finally came. After countless gauge swatches, some truly questionable color combinations, and one memorable attempt that looked more like a crocheted chessboard costume, I finally cracked the code. This lavender and cream checkered crochet dress is everything I dreamed it would be.
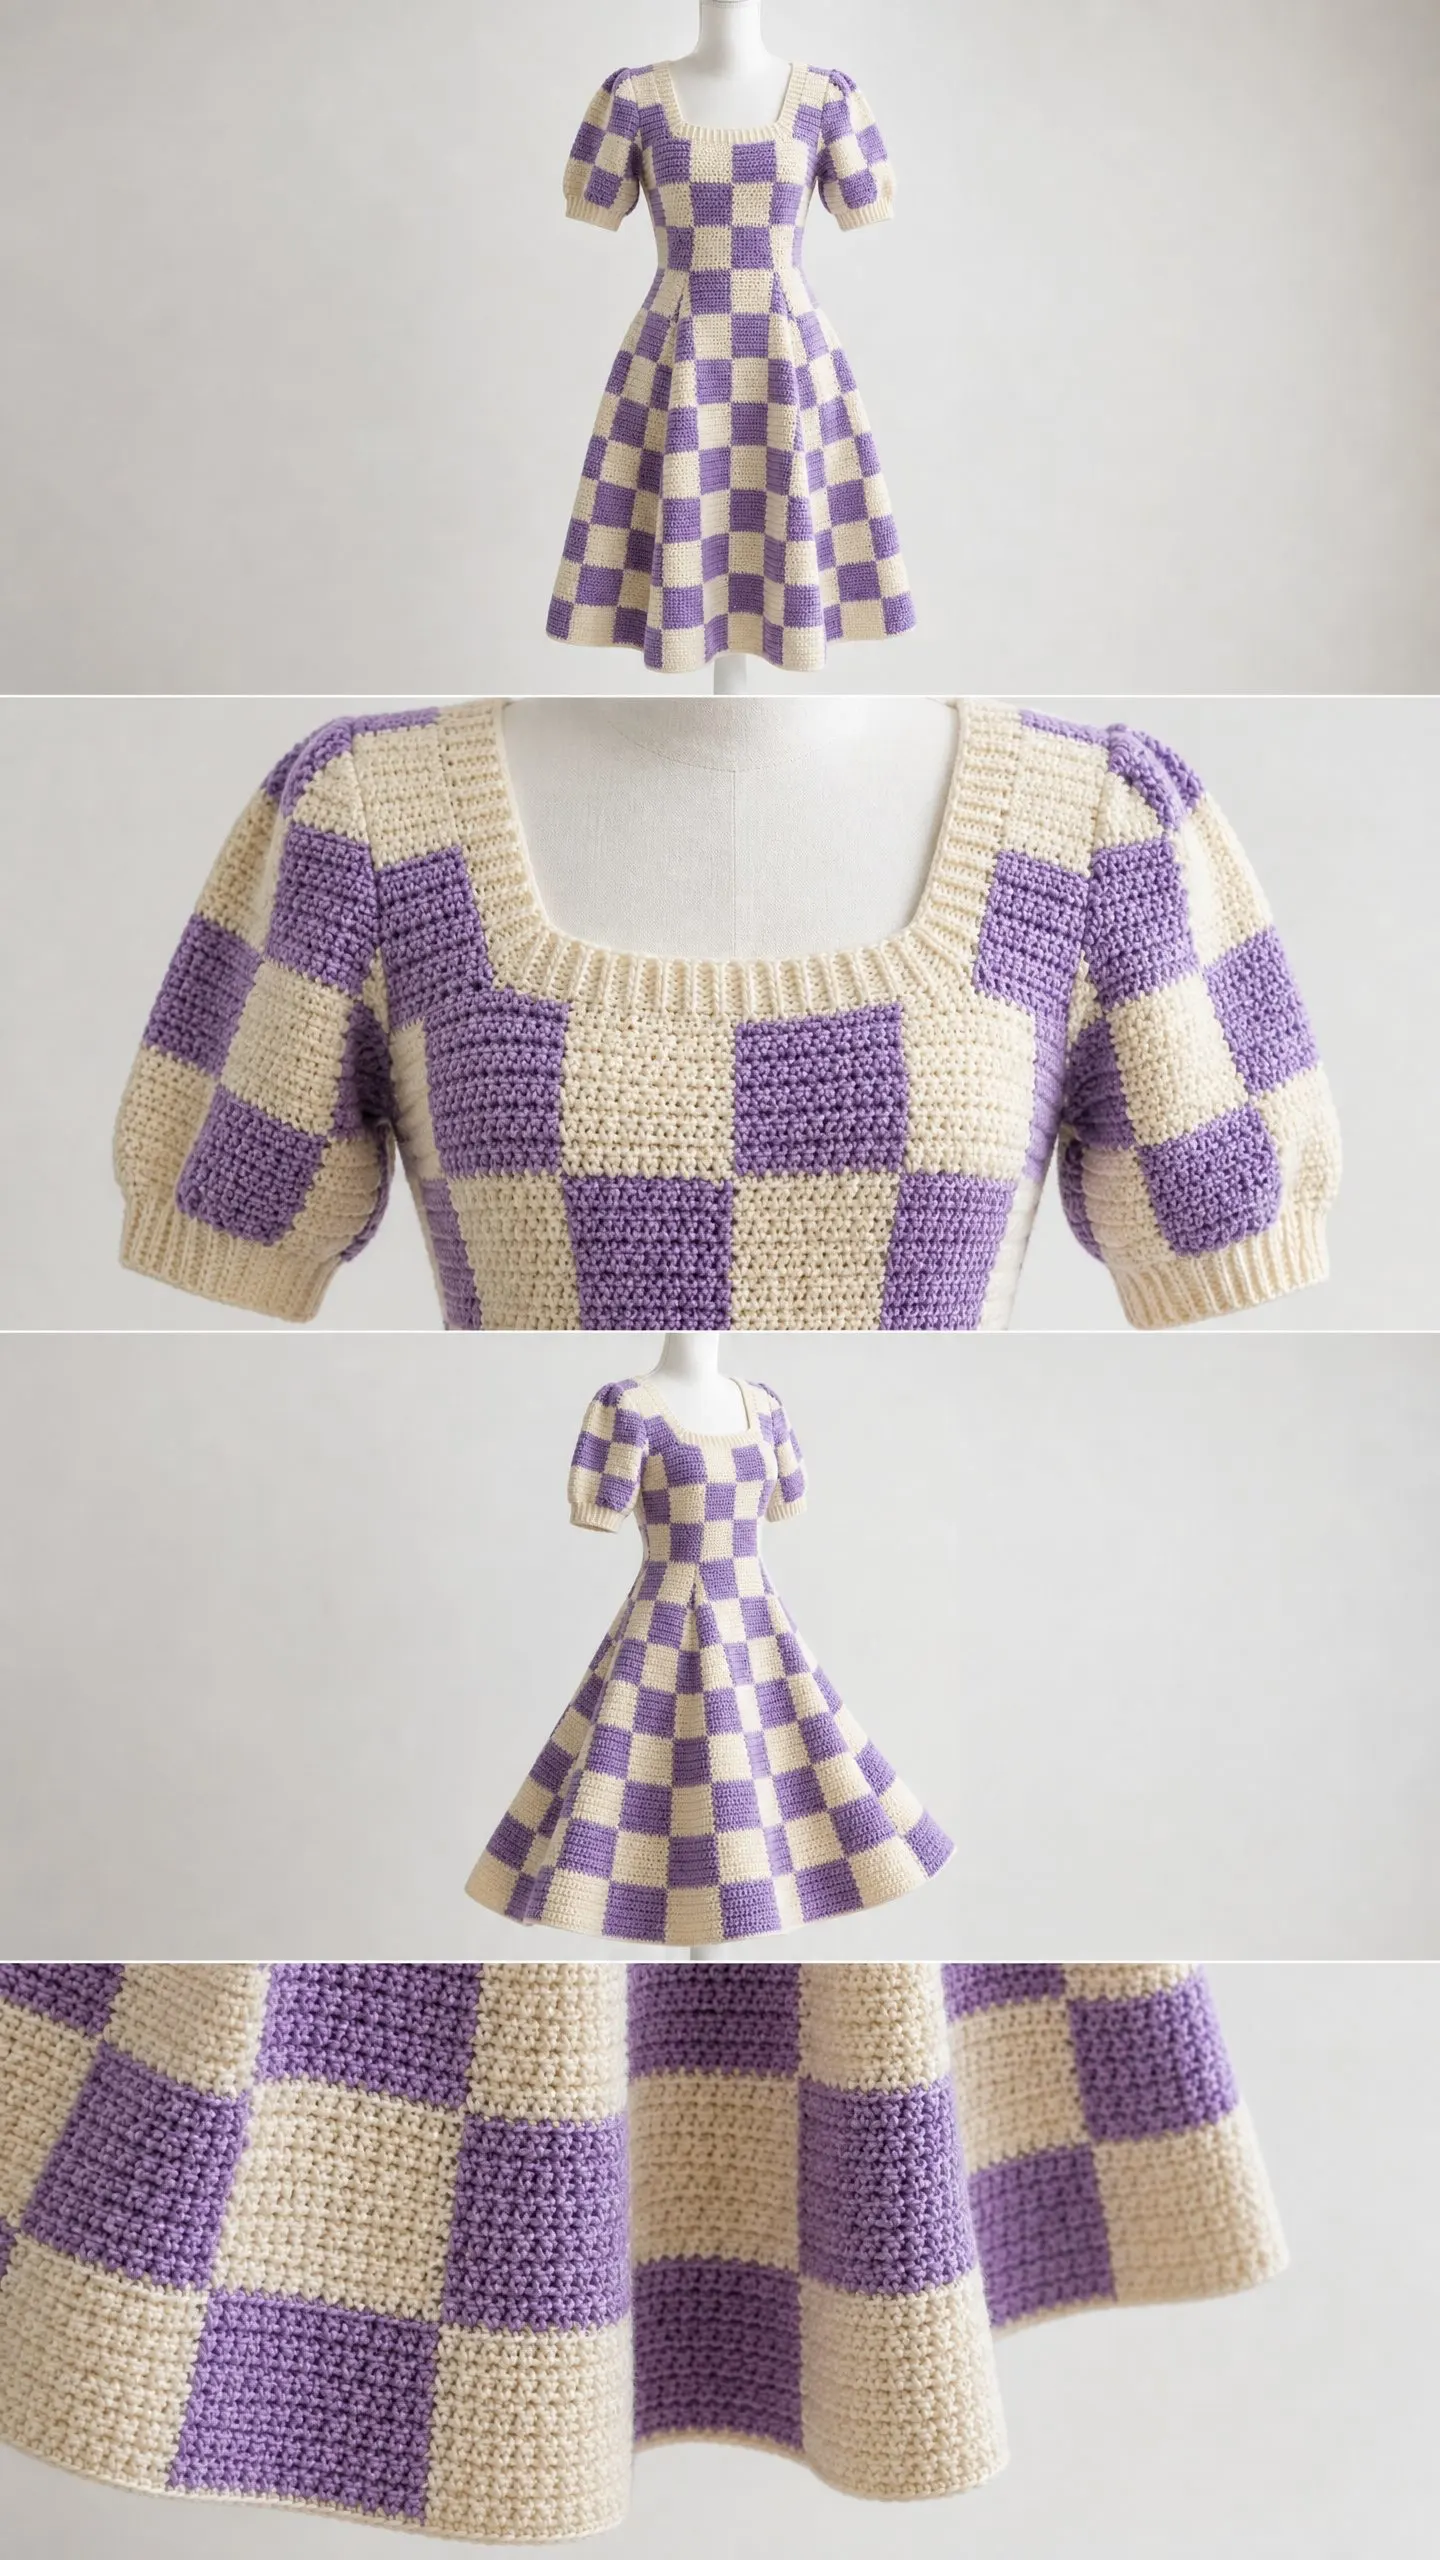
The fitted bodice, the square neckline, those sweet puff sleeves, and that gloriously full A-line skirt. It’s romantic, it’s retro, and it’s absolutely a showstopper. I made the first one for my sister’s garden party last summer, and I’m still getting requests for the pattern. So here it is, every single stitch, laid out for you to create your own.
About This Crochet Dress Pattern
This midi-length A-line dress features a striking two-color checkerboard pattern worked entirely in single crochet. The construction starts at the top of the bodice and works downward in joined rounds. You’ll create a square neckline on both front and back, short puff sleeves with ribbed cuffs, a fitted bodice with waist shaping, and a beautifully flared skirt that falls to approximately knee length.
The checkerboard motif is achieved through color changes at regular intervals. You can use the intarsia method or carry the yarn along the wrong side. Either way, you’ll want to keep your color management neat for a polished finished piece.
This is a structurally complete garment with no seams other than attaching the sleeves. No zipper is required for most sizes since the pattern includes enough ease to slip the dress on and off comfortably. However, I’ve included optional zipper instructions if you prefer a more tailored fit.
Skill Level: Advanced Intermediate
You should be comfortable with working in the round, color changes within a row, waist shaping, sleeve construction, and picking up stitches for edging. The checkerboard colorwork requires attention to alignment across rounds. Nothing extremely advanced here, but consistent tension and color management are essential.
Time Estimate: Approximately 40 to 60 hours depending on your working speed and yarn management
Finished Measurements
This crochet pattern is written for a women’s size Medium.
Size customization guidance is provided at the end of the pattern for those who need to adjust.
Materials Needed
Yarn: Worsted weight yarn (CYCA 4)
Hook: US size H-8 / 5.0 mm crochet hook, or size needed to obtain gauge
Notions:
Yarn Suggestions
Lion Brand Yarn Pound of Love (worsted weight, 100% acrylic, 1020 yards per skein) offers excellent stitch definition and washes easily. One skein each of Buttercream and Lilac will do the trick.
Paintbox Yarns Simply Worsted (100% acrylic, approximately 200 yards per 100g skein) has an excellent color range including a true lavender and warm cream. You’ll need approximately 4 skeins of each color.
Cascade 220 (100% Peruvian highland wool, 220 yards per 100g skein) is a natural fiber option with great stitch definition and excellent blocking properties. Purchase approximately 4 skeins of each color. Note that wool requires gentle hand washing.
Substitution Note: Any smooth worsted weight yarn that produces a firm, even fabric at the stated gauge will work beautifully. Avoid fuzzy or textured yarns since they’ll obscure your beautiful color blocks.
Gauge
18 sc x 20 rows = 4 in / 10 cm worked in single crochet in the round (or flat), blocked.
Gauge is absolutely mandatory for this garment. Even a small deviation will significantly alter the finished dimensions. If your swatch is too small, go up a hook size. If your swatch is too large, go down a hook size. Block your gauge swatch before measuring.
Quick Check: Each checkerboard block at gauge measures approximately 2 in / 5 cm wide x 2 in / 5 cm tall, since each block is 9 stitches wide and 10 rows tall.
Abbreviations
Let me walk you through every abbreviation before we dive in. I’ll define each one with plain English so there’s no confusion.
Special Techniques for the Checkered Pattern
Checkerboard Color Change
Each color block is 9 stitches wide. When working in rounds, the color change happens at the same stitch on every round to maintain vertical alignment.
Here’s how to change colors cleanly: Insert hook into next stitch, pull up a loop of current color, then drop current color to the back (wrong side), pick up new color, and pull through both loops on hook to complete the single crochet (sc) with new color.
Do not cut yarn between color changes within a row. Carry the unused color loosely along the wrong side, catching it every 3 stitches by working over the carried strand. This keeps floats tidy and prevents a bumpy texture on the right side.
Checkerboard Alignment Rule
This is the key to making your checkerboard actually look like a checkerboard:
This creates that beautiful staggered checkerboard effect. Every 10 rounds, the color alignment automatically shifts to maintain the grid if you follow this rule consistently.
Pattern Instructions
Bodice
Foundation Chain and Neckline Setup
The neckline is a square. The front neckline opening is 18 stitches wide (approximately 4 in / 10 cm). Each shoulder strap is 9 stitches wide (approximately 2 in / 5 cm). The back neckline opening is 18 stitches wide, matching the front.
Total stitches around the neckline opening: 18 (front) + 9 (right shoulder) + 18 (back) + 9 (left shoulder) = 54 stitches.
Step 1: Starting Chain
With CA and hook size H-8 / 5.0 mm, ch 55. This gives 54 working stitches plus 1 turning chain.
Row 1 (flat, RS): sc in 2nd ch from hook and in each ch across. Turn. (54 sc)
This flat row becomes the back neckline edge. Now we’ll work in the round by joining the two short ends to form the square neckline tube.
Building the Neckline in the Round
After Row 1, do not fasten off. Fold the strip into a loop and sl st the last stitch of Row 1 to the first stitch of Row 1 to join in the round. You now have 54 stitches in a joined loop. Place a stitch marker at the join point (this is the left shoulder / back-left corner).
Stitch Distribution:
Place markers at all four corners: marker A at beginning of round (left back corner), marker B after 9 sts (front left corner), marker C after 27 sts (front right corner), marker D after 36 sts (back right corner).
Bodice Body Rounds
The starting circumference is 54 stitches. We need to increase to a bust circumference of 162 stitches (36 in / 91.5 cm) over the first portion of the bodice, then taper to a waist of 126 stitches (28 in / 71 cm).
Rnd 1: ch 1 (does not count as st throughout), work 1 sc in each st around in checkerboard pattern: 9 CA, 9 CB, 9 CA, 9 CB, 9 CA, 9 CB. Join. (54 sc)
Rnd 2: ch 1, work in checkerboard (colors shift per alignment rule: 9 CB, 9 CA, 9 CB, 9 CA, 9 CB, 9 CA). Join. (54 sc)
Rnd 3: ch 1, rep Rnd 1 color order, 1 sc in each st. Join. (54 sc)
Rnd 4: ch 1, rep Rnd 2 color order, 1 sc in each st. Join. (54 sc)
Underarm Expansion (Rounds 5 through 14)
At Round 5, we add 108 new chain stitches at two underarm positions (54 chains at each underarm) to create the full bust circumference.
Rnd 5 (underarm chain add): Work in pattern to end of right shoulder strap section (9 sts). At the right underarm position, ch 54. Skip across to the beginning of the back section and continue working across the back neckline (18 sts) and left shoulder strap (9 sts). At the left underarm position, ch 54. Skip across to the front section and work across front neckline (18 sts). Join.
New stitch count: 9 (right shoulder) + 54 (right underarm chain) + 18 (back) + 9 (left shoulder) + 54 (left underarm chain) + 18 (front) = 162 sts.
Rnd 6: ch 1, work 1 sc in each st around in checkerboard pattern. The color blocks continue at 9-stitch intervals regardless of where underarm chains were added. Join. (162 sc)
Rnd 7 through Rnd 16: ch 1, work 1 sc in each st around in checkerboard pattern, alternating color alignment per Alignment Rule. Join at end of each round. (162 sc each round)
Checkpoint 1: After Round 16, the bodice tube should measure approximately 4 in / 10 cm from the shoulder with a circumference of 36 in / 91.5 cm.
Waist Shaping (Rounds 17 through 24)
We decrease from 162 sts to 126 sts over 8 rounds.
Rnd 17 (decrease round): ch 1, (work 16 sc in pattern, sc2tog) x 9. Join. (153 sc)
Rnd 18: ch 1, work 1 sc in each st in pattern. Join. (153 sc)
Rnd 19 (decrease round): ch 1, (work 15 sc in pattern, sc2tog) x 9. Join. (144 sc)
Rnd 20: ch 1, work 1 sc in each st in pattern. Join. (144 sc)
Rnd 21 (decrease round): ch 1, (work 14 sc in pattern, sc2tog) x 9. Join. (135 sc)
Rnd 22: ch 1, work 1 sc in each st in pattern. Join. (135 sc)
Rnd 23 (decrease round): ch 1, (work 13 sc in pattern, sc2tog) x 9. Join. (126 sc)
Rnd 24: ch 1, work 1 sc in each st in pattern. Join. (126 sc)
Checkpoint 2: After Round 24, the bodice should measure approximately 8 in / 20 cm from the shoulder, with a waist circumference of approximately 28 in / 71 cm.
Skirt
The skirt expands from 126 sts at the waist to approximately 288 sts at the hem over approximately 60 rounds.
Skirt Rnd 1 (increase): ch 1, (13 sc in pattern, 2 sc in next st) x 9. Join. (135 sc)
Skirt Rnd 2: ch 1, 1 sc in each st in pattern. Join. (135 sc)
Skirt Rnd 3: ch 1, 1 sc in each st in pattern. Join. (135 sc)
Skirt Rnd 4 (increase): ch 1, (14 sc in pattern, 2 sc in next st) x 9. Join. (144 sc)
Skirt Rnd 5-6: ch 1, 1 sc in each st in pattern. Join. (144 sc)
Skirt Rnd 7 (increase): ch 1, (15 sc in pattern, 2 sc in next st) x 9. Join. (153 sc)
Skirt Rnd 8-9: ch 1, 1 sc in each st in pattern. Join. (153 sc)
Skirt Rnd 10 (increase): ch 1, (16 sc in pattern, 2 sc in next st) x 9. Join. (162 sc)
Skirt Rnd 11-12: ch 1, 1 sc in each st in pattern. Join. (162 sc)
Continue this increase pattern, adding 1 more stitch before each increase every 3 rounds:
Skirt Rnd 13 (increase): (17 sc, 2 sc in next st) x 9. (171 sc)
Skirt Rnd 16 (increase): (18 sc, 2 sc in next st) x 9. (180 sc)
Skirt Rnd 19 (increase): (19 sc, 2 sc in next st) x 9. (189 sc)
Skirt Rnd 22 (increase): (20 sc, 2 sc in next st) x 9. (198 sc)
Skirt Rnd 25 (increase): (21 sc, 2 sc in next st) x 9. (207 sc)
Skirt Rnd 28 (increase): (22 sc, 2 sc in next st) x 9. (216 sc)
Skirt Rnd 31 (increase): (23 sc, 2 sc in next st) x 9. (225 sc)
Skirt Rnd 34 (increase): (24 sc, 2 sc in next st) x 9. (234 sc)
Skirt Rnd 37 (increase): (25 sc, 2 sc in next st) x 9. (243 sc)
Skirt Rnd 40 (increase): (26 sc, 2 sc in next st) x 9. (252 sc)
Skirt Rnd 43 (increase): (27 sc, 2 sc in next st) x 9. (261 sc)
Skirt Rnd 46 (increase): (28 sc, 2 sc in next st) x 9. (270 sc)
Skirt Rnd 49 (increase): (29 sc, 2 sc in next st) x 9. (279 sc)
Skirt Rnd 52 (increase): (30 sc, 2 sc in next st) x 9. (288 sc)
Skirt Rnd 53-60: ch 1, 1 sc in each st in pattern. Join. (288 sc)
Fasten off and weave in ends at the skirt hem.
Final Checkpoint: After Skirt Round 60, the skirt measures approximately 13 in / 33 cm below the waist. Total dress length from shoulder is approximately 38 in / 96.5 cm. Hem circumference is 64 in / 162.5 cm.
Sleeves (Make 2)
Each sleeve is worked from the cuff up to the sleeve cap, then set into the armhole.
Sleeve Cuff Ribbing
With CA, ch 7.
Ribbing Row 1: sc in 2nd ch from hook and in each ch across. Turn. (6 sc)
Ribbing Rows 2 through 54: ch 1, BLO sc in each st across. Turn. (6 sc each row)
After Row 54, sl st the short ends of the ribbing strip together to join into a ring. This creates a ribbed cuff band. From here, you’ll pick up stitches along the long edge of the ribbing and work the sleeve body upward in rounds, following the checkerboard pattern and adding gentle increases near the sleeve cap for that sweet puff shape.
Set the completed sleeves into the armhole openings by slip stitching around the edge, matching the sleeve cap circumference to the 54-stitch armhole opening.
Finishing Your Checkered Crochet Dress
Neckline Ribbing
Pick up stitches evenly around the square neckline opening. Work 3 rows of BLO sc in joined flat rows to create a stretchy, clean edge that frames the neckline beautifully.
Blocking
This step is essential for a professional finish. Wet block your completed dress by soaking it in cool water, gently squeezing out excess moisture (never wring), and laying flat on blocking mats. Pin to measurements and allow to dry completely. Blocking evens out your stitches and helps the checkerboard pattern pop.
Optional Lining
If you want full opacity, cut and sew a simple sheath lining from lightweight cotton or chiffon fabric. Hand-stitch it to the inside of the bodice at the neckline and armholes.
Tips for Success
Tension matters. Keep your tension consistent throughout, especially when changing colors. Tight stitches will make the fabric stiff. Loose stitches will make it droopy.
Count your stitches. I know it’s tedious, but with colorwork, staying on count keeps your blocks aligned.
Work a test block first. Before committing to the whole dress, work a 9-stitch by 10-row block in each color. Check your gauge and get comfortable with color changes.
Carry yarn loosely. When carrying the unused color along the wrong side, keep it relaxed. Pulling tight creates puckers.
Take breaks. This is a 40 to 60 hour project. Pace yourself and enjoy the process.
You Did It!
Thank you so much for choosing this pattern for your next project. I genuinely hope you love making this lavender checkered crochet dress as much as I loved designing it. There’s something so satisfying about watching those color blocks come together round after round.
If you make one, I would absolutely love to see it! Tag me on Instagram or share a photo in my Facebook group. Nothing makes my day quite like seeing your finished projects.
If this pattern caught your eye, go ahead and pin it to your Pinterest boards so you can find it when you’re ready to start. And please drop a comment below if you have any questions or just want to share how yours turned out. I read every single one, and I’m always here to help. Happy crocheting!
