
I’ve been searching for the perfect summer dress pattern for ages, and this one finally checks every box. The gradient colorway, the feminine ruffle sleeves, the flattering fit and flare silhouette. This is my new favorite dress pattern, hands down.
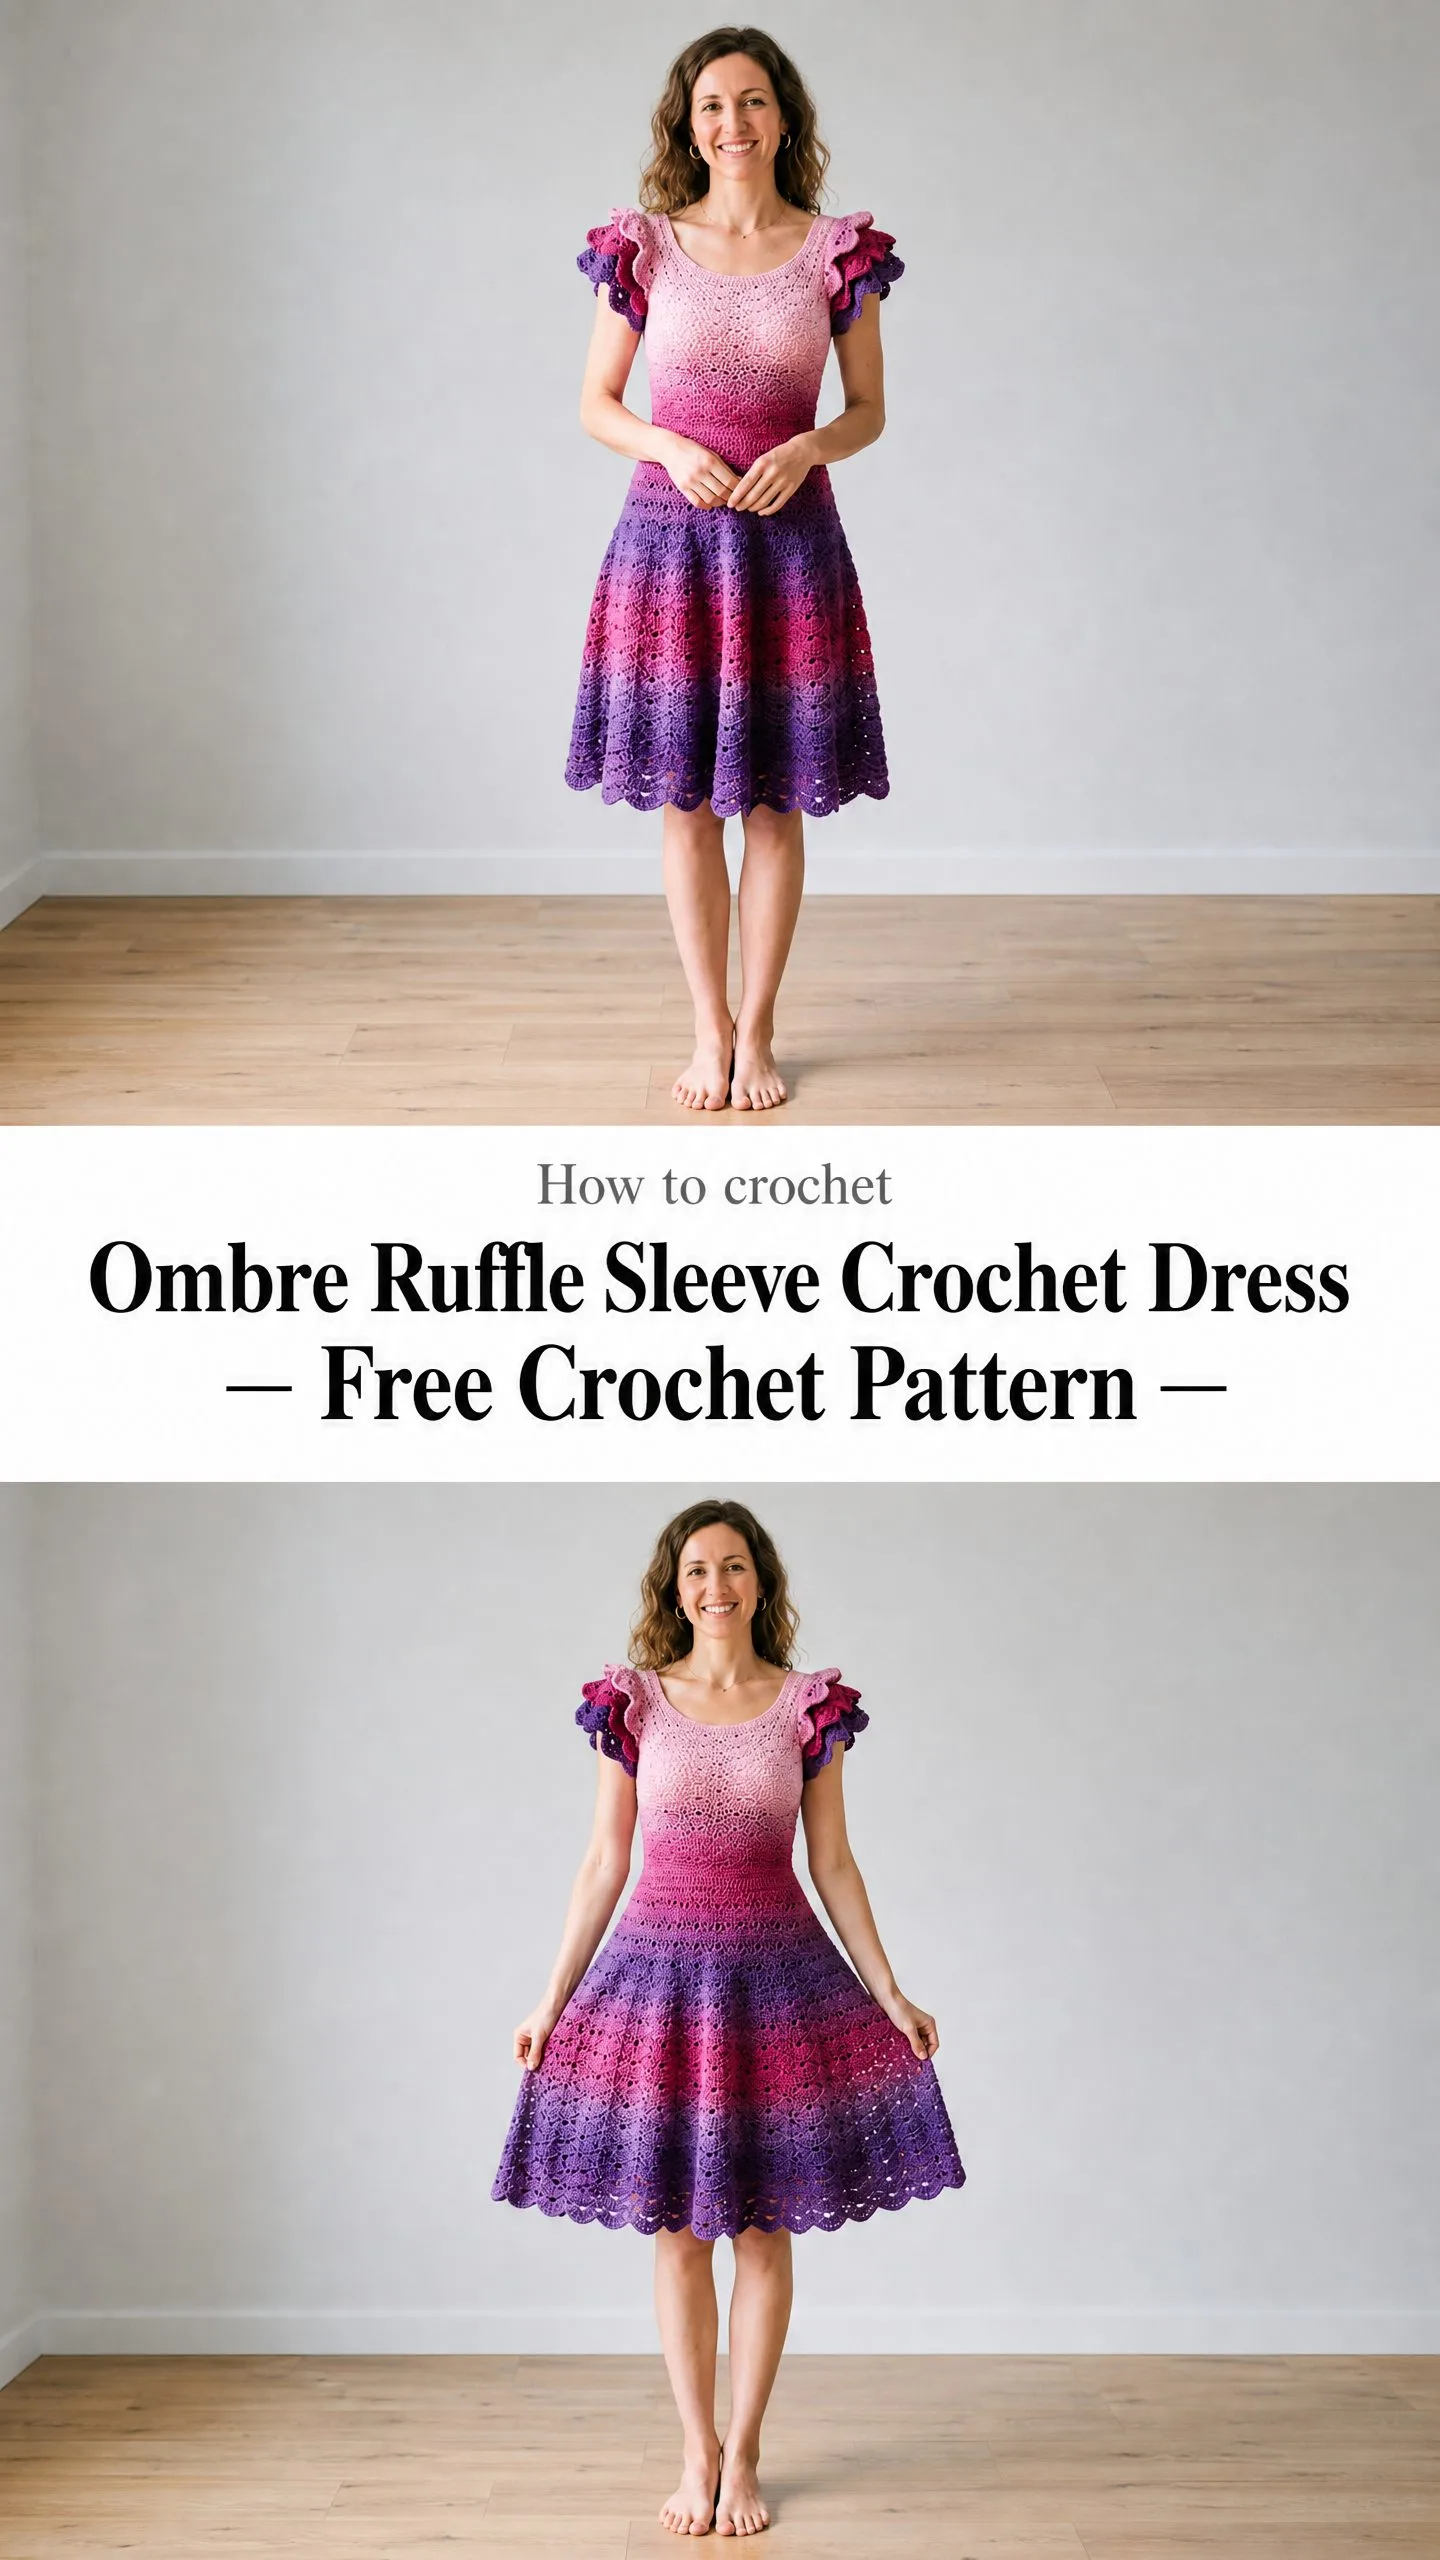
When I first spotted this design, I knew I had to share it. The way the color flows from soft blush pink at the neckline down through hot pink and into deep purple at the hem is absolutely stunning. Those layered ruffle sleeves add just the right amount of whimsy without being over the top.
If you’ve been wanting to challenge yourself with a wearable garment that looks way more impressive than it actually is to construct, this ombre ruffle sleeve crochet dress is calling your name. Let me walk you through everything you need to know to make your own.
About This Crochet Dress Pattern
This dress is worked top down in the round, which means minimal seaming and a continuous workflow that keeps things interesting. You’ll start at the neckline and work your way down through a fitted bodice, a shaped waist, and a gorgeous flared skirt. The only pieces worked separately are those dreamy layered ruffle sleeves.
The construction uses a combination of techniques. The yoke features raglan style increases that shape the shoulders naturally. The bodice is worked in back loop only single crochet, which creates a subtle ribbed texture with nice stretch. Then the skirt transitions into a beautiful lace shell pattern that opens up and drapes beautifully.
Skill level: Advanced Intermediate. You should be comfortable working in the round, executing shell lace repeats, shaping a fitted waist, and constructing multi-layer ruffles. If you’ve made a few garments before, you’re ready for this.
Time estimate: Approximately 40 to 60 hours for a size Medium. The skirt takes up about half of that time since the rounds get longer as you go. This is definitely a project to savor, not rush.
Finished Measurements
This pattern includes sizes XS through 2XL. All measurements below are finished measurements with ease built in.
Bust: 30 in / 76 cm (XS), 34 in / 86 cm (S), 38 in / 97 cm (M), 42 in / 107 cm (L), 46 in / 117 cm (XL), 50 in / 127 cm (2XL)
Waist: 26 in / 66 cm (XS), 30 in / 76 cm (S), 34 in / 86 cm (M), 38 in / 97 cm (L), 42 in / 107 cm (XL), 46 in / 117 cm (2XL)
Hip: 34 in / 86 cm (XS), 38 in / 97 cm (S), 42 in / 107 cm (M), 46 in / 117 cm (L), 50 in / 127 cm (XL), 54 in / 137 cm (2XL)
Total length: Approximately 36 in / 91 cm from shoulder to hem for all sizes. You can easily adjust the skirt length by adding or removing rounds.
Instructions are written for size Medium with other sizes in parentheses in the order XS, S, M, L, XL, 2XL.
Materials Needed
Yarn: Sport weight (CYCA 2) or light DK weight yarn in a gradient or cake format. You need a colorway that transitions from pale blush pink through hot pink to deep purple. Approximately 1200 to 1600 yards total depending on your size.
Recommended yarns:
Hooks:
Notions:
Gauge
Using US E-4 / 3.5 mm hook:
Gauge matters here. This is a fitted garment, so please make a swatch at least 6 inches square, wash and block it, then measure carefully. Adjust your hook size up or down until you match gauge.
Abbreviations
Let me break down every abbreviation you’ll encounter in this pattern.
Special Stitches
Shell Stitch: Work 5 dc all into the same stitch or space. This creates the fan shape that forms the primary texture of the dress fabric.
V-Stitch: Work (dc, ch 1, dc) all into the same stitch or space. This creates a small V that anchors the next round’s shell.
Scallop Edging: Join yarn, ch 3, work 2 dc in same stitch. Skip 2 stitches, sc in next stitch. Skip 2 stitches, work 5 dc in next stitch. Repeat around.
Ruffle Layer: Work a foundation row of sc, then in the next round work 3 dc in every single sc stitch. This triples the stitch count and creates that gorgeous ruffled wave.
Lace Shell Round: Your stitch count must be divisible by 6. Ch 3, work 2 dc in first stitch (half shell). Skip 2 stitches, sc in next stitch. Skip 2 stitches, work 5 dc in next stitch. Repeat around.
Pattern Notes Before You Begin
1. This dress is worked in the round from top down with no seams in the bodice or skirt. Only the sleeves are seamed.
2. When changing colors manually, complete the last yarn over of your final stitch with the new color.
3. Place stitch markers at all four shoulder points to guide your raglan shaping. Move them up every few rounds.
4. The lace shell pattern begins after bodice shaping is complete. The bodice uses back loop only single crochet for a firm, fitted fabric.
5. Block the dress body before attaching sleeves. This sets the final dimensions for accurate armhole fitting.
6. All rounds are joined with a slip stitch unless otherwise specified.
7. Ch 1 does not count as a stitch. Ch 3 counts as the first dc.
Ombre Ruffle Sleeve Dress Pattern Instructions
Section 1: Neckline and Yoke Setup
Round 1 (Neckline foundation):
Chain 72 (60, 66, 72, 78, 84, 90). Join with sl st to first ch to form a ring, being careful not to twist. Ch 1. Work 1 sc in each ch around. Join with sl st to first sc.
(72 sc) (XS: 60, S: 66, M: 72, L: 78, XL: 84, 2XL: 90)
Round 2:
Ch 1. Sc in each st around. Join.
(72 sc)
Place 4 stitch markers dividing the round into sections. For size M: Front 22 sts, Back 22 sts, Left shoulder 14 sts, Right shoulder 14 sts.
Section 2: Yoke Shaping (Raglan Style Increases)
At each marker, work 3 sc in the marked stitch. This adds 2 stitches at each of the 4 points, which equals 8 stitches added per increase round.
Round 3 (Increase): Work increase at each marker. (80 sc)
Round 4 (Plain): Sc in each st around. (80 sc)
Round 5 (Increase): (88 sc)
Round 6 (Plain): (88 sc)
Round 7 (Increase): (96 sc)
Round 8 (Plain): (96 sc)
Round 9 (Increase): (104 sc)
Round 10 (Plain): (104 sc)
Round 11 (Increase): (112 sc)
Round 12 (Plain): (112 sc)
Round 13 (Increase): (120 sc)
Round 14 (Plain): (120 sc)
Round 15 (Increase): (128 sc)
Round 16 (Plain): (128 sc)
Round 17 (Increase): (136 sc)
Round 18 (Plain): (136 sc)
Round 19 (Increase): (144 sc)
Round 20 (Plain): (144 sc)
Round 21 (Increase): (152 sc)
Round 22 (Plain): (152 sc)
Round 23 (Increase): (160 sc)
Round 24 (Plain): (160 sc)
Round 25 (Increase): (168 sc)
Round 26 (Plain): (168 sc)
Round 27 (Increase): (176 sc)
Round 28 (Plain): (176 sc)
Round 29 (Increase): (184 sc)
Round 30 (Plain): (184 sc)
Round 31 (Increase): (192 sc)
Round 32 (Plain): (192 sc)
For size M, your stitch distribution should now be approximately Front 64, Back 64, Left sleeve 32, Right sleeve 32.
Checkpoint: Your yoke should measure approximately 5.5 to 6 in / 14 to 15 cm from neck edge when measured flat at center front.
Section 3: Armhole Separation
Separation Round (M):
Ch 1. Sc across 64 front sts. Place next 32 sts on scrap yarn holder for left sleeve. Chain 4 for underarm. Sc across 64 back sts. Place next 32 sts on scrap yarn holder for right sleeve. Chain 4 for underarm. Join to first sc.
Working body sts: 64 + 4 + 64 + 4 = 136 sc (M)
(XS: 110; S: 122; M: 136; L: 150; XL: 164; 2XL: 178)
Section 4: Bodice
Switch to back loop only single crochet for all bodice rounds. This creates the subtle ribbed texture visible in the upper body.
Rounds 33 to 36 (4 rounds plain BLO sc):
Ch 1. Sc in back loop only of each st around. Join.
(136 sc each round, M)
Round 37 (Waist decrease round 1):
Ch 1. (Sc 15, sc2tog) repeat 8 times around. Join.
(128 sc) (XS: 104; S: 116; M: 128; L: 140; XL: 152; 2XL: 168)
Rounds 38 to 40:
Ch 1. Sc BLO around. Join.
(128 sc, M)
Round 41 (Waist decrease round 2):
Ch 1. (Sc 14, sc2tog) repeat 8 times around. Join.
(120 sc) (XS: 96; S: 108; M: 120; L: 132; XL: 144; 2XL: 156)
Rounds 42 to 44:
Ch 1. Sc BLO around. Join.
(120 sc, M)
Round 45 (Waist decrease round 3):
Ch 1. (Sc 13, sc2tog) repeat 8 times around. Join.
(112 sc) (XS: 88; S: 100; M: 112; L: 124; XL: 136; 2XL: 148)
Rounds 46 to 50:
Ch 1. Sc BLO around. Join.
(112 sc, M)
Round 51 (Transition round):
Ch 1. Sc 56, inc 1, sc 55, inc 1. Join.
(114 sc, M)
This adjustment ensures your stitch count is divisible by 6 for the lace shell pattern.
Checkpoint: Your bodice should measure approximately 10 to 11 in / 25 to 28 cm from the neck edge. The waist should be the narrowest point.
Section 5: Waist Transition to Lace Shell
Switch to US F-5 / 3.75 mm hook for the skirt section.
Round 52 (Shell Setup Round):
Ch 3 (counts as first dc). Work 2 dc in same st (half shell). Skip 2 sts. Sc in next st. Skip 2 sts. (5 dc in next st. Skip 2 sts. Sc in next st. Skip 2 sts.) repeat 18 times. Join with sl st to top of ch-3.
(19 complete pattern positions established)
Round 53 (Offset Shell Round):
Ch 1. Sc in first st (the sc from prev rnd). 5 dc in center dc of first full shell. Sc in next sc. (5 dc in center dc of next shell. Sc in next sc.) repeat 18 times. Join.
Continue alternating shell rounds and offset shell rounds, following the lace shell pattern rhythm. The shells will naturally alternate positions, creating that beautiful textured fabric you see in the finished dress.
Skirt Shaping and Increases
As you continue down the skirt, you’ll add increase rounds periodically to create the flared silhouette. Add extra shells by working a V-stitch where needed to maintain pattern flow. The skirt should flare gradually from waist to hem.
Continue in pattern until your skirt reaches approximately 24 to 26 inches from the waist, or your desired length.
Scallop Hem Border
Join yarn to any stitch. Ch 3. Work 2 dc in the same stitch (half shell starter). Skip 2 stitches. Work 1 sc in the next stitch. Skip 2 stitches. Work 5 dc in the next stitch (full scallop shell). Repeat around, ending with sc in last stitch. Join and fasten off.
Ruffle Sleeves
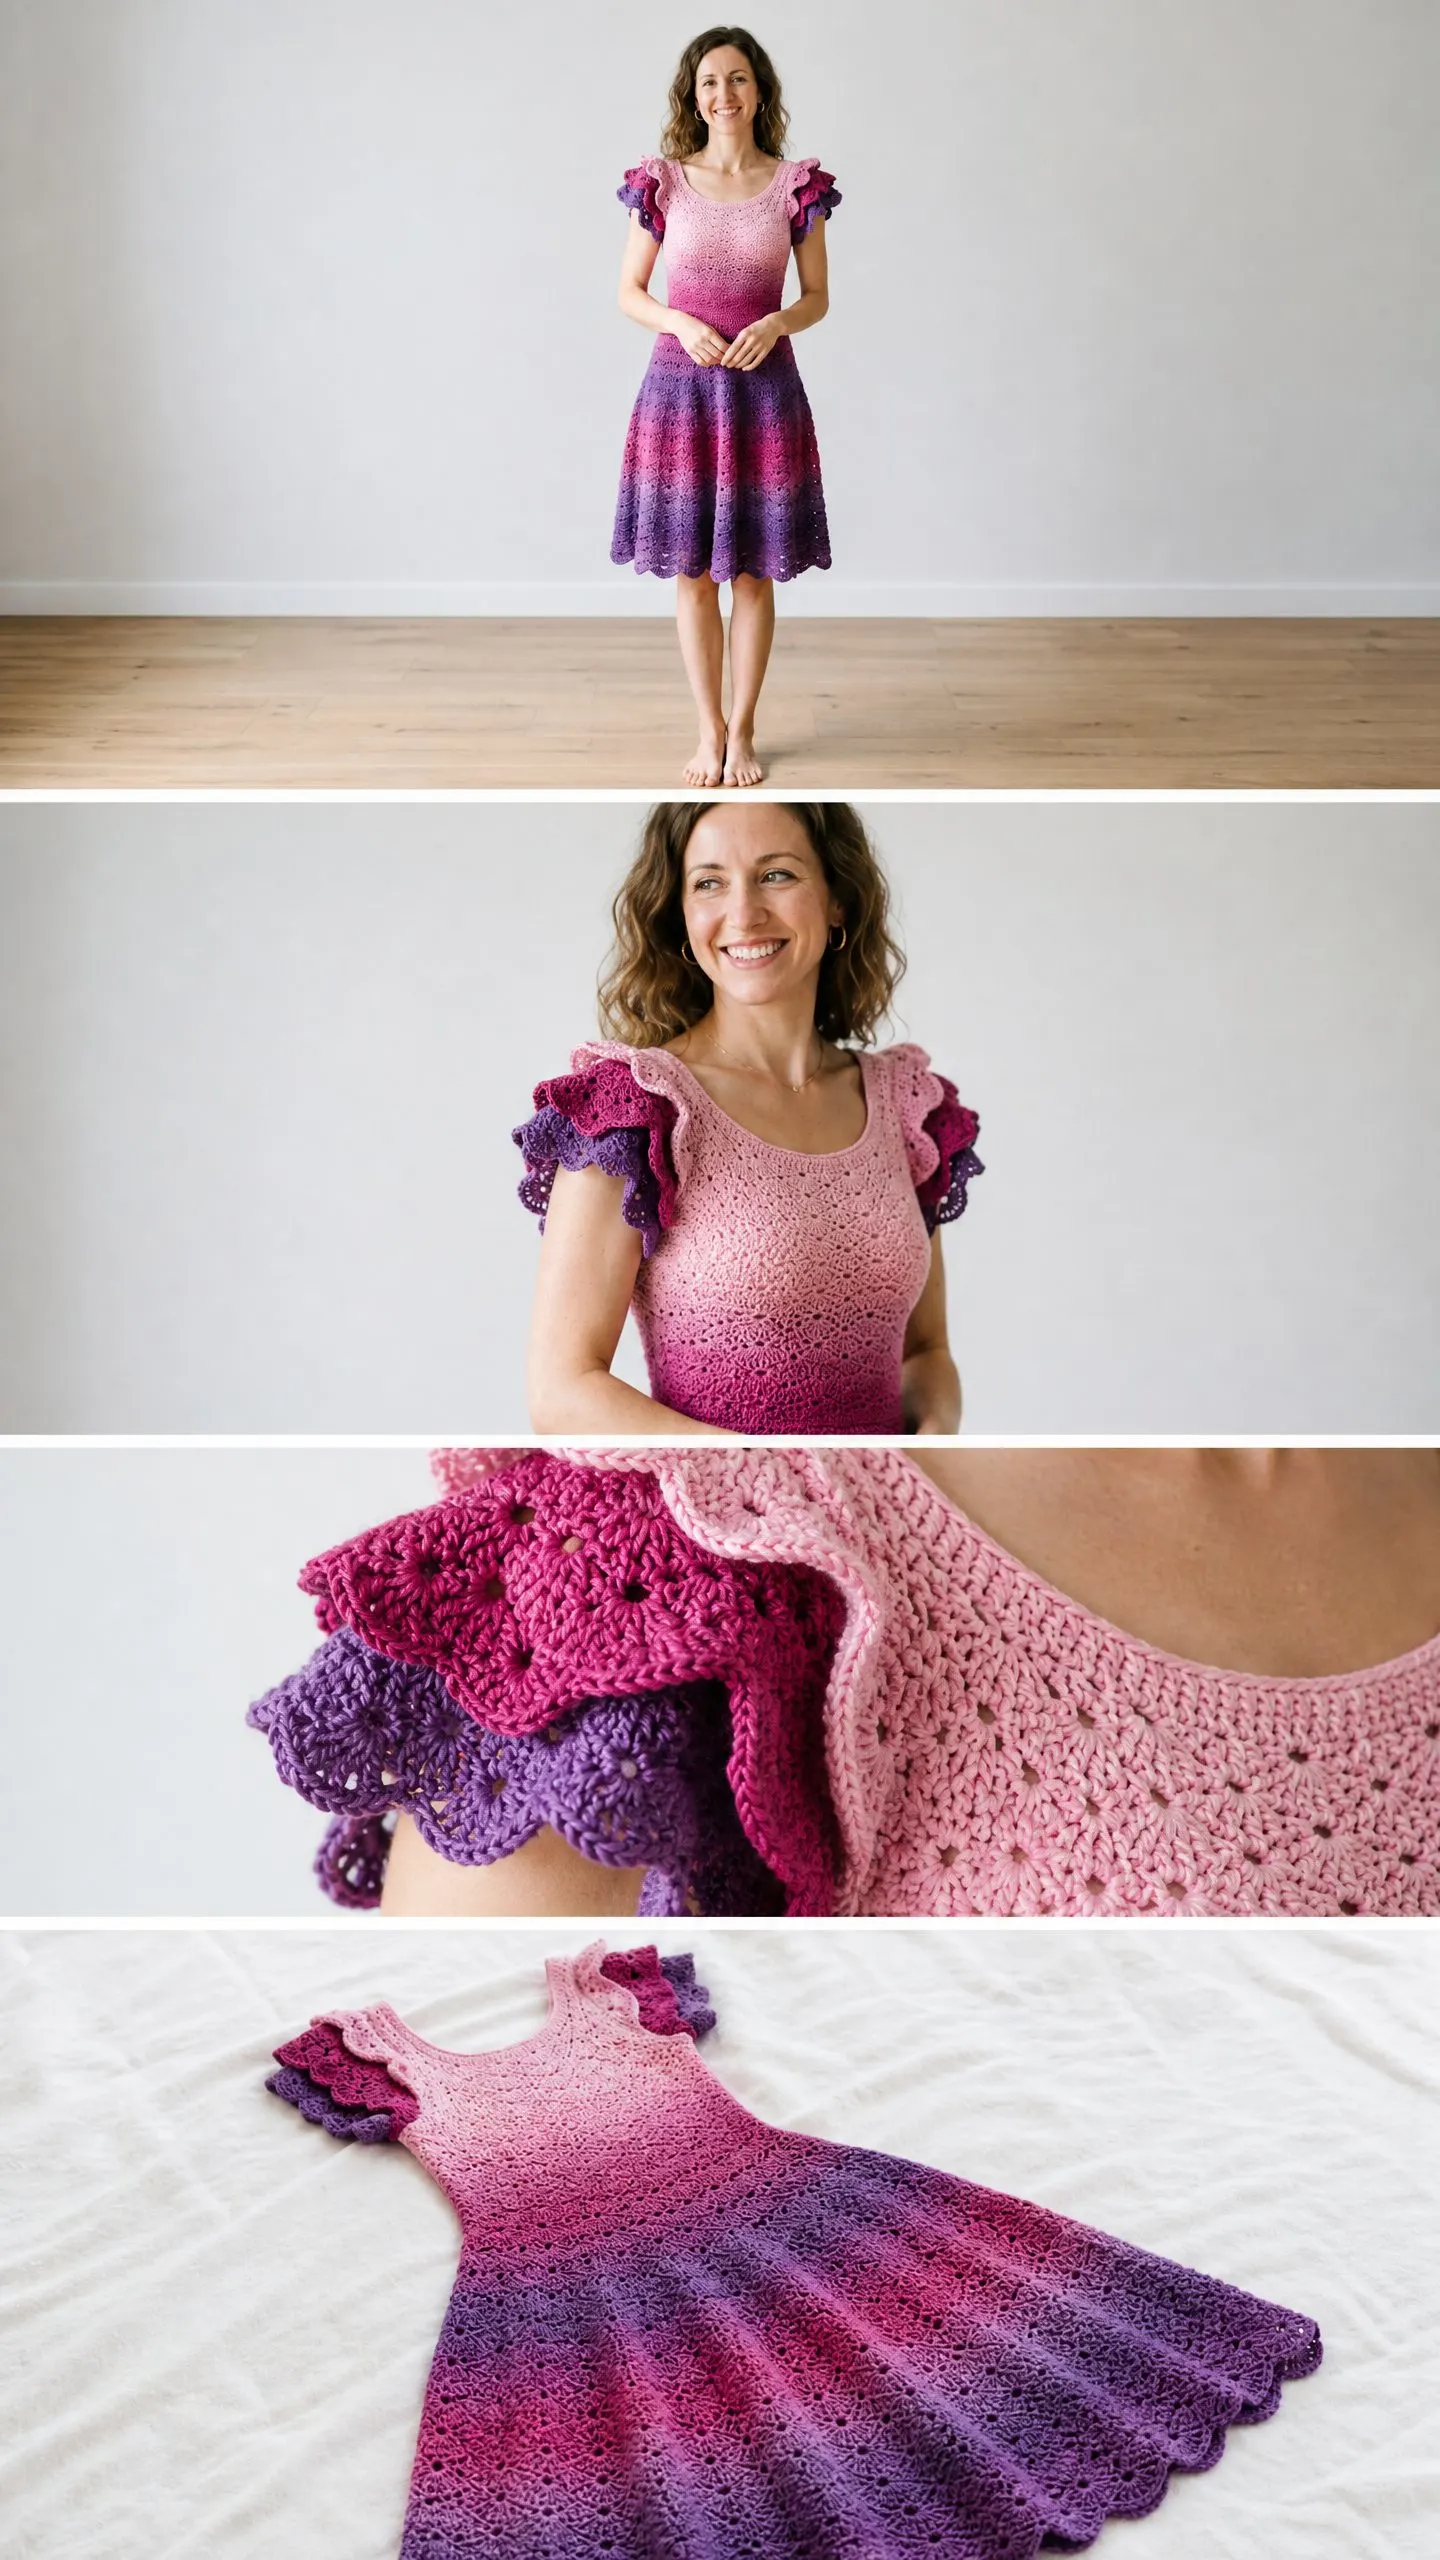
Each sleeve has 3 overlapping layers of ruffles in alternating pink and purple.
Layer 1 (Bottom layer, largest):
Pick up the 32 held sleeve stitches plus 4 from the underarm chain (36 sts total). Work 1 round of sc. In the next round, work 3 dc in every sc. Work the wave edge as described in special stitches. Fasten off.
Layer 2 (Middle layer):
Work into the original pickup round, positioned slightly above Layer 1. Repeat the ruffle construction with fewer starting stitches for a smaller ruffle.
Layer 3 (Top layer, smallest):
Work the final ruffle layer at the top of the armhole opening for a cascading effect.
Sew all ruffle layers securely to the armhole opening, stacking them so they cascade downward.
Finishing Your Dress
Weave in all ends securely. Block your dress on blocking mats, pinning to finished measurements. Allow to dry completely before removing pins.
The dress has no zipper or closure. It relies on the lace structure’s natural elasticity to stretch slightly over the hips. The back is identical to the front with a slightly scooped neckline all the way around.
Tips for Success
Color transitions: If you’re using a gradient cake yarn, the color changes will happen naturally as you work. If you’re blending separate skeins, change colors by completing the last yarn over of your final stitch with the new color.
Fitting as you go: Try on the bodice before starting the skirt. The fitted section should hug comfortably without being tight. Adjust hook size if needed.
Blocking is essential: This dress really comes to life after blocking. The lace opens up, the skirt drapes properly, and the ruffles set into their final shape.
I really hope you love making this gorgeous ombre crochet dress as much as I loved putting together this tutorial for you. It’s such a statement piece that gets better every time you look at it. If you found this pattern helpful, please save it to your Pinterest boards so you can find it when you’re ready to start. And I would absolutely love to see your finished dresses, so drop a comment below or tag me on social media when yours is complete!
