I’ve been searching for the perfect granny square tote pattern for months, and this one from 11Crochet is hands down my favourite. The diagonal layout gives it that gorgeous scalloped edge at the top, and the puff stitch petals create the most satisfying, plump little flowers. Whether you go with sunny sunflowers on a cream background or crisp white daisies against black, you’re getting a statement bag that looks way more complicated than it actually is.
Get the Ad-Free PDF Pattern
You can find the free pattern below, or you can purchase the ad-free printable PDF from my shop.
Get the Printable PDF →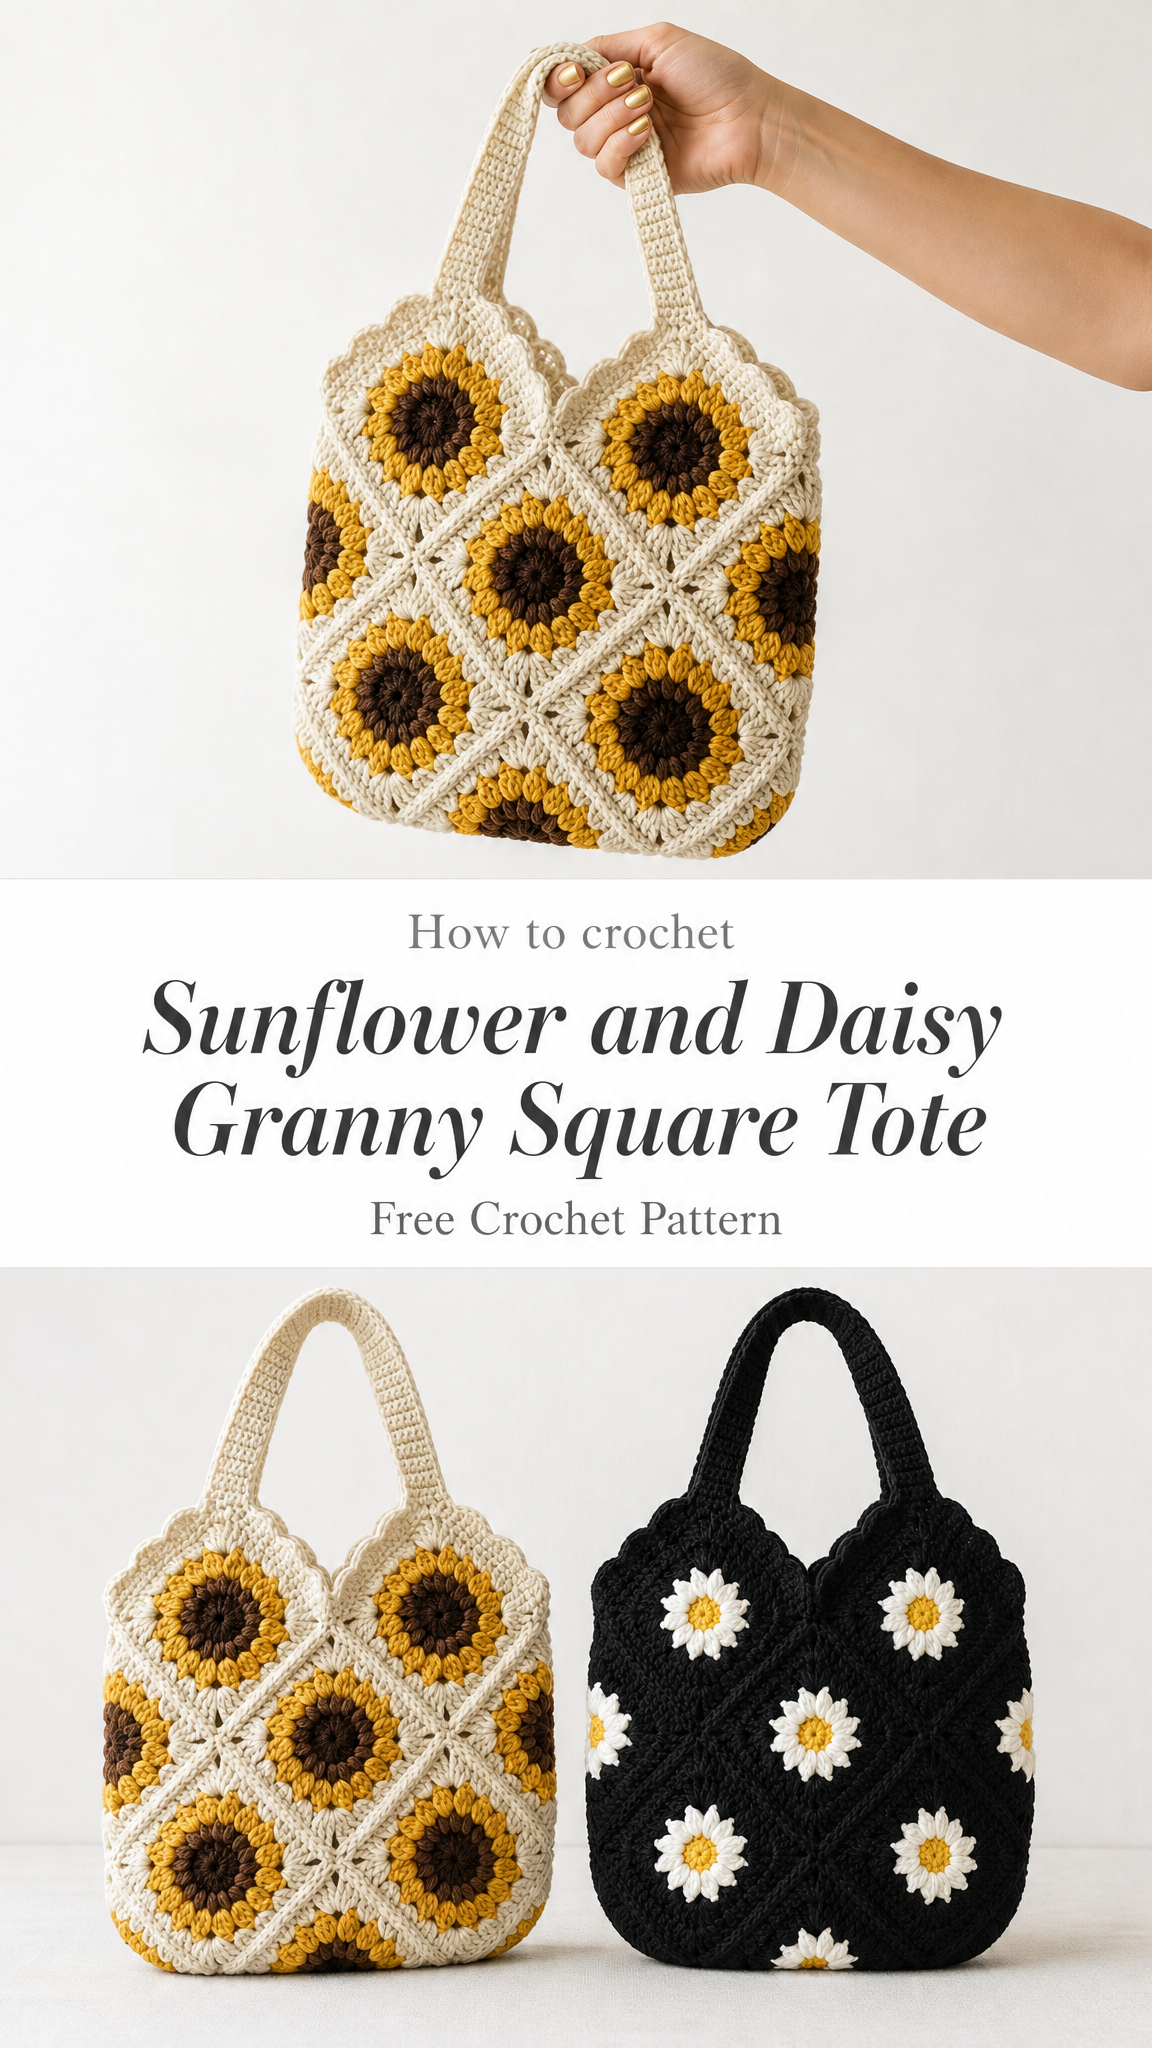
Why This Tote Pattern Works So Well
What makes this bag special is the join-as-you-go construction. Instead of making all your squares and then spending an evening seaming them together, you connect each motif as you work the final round. By the time you finish your thirteenth square, the bag is nearly complete. Just add the edging, attach the handles, and you’re done.
The finished tote measures approximately 28 cm (11 inches) tall without handles, 30 cm (11.8 inches) at the widest point, and has a 6 cm (2.4 inch) depth at the sides. The handle drop is 16 cm (6.3 inches), which sits comfortably on your shoulder or in the crook of your arm. It’s roomy enough for everyday essentials without being so large that your things get lost at the bottom.
Materials You’ll Need
Yarn: Worsted weight (#4) 100% cotton yarn in three colors. The pattern works up with approximately 420 yards (384 meters) total.
For the Sunflower Colorway:
For the Daisy Colorway:
Hook: 4.0 mm (US G/6)
Notions: Yarn or tapestry needle, scissors, stitch markers (optional but helpful), blocking mat and pins (optional but recommended)
Suggested Yarns: Lily Sugar’n Cream works beautifully for this project. It’s easy to find, hard wearing, and holds the bag’s shape nicely. Paintbox Yarns Cotton Aran offers a great color range with true mustard, cream, black, and white. Hobbii Rainbow Cotton 8/8 gives you soft yarn with crisp stitch definition for those puffy petals.
Cotton gives the firmest structure, while a cotton-acrylic blend creates a softer slouch. Avoid slippery superwash or pure acrylic if you want your bag to hold its shape.
Gauge
One granny daisy motif should measure 10 cm (4 inches) square after blocking. Four rounds equal approximately 10 cm (4 inches).
Exact gauge isn’t critical for a tote bag, but keeping your gauge consistent across all thirteen motifs ensures they join evenly without puckering or stretching.
Abbreviations and Special Stitches
ch – chain
sl st – slip stitch
sc – single crochet (insert hook, yarn over, pull up a loop, yarn over, pull through both loops)
hdc – half double crochet
dc – double crochet (yarn over, insert hook, yarn over, pull up a loop, yarn over, pull through two loops, yarn over, pull through remaining two loops)
tr – treble crochet
st(s) – stitch(es)
sp – space
rnd – round
rep – repeat
sk – skip
beg – beginning
Puff Stitch (puff): This creates those beautiful rounded petals. Yarn over, insert your hook into the stitch or space, yarn over and pull up a loop to about 1 cm height. Repeat this sequence two more times in the same place. You’ll have seven loops on your hook. Yarn over and pull through all seven loops, then chain 1 to close the puff. The closing chain is not counted as a stitch unless specified.
Keep your pulled-up loops loose and even. That’s what makes each petal plump and rounded. Give a little tug on the closing chain to seat the puff before moving to the next stitch.
Magic Ring: Wrap your yarn into an adjustable loop, work the first round of stitches into it, then pull the tail to close the center hole completely.
The Granny Daisy Motif
You’ll make thirteen of these motifs total: six for the front panel, six for the back panel, and one for the base.
Round 1 – Center Color
Make a magic ring. Chain 3 (this counts as your first double crochet here and throughout the pattern). Work 11 dc into the ring. Join with a slip stitch to the top of the beginning chain-3. Gently pull the tail to close the ring. (12 dc)
For the crispest color changes, fasten off after Round 1 and rejoin with your petal color in Round 2. Weave in your ends as you go so the back of your work stays neat.
Round 2 – Petal Color
Join with a slip stitch in any double crochet from Round 1. Chain 1, then work a puff stitch in the same stitch. Chain 1 to close the puff. *Work a puff in the next dc, chain 1 to close*. Repeat from * around the entire circle. Join with a slip stitch to the top of the first puff. (12 puff petals)
The chain-1 that closes each puff sits between the petals. These little gaps become your working spaces for Round 3. Count them. You should have twelve.
Round 3 – Background Color
This round transforms your flower into a square.
Join with a slip stitch in any chain-1 space between two petals. This becomes your first corner.
In the same space, work: (ch 3, 2 dc, ch 2, 3 dc) – first corner made.
*Work 3 dc in each of the next 2 spaces. In the next space, work (3 dc, ch 2, 3 dc) for the corner*. Repeat from * two more times.
Work 3 dc in each of the last 2 spaces. Join with a slip stitch to the top of the beginning chain-3. (4 corners with ch-2 spaces; 2 groups of 3 dc per side)
Round 4 – Background Color
Slip stitch across into the nearest corner chain-2 space.
In that corner space, work: (ch 3, 2 dc, ch 2, 3 dc).
*Work 3 dc in each gap along the side (3 gaps total). In the next corner space, work (3 dc, ch 2, 3 dc)*. Repeat from * around, ending with 3 dc in each of the 3 gaps along the last side.
Join with a slip stitch to the top of the beginning chain-3. Fasten off, leaving a 30 cm (12 inch) tail for joining, or continue directly to the join-as-you-go method. (3 groups of 3 dc per side plus 4 corners)
After Round 4, count three 3-dc groups along each side with a corner cluster in each corner. If your corners look rounded instead of pointed, your chain-2 might be too tight. Work it a touch looser on your next motif.
Join-As-You-Go Method
This technique eliminates most of your seaming. Make your first motif completely through Round 4 and fasten off. For every motif after that, work Rounds 1 through 3 in full, then join during Round 4 wherever your new motif touches a finished one.
The Simple Rule: Wherever Round 4 would normally make a chain (each chain of a corner ch-2, or a chain between groups), instead anchor it to the neighboring motif with a single crochet into the matching space. On any outside edge with no neighbor, just chain as written.
Corner Join: Work 3 dc in your corner space, chain 1, single crochet into the matching corner ch-2 space of the finished motif, chain 1, then work 3 dc in the same corner space on your working motif. Continue along the edge.
Side Join: After a 3-dc group, chain 1, single crochet into the matching space on the neighbor, chain 1, then work your next 3-dc group. Repeat along the entire shared edge.
Where Three or Four Corners Meet: Work your joining single crochet into the same central point that the other motifs share. This keeps your corners neat and flat without bulky overlaps.
If you prefer seaming at the end, that works too. Make all thirteen motifs separately, lay them out according to the layout, then join with a whip stitch or single crochet seam through the back loops using your background color. The seam will be slightly more visible but just as sturdy.
Assembly and Layout
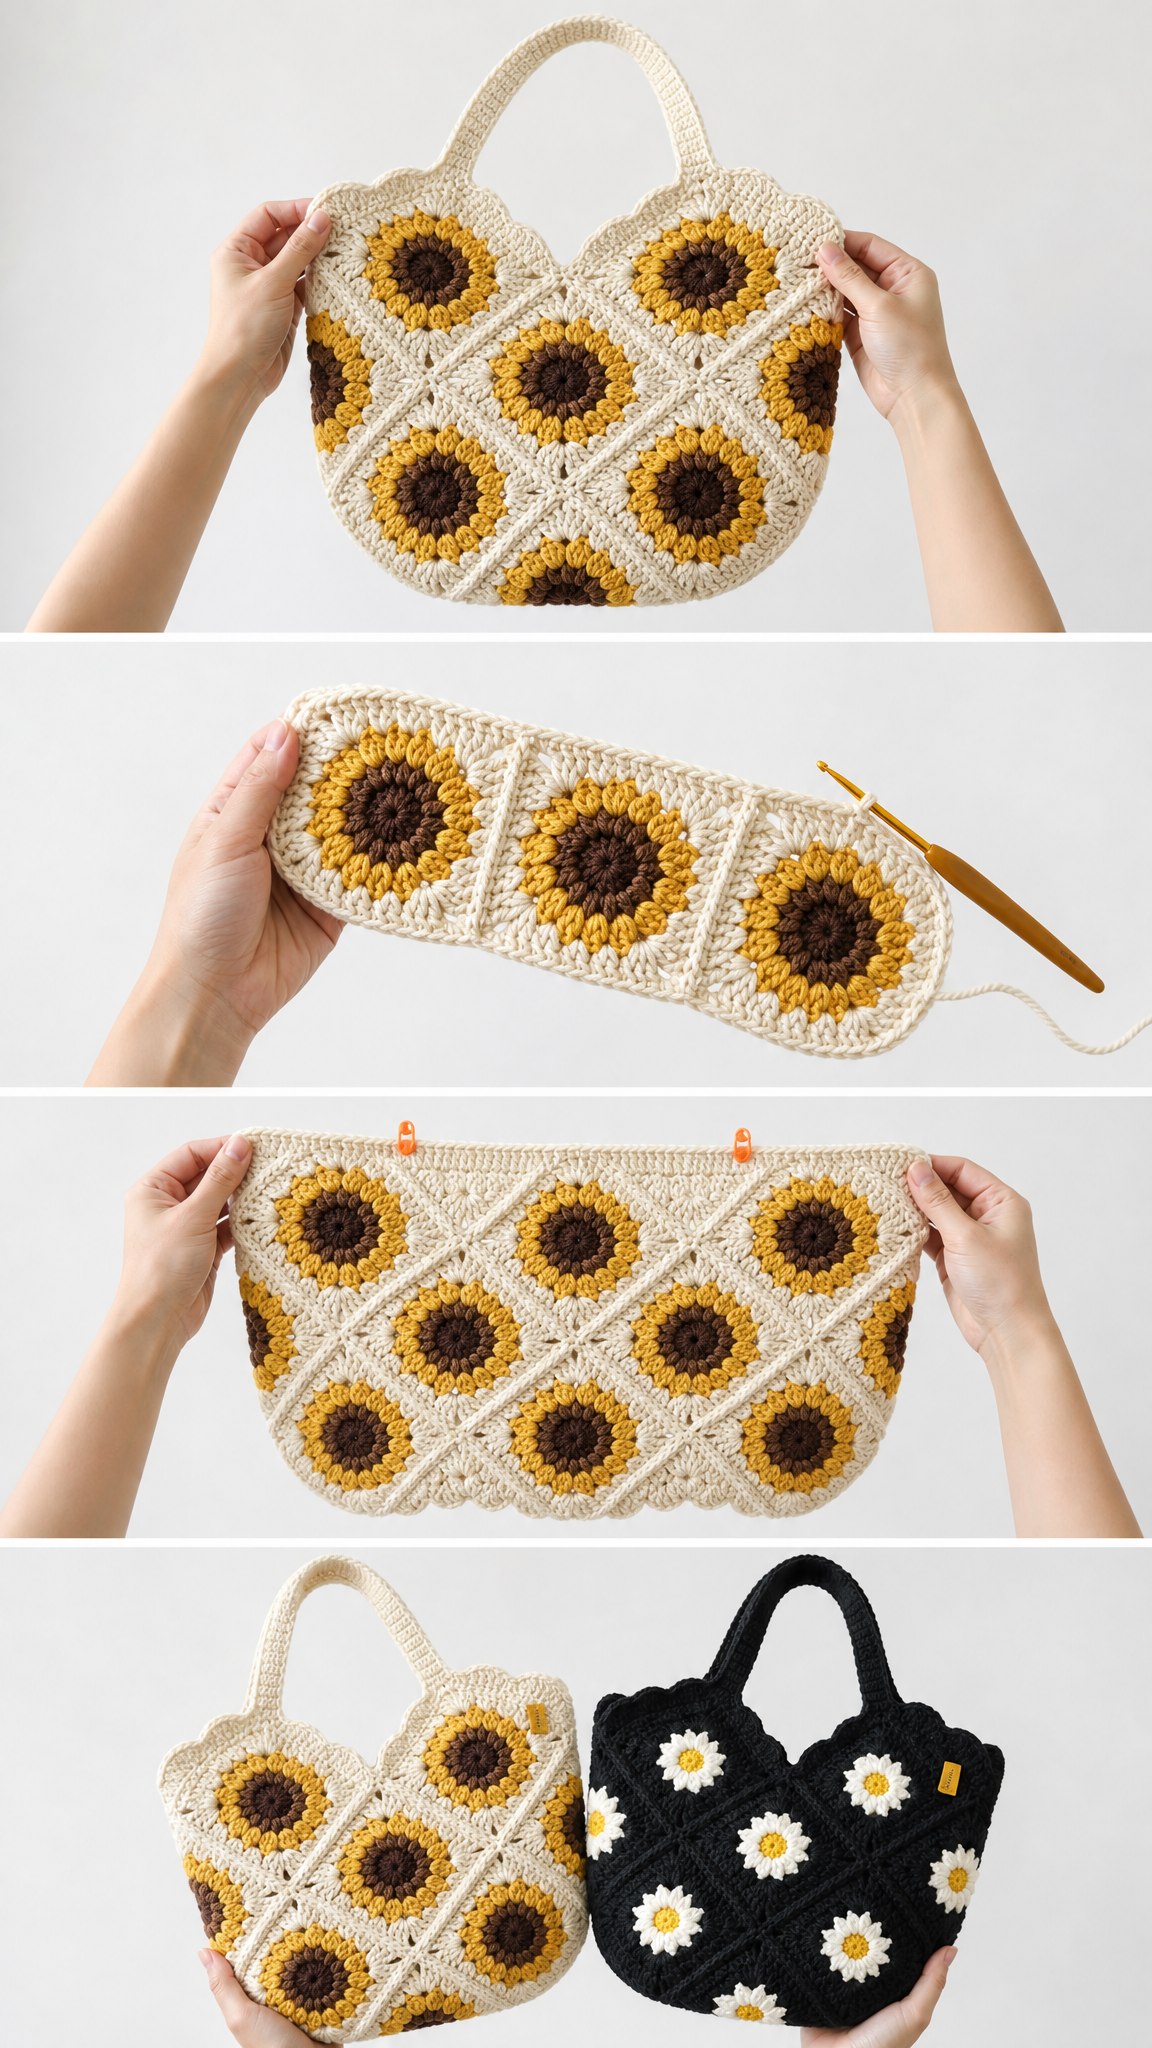
Each panel consists of six motifs arranged on point in a 3-2-1 diamond formation. This diagonal layout creates the beautiful scalloped top edge.
Row 3 (bottom): 3 motifs side by side, touching at corners and edges
Row 2 (middle): 2 motifs nestled into the gaps above Row 3
Row 1 (top): 1 motif centered at the very top
Build your front panel starting with a Row 3 motif. Add the next Row 3 motifs, joining as you go. Then add Row 2, joining along every touching edge. Finally, add the Row 1 motif at the top. Repeat this process for the back panel.
Assembling the Bag: Use the thirteenth motif as the flat base. Hold your front and back panels together with right sides facing out. Join the lower edges of both panels to the base motif, then seam the two side edges, leaving the top opening free. The base motif plus the seamed sides create the approximately 6 cm depth.
Edging for the Top Opening
Round 1
With your background color, join at any point along the top edge. Single crochet evenly around the entire opening, placing 1 sc in each stitch and chain space. Over each outer point of the scalloped edge, work 1 sc. In each inner V where two motifs meet, work sc2tog (single crochet two together) to prevent flaring. Join with a slip stitch.
Round 2
Single crochet in each single crochet around. Join with a slip stitch and fasten off. Aim for a flat, firm edge that holds its shape. (2 sc rounds total)
Handles – Make 2
You’ll make one handle for the front panel and one for the back.
Step 1: With your background color, attach yarn at your chosen handle starting point on the top edge.
Step 2: Chain 36 to 44 stitches for a 16 cm (6.3 inch) drop. Lay the chain over your hand to check the length before continuing. Slip stitch to the matching point about one motif-width away. The two attachment points should be centered on the panel.
Step 3: Turn your work. Single crochet evenly along the chain (this is Row 1). Chain 1, turn, and work 3 more rows of single crochet (4 rows total) for a sturdy strap that won’t stretch.
Step 4: Single crochet once around the entire handle edge for a clean finish. Fasten off and weave the tail back through the handle to reinforce the attachment points.
Repeat on the back panel.
Finishing Your Tote
Weave in all ends securely. Cotton yarn can slip over time, so split a ply and weave in two different directions for extra security.
Block each panel using wet or steam blocking before final assembly. This helps the on-point edges lie flat and gives your finished bag a polished look.
Shape the finished bag by stuffing it lightly with a towel and letting it dry completely. This sets the depth and helps the bag hold its form.
Optional additions: Consider adding a fabric lining for a more finished interior, or insert a piece of plastic canvas in the base for extra structure.
Care Instructions
Hand wash your tote in cold water. Do not bleach. Lay flat to dry and reshape while the bag is still damp. Do not iron directly or tumble dry.
Tips for Left-Handed Crocheters
This pattern is written for right-handed crochet, working right to left with rounds going counter-clockwise. If you’re left-handed, work the mirror image: left to right with rounds going clockwise. All stitch counts, color changes, and assembly steps remain identical. Only the direction reverses. A helpful tip: hold the photos up to a mirror to match your working orientation.
Making It Your Own
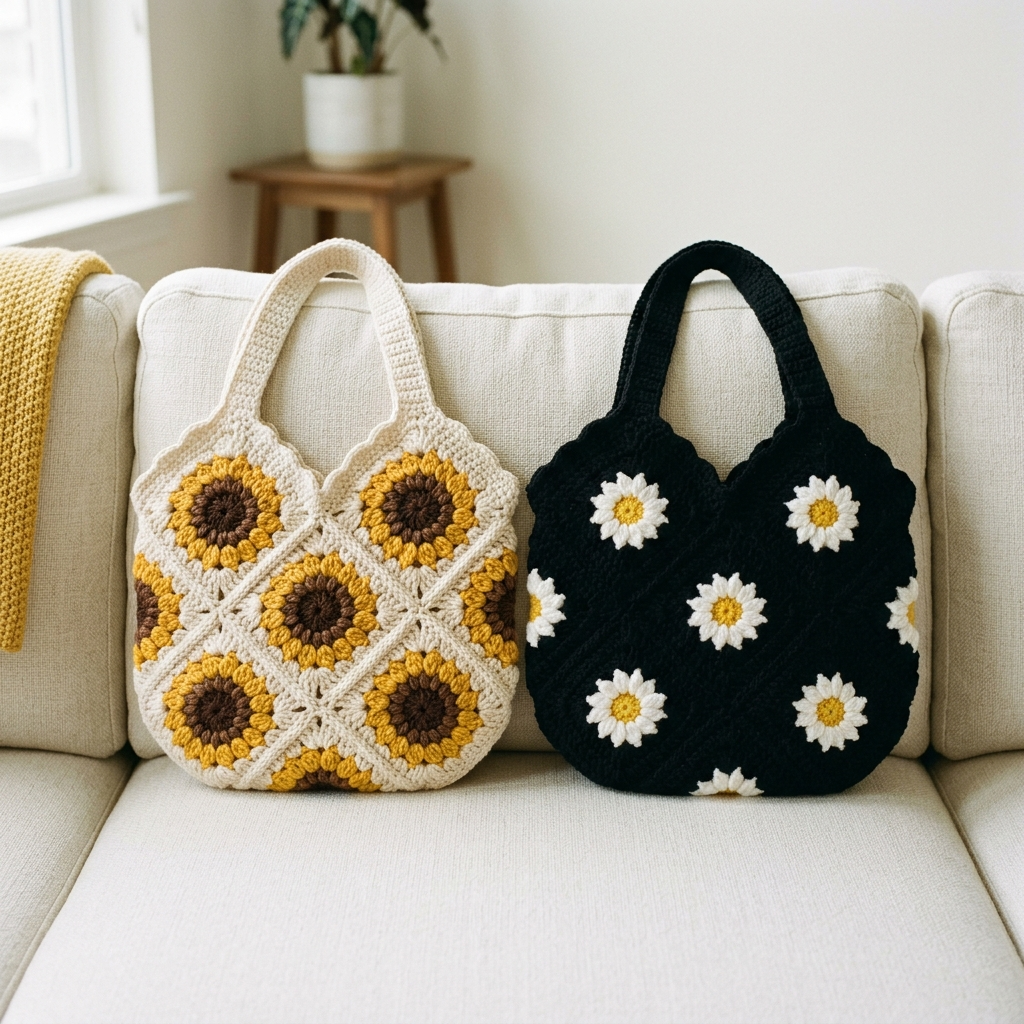
The beauty of this pattern is its versatility. Stick with the sunflower colorway for cheerful summer vibes, or go dramatic with the black and white daisy version. You could also experiment with other flower color combinations: lavender petals with green centers for spring, burnt orange petals with dark brown for autumn, or red petals with green for a festive holiday bag.
The construction stays exactly the same regardless of your color choices. Three colors, thirteen motifs, one beautiful tote.
I hope you love making this tote as much as I enjoyed putting together this pattern guide for you. If you give it a try, I’d absolutely love to see your finished bag. Tag me on Instagram or share it in our Facebook group so I can admire your work!
If this pattern caught your eye, go ahead and save it to your Pinterest boards so you can find it when you’re ready to start. And if you make one, drop a comment below. I always love hearing which colorway you chose and seeing how it turned out!
Want a Quick & Easy Printable Version?
Get a clean, beautifully formatted PDF of this pattern — easy to follow step by step, ready to print or save on any device. No scrolling, no distractions, just the pattern.
Get the Printable PDF →