Last summer, I was scrolling through vacation photos and feeling that familiar itch for warm beaches and tropical flowers. You know the one. I couldn’t book a flight, but I could bring a little bit of that island vibe into my craft room. That’s how this bracelet was born. I wanted something bright, cheerful, and completely over the top in the best possible way. Something that would make me smile every time I looked down at my wrist. And honestly? This little project delivered. It’s like wearing a tiny tropical garden, and I’m obsessed.
What Makes This Crochet Bracelet Pattern Special
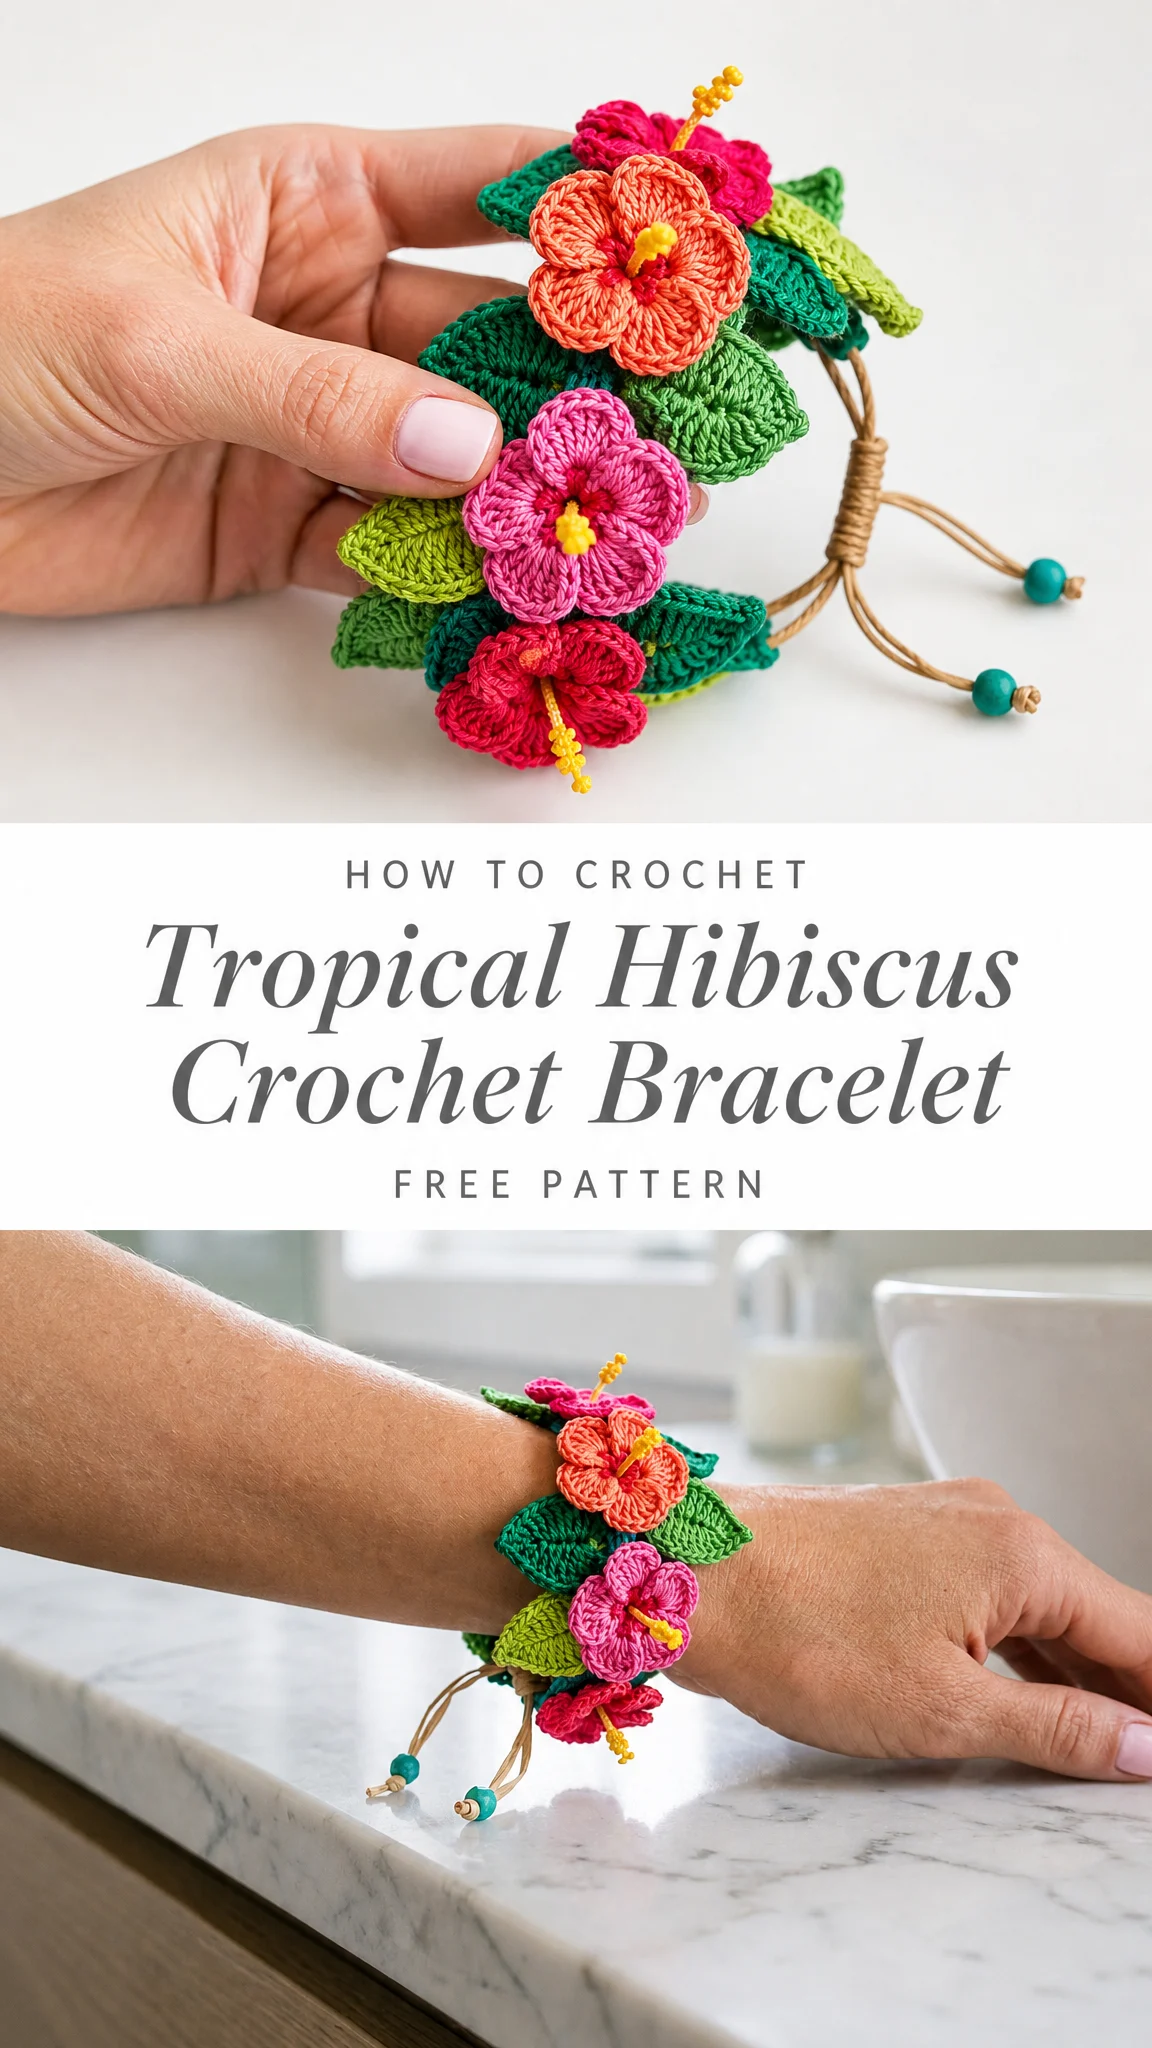
This isn’t your typical friendship bracelet or simple cuff. This tropical hibiscus bracelet features three dimensional crocheted flowers with detailed stamens, layered petals, and realistic leaves all assembled onto an adjustable leather cord. The finished piece looks incredibly intricate, like something you’d find at an artisan market, but I promise the individual components are much more manageable than they appear.
Each hibiscus flower is worked separately using basic stitches in a clever construction that creates those gorgeous overlapping petals. The leaves feature a spine detail achieved through surface slip stitches, giving them that authentic botanical look. Everything comes together on an adjustable sliding knot closure with bead accents on the ends.
Skill level: Intermediate. If you can work in the round and are comfortable with increases and decreases, you can absolutely make this. The trickiest part is the assembly, and I’ll walk you through every step.
Materials You’ll Need
Yarn:
– Coral/peach for one flower (approximately 15 yards)
– Bright pink for one flower (approximately 15 yards)
– Deep magenta/burgundy for one flower (approximately 15 yards)
– Dark red for flower centers (approximately 5 yards)
– Yellow for stamens (approximately 3 yards)
– Dark green for leaves (approximately 25 yards)
– Light green/lime for leaves (approximately 20 yards)
Cotton yarn works best here because it holds stitch definition beautifully and gives those petals a crisp, slightly sturdy feel. I used a mercerized cotton for extra sheen, but regular cotton works perfectly.
Hook:
Additional supplies:
Abbreviations and Stitch Definitions
Before we dive in, let’s cover every stitch you’ll need:
Ch = Chain. Yarn over, pull through the loop on your hook. This creates the foundation for most crochet work.
Sl st = Slip stitch. Insert hook, yarn over, pull through both the stitch and the loop on your hook in one motion. Used for joining and creating flat surface details.
Sc = Single crochet. Insert hook, yarn over and pull up a loop (2 loops on hook), yarn over and pull through both loops. The shortest basic stitch.
Hdc = Half double crochet. Yarn over, insert hook, yarn over and pull up a loop (3 loops on hook), yarn over and pull through all 3 loops. Slightly taller than single crochet.
Dc = Double crochet. Yarn over, insert hook, yarn over and pull up a loop, yarn over and pull through 2 loops, yarn over and pull through remaining 2 loops. Creates a taller stitch with nice drape.
Inc = Increase. Work 2 stitches into the same stitch. This adds one stitch to your count.
Magic ring = An adjustable starting loop that can be pulled completely closed. If you’re not comfortable with magic rings, you can chain 4 and slip stitch to join instead.
How to Crochet the Hibiscus Flower (Make 3)
Each flower consists of five petals worked in the round, a center cup, and a stamen. You’ll make three flowers total, each in a different color.
Flower Petals
Using your main petal color and 2.0mm hook:
Round 1: Make a magic ring. Ch 3 (counts as first dc), work 14 dc into the ring. Sl st to top of ch-3 to join. Pull ring closed. (15 dc)
Round 2: Ch 1, sc in same st. *Ch 5, skip 2 dc, sc in next dc.* Repeat from * around 4 more times, ending last repeat with sl st to first sc instead of sc. (5 ch-5 loops)
These loops will become your petal foundations. Don’t worry if they look floppy right now.
Round 3 (Petal Round): *Into the next ch-5 loop, work: sc, hdc, 5 dc, hdc, sc.* Repeat from * in each ch-5 loop around. Sl st to first sc to join. (5 petals completed)
Round 4 (Petal Shaping): Working behind the petals you just made, sl st into the back loop of the sc between petals from Round 2. *Ch 6, sl st into back loop of next sc between petals.* Repeat from * around. (5 ch-6 loops behind petals)
Round 5: *Into the next ch-6 loop, work: sc, hdc, 7 dc, hdc, sc.* Repeat from * in each loop around. Sl st to first sc to join. Fasten off. (5 larger petals layered behind first petals)
You should now have a dimensional flower with two layers of petals. The outer petals are slightly larger and sit behind the inner ones, creating that beautiful hibiscus overlap.
Flower Center
Using dark red yarn:
Round 1: Make a magic ring. Work 6 sc into the ring. Do not join. Work in a continuous spiral. Place a stitch marker in the first stitch and move it up each round. (6 sc)
Round 2: Inc in each st around. (12 sc)
Round 3: Sc in each st around. (12 sc)
Sl st to next st and fasten off, leaving an 8 inch tail for sewing.
This small cup will sit in the center of your flower and the stamen will poke through it.
Stamen
Using yellow yarn:
Ch 12. Starting in 2nd ch from hook: sl st in first 2 ch, sc in next 3 ch, hdc in next 3 ch, dc in last 3 ch. Fasten off, leaving a 6 inch tail.
The stamen should have a slight curve to it, thicker at the base and delicate at the tip. Make sure those chain stitches at the tip are tight so they create that characteristic bumpy texture of a real hibiscus stamen.
Flower Assembly
1. Thread the stamen tail onto your tapestry needle. Push it through the center of the flower center cup from the outside, so the decorative bumpy end sticks up.
2. Position the center cup in the middle of your flower petals. The dark red should sit right in that open space.
3. Using the red tail from the center cup, sew it securely to the flower, stitching through the back of the petals. Weave in all ends on the wrong side.
Repeat for all three flowers in coral, pink, and magenta.
How to Crochet the Leaves (Make 8 to 10)
You’ll want a mix of dark green and lime green leaves. I made 5 dark green and 4 lime green, but make as many as you’d like for fullness.
Round 1: Ch 10. Starting in 2nd ch from hook: sc in first ch, hdc in next ch, dc in next 2 ch, hdc in next 2 ch, sc in next 2 ch, 3 sc in last ch.
Now working along the opposite side of your foundation chain: sc in next 2 ch, hdc in next 2 ch, dc in next 2 ch, hdc in next ch, sc in last ch. Sl st to first sc to join. (19 sts plus 3 sc cluster at tip)
Leaf Spine (Surface Detail):
Fasten off your main color but don’t weave in the end yet. Join your yarn to the base of the leaf (where you started your chain). Using slip stitches, work a line of surface slip stitches straight up the center of the leaf to the tip. This creates that raised spine detail.
Fasten off and weave in ends.
Your leaves should have a pointed oval shape with a distinct center vein. They’ll be slightly cupped, which adds to the dimensional look.
Bracelet Assembly
This is where everything comes together. Take your time here.
Preparing the Leather Cord
1. Cut your leather cord to 24 inches.
2. Fold the cord in half to find the center point. Mark this spot mentally or with a tiny piece of tape.
3. Working about 2 inches from the center point on each side, you’ll attach your flowers and leaves.
Attaching the Elements
Tip: Lay out your flowers and leaves on a flat surface first. Arrange them until you’re happy with the color placement and leaf positioning. I placed my flowers with the coral in the center, pink on one side, and magenta on the other, with leaves fanning out behind and between them.
1. Using matching thread or thin yarn, sew the leaves to the leather cord first. Position them so they fan out behind where your flowers will sit. Stitch through the base of each leaf and wrap around the leather cord several times.
2. Next, sew your flowers on top, slightly overlapping the leaves. Make sure they’re secure. Add a tiny dot of fabric glue to the thread knots if you want extra security.
3. The finished flower cluster should span approximately 3 to 4 inches along the cord.
Creating the Adjustable Closure
This bracelet uses a sliding knot closure, which allows it to fit any wrist size.
1. Cross the two cord ends so they overlap by about 3 inches, forming a circle.
2. Take the right cord end and wrap it around both cords (including itself) three times, working toward the flower cluster. Tuck the end through the wraps and pull tight.
3. Repeat with the left cord end, wrapping in the opposite direction.
4. Test your sliding knots. They should move smoothly along the cord when you pull the ends, and hold firmly when you pull the bracelet wider.
5. Thread a turquoise bead onto each cord end. Tie a simple overhand knot below each bead to secure it. Trim excess cord.
Pattern Notes and Tips
Sizing: The adjustable closure means this bracelet fits wrist sizes from approximately 5.5 inches to 8 inches.
Substitutions: If you can’t find leather cord, waxed cotton cord works beautifully. Hemp cord gives a more rustic look.
Stiffening optional: Some crocheters like to lightly stiffen their flowers with fabric stiffener or diluted white glue. I prefer them soft, but it’s your choice.
Care instructions: Spot clean only. The leather cord shouldn’t be submerged in water.
Gift idea: This makes a stunning gift for anyone who loves tropical vibes, gardening, or statement jewelry. Package it in a small kraft box with tissue paper for a beautiful presentation.
Customization Ideas
Don’t feel limited to hibiscus! This same basic technique works for other tropical flowers. Try using white and yellow for plumeria, or go wild with neon colors for a festival look.
You could also:
Finished Measurements
Wrapping Up This Tropical Crochet Bracelet Pattern
I hope you love making this bracelet as much as I loved designing it. It’s the kind of project that looks absolutely show stopping but breaks down into small, manageable pieces. Each flower takes maybe 20 minutes once you get the rhythm, and the assembly is honestly the most satisfying part.
This crochet bracelet pattern is perfect for using up those tiny amounts of leftover fingering weight cotton from other projects. Check your stash for bright tropical colors and get creative with your combinations.
Whether you make it for yourself, for a friend, or as a little reminder of summer during the colder months, I think you’ll find this tropical hibiscus bracelet puts a smile on your face every time you wear it.
Thank you so much for choosing this pattern. If you make one, I would absolutely love to see it! Tag me on Instagram or share a photo in my Facebook group. Seeing your creations genuinely makes my day.
If this pattern caught your eye, go ahead and save it to your Pinterest boards so you can find it when you’re ready to start. And if you do make this tropical beauty, drop a comment below. I’d love to hear which colors you chose and how it turned out!
