There is something absolutely magical about a blanket that looks like it belongs in a storybook. This honeycomb bee blanket combines golden hexagon motifs with the sweetest little crocheted bees, creating a cozy throw that is equal parts whimsical and sophisticated. Whether you are making it for a nursery, a nature lover, or your own couch, this crochet pattern delivers stunning results without requiring advanced skills. If you can crochet a basic hexagon and follow a simple join, you can absolutely make this beauty.
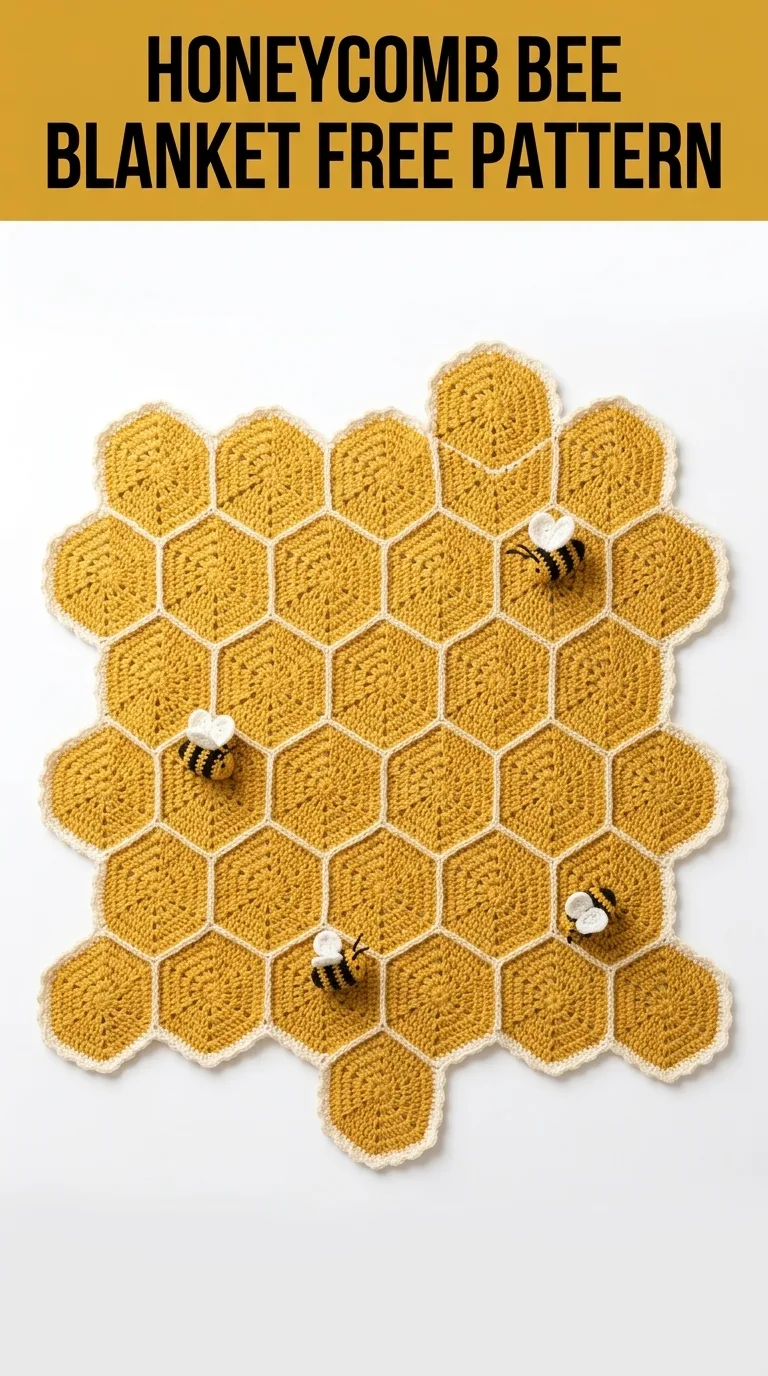
I designed this blanket to mimic the natural structure of a beehive. Each golden hexagon represents a cell of honeycomb, outlined in creamy white to create that distinctive honeycomb definition. The scattered bee appliqués bring the whole piece to life. Trust me, every single person who sees this blanket will want to touch it.
Why This Honeycomb Crochet Pattern Works So Well
The genius of this blanket lies in its modular construction. You are not working one massive piece and hoping for the best. Instead, you crochet individual hexagon motifs, then join them together with a contrasting border that creates the honeycomb effect naturally. This means you can work on it anywhere, take it with you, and watch your progress grow motif by motif.
The golden yellow yarn mimics the warm tones of natural beeswax and honey. The white joining rounds and scalloped border add crisp definition that makes each hexagon pop. And those adorable bee appliqués scattered across the surface transform a beautiful blanket into an heirloom piece.
Skill level: Confident beginner to intermediate. If you have made granny squares before, you can handle hexagons. The bees require basic amigurumi shaping, but I will walk you through every step.
Materials You Will Need
Getting your supplies together before you start makes the whole process smoother. Here is everything you need for this crochet tutorial.
Yarn:
Hook:
Notions:
Gauge: Each completed hexagon measures approximately 5 inches across the widest point (corner to corner) after blocking. Your gauge may vary slightly, which will affect finished size.
Finished size: Approximately 36 inches by 44 inches, perfect for a baby blanket or lap throw. You can easily adjust the size by adding or removing hexagons.
Abbreviations and Stitch Definitions
Let me explain every stitch you will use. Read through this section before starting so nothing catches you off guard.
Ch = Chain. Wrap yarn over hook, pull through loop on hook. This creates the foundation for most crochet work.
Sl st = Slip stitch. Insert hook, yarn over, pull through both the stitch and the loop on your hook in one motion. Used for joining and moving across stitches invisibly.
Sc = Single crochet. Insert hook into stitch, yarn over and pull up a loop (two loops on hook), yarn over and pull through both loops. A short, tight stitch.
Dc = Double crochet. Yarn over, insert hook into stitch, yarn over and pull up a loop (three loops on hook), yarn over and pull through two loops, yarn over and pull through remaining two loops. A taller stitch that works up quickly.
2dc cluster = Two double crochet cluster. Work two incomplete dc in the same stitch (stop each one with two loops remaining), then yarn over and pull through all three loops at once. Creates a subtle texture.
Ch-sp = Chain space. The gap created by chain stitches in a previous round. You work into this space, not into the chain itself.
Magic ring = An adjustable starting loop that closes tightly with no hole in the center. If you prefer, you can substitute ch 4 and sl st to join.
How to Crochet the Hexagon Motif
You will need approximately 55 hexagons for the blanket shown. Work each one the same way, then join them together afterward.
Round 1: Using golden yellow and larger hook, create a magic ring. Ch 3 (counts as first dc throughout), work 11 dc into ring. Sl st to top of beginning ch-3 to join. Pull magic ring closed. (12 dc)
Round 2: Ch 3, dc in same st as join. Work 2 dc in each st around. Sl st to top of beginning ch-3 to join. (24 dc)
Round 3: Ch 3, dc in same st. Dc in next st. *2 dc in next st, dc in next st.* Repeat from * to * around. Sl st to join. (36 dc)
Round 4: Ch 3, dc in same st. Dc in next 2 sts. *2 dc in next st, dc in next 2 sts.* Repeat from * to * around. Sl st to join. (48 dc)
Round 5 (corner round): This round creates the hexagon shape. Ch 3, dc in next st. *Dc in next 2 sts, (2 dc, ch 2, 2 dc) in next st for corner, dc in next 4 sts.* Repeat from * to * five more times, ending last repeat with dc in last 2 sts. Sl st to join. (60 dc plus 6 corner ch-2 spaces)
Round 6: Ch 3, dc in each st to corner ch-2 sp. *(2 dc, ch 2, 2 dc) in corner ch-2 sp, dc in each st to next corner.* Repeat from * to * around. Sl st to join. (72 dc plus 6 corner ch-2 spaces)
Fasten off golden yellow and weave in ends. Your hexagon should lay flat with six distinct corners.
Pro tip: Block each hexagon lightly before joining. This makes assembly so much easier and gives you a more professional finished look.
Joining the Hexagons
This is where the honeycomb magic happens. The white joining creates those beautiful defined edges.
Layout: Arrange your hexagons in offset rows, just like real honeycomb. For the blanket shown, use approximately 7 hexagons across and 8 rows, offsetting every other row by half a hexagon. Take a photo of your layout before joining so you remember the arrangement.
Join method: Using cream/white yarn and larger hook, you will work a simple flat slip stitch join along adjacent edges.
Hold two hexagons with wrong sides together. Join white yarn in corner ch-2 space. Working through both layers, sl st through each corresponding stitch along one edge until you reach the next corner. Fasten off.
Continue joining hexagons in rows first, then join rows together. The white stitches create that distinctive honeycomb outline effect.
Don’t stress: Some joins will have three hexagons meeting at one point. Just work each edge separately and weave your ends securely at intersections.
Creating the Border
The scalloped border frames your honeycomb beautifully and hides any joining inconsistencies along the edges.
Round 1: Join cream/white yarn at any corner ch-2 space along the outer edge. Ch 1, 3 sc in corner sp. Sc evenly around entire blanket, working 3 sc in each outer corner and 1 sc in each stitch and join along the sides. Sl st to first sc to join. Count your stitches and adjust if needed to ensure each edge has an even number.
Round 2: Ch 1, sc in same st. *Skip 2 sts, 5 dc in next st (shell made), skip 2 sts, sc in next st.* Repeat from * to * around, adjusting at corners to keep the border laying flat. Sl st to first sc to join.
Fasten off and weave in all ends.
How to Crochet the Bee Appliqués
These little bees bring the whole blanket to life. Make 3 to 5 bees depending on your preference.
Bee Body:
Using smaller hook and yellow yarn:
Round 1: Magic ring, 6 sc into ring. Do not join. Work in continuous spiral. (6 sc)
Round 2: 2 sc in each st around. (12 sc)
Rounds 3 to 4: Sc in each st around. (12 sc)
Change to black yarn.
Round 5: Sc in each st around. (12 sc)
Change to yellow yarn.
Round 6: Sc in each st around. (12 sc)
Change to black yarn.
Rounds 7 to 8: Sc in each st around. (12 sc)
Round 9: *Sc2tog (single crochet two together, meaning insert hook in next st, pull up loop, insert hook in following st, pull up loop, yarn over and pull through all 3 loops), sc in next st.* Repeat from * to * around. (8 sc)
Stuff body lightly with fiberfill.
Round 10: Sc2tog around. (4 sc)
Fasten off, leaving a long tail. Thread tail through remaining stitches, pull tight to close.
Wings (make 2 per bee):
Using white yarn and smaller hook:
Ch 6. Sl st in 2nd ch from hook, sc in next ch, hdc in next ch, dc in next ch, 5 dc in last ch (this creates the rounded wing tip). Working along opposite side of chain: dc in next ch, hdc in next ch, sc in next ch, sl st in last ch. Fasten off, leaving tail for attachment.
Sew wings to bee body at the yellow section, angling them slightly outward.
Assembly and Finishing
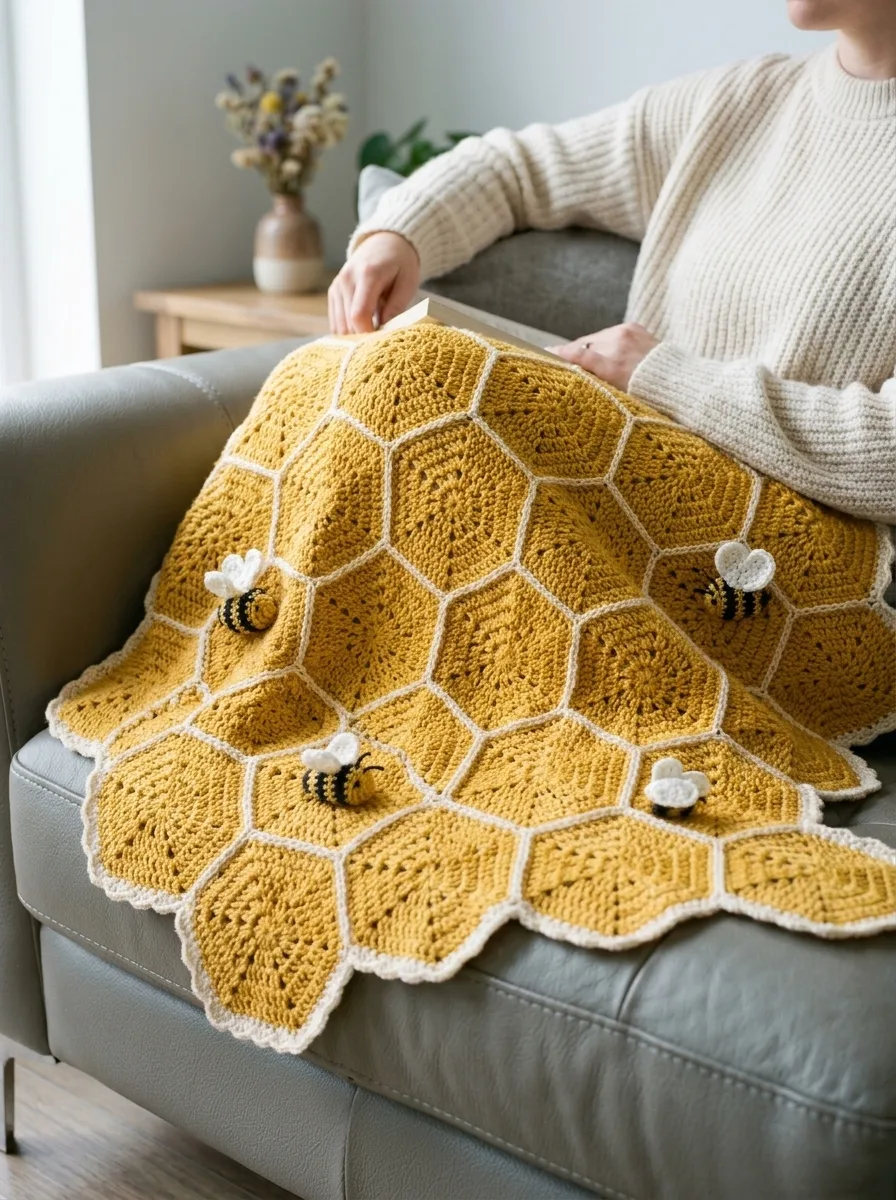
Decide where you want your bees to land. I recommend scattering them randomly across the blanket surface for a natural look. Pin each bee in place and step back to check the arrangement before sewing.
Using matching yarn and tapestry needle, whip stitch each bee body securely to a hexagon. Take small stitches through the back of the bee so your thread does not show.
Give your finished blanket a final blocking. Lay it flat on a towel, mist lightly with water, and gently pat into shape. Let dry completely before using or gifting.
Tips for Success with This Step by Step Pattern
Yarn choice matters: A yarn with good stitch definition shows off the hexagon texture beautifully. Avoid anything too fuzzy or splitty for your first attempt.
Count your stitches: Especially on the hexagons. One missed increase throws off the whole shape.
Consistent tension: Try to keep your tension even throughout. If your first hexagons look different from your last ones, you may want to redo a few for uniformity.
Weave as you go: Do not leave all your ends for the end. Weave in tails after finishing each hexagon and you will thank yourself later.
Customize freely: Want a bigger blanket? Add more hexagons. Want fewer bees? Make just one as a focal point. This pattern adapts to your vision.
Why Crafters Love This Beginner Friendly Design
This honeycomb bee blanket crochet pattern hits the sweet spot between impressive and achievable. The modular construction means no overwhelming commitment to a huge project. The simple stitches mean you can watch TV while you work. And the finished result looks like something from a high end boutique.
It makes an unforgettable baby shower gift, especially for nature themed nurseries. It works beautifully as a lap blanket for reading or movie nights. And it photographs like a dream for your social media feed.
I really hope you enjoy making this honeycomb bee blanket as much as I enjoyed designing it. If you found this crochet pattern helpful, I would love it if you saved it to your Pinterest boards so you can find it easily when you are ready to start. And please drop a comment below if you make one. Seeing your finished projects absolutely makes my day, and I would love to hear how it turned out for you.
