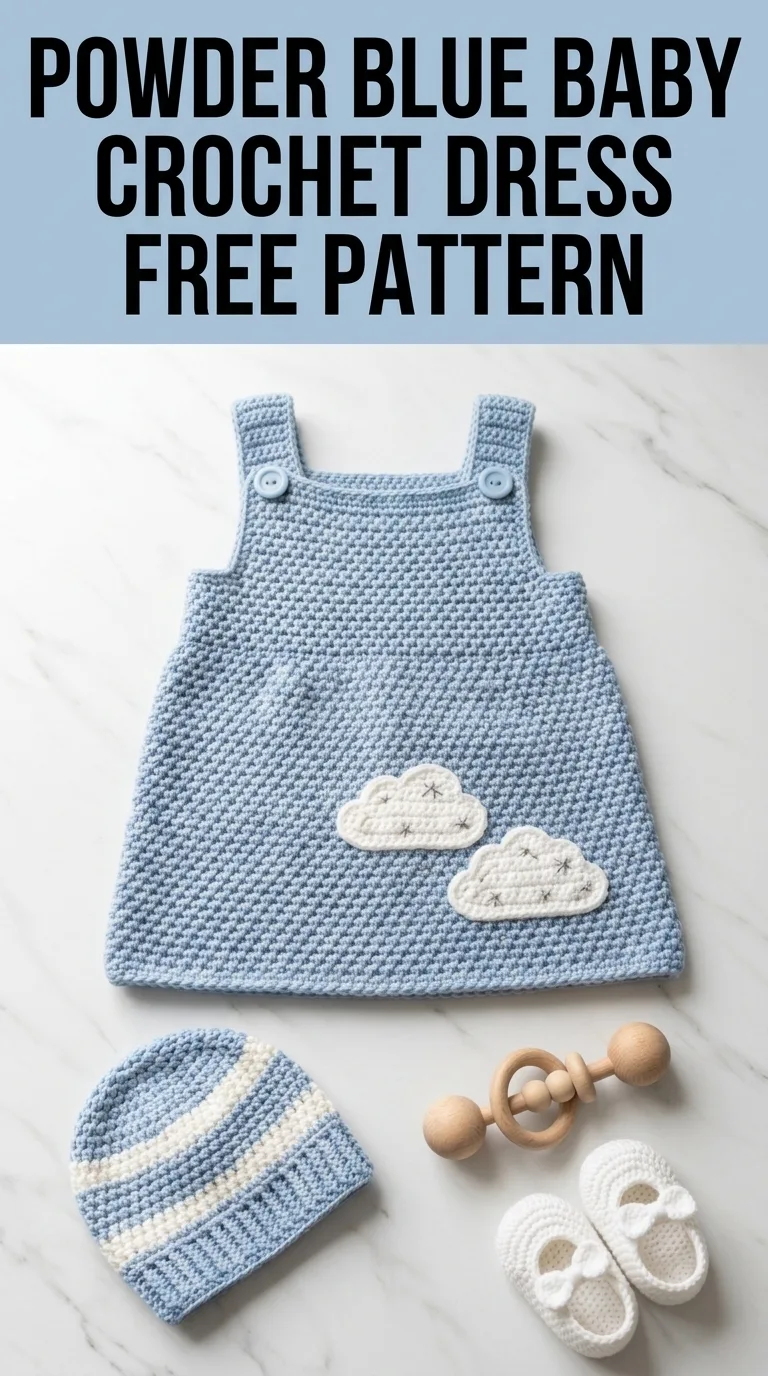
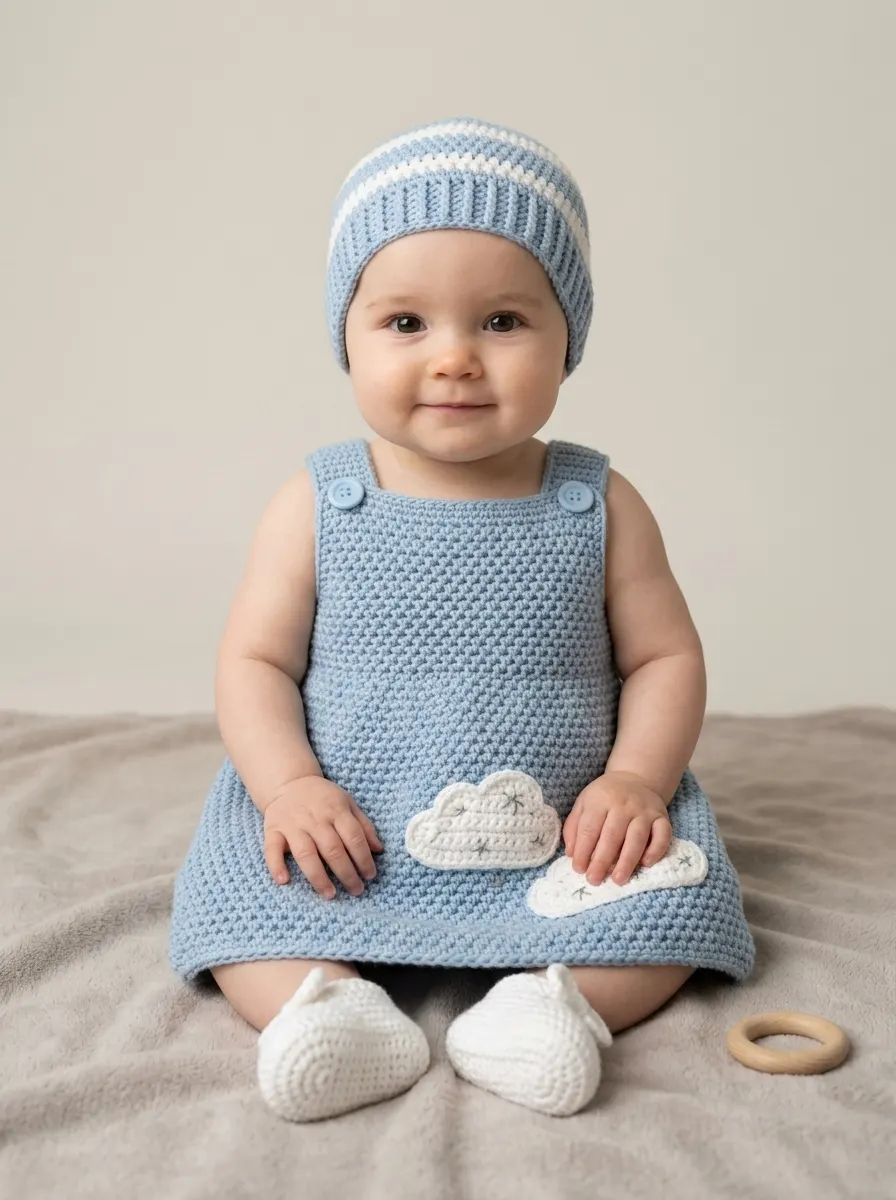
There is something absolutely magical about crocheting tiny garments for little ones. This powder blue baby dress with its sweet cloud appliqués has become one of my most treasured makes, and I cannot wait to walk you through every single stitch. Whether you are creating this for your own baby, a friend’s shower gift, or just because tiny clothes bring you joy, this crochet pattern delivers that perfect mix of simple construction and adorable results.
I designed this dress with busy crafters in mind. The main body uses a straightforward stitch pattern that becomes almost meditative once you get going. The cloud appliqués add that special handmade touch without requiring advanced skills. If you can work basic stitches and follow a simple repeat, you can absolutely make this dress.
What Makes This Baby Dress Pattern Special
This crochet tutorial creates a classic pinafore style dress that slips easily over a onesie or pairs perfectly with a little shirt underneath. The A-line shape gives baby room to move and grow, while the button straps at the shoulders make diaper changes much easier for tired parents.
The stitch pattern you see here creates a dense, soft fabric with beautiful texture. I chose a single crochet base stitch throughout the body because it produces a sturdy fabric that holds its shape beautifully through washing and wearing. The cloud appliqués are worked separately and sewn on, which means you can position them exactly where you want them.
Looking at this dress, you will notice the clean lines and professional finish. That comes from careful attention to turning chains and consistent tension. Do not worry if your tension tends to be tight or loose. I will give you tips throughout to help you achieve great results regardless of your natural crocheting style.
Skill Level and Who This Pattern Is For
I would call this a confident beginner to intermediate project. If you have made a dishcloth or simple scarf and feel comfortable with basic stitches, you are ready for this dress. The construction is straightforward. You will work the body flat, seam the sides, then add straps and finishing details.
The cloud appliqués require a bit of shaping, but I will walk you through every round. These are perfect for practicing increases and working in the round if those techniques are newer to you.
Materials You Will Need
Gathering your supplies before starting makes the whole process smoother. Here is everything required for this powder blue baby crochet dress pattern:
Yarn:
Hook:
Notions:
Gauge:
18 stitches and 20 rows = 4 inches in single crochet using 4.0mm hook
Always check your gauge before starting. A small difference multiplied across many stitches creates big sizing problems. If your swatch measures larger, go down a hook size. If smaller, go up a hook size.
Size Information
This pattern is written for size 6 to 12 months. Finished measurements:
Abbreviations and Stitch Definitions
Let me explain each stitch and term you will encounter. I always include plain English explanations because pattern shorthand can feel like a secret code when you are learning.
Ch = Chain: Wrap yarn over hook, pull through loop on hook. This creates a foundation and adds height.
Sl st = Slip stitch: Insert hook, yarn over, pull through stitch AND loop on hook in one motion. Used for joining and moving across stitches without adding height.
Sc = Single crochet: Insert hook into stitch, yarn over and pull up a loop (2 loops on hook), yarn over and pull through both loops. Your most basic building block stitch.
Inc = Increase: Work 2 single crochet stitches into the same stitch. This adds one stitch to your count.
Dec = Decrease (also called sc2tog): Insert hook into first stitch, pull up a loop, insert hook into next stitch, pull up a loop (3 loops on hook), yarn over and pull through all 3 loops. This removes one stitch from your count.
St(s) = Stitch(es)
RS = Right side (the pretty side that faces out)
WS = Wrong side (the inside of the garment)
Step By Step Crochet Pattern Instructions
Now for the fun part. Take a deep breath, grab your favorite beverage, and let us make this beautiful baby dress together.

Back Panel
The back and front are worked identically until we reach the armhole shaping.
Foundation Row: Using MC and 4.0mm hook, ch 51.
Row 1 (RS): Sc in 2nd ch from hook and in each ch across. Turn. (50 sts)
Row 2: Ch 1 (does not count as a stitch throughout), sc in each st across. Turn. (50 sts)
Rows 3 through 50: Repeat Row 2.
Your piece should measure approximately 10 inches from the foundation edge. This is the hem section before shaping begins.
Armhole Shaping:
Row 51: Ch 1, sl st in first 4 sts, ch 1, sc in same st as last sl st, sc in each st across until 4 sts remain, leave remaining 4 sts unworked. Turn. (42 sts)
Row 52: Ch 1, dec, sc in each st across until 2 sts remain, dec. Turn. (40 sts)
Rows 53 through 54: Repeat Row 52. (36 sts after Row 54)
Rows 55 through 70: Ch 1, sc in each st across. Turn. (36 sts)
This takes you up to the shoulder area.
First Strap:
Row 71: Ch 1, sc in first 10 sts, leave remaining sts unworked. Turn. (10 sts)
Rows 72 through 80: Ch 1, sc in each st across. Turn. (10 sts)
Buttonhole Row (Row 81): Ch 1, sc in first 4 sts, ch 2, skip 2 sts, sc in last 4 sts. Turn. (8 sc + ch-2 space)
Row 82: Ch 1, sc in first 4 sts, 2 sc in ch-2 space, sc in last 4 sts. Fasten off. (10 sts)
Second Strap:
Skip center 16 stitches on Row 70, join yarn in 17th stitch from the end.
Row 71: Ch 1, sc in same st and in each st across. Turn. (10 sts)
Rows 72 through 82: Repeat instructions for First Strap including buttonhole.
Front Panel
Work exactly as Back Panel through Row 70. (36 sts)
First Strap:
Row 71: Ch 1, sc in first 10 sts, leave remaining sts unworked. Turn. (10 sts)
Rows 72 through 82: Ch 1, sc in each st across. Turn. (10 sts)
Do not make a buttonhole on the front straps. Fasten off.
Second Strap:
Work as for First Strap on the opposite side.
Cloud Appliqués (Make 2)
These sweet clouds add so much personality. One is slightly larger than the other for visual interest.
Larger Cloud:
Using CC and 3.5mm hook:
Round 1: Make a magic ring. Ch 1, work 6 sc into the ring. Pull tight to close. Do not join, work in continuous rounds. Place a marker in the first stitch. (6 sts)
Round 2: Inc in each st around. (12 sts)
Round 3: *Sc in next st, inc in next st* repeat around. (18 sts)
Round 4: *Sc in next 2 sts, inc in next st* repeat around. (24 sts)
Round 5: Sc in each st around. Sl st to first st to join. Fasten off, leaving a long tail for sewing.
Work a second bumpy section by repeating Rounds 1 through 3 only. (18 sts) Fasten off.
Work a third bumpy section by repeating Rounds 1 through 2 only. (12 sts) Fasten off.
Arrange the three circles overlapping slightly to form a cloud shape. Use your tapestry needle to whipstitch them together on the wrong side.
Smaller Cloud:
Make one 18 stitch circle (Rounds 1 through 3) and one 12 stitch circle (Rounds 1 through 2). Join them as above.
Assembly and Finishing
This is where your dress comes to life.
Step 1: Block Your Pieces
Wet blocking improves the drape and evens out your stitches. Soak your pieces in cool water for 15 minutes, gently squeeze out excess water (never wring), and pin to measurements on a blocking mat or towel. Let dry completely.
Step 2: Seam the Sides
Place front and back panels with right sides facing. Using a tapestry needle and MC, whipstitch or mattress stitch the side seams from the hem up to the armhole bind off. Leave the armholes and top open.
Step 3: Edging
Turn the dress right side out. Join MC at one side seam on the bottom hem.
Hem Edging: Work 1 round of sc evenly around the entire hem. Sl st to first sc to join. Fasten off.
Armhole Edging: Join MC at the underarm. Work 1 round of sc evenly around each armhole. Sl st to join. Fasten off.
Step 4: Attach Cloud Appliqués
Position your clouds on the front of the dress, slightly overlapping near the hem as shown. Pin in place. Using CC and your tapestry needle, whipstitch around the edges, catching just the back of the appliqué to keep stitches invisible from the front.
Step 5: Sew Buttons
Lay the dress flat with the back panel on top. Position the front straps under the back straps. Mark where the buttonholes land on the front straps. Sew buttons securely in place.
Step 6: Weave In All Ends
Take your time with this step. Weave each tail through several stitches, then back in the opposite direction. Trim close to the fabric.
Care Instructions
This little dress deserves gentle care to stay beautiful wash after wash.
Machine wash on delicate cycle with cold water. Use a mesh laundry bag for extra protection. Lay flat to dry or tumble dry on low heat if your yarn permits. Store flat to prevent stretching.
I recommend washing once before gifting to soften the fabric and remove any sizing from the yarn.
Customization Ideas
Once you feel confident with this basic crochet pattern, consider these variations:
Troubleshooting Common Issues
My edges look wavy: This usually means inconsistent tension on your turning chains. Try not chaining too tightly at the beginning of rows.
My stitch count keeps changing: Place a stitch marker in the first and last stitch of each row. Count after every row until you feel confident.
The armholes seem too small: Wet blocking helps significantly. If still too tight, you can always add an extra row of single crochet edging.
My clouds do not look puffy: Make sure you are pulling your magic ring completely closed and working the first few rounds fairly tightly.
I truly hope you enjoy making this powder blue baby crochet dress as much as I enjoyed designing it. There is nothing quite like seeing your finished handmade creation ready for a sweet little one to wear. If you found this crochet pattern helpful, I would love for you to pin it to your Pinterest boards so you can find it easily when you are ready to start stitching. And please, drop a comment below if you make this dress. Seeing your creations honestly makes my whole day brighter.
