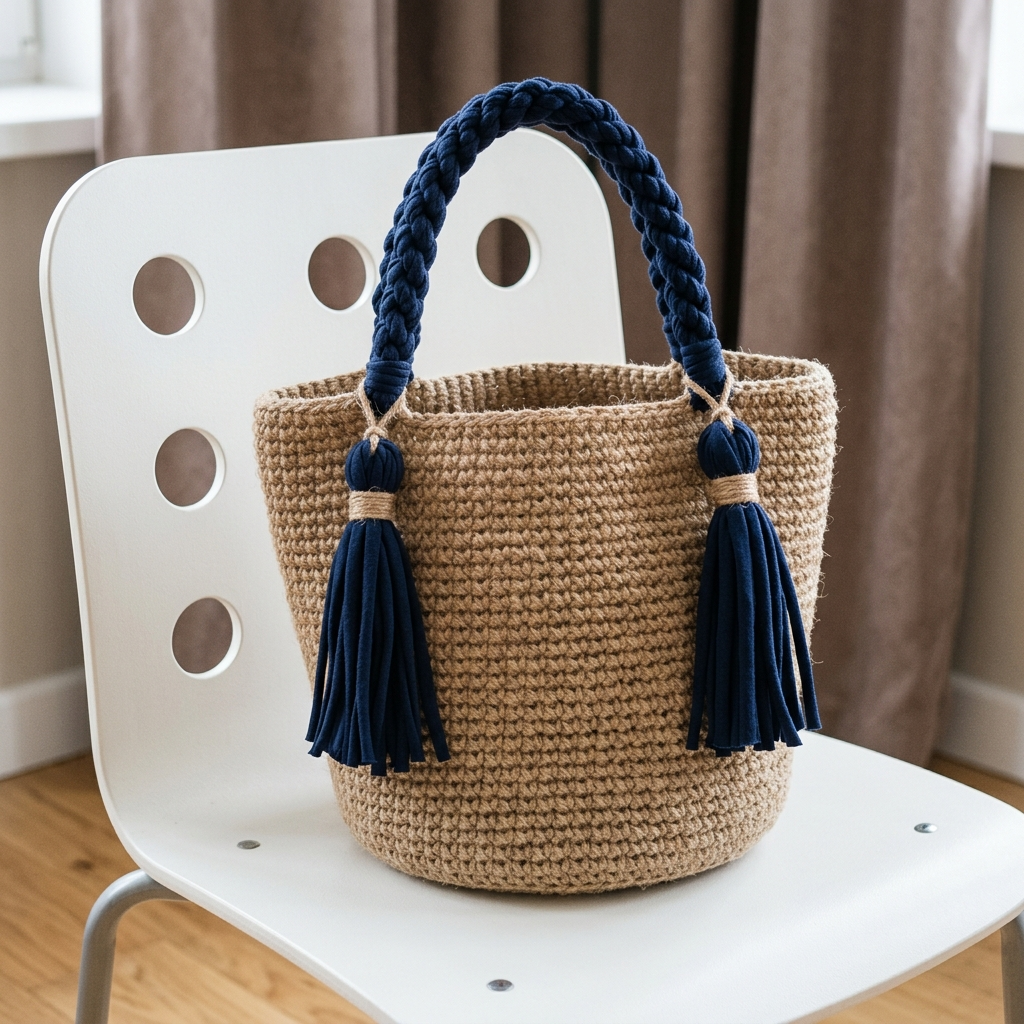
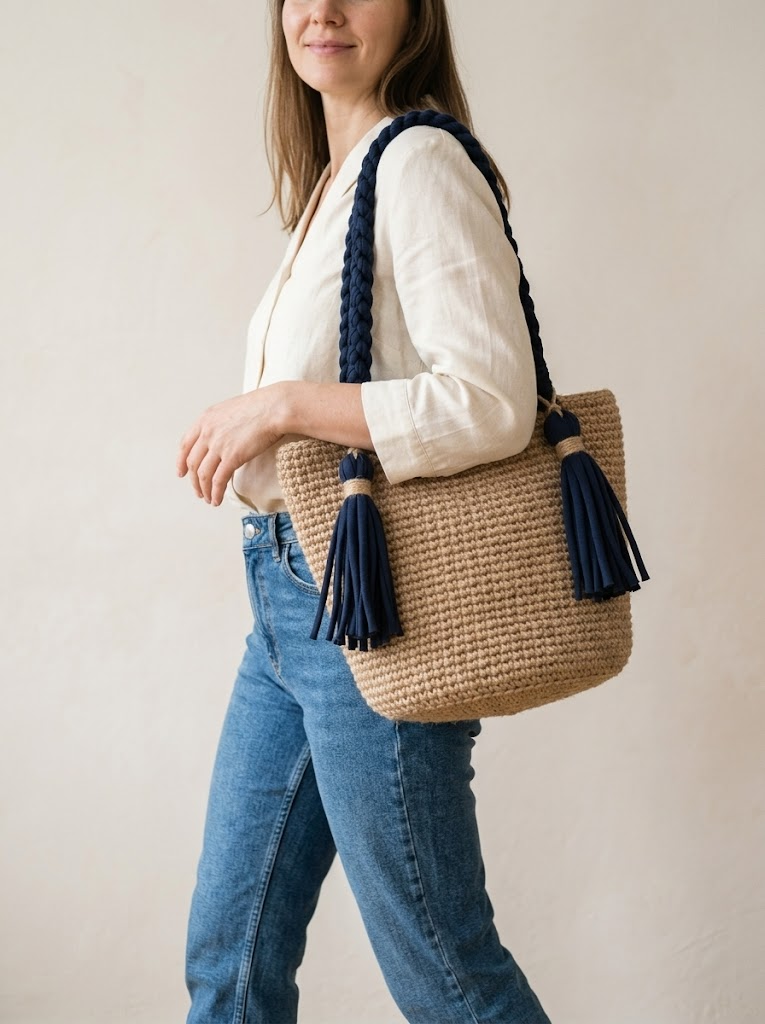
This rustic jute tote bag is exactly the kind of project that makes people stop and ask, “Wait, you *made* that?” I love when crochet looks like something you would find in a boutique. And this one absolutely delivers.
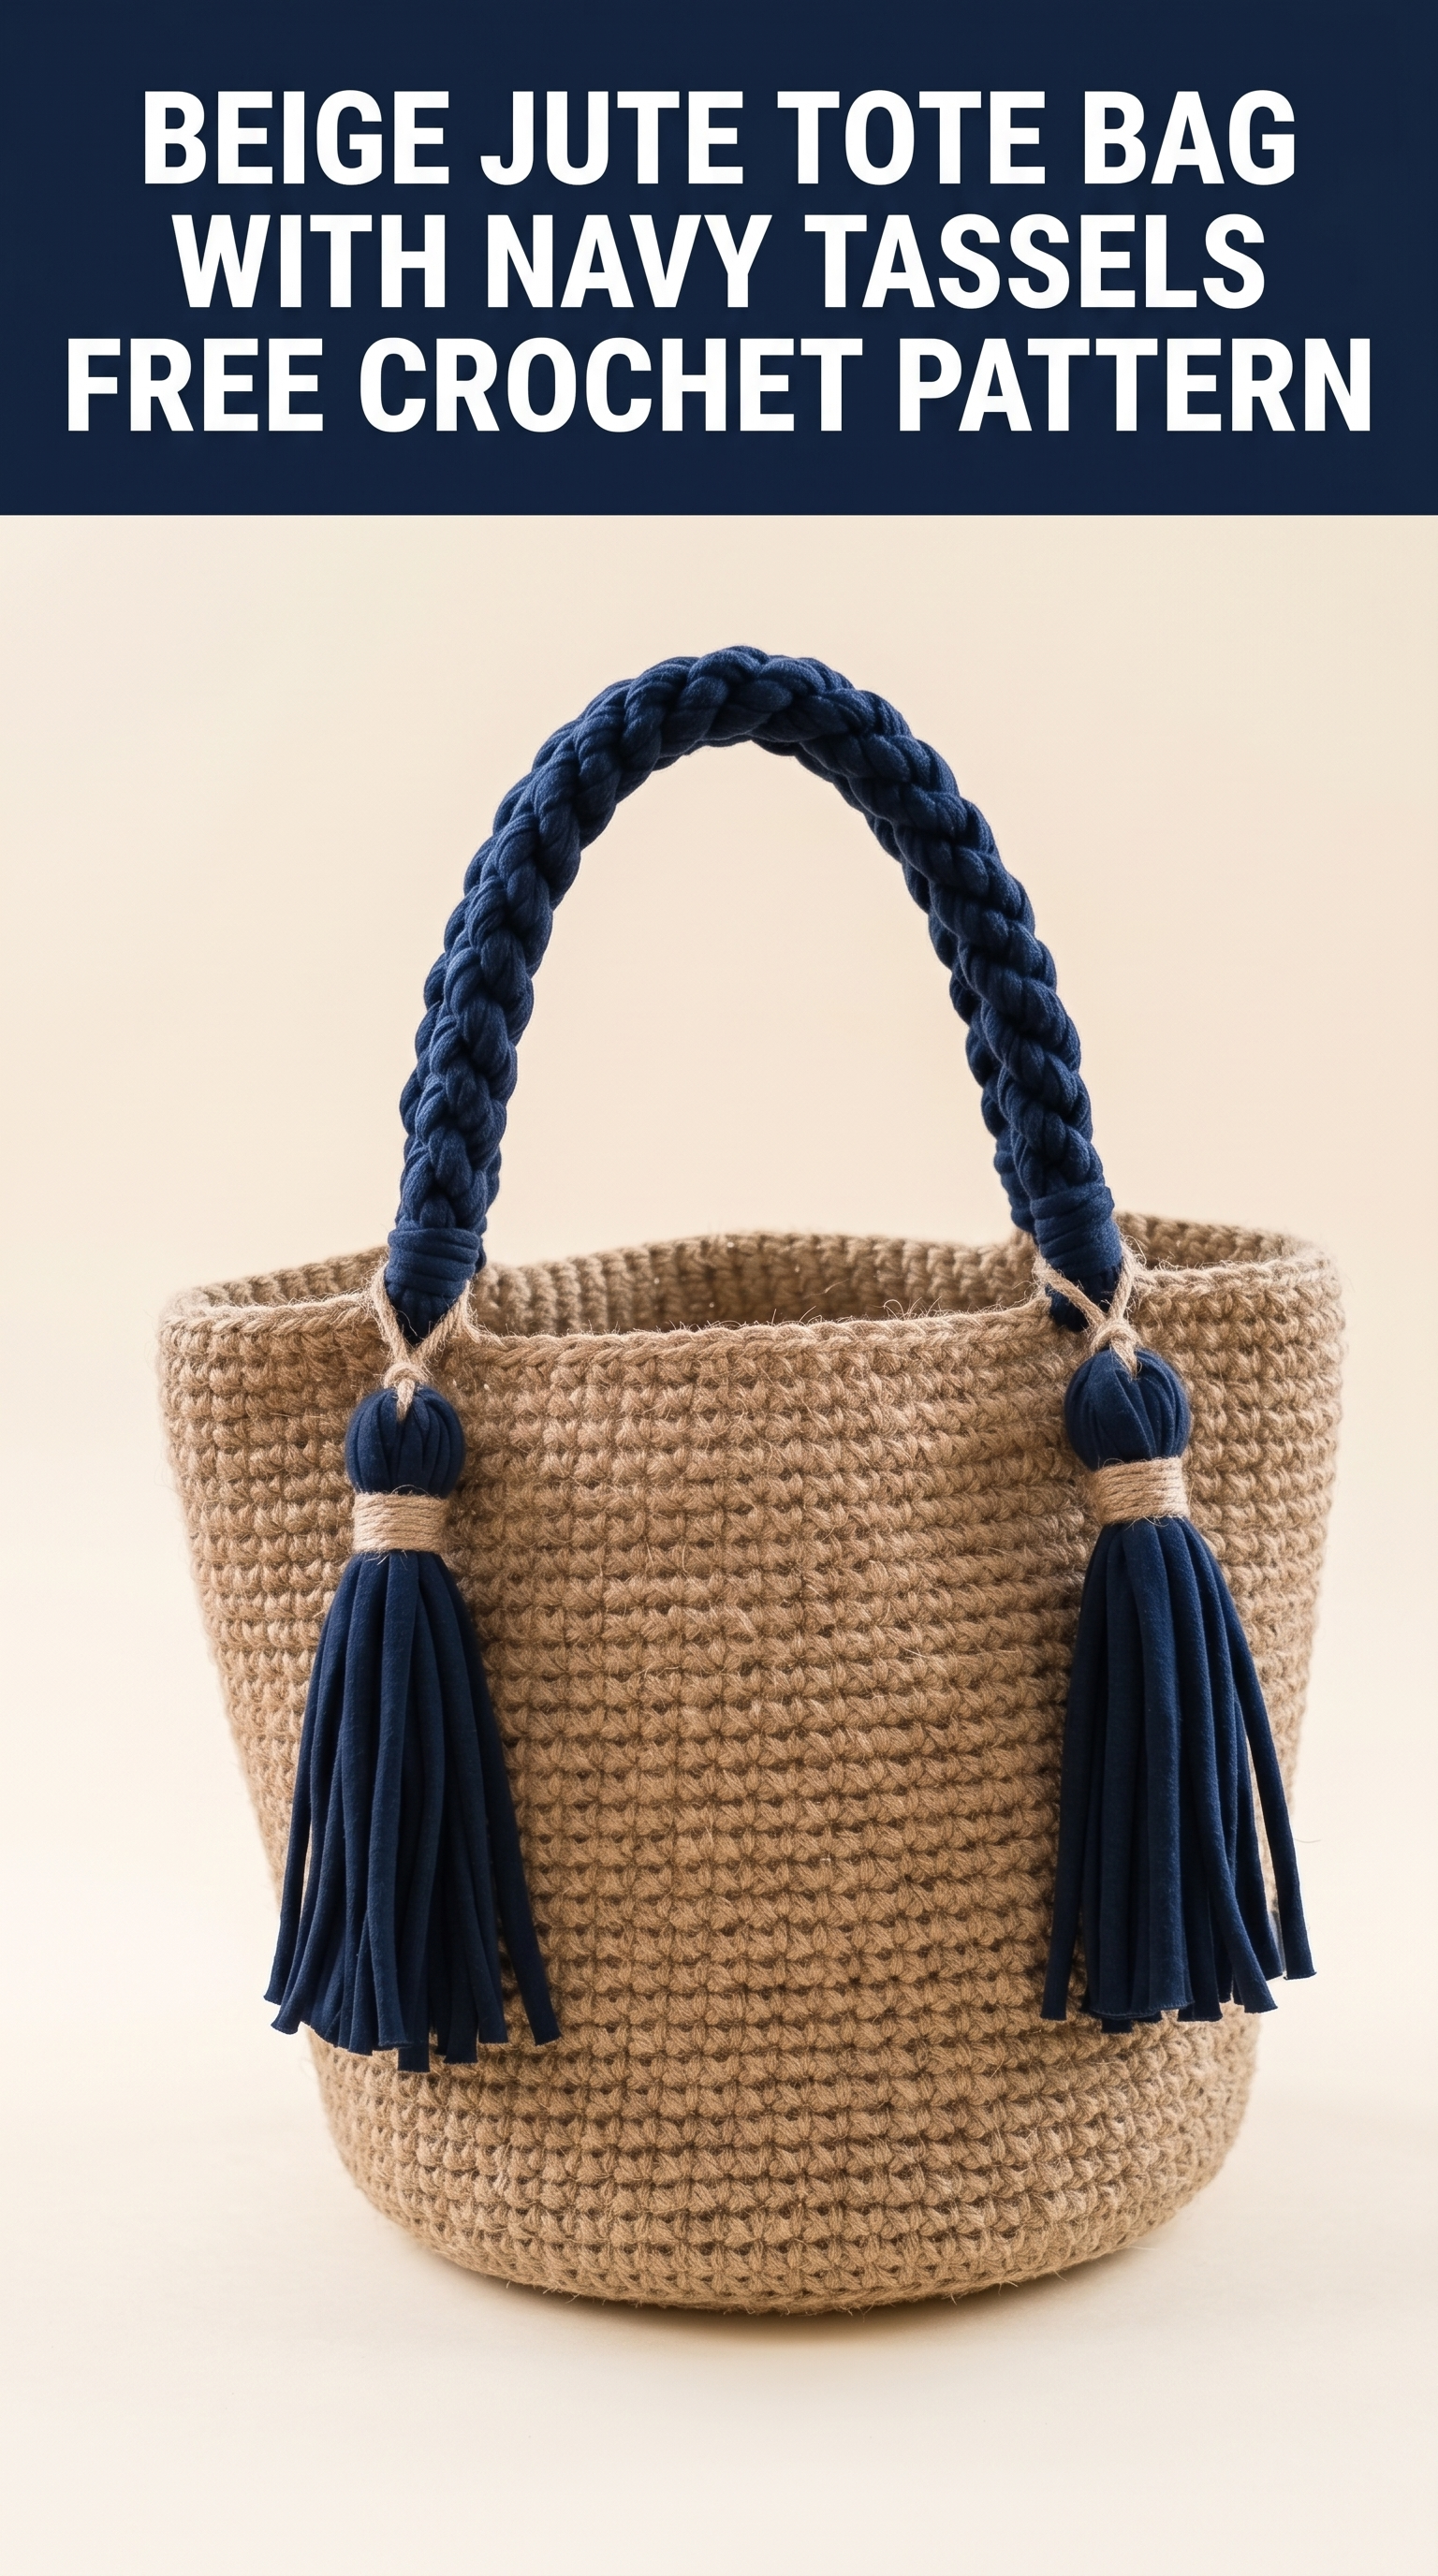
The combination of natural jute yarn with those chunky navy tassels and braided handle creates a beach ready, market ready, everyday ready bag. It is sturdy. It is stylish. And honestly, it is not nearly as complicated as it looks.
If you can work in the round and you know your way around a single crochet, you can absolutely make this tote bag. Intermediate crocheters will find this comfortable. Confident beginners who want a challenge will do just fine with a little patience.
Let me walk you through every single step of this crochet pattern from the circular base all the way to those gorgeous tassels.
Why This Jute Tote Bag Crochet Pattern Works So Well
The magic here is the material. Jute yarn has a natural texture that creates incredible stitch definition. Every single crochet pops beautifully. The finished fabric is stiff enough to hold its shape without any lining or interfacing.
The navy t-shirt yarn for the handle and tassels adds that designer contrast. It is soft against your shoulder but bold enough to make a statement.
This crochet tutorial gives you a tote that measures approximately 10 inches tall and 9 inches wide at the opening. The base is about 7 inches in diameter. Perfect for a day at the farmers market, a quick beach trip, or honestly just running errands in style.
Materials You Will Need
Gather these supplies before you start. Having everything ready makes the process so much smoother.
Yarn:
Hook:
Notions:
Gauge
Gauge matters here. It determines your bag size and stiffness.
Work 14 single crochet stitches and 16 rows in single crochet to get a 4 inch by 4 inch square using jute yarn and a 5.0 mm hook.
If your square is larger, go down a hook size. If it is smaller, go up a hook size. A tighter gauge makes a sturdier bag that holds its shape better.
Abbreviations and Stitch Definitions
Let me define every stitch before we start. Read through these even if you are experienced. Jute behaves differently than regular yarn.
ch = chain. Wrap yarn over hook, pull through loop on hook. This creates your foundation.
sl st = slip stitch. Insert hook, yarn over, pull through stitch AND loop on hook in one motion. Used for joining rounds.
sc = single crochet. Insert hook into stitch, yarn over and pull up a loop (2 loops on hook), yarn over and pull through both loops. The simplest and sturdiest stitch.
inc = increase. Work 2 single crochet stitches into the same stitch. This adds one stitch to your count.
BLO = back loop only. Instead of inserting your hook under both loops of the stitch below, insert it under just the back loop. This creates a ridge on the right side.
Step by Step Crochet Pattern for the Jute Tote Bag
This bag is worked in continuous rounds from the bottom up. That means you do not join at the end of each round. You just keep spiraling. Use a stitch marker to track where each round begins.
The Circular Base
Round 1: Using jute yarn and 5.0 mm hook, create a magic ring. Work 6 sc into the ring. Pull the tail to close the ring. Place marker in first stitch. (6 sts)
*Don’t know the magic ring? You can also ch 2 and work 6 sc into the second chain from hook. Same result.*
Round 2: Inc in each stitch around. (12 sts)
Round 3: *Sc 1, inc* repeat around. (18 sts)
Round 4: *Sc 2, inc* repeat around. (24 sts)
Round 5: *Sc 3, inc* repeat around. (30 sts)
Round 6: *Sc 4, inc* repeat around. (36 sts)
Round 7: *Sc 5, inc* repeat around. (42 sts)
Round 8: *Sc 6, inc* repeat around. (48 sts)
Round 9: *Sc 7, inc* repeat around. (54 sts)
Round 10: *Sc 8, inc* repeat around. (60 sts)
Round 11: *Sc 9, inc* repeat around. (66 sts)
Round 12: *Sc 10, inc* repeat around. (72 sts)
Your base should now measure approximately 7 inches across. Lay it flat and check. It should sit nice and flat without curling or cupping.
Creating the Sides
Here is where the bag starts to come up and form walls. We stop increasing and work a transition round.
Round 13: Working in BLO only, sc in each stitch around. (72 sts)
This BLO round creates that crisp edge between the base and the sides. You will see a visible ridge on the outside of the bag. It looks intentional and professional.
Rounds 14 through 50: Sc in each stitch around, working through both loops normally. (72 sts per round)
That is 37 rounds of plain single crochet. I know it sounds like a lot. But jute works up faster than you think because the yarn is thick. Put on a podcast and enjoy the rhythm.
Tip: Every few rounds, try the bag on for size. Slip your hand inside and hold it up. You want the sides to feel firm but not rock hard.
Finishing the Top Edge
Round 51: Sl st in each stitch around. Fasten off and weave in your end.
This slip stitch round creates a neat finished edge and prevents stretching at the opening.
Making the Braided Handle
The handle is a simple three strand braid using t-shirt yarn. This technique is beginner friendly and creates that chunky rope look.
Step 1: Cut 3 strands of navy t-shirt yarn, each 60 inches long.
Step 2: Hold all three strands together. Tie an overhand knot about 3 inches from one end.
Step 3: Braid the three strands together. Keep even tension. The braid should be tight and uniform.
Step 4: When you have about 3 inches remaining, tie another overhand knot.
Your finished braid should measure approximately 18 to 20 inches in the braided section. This gives you a comfortable shoulder strap length.
Creating the Navy Tassels
These chunky tassels are what take the bag from nice to wow. Each tassel uses t-shirt yarn with jute twine wrapping.
For each tassel (make 2):
Step 1: Cut 8 strips of navy t-shirt yarn, each about 10 inches long.
Step 2: Fold the strips in half.
Step 3: Take a small piece of t-shirt yarn (about 6 inches) and tie it tightly around the folded top, about 1 inch down from the fold. This creates the tassel head.
Step 4: Take natural jute twine and wrap it around the tassel head multiple times, covering that 1 inch section. Secure with a tight knot and trim.
Step 5: Trim the tassel ends so they are even. Mine hang about 5 inches long.
Assembling the Bag
Now we put it all together. This is the satisfying part.
Attaching the handle:
Step 1: Position the handle on one side of the bag, about 15 stitches apart from each attachment point. The knot end of the braid should sit just at the top edge of the bag.
Step 2: Using jute yarn and your yarn needle, stitch the braid knot securely to the inside top edge of the bag. Go through the braid and through several stitches of the bag. Make it secure. This will hold weight.
Step 3: Repeat on the other side, making sure the handle is not twisted.
Attaching the tassels:
Step 1: Thread the folded loop of one tassel through the braided section of the handle, right where it meets the bag. Pull the tassel ends through the loop and tighten.
Step 2: Use jute twine to wrap around the connection point, covering where the tassel meets the braid. This is decorative but also adds security.
Step 3: Repeat for the second tassel on the other side.
Tips for Working with Jute Yarn
Jute is not like your typical acrylic or cotton. Here is what to expect.
It sheds. You will have little jute fibers everywhere. Work over a sheet or towel you can shake out.
It is rough on hands. Take breaks. Use hand cream after your crochet session. Some crafters wear cotton gloves with the fingertips cut off.
It does not have stretch. Your stitches need to be deliberate. Do not try to force the hook through.
It gets softer. After a few uses, the jute relaxes slightly. This is normal and actually makes the bag more comfortable.
Customization Ideas
Want to make this crochet tote bag your own? Here are some easy modifications.
Change the handle color. Coral, mustard, or natural cream would look stunning.
Skip the tassels. Pom poms or leather accents work beautifully too.
Add a fabric lining. This is optional but helpful if you carry small items that might slip through the stitches.
Make it taller. Just add more rounds to the sides. Each round adds roughly a quarter inch of height.
Use different yarn. Chunky cotton or macrame cord creates a similar look with a softer feel.
Skill Level and Time Estimate
I would call this an intermediate crochet pattern. The stitches are simple but working with jute requires some hand strength and patience.
Expect this project to take 8 to 12 hours depending on your pace. I made mine over a long weekend, working a few hours each evening.
Final Thoughts on This Jute Tote Bag Crochet Pattern
This bag is one of those projects that feels like a real accomplishment. When you finish weaving in that last end and step back to look at it, you will feel proud. I certainly did.
The natural jute and navy combination is timeless. It goes with everything from sundresses to jeans and a t-shirt. And every time someone compliments it, you get to say those magic words: “Thanks, I made it.”
Thank you so much for choosing this pattern. I genuinely hope you enjoy making it as much as I enjoyed designing it.
If you make one, I would absolutely love to see it. Tag me on Instagram or share your finished bag in our Facebook group. Seeing your creations honestly makes my whole day.
Happy crocheting, friend. You have got this.
