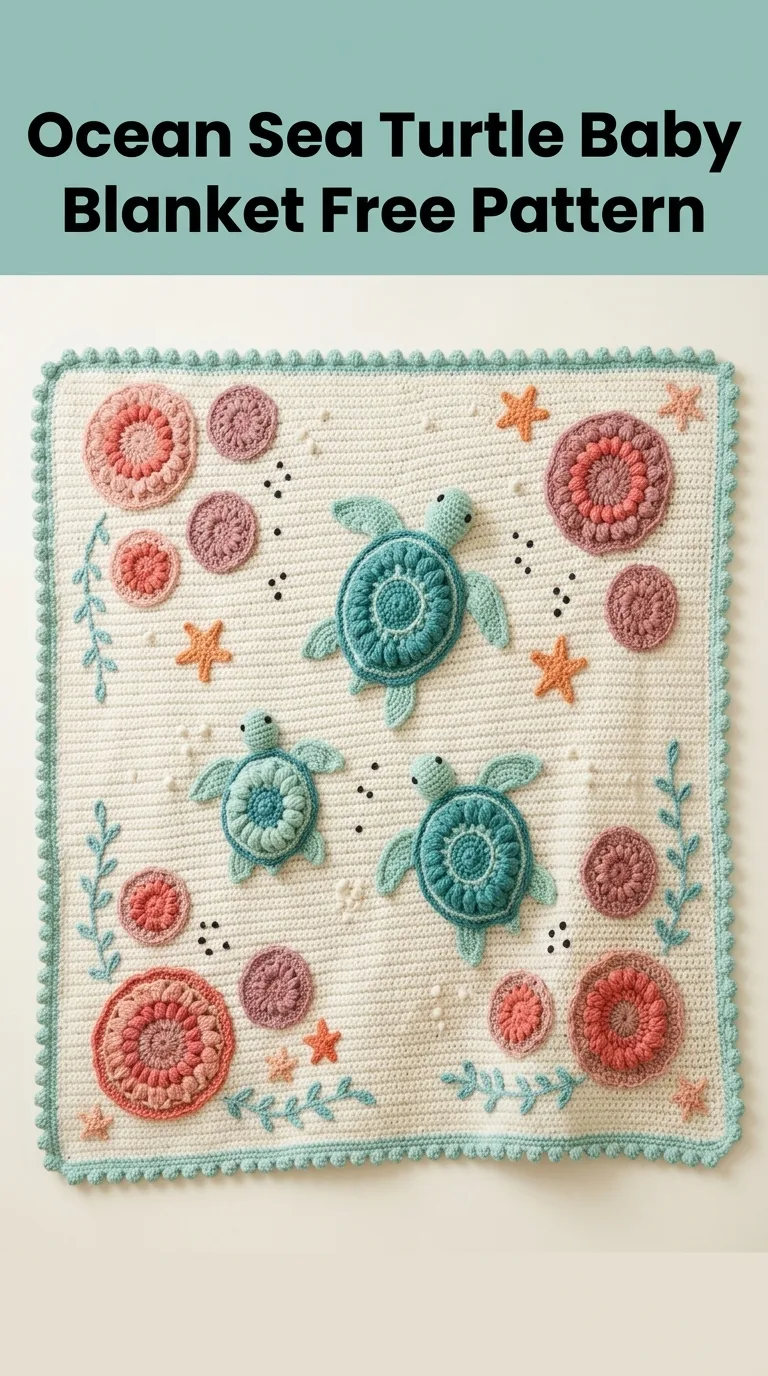
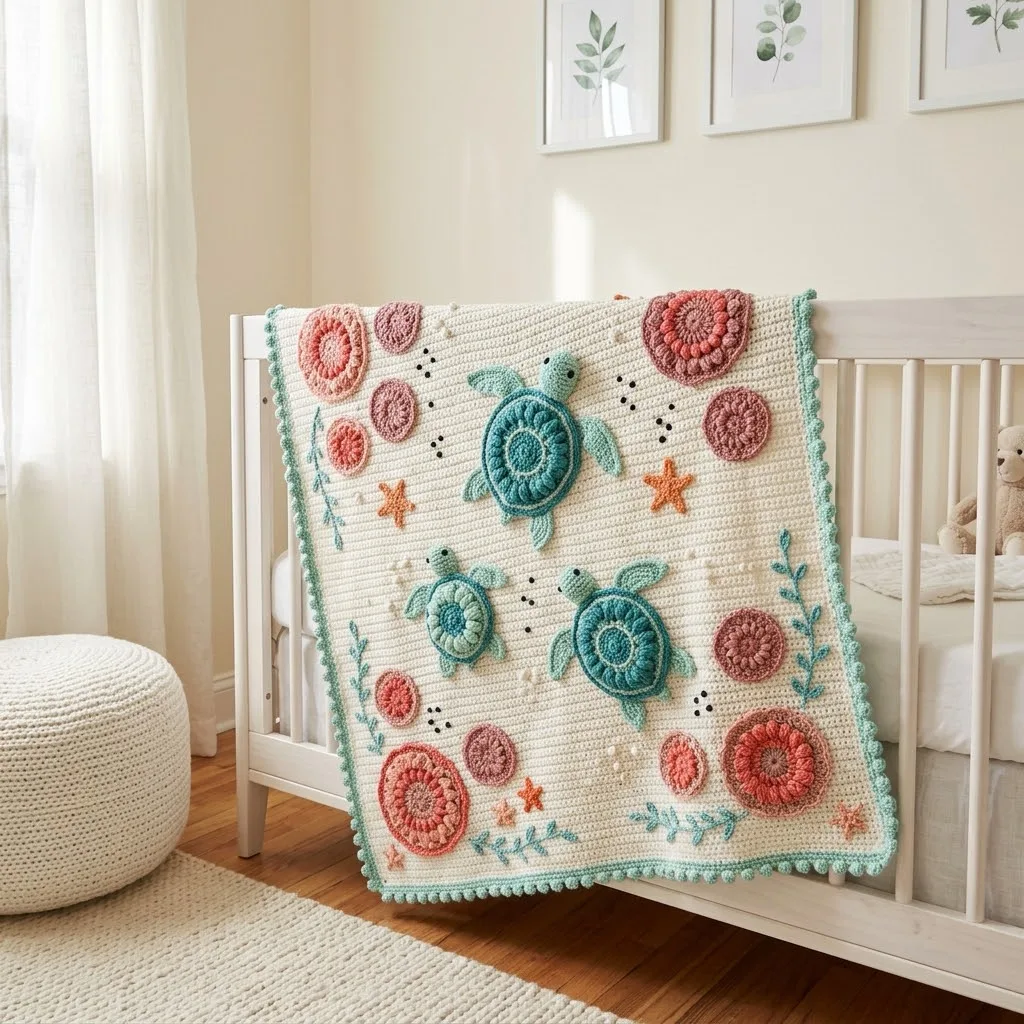
There is something magical about wrapping a little one in a blanket covered in sweet sea turtles swimming through an ocean garden. This Ocean Sea Turtle Baby Blanket crochet pattern combines adorable appliqué turtles, textured seashell motifs, and delicate seaweed details on a soft cream background. The bobble border adds the perfect finishing touch that looks like little bubbles floating around the edge.
I designed this blanket to look impressive while still being totally achievable for confident beginners. If you can work basic stitches and follow appliqué instructions, you can absolutely make this. The construction is simpler than it looks. You will create a solid base blanket first, then make the decorative elements separately and attach them. No complicated colorwork or chart reading required.
Let me walk you through every step to create this beautiful ocean themed baby blanket from start to finish.
Why This Sea Turtle Baby Blanket Pattern Works
This crochet tutorial breaks down into manageable pieces. Instead of trying to work complex designs into the blanket itself, you will crochet simple motifs and sew them on at the end. This approach gives you complete control over placement and lets you customize however you like.
The cream base blanket uses basic single crochet throughout. Clean, simple, and the perfect canvas for your ocean creatures. The sea turtle appliqués feature spiral shells that create that gorgeous swirled effect you see. The seashell motifs in coral and pink tones add warmth and visual interest. Tiny starfish, seaweed vines, and bubble details complete the underwater scene.
Your finished blanket will measure approximately 30 inches by 36 inches, which is a perfect size for a crib, stroller, or tummy time mat.
Materials You Will Need
Yarn:
I recommend a soft acrylic or cotton blend that can handle frequent washing. Baby blankets see a lot of use.
Tools:
Stitch Abbreviations and Definitions
Let me define every stitch before we begin. Knowing exactly what each abbreviation means will help you follow the step by step instructions smoothly.
Ch = Chain: Wrap yarn over hook and pull through the loop on your hook. This creates the foundation for most crochet work.
Sl st = Slip stitch: Insert hook into stitch, yarn over, pull through both the stitch and the loop on your hook in one motion. Used for joining rounds.
Sc = Single crochet: Insert hook into stitch, yarn over and pull up a loop (2 loops on hook), yarn over and pull through both loops. This is your most basic stitch.
Hdc = Half double crochet: Yarn over, insert hook into stitch, yarn over and pull up a loop (3 loops on hook), yarn over and pull through all 3 loops.
Dc = Double crochet: Yarn over, insert hook into stitch, yarn over and pull up a loop (3 loops on hook), yarn over and pull through 2 loops, yarn over and pull through remaining 2 loops.
Inc = Increase: Work 2 stitches into the same stitch to add width.
Bobble = A cluster of stitches worked into one stitch that creates a raised bump. For this pattern, work 5 dc into one stitch, remove hook, insert through the first dc, grab the dropped loop, and pull through to close.
Magic ring = An adjustable starting circle. Wrap yarn around fingers, insert hook, pull up loop, chain to secure, then work stitches into the ring. Pull the tail to close the center hole.
Gauge
Work 14 sc and 16 rows = 4 inches using the 5.0mm hook.
Gauge matters for finished size. If your blanket is coming out too small, go up a hook size. Too large, go down a hook size. The appliqués are more forgiving since they just need to fit nicely on the blanket.
Base Blanket Instructions
This is the foundation everything attaches to. Simple rows of single crochet create a dense, warm fabric with a clean look.
Foundation:
Using 5.0mm hook and cream yarn, ch 107.
Row 1: Sc in 2nd ch from hook and in each ch across. (106 sts)
Row 2: Ch 1, turn. Sc in each st across. (106 sts)
Rows 3 through 130: Repeat Row 2.
Your base should measure approximately 30 inches wide by 32 inches tall. Fasten off and weave in ends.
Do not worry if your row count differs slightly. Just keep going until you reach about 32 inches in height. The border and appliqués are very forgiving.
Sea Turtle Appliqué Pattern
You will make 3 turtles total. Each turtle has a body, shell, head, and four flippers worked separately then assembled.
Turtle Shell (Make 3)
The shell creates that beautiful spiral effect using rounds worked in a continuous spiral.
Using 4.0mm hook and dark teal, make a magic ring.
Round 1: Work 6 sc into the ring. Pull tail to close. Do not join. (6 sts)
Round 2: Inc in each st around. (12 sts)
Round 3: *Sc 1, inc* repeat around. (18 sts)
Round 4: *Sc 2, inc* repeat around. (24 sts)
Round 5: *Sc 3, inc* repeat around. (30 sts)
Round 6: *Sc 4, inc* repeat around. (36 sts)
Round 7: *Sc 5, inc* repeat around. (42 sts)
Sl st to first st to join. Fasten off leaving a long tail for sewing.
For the spiral detail, use teal yarn and backstitch a spiral line from the center outward, following the natural increase lines.
Turtle Body (Make 3)
Using 4.0mm hook and teal/seafoam, make a magic ring.
Round 1: 6 sc into ring. (6 sts)
Round 2: Inc in each st. (12 sts)
Round 3: *Sc 1, inc* around. (18 sts)
Round 4: *Sc 2, inc* around. (24 sts)
Round 5: Sc in each st around. (24 sts)
Sl st to join. Fasten off with long tail.
Turtle Head (Make 3)
Using teal, make a magic ring.
Round 1: 6 sc into ring. (6 sts)
Round 2: Inc in each st. (12 sts)
Rounds 3 and 4: Sc around. (12 sts)
Fasten off with long tail.
Turtle Flippers (Make 12 total, 4 per turtle)
Using teal, ch 8.
Row 1: Sc in 2nd ch from hook, hdc in next, dc in next 2, hdc in next, sc in next, sl st in last. Fasten off.
Shape each flipper by folding slightly to create a natural curve.
Assembling Each Turtle
Position the shell centered on the body circle. Whip stitch around the edge. Attach head at the top between body and shell edge. Attach two front flippers angled outward at the sides. Attach two back flippers angled downward at the bottom. Add French knot eyes using black yarn.
Seashell Motifs (Make 8)
These coral and pink circles create the scattered seashell look. Make them in various sizes and color combinations.
Large Seashell (Make 4)
Using coral or dusty rose, make a magic ring.
Round 1: 8 dc into ring. Sl st to join. (8 sts)
Round 2: Ch 3, dc in same st, 2 dc in each st around. Sl st to join. (16 sts)
Round 3: Ch 3, dc in same st, dc in next, *2 dc in next, dc in next* around. Sl st to join. (24 sts)
Change to a contrasting pink shade.
Round 4: Ch 1, sc in each st around. Sl st to join. Fasten off.
Small Seashell (Make 4)
Work Rounds 1 through 3 only in alternating colors. These smaller motifs fill in spaces nicely.
Starfish Appliqués (Make 4)
Using orange yarn, make a magic ring.
Star Points:
*Ch 5, sl st in 2nd ch from hook, sc in next, hdc in next, dc in next, sl st into ring* Repeat 5 times total to create 5 points.
Pull ring closed tightly. Fasten off and weave in ends.
Seaweed Vines (Make 6 to 8)
These add movement and frame the design beautifully along the sides.
Using teal, ch 25.
Row 1: Working in back bumps of chain, *sl st, ch 3, sl st in same ch* repeat every 2 to 3 stitches for a branching effect. Continue to end.
Fasten off. These should have a wavy, organic feel. Vary the lengths for natural placement.
Bubble Details
Using cream yarn for larger bubbles and black for tiny bubble trails.
Large Bubbles: Magic ring, 6 sc, sl st to join. Fasten off.
Bubble Trails: Using black, work 3 to 5 French knots or small bobbles in diagonal lines near turtle heads to show them swimming.
Bobble Border
This finishing touch frames everything perfectly with that playful bubble texture.
Join teal yarn at any corner of the base blanket.
Round 1: Ch 1, sc evenly around the entire blanket edge, working 3 sc into each corner. Sl st to join.
Round 2: Ch 1, sc in each st, 3 sc in corners. Sl st to join.
Round 3: Ch 1, *sc in next 2 sts, bobble in next st* repeat around, adjusting at corners to maintain 3 sc increases. Sl st to join.
Round 4: Ch 1, sc in each st around. Sl st to join. Fasten off.
Weave in all ends securely.
Assembling Your Ocean Sea Turtle Baby Blanket
Lay your base blanket flat on a large surface. Arrange all your appliqués before sewing anything down. This is the fun part where you get to play with placement.
Suggested Layout:
Pin everything in place. Step back and look at the overall balance. Move things around until you love it.
Using matching yarn colors and a tapestry needle, whip stitch each element securely to the blanket. Take your time with this step. Secure stitching means everything stays put through washing and baby cuddles.
Care Instructions
Machine wash cold on gentle cycle. Tumble dry low or lay flat to dry. The appliqués may puff up slightly when dried, which actually adds to their dimensional charm.
Tips for Success with This Crochet Pattern
For the turtles: The spiral shell detail makes all the difference. Take an extra few minutes to add that embroidered spiral line.
For placement: Odd numbers look more natural. Three turtles, scattered groupings of shells, asymmetric seaweed. Trust your eye.
For borders: Count your corner stitches carefully. The bobbles can throw off your count if you are not paying attention.
For beginners: Make one turtle first before committing to all three. Get comfortable with the assembly process.
Make It Your Own
This step by step crochet tutorial gives you a complete pattern, but feel free to customize. Swap the coral tones for blues and greens for a cooler palette. Add more turtles for a busier design. Skip the bobble border for a simpler finish. Make it larger by adding more rows to the base.
The beauty of this beginner friendly crochet pattern is its flexibility. Each element works independently, so you control the final look.
I really hope you enjoy making this sweet ocean blanket as much as I enjoyed designing it. There is something so satisfying about watching all those little pieces come together into one beautiful finished project. If you make this blanket, I would absolutely love to see it. Share your photos with me on Instagram or post them in my Facebook group. Seeing your creativity makes my whole day.
Save this pattern to your Pinterest boards so you can find it whenever you are ready to start. And please drop a comment below if you have questions or just want to share how yours turned out. I read every single one and love connecting with you all.
