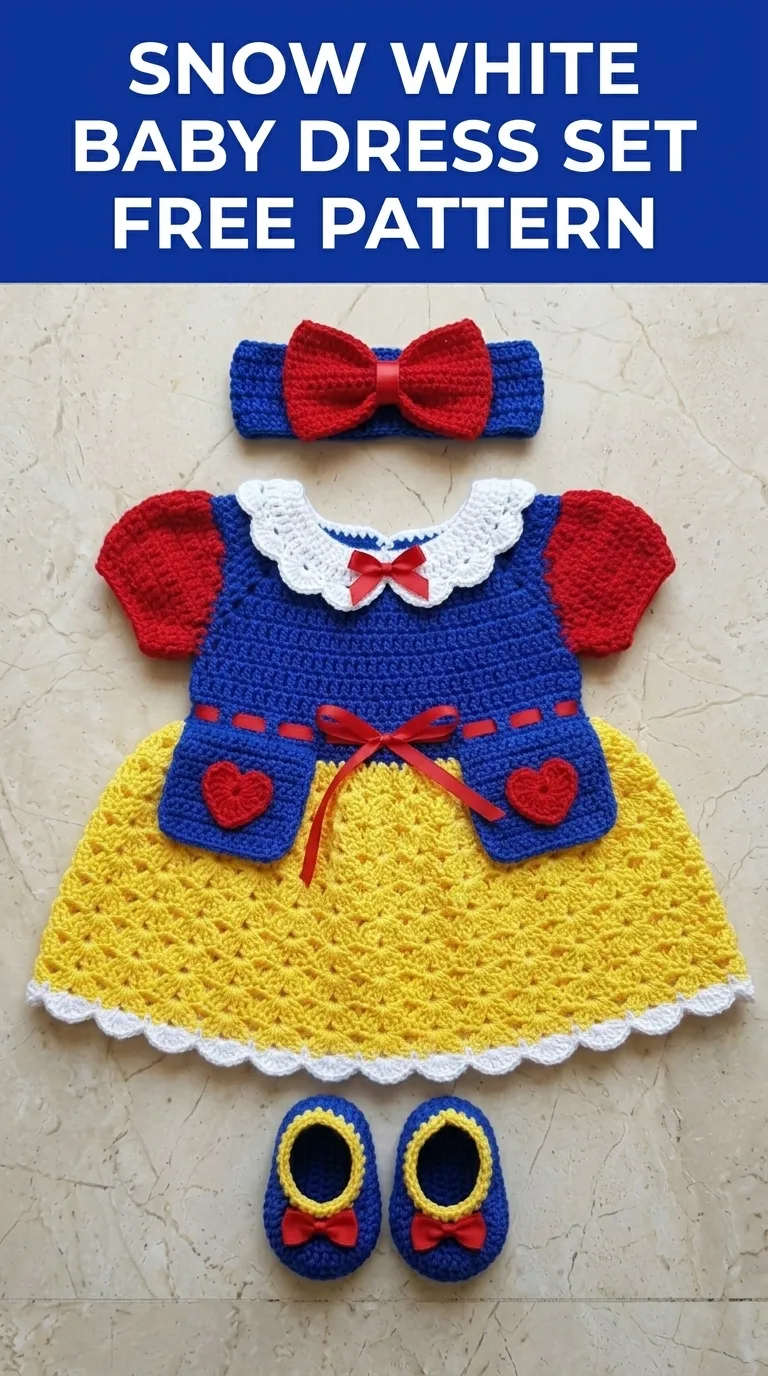
There is something absolutely magical about crocheting a complete outfit for a little one. This Snow White Baby Dress Set captures every iconic detail of the beloved princess, from the puff sleeves to the signature color blocking. I designed this set to include the dress, matching headband with bow, and adorable coordinating booties. The whole ensemble works up beautifully in worsted weight yarn, and I promise you that even if you have never made a garment before, you can absolutely do this.
This crochet pattern walks you through each component step by step. The construction is simpler than it looks because we work each piece separately and join them at the end. You will learn shell stitches, basic shaping, and how to create those sweet little details that make this dress instantly recognizable.
Why This Snow White Baby Dress Set Makes a Perfect Project
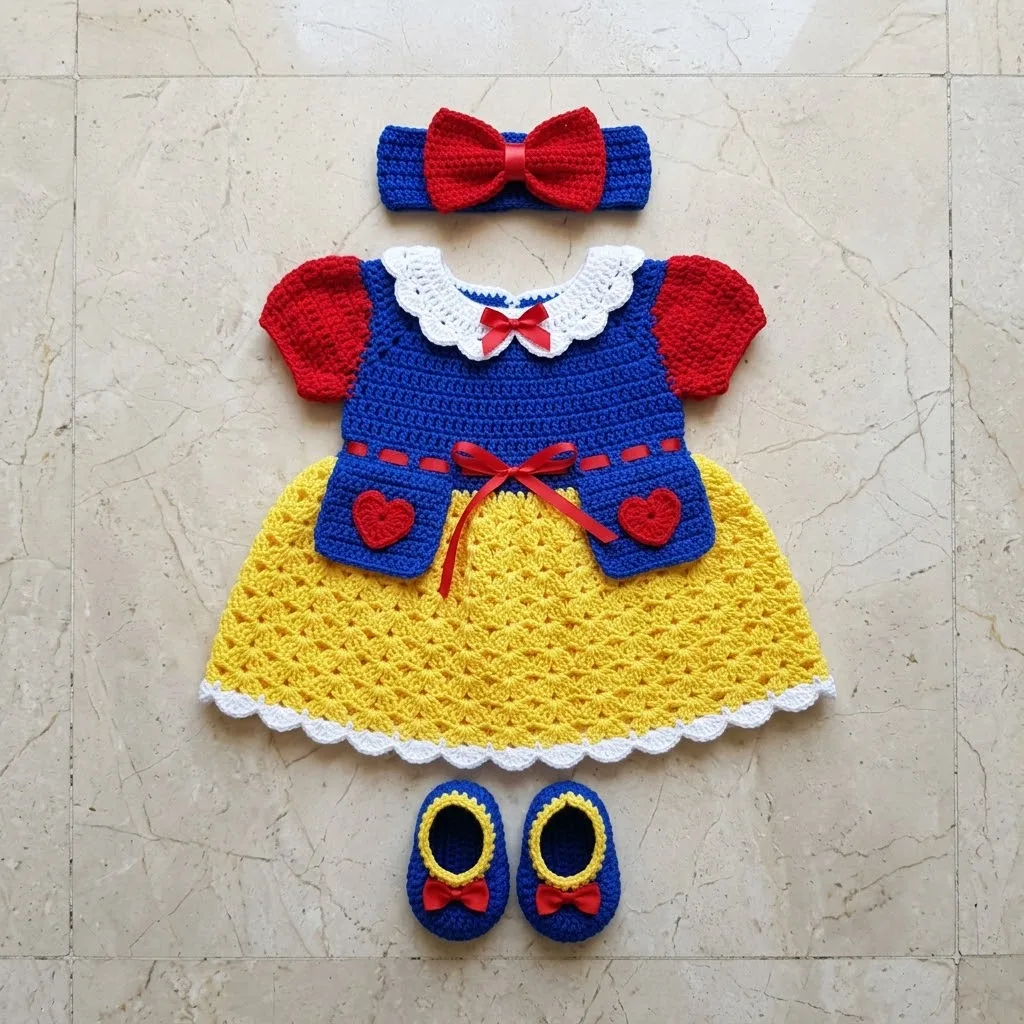
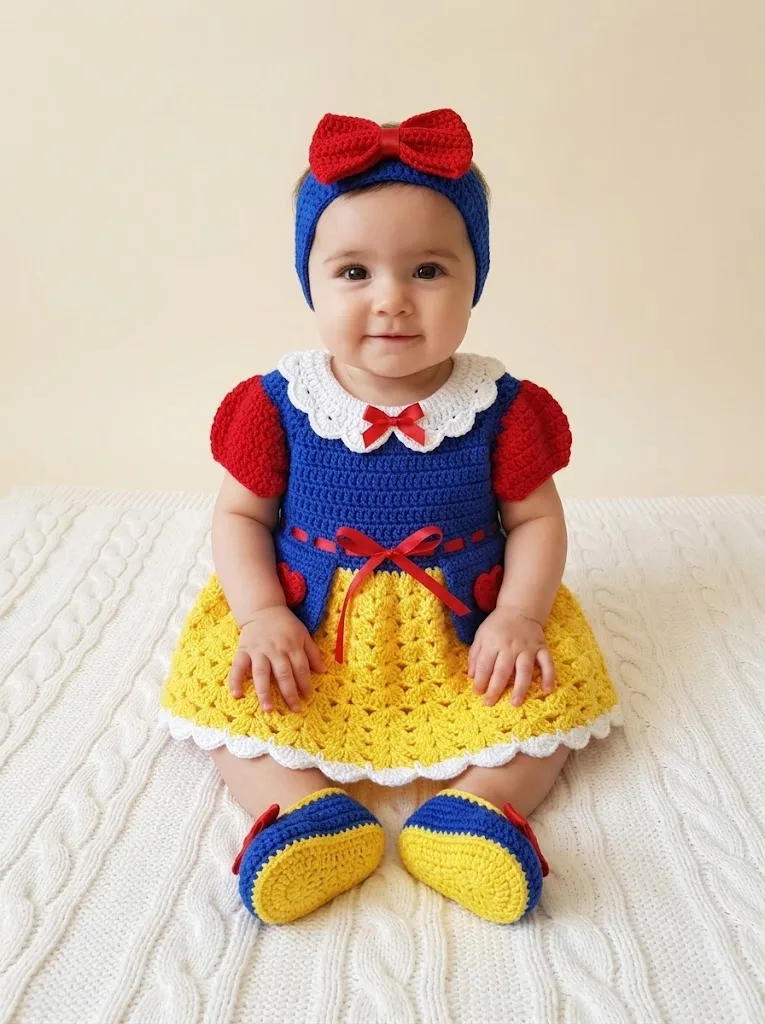
When I first sketched out this design, I wanted something that would photograph beautifully for baby showers, first birthday parties, or newborn photo sessions. The bold primary colors really pop, and the added touches like the ribbon accents and heart pockets elevate the whole look.
This crochet tutorial creates a complete set sized for 0 to 6 months. Every piece coordinates perfectly, so you are not left guessing about proportions. The dress features a fitted blue bodice with red puff sleeves, a white Peter Pan collar, blue pockets with red hearts, and a flowing yellow skirt with a white scalloped border. The headband mirrors the dress with its matching bow, and the booties tie everything together with their blue bodies and yellow trim.
Skill Level
I would call this an intermediate beginner project. If you can work in the round, increase and decrease, and follow a written pattern, you have all the skills you need. The techniques might be new to you, but none of them are difficult once you see how they work together.
Materials You Will Need
Yarn:
– Royal Blue: approximately 150 yards
– Bright Yellow: approximately 120 yards
– Red: approximately 60 yards
– White: approximately 40 yards
I recommend a soft acrylic or cotton blend for baby items. Something machine washable makes life easier for parents.
Hook:
Notions:
Gauge:
16 stitches and 18 rows = 4 inches in single crochet with 4.0 mm hook
Always check your gauge. If your gauge is off, your finished dress will not fit properly.
Abbreviations and Stitch Definitions
Let me walk you through every stitch we will use. I define each one fully so you never have to guess.
ch = chain: Yarn over, pull through loop on hook. This creates the foundation for most crochet work.
sl st = slip stitch: Insert hook into stitch, yarn over, pull through both the stitch and the loop on your hook in one motion. Used for joining and moving across stitches invisibly.
sc = single crochet: Insert hook into stitch, yarn over and pull up a loop (2 loops on hook), yarn over and pull through both loops. The shortest and most basic stitch.
hdc = half double crochet: Yarn over, insert hook into stitch, yarn over and pull up a loop (3 loops on hook), yarn over and pull through all 3 loops. Slightly taller than single crochet.
dc = double crochet: Yarn over, insert hook into stitch, yarn over and pull up a loop (3 loops on hook), yarn over and pull through 2 loops (2 loops remain), yarn over and pull through remaining 2 loops. Creates a taller, more open fabric.
inc = increase: Work 2 stitches into the same stitch. This adds one stitch to your count.
dec = decrease: Work 2 stitches together as one. For single crochet decrease, insert hook in first stitch, pull up a loop, insert hook in next stitch, pull up a loop (3 loops on hook), yarn over and pull through all 3.
shell = shell stitch: Work 5 double crochet stitches into the same stitch. Creates a fan shaped cluster.
magic ring = adjustable starting loop: Create a loop with your yarn, work your starting stitches into that loop, then pull the tail tight to close the center completely. This eliminates the hole you would get from chaining.
The Dress Pattern
Bodice (worked flat, then joined)
We start with the back bodice and work our way around.
Using royal blue yarn and 4.0 mm hook:
Row 1: Ch 37, sc in 2nd ch from hook and in each ch across, turn. (36 sts)
Rows 2 through 8: Ch 1, sc in each st across, turn. (36 sts)
Row 9 (Armhole Shaping): Ch 1, sc in first 8 sts, ch 4, skip 8 sts (this creates the armhole), sc in next 12 sts, ch 4, skip 8 sts, sc in last 8 sts, turn. (28 sc + 2 ch-4 spaces)
Row 10: Ch 1, sc in first 8 sts, 4 sc in ch-4 space, sc in next 12 sts, 4 sc in ch-4 space, sc in last 8 sts, turn. (36 sts)
Rows 11 through 14: Ch 1, sc in each st across, turn. (36 sts)
At this point, your bodice is a flat rectangle with armholes. Do not fasten off.
Joining the Bodice
Fold the bodice so the short edges meet. Sl st the back seam closed, working through both layers for about 6 stitches from the bottom. Leave the top open for the back opening where buttons or snaps will go later.
Skirt (worked in joined rounds)
Now we work the skirt directly onto the bottom edge of the bodice.
Change to bright yellow yarn:
Round 1: Working along the bottom edge of the bodice, sc evenly around, placing approximately 54 sc total. Join with sl st to first sc, turn. (54 sts)
Round 2: Ch 3 (counts as first dc), dc in same st, skip 2 sts, *shell in next st, skip 2 sts*, repeat from * around, ending with 3 dc in same st as beginning ch-3. Join to top of ch-3, turn. (18 shells)
Rounds 3 through 12: Ch 3, 2 dc in same space, *shell in center dc of next shell*, repeat around, join, turn.
The shell stitch creates that beautiful textured pattern you see in the photo. Keep your tension consistent for even shells throughout.
Round 13 (Border): Change to white yarn. Ch 1, working along the bottom edge, *sc in each of next 2 dc, 3 sc in center dc of shell (this creates the scallop point), sc in next 2 dc*, repeat around. Join and fasten off. (approximately 90 sts)
Puff Sleeves (make 2)
These sleeves are what really sell the Snow White look. We work them in the round and attach them to the armholes.
Using red yarn and 4.0 mm hook:
Round 1: Make a magic ring, ch 1, 6 sc into ring, pull tight, join. (6 sts)
Round 2: Ch 1, inc in each st around, join. (12 sts)
Round 3: Ch 1, *sc in next st, inc in next st*, repeat around, join. (18 sts)
Round 4: Ch 1, *sc in next 2 sts, inc in next st*, repeat around, join. (24 sts)
Rounds 5 through 8: Ch 1, sc in each st around, join. (24 sts)
Round 9: Ch 1, *sc in next 2 sts, dec*, repeat around, join. (18 sts)
Round 10: Sl st loosely in each st around. This creates a gathered puff effect. Fasten off, leaving a long tail for sewing.
Pin each sleeve into an armhole opening and whip stitch in place. The puff should face outward with the gathered edge at the armhole.
Peter Pan Collar
This sweet collar frames the neckline beautifully.
Using white yarn and 3.5 mm hook:
Row 1: Ch 31, sc in 2nd ch from hook and in each ch across, turn. (30 sts)
Row 2: Ch 1, inc in first st, sc in next 13 sts, inc in each of next 2 sts (center front), sc in next 13 sts, inc in last st, turn. (34 sts)
Row 3: Ch 3, dc in same st, *skip 1 st, shell in next st*, repeat across, ending with 3 dc in last st. Fasten off.
Attach the straight edge of the collar to the neckline of the bodice, centering it at the front.
Heart Pockets (make 2)
These tiny hearts add so much charm.
Using red yarn and 3.5 mm hook:
Work into a magic ring: Ch 3, 3 dc, ch 1, 3 dc, ch 2, sl st to close the ring. This creates the top bumps of the heart.
Ch 1, turn, working down one side: 3 dc in ch-1 space, sl st in center, 3 dc in other ch-1 space, 3 dc down to point, ch 1, 3 dc up other side. Fasten off.
Pocket Backing (make 2)
Using royal blue yarn:
Row 1: Ch 8, sc in 2nd ch from hook and across, turn. (7 sts)
Rows 2 through 6: Ch 1, sc in each st across, turn. (7 sts)
Fasten off. Sew heart to pocket piece, then sew pocket to dress front at waist level.
Headband Pattern
Using royal blue yarn and 4.0 mm hook:
Row 1: Ch 6, sc in 2nd ch from hook and across, turn. (5 sts)
Rows 2 through 50: Ch 1, sc in each st across, turn. (5 sts)
Measure around baby’s head and adjust length as needed. Sew short ends together to form a loop.
Bow for Headband
Using red yarn:
Center piece: Ch 12, sc in 2nd ch from hook and across for 6 rows. (11 sts)
Wrap the center tightly with a small strip of matching yarn to create the bow shape. Sew securely to headband.
Booties Pattern (make 2)
Using royal blue yarn and 4.0 mm hook:
Sole:
Round 1: Ch 9, sc in 2nd ch from hook, sc in next 6 ch, 3 sc in last ch. Working along opposite side: sc in next 6 ch, 2 sc in last ch. Join. (18 sts)
Round 2: Inc in first st, sc in next 6 sts, inc in each of next 3 sts, sc in next 6 sts, inc in each of last 2 sts. Join. (24 sts)
Rounds 3 through 5: Sc in each st around. Join. (24 sts)
Round 6 (Toe shaping): Sc in next 8 sts, dec 4 times, sc in remaining sts. Join. (20 sts)
Round 7: Change to yellow yarn. Sl st loosely in each st around for decorative trim. Fasten off.
Add a small red bow to each bootie.
Finishing Your Snow White Baby Dress Set
Weave in all your ends. I always weave in at least two directions to keep everything secure through washing.
Thread the red satin ribbon through the stitches at the natural waistline where the blue bodice meets the yellow skirt. Tie in a bow at center front. Attach the small ribbon bow to the center of the collar.
Block lightly if needed. For acrylic yarn, steam blocking works best. Do not press directly on the yarn with a hot iron.
Care Instructions
Machine wash cold on gentle cycle. Tumble dry low or lay flat to dry. The ribbon embellishments may need to be replaced after many washes, so consider making extras.
Size Adjustments
This pattern fits 0 to 6 months. For a larger size, add rows to the bodice before the armhole shaping and add more rounds to the skirt. Increase the sleeve rounds proportionally.
Final Thoughts on This Snow White Baby Dress Set Crochet Pattern
I hope you have as much fun making this Snow White Baby Dress Set as I did designing it. The reaction you will get when you gift this to new parents is absolutely priceless. Every stitch shows your love and care.
This complete step by step crochet pattern gives you everything you need to create a stunning heirloom quality outfit. Whether you are making it for a costume, photo shoot, or just because that little one deserves something magical, this set delivers.
Thank you so much for choosing this pattern. I genuinely appreciate you being here and trusting me to guide you through this project. If you make this dress set, I would absolutely love to see your finished work. Tag me on Instagram or share in my Facebook group. Seeing your creations is honestly the best part of sharing these designs.
If you loved this pattern, go ahead and pin it to your favorite Pinterest board so you can find it when you are ready to start. And please drop a comment below when you finish your set. I read every single one and it truly makes my day to hear from you.
