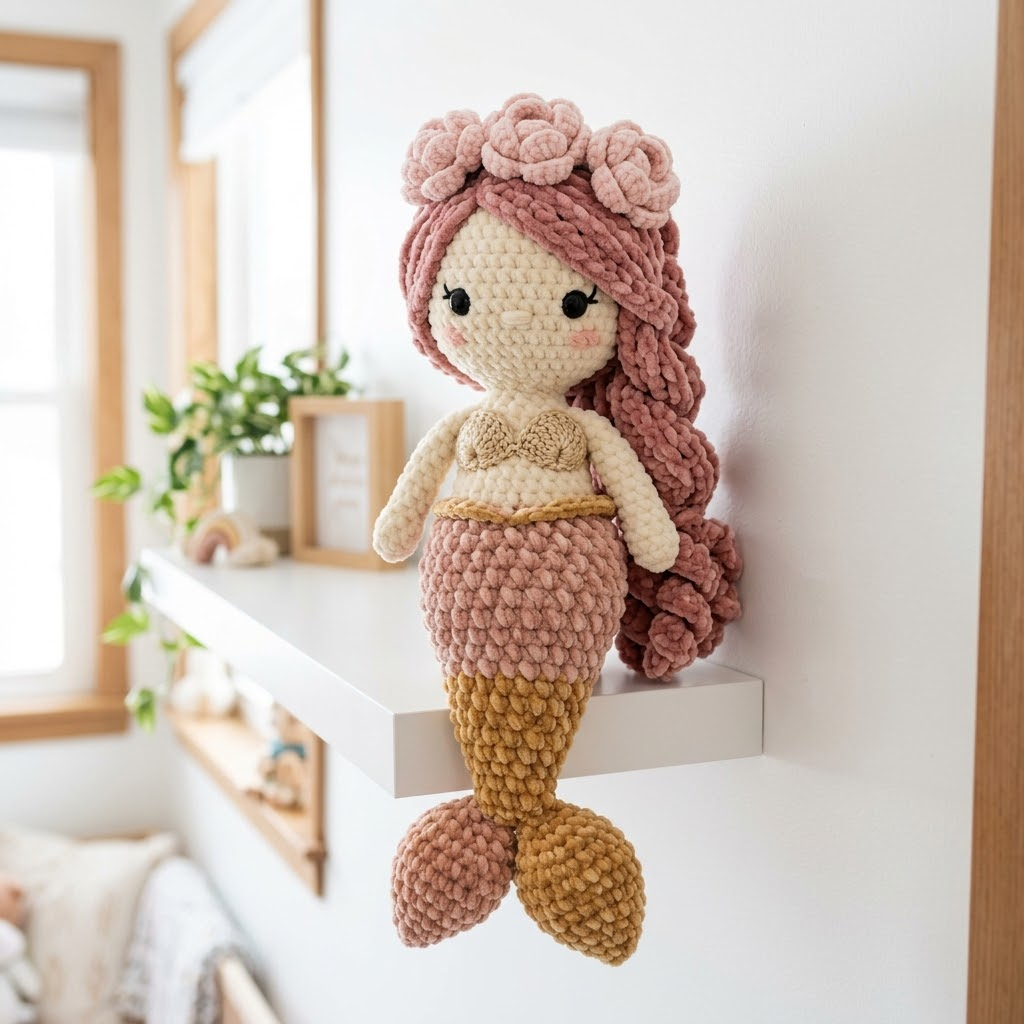
She’s whimsical. She’s cuddly. And she’s about to become the centerpiece of any little one’s room. This rose gold mermaid crochet doll stands approximately 18 inches tall and features the most gorgeous textured details—from her flowing wavy hair crowned with crocheted roses to her ombré tail that gradients from dusty pink to golden bronze.
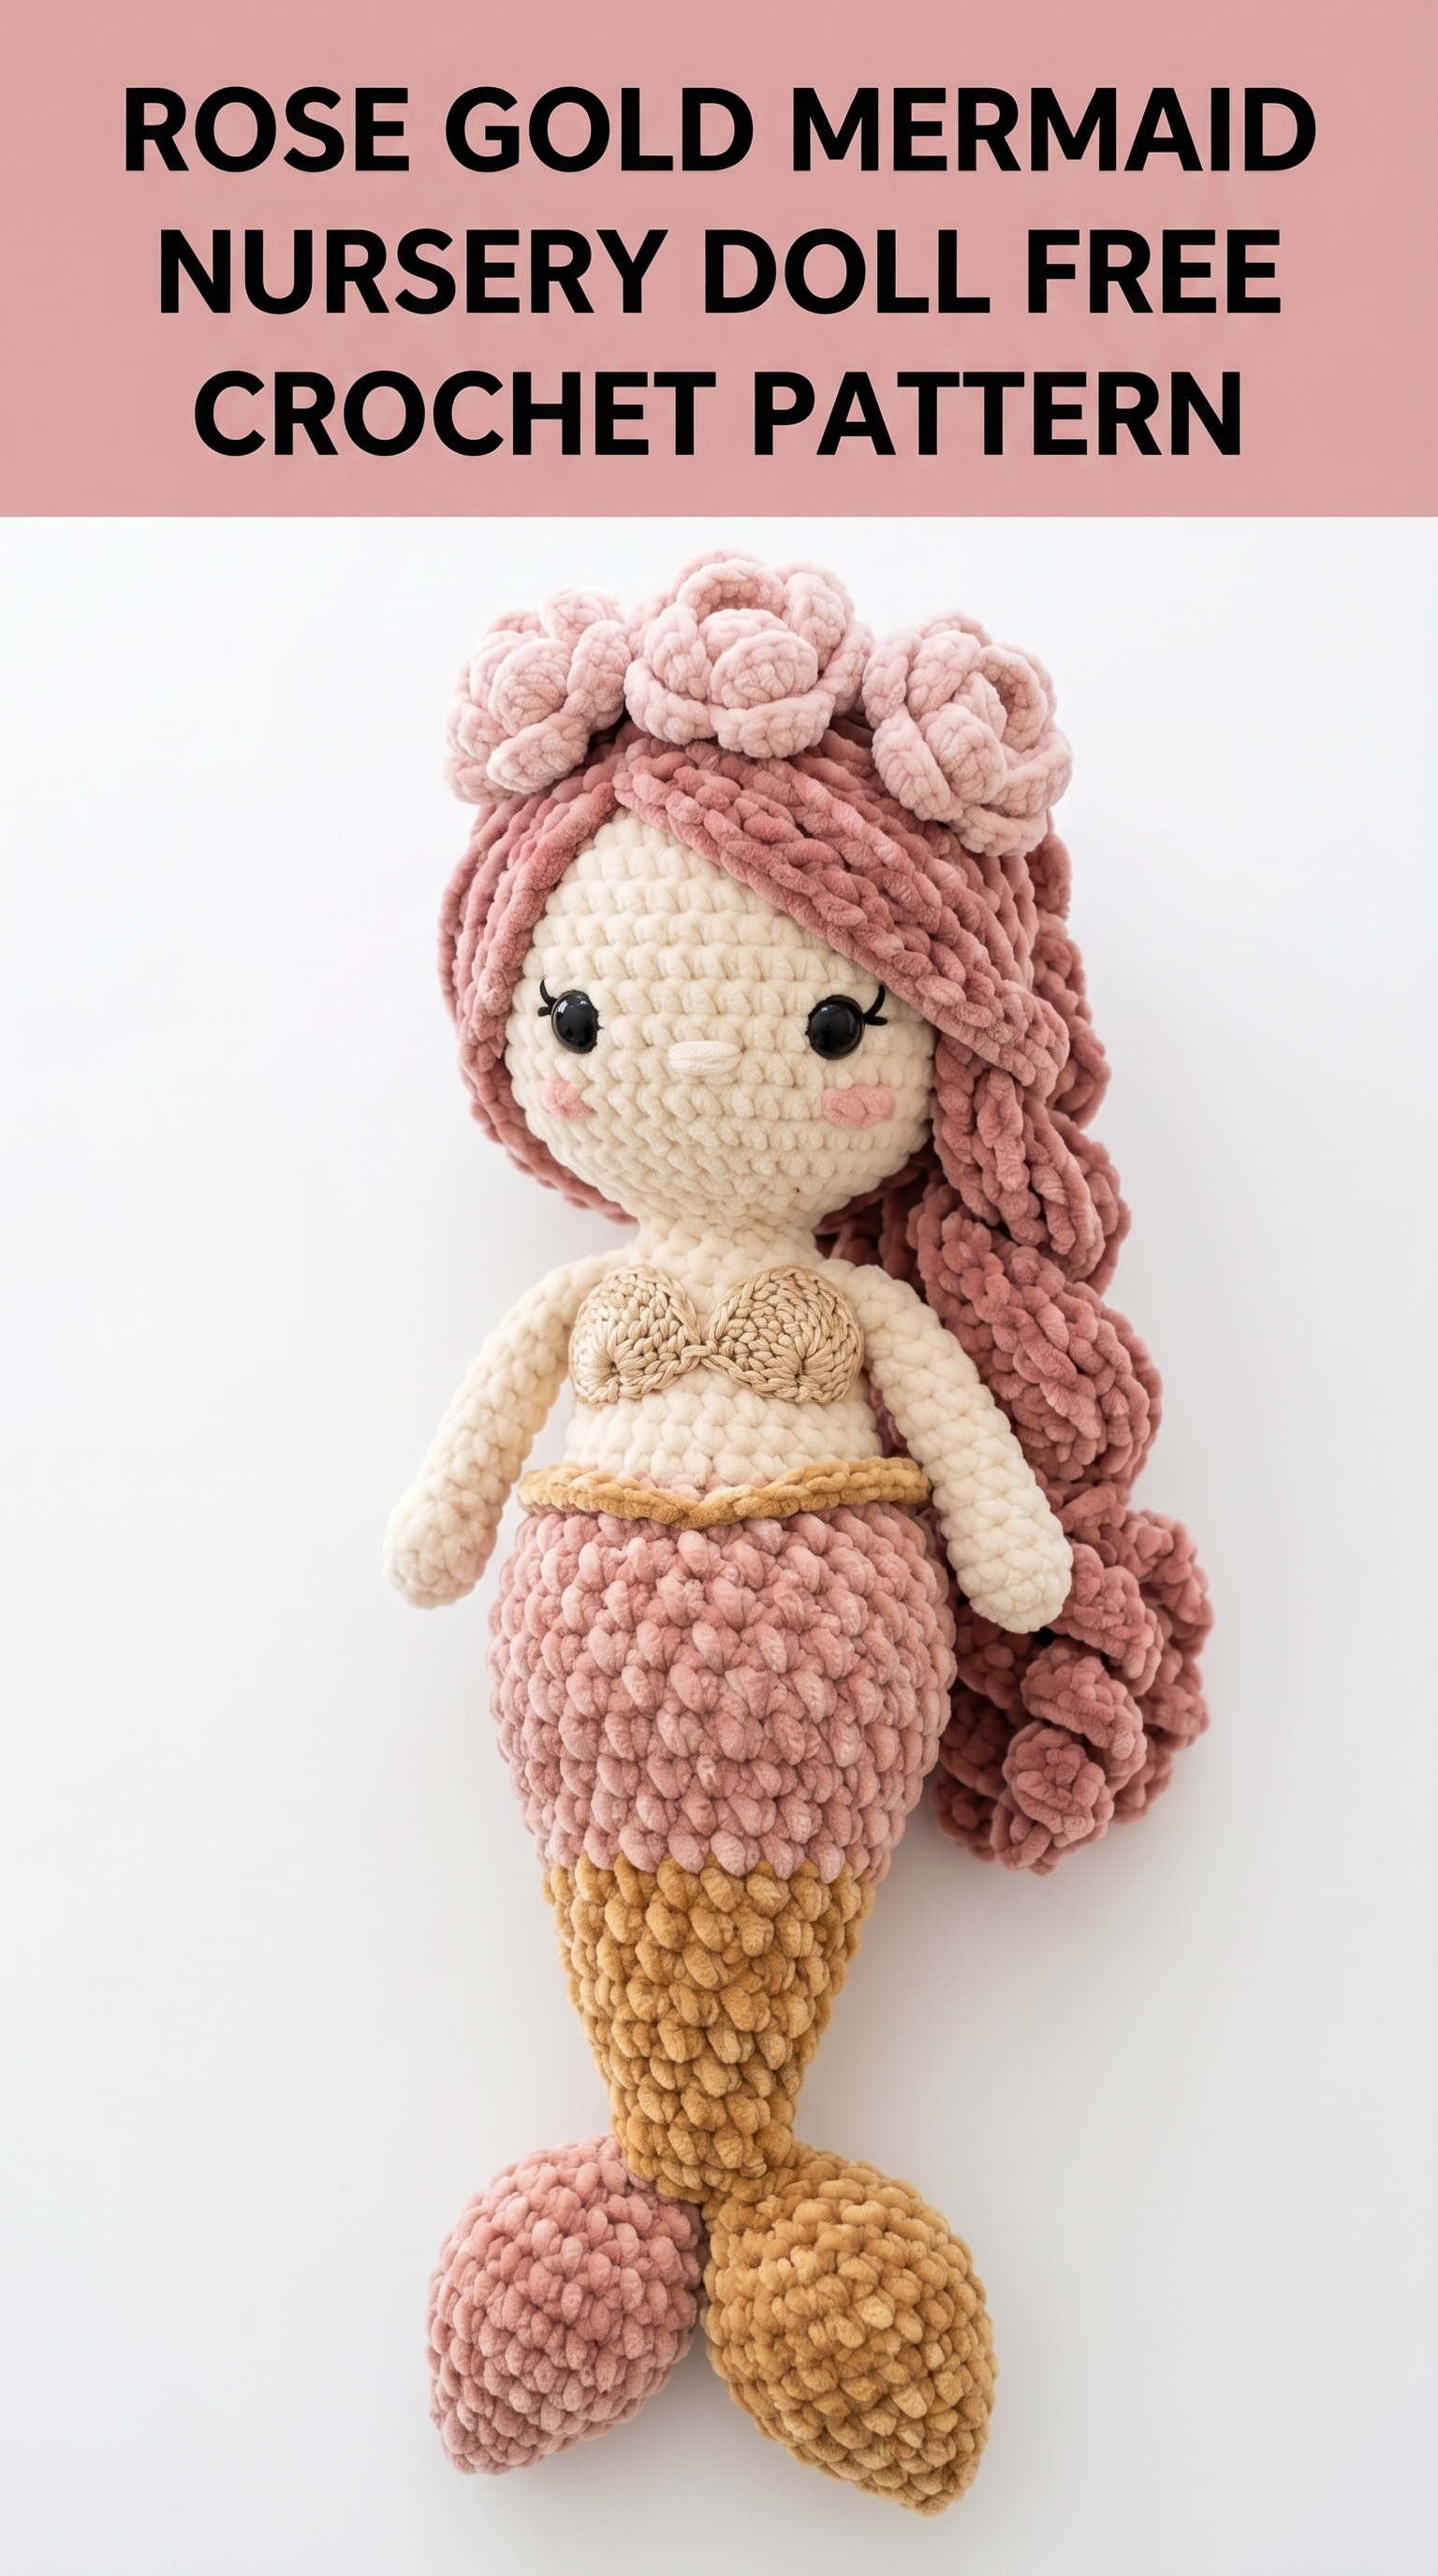
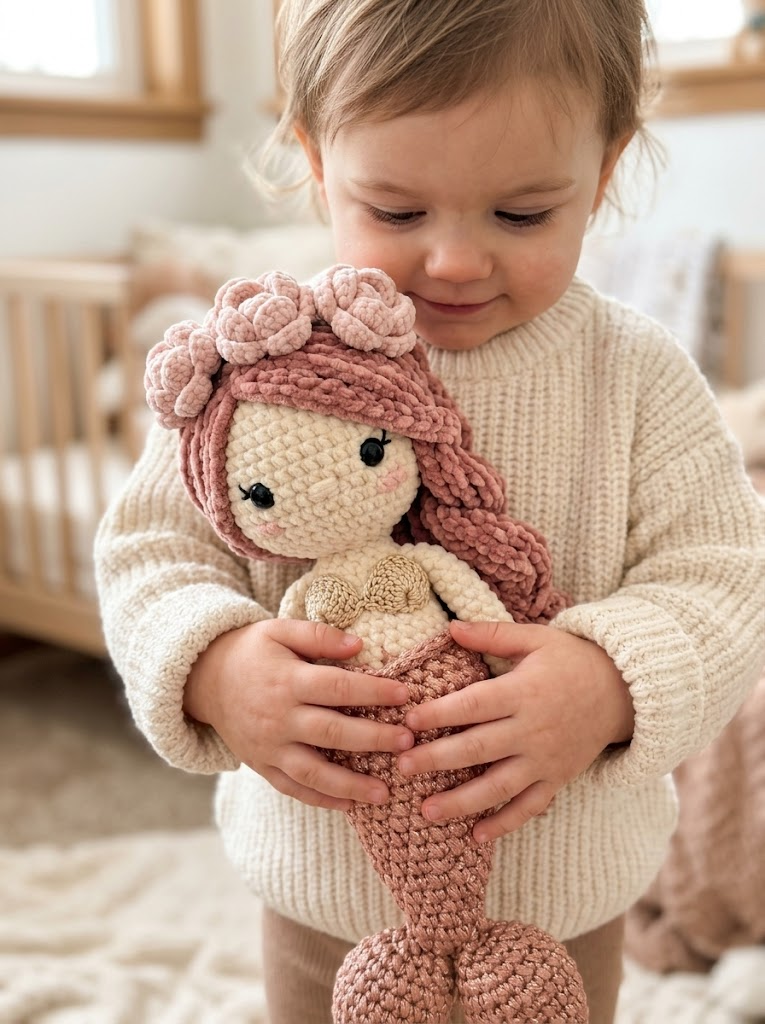
I designed this mermaid doll crochet pattern specifically for nursery decor, but honestly? She’s equally at home on a bookshelf, gifted at a baby shower, or treasured by a mermaid-obsessed kiddo of any age. The chunky yarn makes her quick to work up (we’re talking days, not weeks), and the construction is simpler than she looks. Promise.
If you can crochet in the round and know your basic stitches, you can absolutely make this doll. I’ll walk you through every piece step by step.
Why This Mermaid Doll Pattern Works So Well
Let me tell you what makes this particular design special. The plush chenille-style yarn (often called velvet yarn) creates that incredibly soft, squishy texture you see in the photo. It hides stitch imperfections beautifully—a huge win for anyone nervous about amigurumi.
The color palette feels modern and neutral while still being unmistakably mermaid. That dusty rose hair paired with cream skin and a warm bronze-to-gold ombré tail? Chef’s kiss. It fits right into those boho nursery aesthetics everyone loves right now.
Construction happens in pieces. You’ll crochet the head, body, tail, two tail fins, two arms, the bikini top, hair pieces, and rose embellishments separately. Then you’ll assemble everything. This approach means no tricky color changes mid-round and plenty of stopping points if you need to step away.
Materials You’ll Need
Yarn:
I used a super bulky weight (6) chenille yarn for the main doll. Brands like Bernat Blanket, Loops & Threads Chunky Chenille, or similar work perfectly.
Hook:
Notions:
Abbreviations and Stitch Definitions
Let me define every stitch before we begin. I’ll use these abbreviations throughout the pattern.
Magic ring (MR): An adjustable starting loop that closes completely with no hole. You wrap yarn around your fingers, pull up a loop, then work your first round of stitches into that ring. Tug the tail to close it tight.
Chain (ch): The foundation stitch. Yarn over, pull through the loop on your hook. That’s one chain.
Single crochet (sc): Insert hook into stitch, yarn over, pull up a loop (two loops on hook), yarn over, pull through both loops. One stitch completed.
Increase (inc): Work two single crochet stitches into the same stitch. This adds one stitch to your count.
Invisible decrease (dec): Insert hook through front loops only of the next two stitches, yarn over, pull through both front loops, yarn over, pull through both loops on hook. This creates a neater decrease than the standard method.
Slip stitch (sl st): Insert hook, yarn over, pull through stitch AND loop on hook in one motion. Used for joining and finishing.
Front loop only (FLO): Work into just the loop closest to you, leaving the back loop untouched.
Back loop only (BLO): Work into just the loop farthest from you.
Gauge Note
With chenille yarn and a 5.0mm hook, you should get approximately 4 single crochet stitches and 4 rows per inch. But here’s the thing—exact gauge matters less for amigurumi than for garments. What matters most is that your fabric is tight enough that stuffing won’t peek through. If you see gaps, go down a hook size.
The Pattern: Step by Step
Head
Work in continuous rounds. Use a stitch marker to track your first stitch.
Round 1: MR, 6 sc into ring. Pull tail to close. (6 sts)
Round 2: Inc in each st around. (12 sts)
Round 3: *Sc 1, inc* repeat around. (18 sts)
Round 4: *Sc 2, inc* repeat around. (24 sts)
Round 5: *Sc 3, inc* repeat around. (30 sts)
Round 6: *Sc 4, inc* repeat around. (36 sts)
Round 7: *Sc 5, inc* repeat around. (42 sts)
Rounds 8-15: Sc in each st around. (42 sts) — 8 rounds total
Insert safety eyes between rounds 10 and 11, approximately 8 stitches apart. Make sure they’re secure before continuing.
Round 16: *Sc 5, dec* repeat around. (36 sts)
Round 17: *Sc 4, dec* repeat around. (30 sts)
Round 18: *Sc 3, dec* repeat around. (24 sts)
Begin stuffing the head firmly now. You want a nice round shape.
Round 19: *Sc 2, dec* repeat around. (18 sts)
Round 20: *Sc 1, dec* repeat around. (12 sts)
Continue stuffing as needed. Sl st to close. Leave a long tail for sewing to body.
Body (Torso)
Start with cream yarn.
Round 1: MR, 6 sc into ring. (6 sts)
Round 2: Inc in each st around. (12 sts)
Round 3: *Sc 1, inc* repeat around. (18 sts)
Round 4: *Sc 2, inc* repeat around. (24 sts)
Rounds 5-12: Sc in each st around. (24 sts) — 8 rounds total
Round 13: *Sc 2, dec* repeat around. (18 sts)
Round 14: Sc in each st around. (18 sts)
Stuff body. Leave open for attaching to tail. Fasten off with long tail.
Tail (Upper Section – Dusty Pink)
Round 1: MR, 6 sc into ring. (6 sts)
Round 2: Inc in each st around. (12 sts)
Round 3: *Sc 1, inc* repeat around. (18 sts)
Rounds 4-8: Sc in each st around. (18 sts) — 5 rounds
Change to bronze yarn.
Tail (Lower Section – Bronze/Gold)
Continue from upper section.
Rounds 9-20: Sc in each st around. (18 sts) — 12 rounds
Round 21: *Sc 1, dec* repeat around. (12 sts)
Rounds 22-24: Sc in each st around. (12 sts) — 3 rounds
Round 25: *Sc 2, dec* repeat around. (9 sts)
Rounds 26-28: Sc in each st around. (9 sts) — 3 rounds
Stuff tail as you go. The narrower section should be stuffed less firmly for flexibility.
Sl st, fasten off. Leave tail for assembly.
Tail Fins (Make 2)
Using bronze yarn.
Round 1: MR, 6 sc into ring. (6 sts)
Round 2: Inc in each st around. (12 sts)
Round 3: *Sc 1, inc* repeat around. (18 sts)
Rounds 4-6: Sc in each st around. (18 sts) — 3 rounds
Round 7: *Sc 1, dec* repeat around. (12 sts)
Round 8: Dec around. (6 sts)
Stuff lightly. Fasten off, leaving long tail. These get sewn to the bottom of the tail in a V shape.
Arms (Make 2)
Using cream yarn.
Round 1: MR, 6 sc into ring. (6 sts)
Round 2: Inc in each st around. (12 sts)
Rounds 3-14: Sc in each st around. (12 sts) — 12 rounds
Do not stuff arms, or stuff very lightly at the hand end only. This keeps them floppy and poseable.
Flatten opening, sl st across to close. Leave tail for sewing.
Bikini Top Cups (Make 2)
Switch to 4.0mm hook and tan worsted weight yarn.
Round 1: MR, 6 sc into ring. (6 sts)
Round 2: Inc in each st around. (12 sts)
Round 3: *Sc 1, inc* repeat around. (18 sts)
Sl st, fasten off. Leave tail for sewing.
For the strap, ch 40. Fasten off. This wraps around the back and ties.
Hair Base and Strands
This is where the magic happens. The hair uses a combination of techniques.
For the wavy strands: Cut approximately 30-40 lengths of dusty rose yarn, each about 24 inches long. Using a crochet hook, pull strands through stitches around the hairline of the head (rounds 2-6, focusing on the sides and back). Each strand gets folded in half when attached.
To create waves, you have two options:
1. Twist strands together in pairs and let them naturally coil
2. Chain 30-40 stitches, then work 2-3 sc in each chain to create a spiraling curl effect
For the rose crown: See rose embellishment section below.
Rose Embellishments (Make 5-6)
Using light mauve yarn.
Chain 25.
Row 1: Starting in 2nd ch from hook, work 3 dc in each ch across. (72 dc total)
This creates a long spiral strip. Roll it up tightly, starting from one end, and secure with yarn needle and matching thread at the base. The double crochets naturally curl into a rose shape.
Sew roses across the top of the head like a crown.
Assembly Instructions
Now for the satisfying part—putting her together.
1. Attach head to body: Use the long tail from the head. Position the head on top of the body (the neck opening). Whip stitch around twice for security.
2. Attach body to tail: The body’s open bottom connects to the top of the tail. Stitch firmly all around.
3. Sew on arms: Position arms at the sides of the upper body, about round 2-3 of the body section. Attach at the flattened edge.
4. Attach tail fins: Position both fins at the bottom of the tail in a V formation. The fins should angle outward slightly.
5. Add bikini top: Sew the two cups to the chest area, centered and slightly apart. Wrap the chain strap around the back and tie off, or stitch it in place.
6. Style and attach hair: Arrange the strands to frame the face. Sew down a center part if desired. Attach the rose crown across the top.
7. Embroider face details: Using pink embroidery floss, create a small curved line for the mouth (a simple smile or tiny V shape). If desired, use pink chalk or blush on the cheeks for extra sweetness.
Tips for Success
Working with chenille yarn: This yarn can be slippery and hard to see your stitches. Go slowly. Use a stitch marker religiously. Good lighting helps immensely.
Stuffing evenly: Add small amounts of fiberfill at a time. Poke it into corners with the back of your hook or a chopstick.
Making her sit: The tail’s weight helps the doll sit on shelves. Make sure the tail/body connection is sturdy.
Customization Ideas
Want to make her your own? Try these variations:
You Did It
This mermaid crochet pattern creates something truly special—a handmade keepsake that will be treasured for years. Whether she ends up watching over a sleeping baby, decorating a bookshelf, or becoming a beloved toy, you made her with your own hands. That’s pretty amazing.
Thank you so much for choosing this pattern. I genuinely hope you enjoyed making her.
If you complete your mermaid doll, I would absolutely love to see her. Tag me on Instagram or share in my Facebook group—nothing makes my day like seeing your finished projects. You inspire me more than you know.
Happy crocheting, friend.
