This pattern is SUPER QUICK to fall in love with and even easier to make than it looks! If you have been wanting to try granny squares but felt intimidated, this daisy tote is honestly one of the most satisfying projects you will ever hook up. Each square takes maybe 20 minutes once you get the rhythm down, and before you know it, you have got 18 cheerful daisies ready to become your new favorite bag. Perfect for gift giving, market trips, or just showing off your skills!
Get the Ad-Free PDF Pattern
You can find the free pattern below, or you can purchase the ad-free printable PDF from my shop.
Get the Printable PDF →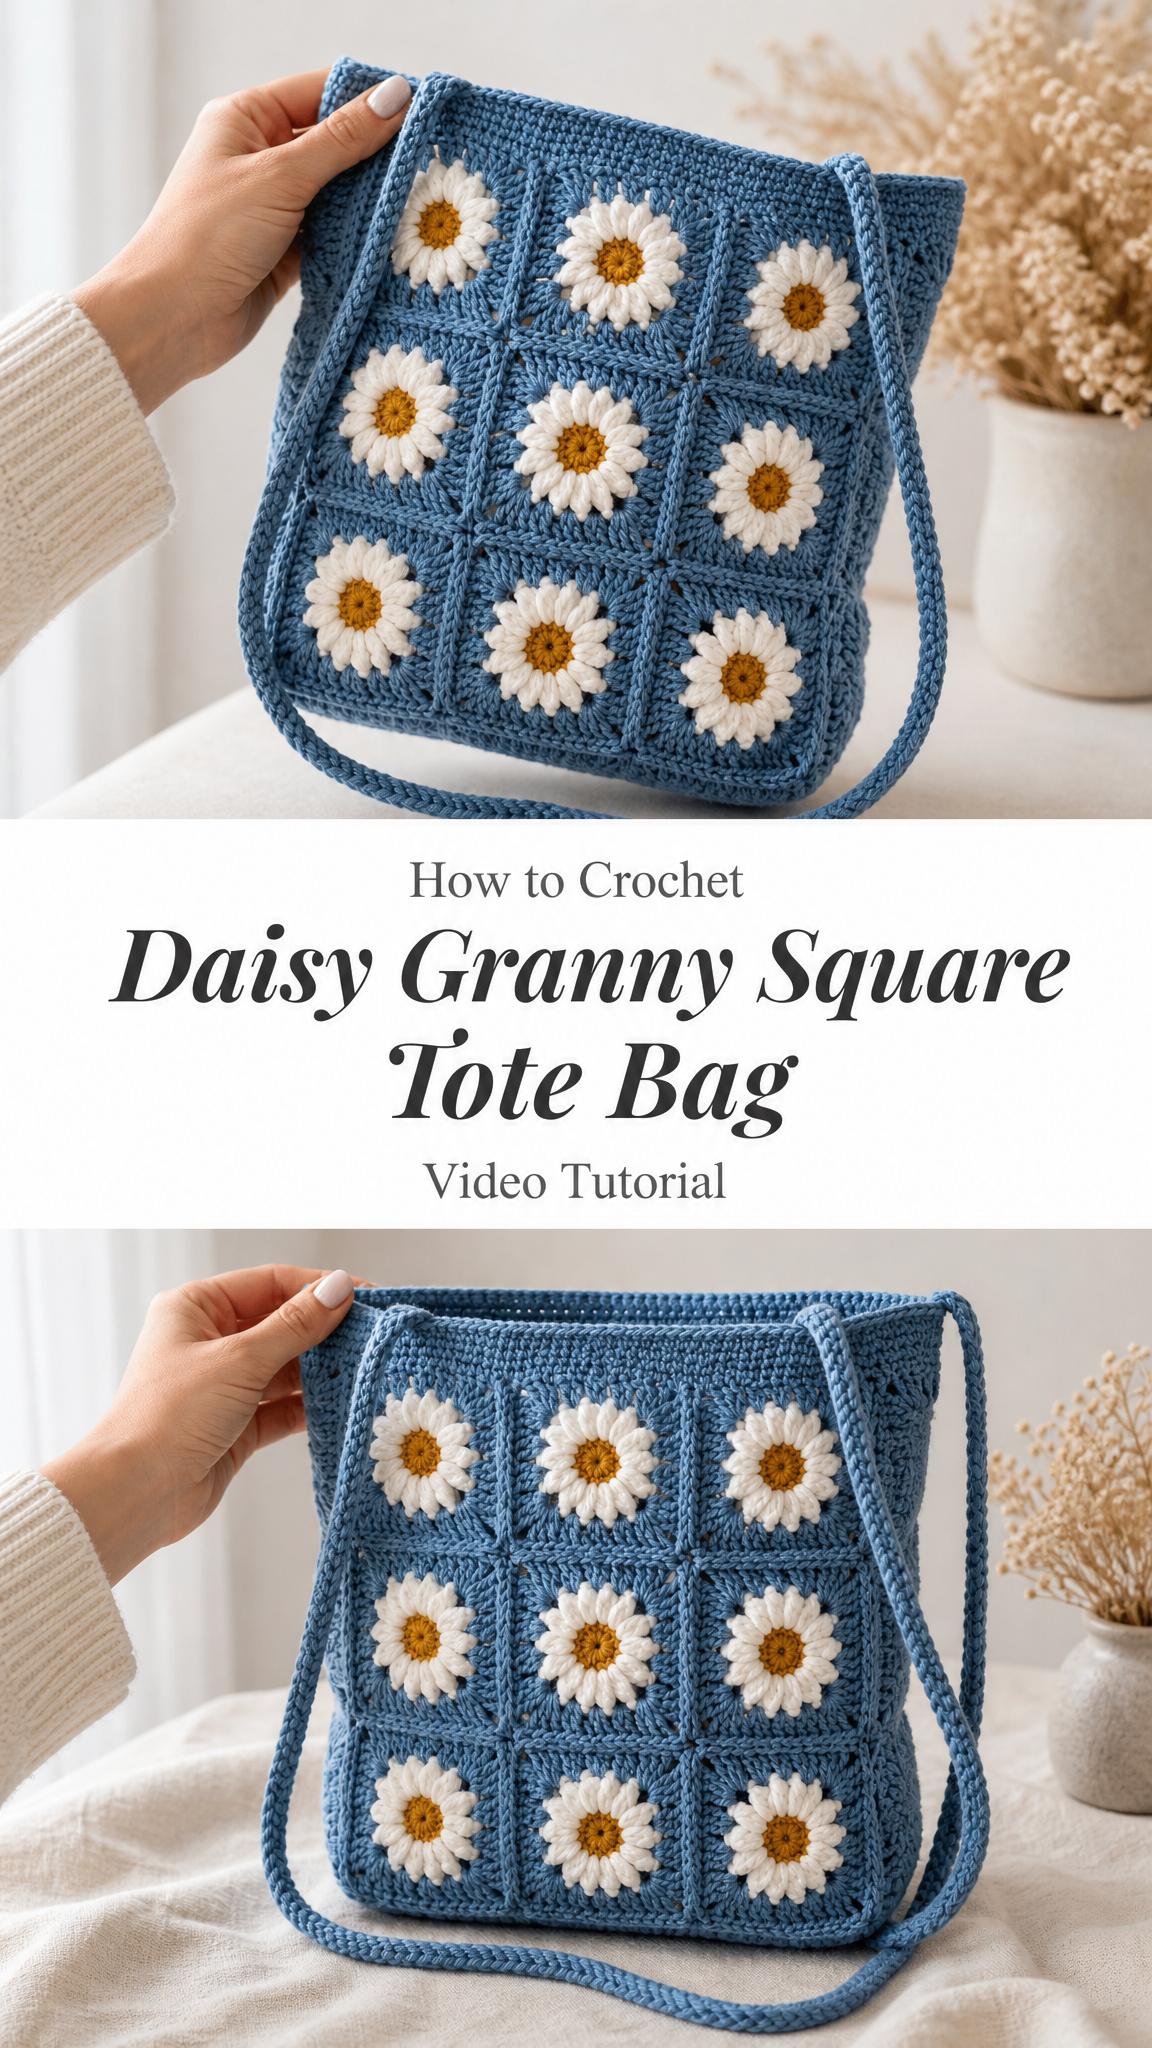
Why You Will Love This Daisy Granny Square Tote
This sunny shoulder tote combines the classic charm of granny squares with sweet dimensional daisies that pop right off the fabric. The pattern uses worsted weight cotton yarn, which gives the bag beautiful structure and makes those crisp white petals really stand out against the blue background.
What makes this project so enjoyable is the rhythm of it. You will make one square, then another, and suddenly you are halfway done. The repetition is meditative rather than boring, and each finished square feels like a small victory.
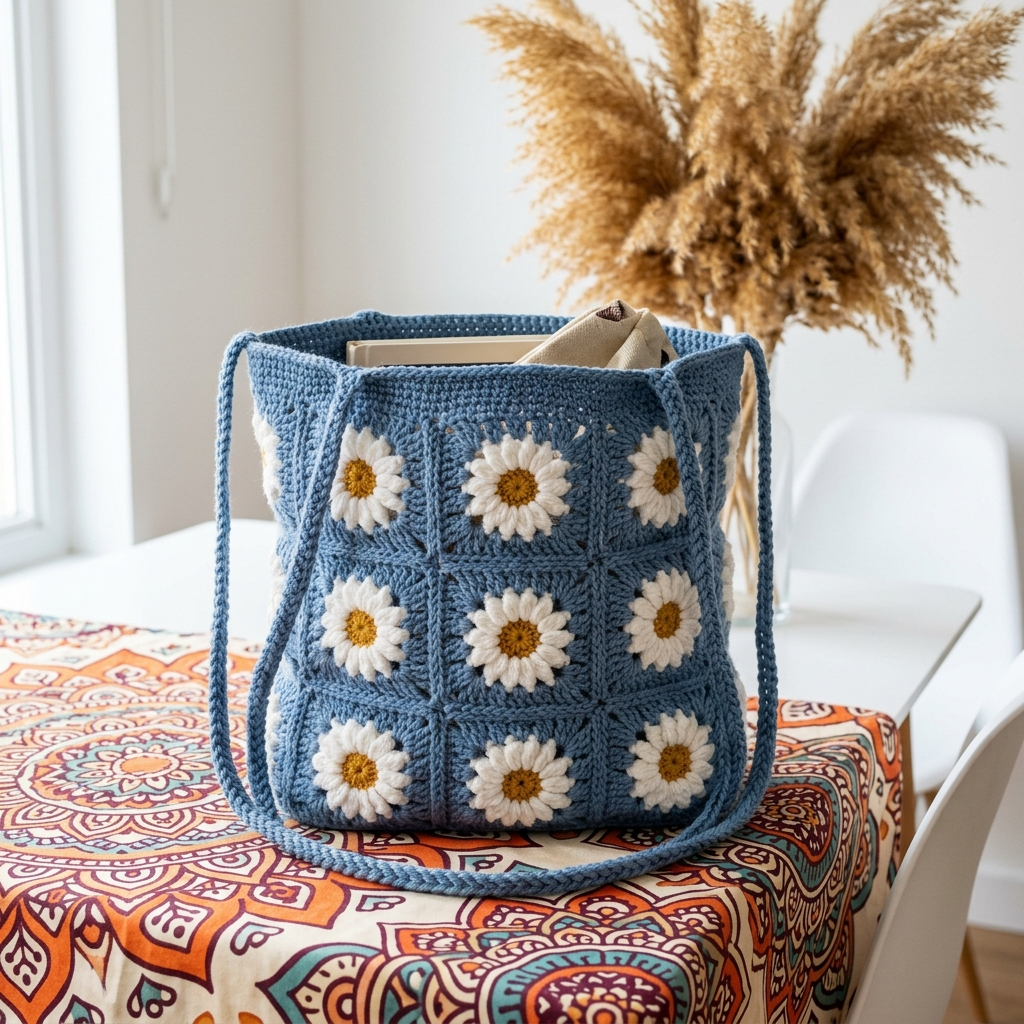
The finished bag measures approximately 36 cm wide by 38 cm tall (about 14 by 15 inches), which is the perfect size for farmers market finds, library books, or a sunny day out. The i-cord straps are adjustable, so you can make them shoulder length or crossbody style depending on your preference.
Materials You Will Need
Before you start, gather these supplies:
Yarn:
Tools:
Gauge: 15 single crochet (sc) stitches by 16 rows equals 4 inches by 4 inches (10 cm by 10 cm). Gauge is not critical for this pattern since it mostly affects the final bag size. Work a quick swatch if you want a specific size.
Yarn Recommendations
Any smooth worsted or aran weight cotton will work beautifully for this project. Here are some reliable options:
Lily Sugar’n Cream is 100% cotton, budget friendly, widely available, and excellent for bags that need body.
Paintbox Yarns Cotton Aran offers a huge solid color range with smooth stitch definition and great value for the main color.
DROPS Paris is an aran weight cotton that is soft yet sturdy, giving crisp even squares.
A quick tip: buy all of one dye lot for the blue since it is the most visible color and any variation will show.
Abbreviations and Special Stitches
Let me walk you through the abbreviations you will see throughout this pattern:
Special Stitches Explained
Magic Ring: Loop the yarn around two fingers, work the first round into the loop, then pull the tail to close the center tightly. This creates a closed center with no hole. If you have never done a magic ring before, do not worry! You can substitute by chaining 4 and joining with a slip stitch to form a ring.
Petal (worked on Round 2): Chain 4, slip stitch in the 2nd chain from hook, single crochet in the next chain, half double crochet in the last chain. This little stem forms one raised white petal that gives the daisy its dimensional look.
Corner: Work (sc, ch 2, sc) all in the same stitch or space to turn a 90 degree corner.
Before You Begin
Here are some helpful notes to set you up for success:
For left-handed crocheters: Work every round in the opposite direction (clockwise). The pattern and charts read identically when mirrored. Stitch counts never change.
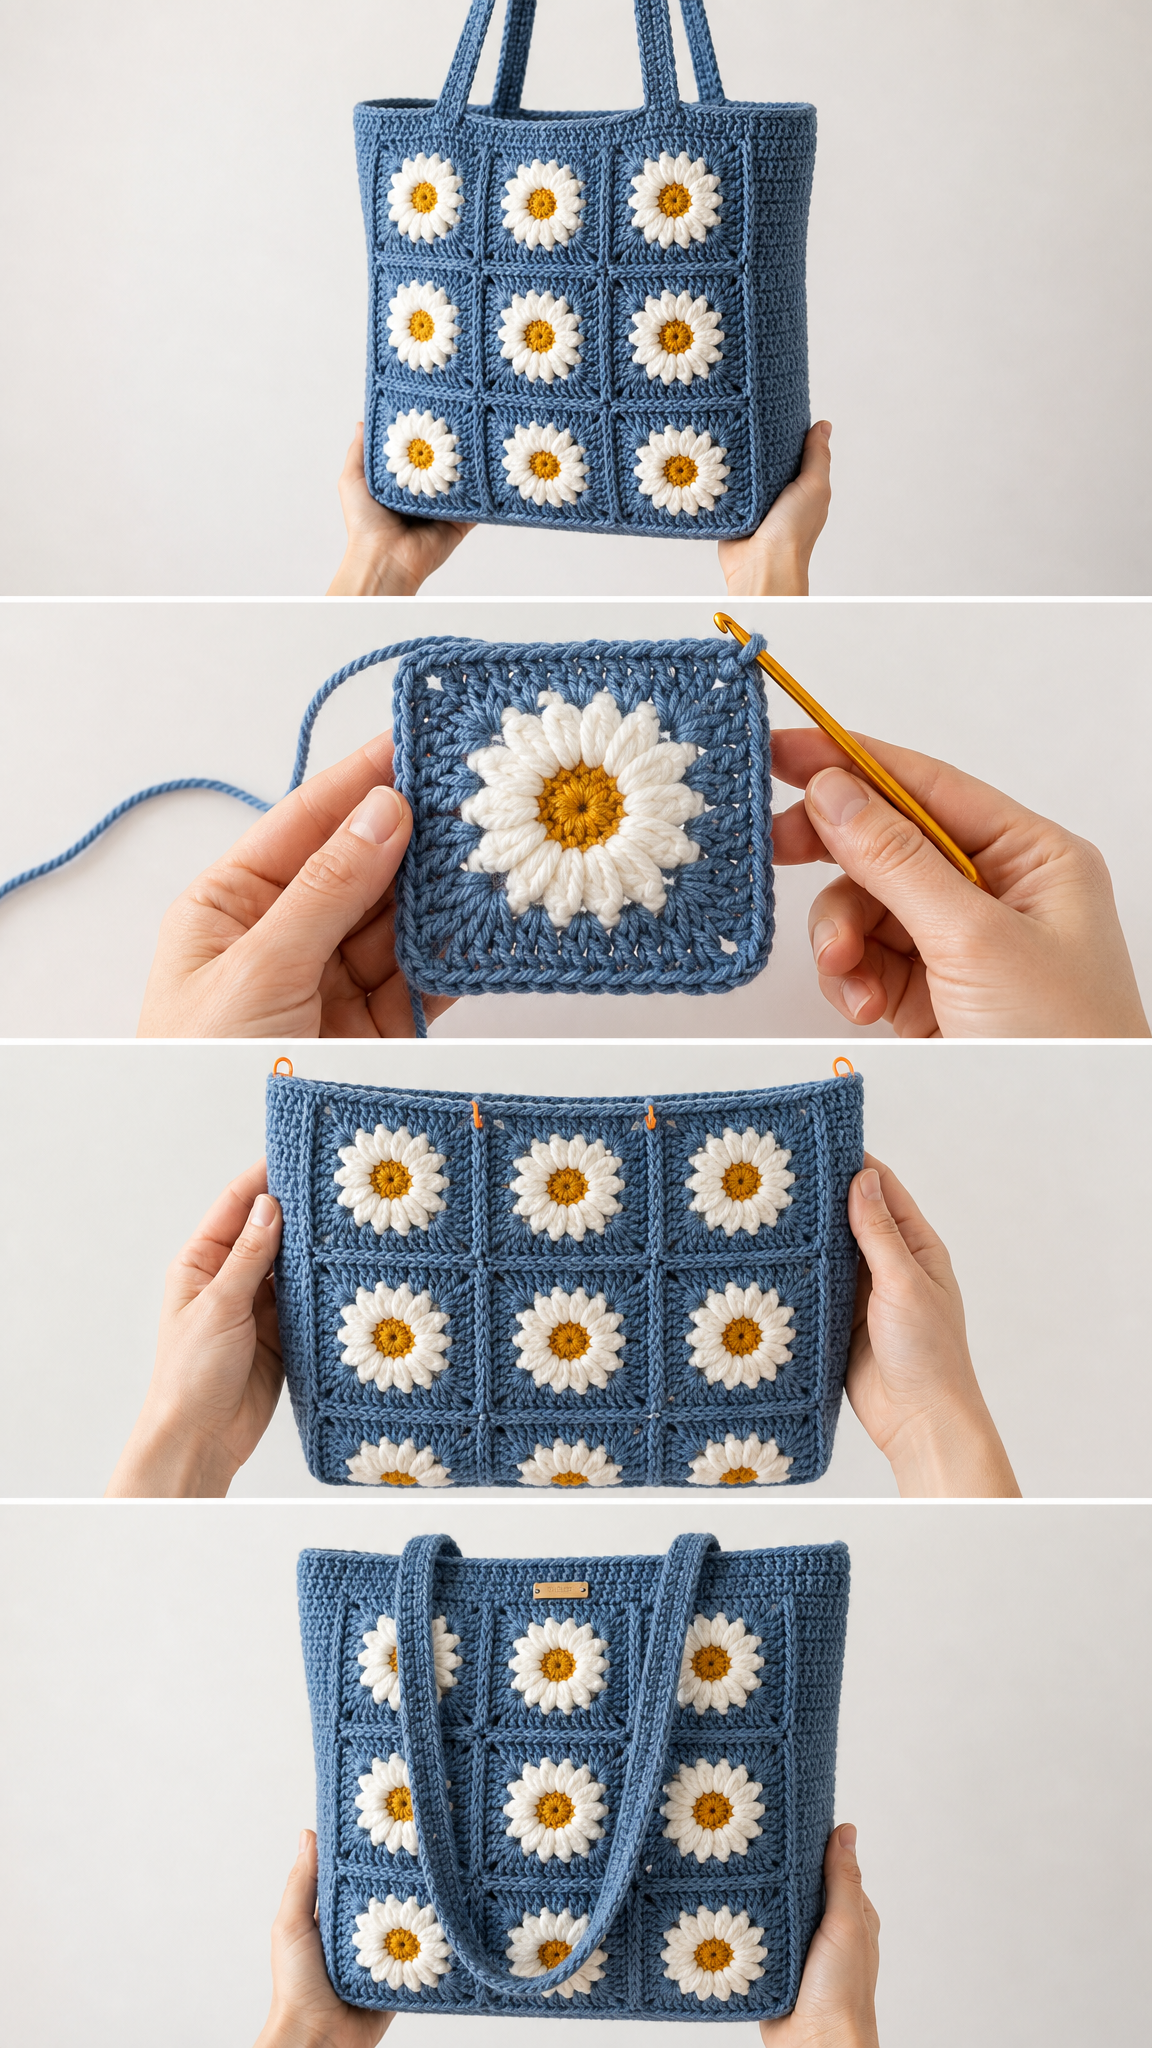
The Daisy Square Pattern
You will make 18 squares total, which is 9 for the front panel and 9 for the back panel. Each square measures approximately 10 to 12 cm (4 to 4.7 inches).
Round 1: The Center (Mustard)
Make a magic ring.
Chain 3 (this counts as your first double crochet), then work 11 double crochet into the ring.
Join with a slip stitch to the top of the beginning chain 3.
Pull the magic ring closed tightly.
You will have 12 dc.
Fasten off the mustard yarn and weave in the end.
Round 2: The Petals (White)
Join white yarn with a slip stitch in any double crochet from Round 1.
Now you will work a petal in each stitch around:
*Make a petal: chain 4, slip stitch in the 2nd chain from hook, single crochet in the next chain, half double crochet in the last chain. Then slip stitch in the next double crochet of Round 1.*
Repeat from * around the entire round, making one petal in each double crochet.
You will have 12 petals.
Join and fasten off white yarn.
Round 3: The Frame Begins (Blue)
This is where you build the blue frame behind the petals, turning the flower into a tidy square. Gently fold the petals forward so you can see the Round 1 gaps between them.
With petals facing you, join blue yarn with a slip stitch in any gap between two petals (these are the Round 1 spaces). There are 12 gaps total. You will treat every 3rd gap as a corner.
Chain 1. In the same (corner) gap, work: (sc, ch 2, sc).
*Single crochet in the next 2 gaps. Then work (sc, ch 2, sc) in the next gap for the corner.*
Repeat from * two more times, then single crochet in the last 2 gaps.
Join to the first single crochet.
You will have 4 corners.
Round 4: Completing the Square (Blue)
Chain 1.
Single crochet in each single crochet around, working (sc, ch 2, sc) in each chain 2 corner space.
Join with a slip stitch.
Fasten off, leaving a tail of approximately 30 cm (12 inches) for joining.
You now have a neat square!
Repeat this entire process to make all 18 squares.
Assembly and Layout
Once all your squares are complete, arrange them into two 3 by 3 panels, one for the front of the bag and one for the back. Take some time to play with the placement so the daisies feel balanced before you start joining.
Joining the Squares
Join the squares of each panel together first, then set the two finished panels aside.
Hold two squares with wrong sides together (this creates a visible ridge on the outside, which looks lovely) or right sides together (for a flat seam on the outside).
Using a blue tail and your yarn needle, whip stitch through the back loops across the edge. Match stitch for stitch to keep everything aligned.
Alternatively, you can use a single crochet join if you prefer that method. Use whichever technique you like best!
Complete joining for all squares in both panels.
Building the Bag
Step 1: Join the Panels
Place the front and back panels with wrong sides together.
Seam the two side edges and the bottom edge, leaving the top open. Use the same whip stitch or single crochet join you used for the squares.
Step 2: Box the Corners (Optional)
For a flat bottomed tote that stands up nicely, fold each bottom corner into a small triangle and stitch a 3 to 4 cm seam across it. This gives the bag a little depth and helps it hold its shape when you set it down.
Step 3: Top Edge
Join blue yarn at a side seam.
Work 2 rounds of single crochet evenly around the entire opening, keeping the count consistent so the rim lies flat.
Join and fasten off after Round 2, but read the strap instructions before completing your final round so you can attach the straps properly.
Optional structured base: For a firmer bottom, crochet a flat blue circle using single crochet in continuous rounds to match your bag’s base size and stitch it inside. You can also drop in a cut to size plastic canvas insert.
Straps and Finishing
I-Cord Strap (Make 2)
Chain 3. Slip stitch in the 2nd chain from hook. Do not turn.
Continue as a slip stitch i-cord: insert the hook under the left vertical loop of the previous stitches and slip stitch, working in the round to form a narrow cord.
Repeat until the strap reaches your chosen length:
Easy alternative: Make a tight long chain and double it, or crochet a narrow single crochet strip and fold it lengthwise, then seam it closed.
Step 4: Attach Straps
Pin one strap end inside each side of the opening, about 6 to 8 cm in from each seam.
Stitch securely, then work your final round of single crochet to lock them in place.
Repeat for the second strap.
Step 5: Lining (Optional)
Cut fabric to the flattened bag size plus approximately 1.5 cm seam allowance.
Sew the fabric into a pouch shape.
Fold the top edge under and hand stitch it just below the rim inside the bag.
A lining hides your woven ends, adds strength, and stops small items from slipping through the stitches.
Step 6: Finish
Weave in all remaining ends.
Gently steam or block the bag to shape.
Tips for Success
Keep your blue tension firm so the bag holds its shape and the fabric is not see through. This is especially important for a tote that will carry weight.
Weave in ends as you finish each square. Trust me, this saves an enormous job at the end when you have 18 squares worth of tails to deal with!
Block the finished panels before joining for the crispest squares. A light steam or wet block works wonders.
A lining is worth the effort if you want a polished look and extra durability.
Care Instructions
Hand wash cold with mild soap. Do not wring the bag, as this can stretch the fabric.
Press out water by rolling the bag in a towel.
Reshape and lay flat to dry. Reshape the rim while damp so it dries with a nice even edge.
Finished Measurements
Make It Your Own
This pattern looks gorgeous in every color palette! Consider trying:
The beauty of granny squares is that you can customize each one, so feel free to experiment and make this tote uniquely yours.
I hope you absolutely love making this daisy tote as much as I loved designing it! There is something so satisfying about watching those cheerful flowers come together into a useful, beautiful bag.
If you make this pattern, I would love to see your creation! Save this pattern to your Pinterest boards so you can find it whenever you are ready to start, and please leave a comment below to share your finished tote or ask any questions. Happy hooking!
Want a Quick & Easy Printable Version?
Get a clean, beautifully formatted PDF of this pattern — easy to follow step by step, ready to print or save on any device. No scrolling, no distractions, just the pattern.
Get the Printable PDF →