
Alright, friends. It is time to dig into that gorgeous pastel yarn stash you have been saving for something special. This layered dress is calling your name.
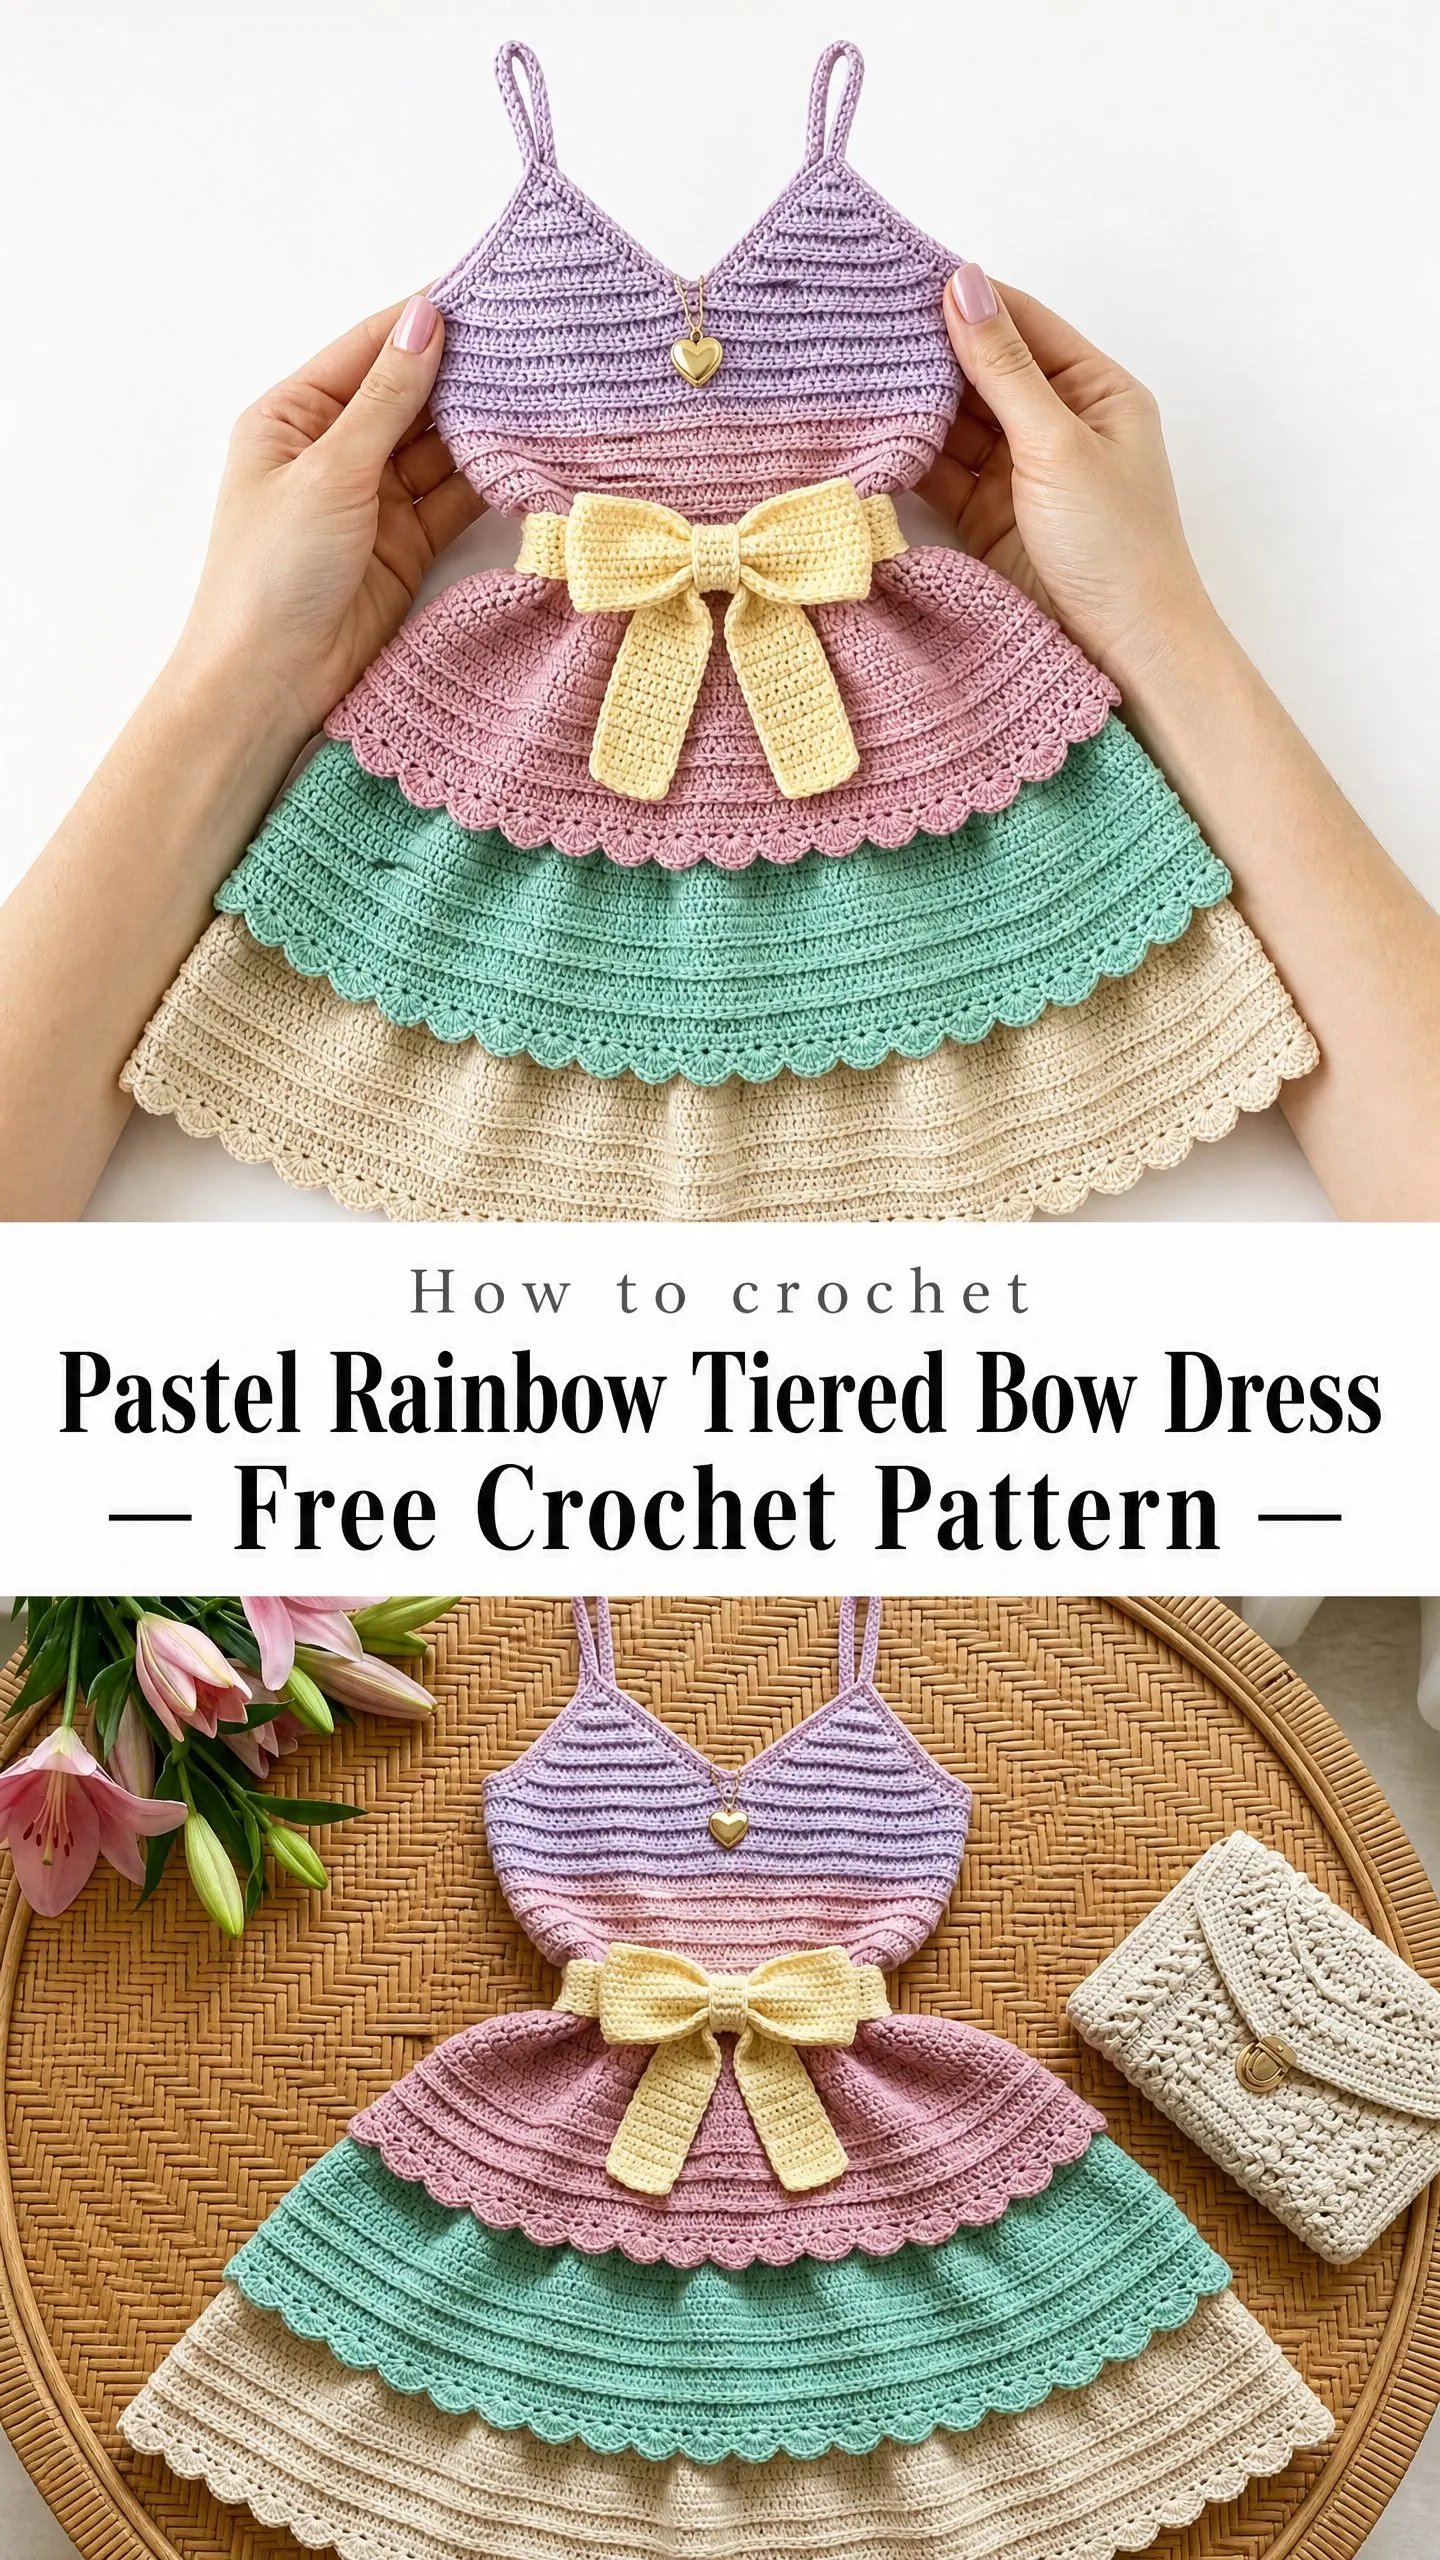
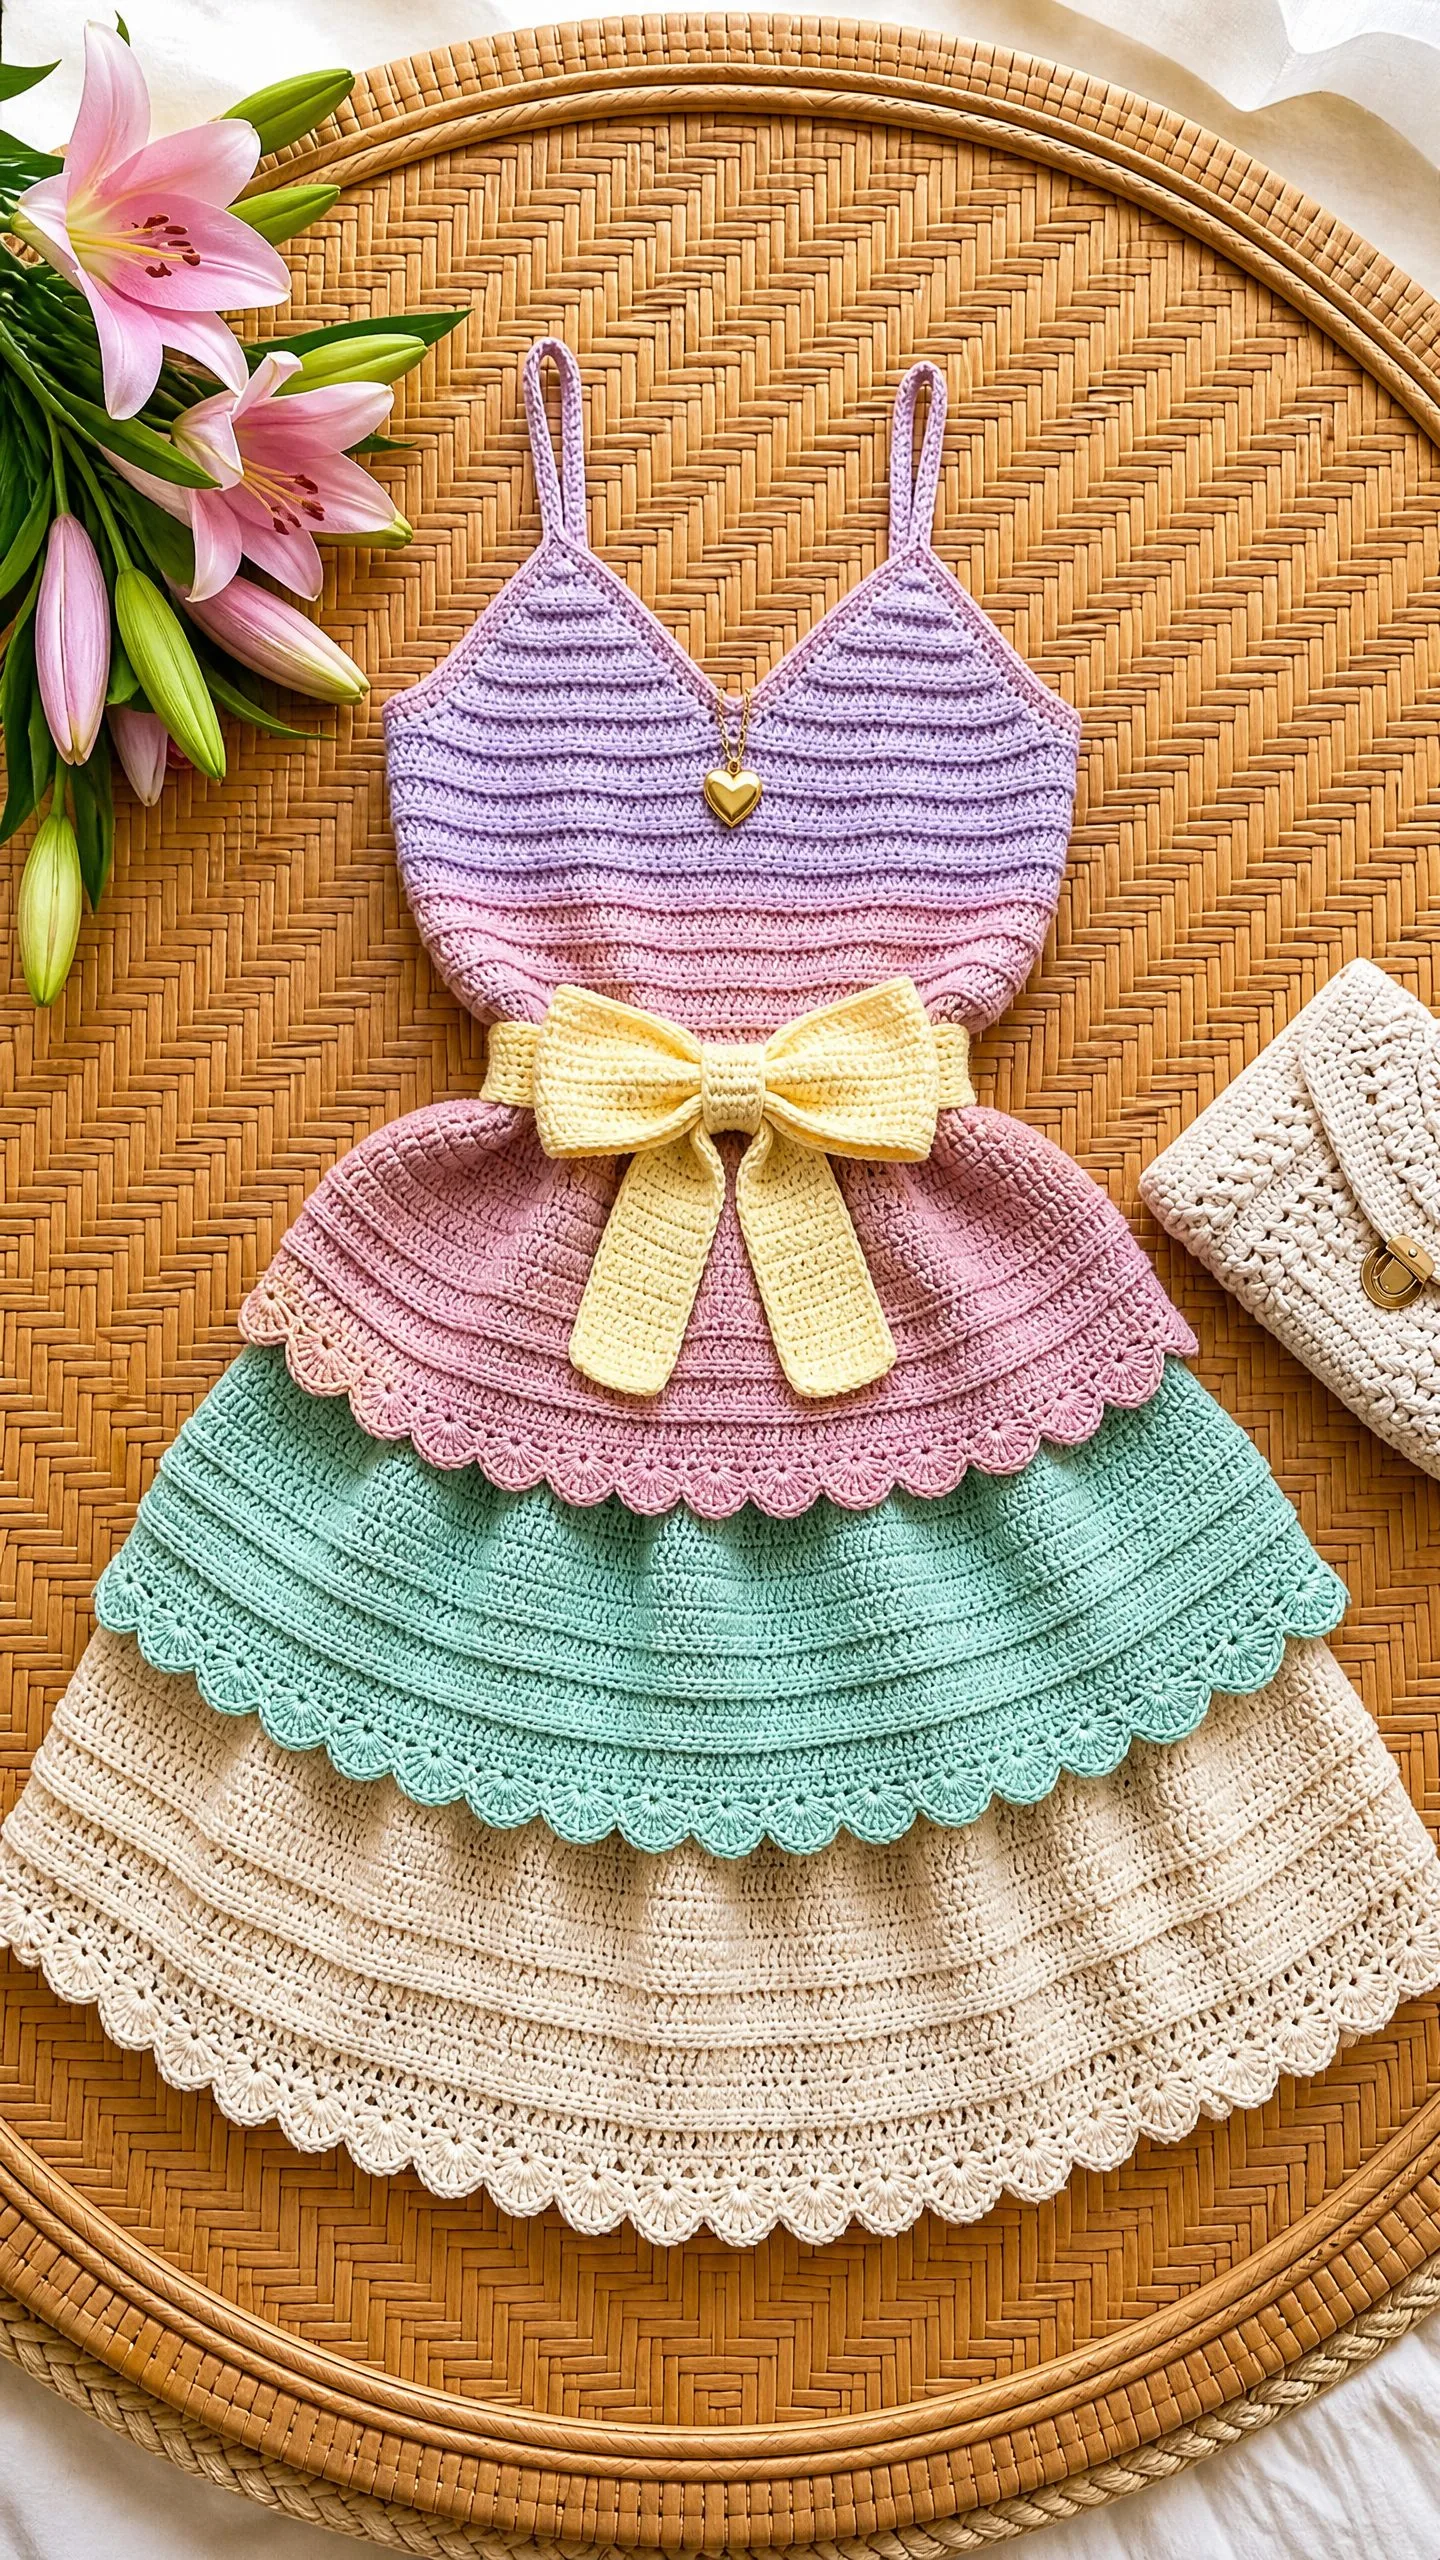
This tiered bow dress features a fitted V-neck bodice with beautiful horizontal ribbing, three cascading skirt layers in soft rainbow colors, and the sweetest crocheted bow at the waist. The construction is more interesting than your typical dress pattern. You will work the bodice flat from the bottom up, create each skirt tier separately, then layer them together for that dreamy cascading effect.
I will be honest with you. This pattern sits at the advanced beginner to intermediate level. If you are comfortable with basic shaping, increases, decreases, and following stitch counts, you can absolutely do this. The individual techniques are not difficult. There are just several of them working together to create something truly special.
Why This Dress Pattern Works So Well
The beauty of this pastel rainbow tiered bow dress lies in its clever construction. Instead of working complicated colorwork or intricate stitch patterns, you are building simple components that come together into something stunning.
The bodice uses a technique called ribbed single crochet, where you work in the back loop only (BLO) of each stitch. This creates those gorgeous horizontal ridges you see in the finished piece. It looks fancy but requires only basic single crochet skills.
The skirt tiers use half double crochet for the body with a pretty scallop edging at the bottom of each layer. Each tier is progressively wider and longer than the one above it. This creates that beautiful cascading effect that makes the dress look so special.
The bow is crocheted as a simple rectangle, pinched in the middle, wrapped, and attached. Easy as that.
Finished Measurements
This pattern is written for toddler size 2T to 3T. Here are your finished dimensions:
Size customization guidance is included at the end of the pattern for sizing up to 4T to 5T or down to 12 to 18 months.
Materials You Will Need
Yarn
You will need DK weight yarn (CYCA 3 / Light) in five colors:
Yarn suggestions:
Paintbox Yarns Simply DK is an excellent choice. It is 100% acrylic with 276 yards per 100g skein. It has great stitch definition, comes in all the pastel colors you need, and is machine washable. Perfect for children’s clothing.
Scheepjes Cahlista is a cotton option if you prefer natural fibers. It is 100% mercerized cotton with 85 yards per 50g ball. It gives the dress a crisper drape and feels softer against skin. Just remember cotton is heavier, so swatching is essential.
Lion Brand Pound of Love works well if you are on a budget. It is 100% acrylic with 1020 yards per skein. Slightly softer with less stitch definition than other options, but excellent for durability in children’s wear.
Avoid yarns with excessive fuzz or loosely plied construction. These will obscure the ribbed texture on the bodice.
Hooks
Notions
Gauge
Getting gauge right matters for a fitted garment like this. Please swatch before you begin.
Using E-4 (3.5 mm) hook:
Bodice gauge: 20 sc x 24 rows = 4 inches or 10 cm in single crochet
Using F-5 (3.75 mm) hook:
Skirt tier gauge: 18 sts x 10 rows = 4 inches or 10 cm in half double crochet
Work a swatch of at least 5 x 5 inches and block it before measuring. Adjust hook size up or down as needed to match gauge.
Abbreviations and Stitch Definitions
Here are all the stitches and terms you will encounter. I have included plain-English definitions so everything makes sense.
Special Stitches
Ribbed Single Crochet
This is what creates the horizontal texture on the bodice. Work all single crochet stitches in the back loop only (BLO) throughout the bodice rows. By leaving the front loop free, you create visible ridges running horizontally across the fabric.
Scallop Edging Stitch
This creates the pretty ruffled edge at the bottom of each skirt tier.
1. Skip 2 stitches
2. Work 5 dc all into the next stitch
3. Skip 2 stitches
4. Work 1 sl st into the next stitch
5. Repeat steps 1 through 4 across the row
This forms a shell of 5 dc separated by a slip stitch, creating the scalloped ruffle.
Fan Shell Stitch
Used in the skirt body rows:
1. Skip 2 stitches
2. Work (2 hdc, ch 1, 2 hdc) all into the next stitch
3. Skip 2 stitches
4. Work 1 sc into the next stitch
5. Repeat across
The fan shell stitch repeat equals 6 stitches. Your stitch count must be divisible by 6 plus 1 for the final anchor stitch.
Important Pattern Notes
Before you dive in, here are some things to keep in mind:
1. The bodice is worked flat from the bottom (waist) upward toward the shoulders. V-neck shaping happens by dividing the work at center and completing each side separately.
2. Skirt tiers are worked flat, beginning with a foundation chain. Each tier attaches to the dress at the waist or to the layer above it.
3. Color placement:
4. Turning chain rules:
5. Stitch counts in parentheses at row ends represent total working stitches, not including turning chains.
6. When changing colors, make the final yarn over of the last stitch in the old color WITH the new color. This creates a cleaner color transition.
Step by Step Crochet Pattern Instructions
Bodice
The bodice is worked flat. Begin at the lower edge (waist) and work upward toward the shoulders.
Foundation: Using E-4 hook and Color A (Lavender), chain 91.
Row 1 (WS): Sc in 2nd ch from hook and in each ch across. Turn. (90 sc)
Row 2 (RS): Ch 1, sc in BLO across all sts. Turn. (90 sc)
Row 3: Ch 1, sc in BLO across all sts. Turn. (90 sc)
Rows 4 through 6: Rep Row 2. Turn. (90 sc each row)
After completing Row 6, the bodice lower section should measure approximately 1 inch or 2.5 cm. This establishes the BLO ribbed texture.
Row 7: Ch 1, sc2tog in BLO, sc in BLO across to last 2 sts, sc2tog in BLO. Turn. (88 sc)
Row 8: Ch 1, sc in BLO across all sts. Turn. (88 sc)
Row 9: Ch 1, sc2tog in BLO, sc in BLO across to last 2 sts, sc2tog in BLO. Turn. (86 sc)
Row 10: Ch 1, sc in BLO across all sts. Turn. (86 sc)
Row 11: Ch 1, sc2tog in BLO, sc in BLO across to last 2 sts, sc2tog in BLO. Turn. (84 sc)
Row 12: Ch 1, sc in BLO across all sts. Turn. (84 sc)
Rows 7 through 12 shape the waist taper. After Row 12, the piece should measure approximately 2.5 inches or 6.5 cm from the foundation.
Rows 13 through 20: Ch 1, sc in BLO across. Turn. (84 sc each row)
After Row 20, the bodice should measure approximately 4 inches or 10 cm. Now transition to Color B (Blush Pink).
Rows 21 through 24: Switch to Color B. Ch 1, sc in BLO across. Turn. (84 sc each row)
After Row 24, the bodice should measure approximately 5.5 inches or 14 cm.
Chest Expansion Rows
Row 25: Ch 1, 2 sc in first st (BLO), sc in BLO to last st, 2 sc in last st. Turn. (86 sc)
Row 26: Ch 1, sc in BLO across. Turn. (86 sc)
Row 27: Ch 1, 2 sc in first st (BLO), sc in BLO to last st, 2 sc in last st. Turn. (88 sc)
Row 28: Ch 1, sc in BLO across. Turn. (88 sc)
V-Neck Division
After Row 28, divide work at center for V-neck shaping. The center stitches are stitch numbers 44 and 45.
Right Bodice Panel
Row 29 Right: Ch 1, sc in BLO across first 43 sts only. Turn. Leave remaining 45 sts unworked. (43 sc)
Row 30: Ch 1, sc in BLO to last 2 sts, sc2tog (neckline edge decrease). Turn. (42 sc)
Row 31: Ch 1, sc2tog (neckline edge), sc in BLO to end. Turn. (41 sc)
Row 32: Ch 1, sc in BLO to last 2 sts, sc2tog. Turn. (40 sc)
Row 33: Ch 1, sc2tog, sc in BLO to end. Turn. (39 sc)
Row 34: Ch 1, sc in BLO to last 2 sts, sc2tog. Turn. (38 sc)
Row 35: Ch 1, sc2tog, sc in BLO to end. Turn. (37 sc)
Row 36: Ch 1, sc in BLO across. Turn. (37 sc)
Armhole Shaping Right Panel
Row 37: Ch 1, sc2tog (armhole edge), sc in BLO to end. Turn. (36 sc)
Row 38: Ch 1, sc in BLO across. Turn. (36 sc)
Row 39: Ch 1, sc2tog (armhole edge), sc in BLO to end. Turn. (35 sc)
Row 40: Ch 1, sc in BLO across. Turn. (35 sc)
Row 41: Ch 1, sc2tog (armhole edge), sc in BLO to end. Turn. (34 sc)
Row 42: Ch 1, sc in BLO across. Turn. (34 sc)
Shoulder Panel
Rows 43 through 46: Ch 1, sc in BLO across. Turn. (34 sc each row)
Fasten off with 18-inch tail for seaming shoulder strap.
Left Bodice Panel
Reattach Color B at stitch 46 on Row 28, skipping the 2 center stitches (sts 44 and 45) which form the V-point.
Row 29 Left: Ch 1, sc in BLO across remaining 43 sts. Turn. (43 sc)
Row 30: Ch 1, sc2tog (neckline edge), sc in BLO to end. Turn. (42 sc)
Row 31: Ch 1, sc in BLO to last 2 sts, sc2tog. Turn. (41 sc)
Row 32: Ch 1, sc2tog, sc in BLO to end. Turn. (40 sc)
Row 33: Ch 1, sc in BLO to last 2 sts, sc2tog. Turn. (39 sc)
Row 34: Ch 1, sc2tog, sc in BLO to end. Turn. (38 sc)
Row 35: Ch 1, sc in BLO to last 2 sts, sc2tog. Turn. (37 sc)
Row 36: Ch 1, sc in BLO across. Turn. (37 sc)
Armhole Shaping Left Panel
Row 37: Ch 1, sc in BLO to last 2 sts, sc2tog (armhole edge). Turn. (36 sc)
Row 38: Ch 1, sc in BLO across. Turn. (36 sc)
Row 39: Ch 1, sc in BLO to last 2 sts, sc2tog. Turn. (35 sc)
Row 40: Ch 1, sc in BLO across. Turn. (35 sc)
Row 41: Ch 1, sc in BLO to last 2 sts, sc2tog. Turn. (34 sc)
Row 42: Ch 1, sc in BLO across. Turn. (34 sc)
Shoulder Panel
Rows 43 through 46: Ch 1, sc in BLO across. Turn. (34 sc each row)
Fasten off with 18-inch tail for seaming.
Checkpoint: The bodice from foundation to top of shoulder panel should measure approximately 8 inches or 20.5 cm total.
Shoulder Straps
Make 2 identical straps.
Using E-4 hook and Color A (Lavender), chain 61.
Row 1: Sc in 2nd ch from hook and in each ch across. Turn. (60 sc)
Row 2: Ch 1, sc in BLO across. Turn. (60 sc)
Row 3: Ch 1, sc in BLO across. Fasten off, leaving 12-inch tail. (60 sc)
Each strap measures approximately 12 inches or 30.5 cm long and 0.5 inch or 1.3 cm wide.
Using yarn needle and tail, sew one short end of each strap to the top corner of the front shoulder panel. Loop strap over and sew the opposite end to the corresponding corner on the back bodice.
Skirt Tier 1 (Blush Pink)
This tier attaches at the waist of the bodice.
Foundation: Using F-5 hook and Color B (Blush Pink), chain 145.
Row 1 (WS): Sc in 2nd ch from hook and in each ch across. Turn. (144 sc)
Rows 2 through 8: Ch 2, hdc in each st across. Turn. (144 hdc each row)
Row 9 (Scallop Edging Row): Ch 1. Sl st in first st, (skip 2 sts, 5 dc in next st, skip 2 sts, sl st in next st) repeat across. (24 scallop shells)
Fasten off, leaving long tails.
Fold Tier 1 into a tube by seaming the short sides together with slip stitch or whip stitch. Attach the foundation edge of Tier 1 evenly around the bottom of the bodice waist. Pin before sewing to distribute fullness evenly.
Skirt Tier 2 (Mint Green)
Foundation: Using F-5 hook and Color D (Mint Green), chain 193.
Row 1 (WS): Sc in 2nd ch from hook and in each ch across. Turn. (192 sc)
Rows 2 through 9: Ch 2, hdc in each st across. Turn. (192 hdc each row)
Row 10 (Scallop Edging Row): Ch 1. Sl st in first st, (skip 2 sts, 5 dc in next st, skip 2 sts, sl st in next st) rep across. (32 scallop shells)
Fasten off. Seam short ends together. Attach Tier 2 approximately 1.5 inches or 4 cm below the Tier 1 attachment line, tucking the top edge slightly beneath Tier 1’s scalloped edge.
Skirt Tier 3 (Cream)
Foundation: Using F-5 hook and Color E (Cream), chain 241.
Row 1 (WS): Sc in 2nd ch from hook and in each ch across. Turn. (240 sc)
Rows 2 through 10: Ch 2, hdc in each st across. Turn. (240 hdc each row)
Row 11 (Scallop Edging Row): Ch 1. Sl st in first st, (skip 2 sts, 5 dc in next st, skip 2 sts, sl st in next st) rep across. (40 scallop shells)
Fasten off. Seam and attach approximately 1.5 inches or 4 cm below Tier 2.
Belt Band
Using E-4 hook and Color C (Pale Yellow), chain 91.
Row 1: Sc in 2nd ch from hook and in each ch across. Turn. (90 sc)
Rows 2 through 4: Ch 1, sc in BLO across. Turn. (90 sc each row)
Fasten off. Sew horizontally across the waist, centered at the Tier 1 attachment seam.
Bow
Main Bow Body: Using E-4 hook and Color C, chain 31.
Row 1: Sc in 2nd ch from hook and in each ch across. Turn. (30 sc)
Rows 2 through 10: Ch 1, sc in BLO across. Turn. (30 sc each row)
Fasten off. Pinch at center and wrap tail yarn tightly around the pinched center at least 8 times. Secure with knots.
Bow Knot Center: Chain 11. Work 10 sc across, then 3 more rows of 10 sc. Wrap around the gathered center and sew ends together at back.
Bow Tails (make 2): Chain 21. Work 20 sc across, then 3 more rows of 20 sc. Cut one end diagonally for the ribbon-tail look. Attach to back of bow.
Position completed bow at center front waist and sew securely.
Neckline Edging
Using E-4 hook and Color A, attach yarn at center back neckline.
Rnd 1: Ch 1, sc evenly around entire neckline opening, working sc2tog at inside corners of V. Join with sl st. (approximately 80 sc)
Rnd 2: Ch 1, sl st in each st around. Join. Fasten off.
Armhole Edging
Using E-4 hook and Color A, attach yarn at underarm point.
Rnd 1: Ch 1, sc evenly around armhole opening. Join. (approximately 40 sc)
Rnd 2: Ch 1, sl st in each st around. Join. Fasten off.
Repeat for second armhole.
Heart Charm
Using sewing needle and matching thread, attach the gold heart charm to the center V of the neckline. Pass through the charm loop and crochet stitches at least 4 to 5 times. Knot securely on the wrong side.
Blocking and Finishing
Wet blocking is strongly recommended, especially for cotton yarn.
1. Weave in all remaining ends on the wrong side
2. Submerge dress in cool water and press gently to saturate
3. Press between clean towels to remove excess water
4. Lay flat on blocking mats and pin bodice to measurements
5. Use pins along scalloped edges to open and define the shells
6. Allow to dry completely (12 to 24 hours)
7. For acrylic yarn, a light steam block helps set stitch definition
Care Instructions
Machine wash gentle cycle in cold water, inside out, in a mesh laundry bag. Lay flat to dry. Do not tumble dry. Do not wring. Do not iron directly. Check the heart charm periodically for security.
Size Customization
To size up to 4T to 5T: Add 12 stitches to bodice foundation (chain 103, work 102 sc). Add 24 stitches to each tier foundation. Add 2 rows to each tier body. Add 12 stitches to belt band.
To size down to 12 to 18 months: Subtract 12 stitches from bodice foundation (chain 79, work 78 sc). Subtract 24 stitches from each tier. Remove 2 hdc rows from each tier.
Thank you so much for choosing this pattern! I truly hope you love making this sweet dress as much as I loved designing it. If you make one, I would absolutely love to see it. Tag me on Instagram or share a photo in our Facebook group.
If this pattern made your day, save it to your Pinterest boards so you can find it again later. And please drop a comment below if you give it a try. I read every single one and your photos and notes make my whole week!
