
I don’t know about you, but I have been absolutely obsessed with the soft, dreamy aesthetic that has taken over social media lately. All those pastel gradients, delicate bows, and cozy textures have been calling my name for months.
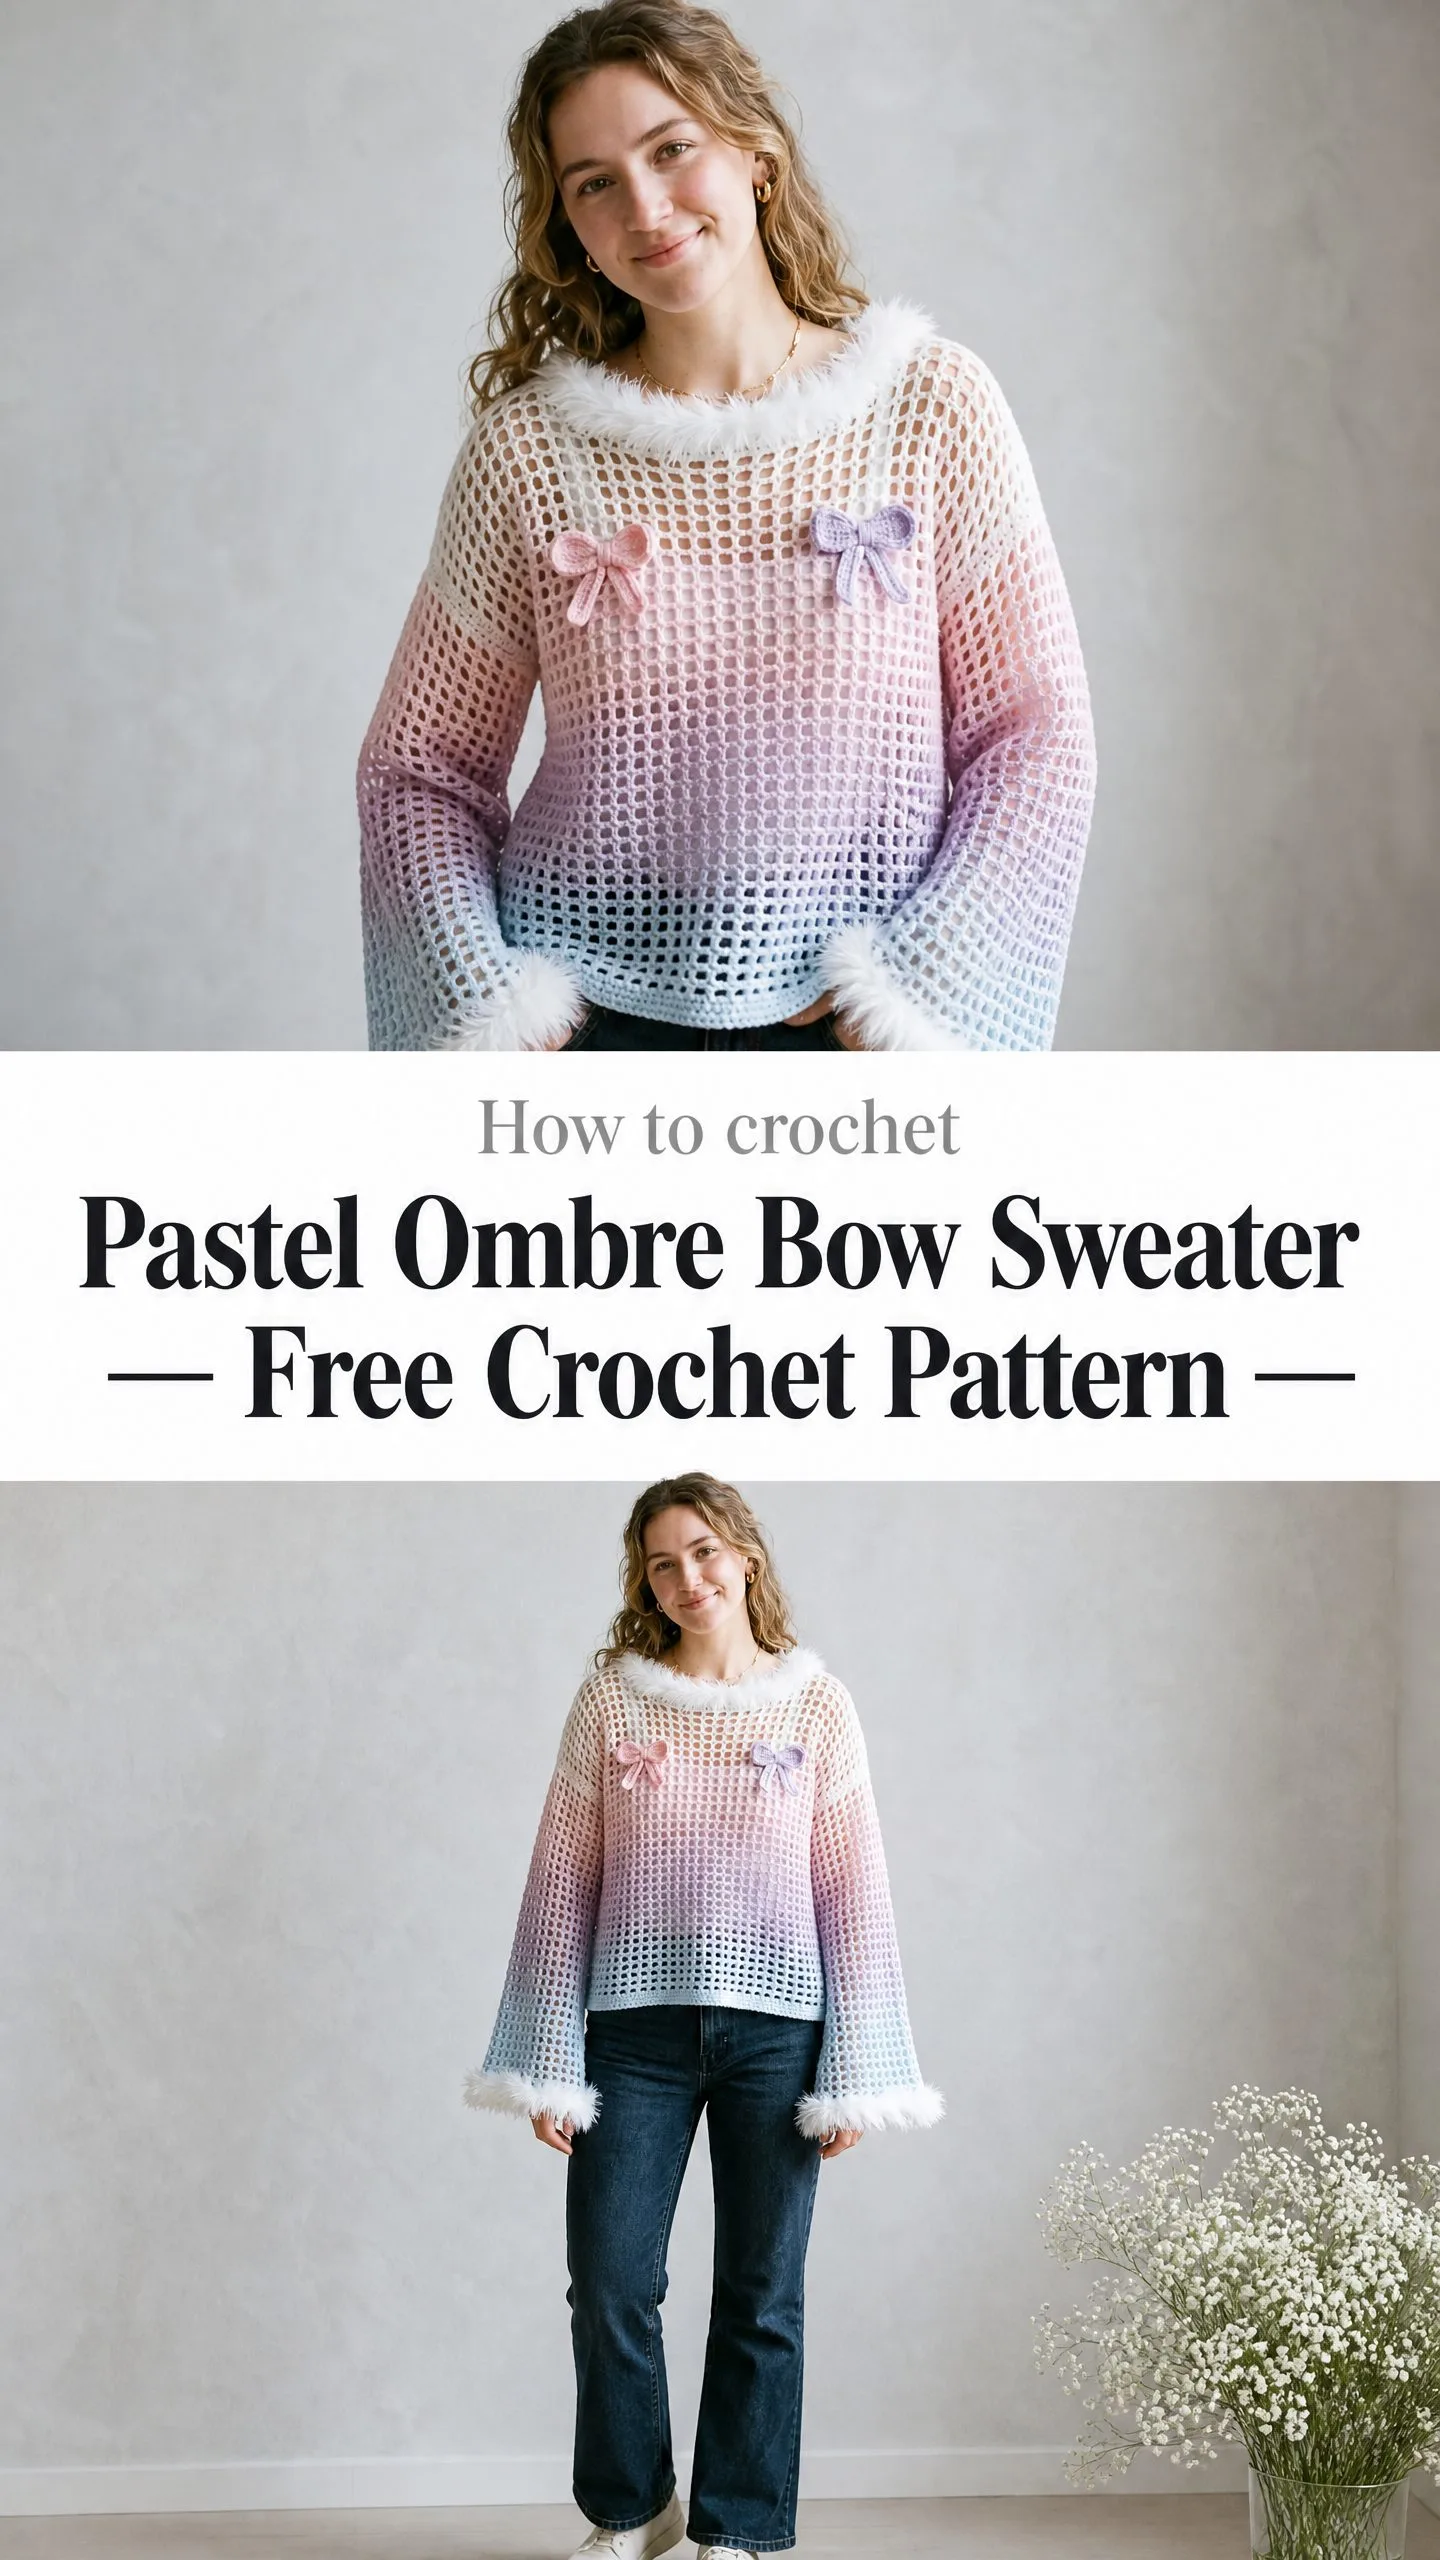
When I finally sat down to create something that captured that vibe, this sweater practically designed itself. The gradient flows from creamy white at the neckline through blush pink and soft lavender, ending in the prettiest baby blue at the hem and cuffs. Add some fluffy trim and a couple of sweet little bows, and you have yourself a statement piece that looks like it walked straight out of a fairy tale.
The best part? That gorgeous open mesh fabric works up faster than you might think, and the construction is more straightforward than it appears. If you have been wanting to try your hand at a garment project with some serious wow factor, this is your sign.
About This Crochet Pattern
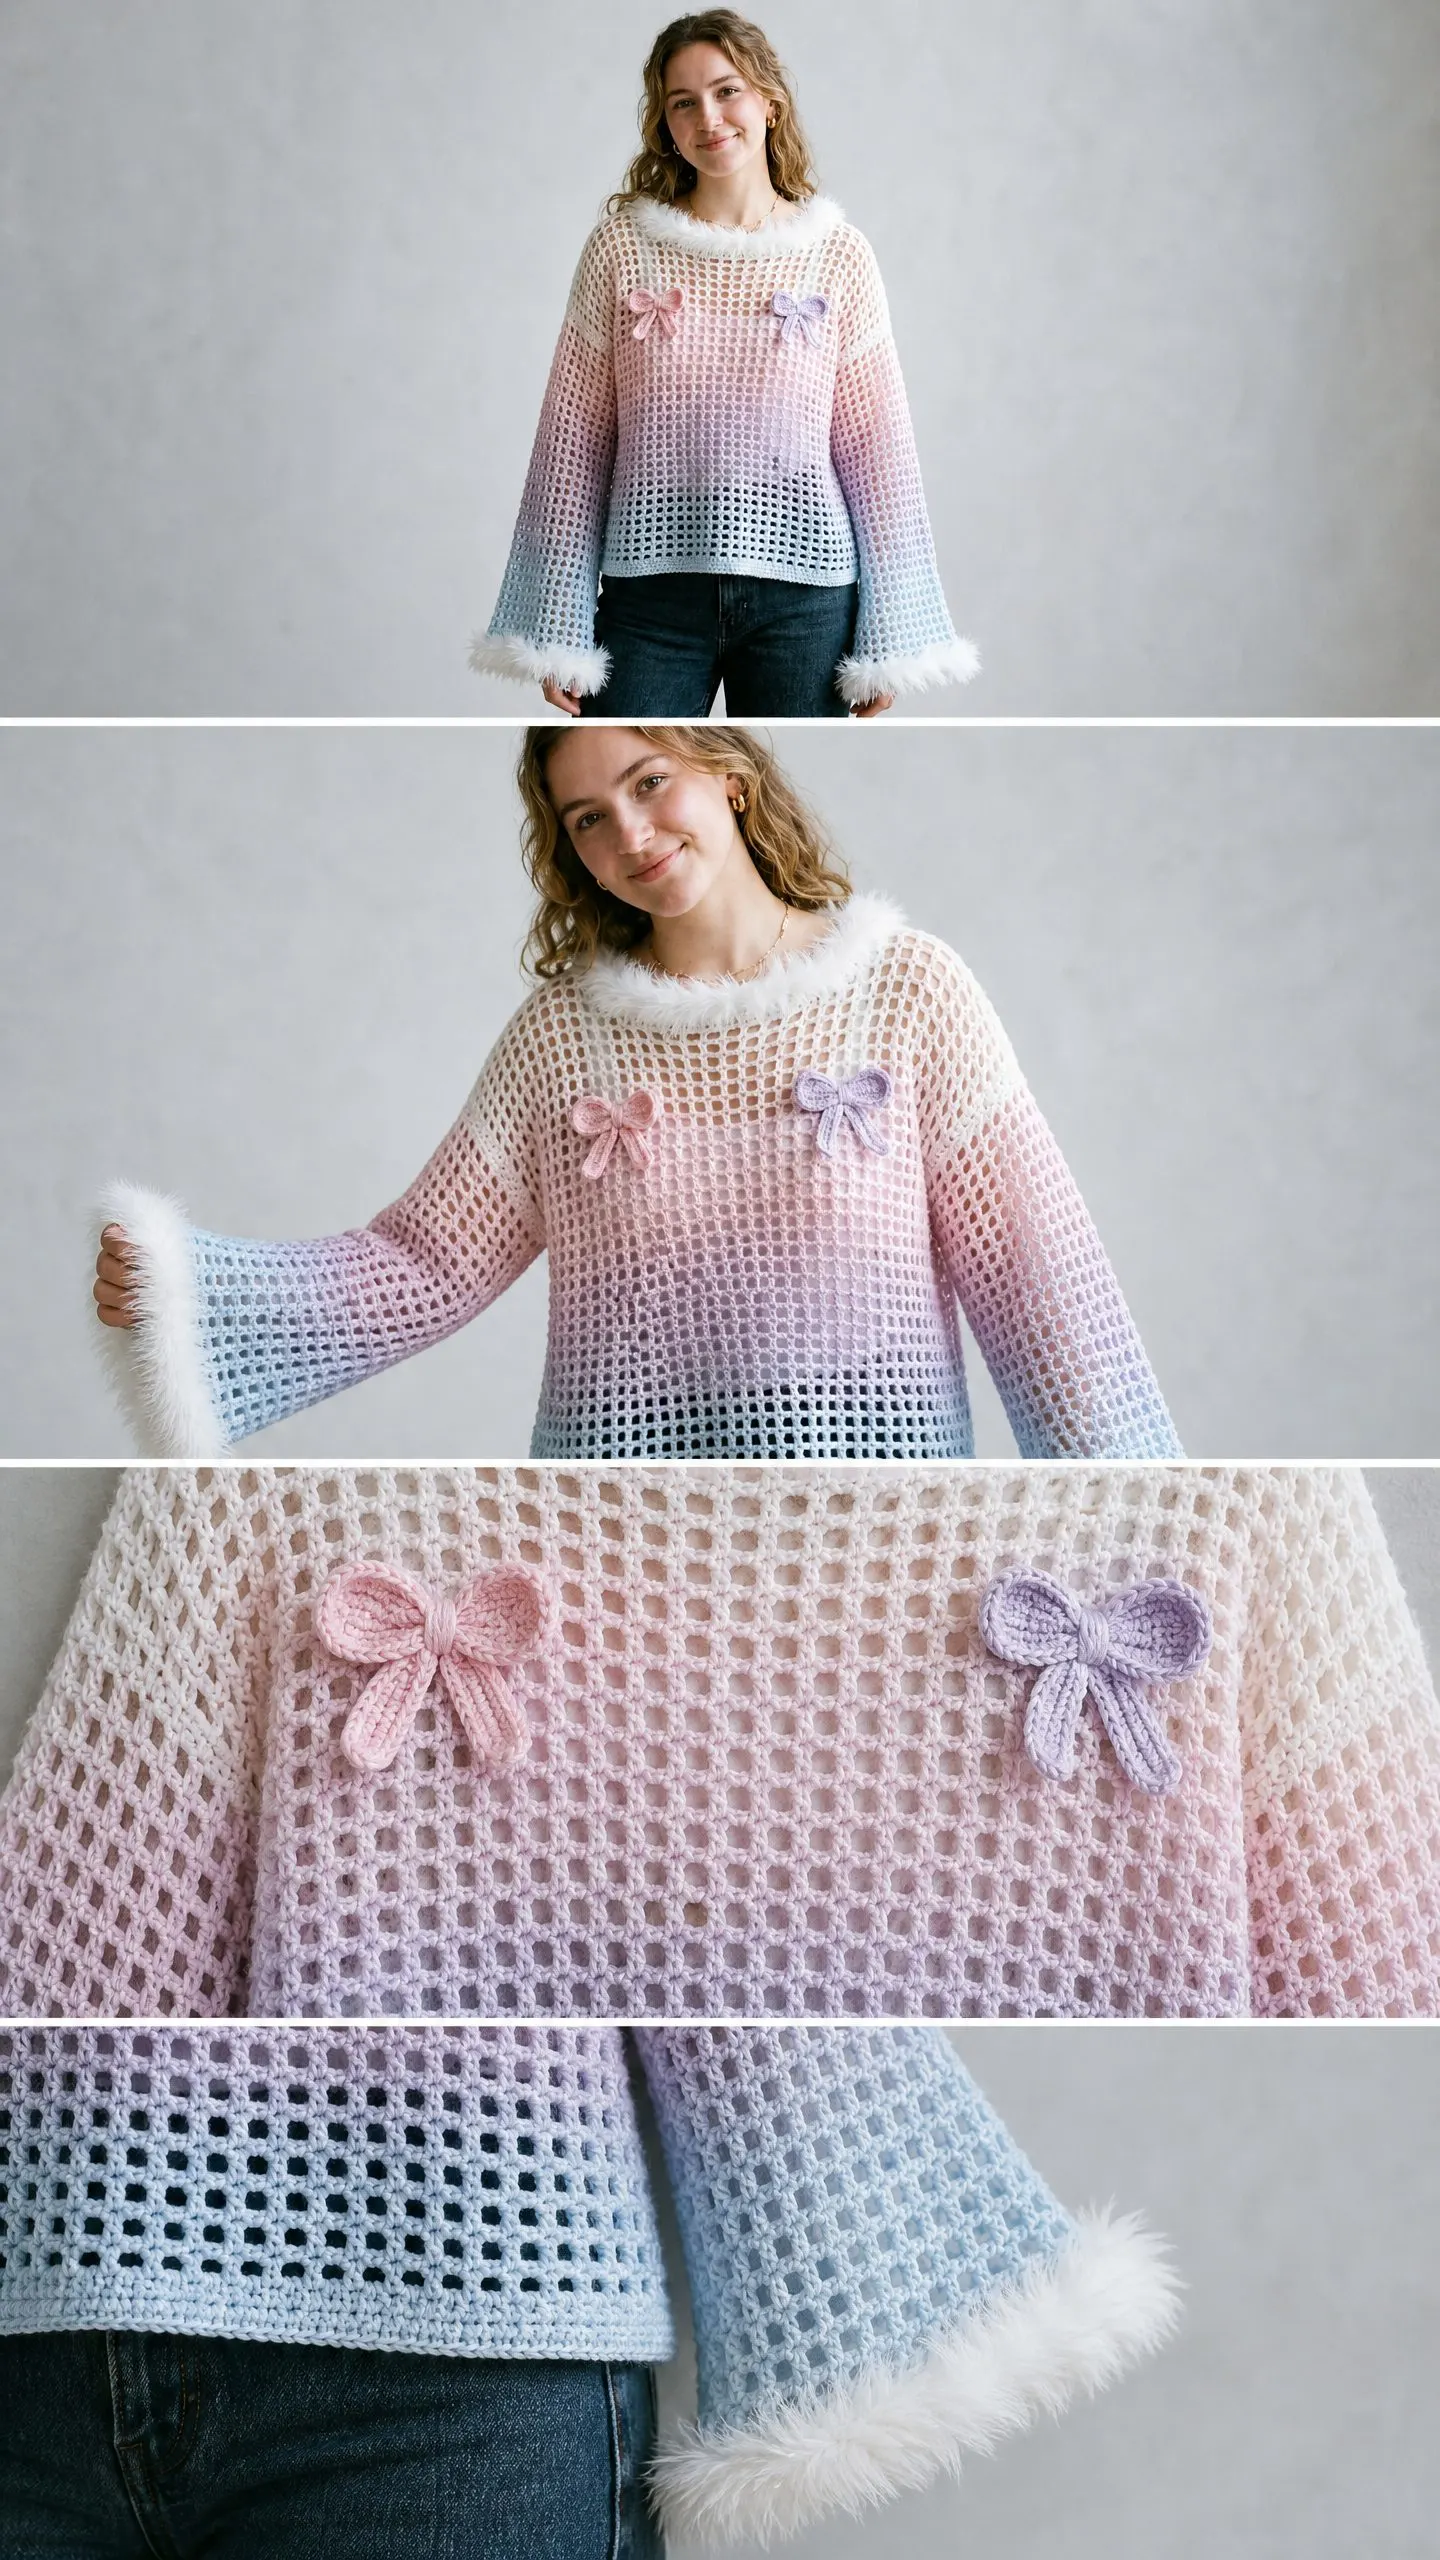
This pullover sweater features a filet mesh stitch pattern that creates a lightweight, semi-sheer fabric with clean geometric lines. The boxy, relaxed silhouette has dramatic bell sleeves that flare beautifully at the wrists. White faux-fur or eyelash yarn trims the neckline and cuffs, giving the whole piece a luxurious, whimsical finish.
The sweater is worked flat in two identical panels for the front and back. You will seam them at the shoulders and sides, then pick up and work the sleeves downward from the armhole. This top-down sleeve construction makes it easy to customize the length as you go.
Two crocheted bow appliques in coordinating pink and lavender add the perfect finishing touch to the chest area.
Skill Level
This is an intermediate level crochet pattern. The mesh stitch itself is actually quite beginner-friendly since it is just a simple chain and double crochet repeat. However, managing a gradient yarn cake or planning your color transitions takes some attention. Working sleeves from picked-up stitches and adding faux-fur trim neatly also require a bit of project experience.
If you have completed a few scarves or blankets and feel comfortable reading patterns, you can absolutely tackle this sweater. Just take your time with the new techniques.
Time Estimate
Plan for approximately 18 to 28 hours of work for size small/medium. This includes swatching, working both body panels, constructing the sleeves, adding trim, and finishing with the bow appliques. Your actual time will vary based on your speed and how much you enjoy the process.
Finished Measurements
The pattern is written for Size Small/Medium (S/M) with notes for Medium/Large (M/L) in parentheses.
| Measurement | S/M | M/L |
|---|---|---|
| Finished Bust | 42 in / 107 cm | 46 in / 117 cm |
| Length (shoulder to hem) | 22 in / 56 cm | 23 in / 58 cm |
| Sleeve Length (underarm to cuff) | 18 in / 46 cm | 19 in / 48 cm |
| Cuff Circumference | 14 in / 36 cm | 15 in / 38 cm |
Materials You Will Need
Yarn
Main Yarn (MC): Approximately 700 (800) yards / 640 (730) meters of fingering weight yarn in a planned gradient or self-striping colorway. You want colors that transition from white through pale pink, soft lavender, and baby blue. A gradient cake or hand-dyed skein works beautifully here.
Contrast Yarn A (CA): Approximately 25 yards / 23 meters of fingering weight yarn in pale pink for the pink bow applique.
Contrast Yarn B (CB): Approximately 25 yards / 23 meters of fingering weight yarn in soft lavender for the lavender bow applique.
Trim Yarn (TR): Approximately 60 yards / 55 meters of white eyelash or faux-fur yarn in bulky to super bulky weight for the neckline and cuff edging.
Yarn Suggestions
Here are some options that work wonderfully for this project:
Lion Brand Mandala (fingering weight, 590 yards per 5.3 oz ball) transitions smoothly through multiple hues and is widely available. One ball almost covers the sweater body in a single gradient cake.
Paintbox Yarns Simply Fingering lets you manually blend color changes by purchasing skeins in White, Blush Pink, Soft Lilac, and Baby Blue.
WeCrochet Stroll Gradient (fingering weight, 462 yards per 100g) gives you that beautiful color flow with minimal effort.
Any smooth fingering weight yarn with good stitch definition will work. Avoid fuzzy or halo yarns for the main body because the open mesh stitch needs clean lines to read correctly.
Hooks
Notions
Gauge
With MC and E-4 / 3.5 mm hook in Filet Mesh Stitch:
Or expressed as a flat gauge: 16 stitches and 8 rows = 4 in / 10 cm in Filet Mesh Stitch, blocked.
Gauge matters here. Even a small deviation multiplies across 84 mesh repeats and will produce a sweater that is several inches too large or too small. Swatch generously, at least 5 in / 13 cm square, and block the swatch before measuring.
Abbreviations (US Terms)
Before we dive into the instructions, let me break down all the abbreviations you will encounter:
Special Stitches and Techniques
Filet Mesh Stitch (Worked Flat)
This stitch creates the beautiful open grid pattern you see in the sweater. Each mesh unit consists of one double crochet (dc) post and one chain-2 space. Here is how it works:
Foundation Row (Row 1, RS): Chain the required number. Work dc in 4th chain from hook (the skipped ch-3 counts as your first dc). Then work (ch 2, skip 2 chains, dc in next chain) across. Turn.
Pattern Row (Row 2 and beyond, WS): Ch 3 (this counts as dc throughout). Work (ch 2, skip the ch-2 space, dc in next dc) across. Place your last dc in the top of the turning chain. Turn.
Repeat the pattern row for the entire fabric. The turning chain at the beginning of each row always counts as the first dc of that row.
Bow Applique
You will make two pieces for each bow, then assemble them.
Piece 1 (Bow Center Rectangle): Ch 7. Row 1: sc in 2nd ch from hook, sc across. (6 sc) Rows 2 through 8: ch 1, turn, sc across. (6 sc each row) Fasten off leaving a 12-inch tail.
Piece 2 (Bow Tie): Ch 4. Row 1: sc in 2nd ch from hook, sc across. (3 sc) Rows 2 through 5: ch 1, turn, sc across. (3 sc each row) Fasten off leaving a 12-inch tail.
Assembly: Fold the short ends of Piece 1 toward the center so they meet in the middle. Use the tail to whipstitch the center edges together. Wrap Piece 2 tightly around the pinched center of Piece 1, overlapping the ends at the back, and sew securely. Weave in ends.
Faux-Fur Trim Join
With TR yarn and J-10 hook, insert your hook into the first edge stitch or chain space, pull up a loop, ch 1 (this does not count as a stitch). Then sc in each stitch or evenly spaced into chain spaces across the edge. Work one sc per dc post and one sc per ch-2 space for consistent density.
Pattern Instructions
Important Pattern Notes
1. The front and back panels are identical rectangles. You will seam them at shoulders and sides, then work sleeves downward.
2. Color gradient tip: If using a gradient cake, simply begin at the white end and crochet continuously. The color changes happen naturally. If using solid skeins, change colors by pulling the new color through the last two loops of the final dc in the current row. Work color changes approximately every 12 rows: rows 1-10 white, rows 11-22 pink, rows 23-34 lavender, rows 35-46 blue.
3. The sweater has a drop shoulder with no armhole shaping cut into the body panels. The armhole opening is simply the top portion of the side seam left open.
4. Block the panels before seaming. Filet mesh relaxes and evens out significantly with wet blocking.
5. Apply faux-fur trim last, after all seaming and blocking.
Body Panels (Make 2)
Both the front and back are worked identically.
Foundation Chain: Ch 127 (139).
Row 1 (RS): Dc in 4th ch from hook (counts as first dc of first mesh unit), (ch 2, sk 2 ch, dc in next ch) across, turn. 42 dc including t-ch, 41 ch-2 spaces; 41 mesh units (M/L: 46 dc including t-ch, 45 ch-2 spaces; 45 mesh units)
Row 2: Ch 3 (counts as dc), (ch 2, sk ch-sp, dc in next dc) across, placing last dc in top of t-ch, turn. 42 dc, 41 ch-2 spaces (M/L: 46 dc, 45 ch-2 spaces)
Rows 3 through 46 (M/L: Rows 3 through 48): Rep Row 2. 41 units each row (M/L: 45 units each row)
Do not fasten off after Row 46 (48). Place a stitch marker in the last stitch to hold your place.
Checkpoint: After Row 46 (48), each body panel should measure approximately 21 in / 53 cm wide and 15.5 in / 39 cm tall, blocked.
Fasten off both panels. Weave in ends loosely for now.
Seaming the Panels
Block both panels flat to their finished measurements before seaming.
Lay the front and back panels with wrong sides together and top edges aligned.
Shoulder Seam: With MC and yarn needle, whipstitch the top 6 mesh units (approximately 3 in / 7.5 cm) of each side together. Leave the center portion open for the neckline. The center open neckline measures the width of the middle 29 (33) mesh units, approximately 14.5 (16.5) in / 37 (42) cm wide.
Armhole Marker: Count down 20 rows from the shoulder seam along each side edge. Place a stitch marker at the 20-row point on both the front and back panels on each side. This marks the base of the armhole. The armhole opening is approximately 6.5 in / 16.5 cm deep.
Side Seam: Whipstitch the side edges of front and back together from the hem upward to the armhole marker. Leave the armhole open above the marker. Repeat on the other side.
Sleeves (Make 2)
The sleeves are worked top-down from the armhole opening in rows, then seamed at the underarm.
Setup Row: With RS facing and MC, join yarn at the bottom of one armhole opening at the side seam marker.
Row 1 (Sleeve, RS): Ch 3, dc in first row-end post of armhole, (ch 2, sk space between row ends, dc in next row-end post) across full open armhole edge, ending with dc at the last row-end post before the side seam on the opposite side, turn. 40 dc posts total, 39 ch-2 spaces; 39 mesh units
Rows 2 through 10: Ch 3, (ch 2, sk ch-sp, dc in next dc) across, last dc in top of t-ch, turn. 40 dc, 39 ch-2 spaces; 39 mesh units
Rows 11 through 48 (M/L: Rows 11 through 52): Continue working Row 2 of Filet Mesh Stitch without shaping. 39 mesh units per row
Checkpoint: After Row 48 (52), the sleeve body should measure approximately 16 in / 40.5 cm long.
Bell Flare Section
Row 49 (53): Ch 5 (counts as dc plus ch 2), dc in first dc (inc at beg), (ch 2, dc in next dc) across, ch 2, dc in top of t-ch, ch 2, dc in same top of t-ch (inc at end), turn. 41 mesh units
Row 50 (54): Ch 5, dc in first dc (inc), (ch 2, dc in next dc) across, ch 2, dc in same top of t-ch (inc), turn. 43 mesh units
Row 51 (55): Ch 5, dc in first dc (inc), (ch 2, dc in next dc) across, ch 2, dc in same top of t-ch (inc), turn. 45 mesh units
Row 52 (56): Ch 5, dc in first dc (inc), (ch 2, dc in next dc) across, ch 2, dc in same top of t-ch (inc), turn. 47 mesh units
Row 53 (57): Ch 5, dc in first dc (inc), (ch 2, dc in next dc) across, ch 2, dc in same top of t-ch (inc), turn. 49 mesh units
Row 54 (58): Ch 5, dc in first dc (inc), (ch 2, dc in next dc) across, ch 2, dc in same top of t-ch (inc), turn. 51 mesh units
Fasten off.
Sleeve Underarm Seam: Fold the sleeve flat with right sides together, aligning the row ends from shoulder to cuff. Whipstitch from the shoulder edge to the cuff.
Repeat for second sleeve.
Neckline Trim
With TR (white faux-fur yarn) and J-10 hook, join at the right shoulder seam at the back neck.
Rnd 1: Ch 1, sc evenly around the entire neckline opening, working 1 sc per dc post and 1 sc per ch-2 space around the neck edge, sl st to first sc to join. Do not turn.
Rnd 2: Ch 1, sc in each sc around, sl st to first sc to join. Fasten off TR. Weave in ends carefully.
Cuff Trim
With TR and J-10 hook, join at the sleeve seam at one cuff edge.
Rnd 1: Ch 1, sc evenly across the cuff edge, working 1 sc per dc post and 1 sc per ch-2 space, sl st to first sc. (approximately 52 sc around)
Rnd 2: Ch 1, sc in each sc around, sl st to first sc. Fasten off TR.
Repeat for second cuff.
Bow Appliques
Make one bow using CA (pink) and one using CB (lavender) following the instructions in the Special Stitches section.
Placement: Position the bows on the chest of the front panel. The pink bow sits approximately 4 in / 10 cm below the neckline and approximately 5 in / 13 cm left of center. The lavender bow sits approximately 4 in / 10 cm below the neckline and approximately 2 in / 5 cm right of center. Sew each bow securely to the front panel through the mesh openings, anchoring at least 4 points per bow.
Size Customization Tips
To add width: Each additional 3-chain increment in the foundation chain adds one mesh unit, which equals approximately 0.5 in / 1.3 cm to the body width.
To add length: Each additional 2 rows of Filet Mesh Stitch adds approximately 0.67 in / 1.7 cm to body length.
To adjust sleeve length: Add or subtract rows in the straight sleeve section (Rows 2 through 48).
To adjust bell flare: Each additional increase row in the bell section widens the cuff by approximately 1 in / 2.5 cm total circumference. Reduce the flare section to 3 or 4 rows for a more tapered sleeve.
Blocking and Finishing
Wet blocking is essential for this garment. Filet mesh can look uneven until properly blocked.
1. Submerge the finished sweater in cool water with a small amount of wool wash. Gently press out air bubbles. Do not wring or twist.
2. Roll in a clean dry towel and press firmly to remove excess water.
3. Lay flat on a blocking mat. Pin to finished measurements. Pull the mesh gently to open the grid and make the squares even.
4. Allow to dry completely before unpinning. This may take 12 to 24 hours.
5. Apply faux-fur trim only after blocking is complete.
6. Sew bow appliques after trim is applied and sweater is dry.
Care Instructions
Hand wash in cool water with mild detergent. Lay flat to dry. Do not wring, tumble dry, or iron. If the faux-fur trim becomes matted, gently shake the sweater or use a soft pet slicker brush to restore the texture when dry. Store folded, not hung, to prevent the lightweight mesh from stretching.
Thank you so much for choosing this Pastel Ombre Bow Sweater crochet pattern! I truly hope you love making it as much as I loved designing it. If you give it a try, I would absolutely love to see your finished sweater. Tag me on Instagram or share a photo in my Facebook group. Seeing your creations genuinely makes my day.
If this pattern caught your eye, go ahead and save it to your Pinterest boards so you can find it when you are ready to cast on. And please drop a comment below if you make one. I love hearing which colors you chose and how your sweater turned out!
