This drawstring backpack uses single crochet for a firm, structured fabric. The scattered five-petal blossoms get sewn on at the end. Intermediate level, 12 to 18 hours, and absolutely worth every stitch.
Get the Ad-Free PDF Pattern
You can find the free pattern below, or you can purchase the ad-free printable PDF from my shop.
Get the Printable PDF →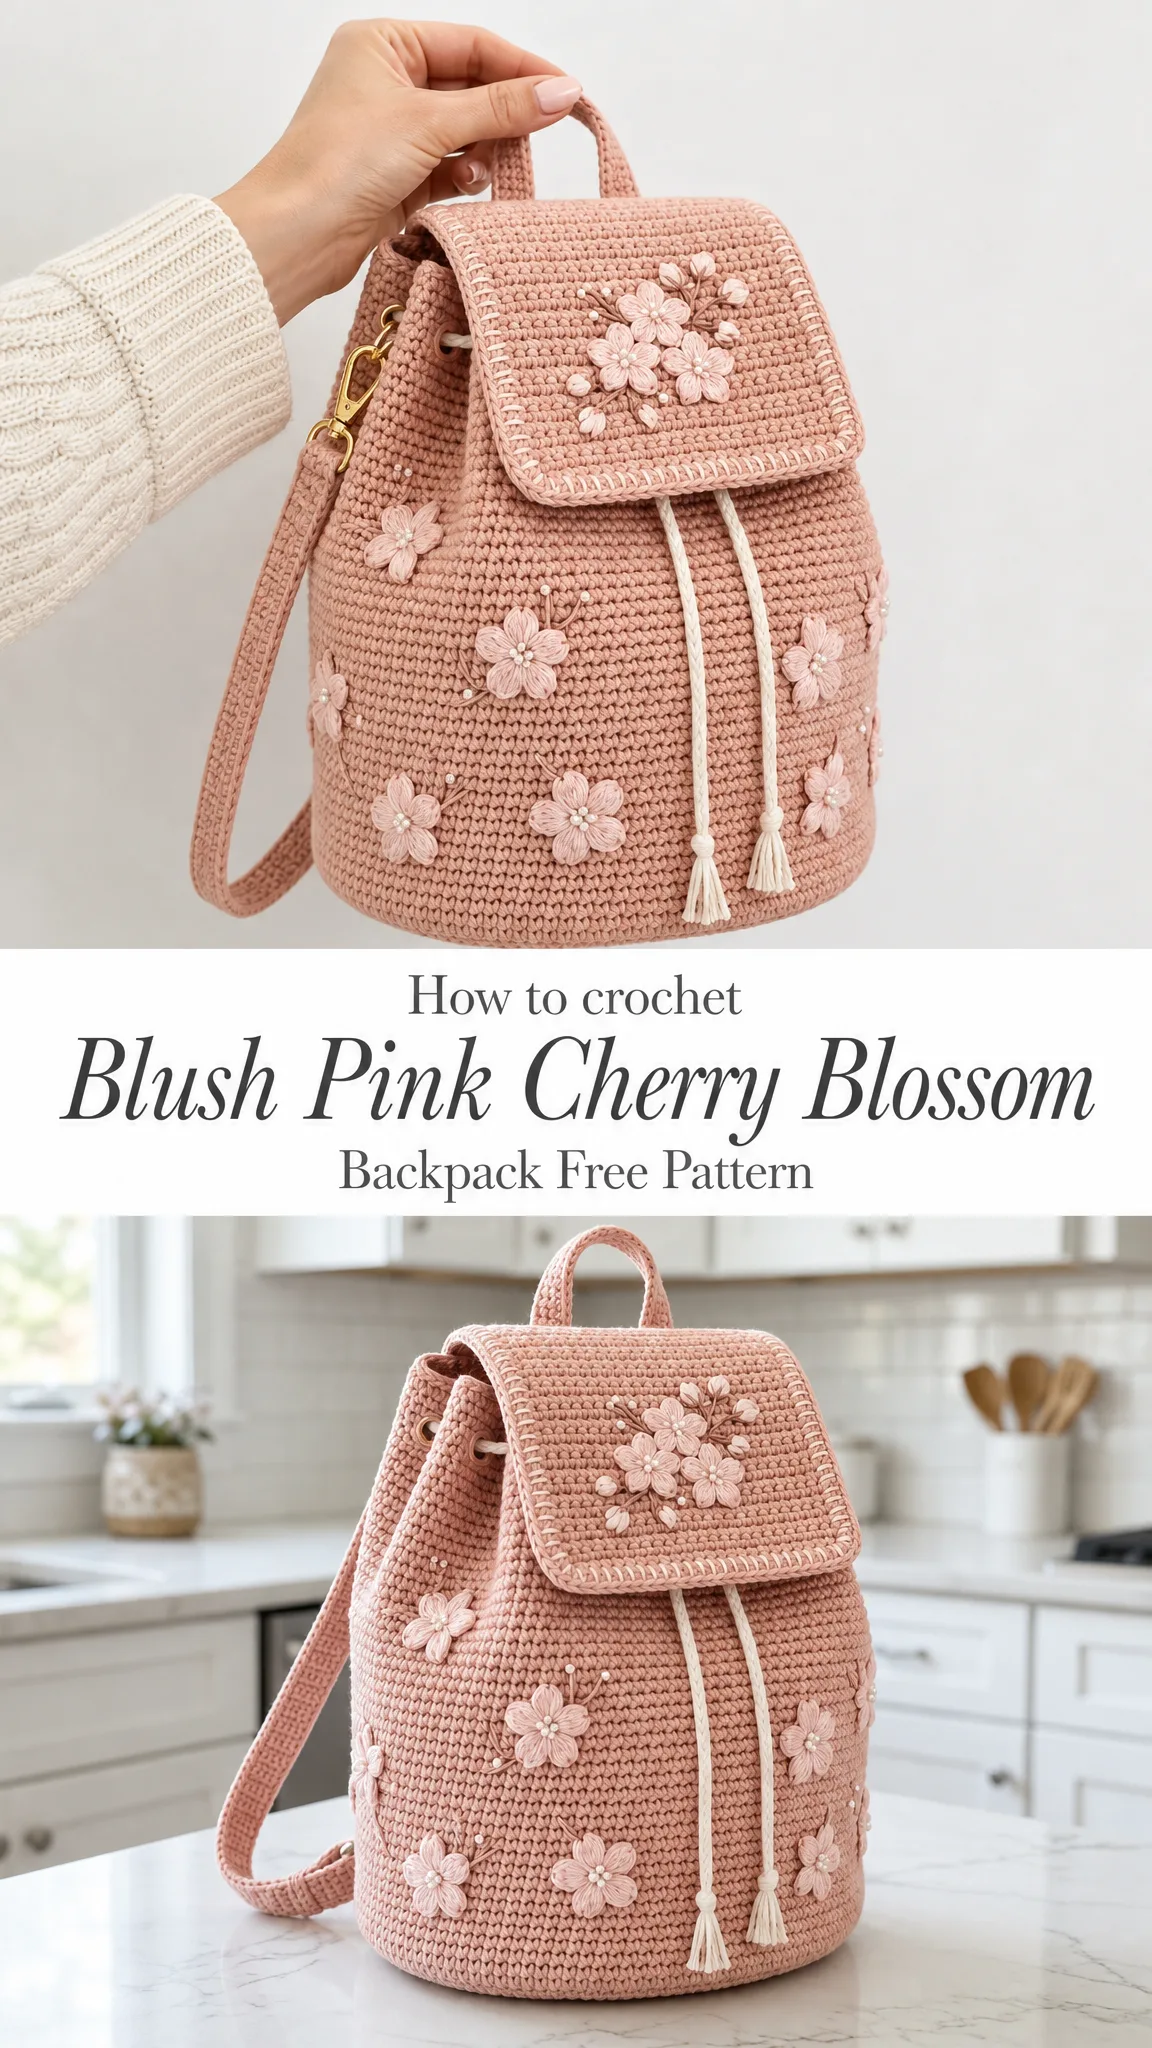
I made this backpack because I wanted something pretty enough for spring outings but sturdy enough to actually use. The cherry blossom appliqués look intricate, but they build from simple repeatable rounds. The real magic happens when you start placing those flowers across the finished bag.
About This Cherry Blossom Backpack Pattern
This crocheted rucksack stands about 27 cm (10.6 inches) tall and 22 cm (8.7 inches) wide with a depth of 14 cm (5.5 inches). The top handle rises approximately 6 cm (2.4 inches), and the shoulder straps adjust between 60 and 95 cm (23.6 to 37.4 inches) to fit most wearers comfortably.
The construction works almost entirely in single crochet (sc), which means inserting your hook, yarning over, pulling through, yarning over again, and pulling through both loops. You will work the base and body in continuous spiral rounds without joining at the end of each round. The flap gets worked flat in rows, and the flowers and straps are made separately before being sewn on during assembly.
This pattern uses US crochet terminology. If you typically follow UK patterns, remember that US single crochet equals UK double crochet, US half double crochet equals UK half treble, and US double crochet equals UK treble.
Materials You Will Need
Yarn (100% Cotton, DK / Light Worsted, CYC 3)
| Color | Used For | Amount |
|---|---|---|
| Dusty Rose (Main) | Base, body, flap, straps, handle | 330 to 380 m / 360 to 420 yd (approximately 175 to 200 g) |
| Blush Pink | Cherry blossom flowers | 25 to 35 m / 28 to 39 yd |
| Beige | Stamens and tassels | 20 to 30 m / 22 to 33 yd |
These amounts are generous estimates. Cotton usage varies with your personal tension.
Hook and Notions
Gauge and Sizing
20 sc × 22 rounds = 10 × 10 cm (4 × 4 inches) in single crochet, worked firmly with the 3.5 mm hook.
Make a small swatch before starting. Cotton has very little stretch, so aim for a tight, even fabric with no gaps between stitches. If your swatch measures larger than gauge, drop down a hook size. If smaller, go up a hook size. Your exact stitch count stays the same throughout the pattern. Only the finished dimensions will shift slightly based on your personal gauge.
Abbreviations
Brackets [ ] indicate a sequence to repeat as directed. Parentheses ( ) show the stitch count at the end of a round or row.
Before You Begin
Keep your tension firm so the bag holds its shape without sagging. Mark the first stitch of every round with a stitch marker and move it up as you work. Read each section completely before starting that portion of the project. Measurements appear in both metric and imperial throughout.
The Base
Work with Main (Dusty Rose) in continuous rounds. The base forms a flat oval. Place a marker in the first stitch and carry it up each round.
Foundation: Ch 15.
Rnd 1: Work 3 sc in 2nd ch from hook, sc in next 12 ch, 3 sc in last ch. Rotate to work along the remaining loops of the foundation chain, sc in next 12 ch. (30 sc)
Rnd 2: Work 2 sc in each of next 3 sts, sc in next 12, 2 sc in each of next 3 sts, sc in next 12. (36 sc)
Rnds 3 through 16: Increase 6 stitches evenly each round (3 increases spread across each curved end), keeping the 12 stitches along each straight side worked even. Each round, place your increases one stitch further apart than the round before so the ends stay smoothly rounded.
| Round | Total Stitches |
|---|---|
| Rnd 3 | 42 |
| Rnd 4 | 48 |
| Rnd 5 | 54 |
| Rnd 6 | 60 |
| Rnd 7 | 66 |
| Rnd 8 | 72 |
| Rnd 9 | 78 |
| Rnd 10 | 84 |
| Rnd 11 | 90 |
| Rnd 12 | 96 |
| Rnd 13 | 102 |
| Rnd 14 | 108 |
| Rnd 15 | 114 |
| Rnd 16 | 120 |
The finished base should measure about 22 × 14 to 15 cm (8.7 × 5.5 to 6 inches). Do not fasten off. Carry straight on into the body.
The Body
Continue with Main (Dusty Rose) in continuous rounds. You have 120 stitches on your hook.
Rnd 17: Working in BLO (back loops only), sc in each st around. (120 sc)
This back loop round folds the work upward so the walls rise and the base sits flat underneath.
Rnds 18 through 60: Sc in each st around, working through both loops. (120 sc)
Repeat the plain single crochet round until the body measures about 20 cm (8 inches) from the base fold. This takes roughly 43 rounds. If you want a taller or shorter bag, add or remove plain rounds here. Just note the change for the strap placement step later.
Drawstring Eyelets and Collar
Rnd 61: [Sc in next 13, ch 2, skip 2 sts] 8 times around. (104 sc and 8 ch-2 eyelets)
Rnd 62: Sc in each sc, and work 2 sc in each ch-2 space, around. (120 sc)
Rnds 63 through 65: Sc in each st around. (120 sc)
Finish: Sl st in next st, fasten off and weave in the end. This forms the soft cinch collar above the eyelets.
Tip: For a crisper top edge, work the very last round in BLO. If you want a firmer bag overall, drop to a 3.25 mm hook for the body rounds, or add a cut-to-size base insert inside at the end.
The Flap
Work with Main (Dusty Rose) flat in rows. The flap joins to the back of the bag opening. Stand the bag with the opening facing up. The "back" is where the straps will attach.
Row 1 (RS): With RS facing, join Main to the top collar at the back. Ch 1, sc in the same st and in next 29 sts across. Turn. (30 sc)
Rows 2 through 22: Ch 1, sc in each st across. Turn. (30 sc)
Work until the flap measures about 10 cm (4 inches).
Shape the Rounded Lower Edge
Row 23: Ch 1, sc2tog, sc in next 26, sc2tog. Turn. (28 sts)
Row 24: Ch 1, sc2tog, sc in next 24, sc2tog. Turn. (26 sts)
Row 25: Ch 1, sc2tog, sc in next 22, sc2tog. (24 sts) Do not turn.
Flap Edging
Border: Ch 1 and sc evenly around the three open sides of the flap. Work 1 sc in the end of each row along the sides, 3 sc in each lower corner, and 1 sc in each st along the lower edge. Sl st to join. Fasten off and weave in ends.
Decorative Whip Stitch Trim
With Blush Pink (or Beige) threaded in a yarn needle, work an even whip stitch right around the flap’s edge. Make small, evenly spaced stitches wrapping over the border. This creates the pretty contrast outline visible in the photos. Keep tension relaxed so the edge lies flat.
The flap should fold neatly over the front of the bag, covering roughly the top third.
Cherry Blossom Flowers
Work with Blush Pink. Make 13 to 15 small five-petal flowers. Each flower works in one quick round from a magic ring.
Make a magic ring.
Rnd 1: Ch 1, 10 sc into the ring. Sl st to the first sc. Gently pull the ring closed. (10 sc)
Rnd 2 (petals): [Ch 2, 2 dc in next st, ch 2, sl st in next st] 5 times around. (5 petals)
Finish: Fasten off, leaving a long tail (about 20 cm / 8 inches) for sewing.
Flower Placement
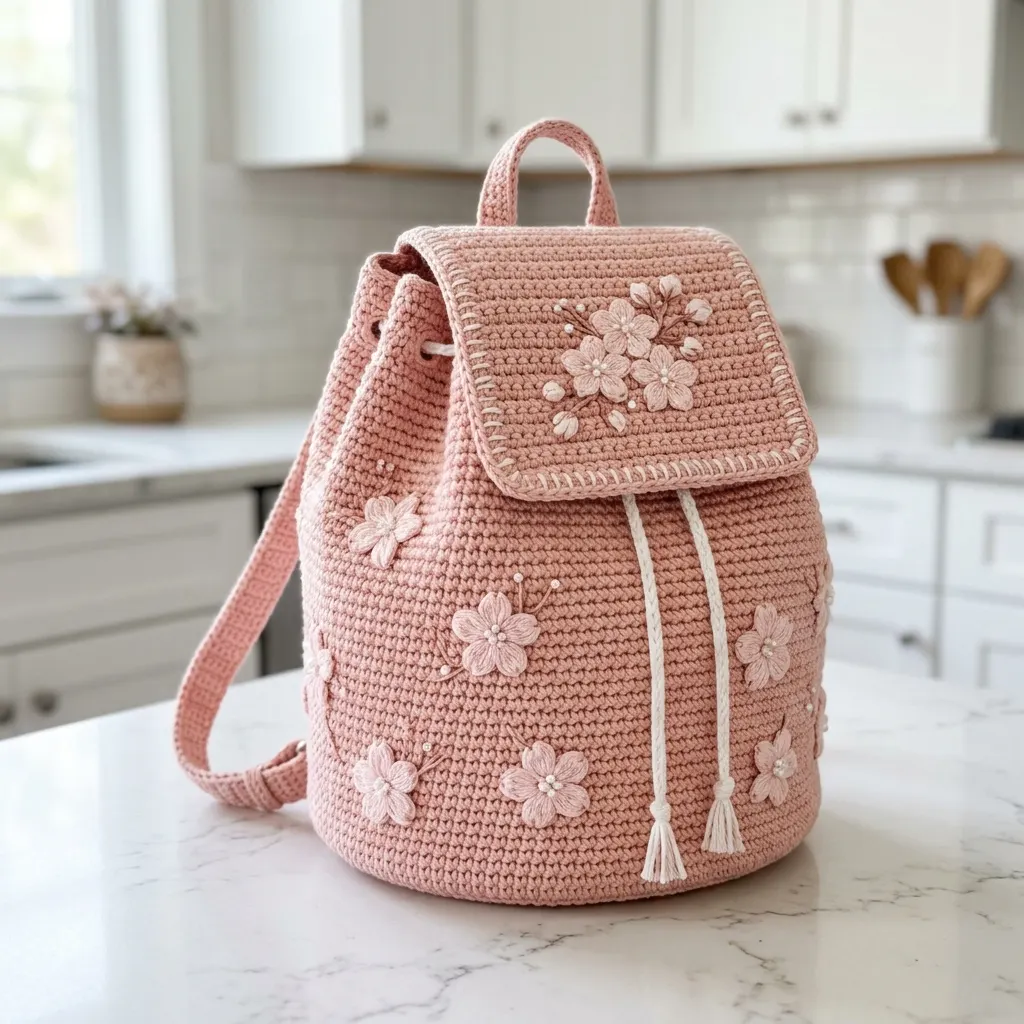
Cluster 3 to 4 blossoms on the flap, then scatter the rest across the front and around the sides. Some flowers sit alone, some group in little pairs. Follow the reference photos for inspiration. Pin all flowers in place before sewing so you can adjust the arrangement until you love it.
Stamens and Centers
Work with Beige yarn and small wooden beads. These details give the blossoms their delicate, realistic appearance.
Important: Work the stamens on each flower before attaching it to the bag. Handling a single motif is much easier than embroidering on the finished backpack.
1. Thread Beige yarn in a needle. From each flower’s center, work 3 to 5 short straight stitches radiating outward like little stamens.
2. Slide a small wooden bead onto some of the stamen tips. Secure each bead with a tiny French knot (wrap thread around needle 2 to 3 times, insert needle close to where it emerged, pull through while holding wraps) so the bead sits at the very end.
3. For flowers without beaded stamens, simply add a small cluster of French knots in the center.
4. Secure all yarn tails neatly on the back of each flower before sewing it to the bag.
A little goes a long way. Three stamens per flower already looks lovely.
Shoulder Straps (Make 2)
Work with Main (Dusty Rose) in rows for a firm, flat strap.
Ch 7.
Row 1: Sc in 2nd ch from hook and in each ch across. Turn. (6 sc)
Rows 2 and onward: Ch 1, sc in each st across. Turn. (6 sc)
Repeat until the strap measures about 46 cm (18 inches) unstretched. Fasten off, leaving a long tail.
Adjustable Hardware
Thread the loose end of each strap through a slide adjuster and a D-ring. Fold back about 3 cm (1.2 inches) and stitch securely. The slider allows the worn length to adjust between 60 and 95 cm (23.6 to 37.4 inches).
If you prefer fixed straps, skip the hardware and make each strap your full preferred length instead.
Top Handle / Hang Loop
Work with Main (Dusty Rose).
Ch 5.
Row 1: Sc in 2nd ch from hook and across. Turn. (4 sc)
Rows 2 through 14: Ch 1, sc across. Turn. (4 sc)
Work until it measures about 12 cm (4.7 inches) so the folded loop stands approximately 6 cm (2.4 inches) tall. Fasten off, leaving a tail for sewing.
Drawstring and Tassels
Drawstring: Use about 90 cm (35 inches) of cotton cord. Alternatively, crochet your own by chaining approximately 140 stitches, then sl st in 2nd ch from hook and each ch across. Fasten off.
Tassels (make 2): Wrap Beige yarn approximately 20 times around a 7 cm (2.75 inch) piece of cardboard. Tie tightly at the top, cut the loops at the bottom, wrap a "neck" a little below the top and tie it off, then trim the ends level. Attach one tassel to each end of the drawstring.
Assembly and Finishing
1. Weave in remaining ends on the base, body, and flap.
2. Check the flap folds neatly over the front. It is already joined at the back from Row 1. Tack the fold lightly if you want it to stay in position.
3. Pin your 13 to 15 blossoms across the flap, front, and sides as shown. Cluster some flowers, scatter others. Sew each flower down through the back of its petals using the long tail.
4. Add or finish the Beige stamens and beaded centers on any flowers you embroidered in place.
5. Sew the straps: Stitch the top ends to the inside top-back seam. Stitch the lower ends to the lower back of the bag, fitting the D-rings and sliders for adjustability.
6. Fold the handle into a loop and sew both ends to the top back, just behind the flap base.
7. Weave the drawstring in and out through the 8 eyelets. Begin and end at center front so both tasseled ends emerge together at the front of the bag.
8. Gently block the bag and lightly stuff it with tissue or a towel while it dries to set a crisp shape. Add a base insert if you want extra structure.
Choosing Your Yarn
Any smooth 100% cotton in DK or light worsted weight will work beautifully. A clean, non-splitty cotton keeps the flower petals and stitch texture crisp. Here are three lovely options in the right weight:
DROPS Muskat offers a soft matte finish that shows stitches cleanly with a wide range of dusty pinks. Look at the soft rose or old pink shades for the main color.
Paintbox Yarns Cotton DK has a huge color palette and friendly price. You can easily find a Dusty Rose, a Blush, and a soft Beige all in one place.
Hobbii Friends Cotton 8/8 is budget-friendly with many blush and neutral tones. Great for a structured bag that holds its shape.
Swatch and match gauge. That matters more than the exact brand. Mercerized cotton gives a subtle sheen and crisp stitches. Matte cotton gives a soft, cozy look. A cotton blend is lighter and gentler on the hands but holds its shape a little less, so add a base insert if you use one. Avoid fuzzy, slubby, or very splitty yarns so the blossom details stay neat.
Care Instructions
Troubleshooting Tips
Bag too floppy: Go down a hook size, work tighter, or add a card or plastic canvas base insert.
Gaps between stitches: Tighten your tension. Cotton shows every loose stitch.
Lost your place: Use a stitch marker in the first stitch of each round and count every few rounds.
Base cups or ruffles: Cupping means too few increases. Ruffling means too many. Re-check against the count table on page 6 of the pattern.
Flowers will not lie flat: Block them under a damp cloth before sewing on.
Left-Handed Note
The pattern is written for right-handed crochet, but every stitch count works identically for lefties. Simply work each round in the mirror image. Your rounds will spiral the opposite way (clockwise instead of counter-clockwise), and any "left, right, front, back" reference gets reversed. Working alongside the photos in a mirror makes the shaping easy to follow.

Final Thoughts on This Cherry Blossom Crochet Backpack Pattern
This backpack takes time, but every round builds on the last in a satisfying rhythm. The base grows into walls, the walls become a bag, and suddenly you are placing delicate blossoms across something you made with your own hands. The combination of firm single crochet fabric and soft floral appliqués creates a piece that looks far more complicated than it actually is.
Take your time with the flowers at the end. That really is where the magic happens. Pin them, step back, rearrange, and only sew when you love the placement. The beaded stamens add a finishing touch that makes people lean in for a closer look.
Whether you keep this backpack for yourself or gift it to someone who loves cherry blossoms, I hope every stitch brings you joy.
I would love to see your finished backpack! Save this pattern to your Pinterest boards so you can find it when you are ready to start, and please leave a comment below if you make one. Your photos always brighten my day, and I truly appreciate you being here.
Want a Quick & Easy Printable Version?
Get a clean, beautifully formatted PDF of this pattern — easy to follow step by step, ready to print or save on any device. No scrolling, no distractions, just the pattern.
Get the Printable PDF →