I have been dreaming about designing a bralette that would look stunning from every angle. Something with gorgeous strappy details in the back, a flattering lace-up front, and that perfect gradient color transition that reminds me of a summer sunset. I wanted it to work across multiple sizes, feel adjustable and comfortable, and use stitches that intermediate crocheters could tackle with confidence. After countless swatches and tweaks to get those crossover straps just right, I am SO pleased with how this Sunset Ombre Strappy Bralette turned out!
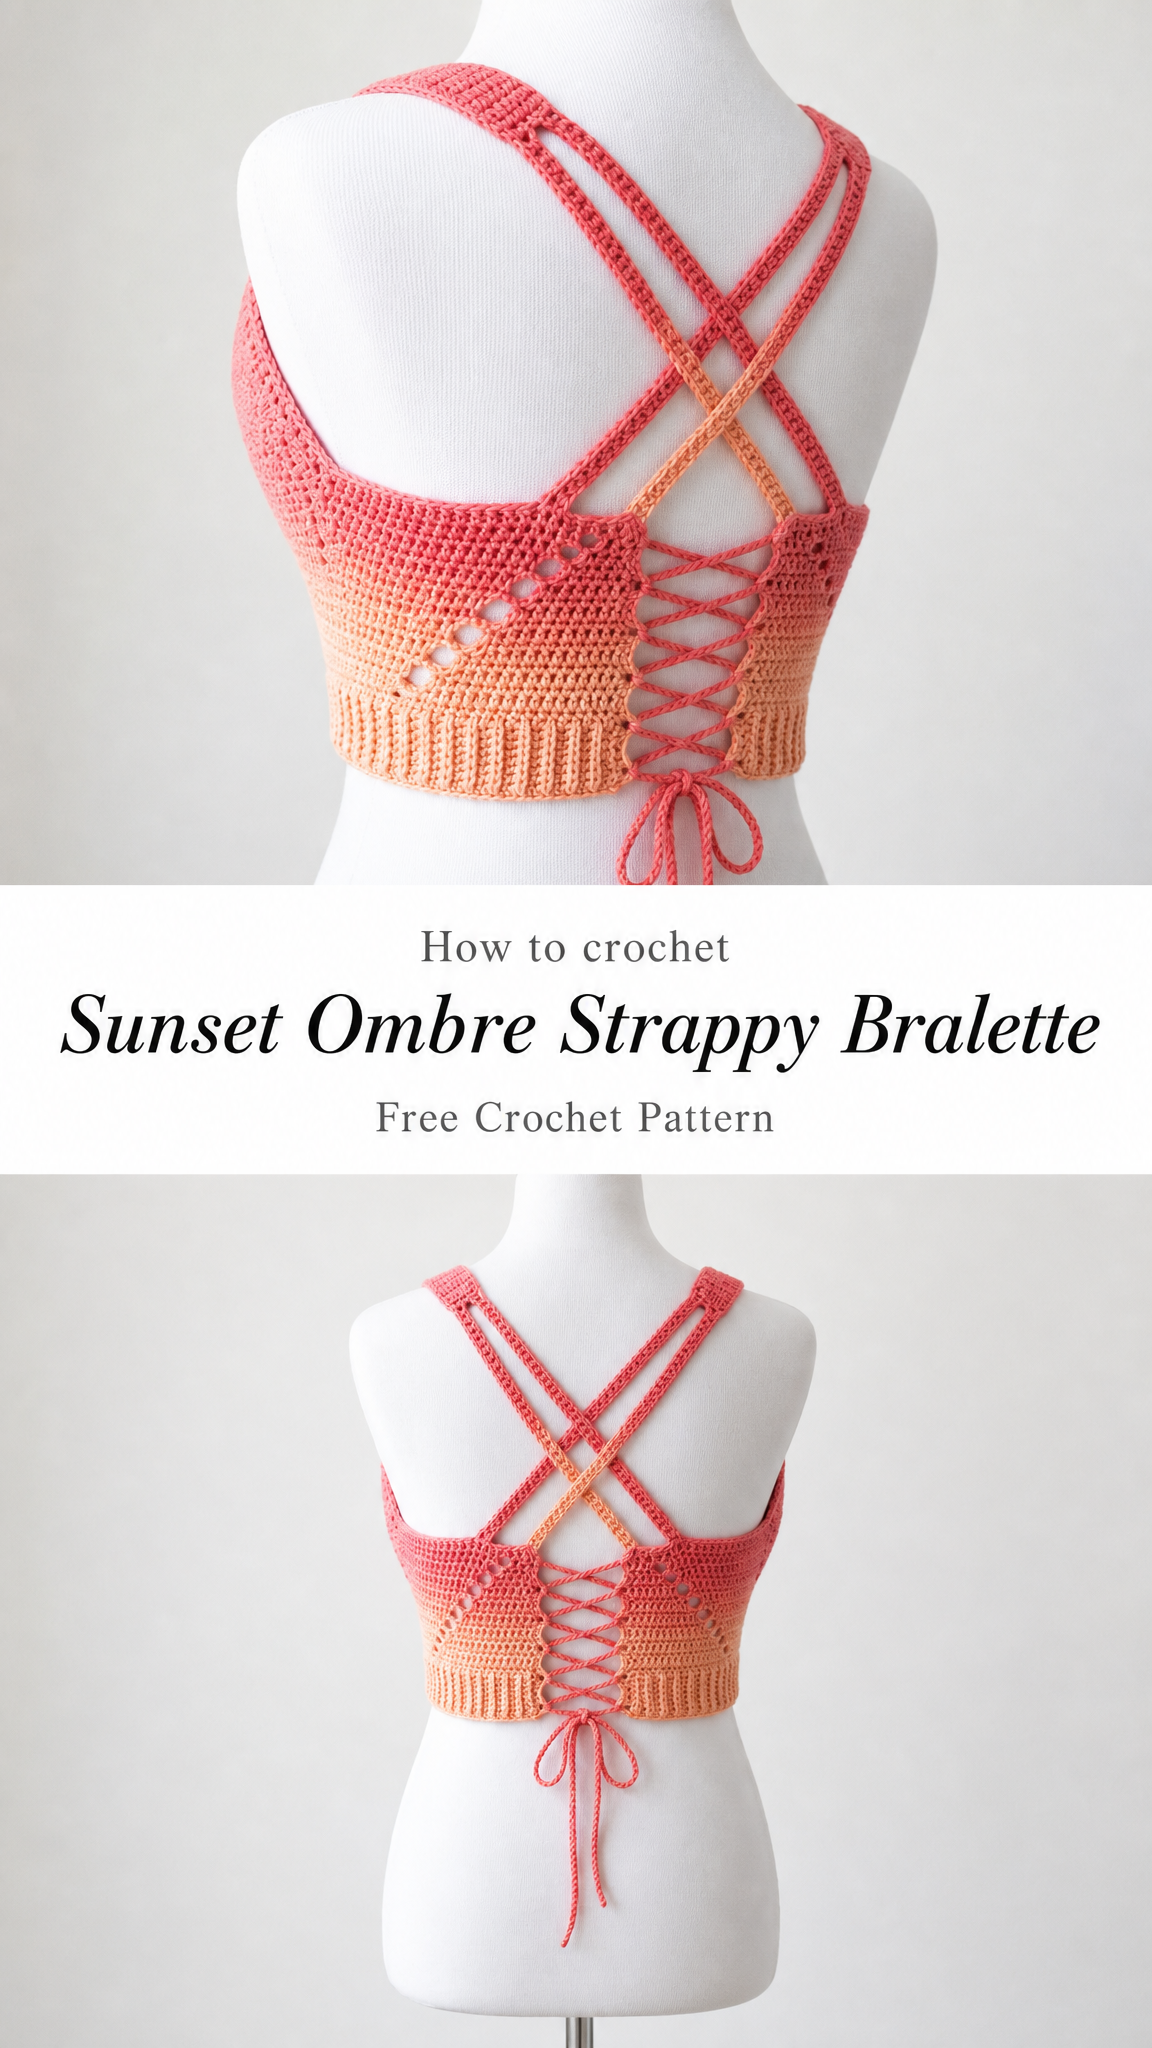
The combination of coral pink flowing into warm peach creates such a beautiful ombre effect. And that lace-up detail on both the front and back? It makes the whole piece adjustable while adding serious visual interest. Let me walk you through exactly how to recreate this crochet bralette pattern step by step.
Why You’ll Love This Crochet Bralette Pattern
This strappy bralette stands out for several reasons. The crossover back straps create an eye-catching X design that looks amazing peeking out from tank tops or worn on its own at the beach. The lace-up front and back panels allow you to customize the fit, making it work for different body shapes and bust sizes.
The two-tone ombre coloring adds depth and dimension without complicated colorwork. You simply switch yarns at the right point, and the gradient does all the heavy lifting.
What I particularly love is how the ribbed band at the bottom creates stretch and structure. It hugs your body without feeling restrictive. The whole piece has enough coverage to feel secure while still showing off that beautiful handmade texture.
Skill Level
This crochet bralette pattern is intermediate level. You should be comfortable with basic stitches and shaping. If you have made a simple top or worked with garment construction before, you can absolutely tackle this project.
The trickiest parts are keeping your eyelet holes aligned and attaching the straps evenly. I will walk you through both sections carefully.
Materials Needed
Yarn:
I recommend 100% cotton or a cotton blend for this project. Cotton has minimal stretch, which helps the bralette maintain its shape. It also feels cool and breathable against your skin, perfect for summer wear.
Hook:
Notions:
Gauge:
18 stitches and 20 rows = 4 inches in single crochet
*Always check your gauge before starting. A too-loose gauge will result in a bralette that stretches out of shape.*
Finished Measurements
This pattern is written for size Small with notes for adjusting.
For larger sizes, add stitches in multiples of 4 to maintain the eyelet pattern alignment.
Abbreviations and Stitch Definitions
Let me define every stitch before we begin so you can reference this section anytime.
Ch = Chain: Yarn over, pull through loop on hook. This creates your foundation and turning chains.
Sl st = Slip stitch: Insert hook, yarn over, pull through both loops at once. Used for joining and creating the cord ties.
Sc = Single crochet: Insert hook into stitch, yarn over and pull up a loop (2 loops on hook), yarn over and pull through both loops.
Hdc = Half double crochet: Yarn over, insert hook into stitch, yarn over and pull up a loop (3 loops on hook), yarn over and pull through all 3 loops.
Dc = Double crochet: Yarn over, insert hook into stitch, yarn over and pull up a loop (3 loops on hook), yarn over and pull through 2 loops, yarn over and pull through remaining 2 loops.
Sk = Skip: Miss the indicated stitch and work into the next one.
Ch-sp = Chain space: The gap created by chain stitches in the previous row. You work into this space, not into individual chains.
BLO = Back loop only: Insert your hook under just the back loop of the stitch instead of both loops. Creates a ribbed texture.
Dec = Decrease: Work two stitches together as one to reduce stitch count.
Sc2tog = Single crochet two together: Insert hook in first stitch, pull up a loop, insert hook in next stitch, pull up a loop (3 loops on hook), yarn over and pull through all 3 loops. This decreases by one stitch.
Pattern Notes
Crochet Bralette Pattern Instructions
Right Cup Panel
With Color A and 4.0mm hook:
Row 1: Ch 3, sc in 2nd ch from hook and in last ch. (2 sts)
Row 2: Ch 1, turn, 2 sc in first st, 2 sc in last st. (4 sts)
Row 3: Ch 1, turn, 2 sc in first st, sc in each st across to last st, 2 sc in last st. (6 sts)
Rows 4-12: Repeat Row 3, increasing 2 stitches each row. (24 sts at end of Row 12)
Row 13: Ch 1, turn, sc in each st across. (24 sts)
Row 14 (Eyelet Row): Ch 1, turn, sc in first 2 sts, *ch 1, sk 1, sc in next 3 sts*, repeat from * across, ending with sc in last 2 sts. (24 sts including ch-sps)
Rows 15-16: Ch 1, turn, sc in each st and ch-sp across. (24 sts)
Row 17: Repeat Row 14.
Rows 18-20: Ch 1, turn, sc in each st and ch-sp across. (24 sts)
Fasten off, leaving a long tail for seaming.
Left Cup Panel
Work exactly as Right Cup Panel. You will have two matching triangular cup pieces.
Back Panel
With Color A and 4.0mm hook:
Row 1: Ch 31, sc in 2nd ch from hook and in each ch across. (30 sts)
Rows 2-4: Ch 1, turn, sc in each st across. (30 sts)
Row 5 (Eyelet Row): Ch 1, turn, sc in first 2 sts, *ch 1, sk 1, sc in next 3 sts*, repeat from * to last 4 sts, ch 1, sk 1, sc in last 3 sts. (30 sts including ch-sps)
Rows 6-8: Ch 1, turn, sc in each st and ch-sp across. (30 sts)
Row 9: Repeat Row 5.
Rows 10-12: Ch 1, turn, sc in each st and ch-sp across. (30 sts)
Switch to Color B.
Rows 13-18: Ch 1, turn, sc in each st across. (30 sts)
Fasten off, leaving a long tail.
Ribbed Band
The ribbed band wraps around your entire torso and provides the structure for the bralette. Working in back loops only creates that stretchy ribbed texture you see in the photos.
With Color B and 4.0mm hook:
Row 1: Ch 9, hdc in 3rd ch from hook and in each ch across. (7 sts)
Row 2: Ch 2 (does not count as st), turn, hdc in BLO of each st across. (7 sts)
Repeat Row 2 until band measures approximately 26 inches, or desired length to wrap around your underbust with about 2 inches of overlap for lacing adjustment.
This will be roughly 90-95 rows depending on your gauge.
Fasten off, leaving a long tail.
Straps (Make 4)
Each strap is worked as a simple chain with single crochet worked back along it for stability.
With Color A and 4.0mm hook:
Row 1: Ch 65.
Row 2: Sc in 2nd ch from hook and in each ch across. (64 sts)
Fasten off, leaving tails for attaching.
Make 4 identical straps.
Lacing Cord (Make 2)
You need two cords, one for the front lacing and one for the back.
With Color A and 4.0mm hook:
Ch 150, sl st in 2nd ch from hook and in each ch across.
Fasten off.
This creates a smooth, cord-like tie that threads easily through the eyelets.
Assembly Instructions
Now comes the fun part where everything comes together. Take your time with assembly, as neat seaming makes all the difference in the finished look.
Step 1: Attach Cups to Band
Lay your ribbed band flat. Find the center point. Position your two cup panels with the pointed tips meeting at center, leaving about a 1-inch gap between them for the front lacing section.
Using Color B and your tapestry needle, whip stitch the bottom edge of each cup to the top edge of the band. The cups should sit slightly above the band, creating that cropped silhouette.
Step 2: Attach Back Panel
Position the back panel at the center back of the band, aligning the bottom edge of the back panel with the top edge of the band.
Whip stitch in place, matching where the color changes meet.
Step 3: Create Side Seams
Fold the bralette so the side edges of the cups meet the side edges of the back panel.
Single crochet or whip stitch these edges together, creating the side seams.
Step 4: Attach Straps
This creates the crossover X design on the back.
Take two straps and attach each end to the top outer corners of the cups at the front.
Cross the straps at your upper back and attach the opposite ends to the top corners of the back panel. The straps should form an X when viewed from behind.
Repeat with the remaining two straps, crossing them in the opposite direction to create that layered X effect.
Secure all strap ends firmly with several stitches.
Step 5: Thread Lacing
Thread your first lacing cord through the front eyelets in a criss-cross pattern, starting from the top and working down.
Thread the second cord through the back eyelets the same way.
Tie both cords in bows at the bottom.
Finishing Touches
Weave in all remaining ends securely. Because this is a garment that will stretch and move, I recommend weaving ends through at least 2-3 inches of stitches and doubling back.
Blocking: Wet block your finished bralette by soaking it in lukewarm water for 15 minutes. Gently squeeze out excess water (never wring), lay flat on a towel, and pin to measurements. Let dry completely.
Blocking helps even out your stitches and gives the whole piece a polished, professional look.
Customization Tips
Want more coverage? Add extra rows to your cup panels before the eyelet sections.
Need a longer length? Increase the width of your ribbed band by chaining more stitches at the start.
Different colors? This pattern looks stunning in solid colors too. Try navy blue, forest green, or classic black.
Adding cups? You can sew in removable bra cups to the inside for extra support and coverage.
Care Instructions
Hand wash your crochet bralette in cool water with mild detergent. Lay flat to dry away from direct sunlight to prevent color fading. Never put handmade cotton garments in the dryer, as they may shrink or lose their shape.
Store flat or gently folded rather than hanging, which can stretch out the straps over time.
Troubleshooting Common Issues
Cups look uneven: Count your stitches at the end of each row. Increases should add exactly 2 stitches per row.
Eyelets don’t line up: Make sure your eyelet rows fall on the same row numbers for both cups and the back panel.
Band is too tight or loose: The ribbed band should fit snugly but not restrictively around your underbust. Add or remove rows as needed before assembly.
Straps are too long: Simply make fewer chains when creating your straps. Try 55 or 50 for shorter straps.
Thank you so much for choosing this Sunset Ombre Strappy Bralette crochet pattern for your next project. I truly hope you love making it as much as I loved designing it. If you create one, I would absolutely love to see it! Tag me on Instagram or share your finished photos in my Facebook group.
If this pattern has you excited to start crocheting, save it to your Pinterest boards so you can find it whenever you’re ready to cast on. And please drop a comment below if you make one. I read every single comment and love hearing about your color choices and any tweaks you make along the way!
