
Last summer, I attended my best friend’s garden party wearing a store-bought crochet dress that fell apart by the end of the night. The seams unraveled, the straps stretched out, and I spent half the evening tugging at the waistline. I stood in my closet that night, staring at the sad heap of yarn, and thought: I can do better than this.
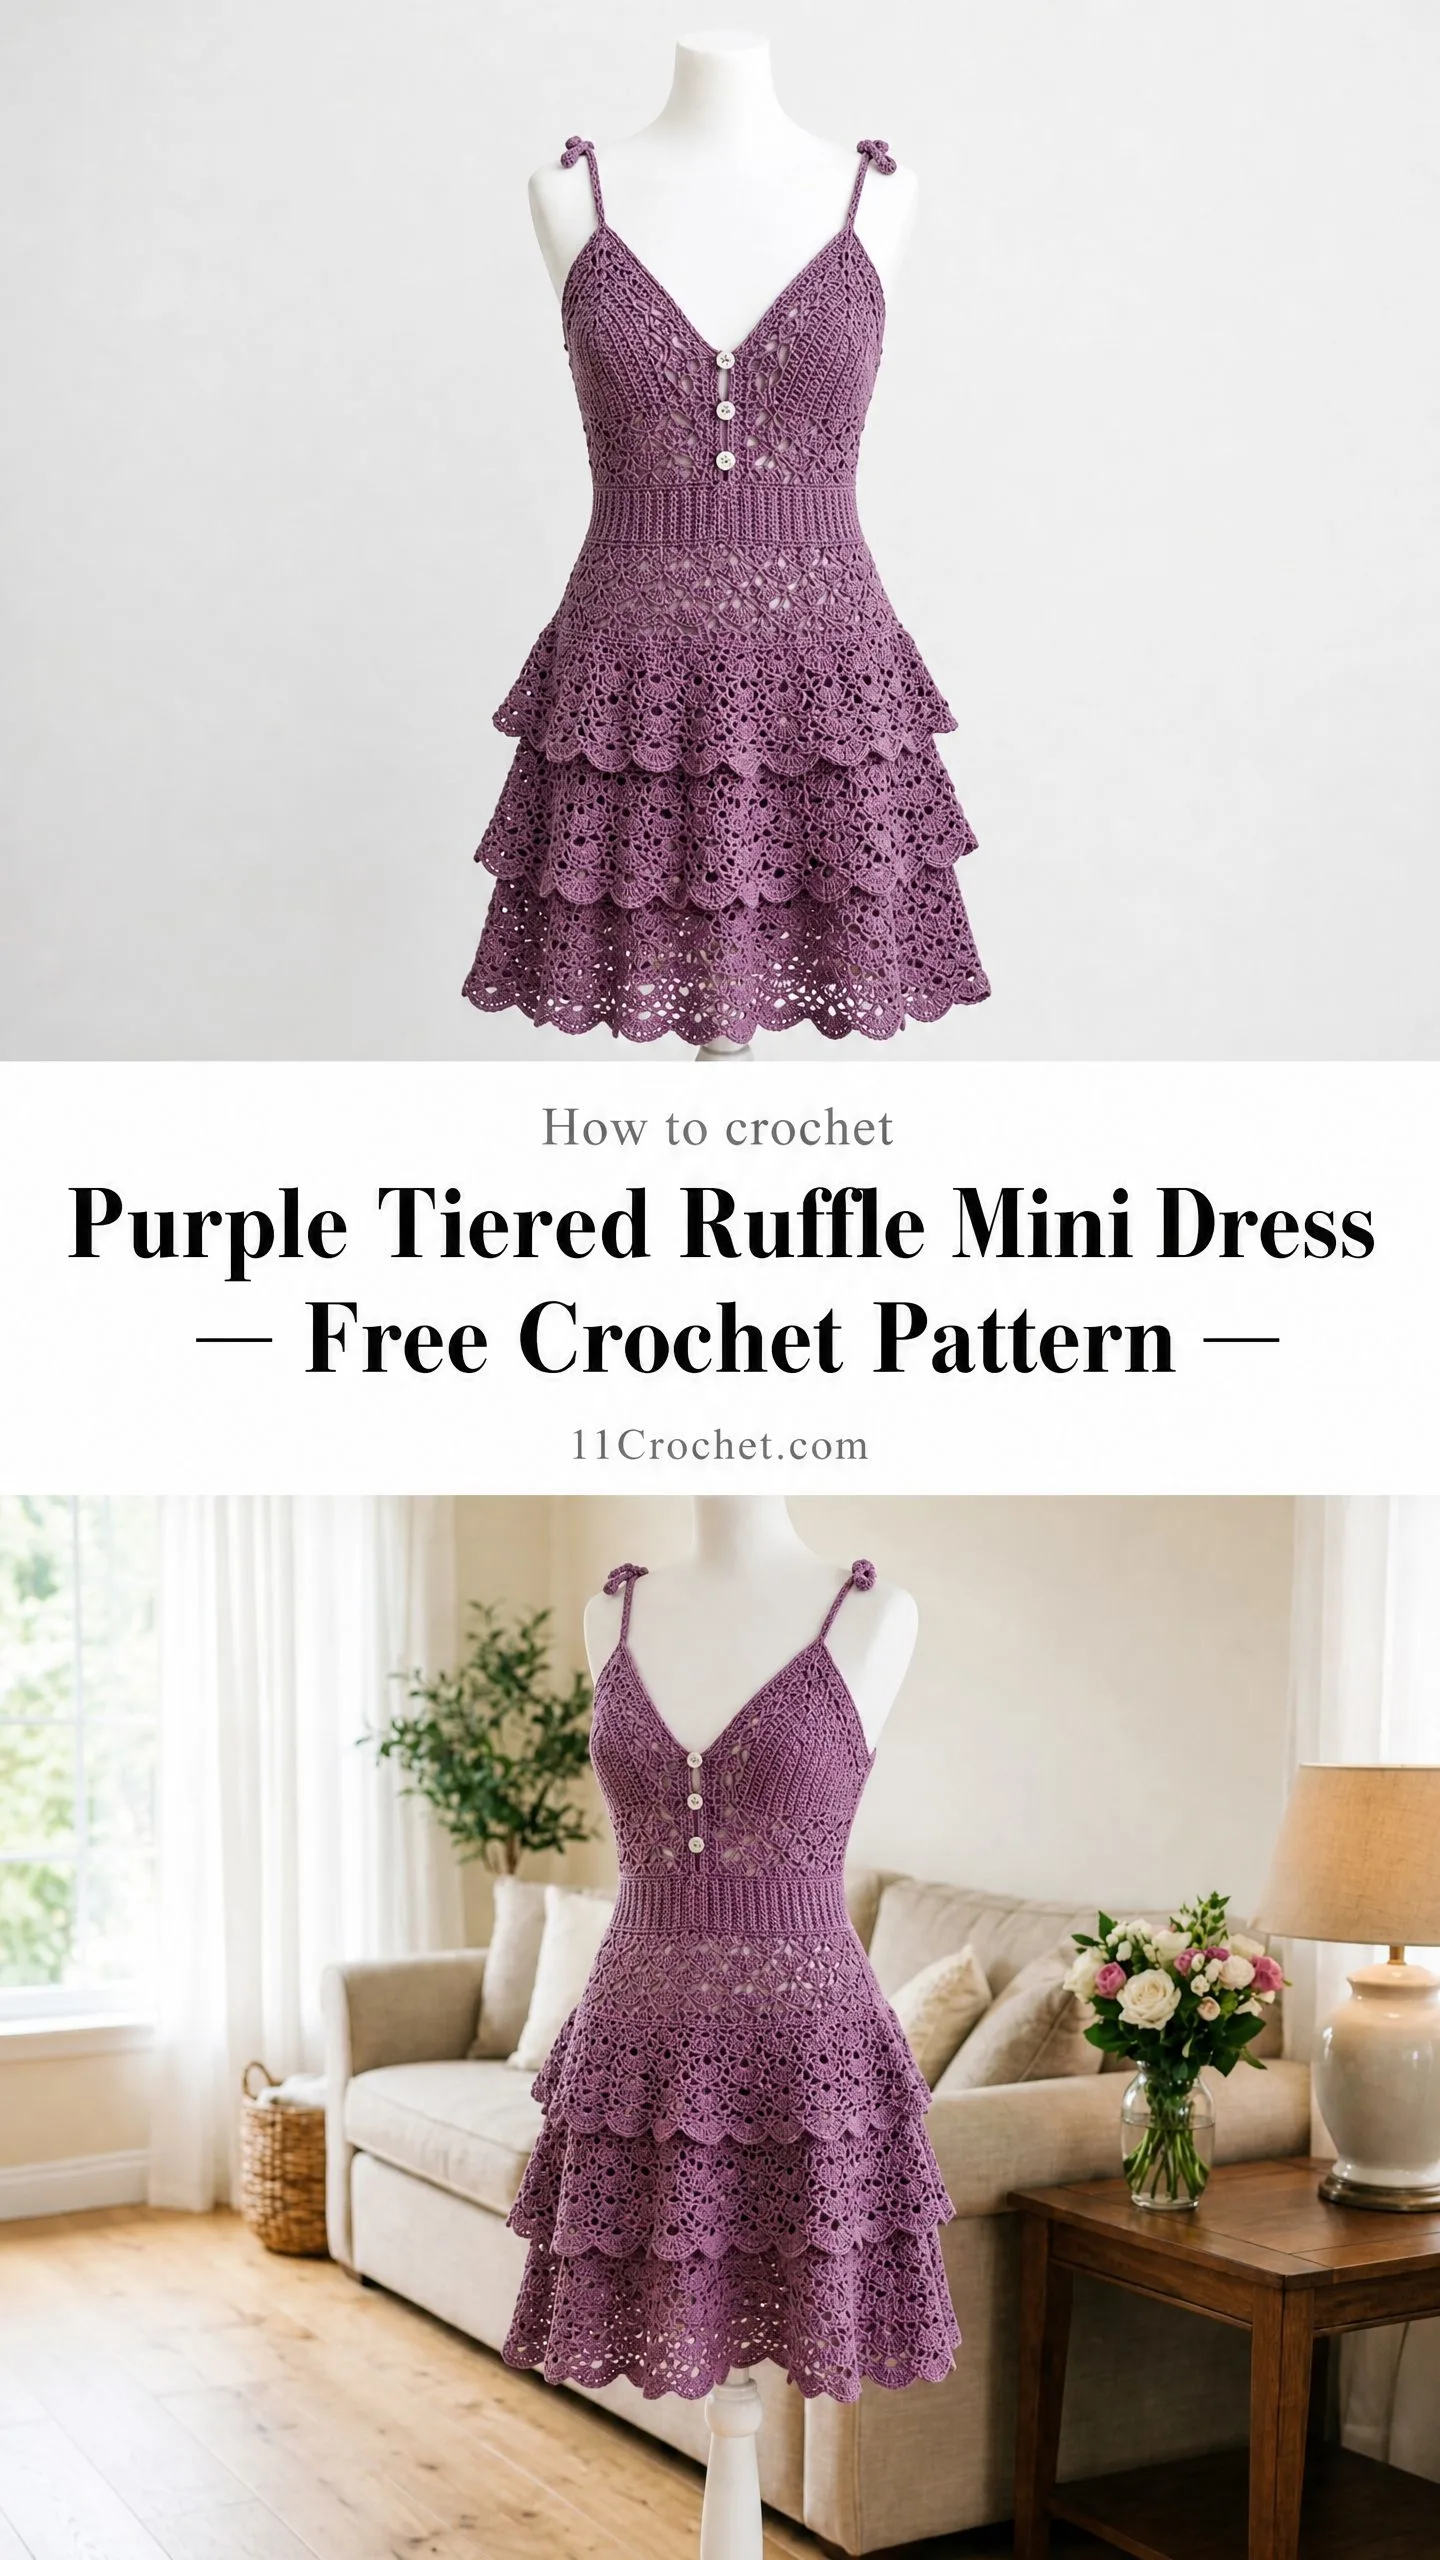
So I did. I spent months designing, frogging, redesigning, and finally perfecting this purple tiered ruffle mini dress crochet pattern. Every single element exists because of something that went wrong with that store-bought disaster. The ribbed waistband that actually hugs your waist? That came from the saggy elastic nightmare. The reinforced strap attachment? From those stretchy, slipping straps. The tiered construction that moves beautifully when you walk? From wanting a dress that looked as good dancing as it did standing still.
This is an advanced project. I won’t sugarcoat that. But if you’ve been crocheting for a while and you’re ready to make something that will genuinely impress you, this is your next project. Let me walk you through every single step.
What Makes This Dress Special
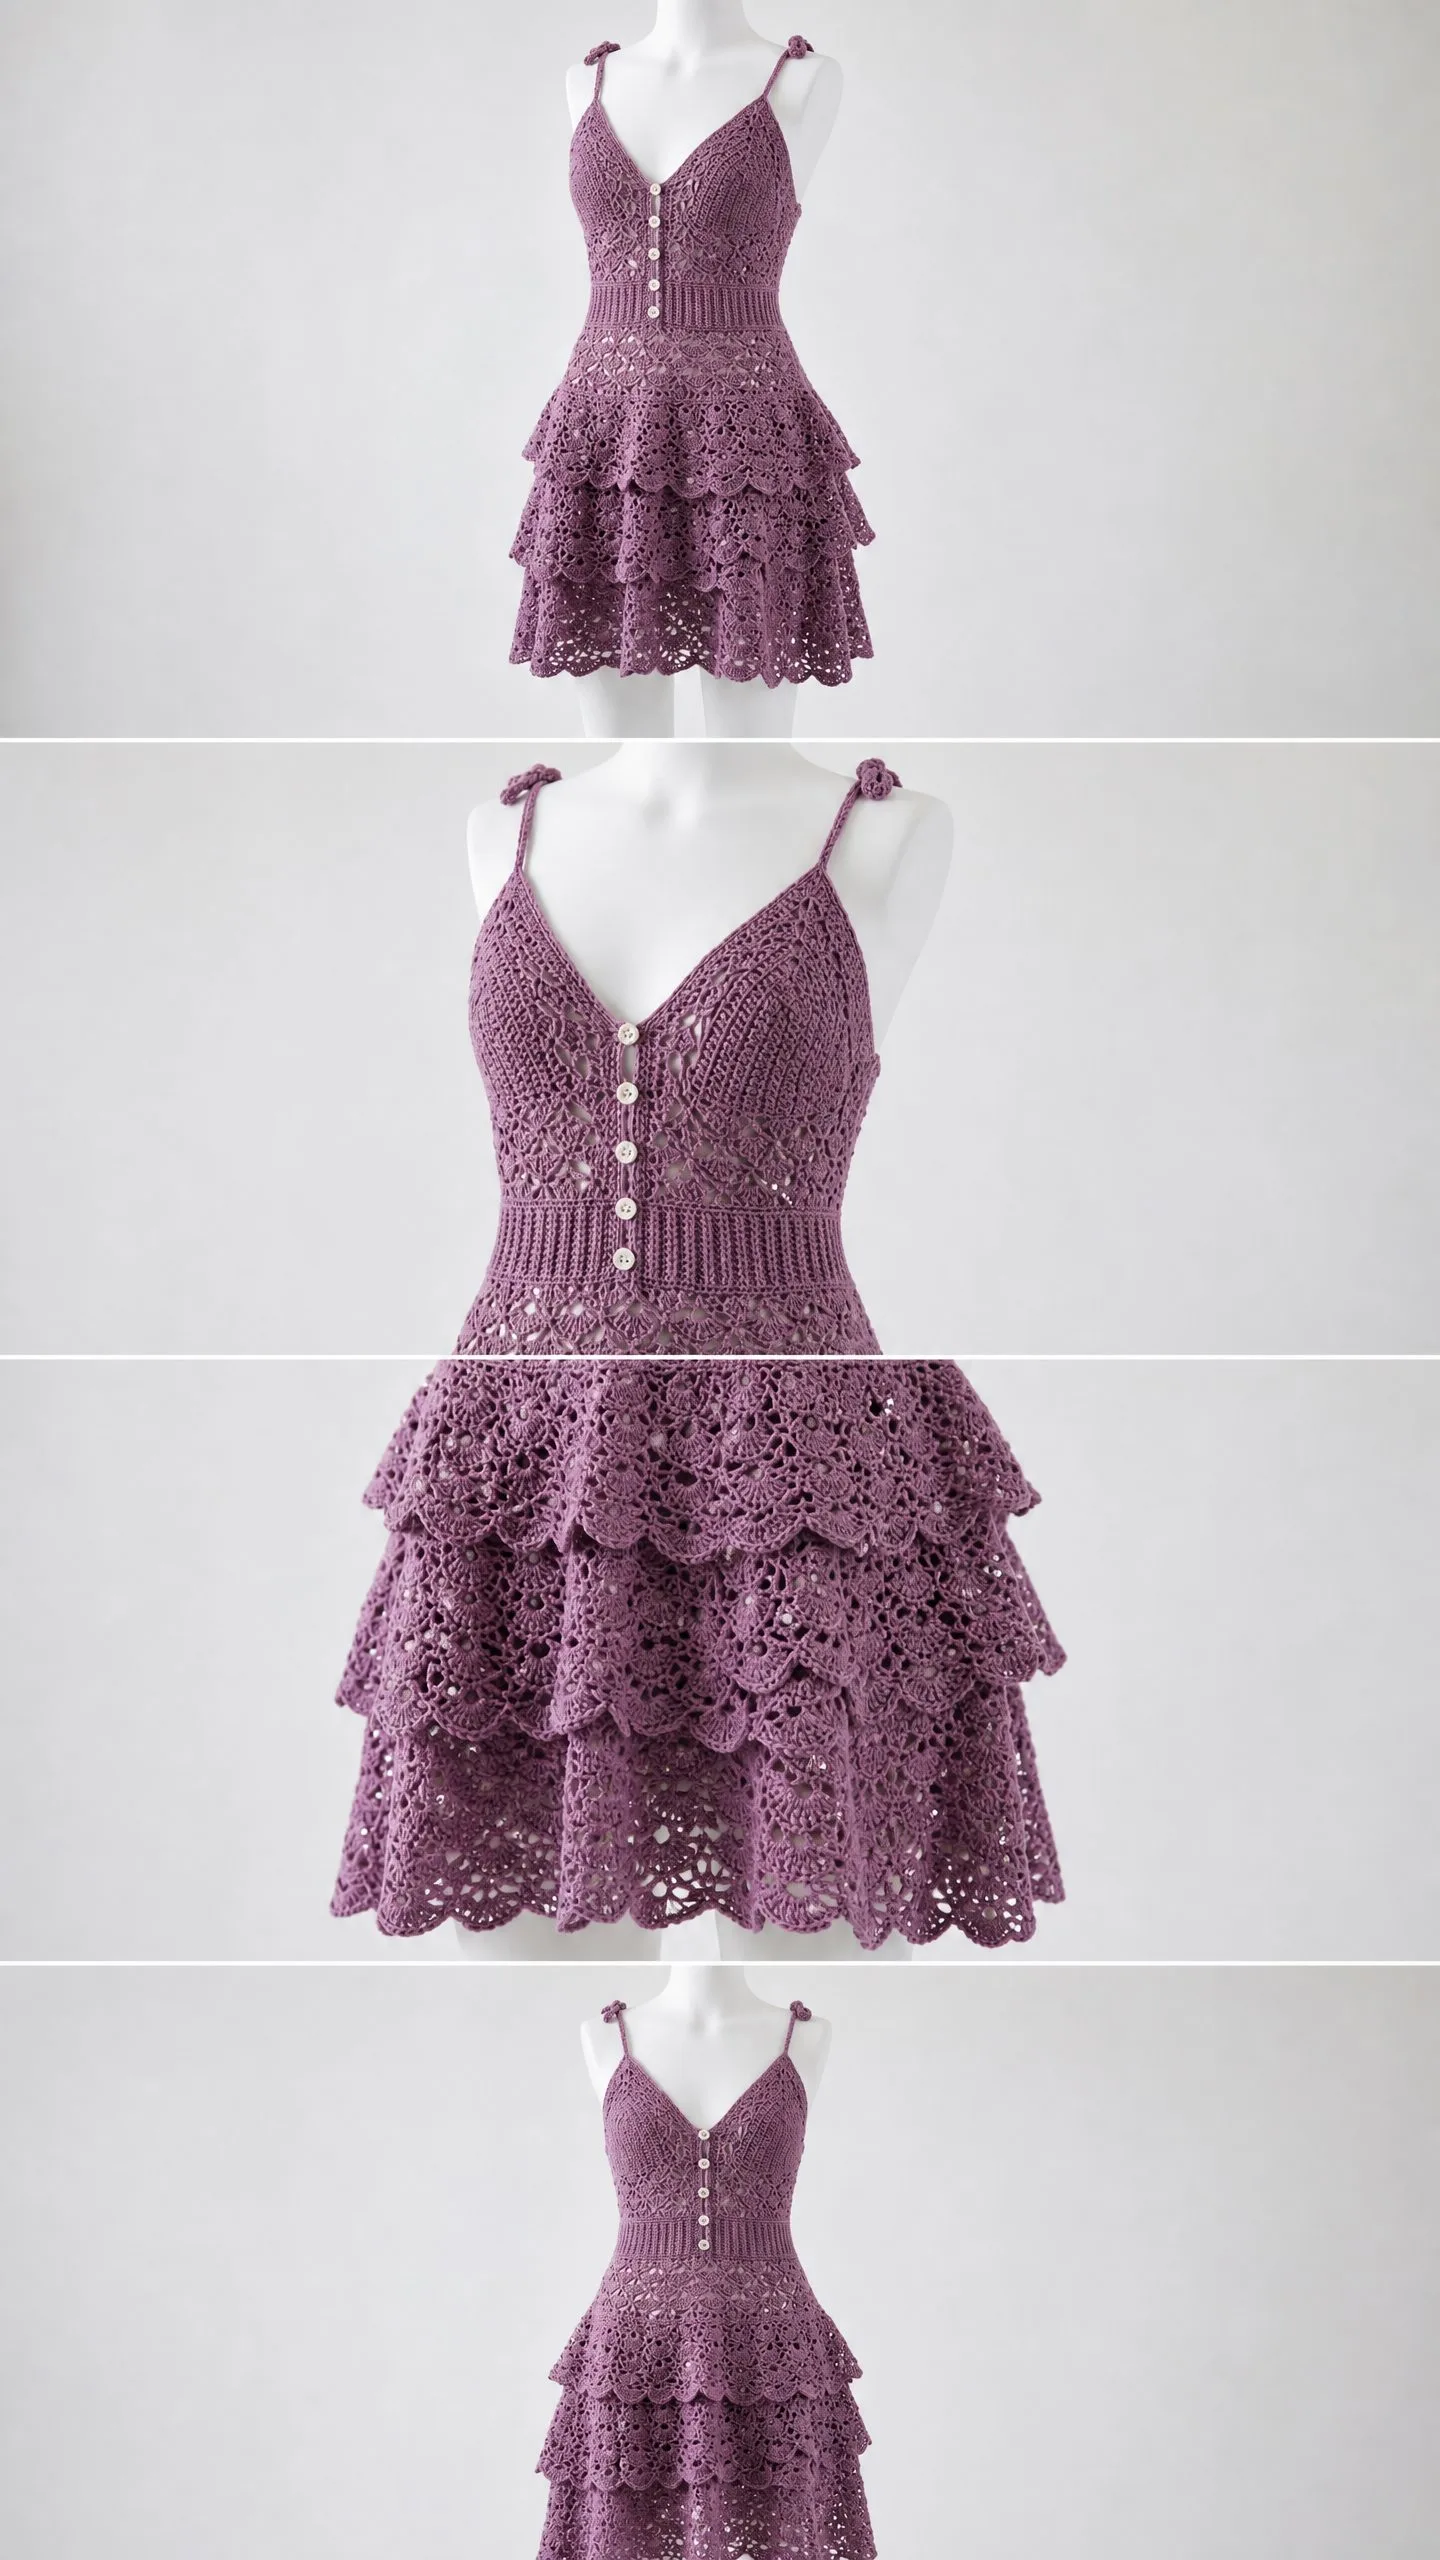
This purple tiered ruffle mini dress combines a fitted lace bodice, a structured ribbed waistband, and a three-tier ruffled skirt with cascading scalloped edges. The silhouette is romantic and bohemian, perfect for summer weddings, beach vacations, or any occasion where you want to feel absolutely stunning in something you made with your own hands.
The construction method is clever. You work the bodice in two flat panels, seam them at the sides, add a waistband in the round, then build each skirt tier downward with increasing stitch counts. Each tier has 1.5 times the stitches of the one above it, creating that beautiful cascading ruffle effect you see in the photos.
The V-neckline on the front sits slightly higher than the back, giving you that gorgeous open-back look that’s both flattering and comfortable. Spaghetti straps with little knotted ends tie at the shoulders for adjustability and visual interest.
Materials You Will Need
Yarn: Fingering weight yarn, also called CYCA 1 or Super Fine weight. Choose 100% cotton or a cotton blend for the best drape and stitch definition. You will need approximately 1,800 yards for size Small, 2,100 yards for Medium, or 2,400 yards for Large. The sample is worked in a dusty mauve purple color.
Great yarn options include:
Hooks: You need two hooks for this project. A US size B/1 hook, which is 2.25 mm, handles all the lace sections. A US size C/2 hook, which is 2.75 mm, works the waistband ribbing.
Notions:
Finished Measurements
This pattern comes in three sizes. All measurements are given as Small (Medium, Large):
Gauge (Do Not Skip This)
Gauge is mandatory for this garment. A difference of even one stitch per repeat will change your finished bust measurement by up to 2 inches across the full bodice. That’s the difference between a dress that fits and a dress that doesn’t.
For lace sections using B/1 (2.25 mm) hook in Diamond Lace Pattern:
For waistband using C/2 (2.75 mm) hook in post-stitch ribbing:
Make a swatch of at least 30 stitches by 20 rows. Block it. Measure it. Adjust your hook size if needed.
Abbreviations and Stitch Definitions
Let me define every abbreviation before we start. I’ll explain each one in plain English so you know exactly what you’re doing.
ch = chain: Yarn over, pull through the loop on your hook. This creates the foundation for your work.
sl st = slip stitch: Insert hook, yarn over, pull through both the stitch and the loop on your hook in one motion. Used for joining rounds.
sc = single crochet: Insert hook, yarn over, pull up a loop (2 loops on hook), yarn over, pull through both loops.
dc = double crochet: Yarn over, insert hook, yarn over, pull up a loop (3 loops on hook), yarn over, pull through 2 loops, yarn over, pull through remaining 2 loops.
tr = treble crochet: Yarn over twice, insert hook, yarn over, pull up a loop, then yarn over and pull through 2 loops three separate times.
hdc = half double crochet: Yarn over, insert hook, yarn over, pull up a loop (3 loops on hook), yarn over, pull through all 3 loops at once.
fpdc = front post double crochet: Yarn over, insert your hook from front to back to front around the post (the vertical part) of the stitch below, yarn over, pull up a loop, complete as a regular double crochet. This creates a raised ridge on the front.
bpdc = back post double crochet: Yarn over, insert your hook from back to front to back around the post of the stitch below, complete as a regular double crochet. This creates a raised ridge on the back.
sc2tog = single crochet two together: A decrease stitch. Insert hook in first stitch, pull up a loop, insert hook in next stitch, pull up a loop (3 loops on hook), yarn over, pull through all 3 loops.
dc2tog = double crochet two together: A decrease stitch. Yarn over, insert hook, pull up loop, yarn over, pull through 2 loops. Repeat in next stitch. Yarn over, pull through all 3 remaining loops.
sk = skip: Pass over the indicated stitch without working into it.
ch-sp = chain space: The gap created by a chain in a previous row. You work into this space, not into the chain itself.
t-ch = turning chain: The chain worked at the beginning of a row that brings your hook up to the correct height.
RS = right side: The front of your work, the side that will show.
WS = wrong side: The back of your work.
pm = place marker
rep = repeat
st(s) = stitch(es)
rnd(s) = round(s)
Special Stitch Patterns
Diamond Lace Pattern (Multiple of 10 stitches plus 1)
This creates the beautiful open mesh on the bodice. It works over a 4-row repeat.
Row 1 (RS): Ch 3 (counts as dc), sk first st, dc in next st, ch 2, sk 2 sts, sc in next st, ch 2, sk 2 sts, dc in next 2 sts. Rep across to last st, dc in last st. Turn.
Row 2 (WS): Ch 1, sc in first dc, ch 3, sk ch-2 sp and sc, sc in next ch-2 sp, ch 3, sk 1 dc, sc in next dc. Rep across, sc in top of t-ch. Turn.
Row 3 (RS): Ch 5 (counts as dc plus ch 2), sc in first ch-3 sp, ch 5, sc in next ch-3 sp, ch 2, dc in next sc. Rep across, end ch 2, dc in last sc. Turn.
Row 4 (WS): Ch 1, sc in dc, 2 sc in ch-2 sp, sc in sc, 5 sc in ch-5 sp, sc in sc, 2 sc in ch-2 sp. Rep across, sc in 3rd ch of t-ch. Turn.
Rows 1 through 4 form one complete Diamond Lace unit.
Fan Lace Pattern (Multiple of 12 stitches, worked in rounds)
This creates the gorgeous fan shells on each skirt tier.
Rnd 1 (RS): Ch 3 (counts as dc), dc in same st, ch 1, sk 2 sts, sc in next st, ch 3, sk 2 sts, sc in next st, ch 1, sk 2 sts, 5 dc in next st (shell made), sk 2 sts. Rep around. Join with sl st to top of beg ch-3.
Rnd 2: Ch 1, sc in same st, ch 3, sk ch-1 sp, sc in ch-3 sp, ch 3, sk ch-1 sp, sc in 3rd dc of 5-dc shell. Rep around. Join with sl st to beg sc.
Rnd 3: Ch 3, 4 dc in same sc, ch 1, sc in ch-3 sp, ch 3, sc in next ch-3 sp, ch 1, 5 dc in next sc. Rep around. Join with sl st to top of beg ch-3.
Rnd 4: Ch 1, sc in same st, sc in each of next 4 dc, sc in ch-1 sp, 3 sc in ch-3 sp, sc in ch-1 sp, sc in each of next 5 dc. Rep around. Join with sl st to beg sc.
Scallop Edging (Multiple of 6 stitches)
This finishes each tier with that pretty shell border.
Rnd A: Ch 1, sc in each st around. Join.
Rnd B: Sl st in next st, ch 3, 4 dc in same st, sk 2 sts, sl st in next st, sk 2 sts, 5 dc in next st. Rep around. Join.
Shell Stitch
5 dc all worked into one stitch or space. You’ll use this throughout the lace patterns.
Pattern Instructions
Section 1: Front Bodice Panel
Using your B/1 (2.25 mm) hook and your main color yarn, ch 103 for Small, ch 123 for Medium, or ch 133 for Large.
Row 1 (RS): Dc in 4th ch from hook (beg ch-3 counts as dc), dc in each remaining ch across. Turn. (101 dc for Small, 121 dc for Medium, 131 dc for Large)
Row 2: Ch 3 (counts as dc), dc in each st across to t-ch, dc in top of t-ch. Turn. (101 dc)
Rows 3 through 6: Rep Row 2 four times. This creates a 6-row plain double crochet foundation at the lower edge of the bodice. (101 dc)
Begin Diamond Lace Pattern on Row 7:
Row 7 (RS, Diamond Row 1): Ch 3 (counts as dc), sk first st, dc in next st, ch 2, sk 2 sts, sc in next st, ch 2, sk 2 sts, dc in next 2 sts. Rep across to last st, dc in last st, dc in top of t-ch. Turn. (101 pattern positions)
Row 8 (WS, Diamond Row 2): Ch 1, sc in first dc, ch 3, sk ch-2 sp and sc, sc in next ch-2 sp, ch 3, sk 1 dc, sc in next dc. Rep across to t-ch, sc in top of t-ch. Turn. (21 sc, 20 ch-3 sps)
Row 9 (RS, Diamond Row 3): Ch 5 (counts as dc plus ch 2), sc in first ch-3 sp, ch 5, sc in next ch-3 sp, ch 2, dc in next sc. Rep across ending ch 2, dc in last sc. Turn. (11 dc, 10 ch-5 sps, 10 ch-2 sps, 20 sc)
Row 10 (WS, Diamond Row 4): Ch 1, sc in dc, 2 sc in ch-2 sp, sc in sc, 5 sc in ch-5 sp, sc in sc, 2 sc in ch-2 sp across, sc in 3rd ch of t-ch. Turn. (101 sc)
Continue working Rows 7 through 10 as the 4-row repeat for a total of 5 repeat units. This means you work Rows 7 through 26. After Row 26, your bodice panel measures approximately 8.5 inches from the foundation edge.
V-Neckline Shaping (Front)
Row 27 (RS): Work Diamond Row 1 pattern across first 45 sts (4 full repeats plus 5 sts). Leave remaining sts unworked. You will work the right shoulder first. Turn. (45 sts)
Right Shoulder Neck Decrease:
Row 28 (WS): Work Diamond Row 2 across to last 4 sts of this side, leave last 4 sts unworked. Turn. (41 sts)
Row 29 (RS): Sl st across first 2 sts, work Diamond Row 3 across to end. Turn. (39 sts)
Row 30 (WS): Work Diamond Row 4 across to last 2 sts, leave last 2 sts unworked. Turn. (37 sts)
Row 31 (RS): Sl st across first st, ch 3, work Diamond Row 1 across. Turn. (36 sts)
Rows 32 through 34: Work Rows 2 through 4 of Diamond Lace pattern even. (36 sts each row)
Work 2 more plain dc rows for the strap attachment point. Fasten off. This shoulder panel measures approximately 10 inches from foundation for size Small.
Left Shoulder:
Skip the center 11 stitches of Row 27 to form the V-neck center. Rejoin yarn to the next stitch on RS.
Row 27L (RS): Work Diamond Row 1 pattern across remaining 45 sts. Turn. (45 sts)
Left Shoulder Neck Decrease (mirror of right):
Row 28L (WS): Sl st across first 4 sts, ch 1, work Diamond Row 2 to end. Turn. (41 sts)
Row 29L (RS): Work Diamond Row 3 to last 2 sts, leave last 2 sts unworked. Turn. (39 sts)
Row 30L (WS): Sl st across first 2 sts, ch 1, work Diamond Row 4 to end. Turn. (37 sts)
Row 31L (RS): Work Diamond Row 1 to last st, dc in last st. Turn. (36 sts)
Rows 32L through 34L: Work even in Diamond Lace pattern. (36 sts each row)
Work 2 more plain dc rows. Fasten off.
Section 2: Back Bodice Panel
The back bodice is identical to the front through Row 22. At Row 23, the back V-neckline begins. This is positioned 4 rows earlier than the front to create the low open-back silhouette.
Using B/1 (2.25 mm) hook and main color, ch 103 for Small. Work Rows 1 through 22 exactly as Front Bodice Rows 1 through 22. (101 sts maintained throughout)
At Row 23, split for back neck exactly as Front Row 27. Work right side across first 45 sts, leave remaining sts. Turn. (45 sts)
Follow the same decrease sequence as Front Right Shoulder but begin at Row 23. Work decreases through Row 30, then work 6 rows even. Fasten off at 36 sts.
Repeat for back left shoulder, mirroring. Fasten off at 36 sts.
Checkpoint 1: Each bodice panel should measure approximately 10 inches from the lower edge to the shoulder top, and approximately 15 inches wide at the lower edge for size Small.
Section 3: Bodice Assembly
Block both bodice panels flat. Allow to dry completely.
With RS facing, align front and back panels along side edges. Using yarn needle and main color, seam side edges together using mattress stitch. Begin at the lower edge and stop 6 rows below the armhole opening. The armhole opening should be approximately 6 inches for size Small.
Do not seam the shoulder straps yet.
Section 4: Spaghetti Straps (Make 2)
Using B/1 (2.25 mm) hook and main color, ch 55.
Row 1: Sc in 2nd ch from hook, sc in each ch across. (54 sc)
Fasten off, leaving a long tail for attachment.
Fold strap in half lengthwise and sl st along the length to create a narrow rope approximately 0.25 inch wide. Tie a knot at each end as shown in the reference images.
Attach one end of each strap to the front bodice top edge, positioned approximately 2 inches from each neckline edge. Sew securely. Attach the other end to the corresponding back bodice top edge at the same horizontal position.
Try the bodice on and adjust strap length before permanently securing.
Section 5: Waistband
Switch to your C/2 (2.75 mm) hook. With RS facing, join yarn at the right side seam at the lower edge of the bodice.
Rnd 1: Ch 1, sc2tog across every 5th and 6th stitch around. Join with sl st. (170 sc for Small, 192 for Medium, 210 for Large)
Rnd 2 (establish ribbing): Ch 2 (does not count as st), fpdc in first st, bpdc in next st. Rep (fpdc, bpdc) around. Join with sl st to first fpdc. (170 sts)
Rnds 3 through 12: Ch 2, fpdc in each fpdc, bpdc in each bpdc around. Join. (170 sts each round)
Work 12 total rounds of ribbing. Waistband depth equals 2 inches.
Do not fasten off. Leave loop live for Tier 1 attachment.
Checkpoint 2: The waistband should measure 2 inches deep and approximately 26 inches in circumference for size Small when slightly stretched.
Section 6: Tier 1 Skirt
Tier 1 attaches directly to the bottom of the waistband. The stitch count increases by 1.5 times.
Stitch count for Tier 1:
Rnd 1 (increase round): Ch 1, work sc around the lower edge of the waistband, increasing to the target count by spacing increases evenly. For Small, work 2 sc in every 5th st and 1 sc in all other sts to reach 252. Join with sl st. (252 sc)
Rnd 2 (RS, Fan Lace Rnd 1): Ch 3 (counts as dc), dc in same st, ch 1, sk 2 sts, sc in next st, ch 3, sk 2 sts, sc in next st, ch 1, sk 2 sts, 5 dc in next st. Rep around, end with 3 dc in same st as beg ch-3. Join with sl st to top of beg ch-3. (21 shells, 21 ch-3 sps)
Rnd 3 (Fan Lace Rnd 2): Ch 1, sc in same st, ch 3, sk ch-1 sp, sc in ch-3 sp, ch 3, sk ch-1 sp, sc in 3rd dc of next shell. Rep around. Join. (63 sc, 42 ch-3 sps)
Rnd 4 (Fan Lace Rnd 3): Ch 3, 4 dc in same sc, ch 1, sc in ch-3 sp, ch 3, sc in next ch-3 sp, ch 1, 5 dc in next sc. Rep around. Join. (21 full shells)
Rnd 5 (Fan Lace Rnd 4): Ch 1, sc in each dc across each shell (5 sc per shell), sc in each ch-1 sp (1 sc each), 3 sc in each ch-3 sp. Rep around. Join. (252 sc)
Rnds 6 through 9: Rep Rnds 2 through 5.
Rnds 10 through 13: Rep Rnds 2 through 5.
Rnds 14 through 17: Rep Rnds 2 through 5. (252 sc after Rnd 17)
Scallop Edge for Tier 1:
Rnd 18 (Scallop Rnd A): Ch 1, sc in each st around. Join. (252 sc)
Rnd 19 (Scallop Rnd B): Sl st in next st, ch 3, 4 dc in same st, sk 2 sts, sl st in next st, sk 2 sts, 5 dc in next st. Rep around. Join. (42 scallop shells)
Fasten off.
Checkpoint 3: Tier 1 should measure approximately 5 inches from waistband base to scallop edge for size Small.
Section 7: Tier 2 Skirt
Tier 2 picks up from Rnd 17 of Tier 1, the sc row just before the scallop edging.
Stitch count for Tier 2:
Join yarn with sl st to any st in Rnd 17 of Tier 1.
Rnd 1 (increase): Ch 1, sc around Rnd 17, working 2 sc in every other st for 120 sts and 1 sc in all other 132 sts to reach 372. Join. (372 sc)
Rnds 2 through 17: Work 4 complete Fan Lace repeat units exactly as Tier 1. For Small, this gives 31 fan repeats per round.
Scallop Edge for Tier 2:
Rnd 18: Ch 1, sc in each st around. Join. (372 sc)
Rnd 19: Sl st in next st, ch 3, 4 dc in same st, sk 2 sts, sl st in next st, sk 2 sts, 5 dc in next st. Rep around. Join. (62 scallop shells)
Fasten off.
Checkpoint 4: Tier 2 should measure approximately 5.5 inches from pick-up row to scallop edge for size Small.
Section 8: Tier 3 Skirt
Tier 3 picks up from Rnd 17 of Tier 2.
Stitch count for Tier 3:
Join yarn with sl st to any st in Rnd 17 of Tier 2.
Rnd 1 (increase): Ch 1, work increases evenly around to reach target stitch count. Join. (552 sc for Small)
Rnds 2 through 17: Work 4 complete Fan Lace repeat units. For Small, this gives 46 fan repeats per round.
Scallop Edge for Tier 3:
Rnd 18: Ch 1, sc in each st around. Join.
Rnd 19: Sl st in next st, ch 3, 4 dc in same st, sk 2 sts, sl st in next st, sk 2 sts, 5 dc in next st. Rep around. Join. (92 scallop shells for Small)
Fasten off.
Finishing
Block the entire dress. Pin it out on blocking mats, paying special attention to opening up all the lace motifs and evening out the scalloped edges on each tier. Allow to dry completely.
Attach buttons: Position 5 decorative buttons evenly spaced down the center front of the bodice. These are decorative only and do not open. Sew securely using matching thread or yarn.
Weave in all ends using your yarn needle. Weave through at least 2 inches of stitches in multiple directions to secure.
Tips for Success
Take breaks during the skirt tiers. The stitch counts get large, and it’s easy to lose your place. Use stitch markers generously.
Block each section before assembly if possible. This makes seaming much easier and more accurate.
Try the bodice on before attaching straps permanently. You may need longer or shorter straps depending on your torso length.
Choose buttons that complement the yarn. Cream, mother-of-pearl, or even clear buttons all look beautiful against the dusty purple.
Time Investment
This is approximately a 40 to 60 hour project depending on your speed and experience. The bodice panels work up relatively quickly. The skirt tiers take the longest because of the increasing stitch counts. Plan to work on this over several weeks rather than trying to rush through it.
Care Instructions
Hand wash in cool water with a gentle detergent. Lay flat to dry, reshaping while damp. Store folded rather than hanging to prevent stretching at the straps and waistband.
I really hope you love making this purple tiered ruffle mini dress crochet pattern as much as I loved designing it. There’s something incredibly satisfying about wearing a handmade garment that fits beautifully and turns heads wherever you go.
If you make this dress, please save this pattern to your Pinterest boards so you can find it again easily. And I would absolutely love to see your finished piece. Drop a comment below with your yarn color choice or any questions you have along the way. Happy crocheting!
