
THIS IS THE ONE. This is the summer statement piece you have been waiting to make. The cream belted crochet romper is absolutely STUNNING and yes, it takes some time, but the finished result? You will feel like you walked off a runway. We are talking structured bustier cups, a gorgeous waffle texture, wide leg shorts, and a cinched waist with a real buckle. This is the project that makes everyone ask "you MADE that?!"
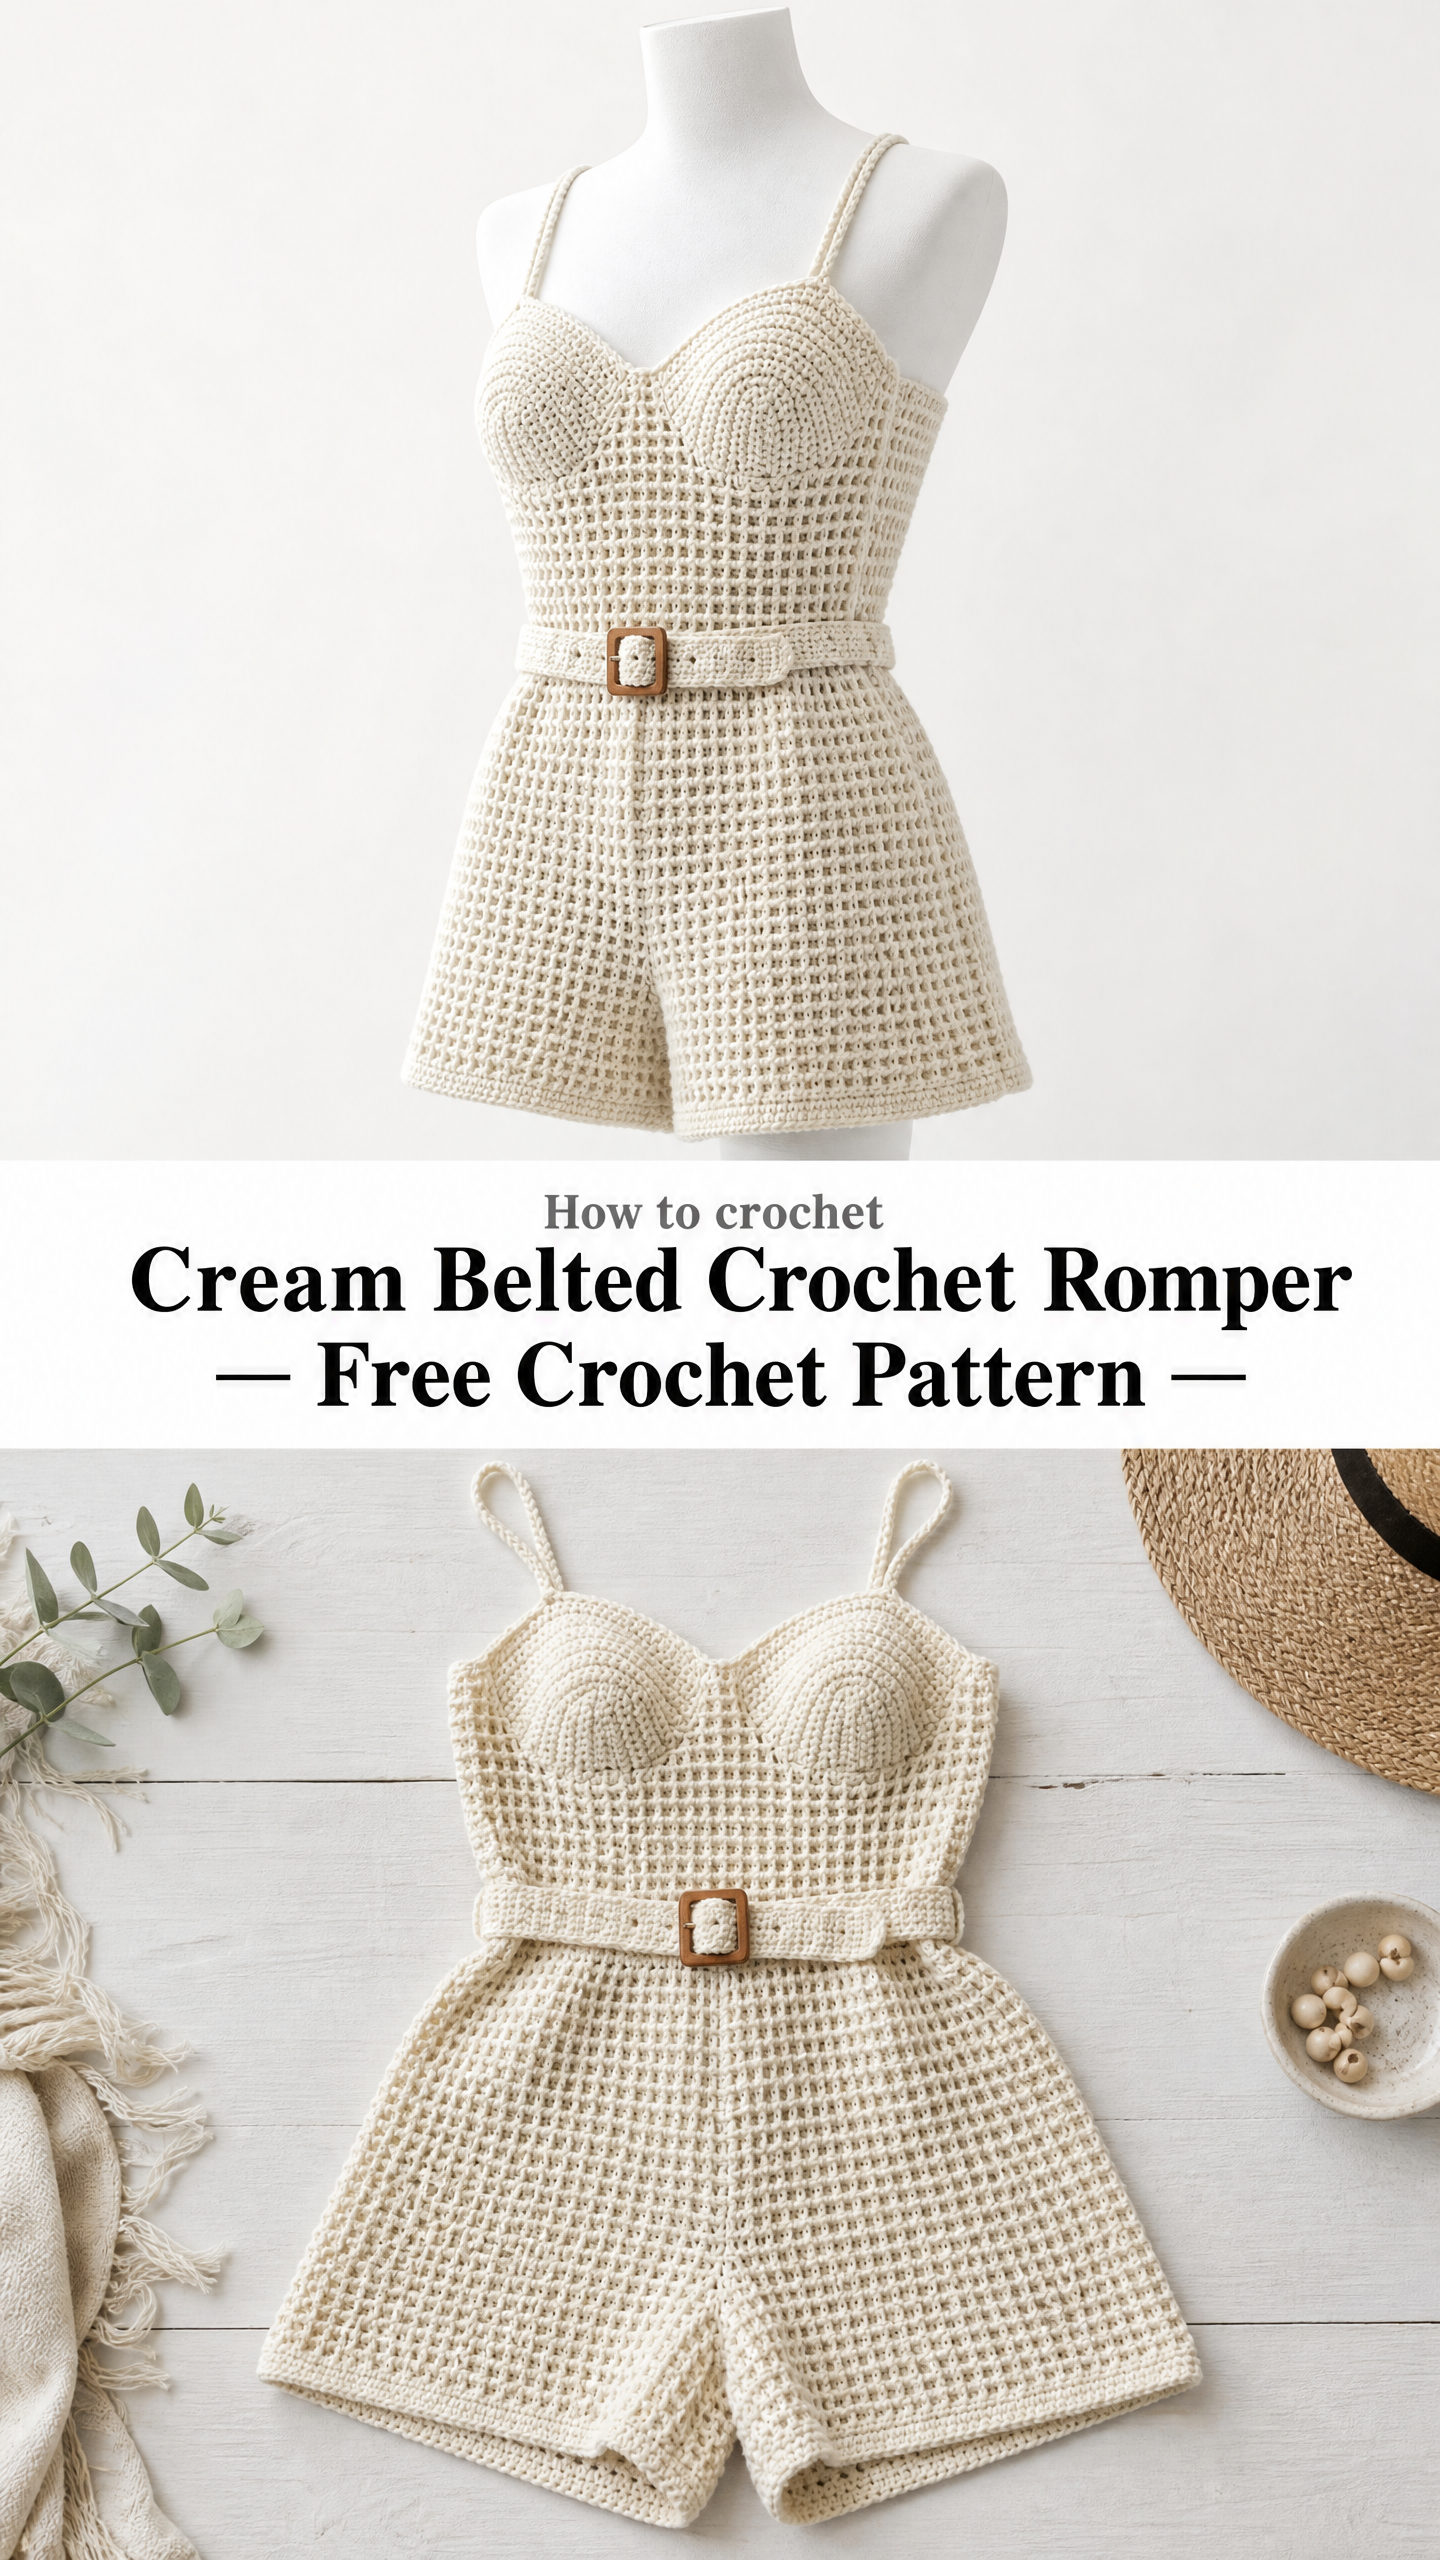
I know what you are thinking. A crocheted romper sounds intimidating. But here is the truth. If you can single crochet and double crochet, you can absolutely make this. The construction is worked in flat pieces and seamed together, so you are never wrestling with complicated shaping while also trying to work in the round.
The waffle stitch creates that beautiful grid texture you see in the photos, and I promise it is way easier than it looks. Once you get the rhythm of the offset spike stitches, your hands will know what to do. Let me walk you through everything.
Why This Crochet Romper Pattern Works So Well
The secret to this crochet romper is the construction method. Instead of working the entire garment as one overwhelming piece, you create separate sections: two cups, a bodice front, a bodice back, shorts front panel, shorts back panel, straps, and a belt. Each section is manageable on its own. Then you seam everything together at the end.
This approach gives you total control over fit. You can try on sections as you go. You can adjust strap length before sewing them down permanently. You can customize the cup size by adding or subtracting one increase round.
The waffle stitch throughout the body creates that dimensional grid texture that photographs so beautifully. It is worked by inserting your hook into the stitch two rows below (sometimes called a spike double crochet) which pulls up the fabric and creates little pockets. The result is a fabric that looks complex but follows a simple two row repeat once you get started.
Skill Level
This pattern is rated intermediate. You should be comfortable with basic stitches like single crochet (sc) and double crochet (dc), working in the round from a magic ring, and seaming pieces together using mattress stitch or slip stitch joins.
The cup shaping involves working increases in a spiral, which can feel unfamiliar if you have only worked flat projects. But I will guide you through it. The waffle stitch requires you to work into a stitch two rows below, skipping the stitch on the current row behind it. This is sometimes called a spike stitch, and it takes a little practice to get the tension right.
No colorwork is required. The entire romper is made in a single cream or off white yarn.
Time Estimate
Plan for 20 to 30 hours for a size Small/Medium. This includes blocking time and all the seaming. Larger sizes will take a bit longer. I recommend working on this over a week or two rather than trying to marathon it in a weekend.
Finished Measurements
Size XS/S:
Size M/L:
Instructions are written for XS/S with M/L adjustments in brackets where they differ.
Materials
Yarn: Approximately 900 (1,100) yards / 823 (1,006) meters of #3 light weight (DK weight) cotton yarn in cream or off white.
Yarn Suggestions:
1. Paintbox Yarns Cotton DK (100% cotton, 137 yards per 50g skein, color: Vanilla Cream). Soft, affordable, excellent stitch definition for the waffle texture.
2. Drops Safran (70% cotton / 30% viscose, 175 yards per 50g skein, color: Off White). Slight sheen, excellent drape, takes blocking beautifully.
3. Lion Brand 24/7 Cotton (100% mercerized cotton, 186 yards per 100g skein, color: Ecru). Widely available, sturdy, washes well.
Choose a tightly spun cotton or cotton blend DK yarn with good stitch definition. Avoid fluffy or textured yarns. The waffle stitch relies on visible grid structure.
Hooks:
Notions:
Gauge
With F/5 (3.75 mm) hook in Waffle Stitch pattern: 18 stitches x 20 rows = 4 inches (10 cm) blocked
With E/4 (3.5 mm) hook in single crochet: 20 stitches x 22 rows = 4 inches (10 cm) blocked
Gauge is mandatory for a fitted garment. Swatch both. Adjust hook size as needed. Cotton has very little stretch, so blocking sets your final dimensions.
Abbreviations
Special Stitches
Waffle Stitch (WS)
The waffle stitch is worked over a multiple of 2 stitches plus 2 for the border.
Setup row (right side): Ch 1, sc across. Turn.
Row 1 (wrong side): Ch 1, sc in each st across. Turn.
Row 2 (right side): Ch 1, sc in first st, (dc in the corresponding st 2 rows below, insert hook into the top of the stitch directly below the next stitch, skip the stitch on the current row behind that dc, sc in next st) rep across to last st, sc in last st. Turn.
Row 3 (wrong side): Ch 1, sc in each st across. Turn.
Row 4 (right side): Ch 1, sc in first st, sc in next st, (dc in the st 2 rows below, offset by one stitch from previous RS row, skip st behind dc, sc in next st) rep across, sc in last st. Turn.
Rows 3 and 4 form the waffle repeat. The offset dc columns alternate each RS row, creating a grid. Rep Rows 3 and 4 for pattern.
The dc worked into the row 2 rows below is sometimes called a spike dc. When you insert the hook into the stitch below, the current row stitch behind it is skipped so the stitch count remains the same.
Belt Loop
Ch 8, sl st into first ch to form a small loop. Fasten off, leaving a 6 inch (15 cm) tail for sewing.
Pattern Notes
1. The bodice front and back are worked flat and seamed at the sides.
2. The cups are completed separately and slip stitch joined to the upper edge of the bodice front before the neckline edge is finished.
3. The shorts front and back panels are worked flat and seamed at the sides and crotch. The bodice is then joined to the shorts at the waist with a slip stitch seam on the wrong side.
4. Turning chains: For sc rows, ch 1 does not count as a stitch.
5. All stitch counts at the end of each row are given in parentheses.
6. Size M/L adjustments appear in brackets [ ] immediately after the XS/S value wherever the two differ.
7. When working Waffle Stitch, count only the stitches on the current row (the spike dc counts as 1 stitch, replacing the skipped stitch behind it).
8. Block all pieces before seaming for best results.
9. The belt is worked flat as a long rectangle and threaded through the buckle. The buckle prong passes through crocheted eyelets spaced along the belt.
Step by Step Instructions
Section 1: Cups (Make 2)
Use E/4 (3.5 mm) hook.
Round 1: MR, 6 sc into ring. Do not join. Work in a continuous spiral. Place marker. (6 sc)
Round 2: Inc in each st around. (12 sc)
Round 3: (Sc in next st, inc in next st) 6 times. (18 sc)
Round 4: (Sc in next 2 sts, inc in next st) 6 times. (24 sc)
Round 5: (Sc in next 3 sts, inc in next st) 6 times. (30 sc)
Round 6: (Sc in next 4 sts, inc in next st) 6 times. (36 sc)
Round 7: (Sc in next 5 sts, inc in next st) 6 times. (42 sc)
For size M/L only:
Round 8: (Sc in next 6 sts, inc in next st) 6 times. (48 sc)
Final round for XS/S (Round 8): Sc in each st around. Sl st to first sc to close round. (42 sc) Fasten off, leave a 24 inch (61 cm) tail for sewing.
Final round for M/L (Round 9): Sc in each st around. Sl st to first sc to close round. (48 sc) Fasten off, leave a 24 inch (61 cm) tail for sewing.
The cups should measure approximately 3 inches (7.5 cm) [3.5 inches (9 cm)] in diameter.
CHECKPOINT: Each cup is a rounded dome, approximately 3 [3.5] inches across at the widest round. Set aside.
Section 2: Bodice Front
Use F/5 (3.75 mm) hook.
The bodice front is worked from the lower waist edge upward.
Foundation: Ch 76 [86].
Row 1 (RS): Sc in 2nd ch from hook, sc in each ch across. Turn. (75 sc) [85 sc]
Row 2 (WS of fabric, Row 1 of Waffle): Ch 1, sc in each st across. Turn. (75 sc) [85 sc]
Row 3 (RS, Waffle Row 2): Ch 1, sc in first st, (spike dc into st 2 rows below next st, skip st behind spike dc, sc in next st) 37 [42] times, sc in last st. Turn. (75 sts) [85 sts]
Row 4: Ch 1, sc in each st across. Turn. (75 sc) [85 sc]
Row 5 (RS, Waffle Row 4 offset): Ch 1, sc in first 2 sts, (spike dc into st 2 rows below next st, skip st behind spike dc, sc in next st) 36 [41] times, sc in last 2 sts. Turn. (75 sts) [85 sts]
Continue in established Waffle Stitch pattern (alternating Rows 4 and 5 above, each RS row offset by 1 stitch) until bodice front measures 6 inches (15 cm) [6.5 inches (16.5 cm)] from foundation edge, ending with a wrong side (all sc) row.
CHECKPOINT: The bodice front panel should now measure approximately 6 [6.5] inches tall and 16.5 [19] inches wide.
Armhole shaping:
Next row (RS): Sl st across first 6 [7] sts, ch 1, continue in Waffle pattern across to last 6 [7] sts, leave rem sts unworked. Turn. (63 sts) [71 sts]
Next row (WS): Ch 1, sc2tog, sc across to last 2 sts, sc2tog. Turn. (61 sc) [69 sc]
Next row (RS): Ch 1, sc2tog, continue Waffle pattern to last 2 sts, sc2tog. Turn. (59 sts) [67 sts]
Next row (WS): Ch 1, sc2tog, sc across to last 2 sts, sc2tog. Turn. (57 sc) [65 sc]
Next row (RS): Ch 1, sc2tog, continue Waffle pattern to last 2 sts, sc2tog. Turn. (55 sts) [63 sts]
Continue in Waffle pattern without further shaping until armhole measures 4 inches (10 cm) [4.5 inches (11.5 cm)], ending with a WS row.
Total bodice front height: approximately 10 inches (25.5 cm) [11 inches (28 cm)].
Final row (RS, neckline edge): Do not fasten off. Set panel aside.
Cup placement: Lay the bodice front flat, RS facing. Position the two cups side by side centered on the upper portion of the bodice front. The bottom edge of each cup sits 1.5 inches (4 cm) below the top edge of the bodice. Pin cups in place. Using the long tail, sew each cup to the bodice front using a whip stitch around the lower two thirds of the cup perimeter, leaving the top arc of each cup free (this creates the bustier effect). Weave in cup tails.
Neckline finish: With RS facing and F/5 hook, work 1 row of sc evenly across the top edge of the bodice front (between the cups and over the cup tops), working approximately 1 sc per stitch or row end as needed for a flat, even edge. Sl st to join if working around the full upper edge. Fasten off.
Section 3: Bodice Back
Use F/5 (3.75 mm) hook.
Foundation: Ch 76 [86].
Row 1 (RS): Sc in 2nd ch from hook, sc in each ch across. Turn. (75 sc) [85 sc]
Work in Waffle Stitch pattern (same as bodice front) for 6 inches (15 cm) [6.5 inches (16.5 cm)], ending with a WS row.
Armhole shaping:
Next row (RS): Sl st across first 6 [7] sts, ch 1, continue in Waffle pattern across to last 6 [7] sts, leave rem sts unworked. Turn. (63 sts) [71 sts]
Next row (WS): Ch 1, sc2tog, sc across to last 2 sts, sc2tog. Turn. (61 sc) [69 sc]
Next row (RS): Ch 1, sc2tog, continue Waffle pattern to last 2 sts, sc2tog. Turn. (59 sts) [67 sts]
Next row (WS): Ch 1, sc2tog, sc across to last 2 sts, sc2tog. Turn. (57 sc) [65 sc]
Next row (RS): Ch 1, sc2tog, continue Waffle pattern to last 2 sts, sc2tog. Turn. (55 sts) [63 sts]
Continue in Waffle pattern without further shaping until back bodice matches front bodice height (10 inches / 25.5 cm [11 inches / 28 cm] total). Fasten off.
Upper back edge finish: With RS facing, work 1 row of sc evenly across the top edge of the bodice back. Fasten off.
CHECKPOINT: Both bodice panels should be identical in height. Side stitch counts should match at every horizontal level so seaming is even.
Section 4: Shorts Front Panel
Use F/5 (3.75 mm) hook.
Foundation: Ch 76 [86].
Row 1 (RS): Sc in 2nd ch from hook, sc in each ch across. Turn. (75 sc) [85 sc]
Work in Waffle Stitch pattern for 5 inches (12.5 cm) [5.5 inches (14 cm)].
Crotch curve shaping:
Next row (WS): Ch 1, sc across. Turn. (75 sc) [85 sc]
Next row (RS): Sl st across first 8 [9] sts, ch 1, continue in Waffle pattern to last 8 [9] sts, leave rem sts unworked. Turn. (59 sts) [67 sts]
Next 2 rows: Ch 1, sc2tog at each end. (55 sts after 2 rows) [63 sts after 2 rows]
Row after decrease: Work 1 row even in Waffle pattern. (55 sts) [63 sts]
The crotch opening now measures approximately 5 inches (12.5 cm) across.
Leg shaping, right leg:
Row 1 (RS): Ch 1, work in Waffle pattern across first 26 [30] sts only. Turn. Leave rem sts on hold.
Row 2 (WS): Ch 1, sc2tog, sc to end. Turn. (25 sc) [29 sc]
Row 3 (RS): Work Waffle pattern to last 2 sts, sc2tog. Turn. (24 sts) [28 sts]
Row 4 (WS): Ch 1, sc across. Turn. (24 sc) [28 sc]
Rep Rows 3 and 4 twice more. (22 sts) [26 sts]
Work 3 rows even. Fasten off.
Leg shaping, left leg:
Rejoin yarn to center 3 [3] sts and fasten off those center sts (crotch gap). Rejoin to remaining 26 [30] sts with RS facing.
Row 1 (RS): Ch 1, work Waffle pattern across. Turn. (26 sts) [30 sts]
Row 2 (WS): Ch 1, sc to last 2 sts, sc2tog. Turn. (25 sc) [29 sc]
Row 3 (RS): Ch 1, sc2tog, continue Waffle pattern to end. Turn. (24 sts) [28 sts]
Row 4 (WS): Ch 1, sc across. Turn. (24 sc) [28 sc]
Rep Rows 3 and 4 twice more. (22 sts) [26 sts]
Work 3 rows even. Fasten off.
Leg opening finish: With RS facing and F/5 hook, work 1 rnd of sc evenly around each leg opening. Sl st to join. Fasten off.
CHECKPOINT: The shorts front panel should measure approximately 8 inches (20 cm) [8.5 inches (21.5 cm)] from foundation to the lower leg edge at the outer side, and roughly 9 inches (23 cm) [9.5 inches (24 cm)] at the widest point.
Section 5: Shorts Back Panel
Use F/5 (3.75 mm) hook.
Foundation: Ch 76 [86].
Row 1 (RS): Sc in 2nd ch from hook, sc in each ch across. Turn. (75 sc) [85 sc]
Work in Waffle Stitch pattern for 4.5 inches (11.5 cm) [5 inches (12.5 cm)].
Back rise shaping (crotch):
Next row (WS): Ch 1, sc across. Turn. (75 sc) [85 sc]
Next row (RS): Sl st across first 4 [5] sts, ch 1, continue in Waffle pattern to last 4 [5] sts, leave rem sts unworked. Turn. (67 sts) [75 sts]
Next 2 rows: Ch 1, sc2tog at each end. (63 sts after 2 rows) [71 sts after 2 rows]
Work 1 row even. (63 sts) [71 sts]
Leg shaping, right leg:
Row 1 (RS): Work Waffle pattern across first 30 [34] sts only. Turn.
Row 2 (WS): Ch 1, sc2tog, sc to end. Turn. (29 sc) [33 sc]
Row 3 (RS): Work Waffle pattern to last 2 sts, sc2tog. Turn. (28 sts) [32 sts]
Row 4 (WS): Ch 1, sc across. Turn. (28 sc) [32 sc]
Rep Rows 3 and 4 twice more. (26 sts) [30 sts]
Work 3 rows even. Fasten off.
Leg shaping, left leg:
Fasten off center 3 [3] sts. Rejoin to remaining 30 [34] sts with RS facing.
Row 1 (RS): Work Waffle pattern across. Turn. (30 sts) [34 sts]
Row 2 (WS): Ch 1, sc to last 2 sts, sc2tog. Turn. (29 sc) [33 sc]
Row 3 (RS): Ch 1, sc2tog, continue Waffle pattern to end. Turn. (28 sts) [32 sts]
Row 4 (WS): Ch 1, sc across. Turn. (28 sc) [32 sc]
Rep Rows 3 and 4 twice more. (26 sts) [30 sts]
Work 3 rows even. Fasten off.
Leg opening finish: With RS facing and F/5 hook, work 1 rnd of sc evenly around each leg opening. Sl st to join. Fasten off.
Section 6: Straps (Make 2)
Use E/4 (3.5 mm) hook.
Foundation: Ch 5.
Row 1: Sc in 2nd ch from hook, sc in each ch across. Turn. (4 sc)
Row 2: Ch 1, sc in each st across. Turn. (4 sc)
Rep Row 2 until strap measures 11 inches (28 cm) [12 inches (30.5 cm)]. Fasten off, leaving a 12 inch (30 cm) tail at each end.
Make 2. Set aside.
Section 7: Belt
Use E/4 (3.5 mm) hook.
Foundation: Ch 5.
Row 1: Sc in 2nd ch from hook, sc in each ch across. Turn. (4 sc)
Row 2: Ch 1, sc in each st across. Turn. (4 sc)
Rep Row 2 until belt measures 32 inches (81 cm) [36 inches (91 cm)].
Eyelet row: Ch 1, sc in first st, (ch 1, sk 1 st, sc in next st) once, sc in last st. Turn. (4 sts + 1 eyelet)
Next row: Ch 1, sc in first st, sc in ch 1 sp, sc in next 2 sts. Turn. (4 sc)
Continue in sc for 3 more inches (7.5 cm) for a total of approximately 5 inches (12.5 cm) of extra length beyond the main belt on this short tail end, adding eyelets every 0.75 inches (2 cm) for 4 total eyelets. Fasten off.
Eyelets summary: Work 4 eyelets spaced 0.75 inches (2 cm) apart on the adjustment end of the belt. These allow the belt to be tightened or loosened through the buckle.
Thread the belt through the buckle and wrap it around the romper waist. The buckle prong passes through an eyelet to secure.
Belt loops (make 4):
Work 4 belt loops as described in Special Stitches. Sew two loops on the front and two on the back of the joined romper waist, evenly spaced (at side seams and center front/back, or at side seams and approximately 3 inches / 7.5 cm from each side seam, depending on preference). Each loop should be just wide enough for the belt to pass through easily.
Assembly
Step 1: Seam bodice. Align bodice front and back with right sides together. Using yarn needle and mattress stitch, seam the side edges. Leave armhole edges open.
Step 2: Seam shorts. Align shorts front and back with right sides together. Seam the side edges and crotch seam using mattress stitch. Leave waist edge open and leg openings open.
Step 3: Join bodice to shorts. With wrong sides together, align the waist edge of the bodice (lower foundation edge) with the waist edge of the shorts (upper foundation edge). Both measure 75 [85] sts. Work a sl st seam through both layers on the inside to join.
Step 4: Attach straps. Pin one end of each strap to the upper front edge of the bodice, positioning each strap approximately 1.5 inches (4 cm) in from the outer edge (aligned with the outer edge of each cup). Pin the other end to the upper back edge of the bodice, approximately 1.5 inches (4 cm) in from the outer edge. Try on or use a dress form to check strap length. Adjust if needed before sewing. Using the long tails, sew each strap end securely with several whip stitches.
Step 5: Attach belt loops. Sew the 4 belt loops to the waist seam area as described in the Belt section.
Step 6: Thread belt. Thread the long end of the belt through the buckle frame, fold over the crossbar, and secure by stitching the folded end to the belt back with yarn. Thread the belt through the belt loops. The adjustment tail with eyelets passes through the buckle prong.
Finishing and Blocking
Wet block all pieces before seaming for best results. Soak each panel in cool water for 10 minutes. Gently press out excess water in a towel. Pin pieces to measurements on a blocking mat using rust proof pins. Allow to dry completely (12 to 24 hours). Cotton does not spring back, so blocking sets the final dimensions.
After assembly, lightly steam block the seams by holding a steam iron 1 inch (2.5 cm) above. Do not press directly onto crochet. Weave in all ends on the wrong side using a yarn needle. Run tails back through at least 1 inch (2.5 cm) in two directions to secure.
Size Customization Tips
To make the crochet romper pattern larger or smaller than the two given sizes, work a gauge swatch first and calculate the new foundation chain using this formula: desired bust circumference (in inches) divided by 4 (in terms of gauge) multiplied by 18 stitches per 4 inches equals the number of stitches for one half of the bust.
For example, for a 40 inch (102 cm) bust, each bodice panel needs 90 stitches. Foundation chain would be 91. Always adjust in increments of 2 stitches to keep the waffle pattern aligned.
To lengthen the shorts, add rows to the straight section before crotch shaping.
To raise or lower the neckline, add or subtract rows of Waffle Stitch above the armhole bind off before the final neckline edge row.
Cup size: Add or subtract one increase round to the cup (6 stitches per round) to size up or down.
Care Instructions
Machine wash cold on gentle cycle, or hand wash in cool water with a mild detergent. Lay flat to dry. Do not tumble dry or wring. Do not dry clean. Remove the buckle before washing if possible to prevent snagging. Store folded rather than hung to prevent stretching.
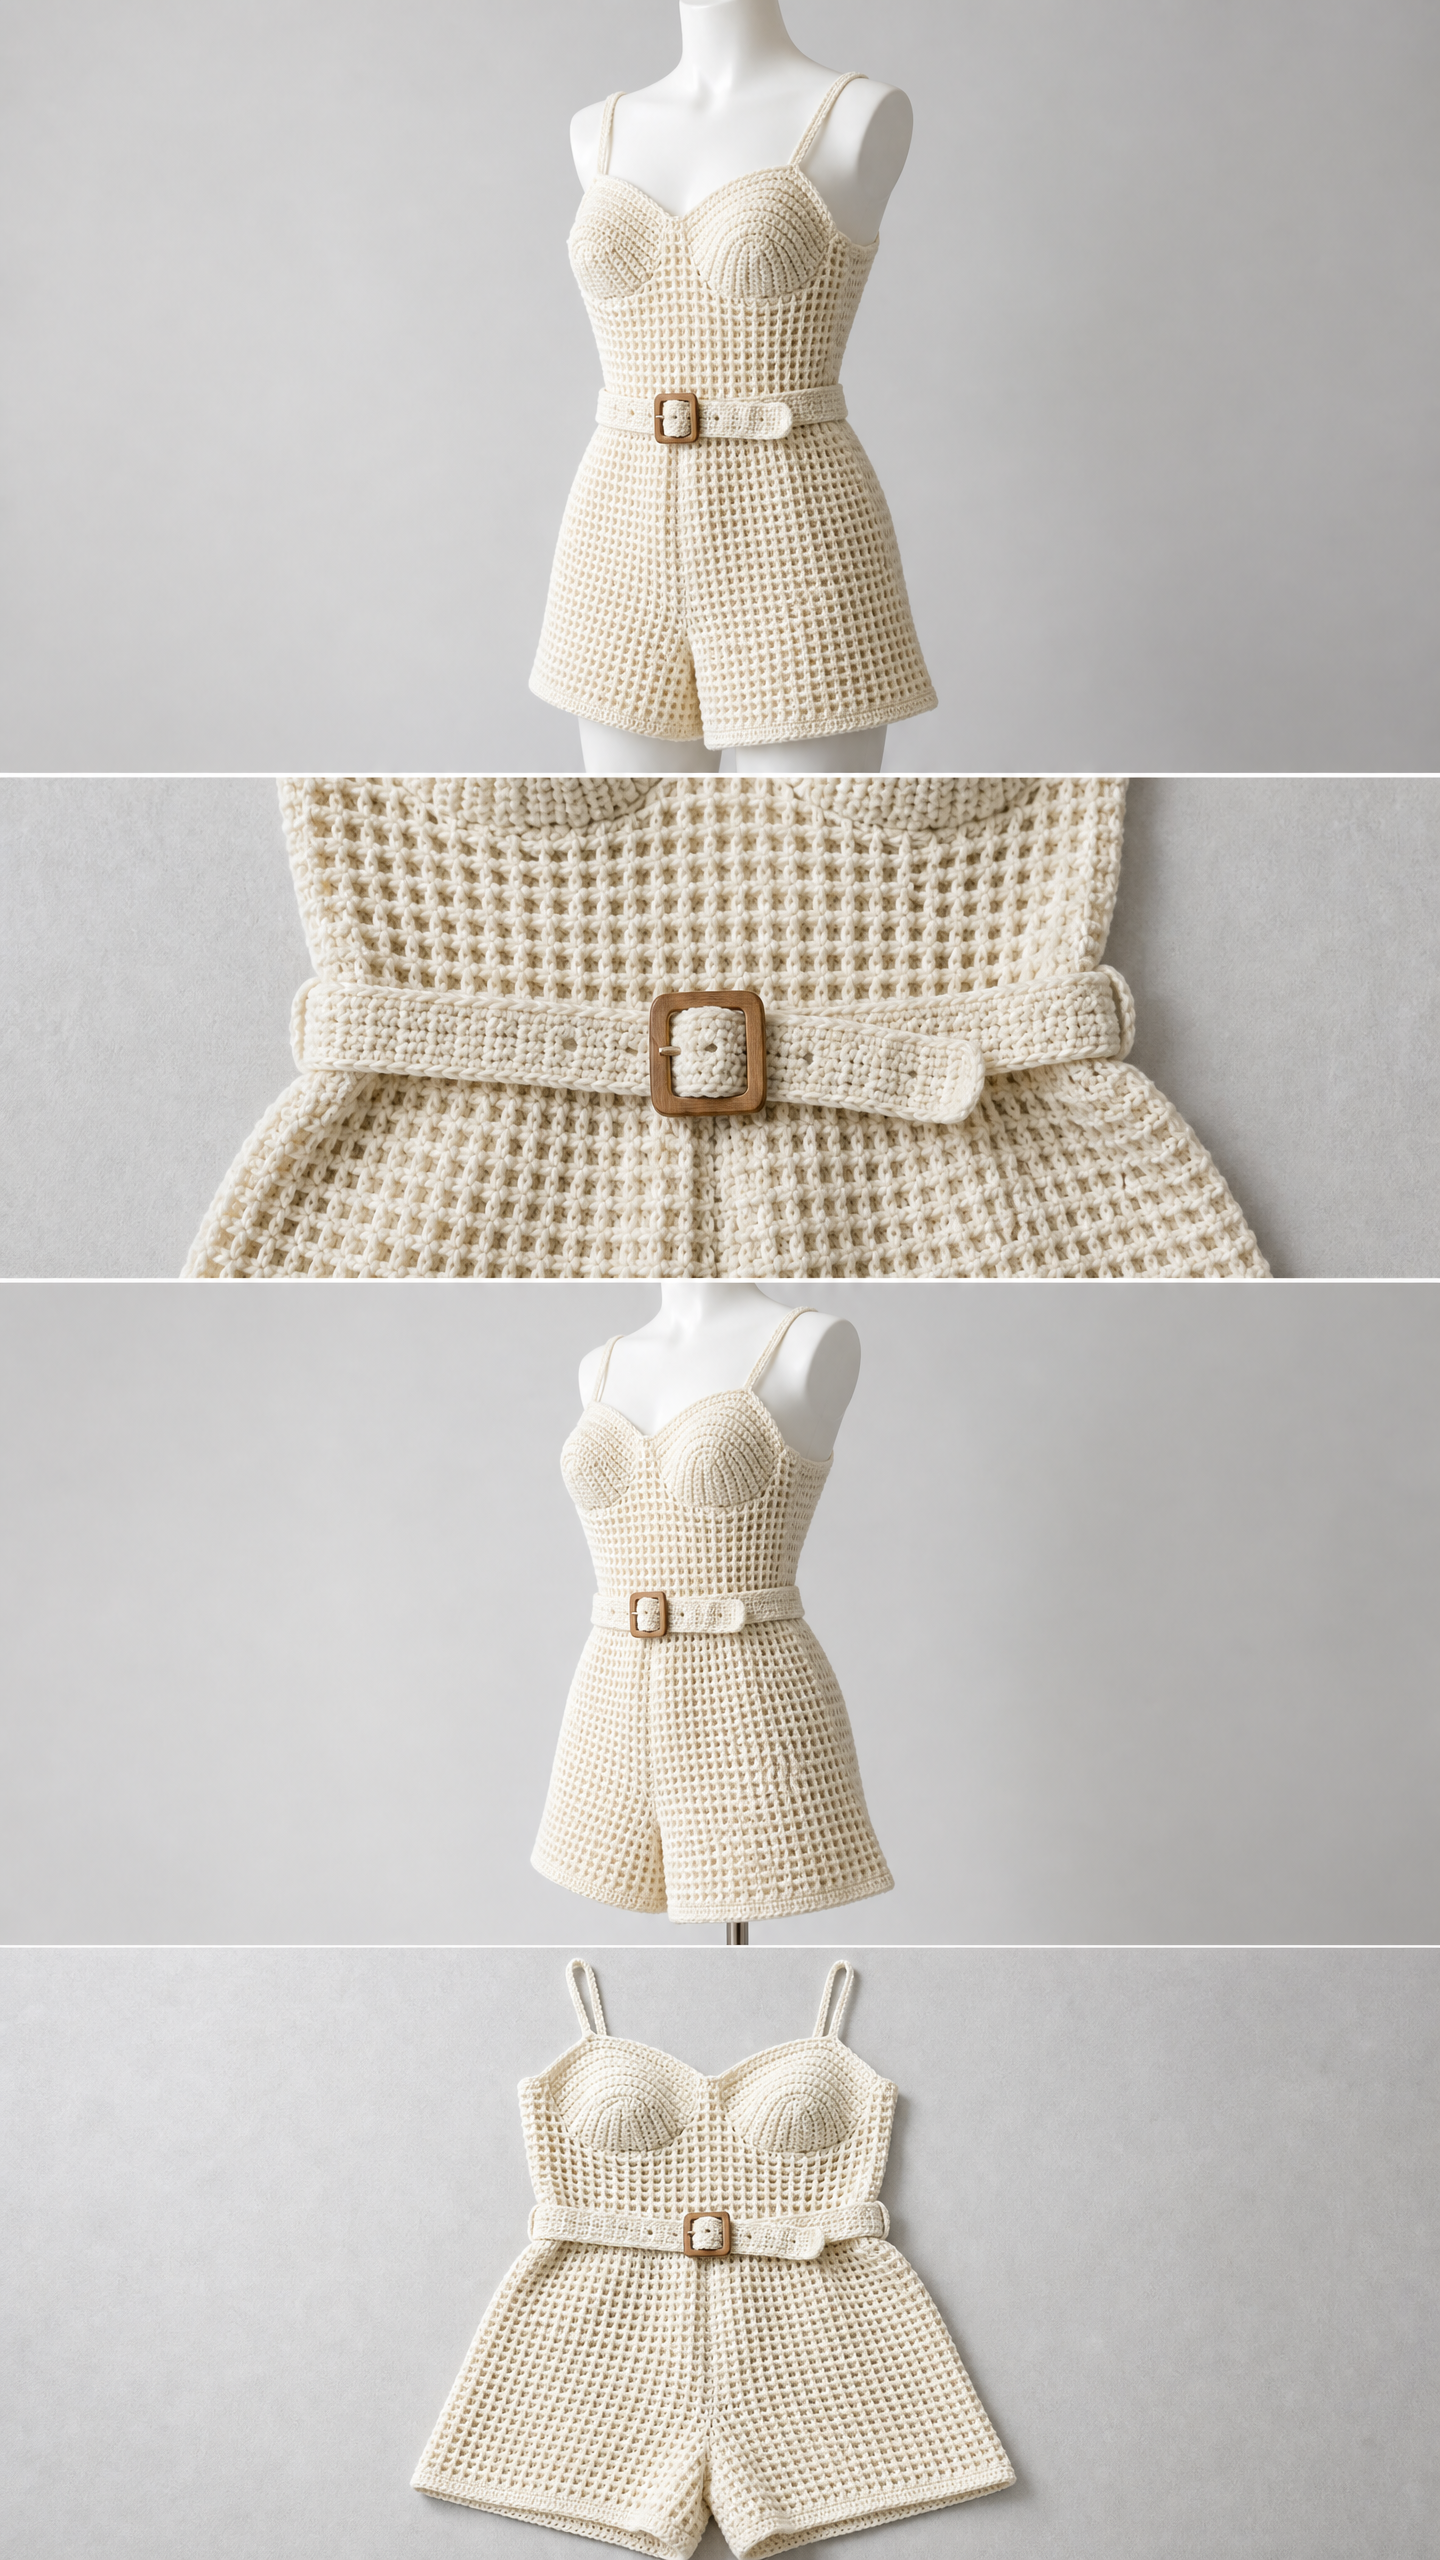
You Did It!
Thank you so much for choosing this pattern. I truly hope you love making this crochet romper as much as I loved designing it. The finished piece is such a showstopper, and you deserve all the compliments coming your way.
If you make this romper, I would absolutely love to see it! Tag me on Instagram or share a photo in my Facebook group. Seeing your finished projects is honestly the best part of my day.
Go ahead and save this cream belted crochet romper pattern to your Pinterest boards so you can find it easily when you are ready to start. And please leave a comment below if you make one. I read every single comment and love hearing how your projects turn out!
