
If you’ve ever scrolled past a stunning market bag and thought "I could never make that," I’m here to tell you that you absolutely can. This tote looks like it belongs in a coastal boutique, but the construction is surprisingly straightforward once you break it down into sections. The navy body is just single crochet worked in rounds. The mesh top band? A simple chain-and-skip repeat. Even those adorable gingham stars are easier than they appear.
Get the Ad-Free PDF Pattern
You can find the free pattern below, or you can purchase the ad-free printable PDF from my shop.
Get the Printable PDF →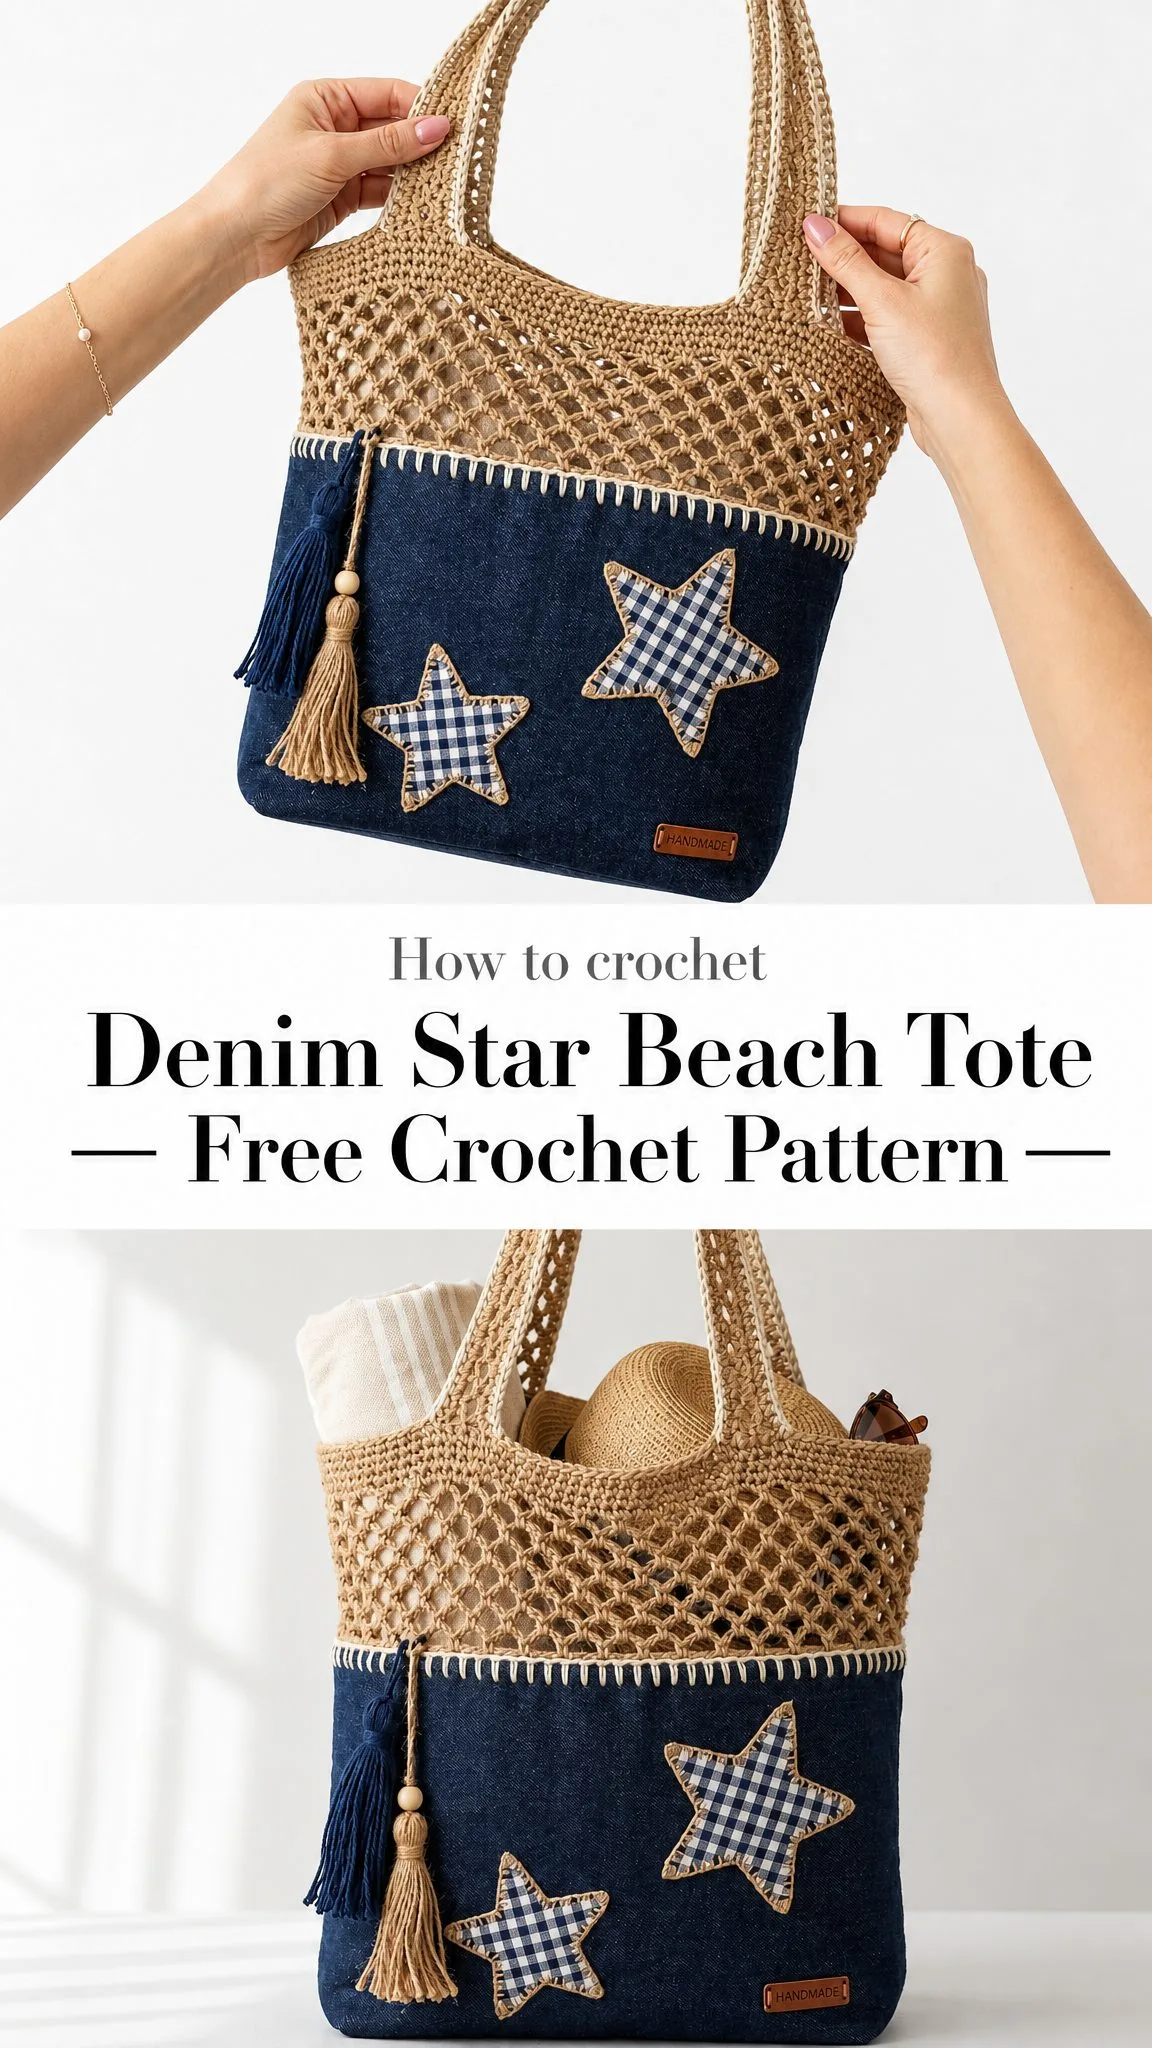
Whether you’re a confident beginner ready to level up or an intermediate crocheter looking for a satisfying summer project, this pattern meets you where you are. I’ll walk you through every step, explain the techniques in plain English, and give you checkpoints along the way so you always know you’re on track.
By the end, you’ll have a gorgeous handmade tote that’s perfect for beach days, farmers markets, or hauling your latest yarn haul. Let’s dig in.
About This Denim Star Beach Tote Crochet Pattern
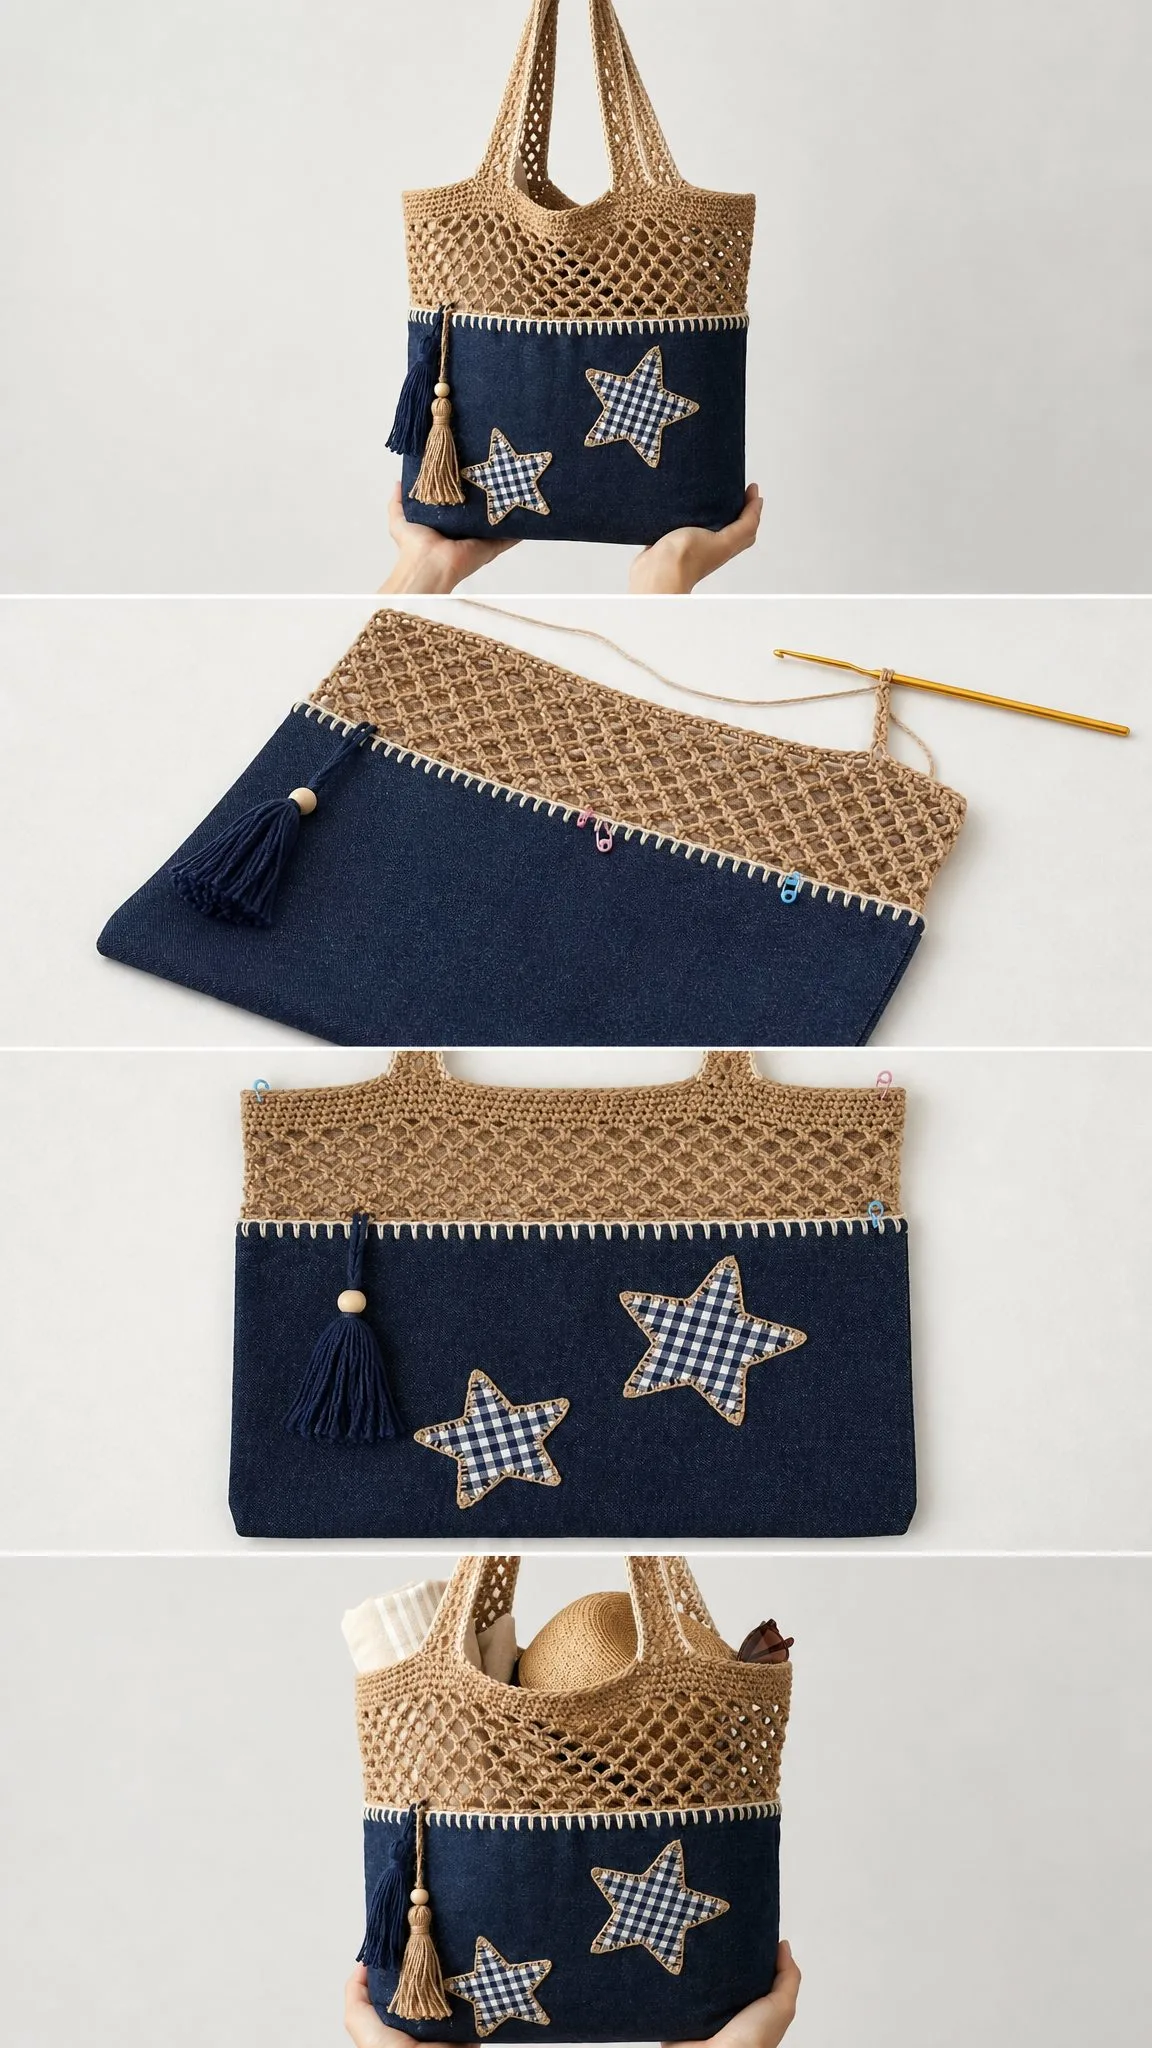
This boutique-style crochet tote combines a solid navy "denim" lower body with an airy jute-colored mesh upper band. The result is a bag that’s both practical and eye-catching. Fabric star appliques in gingham fabric add a charming handmade touch, while a layered tassel charm brings that perfect finishing detail.
Skill Level: Confident beginner to intermediate. You’ll work simple shaping, mesh rounds, sturdy seaming, and applique finishing.
Time to Complete: 8 to 12 relaxed hours
Finished Dimensions: 14 inches wide x 12 inches tall x 4 inches deep (35.5 x 30.5 x 10 cm). Strap drop measures 12 inches (30.5 cm).
Construction Overview: You’ll start with a flat rectangular base, then work the sides upward in joined rounds using navy yarn. The top portion switches to tan yarn for an open mesh band. Two shoulder straps get sewn on at the end, followed by fabric stars and a tassel charm.
Materials You’ll Need
Gathering your supplies before you start makes the whole process smoother. Here’s everything you’ll need for this crochet tutorial.
Yarn
You’ll want a worsted weight cotton or cotton/linen blend for this project. The firm, low-stretch quality of cotton helps the tote stand upright and hold its shape beautifully.
Yarn Suggestions: Lion Brand 24/7 Cotton, Paintbox Yarns Recycled Cotton Worsted, or Knit Picks Dishie all work wonderfully. The key is choosing a firm, low-stretch worsted cotton that will hold the bag’s structure.
Hooks
Always swatch first and adjust if needed to match gauge.
Notions
Gauge
Getting gauge right is essential for this project since it determines your final bag size.
Body Gauge: 16 single crochet (sc) x 18 rounds/rows = 4 inches / 10 cm with the 4 mm hook
Mesh Gauge: 4 mesh repeats x 8 mesh rounds = 4 inches / 10 cm with the 5 mm hook
I recommend swatching in the round when possible since that’s how most of this tote is constructed. Match stitch gauge first, then adjust your hook or the number of height rounds if needed.
Abbreviations and Stitch Guide
Let me walk you through all the stitches and terms you’ll encounter. I’ll explain each one so there’s no guessing.
Standard Abbreviations (US Terms)
UK Crocheters Note: US sc = UK dc, and US dc = UK tr. All instructions below use US terminology.
Special Techniques
Joined Rounds: Join each round with a slip stitch to the first stitch unless noted otherwise. Chain 1 at the start of sc rounds, but this chain does NOT count as a stitch.
Even Mesh Round: Chain 1, single crochet in the first sc, then work chain 3, skip 3 stitches (or work into the next chain-3 space), single crochet in the next sc. Repeat from around. You’ll maintain 36 mesh spaces per round.
Reverse Single Crochet (also called Crab Stitch): With RS facing, chain 1, then insert your hook into the stitch to the RIGHT instead of the left. Yarn over, pull up a loop, yarn over, pull through both loops. Continue working left-to-right for a firm corded edge. This creates a lovely finished look at the top of your bag.
Surface Blanket Stitch: Join cream yarn at the color line. Insert your hook around the post below the line, pull up a loop, slip stitch, then chain 1. Repeat evenly around. This creates those cream decorative stitches that visually separate the denim body from the mesh band.
Fabric Star Applique Border: Cut your star shape with a 1/4 inch (6 mm) seam allowance. Turn under the edge or use fusible web to stabilize. Blanket-stitch or whipstitch the star to the tote, then add a tan running-stitch outline for that handmade look.
Left-Handed Makers: Work the same instructions in the opposite direction. I recommend placing markers at all four corners before starting the sides so your front, back, and side panels stay easy to identify.
Step-by-Step Pattern Instructions
Part 1: Tote Base and Navy Body
The base is a simple rectangle worked in rows, then you’ll pick up stitches around all edges and work upward in rounds.
Base Rectangle
Using navy yarn and your 4 mm hook, chain 57.
Row 1: Single crochet in the 2nd chain from hook and in each chain across. Turn. (56 sc)
Rows 2 through 18: Chain 1, single crochet in each stitch across. Turn. (56 sc each row)
Pick-Up Round
With the RS facing, chain 1. Work 56 sc across the long edge, 16 sc evenly along the short edge, 56 sc across the opposite long edge, and 16 sc evenly along the final short edge. Join with a slip stitch. (144 sc total)
Checkpoint: Your base should measure about 14 x 4 inches (35.5 x 10 cm). If your length is correct but the depth differs slightly, adjust the short-edge pick-up to maintain exactly 16 sc per side. The total count of 144 sc is important for the mesh to work out correctly.
Navy Body Rounds
Continue with navy yarn and your 4 mm hook, working in joined rounds.
Rounds 1 through 34: Chain 1, single crochet in each stitch around. Join. (144 sc each round)
At the end of Round 34, your navy side wall should measure about 7.5 inches (19 cm) from the base edge.
Cream Divider
Switch to cream yarn. Work one round of surface blanket stitch at the top of Round 34, placing 1 decorative stitch around each visible navy stitch. Join and fasten off. (144 decorative stitches)
This cream line creates a beautiful visual separation between the solid navy section and the mesh band coming up next.
Part 2: Jute Mesh Upper Band
Now switch to tan yarn and your 5 mm hook. Keep the tote with the RS facing outward. Your stitch count remains 144 sc before the mesh begins. The mesh pattern works over 36 repeats of 4 stitches each.
Round 35: Join tan in any stitch. Chain 1, single crochet in each stitch around. Join. (144 sc)
Round 36: Chain 1, single crochet in the first stitch. Chain 3, skip 3 stitches, single crochet in the next stitch. Repeat from around, ending with chain 3, skip the last 3 stitches. Join to the first sc. (36 sc + 36 chain-3 spaces)
Rounds 37 through 46: Chain 1, single crochet in the first sc. Chain 3, single crochet in the next sc. Repeat from around. Join. (36 sc + 36 chain-3 spaces each round)
Round 47: Chain 1, work 3 sc in each chain-3 space around, skipping the sc posts. Join. (108 sc)
Round 48: Chain 1, single crochet in each stitch around, increasing 36 stitches evenly by working 2 sc in every 3rd stitch. Join. (144 sc)
Rounds 49 through 51: Chain 1, single crochet in each stitch around. Join. (144 sc each round)
Round 52: Work reverse single crochet around the entire edge. Join invisibly and fasten off. (144 reverse sc)
Checkpoint: Your mesh band should add about 4.5 inches (11.5 cm) of height. The total bag height should now be approximately 12 inches (30.5 cm) before adding handles.
Part 3: Openwork Handles
Make 2 handles using tan yarn and your 5 mm hook. Each strap measures about 25 inches (63.5 cm) long before sewing, which gives approximately a 12 inch (30.5 cm) drop when attached.
Row 1: Chain 96. Single crochet in the 2nd chain from hook and in each chain across. Turn. (95 sc)
Row 2: Chain 1, single crochet in the first stitch. Chain 1, skip 1 stitch, single crochet in the next stitch. Repeat from across. Turn. (48 sc + 47 chain-1 spaces)
Row 3: Chain 1, single crochet in the first sc. Chain 1, single crochet in the next sc. Repeat from across. Turn. (48 sc + 47 chain-1 spaces)
Row 4: Repeat Row 3. Turn. (48 sc + 47 chain-1 spaces)
Edging: Chain 1, single crochet evenly around all four sides of the strap, placing 3 sc in each corner. Join and fasten off.
Attaching the Handles
Mark the front top edge 3 inches (7.5 cm) in from each side seam. Pin one strap end at each mark, extending about 1.25 inches (3 cm) down inside the tote. Repeat the same placement on the back of the bag.
Sew a secure box shape with an X through the center at each strap attachment point. Use tan yarn or strong thread for durability. This reinforced stitching ensures your handles can carry beach towels, sunscreen, books, and whatever else you pack.
Part 4: Stars, Tassel, and Finishing Details
This is where your tote transforms from a nice bag into a showstopper.
Star Appliques
Cut one large star approximately 3.75 inches (9.5 cm) across and one smaller star about 2.75 inches (7 cm) across from gingham fabric. Stabilize each star with lightweight fusible interfacing to prevent fraying.
Pin the large star on the front upper right area and the small star on the lower center-left area. Sew around each star with small whipstitches, then add tan running stitches around the edges for that charming handmade aesthetic.
Crochet Star Option: If you prefer an all-crochet look, use cream yarn and make a magic ring. Chain 1, work 10 sc in the ring, and join. Chain 5, sc in the 2nd chain from hook, hdc in the next chain, dc in the next, tr in the next, skip 1 sc on the ring, slip stitch in the next sc. Repeat from 5 times total. Fasten off and sew in place. For a larger star, use hdc/dc/tr/dtr for the points and a larger hook.
Tassel Charm
Wrap tan yarn around a 5 inch (12.5 cm) piece of cardboard 24 times. Tie securely at the top, then cut the lower loops. Wrap the neck about 1/2 inch (1.3 cm) below the top and trim the ends evenly.
For extra visual interest, make a second shorter tassel in navy. Thread your tassel cord through two wooden beads and tie the whole charm to the front left area where the mesh meets the body.
Blocking and Shaping
Steam your finished tote lightly from the wrong side without pressing the mesh flat. Shape the corners by hand and allow the bag to dry completely before adding heavy contents.
Optional Lining
For extra durability and a polished interior, sew a simple 14 x 12 x 4 inch (35.5 x 30.5 x 10 cm) boxed cotton lining. Slip it inside the tote with wrong sides together and hand-stitch just below the top edge.
Size Customization Options
Want to tweak the dimensions? Here’s how to adjust this pattern to your needs.
Wider Tote: Add stitches to the base row in multiples of 4. The side-round count must remain divisible by 4 for the mesh pattern to work correctly.
Taller Tote: Add or remove navy body rounds before the cream divider. Every 4 to 5 sc rounds changes the height by about 1 inch (2.5 cm).
Longer Straps: Add or remove starting chains. Every 4 chains changes the finished strap length by approximately 1 inch (2.5 cm).
More Structure: Add a firm lining, insert plastic canvas in the base, or work an extra round of reverse sc at the top.
Troubleshooting Common Issues
Even experienced crocheters run into hiccups. Here are solutions to the most common problems.
Mesh Twists or Leans: Double-check that each sc is worked into the next sc from the round below. Don’t accidentally shift into the chain space unless the pattern specifically directs you to.
Top Edge Ruffles: Round 48 should return you to exactly 144 sc by increasing 36 times evenly. Too many increases will cause flaring.
Base Cups Upward: Pick up exactly 16 sc on each short edge. Don’t work one sc in every row-end, as this creates too many stitches.
Bag Stretches Over Time: Use firm cotton yarn, try a smaller hook, and add a lining. Avoid loosely spun yarns for the lower body section.
Care Instructions
Your beautiful handmade tote deserves gentle care to last for years.
Spot clean whenever possible. For a full wash, remove the detachable tassel charm first. Hand wash in cool water, roll the bag in a towel to remove excess moisture, reshape carefully, and dry flat. Never hang the bag while wet, as the weight of the water can stretch it out of shape.
You Made It!
I hope this step-by-step crochet pattern has shown you that a boutique-worthy beach tote is absolutely within your reach. The combination of solid stitches and open mesh creates visual interest while keeping the construction manageable. And those sweet gingham stars? They’re the perfect finishing touch that makes everyone ask "where did you get that?"
Thank you so much for choosing this pattern for your next project. I genuinely love seeing what you create, so please snap a photo and share it on Instagram or Facebook. Watching these designs come to life in different yarn colors and personal styling choices is one of my favorite parts of sharing patterns.
If you enjoyed making this Denim Star Beach Tote, consider saving this pattern to your Pinterest boards so you can find it again later or share it with your crafty friends. And if you do make one, I’d absolutely love to hear about it in the comments below. Happy crocheting!
Want a Quick & Easy Printable Version?
Get a clean, beautifully formatted PDF of this pattern — easy to follow step by step, ready to print or save on any device. No scrolling, no distractions, just the pattern.
Get the Printable PDF →