
This is one of those projects that gets ALL the compliments. Seriously. The Rainbow Charm Anklet is SUPER impressive looking, but once you break it down, you’re basically making six tiny stuffed animals and braiding some yarn together. That’s it!
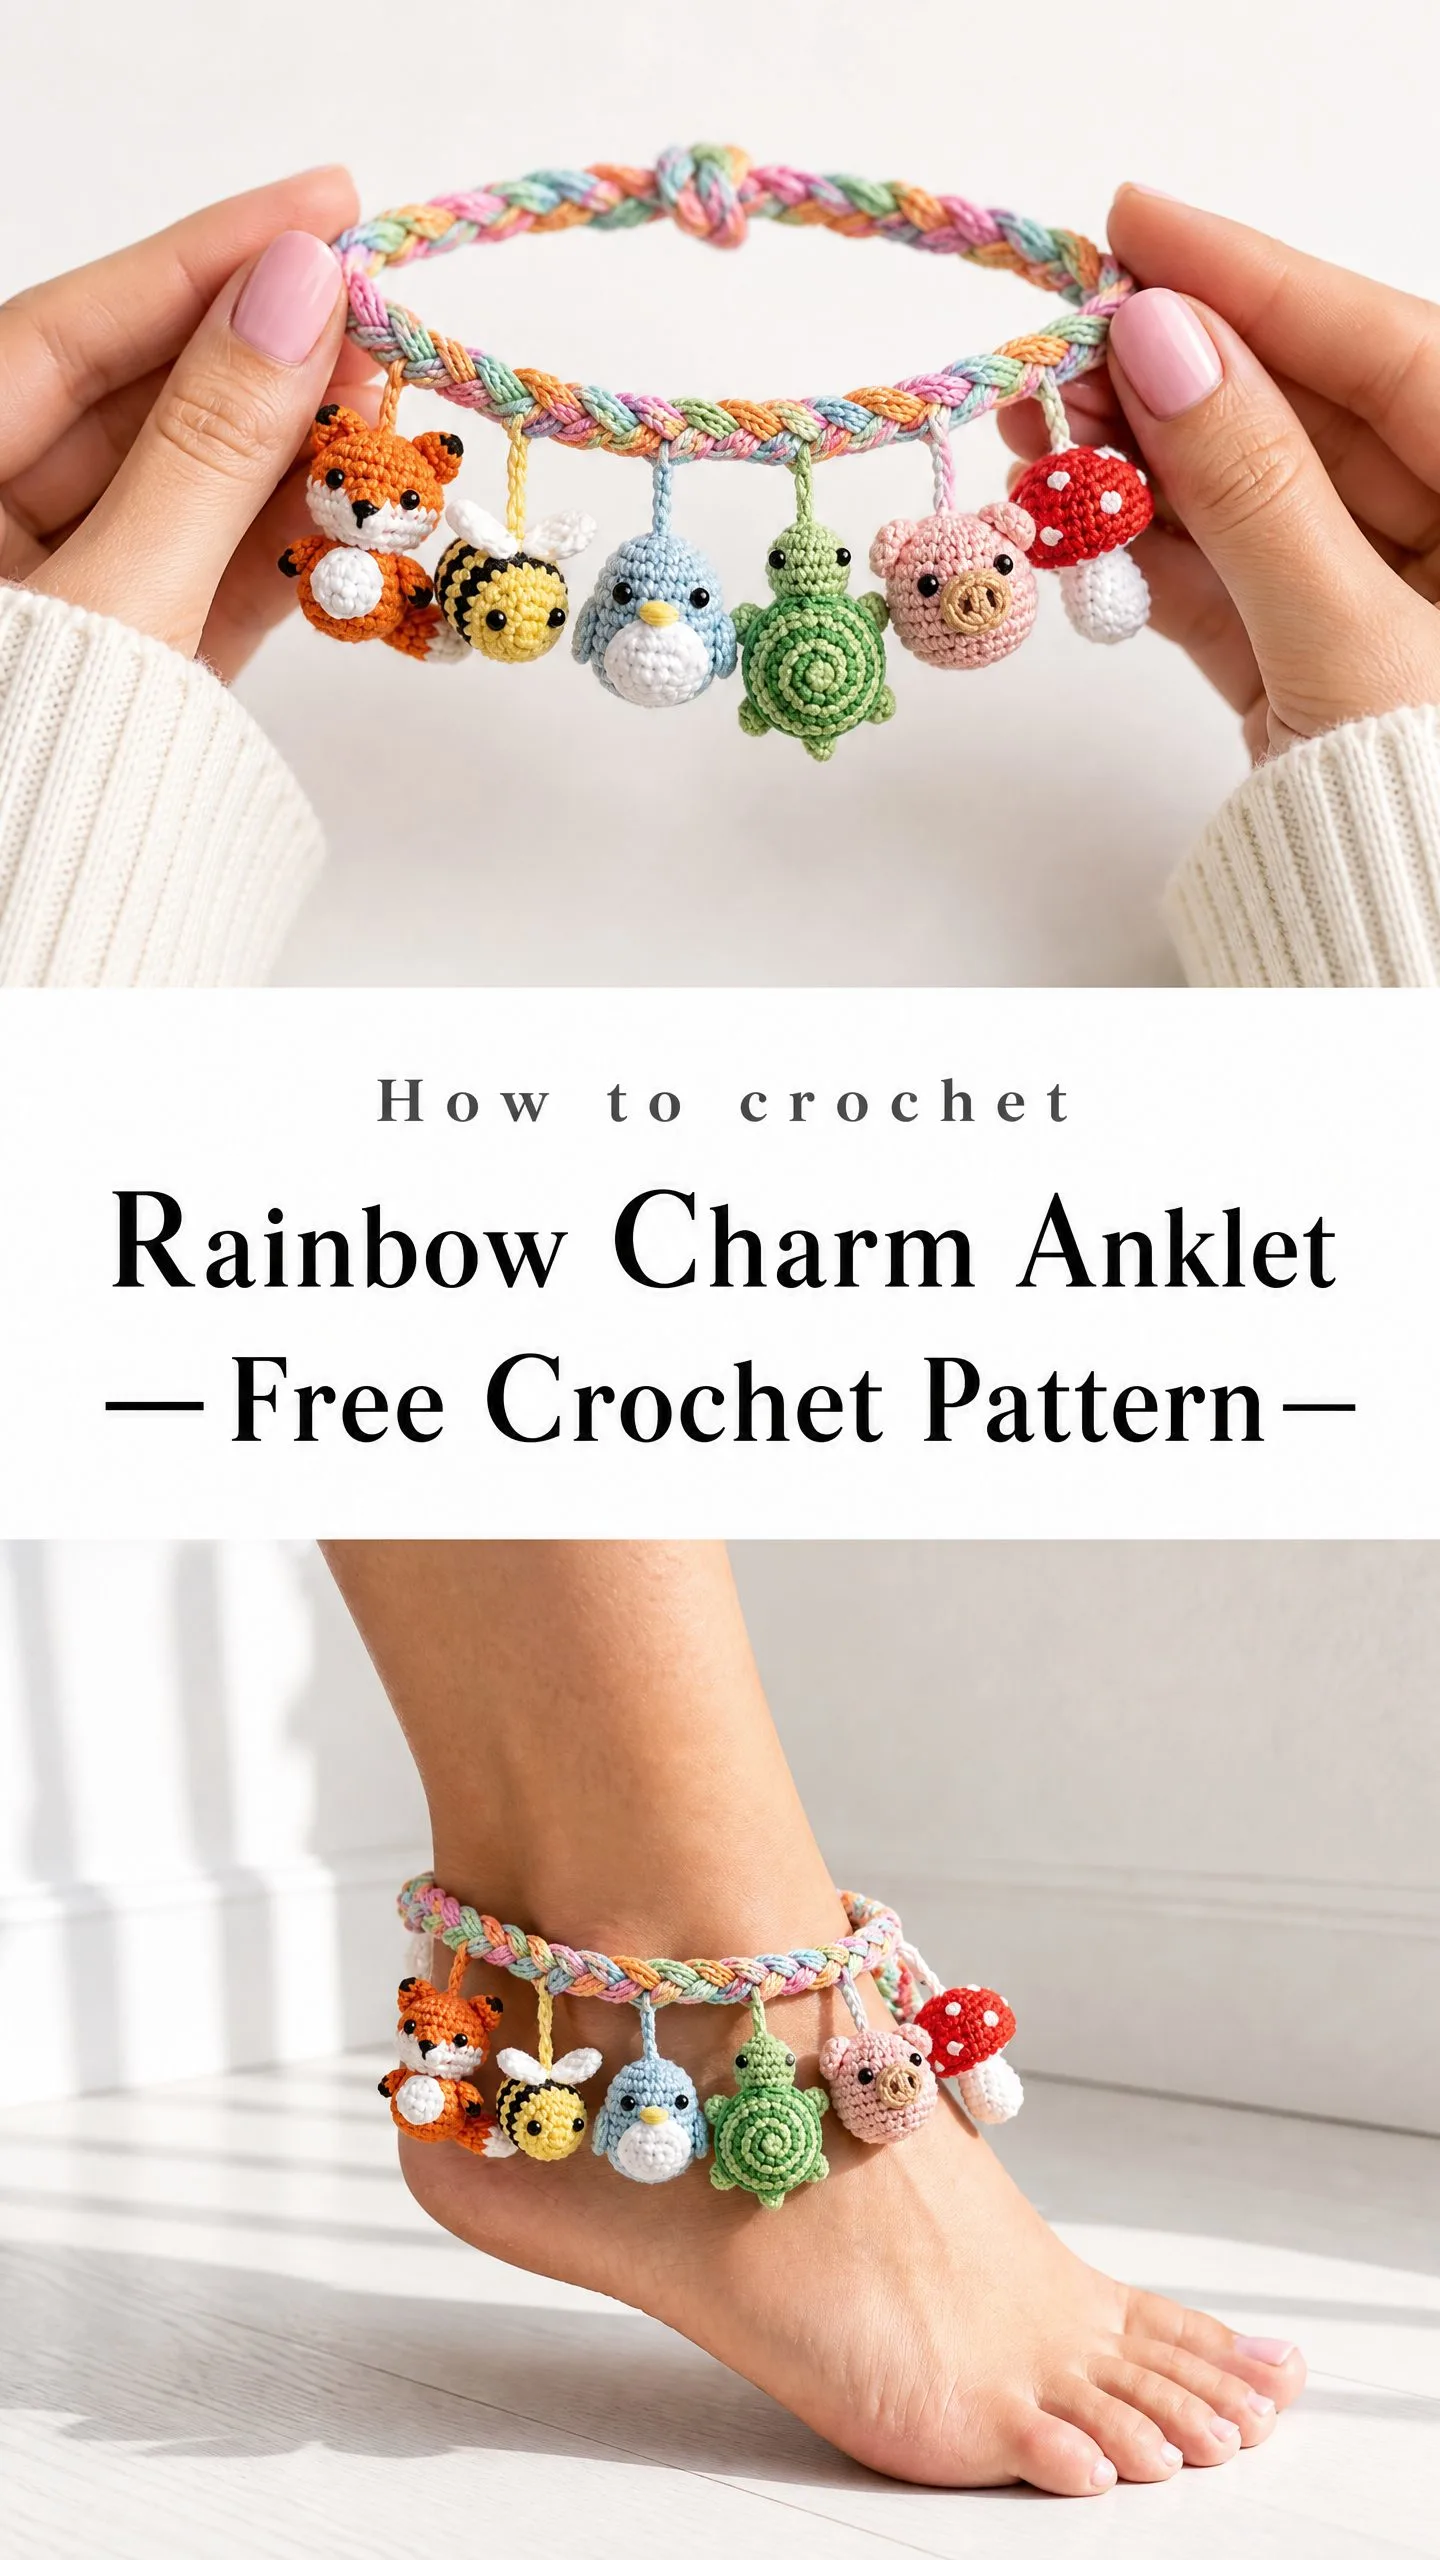
Each little charm takes about 45 to 90 minutes, and the braided band itself is a 30-minute job. So we’re talking 8 to 12 hours total for something that looks like it belongs in a boutique. Perfect for gifting, perfect for keeping, perfect for summer beach days.
If you’ve ever wanted to try miniature amigurumi but felt intimidated, this is your gateway project. The charms are small enough to feel like quick wins but detailed enough to feel like real accomplishments. Let’s make something adorable together.
What Makes This Crochet Anklet Pattern Special
I love this pattern because it combines so many fun techniques into one wearable piece. You’ve got a braided band made from three colorful crochet cords. You’ve got six teeny tiny amigurumi charms dangling from it. And you’ve got that beachy, whimsical vibe that makes people stop and ask where you got it.
The charms include a fox, a bee, a bluebird (or penguin, depending on your color choices), a turtle with a spiral shell, a pig, and a classic red and white mushroom. Each one is worked in the round using the magic ring technique, stuffed with polyfill, and attached to the band with a simple lark’s head knot.
The braided band is adjustable, so it fits ankles ranging from about 7 inches to 10 inches. You can also easily adapt this into a bracelet by shortening the starting chains.
Skill Level
This pattern is intermediate level. The braided band portion is totally beginner friendly. However, the six miniature amigurumi charms require comfort with a few specific techniques.
You should know how to work in a magic ring, make invisible decreases, change colors mid-round, and stuff small pieces evenly. If you’ve made a basic amigurumi ball before, you’re ready for this. If you haven’t, I’d suggest practicing one simple sphere first, then coming back to tackle these charms.
Materials You’ll Need
Yarn: Size 3 light DK weight or size 4 medium worsted weight cotton yarn. Cotton is strongly preferred because it’s skin safe, washable, and holds stitch definition beautifully in small-scale work.
For the band, you’ll need approximately 15 yards (14 meters) each of three colors. The pictured piece uses pink, mint green, and peach/orange. Any three pastel shades work wonderfully.
For the charms, you’ll need small amounts (approximately 3 to 8 yards each) of the following colors:
Yarn Suggestions: Lion Brand 24/7 Cotton, Paintbox Yarns Simply DK Cotton, or Drops Safran all work beautifully. Look for any smooth, plied cotton or cotton-blend yarn in DK to light worsted weight, approximately 200 to 220 yards per 100 grams. Avoid fuzzy or textured yarns because stitch definition matters a lot in miniature work.
Hook: US B-1 / 2.25 mm for the charms. This small hook creates a tight fabric that conceals the stuffing inside. US E-4 / 3.5 mm for the band strands.
Notions:
Gauge
With US B-1 / 2.25 mm hook and DK cotton, working in continuous rounds of single crochet:
7 single crochet stitches equal 1 inch (2.5 cm)
7 rows or rounds equal 1 inch (2.5 cm)
Gauge matters here for charm size consistency. A 12-stitch diameter circle at this gauge produces a charm approximately 0.85 inches across, which matches the intended finished dimensions.
For the band, gauge is flexible. The finished braid should measure approximately 0.5 inches wide.
Finished Size
Band: Approximately 9 inches long by 0.5 inches wide, adjustable from 7 to 10 inches with the knot-and-loop closure.
Each charm: Approximately 1 to 1.25 inches tall by 0.75 to 1 inch wide.
Abbreviations
Special Techniques
Magic Ring (MR)
Make a loop with the yarn so the tail end crosses over the working yarn. Insert hook through the loop from front to back. Yarn over and pull up a loop but do not tighten yet. Chain 1 to secure. Work the specified number of single crochets into the center of the ring by inserting the hook through the ring opening each time. After all stitches are complete, pull the tail end firmly to close the ring. The center hole will disappear completely.
Invisible Decrease (sc2tog)
This decrease lies much flatter than a standard decrease and is nearly invisible on the right side of amigurumi fabric. Insert hook into the front loop only of the next stitch. Without completing the stitch, insert hook into the front loop only of the following stitch. Yarn over and draw through both front loops (you now have 2 loops on hook). Yarn over and draw through both loops to complete.
Continuous Rounds
Do not join at the end of each round. Do not chain. Simply continue into the next round without stopping. Place a stitch marker in the first stitch of each round and move it up as you work. This produces a seamless spiral that is standard for amigurumi.
Surface Slip Stitch Embellishment
This technique creates the spiral on the turtle shell. With a length of contrasting yarn threaded on a tapestry needle, bring yarn up through the fabric at the center top of the shell. Working outward in a spiral, take small stitches over the surface of the fabric, picking up only the top yarn strands without penetrating deeply. This creates a raised spiral line.
Important Pattern Notes
1. All charms are worked in continuous rounds unless stated otherwise.
2. Stuff each charm firmly as you work, adding small amounts of fiberfill every few rounds rather than all at once. This produces evenly distributed stuffing without lumps.
3. Leave a tail of at least 8 inches when fastening off each charm. This tail is used to sew closed any remaining opening and to attach the charm to the band.
4. Safety eyes should be inserted and locked in place before the opening of each charm becomes too small to reach inside comfortably. For most charms, this is after round 5 or 6.
5. When the pattern says "join new color," complete the last yarn-over of the current stitch with the new color yarn, then continue in the new color.
6. Work the charms using the smaller B-1 hook throughout. Switch to the E-4 hook only for the band.
The Pattern Instructions
Section 1: The Anklet Band
The band is made from three crochet cords braided together. Each cord uses approximately 15 yards of yarn. Use the E-4 / 3.5 mm hook for this section.
Crochet Cord (make 3, each in a different color)
Foundation: Ch 75. (75 ch)
Row 1: Sl st in 2nd ch from hook and in each ch across. (74 sl sts)
Fasten off, leaving a 6-inch tail at each end.
Make all three cords this way: one pink, one mint green, one peach/orange (or your chosen three pastels).
Braiding the Band
Align the three cords at one end. Tie all three tails together in a single overhand knot approximately 1 inch from the end. This knot forms half of the adjustable closure.
Braid the three cords together using a standard three-strand braid: pass the right strand over the center strand, then pass the left strand over the new center strand. Repeat, keeping even tension, until approximately 1 inch of cord remains unbraided at the far end.
Tie the remaining tails in an overhand knot to mirror the first end.
To wear: pass one knotted end through the loop of the opposite knot, or adjust by pulling the knots closer together or farther apart.
Checkpoint: After braiding, the band should measure approximately 9 inches total from knot to knot, with approximately 7 inches of braided section. The braid should be approximately 0.5 inches wide.
Section 2: Charm 1, The Fox
Colors: Orange (main), White (belly/inner ear), Black (markings/eyes)
With orange yarn and B-1 hook:
Rnd 1: MR, 6 sc in ring. (6 sc)
Rnd 2: Inc in each st around. (12 sc)
Rnd 3: (Sc in next st, inc in next st) rep 6 times. (18 sc)
Rnd 4: (Sc in next 2 sts, inc in next st) rep 6 times. (24 sc)
Rnd 5: Sc in each st around. (24 sc)
Rnd 6: Sc in each st around. (24 sc)
Insert safety eyes between rounds 3 and 4, approximately 6 stitches apart.
Rnd 7: (Sc in next 2 sts, sc2tog) rep 6 times. (18 sc)
Begin stuffing now. Add a small amount of fiberfill.
Rnd 8: (Sc in next st, sc2tog) rep 6 times. (12 sc)
Add more stuffing. The body should be firmly filled.
Rnd 9: Sc2tog 6 times. (6 sc)
FO, leaving a long tail. Thread tail through remaining 6 sts and pull closed. Weave in ends on wrong side.
Fox Ears (make 2 in orange)
Ch 4. Sc in 2nd ch from hook, sc in next ch, 3 sc in last ch. Working back along the other side of the foundation chain: sc in next ch, sc in last ch. Sl st to close. (7 sc + sl st)
FO, leaving a tail for sewing.
Fox Belly/Snout Patch (in white)
MR, 6 sc in ring. Pull closed, do not fasten off.
Rnd 2: Inc in each st. (12 sc)
FO, leaving a long tail. Flatten slightly and sew to front lower half of fox body over rounds 2 through 5.
With black yarn and tapestry needle, embroider a small nose triangle and two curved smile lines on the snout area.
Sew ears to top of fox head, approximately 2 stitches apart, angling them outward slightly.
Fox Hanging Loop
Cut a 6-inch length of orange yarn. Fold in half. Thread the folded end through the top of the fox between rnds 8 and 9 using the tapestry needle, then pass both tails through the folded loop and pull snug (lark’s head knot). This creates the hanging loop.
Section 3: Charm 2, The Bee
Colors: Yellow (main), Black (stripes/eyes), White (wings)
With yellow yarn and B-1 hook:
Rnd 1: MR, 6 sc in ring. (6 sc)
Rnd 2: Inc in each st around. (12 sc)
Rnd 3: (Sc in next st, inc in next st) rep 6 times. (18 sc)
Rnd 4: Sc in each st around. (18 sc)
Change to black yarn at end of rnd 4.
Rnd 5: Sc in each st around in black. (18 sc)
Change to yellow.
Rnd 6: Sc in each st around in yellow. (18 sc)
Change to black.
Rnd 7: Sc in each st around in black. (18 sc)
Change to yellow.
Insert safety eyes between rounds 2 and 3, approximately 4 stitches apart.
Rnd 8: (Sc in next st, sc2tog) rep 6 times. (12 sc)
Stuff firmly.
Rnd 9: Sc2tog 6 times. (6 sc)
FO, pull closed as with fox.
Bee Wings (make 2 in white)
Ch 6. Sc in 2nd ch from hook, hdc in next, dc in next 2, hdc in last. Turn piece and work along other side: hdc in same ch, dc in next 2, hdc in next, sc in last. Sl st to join. FO, leaving tail.
Flatten and sew one wing to each side of bee body between rounds 4 and 6.
With black yarn, embroider two small antenna lines from the top of the bee head.
Bee Hanging Loop: Same method as fox, using yellow yarn.
Section 4: Charm 3, The Bluebird
Colors: Light blue (main body), White (belly), Yellow/gold (beak)
With light blue yarn and B-1 hook:
Rnd 1: MR, 6 sc in ring. (6 sc)
Rnd 2: Inc in each st around. (12 sc)
Rnd 3: (Sc in next st, inc in next st) rep 6 times. (18 sc)
Rnd 4: (Sc in next 2 sts, inc in next st) rep 6 times. (24 sc)
Rnd 5: Sc in each st around. (24 sc)
Rnd 6: Sc in each st around. (24 sc)
Insert safety eyes between rounds 3 and 4, approximately 5 stitches apart.
Rnd 7: (Sc in next 2 sts, sc2tog) rep 6 times. (18 sc)
Stuff firmly.
Rnd 8: (Sc in next st, sc2tog) rep 6 times. (12 sc)
Add more stuffing.
Rnd 9: Sc2tog 6 times. (6 sc)
FO, pull closed.
Belly Patch (in white)
MR, 6 sc in ring. Pull ring closed, do not fasten off.
Rnd 2: Inc in each st. (12 sc)
FO, leaving a long tail. Sew to front of bird body, centering over rounds 2 through 5.
Beak (in yellow/gold)
Ch 3. Sl st in 2nd ch from hook, sl st in last ch. FO, leaving tail. Fold in half to form a small triangle. Sew between eyes in the center of the face.
Bird Hanging Loop: Same method as fox, using light blue yarn.
Section 5: Charm 4, The Turtle
Colors: Medium green (shell outer), Dark green (shell spiral), Light green (head/limbs)
The turtle is worked in two parts: the shell (a flattened dome) and the body/head.
Shell
With medium green yarn and B-1 hook:
Rnd 1: MR, 6 sc in ring. (6 sc)
Rnd 2: Inc in each st around. (12 sc)
Rnd 3: (Sc in next st, inc in next st) rep 6 times. (18 sc)
Rnd 4: (Sc in next 2 sts, inc in next st) rep 6 times. (24 sc)
Rnd 5: Sc in each st around. (24 sc)
Rnd 6: Sc in each st around. (24 sc)
Rnd 7: (Sc in next 2 sts, sc2tog) rep 6 times. (18 sc)
Do not stuff the shell yet. With dark green yarn and tapestry needle, work a surface spiral from center outward using the surface slip stitch method. Work 3 to 4 rings of the spiral from center to edge for a snail-shell effect.
After embellishment, lightly stuff the shell dome. Then continue:
Rnd 8: (Sc in next st, sc2tog) rep 6 times. (12 sc)
Body/Head (in light green)
MR, 6 sc in ring. (6 sc)
Rnd 2: Inc in each st. (12 sc)
Rnd 3: Sc in each st. (12 sc)
Rnd 4: Sc in each st. (12 sc)
Rnd 5: Sc2tog 6 times. (6 sc)
Do not stuff head separately. FO, leaving a long tail.
Insert safety eyes in head piece between rounds 2 and 3, approximately 3 stitches apart, before closing head.
Legs (make 4 in light green)
Ch 4. Sc in 2nd ch from hook, sc in next 2 ch. FO, leaving a tail. (3 sc)
Sew head to front of shell at rnd 7 to 8 junction. Sew legs to underside sides of shell, two on each side.
Continue closing shell:
Rnd 9: Sc2tog 6 times. (6 sc)
FO, pull closed.
Turtle Hanging Loop: Use light green yarn, same method as fox.
Section 6: Charm 5, The Pig
Colors: Pink (main), Black (eyes)
With pink yarn and B-1 hook:
Rnd 1: MR, 6 sc in ring. (6 sc)
Rnd 2: Inc in each st around. (12 sc)
Rnd 3: (Sc in next st, inc in next st) rep 6 times. (18 sc)
Rnd 4: (Sc in next 2 sts, inc in next st) rep 6 times. (24 sc)
Rnd 5: Sc in each st around. (24 sc)
Rnd 6: Sc in each st around. (24 sc)
Insert safety eyes between rounds 3 and 4, approximately 5 stitches apart.
Rnd 7: (Sc in next 2 sts, sc2tog) rep 6 times. (18 sc)
Stuff firmly.
Rnd 8: (Sc in next st, sc2tog) rep 6 times. (12 sc)
Add more stuffing.
Rnd 9: Sc2tog 6 times. (6 sc)
FO, pull closed.
Snout (in pink)
MR, 6 sc in ring. Pull ring closed, do not fasten off. Sl st to close round. FO, leaving a long tail.
With black embroidery thread or yarn, make 2 small vertical stitches on the snout surface to represent nostrils. Sew snout to center of face between eyes, rounds 3 to 5.
Ears (make 2 in pink)
MR, 4 sc in ring. Pull ring closed. FO, leaving a tail.
Sew to top of head, one on each side, approximately 3 stitches apart.
Pig Hanging Loop: Use pink yarn, same method as fox.
Section 7: Charm 6, The Mushroom
Colors: Red (cap), White (stem and cap spots)
Stem
With white yarn and B-1 hook:
Rnd 1: MR, 6 sc in ring. (6 sc)
Rnd 2: Inc in each st around. (12 sc)
Rnd 3: Sc in each st around. (12 sc)
Rnd 4: Sc in each st around. (12 sc)
Rnd 5: (Sc in next st, sc2tog) rep 4 times. (8 sc)
Rnd 6: Sc in each st around. (8 sc)
Stuff stem lightly. FO, leaving a long tail.
Cap
With red yarn and B-1 hook:
Rnd 1: MR, 6 sc in ring. (6 sc)
Rnd 2: Inc in each st around. (12 sc)
Rnd 3: (Sc in next st, inc in next st) rep 6 times. (18 sc)
Rnd 4: (Sc in next 2 sts, inc in next st) rep 6 times. (24 sc)
Rnd 5: Sc in BLO of each st around. (24 sc) Working in back loop only creates a ridge that forms the cap edge/brim.
Rnd 6: (Sc in next 2 sts, sc2tog) rep 6 times. (18 sc)
Rnd 7: (Sc in next st, sc2tog) rep 6 times. (12 sc)
Stuff cap firmly before continuing.
Rnd 8: Sc2tog 6 times. (6 sc)
FO, pull closed.
Spots on cap: With white yarn and tapestry needle, embroider 4 to 5 small circular satin-stitch spots on the domed surface of the cap. Each spot is approximately 3 to 4 stitches wide.
Assembly of mushroom: Thread the long tail from the stem through the tapestry needle. Insert needle up through the center bottom of the cap, pulling the stem snug against the underside. Stitch back and forth several times to secure stem to cap.
Mushroom Hanging Loop: Attach a white yarn lark’s head loop to the top of the mushroom cap, at rounds 3 to 4.
Section 8: Attaching Charms to Band
Lay the finished band flat on a surface. Position the 6 charms evenly across the front of the braid, spacing them approximately 0.75 to 1 inch apart. The order from left to right in the pictured piece is: Fox, Bee, Bluebird, Turtle, Pig, Mushroom.
For each charm: thread the hanging loop tails or a fresh 8-inch piece of matching yarn onto the tapestry needle. Weave the needle under and over two strands of the braid at the chosen attachment point. Tie the ends in a double knot on the top (inner) side of the braid. Trim tails to approximately 0.5 inches or tuck them into the braid weave. Pull each knot gently to confirm it is secure.
The charms should hang approximately 0.5 inches below the lower edge of the braid.
Checkpoint: After attaching all six charms, hold the anklet up and let the charms hang freely. All six should hang at approximately the same height and face outward. The band should remain flat without twisting.
Size Customization Tips
To make the band longer for a larger ankle: add more chains to each cord before working the slip stitch row. Each additional chain adds approximately 0.14 inches to the braided band length. For a 10-inch finished band, start with a chain of 85 instead of 75.
To make the band shorter for a child’s ankle: reduce the starting chain to 60 for a band that finishes at approximately 7 inches.
To make a bracelet version: use a starting chain of 50 for an adult wrist or 42 for a child’s wrist.
To increase charm size: go up one hook size (US D-3 / 3.25 mm) and use the same stitch counts. This produces charms approximately 20% larger.
To decrease charm size for a child’s bracelet: use fingering weight yarn and a US steel hook size 7 / 1.65 mm, maintaining the same stitch counts.
Finishing and Blocking
Weave in all ends securely using a tapestry needle, burying the tails inside the charm bodies where possible.
Blocking: Lightly steam-block or wet-block the braided band only. Lay it flat on a blocking board, pin at both ends to desired length, and allow to dry completely before attaching charms. Do not steam the stuffed charms as heat can damage fiberfill and plastic safety eyes.
Final check: Tug each charm attachment firmly to confirm the connection will hold during wear. Tug the braided band at both ends to confirm the braid is tight and will not unravel.
Care Instructions
Hand wash only in cool water with a mild soap. Gently squeeze water through the piece without wringing or twisting. Rinse thoroughly. Roll in a clean towel and press gently to remove excess water. Reshape and lay flat to dry away from direct sunlight and heat.
Do not machine wash, machine dry, iron, or bleach. Remove the anklet before swimming, bathing, or applying lotions and sunscreens.
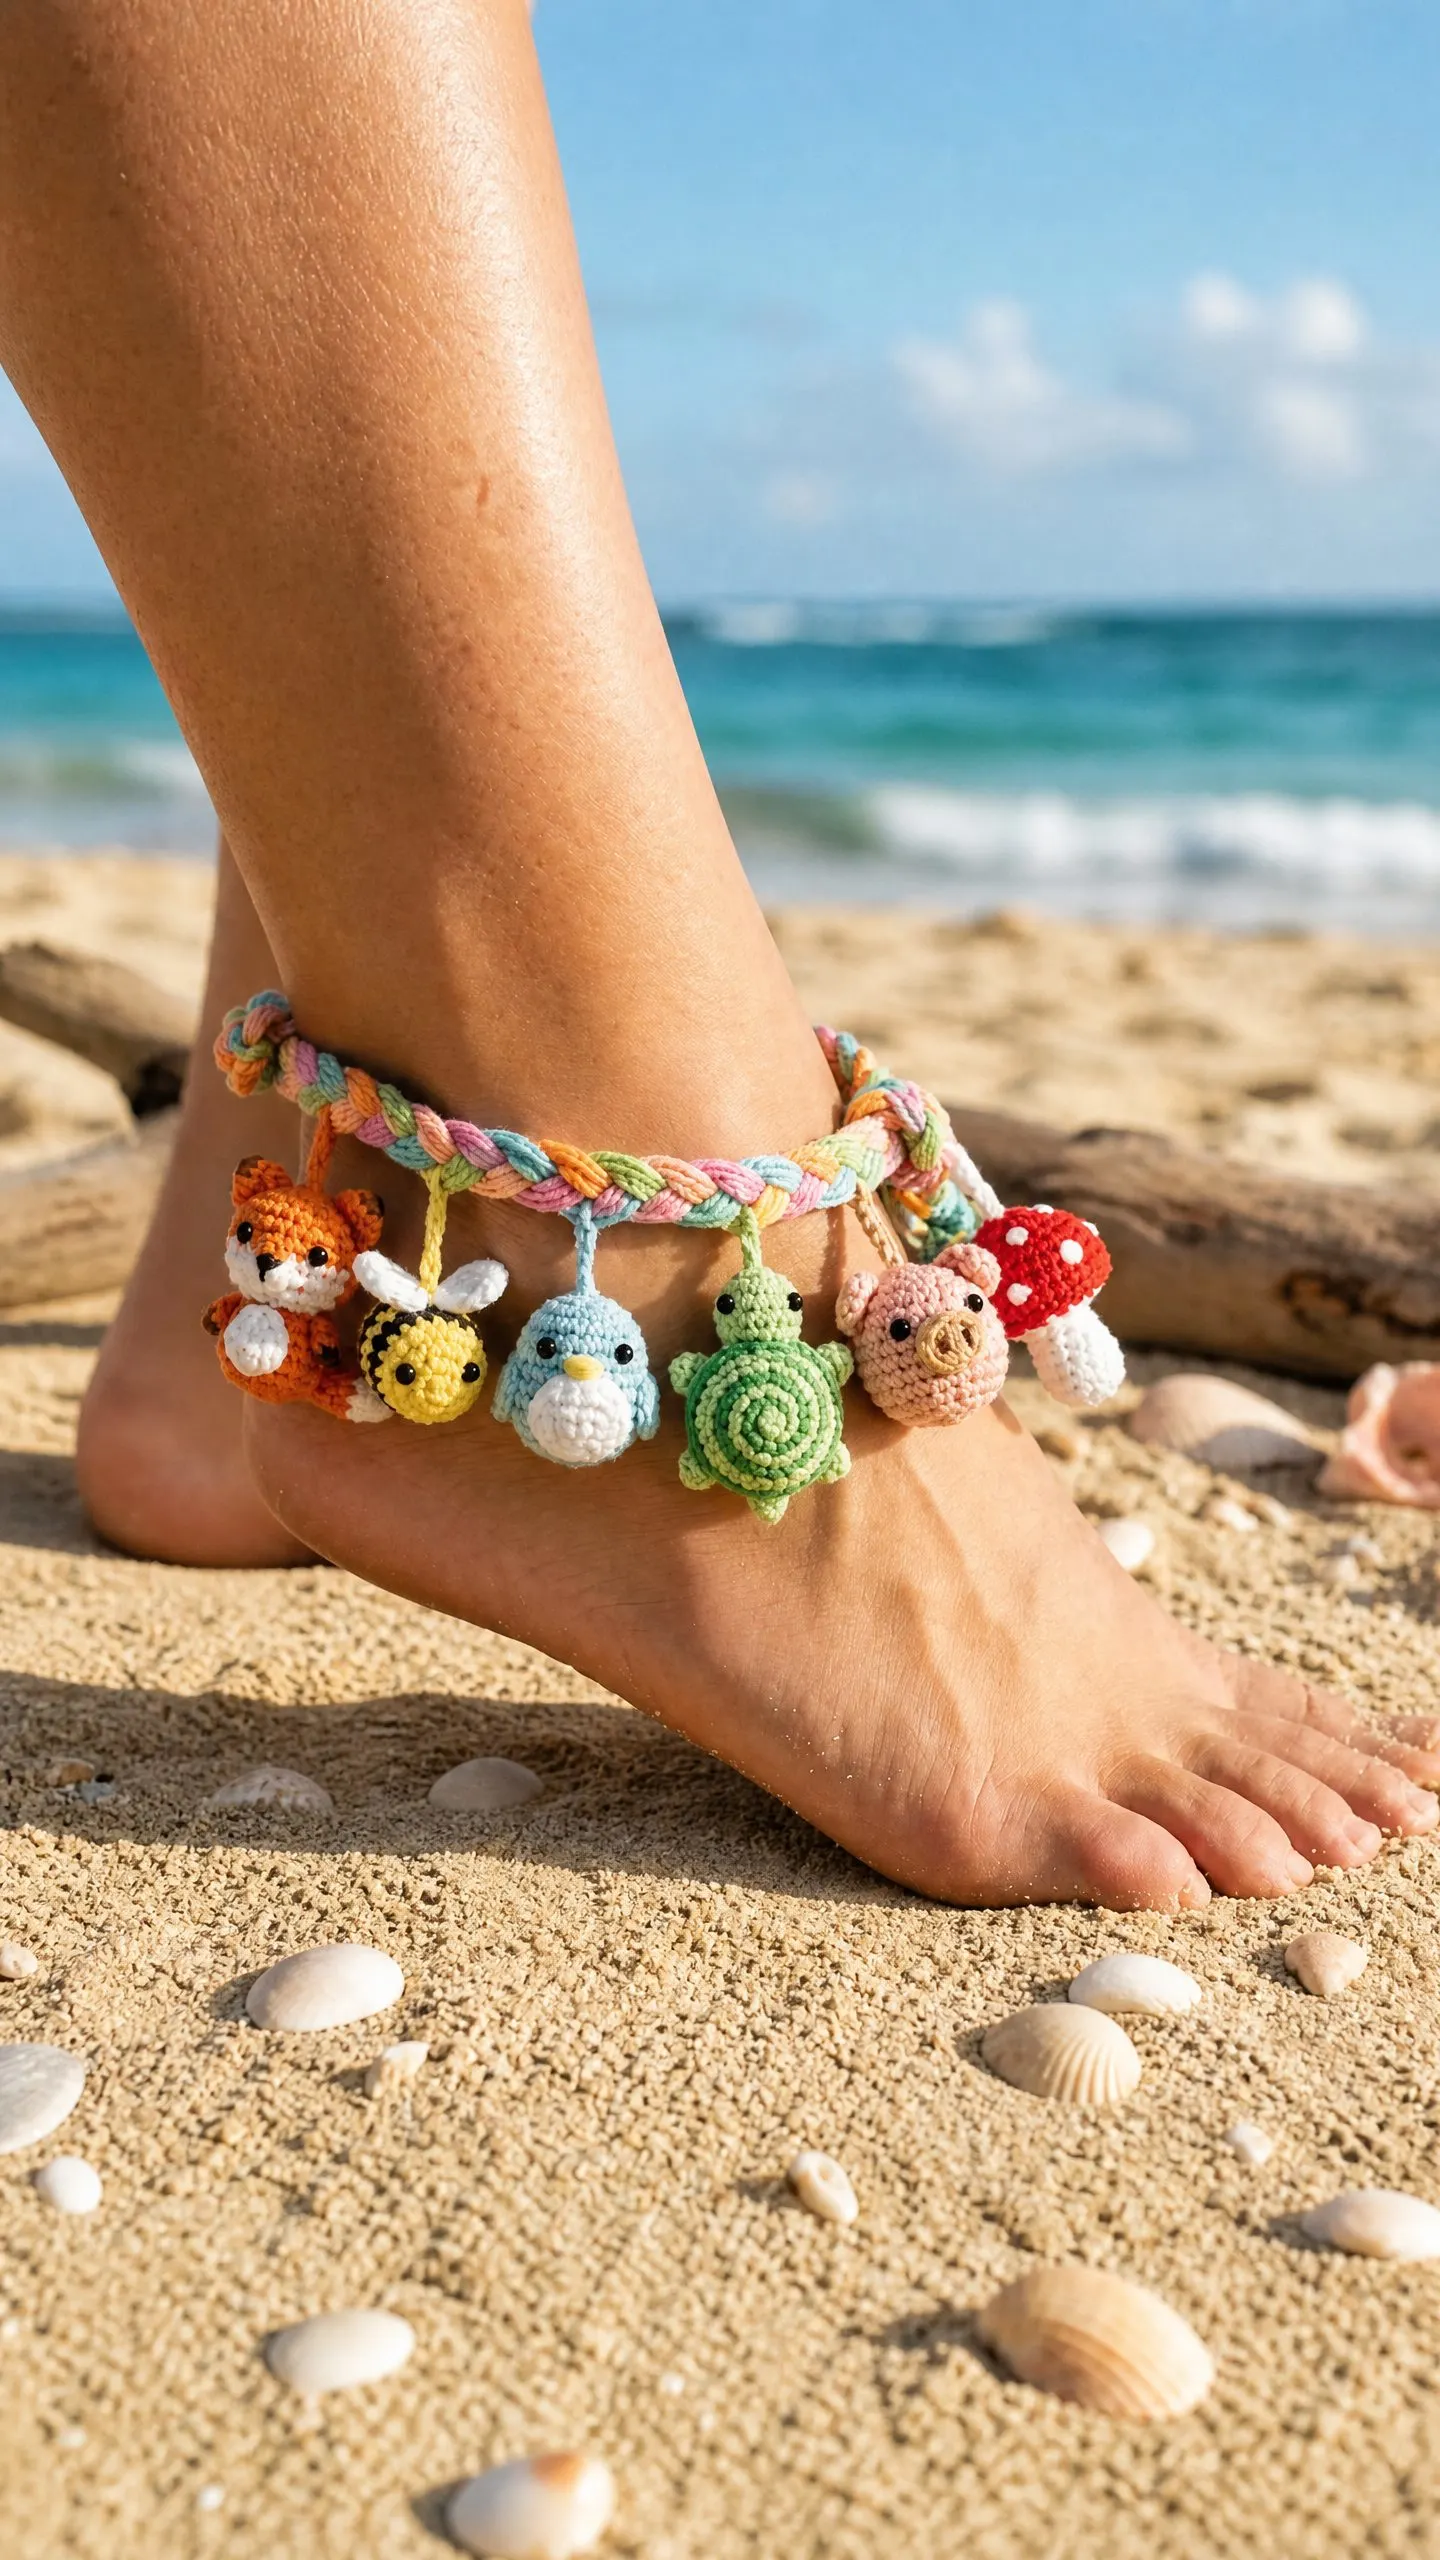
You Did It!
Thank you so much for choosing this rainbow charm anklet crochet pattern for your next project. I hope you had as much fun making these little cuties as I did designing them. There’s something really satisfying about watching a tiny fox or mushroom come together in your hands.
I would absolutely love to see your finished anklet! Tag me on Instagram or share your photos in my Facebook group. Seeing your creations honestly makes my whole day.
If you loved this pattern, go ahead and save it to your Pinterest boards so you can find it easily later. And please drop a comment below if you make this one. I’d love to hear which charm was your favorite to crochet!
