
This bag is SUPER EASY to make and absolutely stunning when finished! If you have been wanting to try granny squares but felt intimidated, this is your sign to grab your hook and dive in. The sunburst squares come together quickly, the construction is straightforward, and the finished bag looks like something you would find in a boutique.
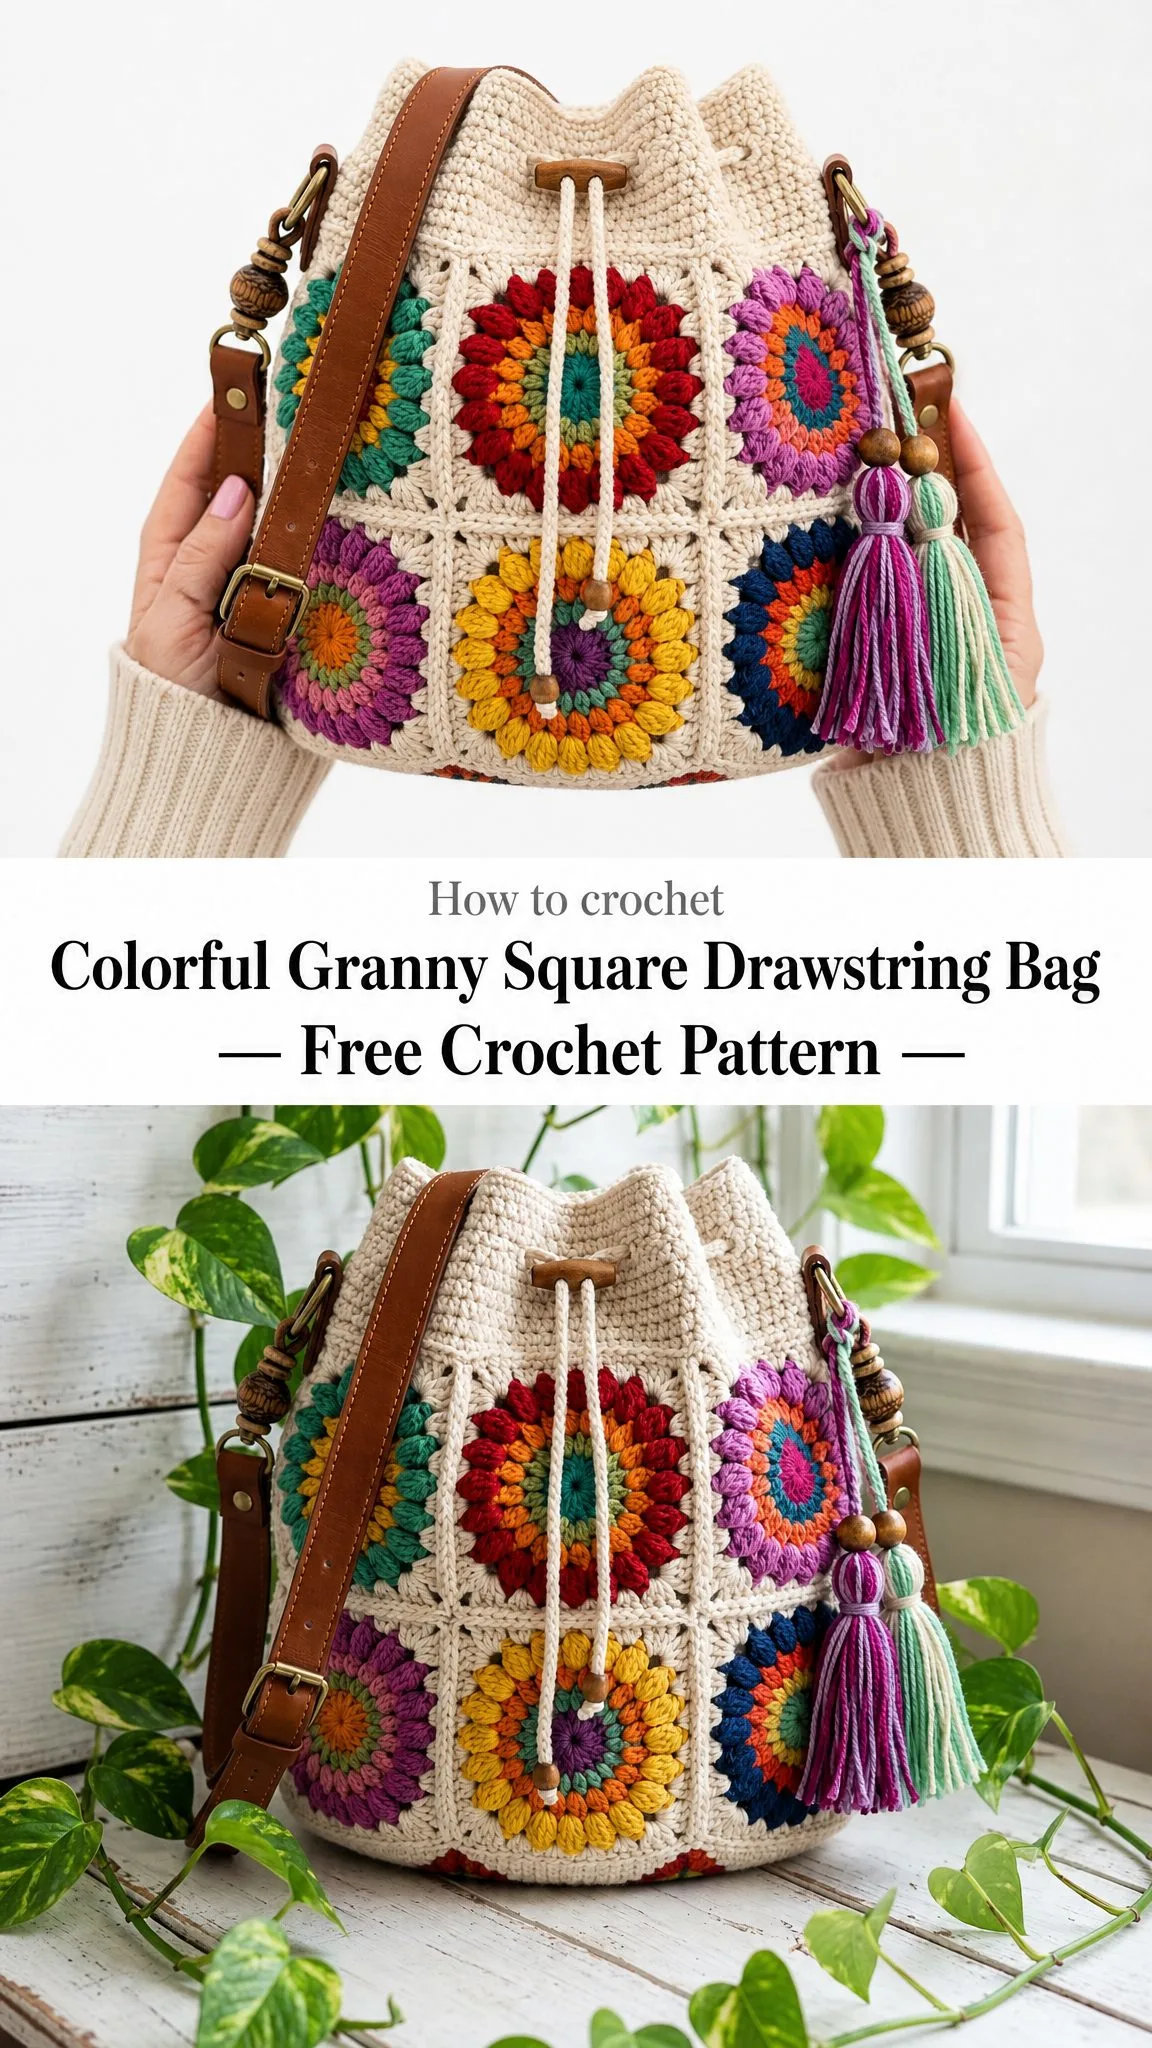
I am not exaggerating when I say this project is one of the most satisfying makes I have completed in a long time. Each square takes maybe 20 minutes once you get the rhythm down, and watching those bright colors pop against the cream border is genuinely exciting. You will have a gorgeous handmade crossbody bag in 12 to 16 hours of total work.
This makes an INCREDIBLE gift. Seriously. Imagine handing someone a colorful, one of a kind crocheted bag that you made with your own hands. They will treasure it forever. Let me walk you through everything you need to know to make your own.
About This Sunburst Granny Square Bag
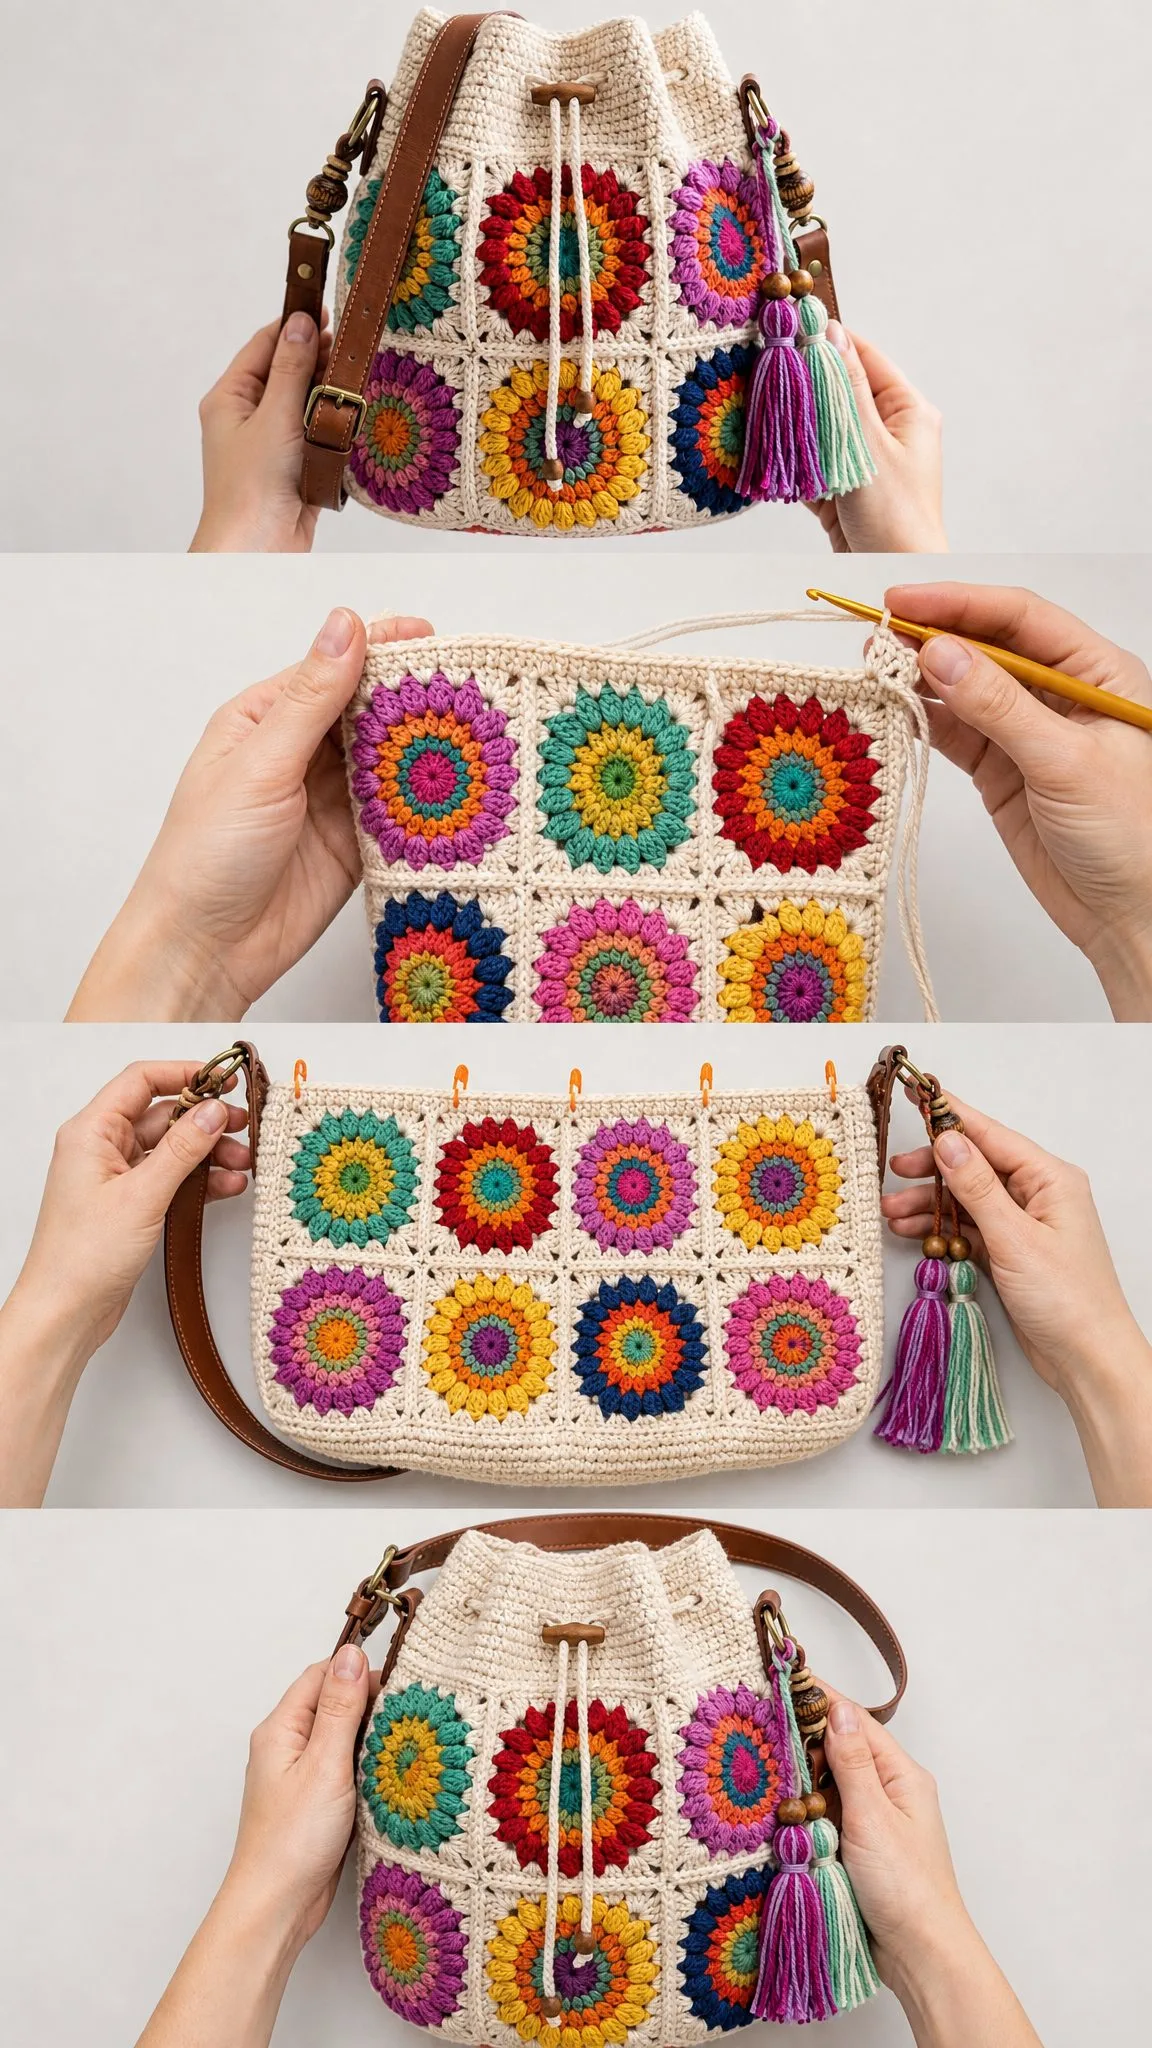
This colorful granny square drawstring bag features sixteen three color sunburst squares joined into a tube, eight squares around and two rows tall. A flat round disc forms the base, and a plain collar with an eyelet round carries a beaded drawstring. The finishing touches include bright yarn tassels and a leather crossbody strap.
The finished bag measures approximately 9 inches (23 cm) in diameter and 9.5 inches (24 cm) in height including the collar. Each sunburst square measures 3.5 inches (9 cm) when blocked. The strap length is adjustable based on your preference.
This pattern is rated intermediate level, but do not let that scare you. If you can work basic stitches and follow a pattern, you can absolutely make this bag. The only special stitch is the puff stitch, and I will explain exactly how to do it.
Materials You Will Need
Yarn
Main color (cream): approximately 250 to 300 yards (230 to 275 meters) of worsted weight (medium / #4) cotton or cotton blend. This is used for the corners, base, collar, and joins.
Accent colors: small amounts of 6 to 8 bright shades such as rust, mustard, teal, magenta, plum, and navy. About 12 to 18 yards of each color total will cover all sixteen squares.
Each square uses three accent colors plus cream corners. Mix and match your colors so no two squares look exactly the same. This is what gives the bag that beautiful eclectic, handmade charm.
Yarn recommendations:
Hooks and Notions
Gauge
One finished sunburst square should measure 3.5 inches (9 cm) across using a 4.5 mm hook. In double crochet (dc), you should have 16 stitches and 8 rows equaling 4 inches (10 cm).
Gauge matters more for the base and collar than the squares. Block a test square and adjust your hook size if needed. If your square is too small, go up a hook size. If it is too large, go down a hook size.
Abbreviations and Stitch Definitions
Let me break down all the stitches and abbreviations you will encounter in this pattern:
ch = chain: wrap yarn over hook, pull through loop on hook
sl st = slip stitch: insert hook, yarn over, pull through stitch and loop on hook in one motion
sc = single crochet: insert hook, yarn over, pull up a loop (2 loops on hook), yarn over, pull through both loops
hdc = half double crochet: yarn over, insert hook, yarn over, pull up a loop (3 loops on hook), yarn over, pull through all 3 loops
dc = double crochet: yarn over, insert hook, yarn over, pull up a loop (3 loops on hook), yarn over, pull through 2 loops, yarn over, pull through remaining 2 loops
puff = puff stitch: this one looks fancy but is simpler than you think. [Yarn over, insert hook in stitch, yarn over and pull up a loop] 3 times in the same stitch (you will have 7 loops on your hook), yarn over and pull through all 7 loops, chain 1 to close
st(s) = stitch(es)
sp = space
rep = repeat
beg = beginning
UK crocheters note: US sc = UK dc, US hdc = UK htr, US dc = UK tr. This pattern uses US terms throughout.
Special Stitches
Magic ring: This is an adjustable loop used to start each round piece. If you have never made one, there are excellent video tutorials available. Essentially, you create a loop, work your stitches into that loop, then pull the tail to close it tight with no hole in the center.
Pattern Notes Before You Begin
Read through these notes before starting. They will save you confusion later.
The body is worked as 16 separate sunburst squares, then joined into a tube and seated onto a round base.
Every square is worked the same way. Only the three accent colors change. Cream is always used for the final two rounds which form the corners.
Each round of a square is joined with a slip stitch to the first stitch. You begin a new round with the new color unless noted otherwise.
Fasten off and weave in ends after each color change, or carry cream loosely up the inside if you prefer fewer ends to weave.
Stitch counts at the end of each round or row are shown in parentheses, for example (128 dc).
The beginning chain 3 counts as a double crochet throughout the pattern. The beginning chain 2 does not count as a stitch in puff rounds.
Block your squares before joining for crisp corners and even edges. This step makes a huge difference in the final appearance.
A lining is optional but helps the drawstring bag keep its shape and hold small items securely.
How to Make the Sunburst Square
Make 16 squares total. For each square, choose 3 accent colors: Color A for the center, Color B for the petals, and Color C for the fans. Use cream for Rounds 4 and 5.
Round 1 (Color A)
Make a magic ring. Chain 1, work 12 single crochet (sc) into the ring. Join with a slip stitch to the first sc. Pull the ring closed. (12 sc)
Round 2 (Color B)
Join Color B in any sc. Chain 2, puff in the same stitch, chain 1, [puff in next sc, chain 1] around. Join with a slip stitch to the top of the first puff. (12 puffs, 12 ch-1 spaces)
Round 3 (Color C)
Slip stitch into the first ch-1 space. Chain 3 (this counts as a dc), 2 dc in the same space, 3 dc in each ch-1 space around. Join with a slip stitch to the top of the beginning ch-3. (36 dc, in 12 fans)
This is the colorful sunburst face of each square. The next two cream rounds turn the circle into a square.
Squaring the Corners
Work Rounds 4 and 5 in cream. The gaps between the 12 fans become 4 corners and 8 side groups.
Round 4 (Cream)
Join cream with a slip stitch in any gap between two fans (this becomes a corner). Chain 3 (counts as dc), (2 dc, ch 2, 3 dc) in the same gap, 3 dc in each of the next 2 gaps, (3 dc, ch 2, 3 dc) in the next gap, 3 dc in each of the next 2 gaps; repeat from twice more. Join to the top of the beginning ch-3. (48 dc, 4 ch-2 corner spaces)
Round 5 (Cream)
Slip stitch to the next stitch. Chain 3, dc in each dc to the first corner, (2 dc, ch 2, 2 dc) in the corner ch-2 space, dc in each dc to the next corner; repeat from around, ending (2 dc, ch 2, 2 dc) in the last corner. Join to the top of the beginning ch-3. (64 dc, 16 dc per side, 4 corners)
Fasten off, leaving a long cream tail if you plan to whip stitch the squares together. Make 16 squares total. Block each one to 3.5 inches (9 cm) square.
Each finished side has 16 dc between corner spaces. With 8 squares around the tube, every horizontal edge has 8 times 16 which equals 128 stitches. This is the number the base and collar are built to match.
Joining Into a Tube
Arrange your 16 squares as two rows of 8, mixing colors so neighboring squares contrast nicely.
Step 1: Lay out a grid 8 squares wide and 2 squares tall. Step back and shuffle until the color balance feels even all the way around.
Step 2: With cream and a tapestry needle, whip stitch (or sc join through back loops) the squares together along their touching edges. First join each row of 8 into a long strip.
Step 3: Join the two strips along one long edge to make one panel 8 wide by 2 tall.
Step 4: Bring the two short ends together and seam them to form a tube. Keep tension even so the seam disappears into the grid.
Step 5: Weave in all ends. The tube now has a 128 stitch opening at both the top and the bottom.
For an invisible join, you can use the flat braid or continuous join as you go method while making the squares instead of seaming at the end. Either way, the edge count stays 128 stitches top and bottom.
Making the Round Base
The base is worked flat in cream dc from the center out. The beginning ch-3 counts as a dc each round.
Rnd 1: Magic ring, ch 3, 11 dc in ring, join. (12 dc)
Rnd 2: Ch 3, dc in same st, 2 dc in each st around, join. (24 dc)
Rnd 3: Ch 3, [dc in next st, 2 dc in next] around, join. (36 dc)
Rnd 4: [dc in next 2, 2 dc in next] around. (48 dc)
Rnd 5: [dc in next 3, 2 dc in next] around. (60 dc)
Rnd 6: [dc in next 4, 2 dc in next] around. (72 dc)
Rnd 7: [dc in next 5, 2 dc in next] around. (84 dc)
Rnd 8: [dc in next 6, 2 dc in next] around. (96 dc)
Rnd 9: [dc in next 7, 2 dc in next] around. (108 dc)
Rnd 10: [dc in next 8, 2 dc in next] around. (120 dc)
Rnd 11: [dc in next 14, 2 dc in next] 8 times around, join. (128 dc)
The base now matches the tube exactly. With wrong sides together, sc the base to the bottom edge of the tube through both loops, working 1 sc in each of the 128 stitches. Join and fasten off. (128 sc join)
Creating the Drawstring Collar
The collar is worked in cream sc around the top opening of the tube. Join each round with a slip stitch.
Rnd 1: Join cream in any top stitch. Ch 1, sc in each st around, join. (128 sc)
Rnds 2 to 4: Ch 1, sc in each sc around, join. (128 sc each round)
Rnd 5 (eyelets): Ch 1, [sc in next 7 sts, ch 1, skip next st] 16 times, join. (112 sc, 16 ch-1 spaces)
Rnd 6: Ch 1, sc in each sc and in each ch-1 sp around, join. (128 sc)
Rnds 7 to 8: Ch 1, sc in each sc around, join. Fasten off after Rnd 8. (128 sc each round)
For a firmer, less floppy top edge, work the final round in back loops only or switch to hdc.
The eyelet round (Rnd 5) is what carries the drawstring.
Finishing: Drawstring, Tassels, and Strap
Making the Drawstring Cord
With cream, make a chain about 36 inches (90 cm) long, or longer if you want a full bow. Then slip stitch back along it for a sturdy cord. Alternatively, you can twist two strands together. Weave the cord in and out through the 16 eyelets of Round 5, beginning and ending at the front.
Adding Beads and Tassels
Thread a wooden bead onto each end of the drawstring and knot to secure.
For each tassel: wrap bright yarn around a 4 inch (10 cm) card 20 to 30 times, tie at the top, cut the bottom loops, then wrap and tie a neck about 0.5 inches (1.5 cm) down. Trim the ends level.
Make 2 to 3 tassels in mixed colors and tie them to the drawstring ends and one side ring.
Attaching the Strap
For a leather strap (as shown): Attach two cream loops or D-rings to opposite sides of the collar, then clip on a purchased adjustable leather strap with swivel clasps.
For a crocheted strap: Chain 8, sc in the 2nd chain and across. Work in rows for the length you want (about 40 to 46 inches or 100 to 117 cm), then sew the ends securely to the inside of the collar.
Care Instructions
Hand wash your bag in cool water with mild detergent. Avoid wringing.
Reshape while damp and lay flat to dry, stuffing lightly with a towel to hold the bucket shape.
Remove or protect a leather strap before washing.
Store the bag stuffed so the body keeps its round form.
Sizing Adjustments
Bigger bag: Add more squares around (try 10 wide) and extend the base by repeating the increase pattern two more rounds to match.
Taller bag: Add a third row of squares, or add plain dc rounds between the body and collar.
Smaller bag: Drop to 6 squares around and stop the base at Rnd 9, then ease to match.
Different look: Keep the corners cream but try a single accent palette per row for an ombré effect.
Final Thoughts on This Crochet Pattern
This colorful granny square drawstring bag crochet pattern is one of those projects that looks impressive but is totally achievable. The sunburst squares are meditative to make, the assembly is logical, and the finished bag is genuinely useful and beautiful. Whether you make it for yourself or as a gift, this bag will get compliments every time you carry it.
I hope you enjoy making this as much as I enjoyed designing it. The mix of bright colors against that creamy background never gets old, and there is something deeply satisfying about turning a pile of yarn into a functional, gorgeous accessory.
Thank you so much for choosing this pattern! I would absolutely love to see your finished bags, so please tag me on Instagram or share in my Facebook group when you complete yours. If you make this bag, drop a comment below and let me know which colors you chose. And do not forget to save this pattern to your Pinterest boards so you can find it easily when you are ready to start. Happy crocheting!
