
Last spring, I lost my grandmother’s pearl bracelet at a farmer’s market. I retraced my steps three times, asked every vendor, and even checked the parking lot on my hands and knees. Gone. That bracelet had been hers for forty years, and I wore it every May when the lily of the valley bloomed in her old garden.
I couldn’t replace what she gave me, but I could make something new that carried the same feeling. Something with pearls. Something with those little bell-shaped flowers she loved so much. Something I made with my own hands, which honestly felt like the most fitting tribute anyway.
This bracelet took me a full weekend to finish, and I cried a little when I put it on. Now I’m sharing the pattern with you because I think there’s something powerful about wearing flowers you crocheted yourself, strung on pearls, clasped around your wrist like a tiny garden.
About This Lily of the Valley Crochet Pattern
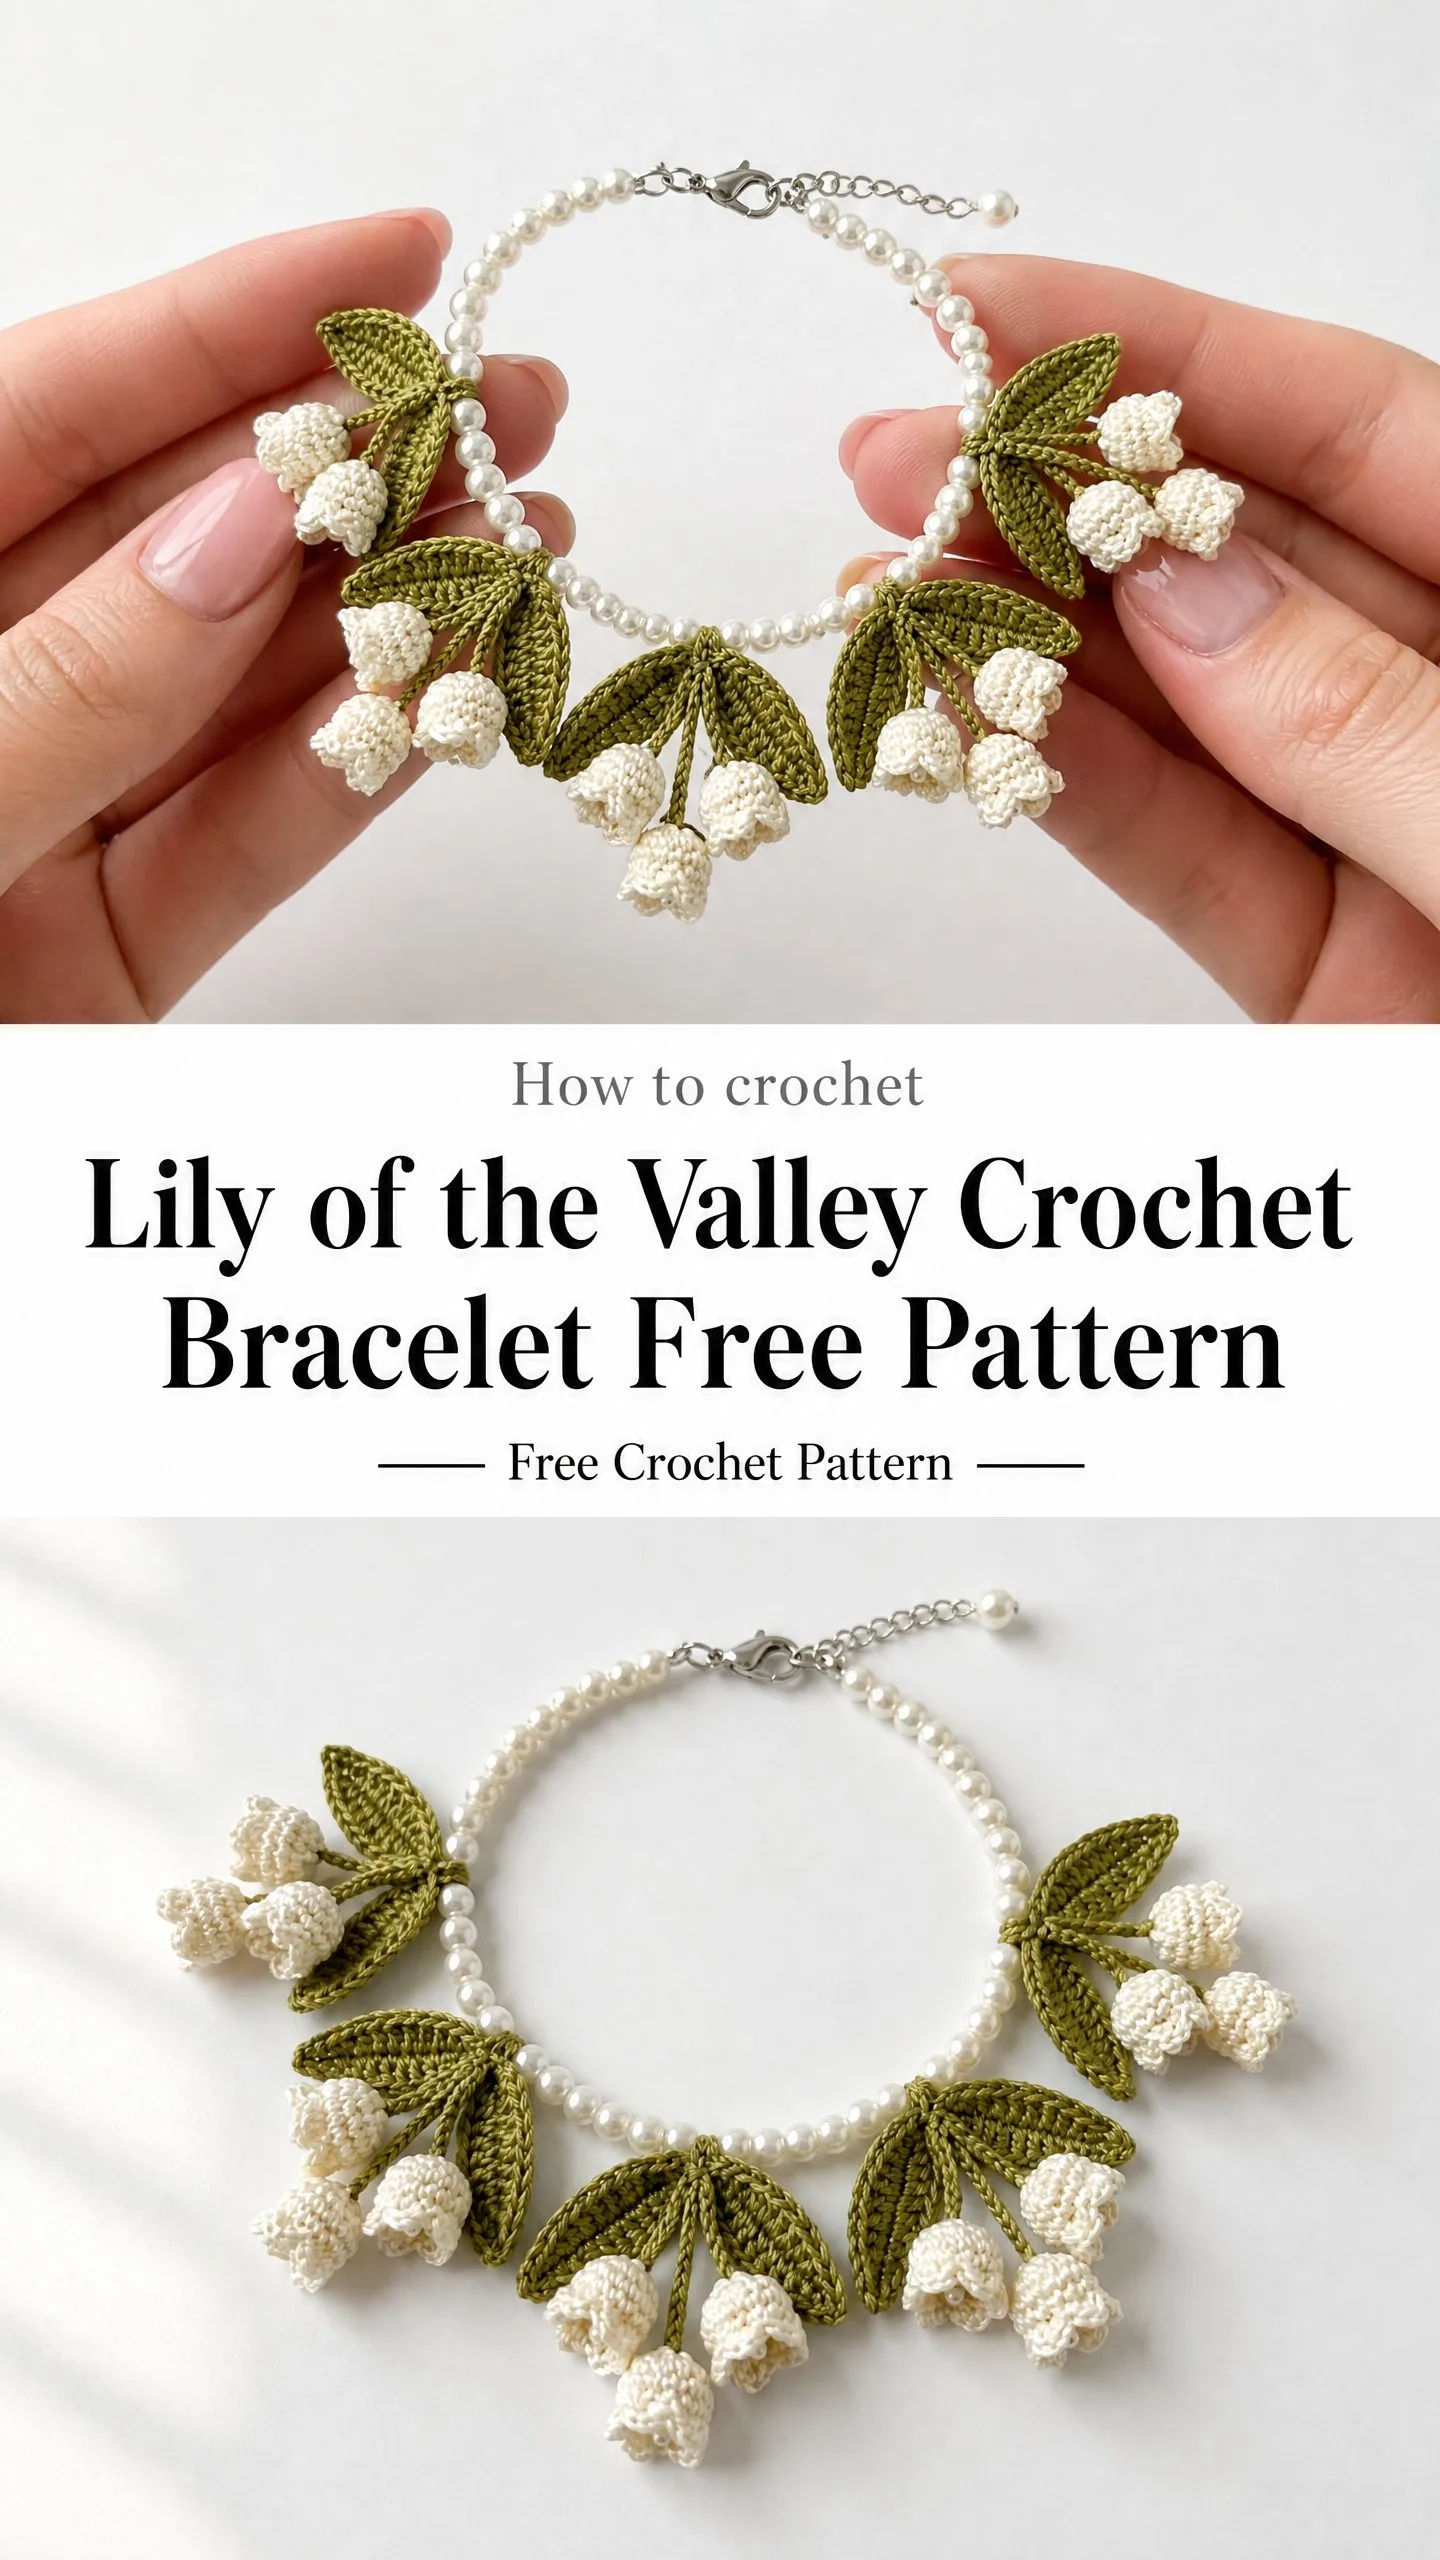
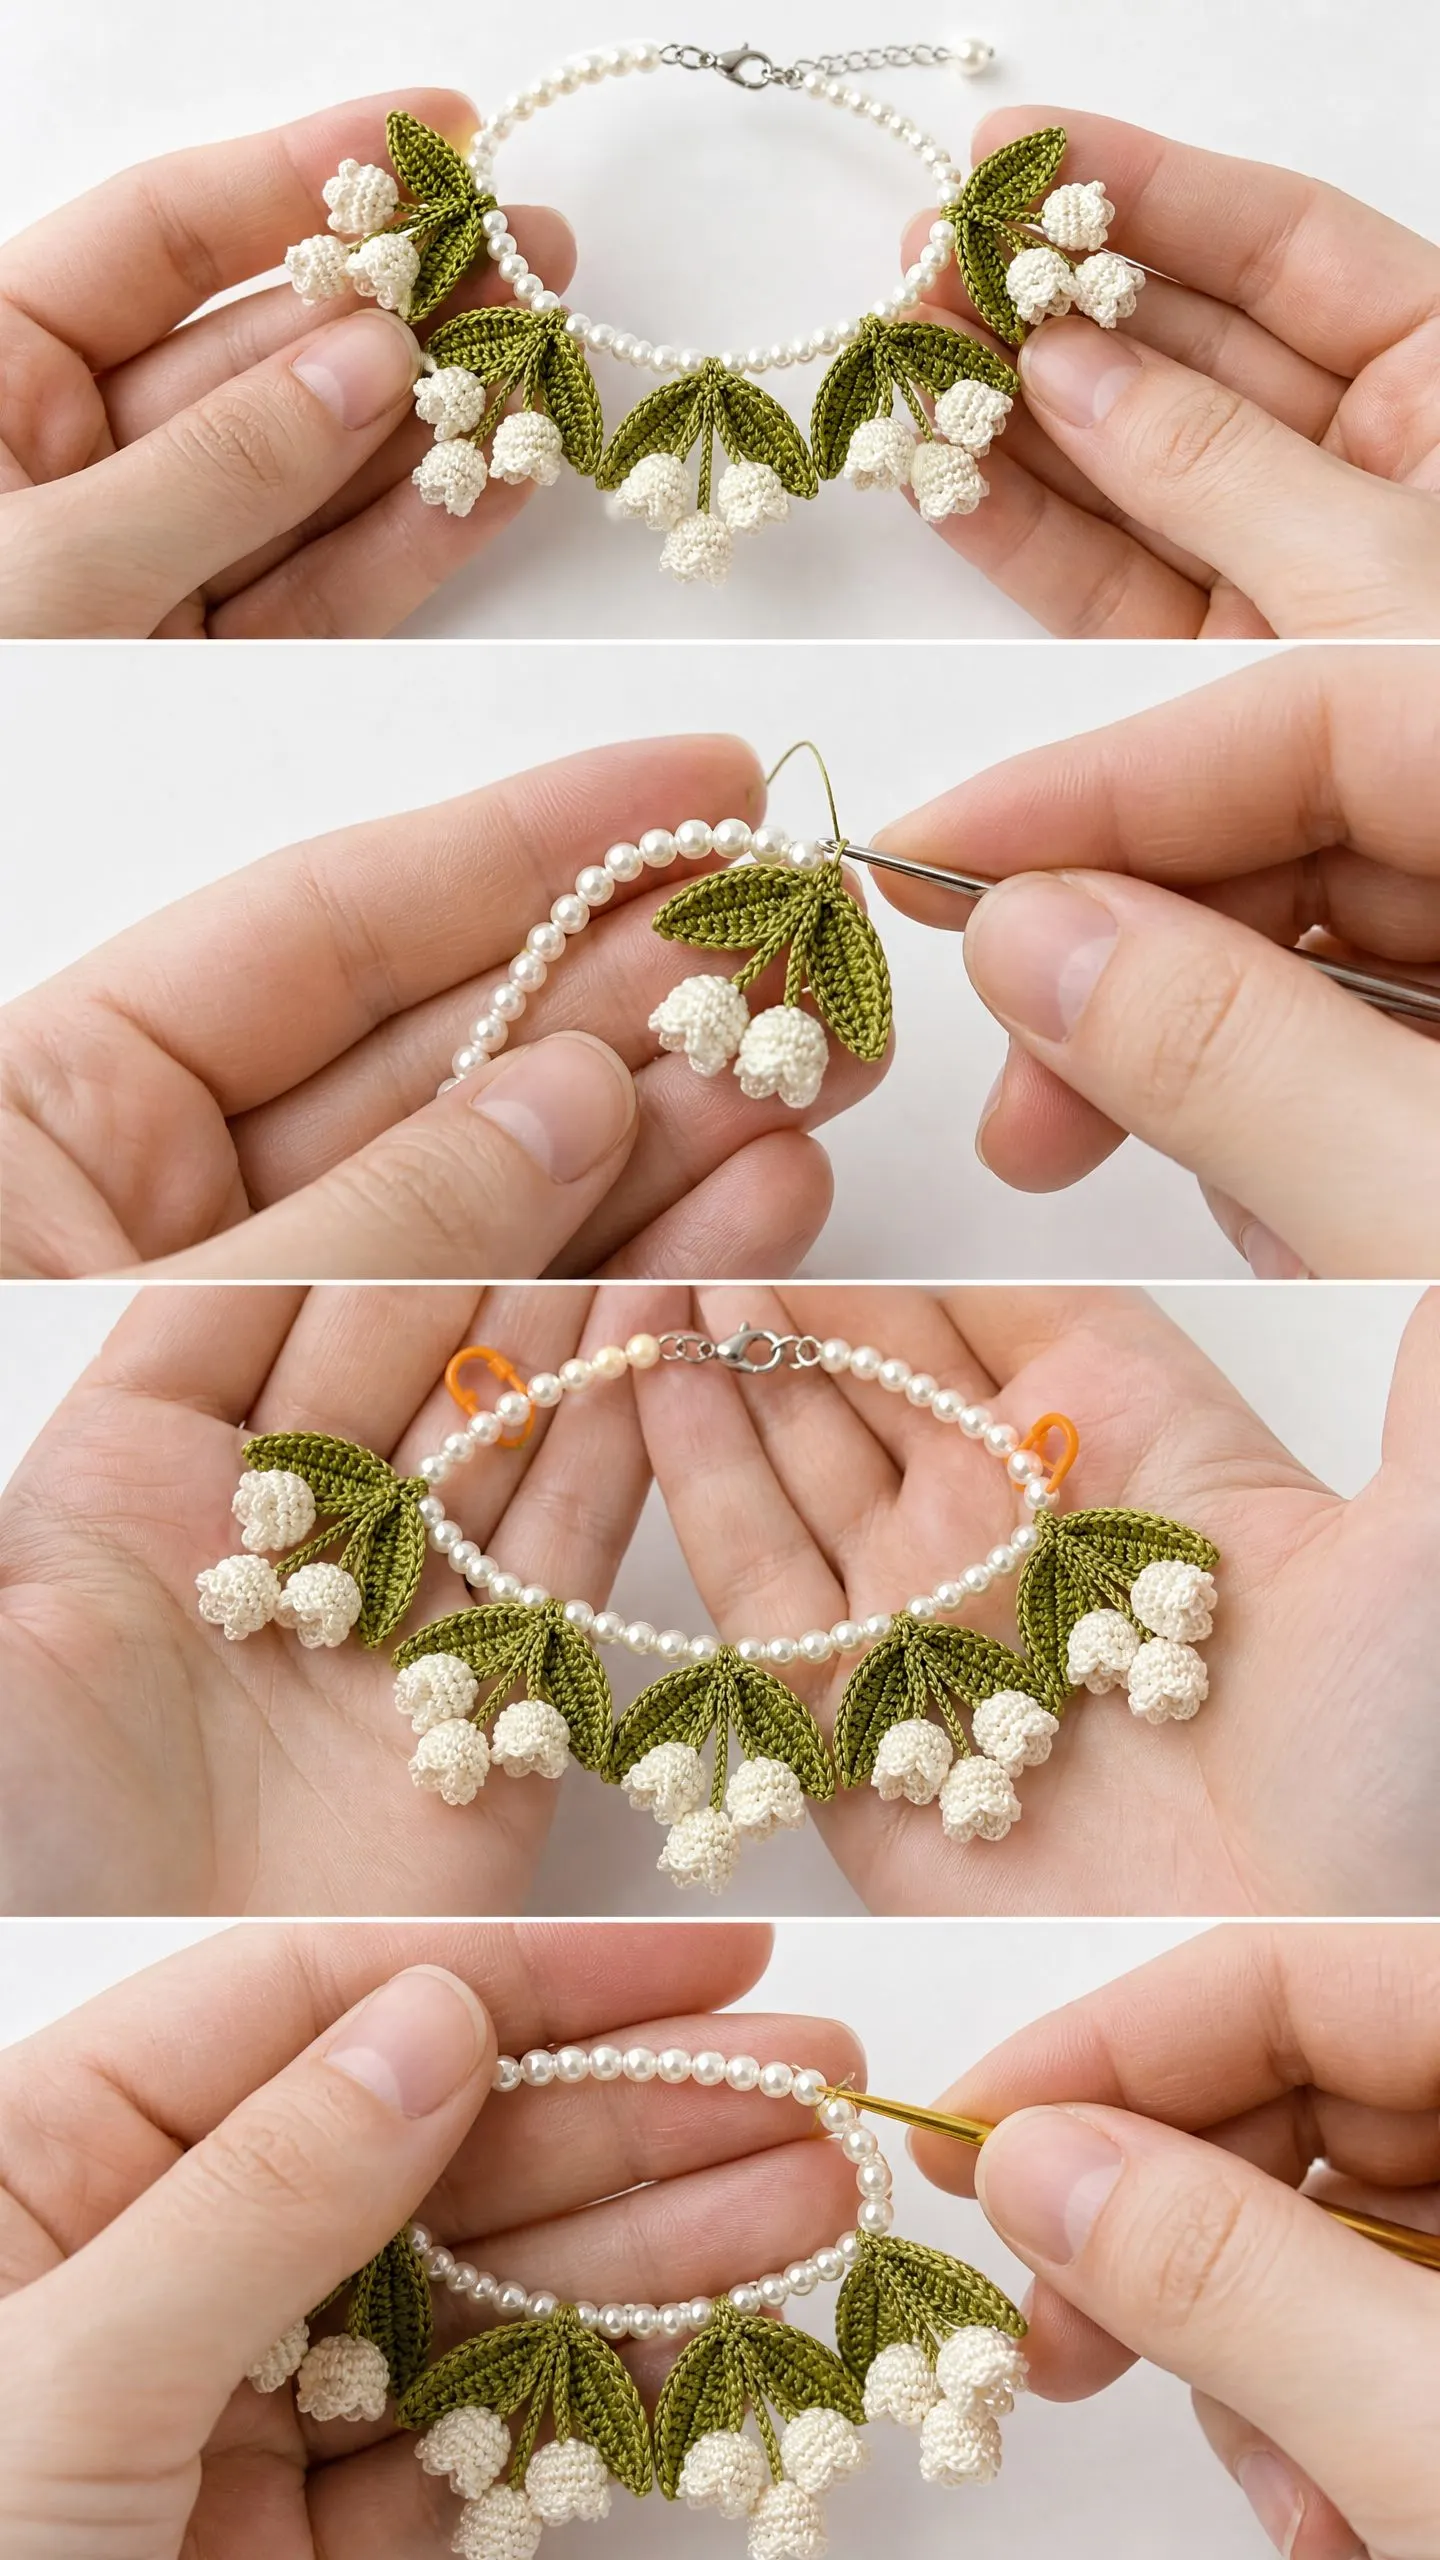
This statement bracelet features hand-crocheted lily of the valley blooms and pointed leaves attached to a strand of pearl beads. The construction method is modular, meaning you crochet each flower and leaf separately, then stitch them onto the pearl base. Think of it like building a tiny botanical arrangement, one piece at a time.
The finished piece works beautifully as a bracelet or a choker-style necklace, depending on how many beads you string. The instructions below are written for the necklace length shown in the photos, with notes for adjusting to bracelet size.
Skill level: Advanced beginner to intermediate. If you’ve never worked with thread-weight yarn and tiny steel hooks before, expect a learning curve. The individual stitches are basic, but the small scale and three-dimensional shaping require patience.
Time estimate: Plan for 6 to 10 hours if this is your first thread crochet project. Experienced makers can finish in 4 to 6 hours.
Finished Measurements
Here’s what you’re working toward:
Materials You’ll Need
Thread
Thread recommendations: Lizbeth Size 10 in Cream and Antique Olive gives beautiful stitch definition. DMC Cebelia Size 10 in Ecru and color 523 Light Fern Green is widely available and works smoothly. Aunt Lydia’s Classic Size 10 in Natural and Fern is the most budget-friendly option.
Important: Do not substitute with size 3 or size 5 thread. The motifs will be too large and stiff. Stick with size 10 mercerized cotton for the best results.
Hook
Notions
Gauge
Working in single crochet (sc) with size 10 cotton thread and a 1.65 mm steel hook:
10 sc x 12 rows = 1 inch (2.5 cm), blocked
Check your gauge by completing one bell flower and one leaf. The flower should measure approximately 0.4 inches (1 cm) tall. The leaf should measure approximately 0.7 inches (1.8 cm) long.
If your motifs are too large, try a smaller hook. If they’re too small, go up a hook size.
Abbreviations and Stitch Definitions
Before we dive in, let me define every stitch you’ll encounter:
Special Stitches
Picot
This creates a small decorative point at the leaf tip.
Step 1: Chain 3.
Step 2: Slip stitch into the first chain made (the one closest to your last completed stitch).
Step 3: You now have a tiny raised loop. Continue working.
Pattern Notes Before You Begin
Read these through before starting. They’ll save you confusion later.
1. Total motif count: You’ll make 11 bell flowers and 11 leaves, arranged into 5 clusters.
2. Cluster breakdown: Clusters 1, 2, 4, and 5 each have 2 flowers and 2 leaves. Cluster 3 (the center) has 3 flowers and 3 leaves.
3. Working in continuous rounds: The bell flowers are worked in a spiral without joining at the end of each round. Use a stitch marker to track your first stitch.
4. Leave long tails: When fastening off each motif, leave at least 6 inches (15 cm) of thread. You’ll use this tail to attach the motif to the pearl strand.
5. Block before assembly: Lightly starch and pin your motifs before stitching them together. This makes a huge difference in the finished appearance.
Pearl Strand Base Instructions
Let’s start with the foundation of your bracelet or necklace.
Step 1: Cut beading wire approximately 20 inches (50 cm) long for the necklace version, or 12 inches (30 cm) for a bracelet.
Step 2: Thread one cord end cap onto one end of the wire. Pass the wire back through the crimp tip to create a small loop. Crimp securely with pliers. Attach your lobster clasp to this loop.
Step 3: String pearl beads onto the wire. For the necklace, string until you reach approximately 13 inches (33 cm). For the bracelet, string approximately 6 inches (15 cm). The necklace uses approximately 82 to 100 beads. The bracelet uses approximately 38 to 44 beads.
Step 4: Thread the second cord end cap onto the free end. Pass the wire back through to form a loop. Crimp securely. Attach the extender chain to this loop.
Step 5: Set your completed pearl strand aside.
Bell Flower Pattern (Make 11)
Work all flowers in cream or ivory thread. Each flower is identical.
Foundation: Make a magic ring.
Round 1: Work 4 sc into the magic ring. Pull ring closed but do not join. Place marker in first stitch. (4 sc)
Round 2: Work 2 sc in each stitch around. (8 sc)
Round 3: Work 1 sc in each stitch around. (8 sc)
Round 4: Working in back loop only, work 1 sc in each stitch around. (8 sc)
This back-loop-only round creates a subtle ridge that mimics the natural shoulder of a real lily of the valley bell. Don’t skip it.
Round 5: Work 1 sc in each stitch around. (8 sc)
Round 6: Work (1 sc, 1 hdc) in each stitch around. (16 sts)
Round 7: Work 1 hdc in each stitch around. (16 hdc)
Round 8 (rim): Work (1 sc, ch 1, skip 1) around, then sl st to first sc to close. (8 sc, 8 ch-1 spaces)
The skipped stitches create a scalloped edge that looks like the flared opening of the real flower.
Fasten off, leaving a 6-inch (15 cm) tail. Pull the magic ring completely tight so the tip closes.
Checkpoint: Your finished flower should measure approximately 0.4 inches (1 cm) tall from tip to rim, and 0.35 inches (0.9 cm) wide at the opening.
Leaf Pattern (Make 11)
Work all leaves in olive green thread. Each leaf is identical.
Foundation chain: Chain 8.
Row 1 (up the first side): Starting in 2nd chain from hook, work 1 sc in each of next 2 chains, 1 hdc in next chain, 1 dc in next chain, 1 hdc in next chain, 1 sc in next chain. In the last chain (the tip), work (1 sc, picot, 1 sc).
Row 1 continued (down the second side): Rotate your work to crochet down the opposite side of the foundation chain. Working into the unused loops, work 1 sc in next chain, 1 hdc in next chain, 1 dc in next chain, 1 hdc in next chain, 1 sc in each of last 2 chains. Slip stitch into the very first sc at the base to close.
Fasten off, leaving a 6-inch (15 cm) tail.
Checkpoint: Each leaf should measure approximately 0.7 inches (1.8 cm) from base to tip, and 0.3 inches (0.75 cm) at the widest point.
Stem Connectors (Make 5)
These short chains connect each cluster to the pearl strand.
With cream thread:
The longer center stem allows Cluster 3 to hang slightly lower, creating the cascade effect.
Blocking Your Motifs
Before assembly, block every piece. This step is not optional if you want professional results.
For bell flowers: Pin each flower upright on a foam blocking mat. Insert a round toothpick gently inside to prop the opening. Mist with diluted starch (1 part liquid starch to 3 parts water) or plain water. Allow to dry 1 to 2 hours.
For leaves: Pin each leaf flat with the picot tip stretched to a point. Mist and allow to dry completely.
Assembly Instructions
Now for the fun part: putting it all together.
Step 1: Lay the pearl strand flat. Find the center bead (approximately bead 50 for the necklace, bead 21 for the bracelet). Mark it with a small piece of waste yarn. This is where Cluster 3 goes.
Step 2: Mark the positions for all five clusters:
Step 3: Start with Cluster 3. Take the 6-chain stem connector. Using one tail end, stitch the top of the stem securely to the pearl strand at the center mark. Wrap the thread around the beading wire or between beads at least 3 times. Knot securely. Apply a tiny dot of clear adhesive if desired.
Step 4: Attach the 3 bell flowers to Cluster 3. Thread each flower’s tail onto a tapestry needle. Stitch the rim end of each flower to the base of the stem connector so the flowers hang downward with open rims facing the viewer and closed tips pointing down. Space all three so they’re visible, with the middle flower hanging slightly lower than the two flanking it.
Step 5: Attach the 3 leaves to Cluster 3. Stitch the base of each leaf to the stem connector just above where the flowers attach. Angle the leaves outward so they fan above and around the flowers, spaced approximately 120 degrees apart.
Step 6: Repeat steps 3 through 5 for Clusters 1, 2, 4, and 5. Use the 4-chain stem connectors. Attach 2 flowers and 2 leaves per cluster. Position flowers side by side with leaves fanning upward and outward above them.
Step 7: Check that the front panel hangs evenly. Adjust any motifs by releasing and re-stitching if needed. Weave in all thread tails and trim to approximately 0.2 inches (0.5 cm) after knotting.
Step 8: Remove all waste yarn markers.
Final checkpoint: Your front panel should span approximately 3.5 inches (9 cm) from the first leaf of Cluster 1 to the last leaf of Cluster 5. The lowest flower in Cluster 3 should drop approximately 1.25 inches (3.2 cm) below the pearl strand.
Size Customization Tips
For a shorter bracelet (7 inches total): Use 38 to 44 beads. Keep all five clusters but make slightly smaller leaves by working only sc and hdc stitches, skipping the dc row. This reduces leaf length to approximately 0.5 inches (1.3 cm).
For a longer necklace (18 inches total): Add more beads to the back section only. Keep the front cluster panel the same. You’ll need approximately 130 to 140 beads total.
For a fuller front panel: Add Cluster 6 and Cluster 7 at 2.25 inches (5.7 cm) from center. Make 4 additional flowers and 4 additional leaves.
Care Instructions for Your Finished Bracelet
Your handmade piece needs gentle care.
Cleaning: Hand wash only the crocheted sections with cool water and a drop of gentle soap. Avoid submerging the pearl beads or metal hardware. Blot with a damp cloth to rinse. Roll in a clean dry towel and air dry flat.
Storage: Store flat or loosely coiled in a soft pouch. Do not compress tightly, as this will crush the bell shapes.
Reshaping: If the bells lose their shape after wear, mist lightly with diluted starch and allow to dry.
Avoid: Prolonged direct sunlight, which can yellow the cream thread over time.
You Did It
This bracelet is one of my most treasured makes, and I hope it becomes one of yours too. Every time I wear mine, I think about my grandmother’s garden and those perfect little bell-shaped flowers nodding in the May breeze. There’s something irreplaceable about wearing something you made with your own hands, stitch by stitch, bead by bead.
Thank you so much for choosing this pattern. I’d love to see what you create. Tag me on Instagram or share your finished bracelet in our Facebook group. Seeing your versions genuinely makes my day.
If this pattern spoke to you, save it to your Pinterest boards so you can find it when you’re ready to start. And if you make one, please leave a comment below. I read every single one, and I’d love to hear how it turned out for you.
