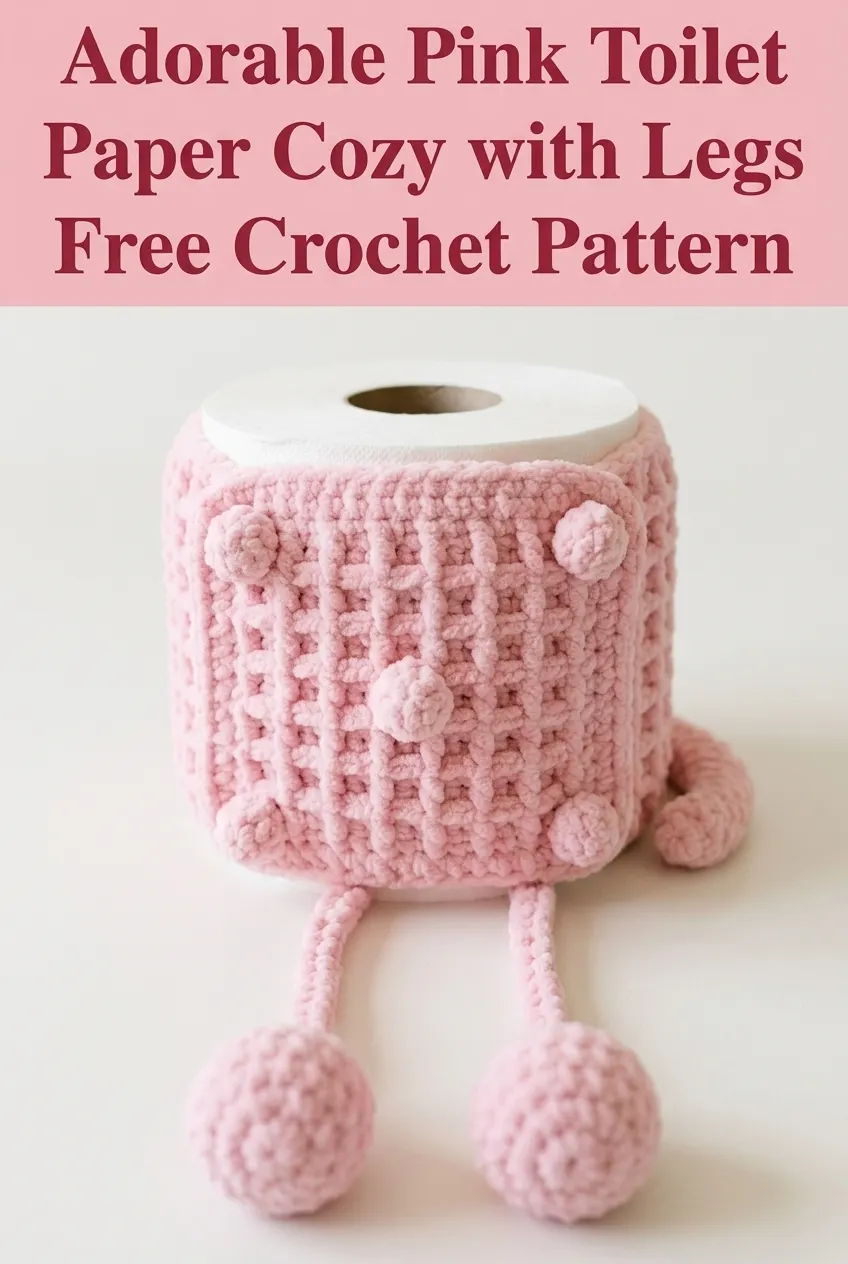
Go ahead and dig into that stash of chunky yarn you’ve been saving for the perfect project. This playful toilet paper cozy is exactly the kind of quirky, quick make that deserves your favorite pink skein. The construction is actually pretty straightforward: you’re working a textured tube with a waffle-style stitch pattern, then adding bobbles and those adorable dangling legs with pom pom feet. I’ll be honest with you, the bobble stitch placement and leg attachment take a little focus, but nothing an adventurous beginner can’t handle with patience. This is the bathroom accessory nobody knew they needed, and everyone will ask you about.
Why You Need This Pink Toilet Paper Cozy Pattern
Let me tell you, bathroom decor doesn’t have to be boring. This little guy brings personality to the most mundane room in your house. The textured waffle stitch creates visual interest while the scattered bobbles add dimension. And those legs? They’re the finishing touch that turns a simple cover into a conversation piece.
This crochet toilet paper cozy pattern works up in just a few hours, making it perfect for weekend crafting or a last minute housewarming gift. The chunky yarn creates a plush, cozy look while ensuring the finished piece holds its shape around a standard toilet paper roll.
Materials You’ll Need
Before we dive into this crochet tutorial, gather these supplies:
Yarn:
Hook:
Notions:
Gauge:
12 stitches and 10 rows = 4 inches in single crochet with chunky yarn and 6.0mm hook
Don’t stress too much about gauge here. The cover needs to stretch slightly around the roll, so being a little off won’t ruin your project.
Finished Dimensions
Skill Level
Confident Beginner to Intermediate
If you can work in the round and have made bobble stitches before, you’re ready. If bobbles are new to you, I’ll walk you through them step by step.
Stitches and Abbreviations
Let me break down every stitch you’ll encounter in this step by step crochet pattern:
Ch = Chain: Wrap yarn over hook, pull through loop. This creates the foundation for most crochet work.
Sl st = Slip stitch: Insert hook, yarn over, pull through stitch and loop on hook in one motion. Used to join rounds.
Sc = Single crochet: Insert hook into stitch, yarn over and pull up a loop (2 loops on hook), yarn over and pull through both loops.
Dc = Double crochet: Yarn over, insert hook into stitch, yarn over and pull up a loop (3 loops on hook), yarn over and pull through 2 loops, yarn over and pull through remaining 2 loops.
FPdc = Front post double crochet: Yarn over, insert hook from front to back around the post (vertical part) of the stitch below, complete as a regular double crochet. This creates raised texture.
BPdc = Back post double crochet: Yarn over, insert hook from back to front around the post of the stitch below, complete as a regular double crochet. This creates the recessed texture.
Bob = Bobble stitch: Work 5 double crochets into the same stitch but leave the last loop of each dc on your hook (6 loops total), yarn over and pull through all 6 loops at once. Push the bobble to the front of your work.
Inc = Increase: Work 2 stitches into the same stitch.
Dec = Decrease: Single crochet 2 together by inserting hook into stitch, pulling up a loop, inserting into next stitch, pulling up a loop (3 loops on hook), yarn over and pull through all 3.
Pattern Notes Before You Begin
This toilet paper cozy is worked from the bottom up in continuous rounds for the base, then joined rounds for the textured body. The legs are worked separately and attached at the end.
The waffle stitch texture comes from alternating front and back post double crochets. It sounds complicated, but once you get the rhythm going, it becomes almost meditative.
Place a stitch marker at the beginning of each round to keep track of where you are. Trust me on this one.
The Pattern: Crochet Toilet Paper Cozy with Legs
Base Circle
Round 1: Using a magic ring, work 6 sc into the ring. Pull tight to close. (6 sts)
Round 2: Inc in each st around. (12 sts)
Round 3: *Sc in next st, inc in next st* repeat around. (18 sts)
Round 4: *Sc in next 2 sts, inc in next st* repeat around. (24 sts)
Round 5: *Sc in next 3 sts, inc in next st* repeat around. (30 sts)
Round 6: *Sc in next 4 sts, inc in next st* repeat around. (36 sts)
Round 7: *Sc in next 5 sts, inc in next st* repeat around. (42 sts)
Your circle should measure approximately 4.5 inches across. If it’s smaller, add another increase round. If larger, stop one round earlier.
Building the Sides
Now we transition to working up the sides. This is where the magic happens.
Round 8: Working in back loops only, sc in each st around. Sl st to first sc to join. (42 sts)
This creates a nice defined edge at the base.
Round 9: Ch 2 (counts as first dc), dc in each st around. Sl st to top of ch 2 to join. (42 sts)
Waffle Stitch Texture
Here comes the fun textured portion. Take a breath, you’ve got this.
Round 10: Ch 2, *FPdc around next st, BPdc around next st* repeat around, ending with BPdc. Sl st to join. (42 sts)
Round 11: Ch 2, *BPdc around next FPdc, FPdc around next BPdc* repeat around. Sl st to join. (42 sts)
See what we’re doing? We’re alternating which posts go forward and which go back, creating that grid-like waffle texture.
Rounds 12 through 17: Repeat Rounds 10 and 11 three more times, continuing to alternate the post stitches.
Your cozy should be about 3.5 inches tall at this point.
Adding the Bobbles
Now for the decorative bobbles. These are placed randomly for a playful scattered effect.
Round 18: Ch 2, work in established waffle pattern for 7 sts, Bob in next st, continue in pattern for 12 sts, Bob in next st, continue in pattern for 8 sts, Bob in next st, continue in pattern to end. Sl st to join. (42 sts, 3 bobbles)
Push each bobble firmly to the outside of your work as you complete it.
Round 19: Continue in waffle stitch pattern (no bobbles this round). Sl st to join. (42 sts)
Round 20: Ch 2, work in pattern for 4 sts, Bob in next st, continue for 15 sts, Bob in next st, continue to end. Sl st to join. (42 sts, 2 bobbles)
Top Edge
Round 21: Ch 1, sc in each st around. Sl st to join. (42 sts)
Round 22: Ch 1, sc in each st around. Sl st to join. Fasten off. (42 sts)
Weave in your end on the inside of the cozy.
Making the Legs (Make 2)
The legs are simple chains with a stuffed pom pom ball at the end. They’re what take this project from cute to absolutely adorable.
The Chain Cord:
Ch 35. This creates a leg approximately 6 inches long.
Row 1: Starting in 2nd ch from hook, sl st in each ch across. (34 sl sts)
Fasten off, leaving a 12 inch tail for attaching.
Pom Pom Feet (Make 2)
These little stuffed balls complete the look.
Round 1: Using a magic ring, work 6 sc. Do not join, work in continuous rounds. (6 sts)
Round 2: Inc in each st around. (12 sts)
Round 3: *Sc in next st, inc in next st* repeat around. (18 sts)
Rounds 4 through 6: Sc in each st around. (18 sts)
Round 7: *Sc in next st, dec* repeat around. (12 sts)
Stuff the ball firmly with polyester fiberfill now, before the opening gets too small.
Round 8: Dec around. (6 sts)
Fasten off, leaving a long tail. Thread tail through remaining stitches and pull tight to close. Do not cut the tail yet.
Assembly
This is the satisfying part where everything comes together.
Attaching Pom Poms to Legs:
Thread the tail from your pom pom through your yarn needle. Push the needle through the end of one chain cord, then back through the pom pom a few times to secure. The cord should be firmly attached to the top of the ball. Weave in the end inside the pom pom.
Repeat for the second leg.
Attaching Legs to Cozy:
Position your cozy with the base facing up. The legs attach to the bottom edge of the cozy, evenly spaced so they hang down naturally when displayed.
Using the long tail from your chain cord, sew the top of each leg securely to the inside bottom edge of the cozy. Space them about 3 inches apart. Stitch several times through the base round to ensure they’re firmly attached.
Weave in all remaining ends.
Styling Tips
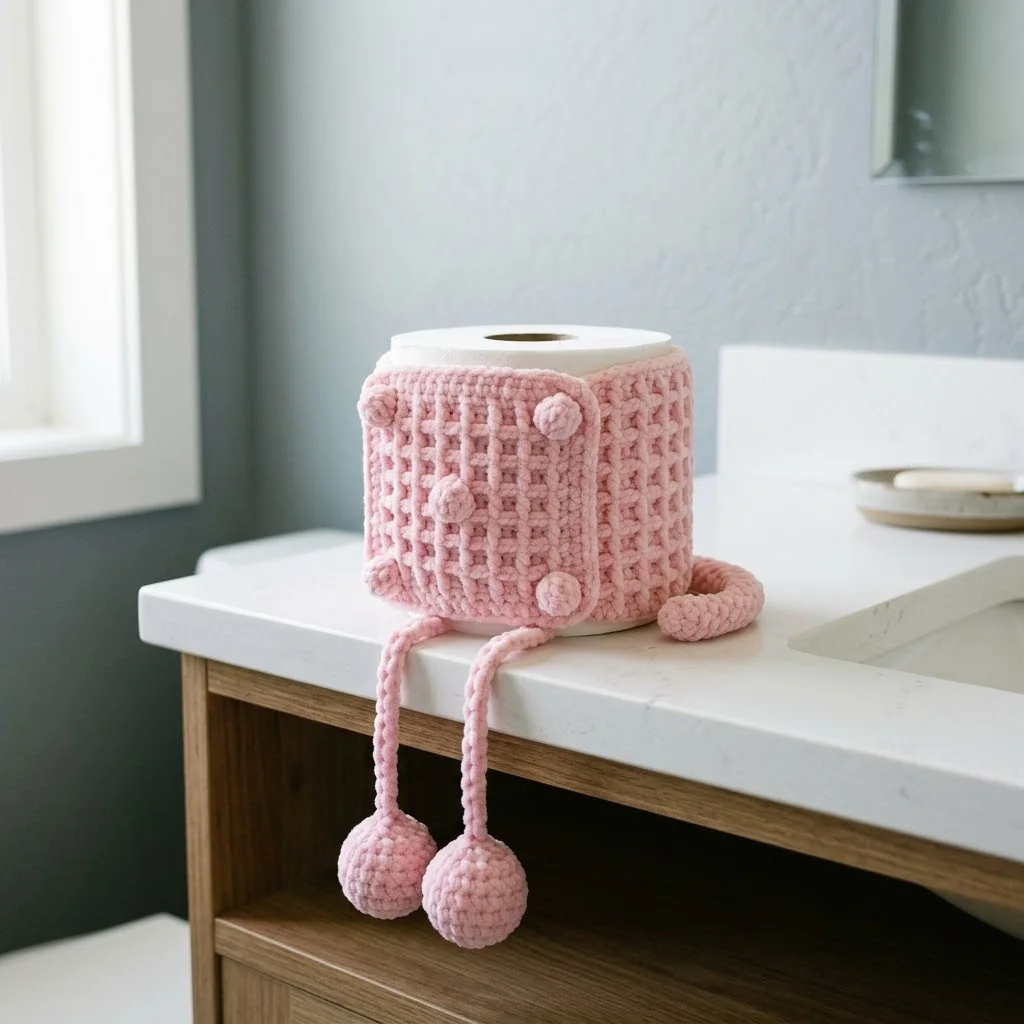
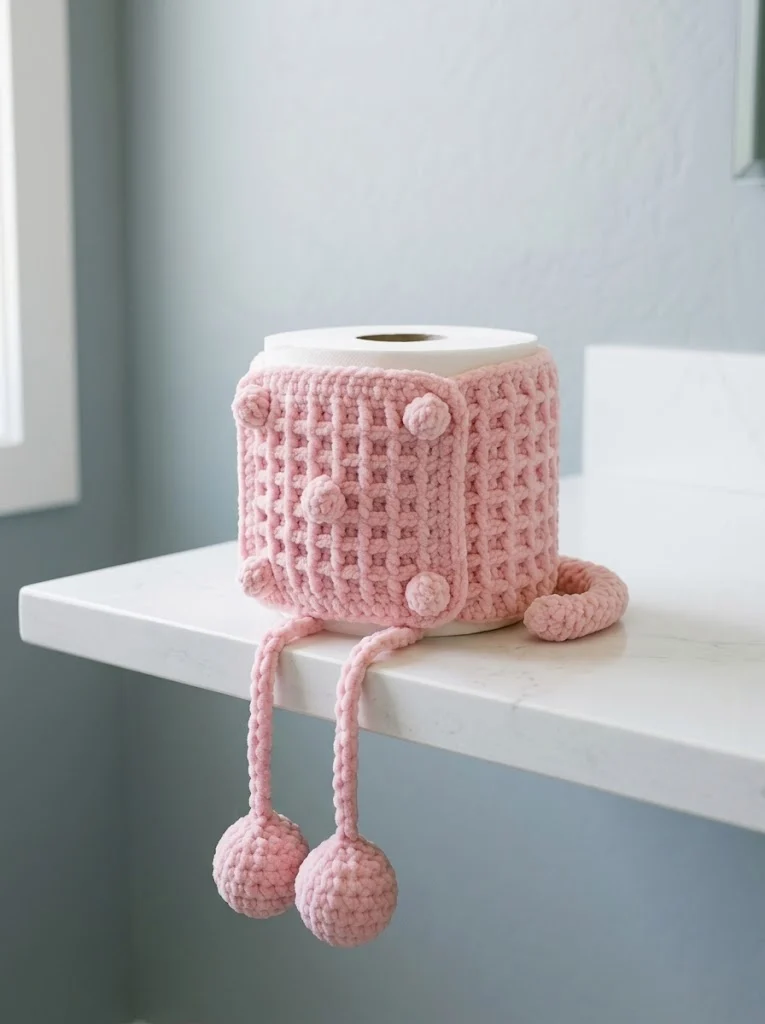
Pop your cozy over a standard toilet paper roll with the legs dangling over the edge of your counter or tank. The texture hugs the roll nicely while allowing easy paper access from the top center opening.
This beginner friendly crochet pattern makes an excellent housewarming gift, dorm room accessory, or craft fair item. Try different colors to match various bathroom decors. Pastels look sweet and modern, while bold colors make a fun statement.
Troubleshooting Common Issues
My cozy is too tight: Go up a hook size or add 6 more stitches to your base circle.
My cozy is too loose: Go down a hook size or stop your base circle one round earlier.
My bobbles look flat: Make sure you’re pushing them firmly to the front of your work immediately after completing them.
My waffle texture isn’t showing: Check that you’re truly alternating your front and back post stitches each round. The posts need to stack vertically to create the grid effect.
Final Thoughts on This Crochet Toilet Paper Cozy Pattern
You did it! You now have the most charming bathroom accessory anyone has ever seen. This crochet toilet paper cozy with legs is proof that practical items can still bring joy and personality to everyday spaces.
I had so much fun designing this quirky little project, and I really hope you enjoy making it just as much. The combination of textured stitches, playful bobbles, and those irresistible dangling legs creates something truly special.
Thank you for trusting me with your crafting time. It means the world when you choose to make one of my patterns. I’d absolutely love to see your finished cozy, so please tag me on Instagram or share a photo in my Facebook group. Seeing your creations in different colors and yarns always makes my day.
If this pattern made you smile, I hope you’ll pin it to your Pinterest boards so you can find it easily later and share the fun with your crafty friends. And please drop a comment below if you make one. I love hearing which colors you chose and where your little cozy friend ends up living!
