I don’t know about you, but I’ve killed more houseplants than I care to admit. Between forgetting to water them and placing them in the wrong light, my track record with greenery is honestly embarrassing. That’s exactly why I fell head over heels for this crochet monstera deliciosa pattern. All the lush tropical vibes with absolutely zero plant care required. No watering schedule, no yellow leaves, no guilt. Just gorgeous, permanent greenery that looks stunning on any shelf or table.
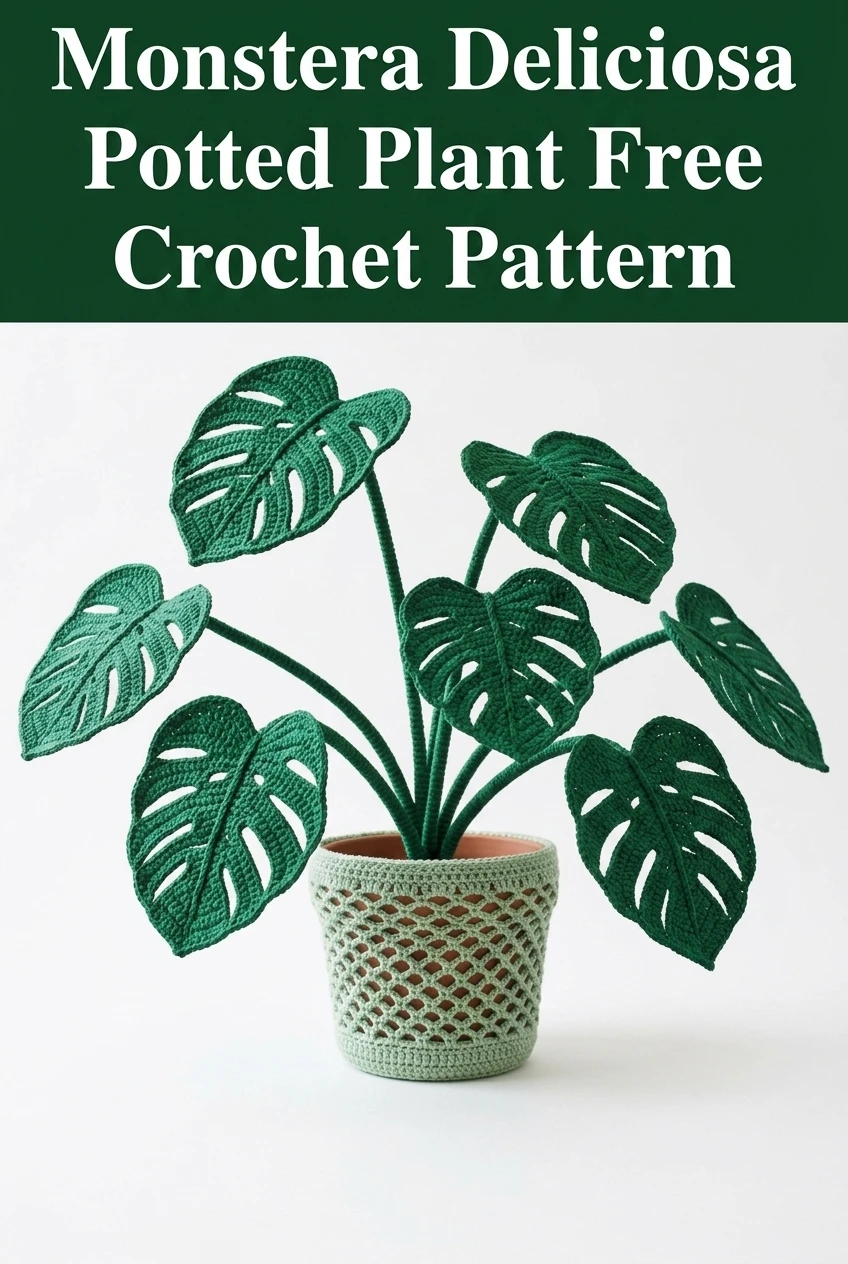
This crochet monstera plant is one of the most satisfying projects I’ve ever designed. The iconic split leaves, those beautiful fenestrations that make monstera plants so recognizable, translate perfectly into crochet. And the finished piece? It looks like something you’d find in a high-end home decor boutique.
Why You’ll Love This Crochet Monstera Pattern
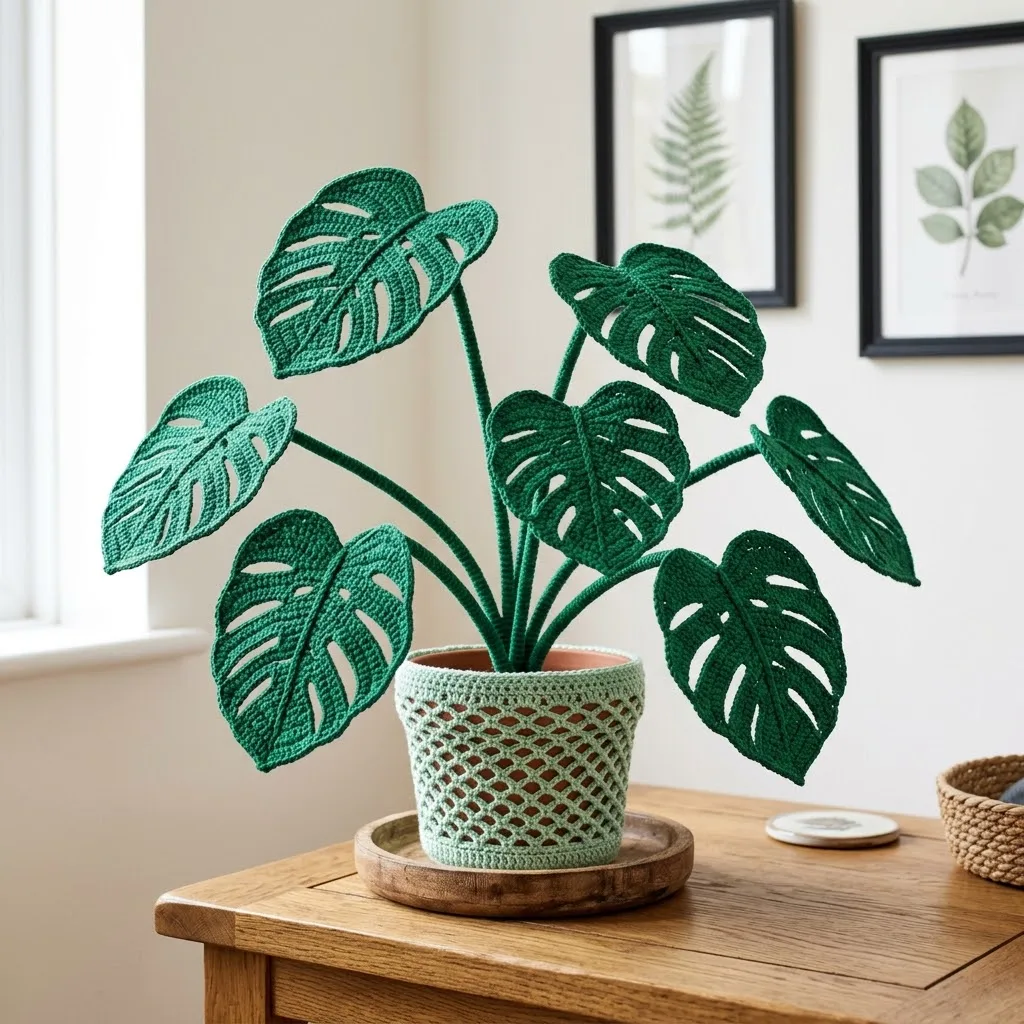
This crochet plant pattern is perfect for anyone who wants to add some botanical charm to their space without the commitment of real plant care. It also makes an incredible gift for plant lovers, new homeowners, or anyone who appreciates unique handmade decor.
The construction might look complicated, but I promise it’s more approachable than you’d think. Each leaf is worked flat, then shaped with simple finishing techniques. The stems are basic tubes worked in the round. And that beautiful lacy pot cover? It’s just a repeated mesh pattern that works up faster than it looks.
What makes this pattern special:
Skill Level
This crochet tutorial is best suited for confident beginners to intermediate crocheters. You should be comfortable with basic stitches and working in the round. The leaf shaping involves some increases and decreases, but nothing too tricky.
If you’ve never crocheted before, I’d suggest practicing a few basic projects first. But if you can make a granny square or a simple amigurumi, you can absolutely tackle this pattern.
Materials Needed
Yarn:
I recommend using 100% cotton yarn for this project. Cotton holds its shape beautifully, gives crisp stitch definition, and has that natural matte finish that looks so realistic for plant projects. Acrylic will work in a pinch, but cotton really elevates the finished look.
Suggested yarn brands: Lily Sugar’n Cream, Paintbox Cotton Aran, or Drops Paris
Hook:
Additional Supplies:
Gauge
Gauge is not critical for this decorative project, but for reference: 16 stitches and 18 rows = 4 inches in single crochet with worsted weight yarn and a 4.0mm hook.
Your leaves may turn out slightly larger or smaller depending on your personal tension. This won’t affect the final project, just adjust the number of leaves to fill your pot nicely.
Abbreviations and Stitch Definitions
Let me break down every stitch you’ll need for this step by step crochet pattern:
ch = chain: Yarn over, pull through loop on hook. This creates your foundation.
sl st = slip stitch: Insert hook, yarn over, pull through both loops at once. Used for joining and invisible movement.
sc = single crochet: Insert hook, yarn over, pull up a loop (2 loops on hook), yarn over, pull through both loops. Your most basic stitch.
hdc = half double crochet: Yarn over, insert hook, yarn over, pull up a loop (3 loops on hook), yarn over, pull through all 3 loops. Slightly taller than single crochet.
dc = double crochet: Yarn over, insert hook, yarn over, pull up a loop (3 loops on hook), yarn over, pull through 2 loops, yarn over, pull through remaining 2 loops. Creates a taller, more open fabric.
inc = increase: Work 2 stitches into the same stitch. This adds width.
dec = decrease (invisible decrease for sc): Insert hook through front loops only of next 2 stitches, yarn over, pull through both, yarn over, pull through both loops on hook.
sk = skip: Miss the indicated stitch and work into the next one.
sp = space: The gap created by chains, where you’ll insert your hook.
Pattern Instructions
Large Monstera Leaf (Make 2 to 3)
This is the showstopper leaf with multiple fenestrations. Take your time with this one, and don’t worry if your first attempt isn’t perfect. The organic nature of leaves means slight variations look completely natural.
Foundation:
Ch 25.
Row 1: Sc in 2nd ch from hook and in each ch across. (24 sts)
Row 2: Ch 1, turn. Sc in first 6 sts, ch 5, sk 3 sts, sc in next 6 sts, ch 5, sk 3 sts, sc in last 6 sts. (18 sc, 2 ch-5 spaces)
Row 3: Ch 1, turn. Sc in first 6 sts, 5 sc in ch-5 sp, sc in next 6 sts, 5 sc in ch-5 sp, sc in last 6 sts. (28 sts)
Row 4: Ch 1, turn. 2 sc in first st (inc), sc in next 26 sts, 2 sc in last st (inc). (30 sts)
Row 5: Ch 1, turn. Sc in first 7 sts, ch 4, sk 2 sts, sc in next 4 sts, ch 4, sk 2 sts, sc in next 4 sts, ch 4, sk 2 sts, sc in last 7 sts. (22 sc, 3 ch-4 spaces)
Row 6: Ch 1, turn. Sc in first 7 sts, 4 sc in ch-4 sp, sc in next 4 sts, 4 sc in ch-4 sp, sc in next 4 sts, 4 sc in ch-4 sp, sc in last 7 sts. (34 sts)
Row 7: Ch 1, turn. Inc in first st, sc in next 32 sts, inc in last st. (36 sts)
Row 8: Ch 1, turn. Sc in each st across. (36 sts)
Row 9: Ch 1, turn. Sc in first 8 sts, ch 3, sk 2 sts, sc in next 16 sts, ch 3, sk 2 sts, sc in last 8 sts. (32 sc, 2 ch-3 spaces)
Row 10: Ch 1, turn. Sc in first 8 sts, 3 sc in ch-3 sp, sc in next 16 sts, 3 sc in ch-3 sp, sc in last 8 sts. (38 sts)
Rows 11 to 14: Ch 1, turn. Sc in each st across. (38 sts)
Begin Top Shaping:
Row 15: Ch 1, turn. Dec, sc in next 34 sts, dec. (36 sts)
Row 16: Ch 1, turn. Dec, sc in next 32 sts, dec. (34 sts)
Row 17: Ch 1, turn. Dec, sc in next 30 sts, dec. (32 sts)
Row 18: Ch 1, turn. Dec, sc in next 28 sts, dec. (30 sts)
Row 19: Ch 1, turn. Dec, sc in next 26 sts, dec. (28 sts)
Row 20: Ch 1, turn. Dec, sc in next 24 sts, dec. (26 sts)
Continue decreasing 2 stitches per row until you have 8 sts remaining.
Final Row: Ch 1, turn. Dec, sc in next 4 sts, dec. (6 sts)
Fasten off, leaving a long tail for attaching to the stem.
Edge Detail:
Join yarn at the bottom center of the leaf. Work a round of sc evenly around the entire leaf edge, working 3 sc in each corner point to create smooth curves. Sl st to join. Fasten off.
Medium Monstera Leaf (Make 2 to 3)
Foundation:
Ch 20.
Row 1: Sc in 2nd ch from hook and in each ch across. (19 sts)
Row 2: Ch 1, turn. Sc in first 5 sts, ch 4, sk 2 sts, sc in next 5 sts, ch 4, sk 2 sts, sc in last 5 sts. (15 sc, 2 ch-4 spaces)
Row 3: Ch 1, turn. Sc in first 5 sts, 4 sc in ch-4 sp, sc in next 5 sts, 4 sc in ch-4 sp, sc in last 5 sts. (23 sts)
Rows 4 to 6: Ch 1, turn. Sc in each st across. (23 sts)
Row 7: Ch 1, turn. Inc in first st, sc in next 21 sts, inc in last st. (25 sts)
Row 8: Ch 1, turn. Sc in first 6 sts, ch 3, sk 2 sts, sc in next 9 sts, ch 3, sk 2 sts, sc in last 6 sts. (21 sc, 2 ch-3 spaces)
Row 9: Ch 1, turn. Sc in first 6 sts, 3 sc in ch-3 sp, sc in next 9 sts, 3 sc in ch-3 sp, sc in last 6 sts. (27 sts)
Rows 10 to 12: Ch 1, turn. Sc in each st across. (27 sts)
Begin Top Shaping:
Decrease 2 stitches per row (one at each end) until 6 sts remain.
Fasten off and work edge detail as for large leaf.
Small Leaf (Make 2 to 3)
Younger monstera leaves have fewer or no splits, so these simple leaves add realistic variety.
Foundation:
Ch 15.
Row 1: Sc in 2nd ch from hook and in each ch across. (14 sts)
Rows 2 to 4: Ch 1, turn. Sc in each st across. (14 sts)
Row 5: Ch 1, turn. Inc in first st, sc in next 12 sts, inc in last st. (16 sts)
Rows 6 to 8: Ch 1, turn. Sc in each st across. (16 sts)
Begin Top Shaping:
Decrease 2 stitches per row until 4 sts remain. Fasten off.
Work edge detail around entire leaf.
Stems (Make One Per Leaf)
The stems are simple tubes worked in continuous rounds. Use a stitch marker to track your rounds.
Round 1: With medium green yarn, create a magic ring. Work 6 sc into the ring. Do not join. (6 sts)
Rounds 2 to 40 (or desired length): Sc in each st around. (6 sts)
For larger leaves, work longer stems (40 to 50 rounds). For smaller leaves, work shorter stems (25 to 35 rounds). This creates natural height variation.
Sl st to close. Fasten off, leaving a long tail.
Important: Before closing the stem, insert a piece of floral wire cut to the stem length plus 3 inches. This allows you to bend and position the stems naturally. Wrap exposed wire with green floral tape.
Pot Cover
This beginner friendly lacy cover transforms any basic pot into something special.
Foundation:
Ch 4, sl st to first ch to form a ring.
Round 1: Ch 3 (counts as first dc), 11 dc into ring. Sl st to top of ch-3 to join. (12 dc)
Round 2: Ch 3, dc in same st, 2 dc in each st around. Sl st to join. (24 dc)
Round 3: Ch 3, dc in next st, 2 dc in next st. *Dc in next 2 sts, 2 dc in next st.* Repeat from * around. Sl st to join. (32 dc)
Round 4: Ch 5 (counts as dc plus ch 2), sk 1 st, *dc in next st, ch 2, sk 1 st.* Repeat from * around. Sl st to 3rd ch of beginning ch-5. (16 dc, 16 ch-2 spaces)
Rounds 5 to 10: Ch 5, *dc in next dc, ch 2.* Repeat from * around. Sl st to join.
Continue until the cover reaches the desired height for your pot, approximately 3 to 4 inches.
Final Round: Ch 1, *sc in dc, 2 sc in ch-2 sp.* Repeat from * around. Sl st to join. Fasten off.
Assembly Instructions
Step 1: Attach each leaf to its stem by sewing the leaf base firmly to the top of the stem tube. Use the long tail and a tapestry needle to secure with whip stitches.
Step 2: Wrap floral tape around the connection point to conceal stitches and add stability.
Step 3: Fill your pot with poly-fil, fabric scraps, or floral foam to anchor the stems.
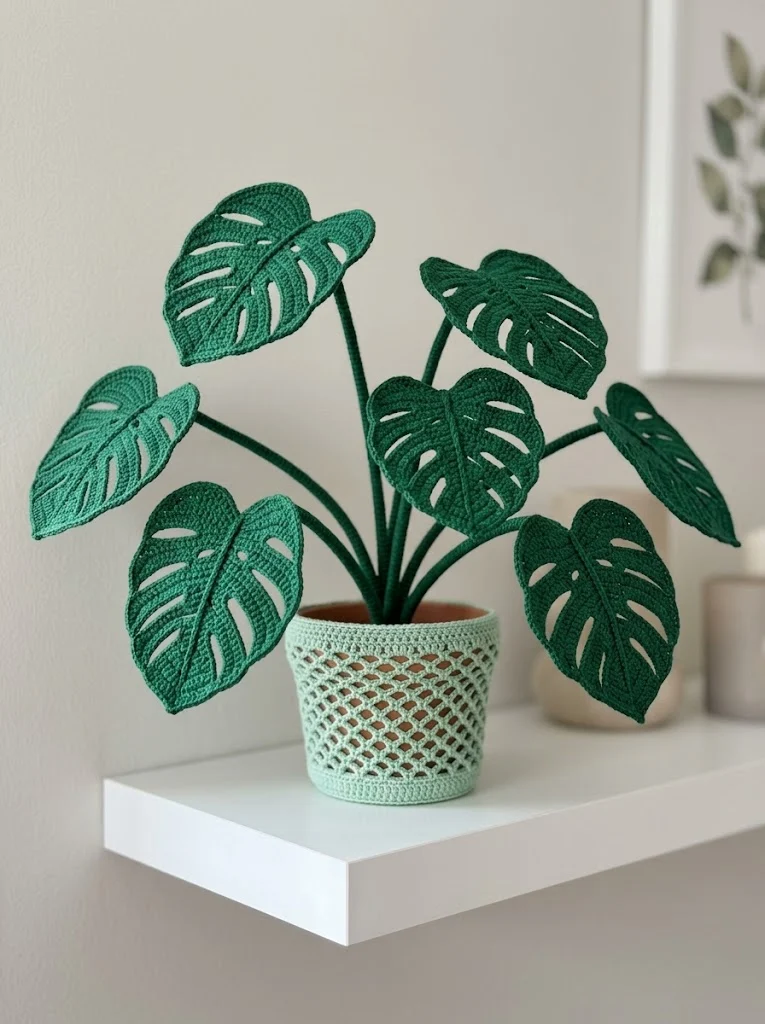
Step 4: Insert stems into the pot filling, arranging them at varying heights and angles. Real monstera plants grow in a somewhat wild pattern, so don’t aim for perfect symmetry.
Step 5: Place the crocheted pot cover over your pot, stretching gently to fit.
Step 6: Adjust leaf positions by gently bending the wired stems until you achieve your desired look.
Tips for Success
On yarn selection: Stick with cotton for the most realistic look. The slight stiffness helps leaves hold their shape without additional blocking.
On the fenestrations: Those characteristic holes and splits are created by the chain spaces. Don’t stress if yours look slightly different from mine. Real monstera leaves vary tremendously.
On sizing: Want a bigger plant? Simply make more leaves and longer stems. This pattern is completely scalable.
On gifting: This makes an absolutely showstopping housewarming gift. Consider making a smaller version with just 3 to 4 leaves for a quicker project that still looks impressive.
Final Thoughts on This Crochet Monstera Pattern
I genuinely love how this crochet monstera deliciosa pattern turned out. Every time I walk past it in my living room, I smile. It has all the beauty of a tropical houseplant without any of the anxiety of keeping something alive.
Whether you’re making this for yourself or as a gift, I think you’ll find it incredibly satisfying to create. The combination of simple stitches and clever construction creates something that looks far more complicated than it actually is.
Thank you so much for choosing this pattern for your next project. I truly appreciate you being here and trusting me to guide you through the process. If you make your own crochet monstera plant, I would absolutely love to see it! Tag me on Instagram or share a photo in my Facebook group.
If you loved this pattern, go ahead and save it to your Pinterest boards so you can find it easily when you’re ready to start. And please drop a comment below to let me know if you have any questions or just to say hello. I read every single one and they make my day!
