
THIS ONE IS A SHOWSTOPPER. I mean it. If you have ever wanted to create something that makes every single person at the baby shower gasp, this dusty rose lace toddler dress is exactly that project.
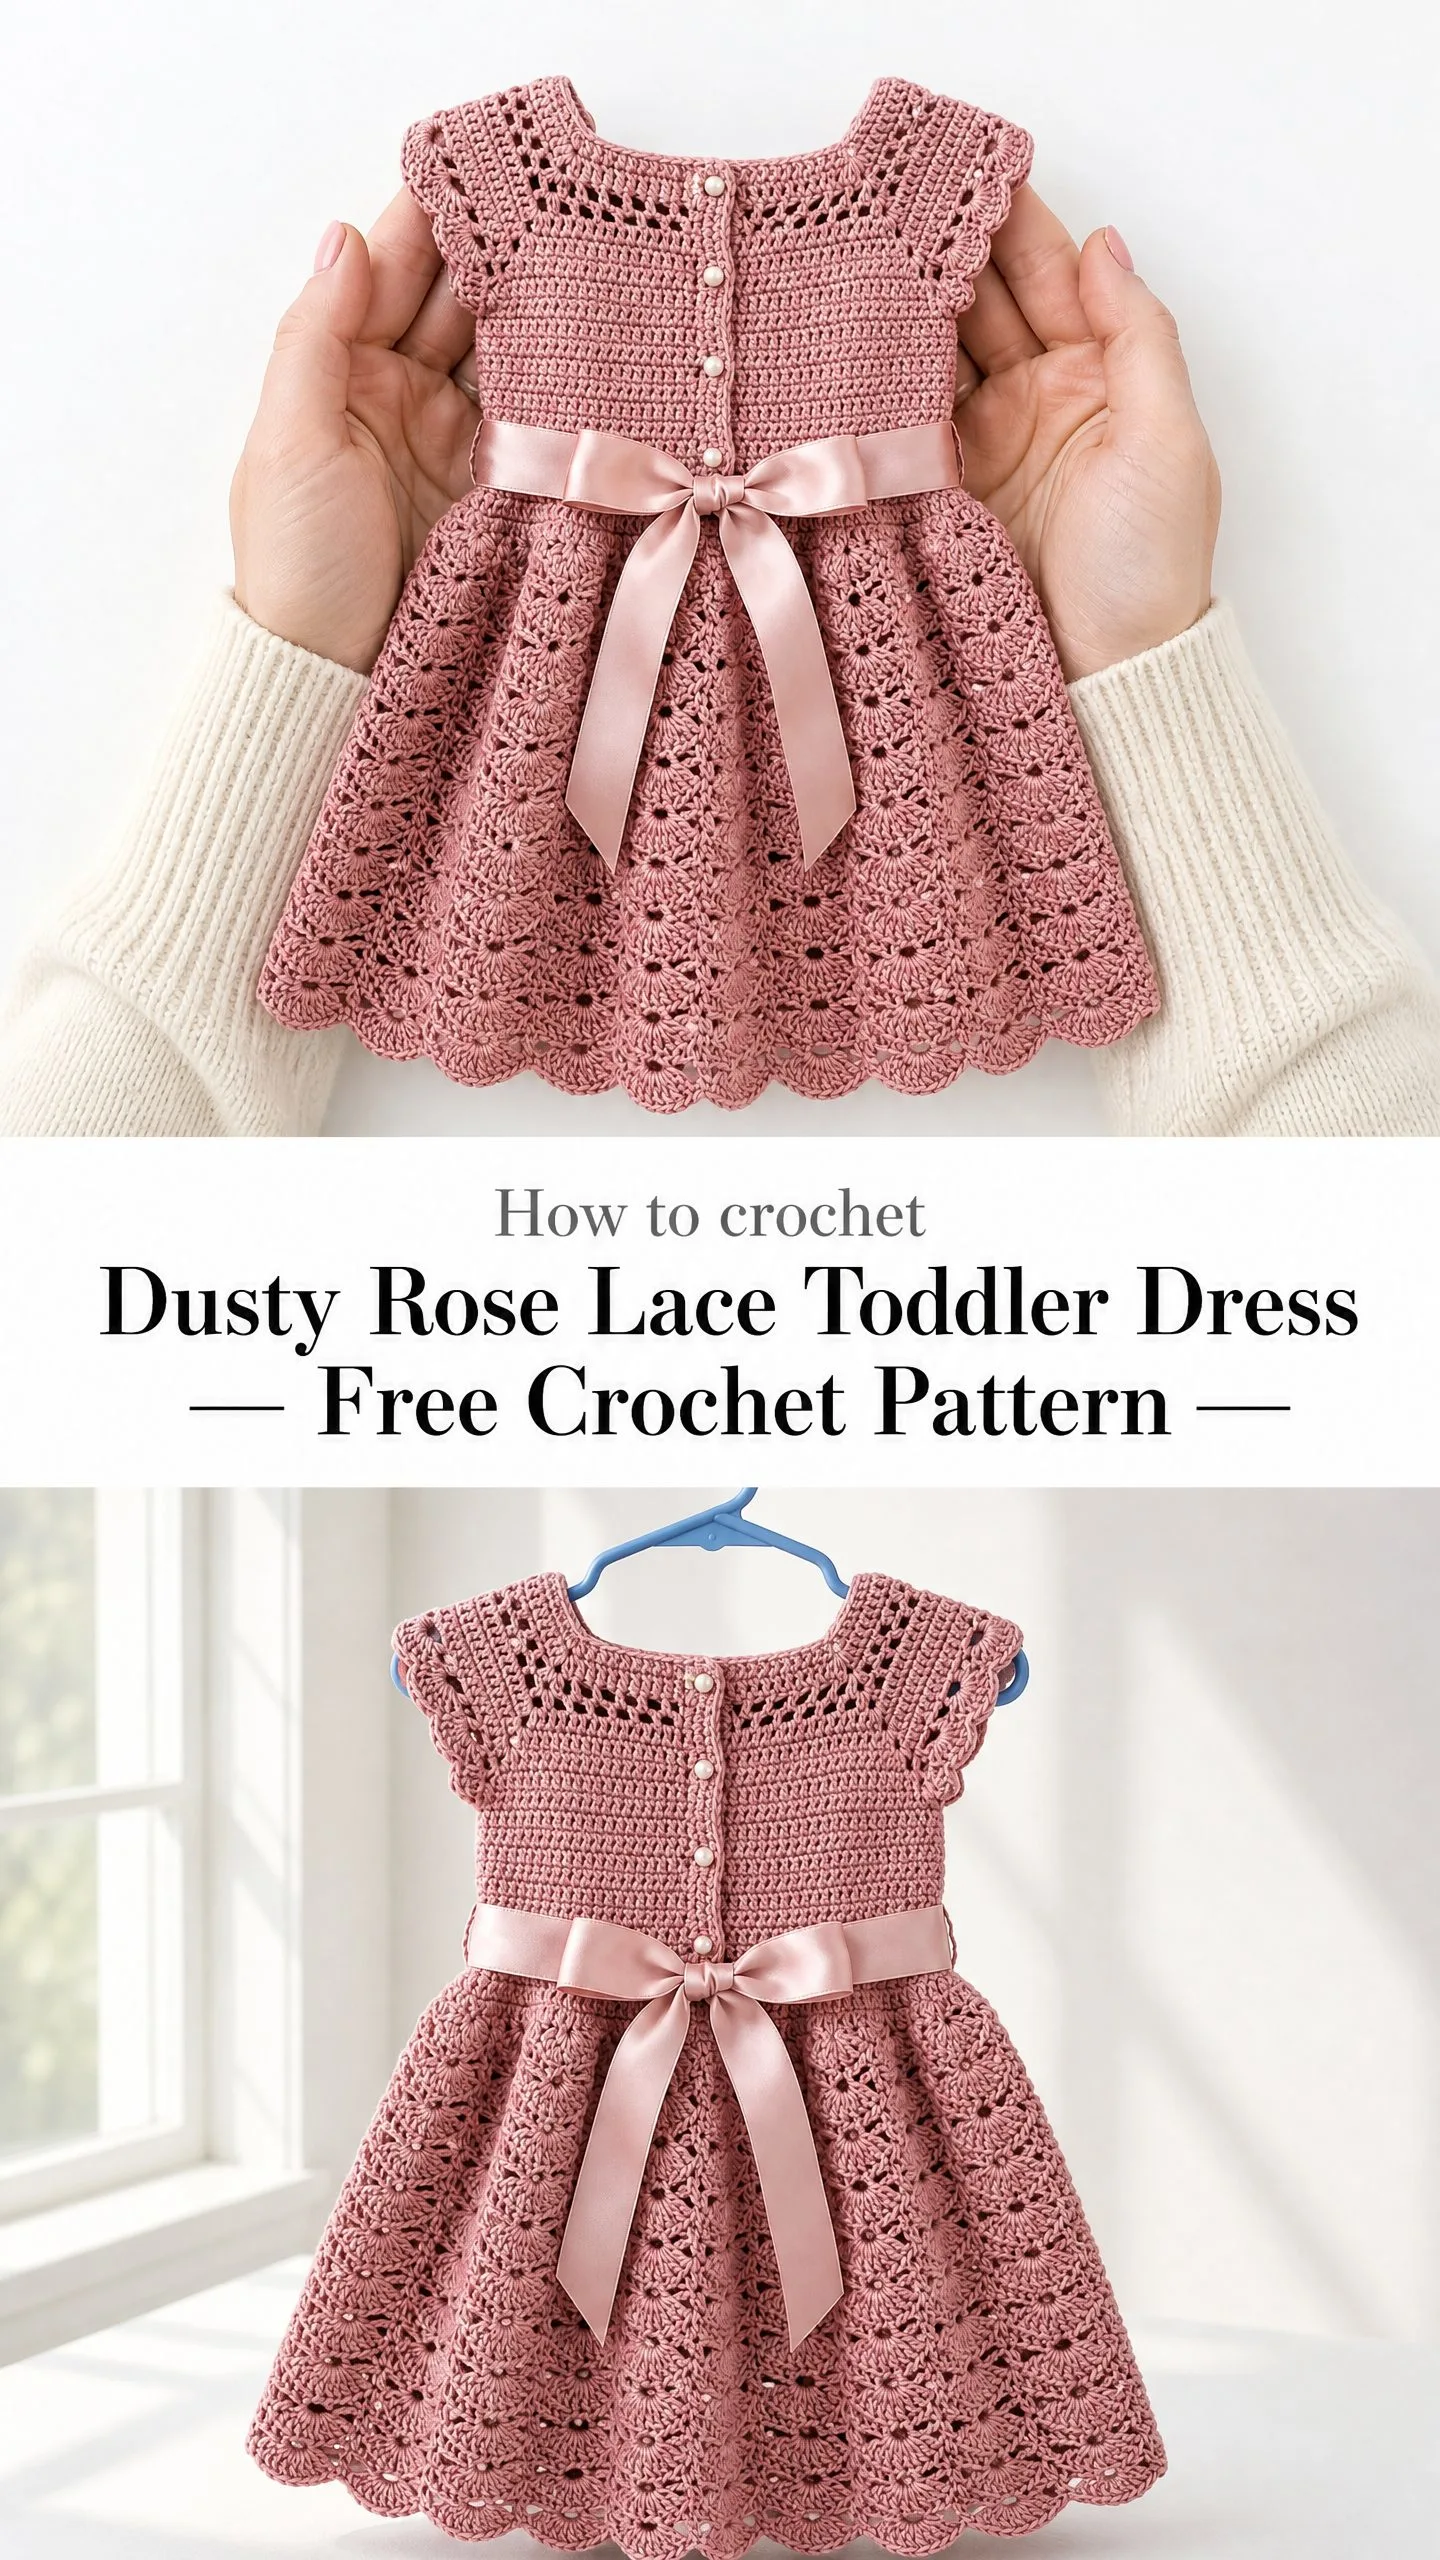
Yes, it takes some time. We are talking about 12 to 18 hours of work here. But every single minute is worth it when you see that gorgeous fan stitch skirt cascade down from a perfectly fitted bodice. The satin ribbon bow at the waist? Chef’s kiss.
This dress looks like something you would find in a high end boutique or tucked away in grandma’s cedar chest from decades past. That vintage heirloom quality is built right into the construction. And you are absolutely capable of making it yourself.
Why This Crochet Pattern Creates Such a Stunning Dress
Let me tell you what makes this toddler dress so special. The construction is clever. You start at the neckline and work your way down in one continuous piece. No seaming the bodice to the skirt later. No fussing with separate panels that never quite line up.
The yoke section uses a combination of solid single crochet (sc) fabric and decorative eyelet rows. Single crochet is simply inserting your hook into a stitch, pulling up a loop, yarning over, and pulling through both loops on your hook. Those eyelets create visual texture and also serve a practical purpose. The ones at the shoulder become your button loops.
Once you divide for the armholes and join into rounds, the bodice continues in simple single crochet. Then the magic happens. The skirt transitions into a beautiful fan and shell lace pattern that flares out dramatically. Each fan consists of five double crochet stitches all worked into the same spot. This creates those rounded, shell like clusters you can see cascading down the skirt.
The scalloped hem at the bottom finishes everything off perfectly. It echoes the curves of the fan pattern and gives the dress a polished, intentional look.
Skill Level and Who Should Try This Pattern
I am going to be honest with you. This is an intermediate level project. If you have never crocheted a garment before, this probably should not be your first one.
That said, if you have completed at least two garments and feel comfortable with working in joined rounds, reading stitch count increases, and executing lace repeats, you can absolutely handle this. The pattern walks you through everything step by step.
The trickiest parts are the yoke shaping and getting the fan stitch repeat to work out mathematically. But I have done all that math for you already. Just follow the stitch counts at the end of each row and you will be golden.
Finished Sizes for This Toddler Dress Pattern
This crochet pattern covers three size ranges:
Size 12 months: chest 19 inches (48 cm), total length 14 inches (35.5 cm)
Size 18 to 24 months: chest 20.5 inches (52 cm), total length 15.5 inches (39.5 cm)
Size 2T to 3T: chest 22 inches (56 cm), total length 17 inches (43 cm)
All measurements are taken with the garment laid flat. The satin ribbon and bow are not included in the length measurement.
Throughout the pattern, instructions are given for size 12 months first. Sizes 18 to 24 months and 2T to 3T appear in parentheses in that order. When only one number appears, it applies to all sizes.
Materials You Will Need
Yarn
You need light worsted weight yarn, also labeled as size 3 DK or heavy DK. Plan for approximately 400 to 550 yards depending on which size you are making.
Here are three yarn suggestions that work beautifully:
Paintbox Yarns Simply DK in Rose Pink: Excellent stitch definition for lace. Machine washable. 100% acrylic. 137 yards per 50 gram ball. You will need 3 to 4 balls.
Lion Brand Yarn Pound of Love in Pastel Pink: Soft, durable, widely available. Machine washable acrylic sold in large skeins. Purchase one 16 ounce skein and you will have plenty.
Drops Safran in Dusty Pink: 100% cotton DK weight yarn that gives true heirloom quality with a slight sheen. 175 yards per 50 gram ball. You will need 3 to 4 balls.
You can substitute any DK or light worsted weight yarn that achieves the stated gauge. Natural cotton or cotton acrylic blends drape beautifully in the skirt. Avoid heavily textured or bouclé yarns because they will obscure that gorgeous lace pattern.
Hook
US size G-6 / 4.0 mm crochet hook. Adjust as needed to meet gauge.
Notions
Gauge
Getting gauge right matters enormously for garment fit. Check yours before starting.
20 sc and 22 rows = 4 inches (10 cm) worked in single crochet, blocked.
For the lace skirt section: one full fan repeat (12 stitches wide) measures approximately 2.4 inches (6 cm) across. Four rows of the fan pattern measure approximately 1.5 inches (3.8 cm) tall.
If your gauge is loose, go down a half hook size. If your gauge is tight, go up a half hook size.
Abbreviations and Stitch Definitions
Let me walk you through every stitch abbreviation you will encounter:
ch: chain. Yarn over, pull through the loop on your hook.
sl st: slip stitch. Insert hook, yarn over, pull through both the stitch and the loop on your hook in one motion.
sc: single crochet. Insert hook, pull up a loop (2 loops on hook), yarn over, pull through both loops.
hdc: half double crochet. Yarn over, insert hook, pull up a loop (3 loops on hook), yarn over, pull through all 3 loops.
dc: double crochet. Yarn over, insert hook, pull up a loop (3 loops on hook), yarn over, pull through 2 loops (2 loops remain), yarn over, pull through remaining 2 loops.
tr: treble crochet. Yarn over twice, insert hook, pull up a loop, (yarn over, pull through 2 loops) three times.
sk: skip. Pass over the indicated stitch without working into it.
st(s): stitch(es)
sp(s): space(s)
RS: right side
WS: wrong side
rep: repeat
rem: remaining
beg: beginning
cont: continue
approx: approximately
yo: yarn over
tog: together
sc2tog: single crochet two together. A decrease that combines two stitches into one.
dc2tog: double crochet two together
pm: place marker
sm: slip marker
rnd(s): round(s)
t-ch: turning chain
Special Stitches Explained
Fan Stitch
The fan stitch is worked over a multiple of 12 stitches plus 1. A fan consists of 5 double crochet stitches all worked into the same stitch or space. This creates that rounded, shell like cluster.
To work a fan: insert your hook into the indicated stitch or space, yarn over and pull up a loop, yarn over and draw through 2 loops (first dc made). Work 4 more dc into the same stitch or space without moving to the next stitch. You now have 5 dc clustered in one spot. That is one complete fan.
Scallop Edging
This is the shell border at the hem of the skirt. Into the same stitch work: sc, hdc, 3 dc, hdc, sc. This creates one rounded scallop shell. Each scallop is separated by a slip stitch into the next stitch.
Eyelet Row (Ribbon Casing)
Work (sc in next st, ch 1, sk 1 st) repeated across the round. This creates evenly spaced holes through which you will later thread the satin ribbon.
Joining Round
At the end of every round, slip stitch into the first stitch of that round (not into the turning chain). Chain 1 at the beginning of the next round to rise, and work the first sc of the new round into the same stitch as the slip stitch join. This avoids a jog and keeps the join tight.
Important Pattern Notes Before You Begin
1. The dress is worked top down and in the round from the yoke downward. The cap sleeves are worked separately.
2. The yoke is worked flat for the first few rows to create the back opening, then joined and worked in rounds.
3. The back opening runs from the neckline down approximately 2.5 inches (6.5 cm) and overlaps for button placement on the left shoulder.
4. Stitch counts given at the end of each row or round reflect the total number of working stitches, not including turning chains.
5. All rounds are joined rounds (joined with sl st, beginning with ch 1) unless noted otherwise.
6. Right side is always facing you during skirt rounds.
7. The ribbon is not crocheted in. Thread it through the eyelet waistband after the dress is complete and tie it in a bow at center front.
8. Block the dress before attaching the ribbon and buttons. Blocking opens the lace and evens the stitches dramatically.
Step by Step Instructions
YOKE
The yoke begins at the neckline edge worked flat, then joins into rounds after the back opening is established.
Foundation Chain:
Ch 70 (76, 82). This chain represents the neckline circumference plus a 2 stitch back overlap allowance.
Row 1 (RS):
Sc in 2nd ch from hook and in each ch across. Turn.
69 (75, 81) sc.
Row 2 (WS):
Ch 1, sc in first st, (ch 1, sk 1 st, sc in next st) across. Turn.
This is the shoulder eyelet row for visual texture and optional button loop placement.
35 (38, 41) sc and 34 (37, 40) ch-1 sp worked alternately. Total working sts including spaces: 69 (75, 81).
Row 3 (RS):
Ch 1, sc in first st, (sc in ch-1 sp, sc in sc) across. Turn.
69 (75, 81) sc.
Row 4 (WS):
Ch 1, sc in each st across. Turn.
69 (75, 81) sc.
Row 5 (RS) – Yoke Increase Row 1:
Ch 1, sc in first 6 (6, 7) sts, 2 sc in next st, (sc in next 7 (8, 8) sts, 2 sc in next st) 8 times, sc in rem 0 (1, 1) sts. Turn.
78 (84, 90) sc.
Place stitch markers to divide the yoke into sections after Row 5:
The sleeve placeholder sections will later become armhole openings.
Row 6 (WS):
Ch 1, sc in each st across. Turn.
78 (84, 90) sc.
Row 7 (RS) – Yoke Increase Row 2:
Ch 1, sc in first 4 (4, 5) sts, 2 sc in next st, (sc in next 8 (9, 9) sts, 2 sc in next st) 8 times, sc in rem 3 (3, 4) sts. Turn.
87 (93, 99) sc.
Row 8 (WS):
Ch 1, sc in each st across. Turn.
87 (93, 99) sc.
Row 9 (RS) – Yoke Increase Row 3:
Ch 1, sc in first 3 (4, 4) sts, 2 sc in next st, (sc in next 9 (9, 10) sts, 2 sc in next st) 8 times, sc in rem 3 (4, 5) sts. Turn.
96 (102, 108) sc.
Row 10 (WS):
Ch 1, sc in each st across. Turn.
96 (102, 108) sc.
Row 11 (RS) – Yoke Eyelet Decorative Row:
Ch 1, sc in first st, (ch 1, sk 1 st, sc in next st) across. Turn.
Total working positions: 96 (102, 108).
Row 12 (WS):
Ch 1, sc in first st, (sc in ch-1 sp, sc in sc) across. Turn.
96 (102, 108) sc.
Row 13 (RS) – Yoke Increase Row 4:
Ch 1, sc in first 3 (3, 4) sts, 2 sc in next st, (sc in next 10 (11, 11) sts, 2 sc in next st) 8 times, sc in rem 3 (3, 4) sts. Turn.
105 (111, 117) sc.
Row 14 (WS):
Ch 1, sc in each st across. Turn.
105 (111, 117) sc.
Row 15 (RS) – Yoke Increase Row 5:
Ch 1, sc in first 2 (3, 3) sts, 2 sc in next st, (sc in next 11 (11, 12) sts, 2 sc in next st) 8 times, sc in rem 2 (3, 3) sts. Turn.
114 (120, 126) sc.
Row 16 (WS):
Ch 1, sc in each st across. Turn.
114 (120, 126) sc.
CHECKPOINT: After Row 16, your yoke panel should measure approximately 3 inches (7.5 cm) tall from the foundation chain edge. The fabric should be flat with no cupping or flaring. If it is cupping, your tension is too tight and you should go up a hook size. If it is ruffling, go down a hook size.
DIVIDE FOR ARMHOLES
Row 17 (RS) – Separation Row:
This row closes the armhole gaps by chaining across each sleeve section.
Ch 1, sc across first 18 (19, 20) sts (left back). Ch 6 (7, 8) for left armhole, sk next 18 (19, 20) sts (left sleeve placeholder). Sc across next 42 (44, 46) sts (front). Ch 6 (7, 8) for right armhole, sk next 18 (19, 20) sts (right sleeve placeholder). Sc across rem 18 (19, 20) sts (right back). Turn.
Total sts including chains: 96 (102, 108). Working st count after this row (counting ch as sts): 96 (102, 108).
Row 18 (WS):
Ch 1, sc in each st and in each ch across. Turn.
96 (102, 108) sc.
JOIN FOR WORKING IN THE ROUND
At the end of Row 18, do not turn. Instead, sl st to the first st of Row 18 (the beginning of the left back edge) to join into a round.
This join establishes the continuous round construction of the bodice. The back opening now overlaps. The left back edge overlaps the right back edge by approximately 1 inch (2.5 cm), and that overlap will be button secured when finishing. From this point forward, all work is done in joined rounds with RS always facing.
BODICE
Round 1:
Ch 1, sc in same st as join, sc in each st around. Join with sl st to first sc.
96 (102, 108) sc.
Rounds 2 through 8:
Ch 1, sc in same st as join, sc in each st around. Join with sl st to first sc.
96 (102, 108) sc.
Round 9 (size 12 months only):
Ch 1, sc in same st as join, sc in each st around. Join with sl st to first sc.
96 sc.
Rounds 9 and 10 (sizes 18 to 24 months and 2T to 3T only):
Ch 1, sc in same st as join, sc in each st around. Join with sl st to first sc.
102 (108) sc.
WAISTBAND EYELET ROUND (all sizes)
Ch 1, sc in same st as join, (ch 1, sk 1 st, sc in next st) around, ending with ch 1, sk 1 st. Join with sl st to first sc.
Total positions: 96 (102, 108), alternating sc and ch-1 sp.
This eyelet round is the ribbon casing.
Next Round:
Ch 1, sc in same st as join, (sc in ch-1 sp, sc in sc) around. Join with sl st to first sc.
96 (102, 108) sc.
CHECKPOINT: After the waistband eyelet section, your bodice from the armhole join round to the eyelet round should measure approximately 3 inches (7.5 cm) for size 12 months, 3.5 inches (9 cm) for size 18 to 24 months, or 4 inches (10 cm) for size 2T to 3T.
SKIRT INCREASE TRANSITION ROUND
Before beginning the lace skirt, the stitch count must be increased to a multiple of 12 to accommodate the fan stitch repeat.
Target stitch counts:
Increase Round (size 12 months):
Ch 1, sc in same st as join, 2 sc in next st, (sc in next 3 sts, 2 sc in next st) 23 times, sc in rem 0 sts. Join with sl st to first sc.
120 sc.
Increase Round (size 18 to 24 months):
Ch 1, sc in same st as join, (sc in next 2 sts, 2 sc in next st) 10 times, (sc in next 3 sts, 2 sc in next st) 20 times. Join with sl st to first sc.
132 sc.
Increase Round (size 2T to 3T):
Ch 1, sc in same st as join, (sc in next 3 sts, 2 sc in next st) 36 times. Join with sl st to first sc.
144 sc.
SKIRT LACE SECTION
The skirt is worked in a fan and mesh lace pattern over a 12 stitch repeat.
Skirt Round 1 (Fan Round):
Ch 3 (counts as first dc), 2 dc in same st as join (half fan to start), ch 3, sk 2 sts, sc in next st, ch 3, sk 2 sts, (5 dc in next st, ch 3, sk 2 sts, sc in next st, ch 3, sk 2 sts) around, ending last rep with 2 dc in same st as starting st. Join with sl st to top of ch-3 at beg of round.
Total fans: 10 (11, 12). Total sc between fans: 10 (11, 12).
Skirt Round 2 (Mesh Round):
Sl st into first ch-3 sp, ch 1, sc in same ch-3 sp, ch 5, (sc in ch-3 sp before sc, ch 5, sc in ch-3 sp after sc, ch 5) around. Join with sl st to first sc.
Total ch-5 spaces: 20 (22, 24).
Skirt Round 3 (Fan Round, offset):
Ch 3 (counts as first dc), 2 dc in same st, ch 3, sk to center of ch-5 arch, sc in ch-5 sp, ch 3, (5 dc in next sc, ch 3, sc in ch-5 sp, ch 3) around, ending with 2 dc in same st as beg ch-3. Join with sl st to top of ch-3.
Total fans: 10 (11, 12).
Skirt Round 4 (Mesh Round):
Sl st into first ch-3 sp, ch 1, sc in same ch-3 sp, ch 5, (sc in ch-3 sp before sc, ch 5, sc in ch-3 sp after sc, ch 5) around. Join with sl st to first sc.
Total ch-5 spaces: 20 (22, 24).
Skirt Rounds 5 through 12:
Continue alternating Fan Rounds (odd numbers) and Mesh Rounds (even numbers) following the established pattern.
Size 12 months: Stop after Skirt Round 12 (12 skirt lace rounds total).
Size 18 to 24 months: Work Skirt Rounds 13 and 14 (14 skirt lace rounds total).
Size 2T to 3T: Work Skirt Rounds 13 through 16 (16 skirt lace rounds total).
CHECKPOINT: After the lace skirt rounds, the skirt from the waistband to the current edge should measure approximately 7 inches (18 cm) for size 12 months, 8 inches (20.5 cm) for size 18 to 24 months, and 9 inches (23 cm) for size 2T to 3T.
HEM PREPARATION ROUND
Size 12 months:
Sl st into first ch-5 sp of last mesh round, ch 1, 3 sc in each ch-5 sp around. Join with sl st to first sc.
60 sc.
Size 18 to 24 months:
Sl st into first ch-5 sp of last mesh round, ch 1, (3 sc in next ch-5 sp) 20 times, (4 sc in next ch-5 sp) 2 times. Join with sl st to first sc.
68 sc.
Size 2T to 3T:
Sl st into first ch-5 sp of last mesh round, ch 1, 3 sc in each ch-5 sp around. Join with sl st to first sc.
72 sc.
SCALLOP HEM EDGING (all sizes)
Edging Round 1:
Ch 1, sc in same st as join, sc in each st around. Join with sl st to first sc.
60 (68, 72) sc.
Edging Round 2 – Scallop:
Sl st in first st, (sk next st, 5 dc in next st, sk next st, sl st in next st) around.
15 (17, 18) scallops made.
Do not join after last sl st. That sl st closes the round naturally into the first sl st.
Fasten off. Weave in end.
CAP SLEEVES
Work one cap sleeve into each armhole opening.
Round 1:
Join yarn with sl st at underarm chain space center. Ch 1, sc evenly around the armhole opening, placing sc in each skipped st and in each ch of the armhole chain. Join with sl st to first sc.
Size 12 months: 24 sc.
Size 18 to 24 months: 26 sc.
Size 2T to 3T: 28 sc.
Round 2 – Ruffle Edge:
Ch 1, (sc in next st, 2 dc in next st, sc in next st) around. Join with sl st to first sc.
This creates a simple flutter ruffle. Work 8 (8 or 9, 9) repeats of the 3 st cluster.
Note: For 26 sts in size 18 to 24 months, work 8 full 3 st repeats (24 sts) then sc in rem 2 sts.
Fasten off. Weave in end. Repeat for second armhole.
Finishing Your Toddler Dress
Back Overlap and Buttons
Lay the dress flat with the back opening facing you. The left back edge overlaps the right back edge. Using a yarn needle and a short length of matching yarn or sewing thread, tack the bottom of the overlap invisibly at the joining point just above the waistband to keep the opening closed at that point.
Sew 4 pearl buttons along the left back shoulder edge, spacing them evenly from the neckline down approximately 2.5 inches (6.5 cm). The eyelet row at Row 2 of the yoke serves as the buttonhole row on the right back edge when overlapped.
Ribbon
Cut the satin ribbon to approximately 36 inches (91.5 cm). Thread the ribbon through the waistband eyelet round, beginning and ending at center front. Tie in a bow. Trim ribbon ends at a 45 degree angle to prevent fraying, or use a lighter flame passed briefly and carefully under the cut end to seal a synthetic ribbon.
Weave in all remaining yarn ends. Trim cleanly.
Blocking Your Finished Dress
Wet blocking is strongly recommended for this lace dress. Soak the finished dress in cool water for 20 minutes. Gently squeeze out excess water without wringing. Roll briefly in a clean towel.
Lay the dress on a blocking mat. Pin the skirt hem into its scalloped shape. Open up the fan lace with your fingers and pin the neckline and armholes to their finished dimensions. Allow to dry completely, which takes 24 to 48 hours depending on your yarn fiber.
Blocking makes an enormous difference with lace projects. The stitches even out, the fans open up beautifully, and the whole dress takes on that professional, heirloom quality you see in the finished photos.
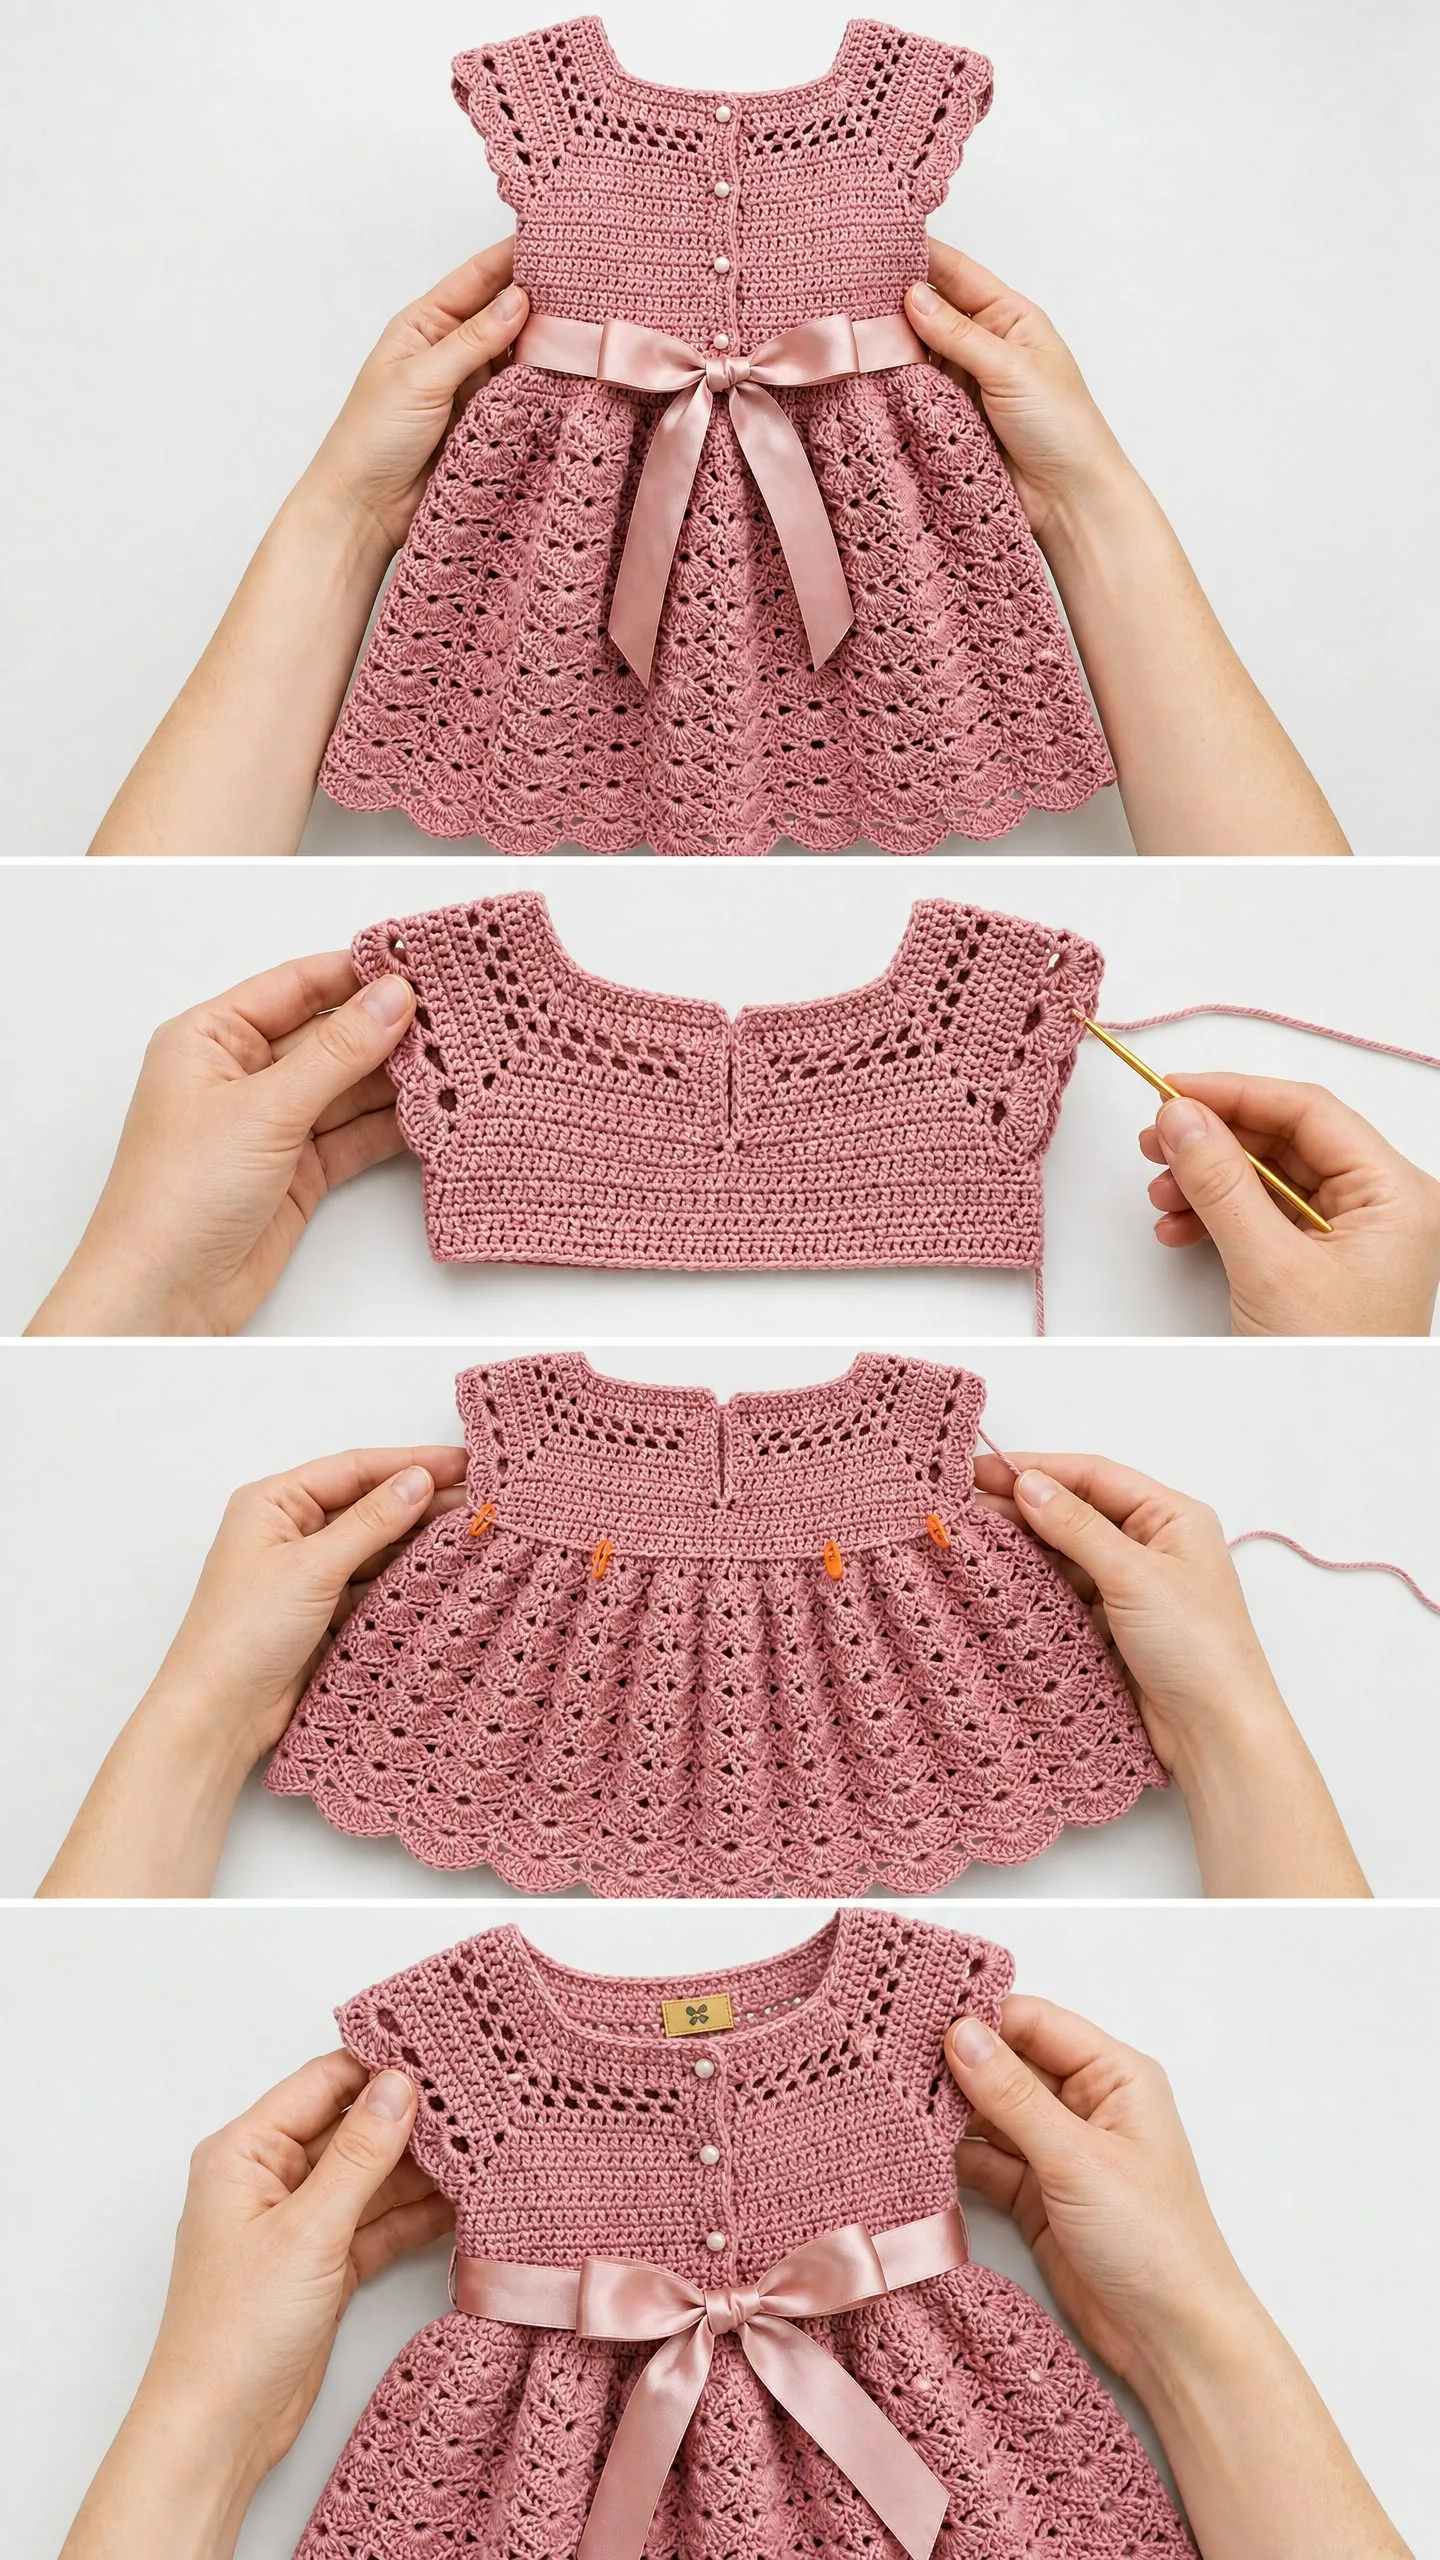
Tips for Success with This Crochet Tutorial
Count your stitches religiously. The stitch counts at the end of each row and round are your best friends. If something is off, you will know immediately instead of discovering it five inches later.
Use stitch markers generously. Mark your yoke sections, mark the beginning of your rounds, mark anything that helps you keep track. They cost nothing to use and save hours of frustration.
Swatch for gauge. I know nobody wants to hear this, but garment fit depends on gauge. A dress that is too small is heartbreaking after all that work.
Block before finishing. Do not attach buttons or thread the ribbon until after blocking. The dress needs to be completely dry and settled into its final shape first.
Thank you so much for choosing this pattern for your next project. I truly hope you love making this dress as much as I loved designing it. The finished piece makes an incredible gift for baby showers, birthdays, christenings, or just because. If you make one, I would absolutely love to see it. Tag me on Instagram or share a photo in our Facebook group.
If this pattern caught your eye, go ahead and pin it to your Pinterest boards so you can find it easily when you are ready to start. And please drop a comment below if you make this dress. I read every single one, and nothing makes my day like seeing your finished projects come to life.
