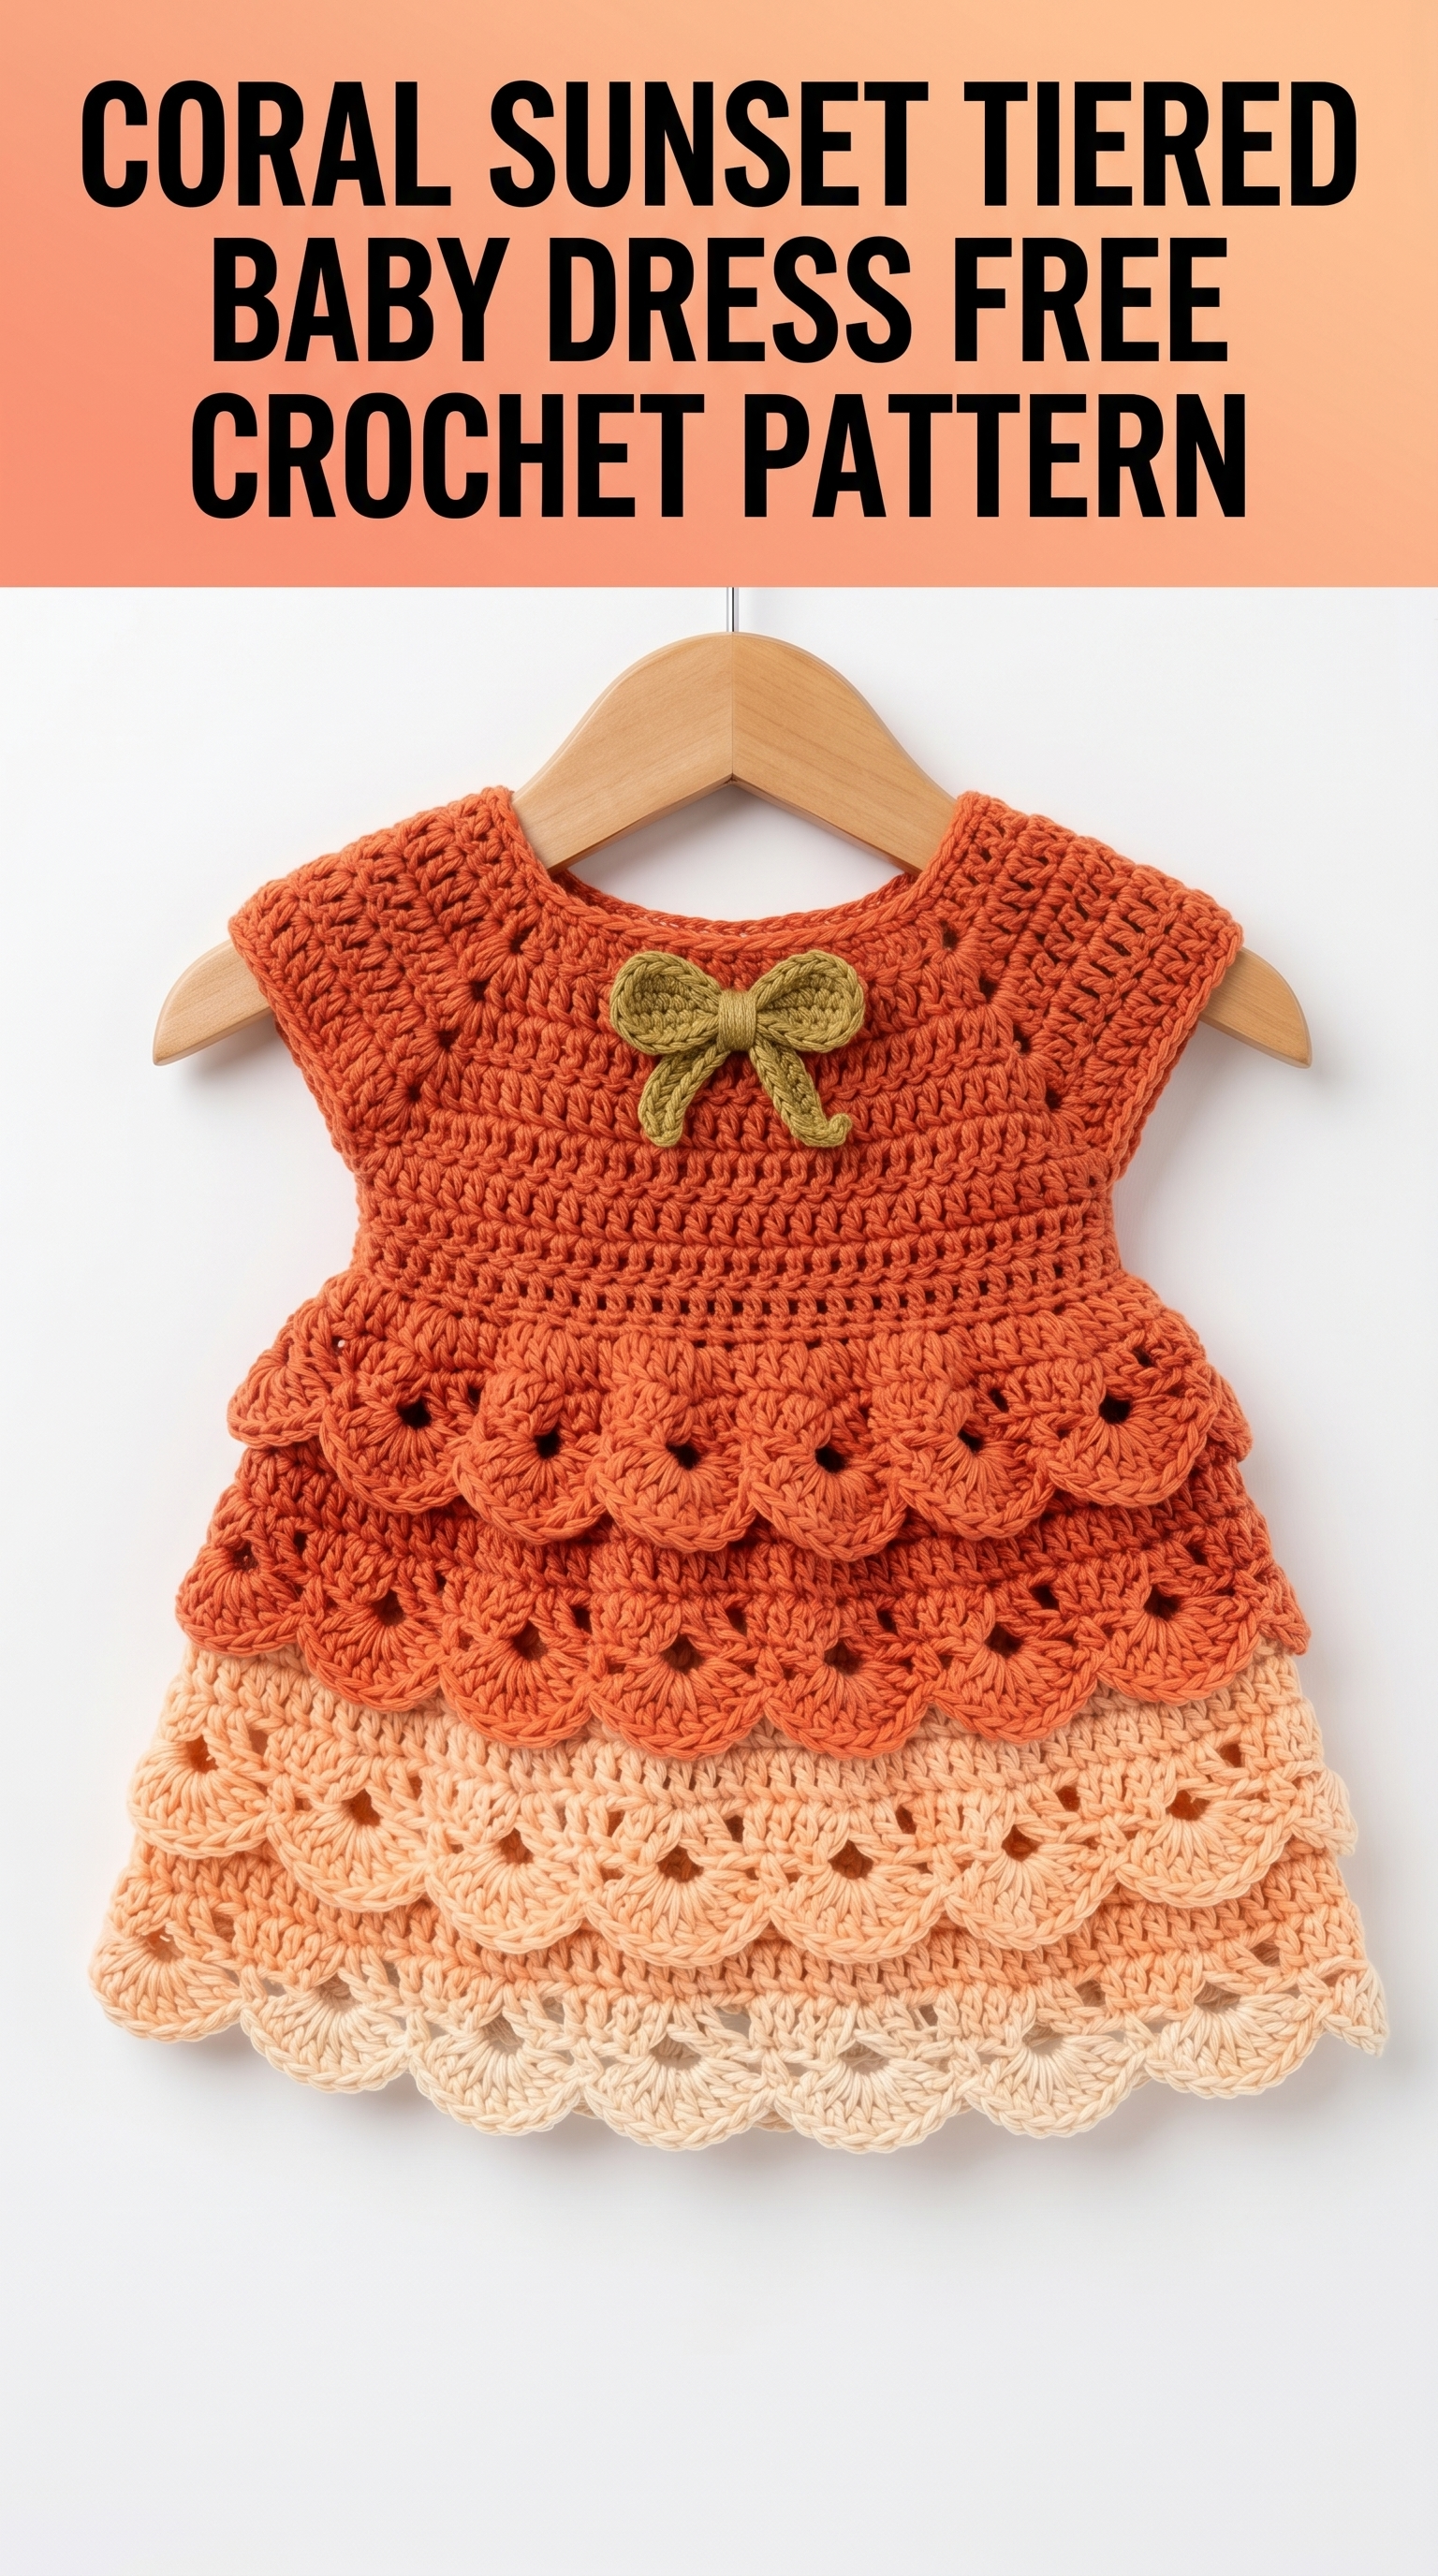
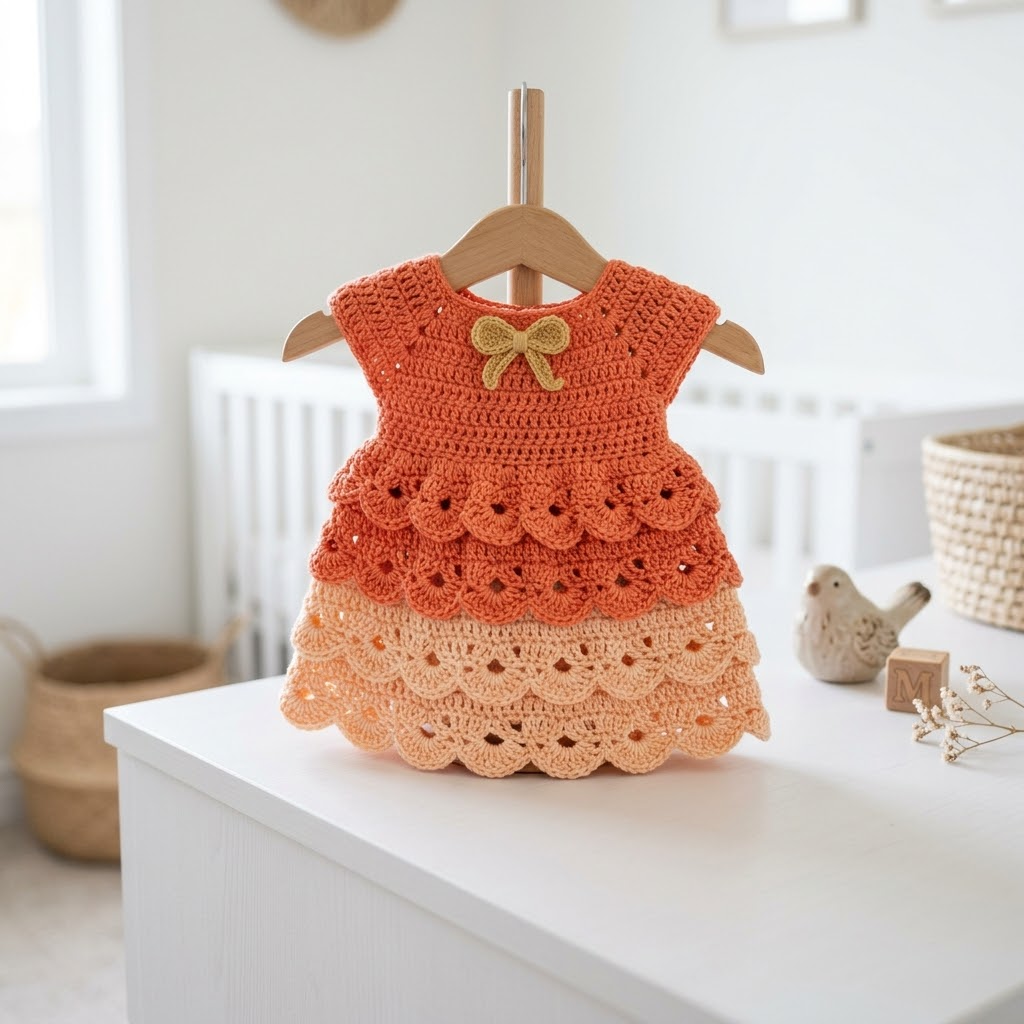
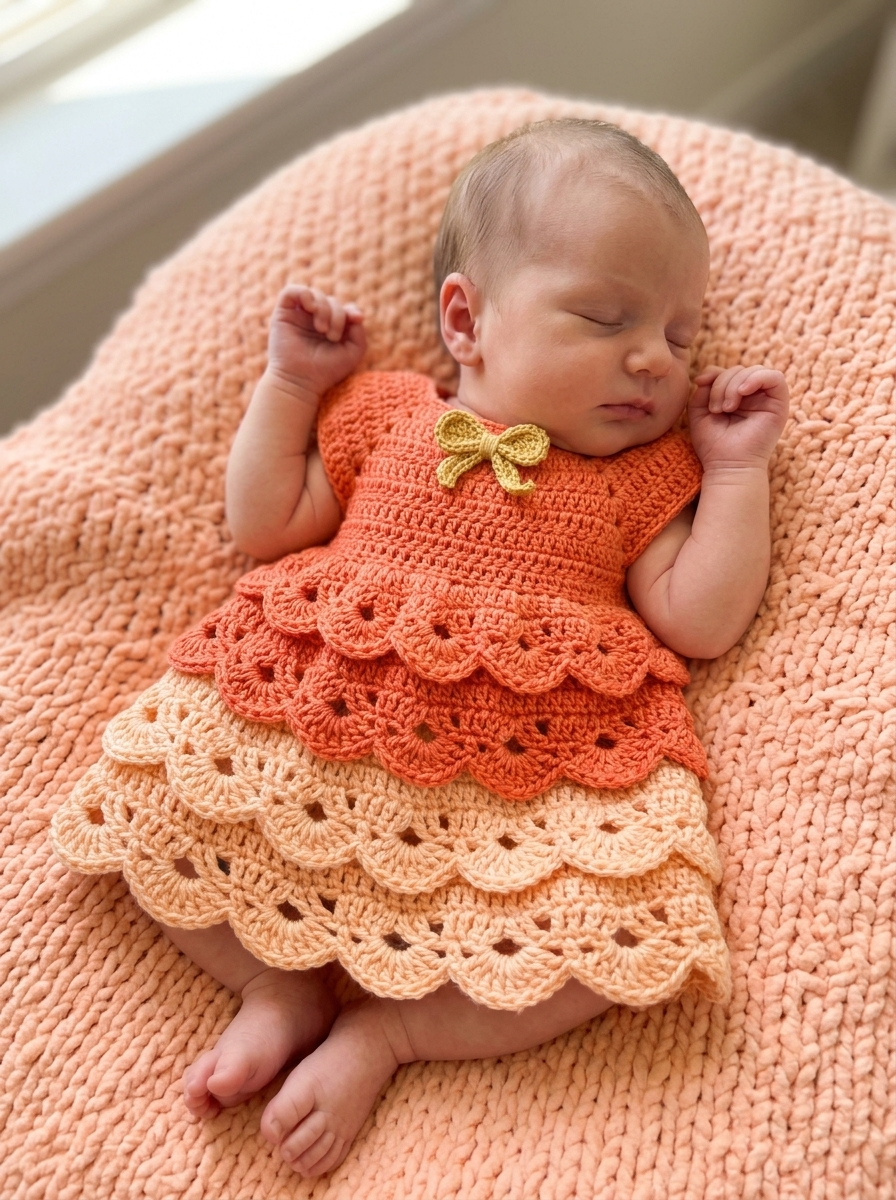
There is something absolutely magical about crocheting tiny garments for babies. This Coral Sunset Tiered Baby Dress captures that sweetness perfectly with its ombre color flow, layered shell tiers, and delicate bow accent. I designed this dress to look impressive while remaining completely achievable for confident beginners and intermediate crocheters alike.
The construction is simpler than it appears. You will work the bodice from the neckline down, then add each tiered skirt layer separately. Those gorgeous scalloped shells create a stunning visual effect without complicated stitch work. If you can double crochet and follow a basic repeat, you can absolutely make this dress.
This crochet pattern works up in a weekend and makes a showstopping baby shower gift. The finished dress fits approximately 6 to 12 months, though I will share sizing notes throughout so you can adjust as needed.
Why This Baby Dress Crochet Pattern Works So Well
The tiered design serves both form and function. Each shell layer adds fullness without bulk, keeping the dress lightweight and comfortable against baby skin. The ombre color transition from deep coral at the bodice through peachy cream at the hem creates that sunset effect without any complicated colorwork techniques.
I chose a DK weight cotton blend for this project because it holds stitch definition beautifully, washes well, and breathes against sensitive skin. The slight sheen adds polish to those shell stitches.
The small crocheted bow at the neckline adds the finishing touch. It is worked separately and sewn on, so you can customize placement or skip it entirely if you prefer a simpler look.
Materials You Will Need
Yarn:
I recommend yarns like Paintbox Cotton DK, Lion Brand 24/7 Cotton, or similar smooth cotton blends. Avoid fuzzy or textured yarns as they will obscure the shell detail.
Hook:
Notions:
Gauge and Finished Measurements
Gauge: 18 stitches and 10 rows = 4 inches in double crochet
Always check your gauge before starting. A too-loose gauge will result in a floppy bodice that does not hold its shape. A too-tight gauge creates stiff fabric uncomfortable for baby.
Finished Measurements (6-12 months):
Abbreviations and Stitch Definitions
Let me walk you through every stitch you will use in this crochet tutorial. Even if you know these stitches, reading through helps you understand my terminology.
ch = chain: Yarn over, pull through loop on hook. This creates your foundation.
sl st = slip stitch: Insert hook, yarn over, pull through both the stitch and loop on hook in one motion. Used for joining and moving across work invisibly.
sc = single crochet: Insert hook into stitch, yarn over and pull up a loop (2 loops on hook), yarn over and pull through both loops. Creates a short, dense stitch.
dc = double crochet: Yarn over, insert hook into stitch, yarn over and pull up a loop (3 loops on hook), yarn over and pull through 2 loops, yarn over and pull through remaining 2 loops. Creates a taller stitch with nice drape.
dc2tog = double crochet 2 together (decrease): Work a dc but stop before the final step (2 loops remain), work another dc in the next stitch and stop before the final step (3 loops remain), yarn over and pull through all 3 loops. This joins 2 stitches into 1.
shell = In this pattern, a shell means 5 dc worked into the same stitch or space. This creates the fan-like scallop effect.
sk = skip: Do not work into this stitch. Move past it.
Special Techniques
Working in the round: After joining with a slip stitch, you will work in a continuous spiral or joined rounds depending on the section. I will specify which method for each part.
Color changes: When switching colors, complete the last stitch of the old color until 2 loops remain on hook. Yarn over with the new color and pull through to complete the stitch. This creates a clean color transition.
Identifying shell placement: Each tier builds shells into the center stitch of the previous shell below. Placing a stitch marker in that center dc helps tremendously until you develop the rhythm.
The Pattern: Step by Step Instructions
Bodice Section
The bodice works from the neckline down to the waist. We create the yoke first, then separate for armholes.
With Color A and 4.0mm hook:
Foundation Row: Ch 62.
Row 1: Dc in 4th ch from hook (the skipped chains count as your first dc), dc in each ch across. Turn. (60 dc)
Row 2: Ch 3 (counts as dc here and throughout), dc in each dc across. Turn. (60 dc)
Row 3: Ch 3, dc in next 9 dc, 2 dc in next dc (this is an increase), dc in next 18 dc, 2 dc in next dc, dc in next 18 dc, 2 dc in next dc, dc in last 10 dc. Turn. (63 dc)
Row 4: Ch 3, dc in each dc across. Turn. (63 dc)
Row 5 (Increase Row): Ch 3, dc in next 10 dc, 2 dc in next dc, dc in next 19 dc, 2 dc in next dc, dc in next 19 dc, 2 dc in next dc, dc in last 10 dc. Turn. (66 dc)
Rows 6-8: Ch 3, dc in each dc across. Turn. (66 dc)
This creates the upper bodice and sets up the armhole shaping.
Armhole Division
Now we separate the front and back, leaving openings for the armholes.
Row 9: Ch 3, dc in next 14 dc (this is the back right section), ch 5, sk next 8 dc (armhole created), dc in next 18 dc (front section), ch 5, sk next 8 dc (second armhole), dc in last 15 dc (back left section). Turn. (47 dc + 2 ch-5 spaces)
Row 10: Ch 3, dc in next 14 dc, dc 5 times into the ch-5 space, dc in next 18 dc, dc 5 times into the ch-5 space, dc in last 15 dc. Turn. (57 dc)
Rows 11-14: Ch 3, dc in each dc across. Turn. (57 dc)
The bodice is now complete. Do not fasten off.
First Skirt Tier (Color A – Deep Coral)
This tier attaches directly to the bodice and creates the first layer of shells.
Round 1: Ch 1, work 80 sc evenly around the bottom edge of the bodice, join with sl st to first sc. (80 sc)
*Tip: Space your stitches evenly. You may need to work 2 sc into some dc stitches to achieve 80. Count as you go.*
Round 2: Ch 3, dc in same st, sk 1 st, *shell (5 dc) in next st, sk 2 sts*, repeat from * to * around, ending with 3 dc in same st as beginning ch-3, join with sl st to top of ch-3. (Approximately 16 shells)
Round 3: Ch 3, 2 dc in same space, *sc in center dc of shell below, shell in sc between shells*, repeat from * to * around, ending with sc in center dc of last shell, 2 dc in same space as beginning, join.
Round 4: Repeat Round 3.
Fasten off Color A. Weave in ends.
Second Skirt Tier (Color B – Medium Peach)
This tier works into the front loops of the previous tier, creating that beautiful layered effect.
Join Color B to any center dc of a shell from the first tier.
Round 1: Ch 3, 4 dc in same st (first shell made), *sk to center dc of next shell, shell in that center dc*, repeat from * to * around, join with sl st. (16 shells)
Round 2: Sl st to center dc of first shell, ch 3, 4 dc in same st, *shell in center dc of next shell*, repeat around, join. (16 shells)
Round 3: Repeat Round 2.
Fasten off Color B. Weave in ends.
Third Skirt Tier (Color C – Cream Peach)
Join Color C to the bottom edge of the second tier, working into the front loops again.
Round 1: Ch 3, 4 dc in same st, *shell in center dc of next shell*, repeat around, join. (16 shells)
Round 2: Repeat Round 1. (16 shells)
Round 3: Ch 1, *sc in first 2 dc of shell, 3 sc in center dc, sc in last 2 dc of shell*, repeat around, join. (This creates the scalloped bottom edge with approximately 112 sc)
Fasten off. Weave in all ends.
Crocheted Bow (Color D)
The bow adds that perfect finishing detail.
Center Rectangle:
Ch 8.
Row 1: Sc in 2nd ch from hook and in each ch across. Turn. (7 sc)
Rows 2-14: Ch 1, sc in each sc across. Turn. (7 sc)
Fasten off, leaving a long tail.
Fold the rectangle in half lengthwise (short ends together). Wrap the tail tightly around the center several times to create the bow pinch. Secure with a few stitches and weave in the end.
Finishing and Assembly
Neckline Edging:
With Color A, join yarn at the back corner of the neckline.
Work 1 round of sc evenly around the entire neckline opening, placing 3 sc in each corner to keep it flat. Join with sl st. Fasten off.
Attaching the Bow:
Position the bow at center front of the bodice, just below the neckline. Using Color D and your tapestry needle, sew the bow securely in place with small invisible stitches.
Optional Back Buttons:
If desired, add 2 small buttons along the back bodice edge to create a closure. Crochet small chain loops on the opposite edge for buttonholes.
Blocking:
Wet block your finished dress by soaking it in lukewarm water, gently squeezing out excess moisture (do not wring), and laying flat on a towel. Shape the tiers so they lay nicely and allow to dry completely.
Tips for Success With This Crochet Tutorial
Keeping tiers even: The layered effect depends on each tier sitting properly. If your shells bunch or gap, adjust your stitch count on the foundation round of each tier.
Consistent tension: The bodice needs firm tension to support the skirt weight. The skirt tiers can be slightly looser for better drape.
Color substitution: This pattern works beautifully in any ombre combination. Try blues for a ocean theme, purples for a garden party look, or soft pinks for classic sweetness.
Sizing adjustments: For newborn size, reduce the foundation chain to 54 and adjust increases proportionally. For 12 to 18 months, increase the foundation chain to 70.
Care Instructions
This dress washes beautifully. Machine wash on gentle cycle with cold water, or hand wash in lukewarm water with mild detergent. Lay flat to dry to maintain the shape of those gorgeous tiers. A light steam can refresh the shells between wearings.
You Did It!
I hope you enjoyed working through this Coral Sunset Tiered Baby Dress crochet pattern as much as I enjoyed designing it. Those layered shells and that gradient color flow create something truly special without requiring advanced techniques.
This is exactly the kind of project that reminds me why I love crocheting for little ones. Every stitch carries intention and love.
Thank you so much for choosing this pattern for your next project. I would absolutely love to see your finished dress! Tag me on Instagram or share in our Facebook community. Seeing your color choices and creative touches genuinely makes my day.
Happy crocheting, friend. You have got this.
