
The Story Behind This Romantic Design
I call this one the Adelaide cardigan, named after my grandmother who kept a tin full of pearl buttons in her sewing room. When I first sketched this design in my notebook three years ago, I wanted to create something that felt like it belonged in a period drama. The kind of piece you imagine a clever heroine wearing while writing letters by candlelight.
The pattern sat in that notebook for ages because honestly, I was intimidated by my own idea. All those ruffles. The lace sleeves. That nipped waist and flared peplum. But when I finally sat down to work through the construction, I discovered something wonderful. Each section builds logically on the last.
Now the Adelaide is one of my proudest makes. And today I am sharing every single detail so you can create your own.
What Makes This Cardigan Special
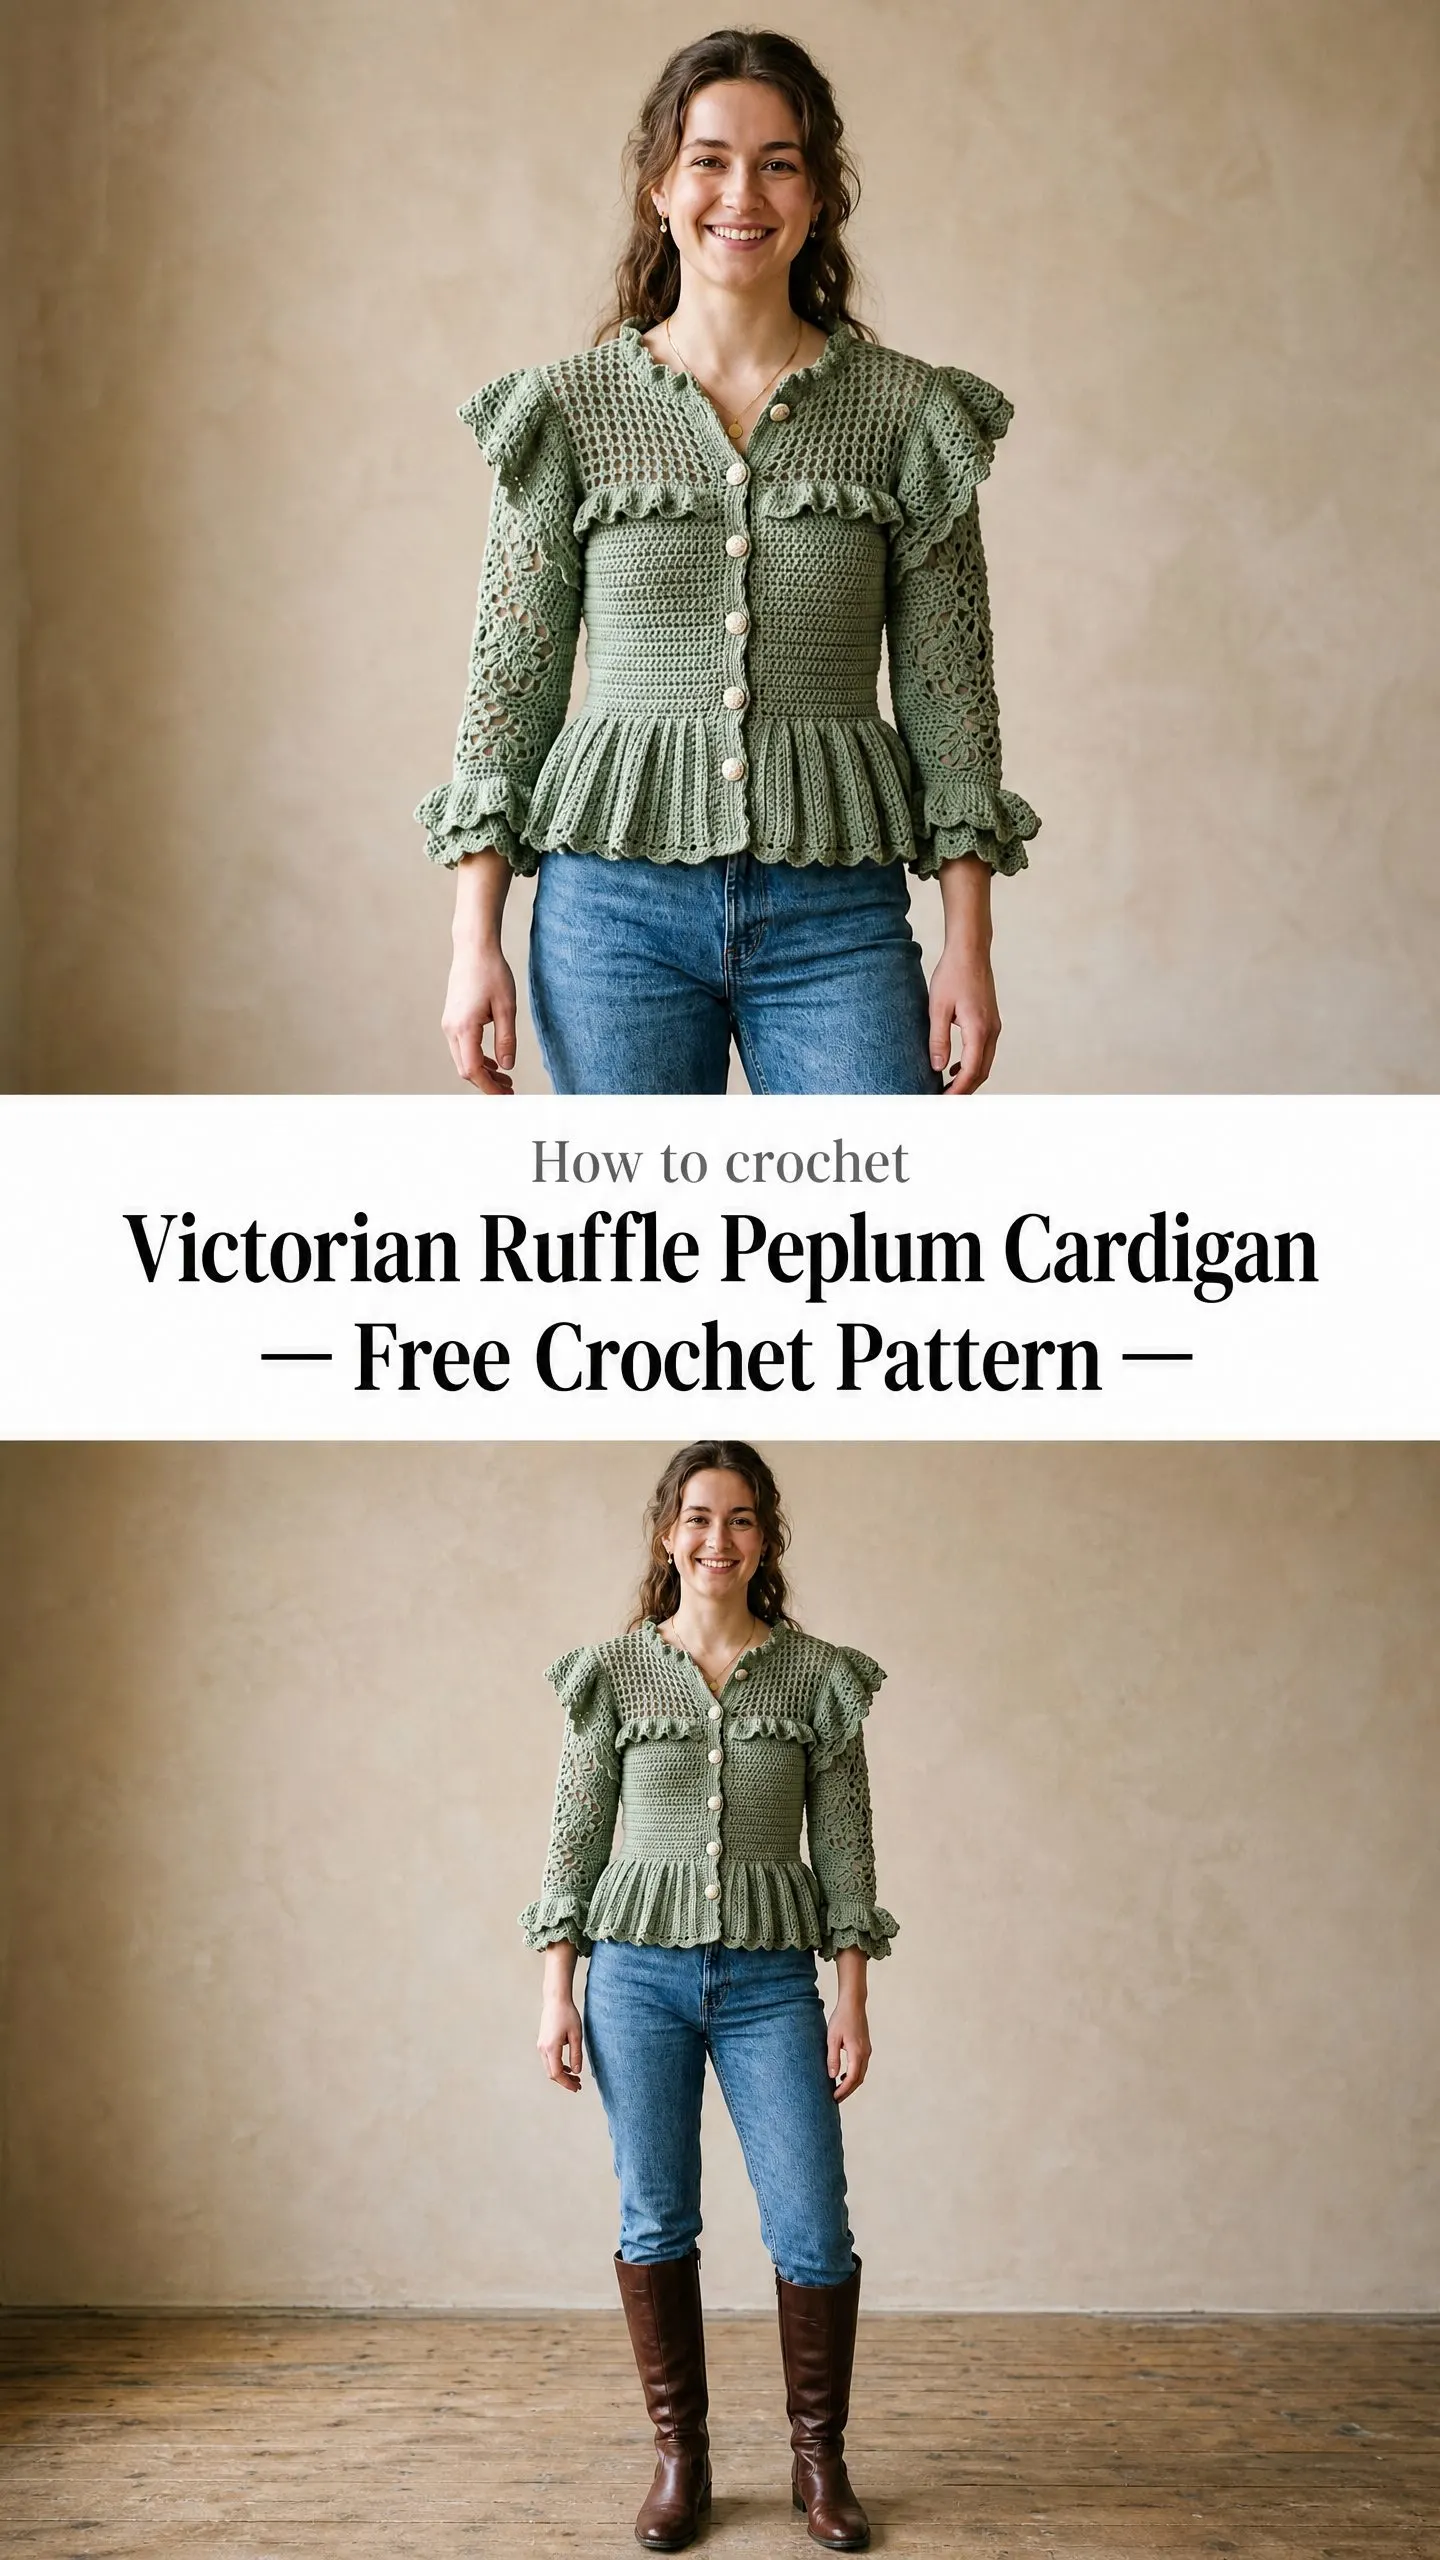
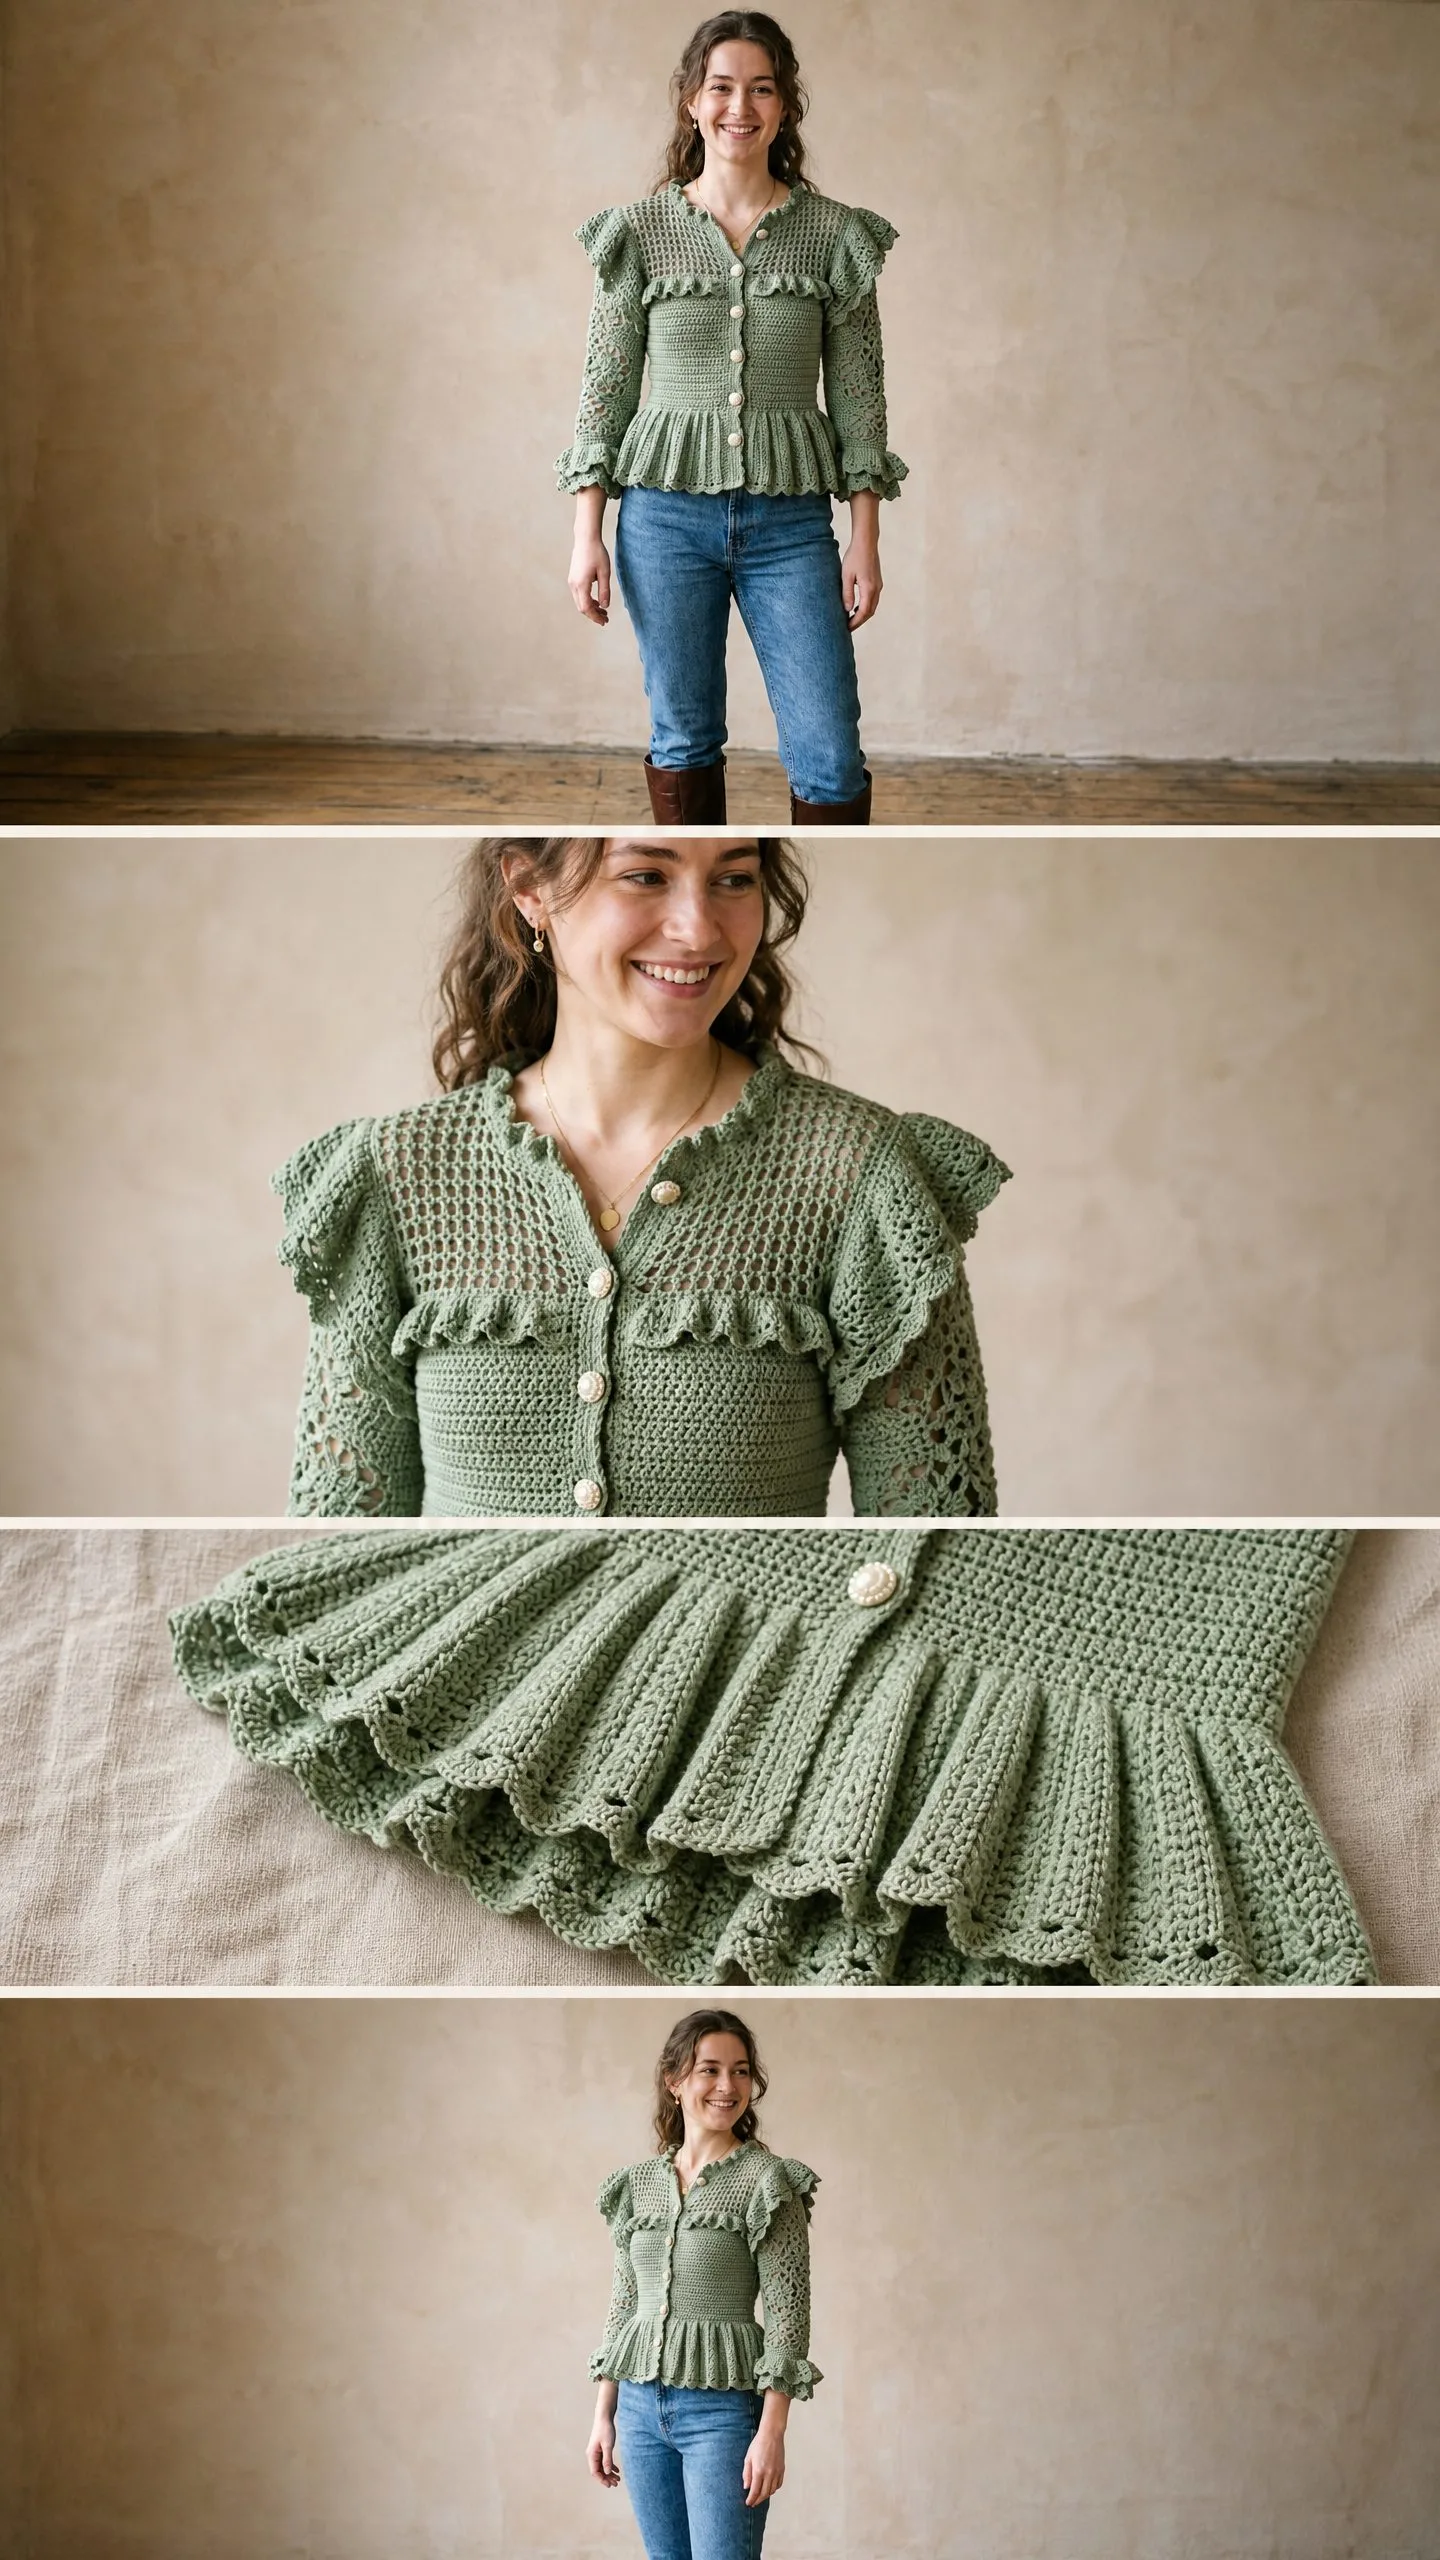
This Victorian ruffle peplum cardigan features a fitted structured bodice worked in a dense single crochet (sc) grid stitch. The sleeves showcase a beautiful floral filet mesh motif that catches the light. A dramatic ruffled peplum flares at the hip. Double ruffle cuffs add romantic detail. And that wide decorative shoulder ruffle yoke ties the whole silhouette together.
Six pearl style buttons run down the center front button band. The neckline is a simple V shape trimmed with a delicate picot scallop edge. The entire garment uses a single sage green cotton blend yarn, which gives it that cohesive vintage feel.
Construction overview: You will work the back bodice first from the bottom up. Then you create the front panels separately. The shoulder and yoke ruffle gets added next. The sleeves are worked in the round from the cuff upward and set into the armholes. All the beautiful ruffle trims come last as surface applied edgings.
Skill Level
This pattern is rated intermediate to advanced. You should feel comfortable with working in rows and rounds at the same time. You will manage filet lace repeat patterns. You will shape armholes and necklines with decreases. You will construct set in sleeves. And you will apply multiple decorative edgings.
If you have completed at least two fitted garments before, you will find this manageable with careful stitch counting. Take your time. Mark your rows. Trust the process.
Time Estimate
Plan for approximately 40 to 60 hours depending on your working speed. The bodice works up quickly in that simple sc stitch. The filet lace sleeves and the layered ruffle applications are the most time intensive portions. This is a slow fashion project. Pour yourself some tea and enjoy the journey.
Finished Measurements
The pattern is written for size Small/Medium with the following finished dimensions:
Size customization tips are provided at the end of the pattern.
Materials You Will Need
Yarn: Approximately 1200 yards / 1097 meters of DK weight (CYCA 3) cotton or cotton blend yarn in sage green.
Hooks:
Notions:
Yarn Suggestions
Option 1: Lion Brand 24/7 Cotton in "Sage" (100% mercerized cotton, 186 yards / 170 m per 3.5 oz / 100 g skein). You will need approximately 7 skeins. This yarn produces crisp defined stitch definition ideal for filet lace panels and holds the ruffle structure beautifully.
Option 2: Paintbox Yarns Simply DK (100% acrylic, 137 yards / 125 m per 1.76 oz / 50 g skein) in "Pistachio Green." You will need approximately 9 skeins. More budget friendly and widely available. Gives a slightly softer drape.
Option 3: We Are Knitters The Cotton (100% Egyptian cotton, 153 yards / 140 m per 3.5 oz / 100 g skein) in "Sage Green." You will need approximately 8 skeins. This gives a slightly heavier drape that suits the Victorian weight of the garment beautifully.
Substitution note: Any DK weight yarn at gauge may be substituted. For best results use a smooth plied cotton or cotton blend with good stitch definition. Avoid fuzzy or textured yarns as the filet lace pattern requires clean open spaces.
Gauge
With E/4 (3.5 mm) hook in single crochet: 20 stitches and 22 rows = 4 inches / 10 cm, blocked.
With F/5 (3.75 mm) hook in filet lace pattern: 16 stitches and 10 rows = 4 inches / 10 cm, blocked.
Gauge is mandatory for this garment. A difference of even one stitch per 4 inches will alter the bust measurement by approximately 2 inches across the full circumference. Work a gauge swatch of at least 5 inches square and block it before proceeding. I know swatching feels tedious, but trust me on this one.
Abbreviations
Special Stitches
Picot Scallop Edging
Insert hook into indicated stitch, draw up a loop, chain 3, slip stitch into first chain of that chain 3 (this forms one picot), then work 2 sc into the same stitch. Skip 2 stitches. Repeat from beginning of this instruction. This creates the scalloped picot border seen at the collar, cuffs, and peplum hem.
Shell Stitch (for peplum)
Work 5 dc into a single indicated stitch or chain space. This is one shell. When worked in alternating rows with anchor single crochets, it creates the fanned pleated peplum texture.
V Stitch (for filet lace panels)
Work [dc, ch 1, dc] all into the same stitch or chain space. This is one V stitch.
Filet Lace Block (closed mesh square)
Work dc into the next stitch, ch 1, dc into the next stitch. This fills a filet square.
Filet Lace Open Mesh Square
Work dc into indicated position, ch 2, skip 2 stitches or chains, dc into next position. This leaves the mesh open.
Flower Motif (used in sleeve lace panel)
Make a magic ring (or ch 4, sl st to join).
Round 1: Ch 3 (counts as dc), work 11 dc into ring, sl st to top of beg ch 3. (12 dc)
Round 2: Ch 1, [sc in next dc, ch 5, skip 1 dc] 6 times, sl st to beg sc. (6 ch 5 loops)
Round 3: Into each ch 5 loop work [sc, hdc, 3 dc, hdc, sc]. Sl st to join. (6 petals)
Fasten off, leaving a tail for joining. These motifs are assembled into the sleeve lace panel by joining adjacent petals with a sl st during the final round of each subsequent motif.
Ruffle Row (applied to finished edges)
With RS facing, join yarn at any edge stitch. Ch 3 (counts as dc). Work 2 dc into same stitch. Work 3 dc into every stitch along the edge. Join if working in round. This triples the stitch count along the edge and creates the ruffle volume.
Double Ruffle
Work one Ruffle Row as described above. Then, working into each stitch of that ruffle row, work one additional Ruffle Row. The second layer is slightly longer and wider than the first, creating the double tiered ruffles seen at the cuffs.
Pattern Notes Before You Begin
1. The back bodice, left front bodice, and right front bodice are each worked flat in rows.
2. The sleeves are worked in the round from the cuff upward, with the filet lace flower motif panel spanning the outer sleeve and a plain sc panel spanning the inner sleeve (underarm).
3. The peplum is worked as an attached border to the lower edge of the assembled bodice, worked in the round after seaming.
4. All ruffle trims including the shoulder ruffle yoke, the cuffs, and the peplum scallop are applied after the main construction is complete.
5. The button band is worked as a simple sc border along both center front edges after assembly.
6. Always turn with a ch 1 for sc rows. Do not count the turning chain as a stitch.
7. Always turn with ch 3 for dc rows. Count this ch 3 as the first dc.
8. Right and left fronts are mirror images. Neckline and armhole shaping instructions are given for the right front. Reverse placement for the left front.
9. Block all major pieces before seaming. The filet lace panels in particular will open up significantly with wet blocking.
10. The shoulder ruffle yoke is a separate strip crocheted and whipstitched to the shoulder seam area after assembly.
11. Stitch counts in parentheses at the end of each row reflect the total working stitches in that row, not counting turning chains.
Instructions
Section 1: Back Bodice
Foundation: Ch 92.
Row 1 (WS): Sc in second ch from hook and in each ch across. Turn. (91 sc)
Row 2 (RS): Ch 1, sc in each sc across. Turn. (91 sc)
Rows 3 through 8: Repeat Row 2. (91 sc each row)
After Row 8 the piece should measure approximately 1.5 inches / 3.8 cm from foundation chain.
Begin Waist Shaping Decreases
Row 9: Ch 1, sc2tog over first 2 sts, sc to last 2 sts, sc2tog. Turn. (89 sc)
Row 10: Ch 1, sc across. Turn. (89 sc)
Row 11: Ch 1, sc2tog, sc to last 2 sts, sc2tog. Turn. (87 sc)
Row 12: Ch 1, sc across. Turn. (87 sc)
Row 13: Ch 1, sc2tog, sc to last 2 sts, sc2tog. Turn. (85 sc)
Row 14: Ch 1, sc across. Turn. (85 sc)
Row 15: Ch 1, sc2tog, sc to last 2 sts, sc2tog. Turn. (83 sc)
Row 16: Ch 1, sc across. Turn. (83 sc)
Row 17: Ch 1, sc2tog, sc to last 2 sts, sc2tog. Turn. (81 sc)
Row 18: Ch 1, sc across. Turn. (81 sc)
After Row 18 the piece should measure approximately 3.5 inches / 9 cm from foundation. This is the waist.
Begin Waist Expansion Increases
Row 19: Ch 1, 2 sc in first st, sc to last st, 2 sc in last st. Turn. (83 sc)
Row 20: Ch 1, sc across. Turn. (83 sc)
Row 21: Ch 1, 2 sc in first st, sc to last st, 2 sc in last st. Turn. (85 sc)
Row 22: Ch 1, sc across. Turn. (85 sc)
Row 23: Ch 1, sc across. Turn. (85 sc)
Row 24: Ch 1, sc across. Turn. (85 sc)
After Row 24 the piece should measure approximately 5 inches / 12.7 cm from foundation chain.
Continue Even With No Shaping
Rows 25 through 40: Ch 1, sc across. Turn. (85 sc each row)
After Row 40 the piece should measure approximately 7.5 inches / 19 cm from foundation. This is the approximate underarm height.
Checkpoint: The back bodice from lower edge to armhole should measure approximately 7.5 inches / 19 cm. Width should be approximately 17 inches / 43 cm.
Begin Armhole Shaping
Row 41 (RS): Sl st across first 5 sts, ch 1, sc in same st as last sl st (this is now your first working st), sc across to last 5 sts, leave last 5 sts unworked. Turn. (75 sc)
Row 42: Ch 1, sc2tog, sc to last 2 sts, sc2tog. Turn. (73 sc)
Row 43: Ch 1, sc2tog, sc to last 2 sts, sc2tog. Turn. (71 sc)
Row 44: Ch 1, sc2tog, sc to last 2 sts, sc2tog. Turn. (69 sc)
Row 45: Ch 1, sc2tog, sc to last 2 sts, sc2tog. Turn. (67 sc)
Row 46: Ch 1, sc across. Turn. (67 sc)
Continue Even on 67 Stitches
Rows 47 through 60: Ch 1, sc across. Turn. (67 sc each row)
After Row 60 the armhole depth should measure approximately 5.5 inches / 14 cm.
Begin Back Neck and Shoulder Shaping
Row 61: Ch 1, sc across first 20 sts. Turn, leaving remaining 47 sts unworked. (20 sc) This is the right shoulder.
Row 62: Ch 1, sc2tog, sc to end. Turn. (19 sc)
Row 63: Ch 1, sc to last 2 sts, sc2tog. Turn. (18 sc)
Row 64: Ch 1, sc across. Turn. (18 sc) Fasten off.
Rejoin yarn at center. Skip center 27 sts for back neck. Rejoin to next st.
Row 61L: Ch 1, sc across remaining 20 sts. Turn. (20 sc)
Row 62L: Ch 1, sc to last 2 sts, sc2tog. Turn. (19 sc)
Row 63L: Ch 1, sc2tog, sc to end. Turn. (18 sc)
Row 64L: Ch 1, sc across. Turn. (18 sc) Fasten off.
Section 2: Right Front Bodice
Foundation: Ch 47.
Row 1 (WS): Sc in second ch from hook and in each ch across. Turn. (46 sc)
Row 2 (RS): Ch 1, sc across. Turn. (46 sc)
Rows 3 through 8: Ch 1, sc across. Turn. (46 sc each row)
Waist Decreases
Row 9: Ch 1, sc2tog, sc to last 2 sts, sc2tog. Turn. (44 sc)
Row 10: Ch 1, sc across. Turn. (44 sc)
Row 11: Ch 1, sc2tog, sc to last 2 sts, sc2tog. Turn. (42 sc)
Row 12: Ch 1, sc across. Turn. (42 sc)
Row 13: Ch 1, sc2tog, sc to last 2 sts, sc2tog. Turn. (40 sc)
Row 14: Ch 1, sc across. Turn. (40 sc)
Row 15: Ch 1, sc2tog, sc to last 2 sts, sc2tog. Turn. (38 sc)
Row 16: Ch 1, sc across. Turn. (38 sc)
Row 17: Ch 1, sc2tog, sc to last 2 sts, sc2tog. Turn. (36 sc)
Row 18: Ch 1, sc across. Turn. (36 sc)
Waist Increases
Row 19: Ch 1, 2 sc in first st, sc to last st, 2 sc in last st. Turn. (38 sc)
Row 20: Ch 1, sc across. Turn. (38 sc)
Row 21: Ch 1, 2 sc in first st, sc to last st, 2 sc in last st. Turn. (40 sc)
Rows 22 through 40: Ch 1, sc across. Turn. (40 sc each row)
Checkpoint: Right front panel should be approximately 7.5 inches / 19 cm tall and approximately 8 inches / 20 cm wide at the widest point.
Begin Armhole Shaping (right front)
The armhole is at the right edge when RS faces you.
Row 41 (RS): Ch 1, sc across to last 5 sts, leave last 5 sts unworked. Turn. (35 sc)
Row 42: Ch 1, sc2tog, sc across. Turn. (34 sc)
Row 43: Ch 1, sc across to last 2 sts, sc2tog. Turn. (33 sc)
Row 44: Ch 1, sc2tog, sc across. Turn. (32 sc)
Row 45: Ch 1, sc across to last 2 sts, sc2tog. Turn. (31 sc)
Row 46: Ch 1, sc across. Turn. (31 sc)
Rows 47 through 54: Ch 1, sc across. Turn. (31 sc each row)
Begin Neckline Shaping (right front)
The neckline is at the left edge when RS faces you.
Row 55: Ch 1, sc2tog, sc across. Turn. (30 sc)
Row 56: Ch 1, sc across. Turn. (30 sc)
Row 57: Ch 1, sc2tog, sc across. Turn. (29 sc)
Row 58: Ch 1, sc across. Turn. (29 sc)
Row 59: Ch 1, sc2tog, sc across. Turn. (28 sc)
Row 60: Ch 1, sc across. Turn. (28 sc)
Row 61: Ch 1, sc2tog, sc across. Turn. (27 sc)
Row 62: Ch 1, sc across. Turn. (27 sc)
Row 63: Ch 1, sc2tog, sc across. Turn. (26 sc)
Row 64: Ch 1, sc across to last 2 sts keeping shoulder edge straight.
Shoulder Shaping
Work even on 18 shoulder sts after working off the inner 8 neck edge sts as follows:
Row 64 continued: Ch 1, sc across first 18 sts. Turn. (18 sc) Leave remaining 8 sts unworked (these become part of the V neck opening).
Row 65: Ch 1, sc across. Turn. (18 sc) Fasten off.
Section 3: Left Front Bodice
Work as for Right Front Bodice, reversing all shaping. The armhole is at the left edge and the neckline is at the right edge when RS faces you. All row counts are identical. Simply reverse the direction of decreases.
After all three bodice panels are complete, wet block them flat to measurements before proceeding.
Section 4: Bodice Assembly
Seam both shoulder seams using a whipstitch through the back loops of the 18 st shoulder sections. The back neck gap of 27 sts remains open.
Seam both side seams using a mattress stitch (or sl st through both layers on WS), matching rows from lower edge to underarm.
Checkpoint: The assembled bodice without sleeves should measure approximately 17 inches / 43 cm across the back at the bust, approximately 15 inches / 38 cm in total body length from lower edge to shoulder, and the armhole opening should measure approximately 7.5 inches / 19 cm in circumference on each side.
Section 5: Button Band
With RS facing and E/4 hook, join yarn at lower right front corner.
Row 1: Ch 1, work sc evenly up the right front edge, placing approximately 2 sc per 3 rows. Do not count. At neckline corner, work 3 sc into corner stitch. Continue across back neck (working 1 sc per stitch across the 27 back neck sts). Work 3 sc into left neckline corner. Work sc evenly down left front edge. Turn.
Row 2: Ch 1, sc across entire band. Turn.
Row 3 (buttonhole row, right side band only): Work sc up left front (no buttonholes). When reaching right front edge during Row 3, place 6 evenly spaced buttonholes as follows: [sc to buttonhole position, ch 2, skip 2 sc] 6 times, sc to end. Place first buttonhole approximately 0.5 inches / 1.3 cm from bottom edge, last buttonhole approximately 0.5 inches / 1.3 cm below top of band, and space remaining four evenly between.
Row 4: Ch 1, sc across, working 2 sc into each ch 2 buttonhole space. Turn.
Row 5: Ch 1, sc across. Fasten off.
Sew buttons to left band opposite buttonholes.
Section 6: Peplum
The peplum is worked in joined rounds attached to the lower edge of the assembled bodice, working downward.
With RS facing and E/4 hook, join yarn at right front lower corner (at button band seam).
Round 1: Ch 1, sc evenly around entire lower edge of bodice, working 1 sc into each foundation chain stitch. Work into right front lower edge, across back, and up left front lower edge. Total stitches should be approximately 181 sc (91 back plus 45 right front plus 45 left front). Join with sl st to beg sc. (181 sc)
Round 2 (increase round for peplum fullness): Ch 3 (counts as dc), work [2 dc in first st, dc in next 2 sts] 60 times, dc in last st. Join with sl st to top of beg ch 3. (241 dc)
Round 3: Ch 1, sc in each dc around. Work sc2tog once at any inconspicuous seam point during this round to reduce from 241 to 240. Join with sl st to beg sc. (240 sc)
Round 4 (shell peplum round): [sc in first sc, skip 2 sc, 5 dc in next sc, skip 2 sc] 40 times. Join with sl st to beg sc. (40 shells and 40 sc = 240 working sts)
Round 5: Ch 3 (counts as dc), 2 dc in same st, [sc in center dc of next shell, skip 2 dc, 5 dc in next sc, skip 2 dc] repeat from bracket around, end sc in center dc of last shell, 2 dc in same st as beg, sl st to top of beg ch 3 to complete final 5 dc shell. (40 shells)
Round 6: Ch 1, sc in same st, [skip 2 dc, 5 dc in next sc, skip 2 dc, sc in center dc of shell] repeat around. Join. (40 shells)
Rounds 7 through 10: Repeat Rounds 5 and 6 alternately twice more. This gives 4 additional rows of shell pattern for peplum depth.
After Round 10, the peplum should measure approximately 4.5 inches / 11.4 cm deep before the edging.
Apply Picot Scallop Edging to lower edge of peplum: With RS facing, join yarn at any point in Round 10. Work Picot Scallop Edging (as described in Special Stitches) around entire lower edge. Fasten off.
Section 7: Sleeve (Make 2)
The sleeve is worked in the round from the cuff upward. The outer half of the sleeve features the filet lace flower motif panel. The inner half features plain sc. The two halves are joined seamlessly each round.
Note on sleeve structure: The flower motif panel is made first as individual hexagonally arranged joined motifs, then sc panels are worked in rows on each side of the motif strip, and the resulting sleeve panel is seamed and worked in the round for the upper sleeve and sleeve cap.
Flower Motif Strip for Sleeve
Make a strip of 9 flower motifs joined side by side. Each motif is approximately 2 inches / 5 cm in diameter when blocked.
Motif 1: Using F/5 hook. Ch 4, sl st to first ch to form ring.
Round 1: Ch 3 (counts as dc), work 11 dc into ring, sl st to top of beg ch 3. (12 dc)
Round 2: Ch 1, [sc in next dc, ch 5, skip 1 dc] 6 times, sl st to beg sc. (6 ch 5 loops, 6 sc)
Round 3: Into each ch 5 loop work [sc, hdc, 3 dc, hdc, sc]. Sl st to join. Fasten off. (6 petals, 42 sts around outer edge)
Motifs 2 through 9: Work as Motif 1 through Round 3, but on Round 3, when working the petal that will join to a previously made motif, replace the center dc of that petal with a sl st into the center dc of the corresponding petal on the adjacent motif. Join 2 petals per join point (left petal of new motif joins to right petal of previous motif at their center dc points).
Arrange the 9 motifs in a single vertical strip (for sleeve length). The joined strip should measure approximately 17 inches / 43 cm long and approximately 2.5 inches / 6.4 cm wide.
On each long edge of the motif strip, pick up stitches and work plain sc panels to build sleeve width.
Inner Sleeve Panel
With E/4 hook, RS facing, join yarn at top edge of motif strip on left long edge.
Row 1: Ch 1, work 46 sc evenly along the left long edge of motif strip (approximately 1 sc per dc and 1 sc per chain space point along the petal edges). Turn. (46 sc)
Rows 2 through 14: Ch 1, sc across. Turn. (46 sc each row) This builds the inner sleeve panel width. After Row 14 the inner panel should be approximately 2.5 inches / 6.4 cm wide.
Work the corresponding outer sleeve panel on the right long edge of the motif strip in the same manner: 46 sc across, 14 rows even.
Seam the outer panel edge to the inner panel edge along their outer long edges (the edges farthest from the motif strip) using mattress stitch to form the sleeve tube. The sleeve tube is now 17 inches / 43 cm long and approximately 8 inches / 20 cm circumference at the cuff.
At this point the sleeve circumference is approximately 8 inches / 20 cm. You need to increase to approximately 13 inches / 33 cm at the upper sleeve for the armhole fit.
Upper Sleeve Shaping (worked in the round)
With E/4 hook, join yarn at top edge of sleeve tube.
Round 1: Ch 1, sc around the top edge of the sleeve tube. Work approximately 84 sc evenly around the top edge, picking up stitches proportionally from the inner panel, the motif strip top, and the outer panel. Join. (84 sc)
Round 2: Ch 1, [sc in next 6 sts, 2 sc in next st] 12 times. Join. (96 sc)
Round 3: Ch 1, sc around. Join. (96 sc)
Round 4: Ch 1, [sc in next 7 sts, 2 sc in next st] 12 times. Join. (108 sc)
Round 5: Ch 1, sc around. Join. (108 sc)
Round 6: Ch 1, [sc in next 8 sts, 2 sc in next st] 12 times. Join. (120 sc)
Rounds 7 through 12: Ch 1, sc around. Join. (120 sc each round)
After Round 12 the sleeve should measure approximately 13 inches / 33 cm around and approximately 8 inches / 20 cm from cuff edge.
Checkpoint: Upper sleeve circumference at this point should be approximately 13 inches / 33 cm. This matches the intended armhole circumference.
Begin Sleeve Cap Shaping
The sleeve cap is worked flat (back and forth in rows) over the upper 60 sts (center front to back of sleeve).
Mark the center 60 sts of Round 12. Rejoin yarn to the first of these 60 sts with RS facing.
Row 1 (RS): Ch 1, sc across 60 sts. Turn. (60 sc)
Row 2: Ch 1, sc2tog, sc to last 2 sts, sc2tog. Turn. (58 sc)
Row 3: Ch 1, sc across. Turn. (58 sc)
Row 4: Ch 1, sc2tog, sc to last 2 sts, sc2tog. Turn. (56 sc)
Row 5: Ch 1, sc across. Turn. (56 sc)
Row 6: Ch 1, sc2tog, sc to last 2 sts, sc2tog. Turn. (54 sc)
Row 7: Ch 1, sc across. Turn. (54 sc)
Row 8: Ch 1, sc2tog, sc to last 2 sts, sc2tog. Turn. (52 sc)
Row 9: Ch 1, sc2tog, sc to last 2 sts, sc2tog. Turn. (50 sc)
Row 10: Ch 1, sc2tog, sc to last 2
