
Go dig through your yarn stash right now. I know you have some cotton yarn tucked away that you have been saving for the perfect project. This daisy granny square tote bag is exactly what that yarn has been waiting for.
Get the Ad-Free PDF Pattern
You can find the free pattern below, or you can purchase the ad-free printable PDF from my shop.
Get the Printable PDF →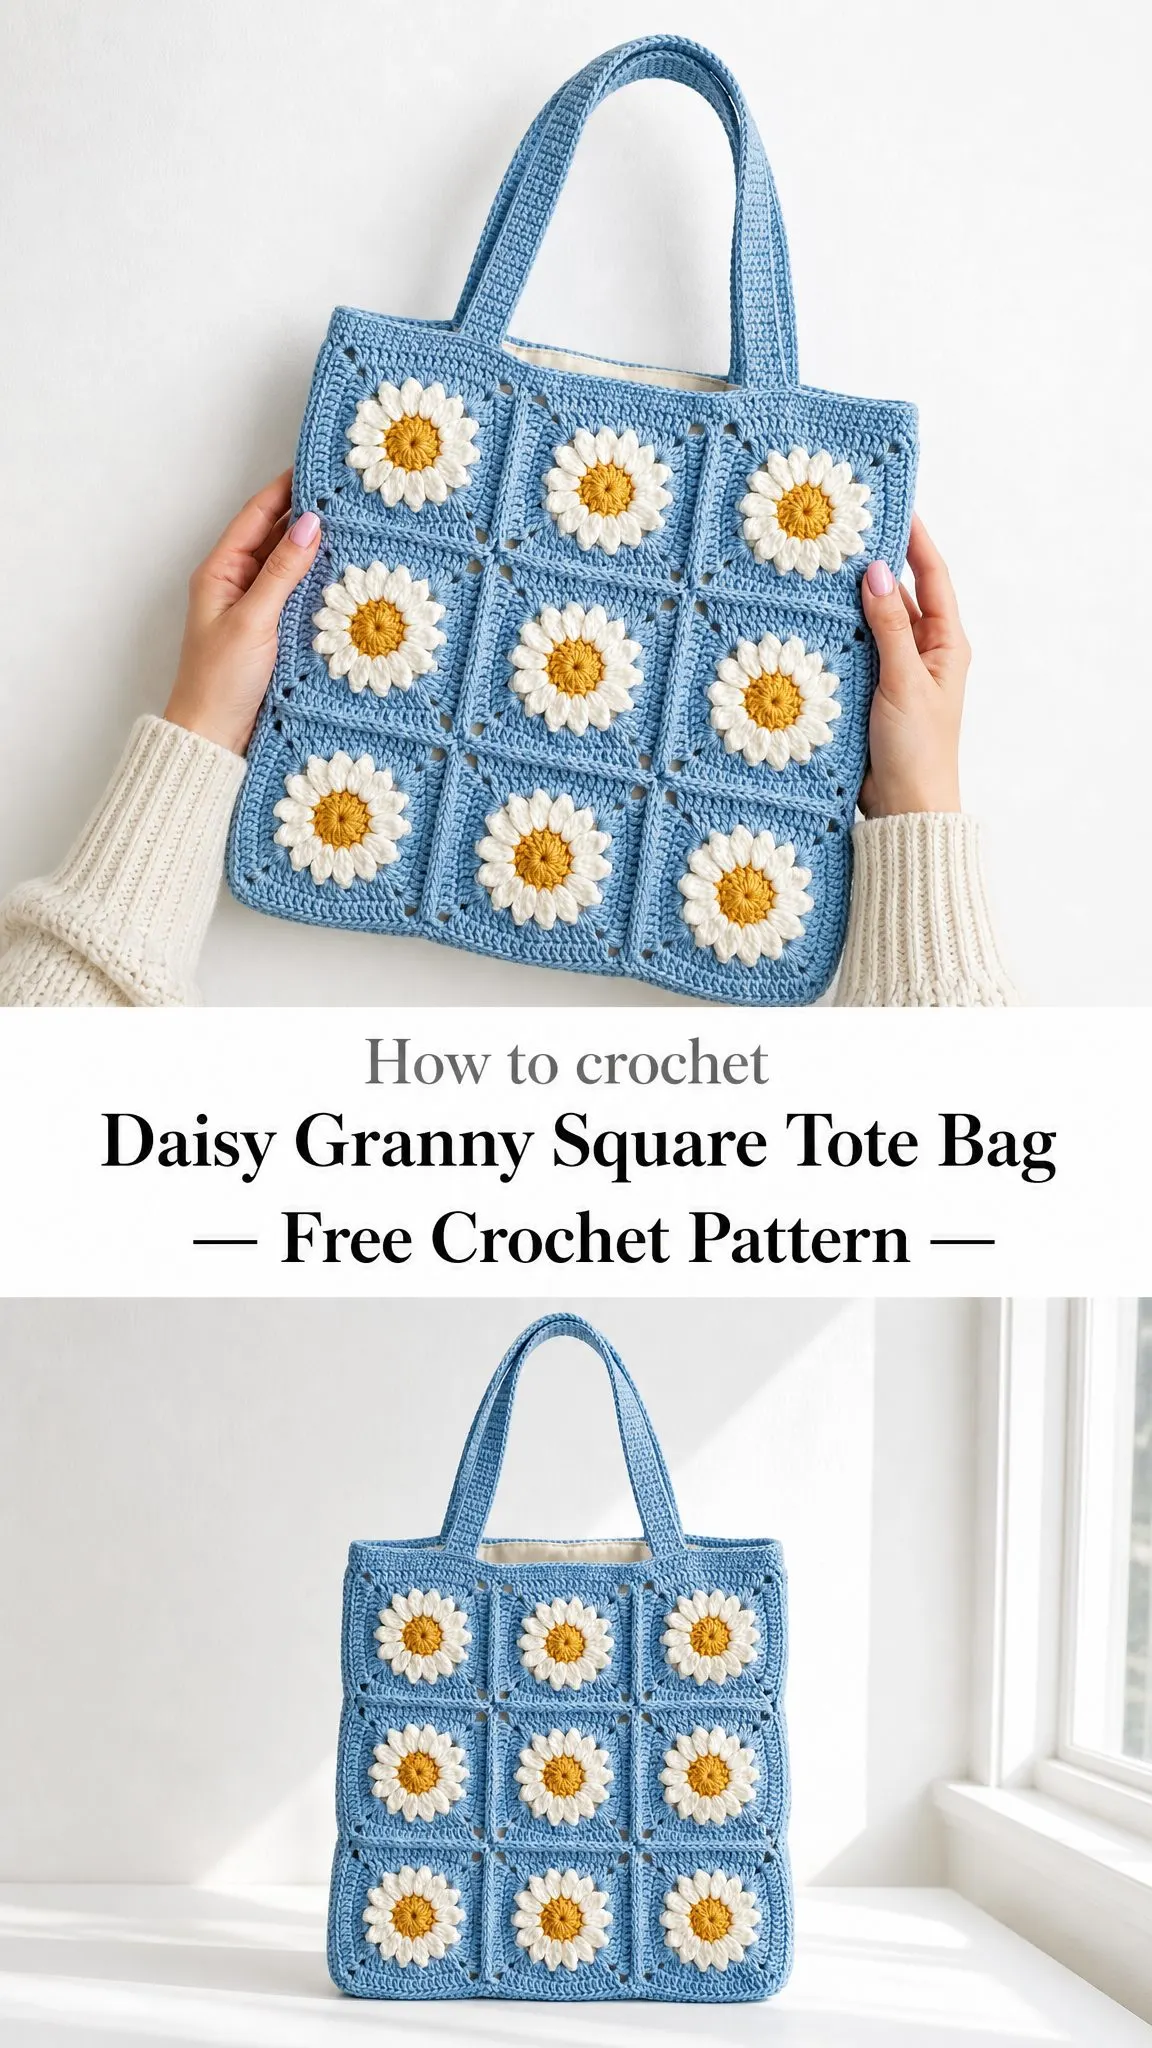
The construction on this bag is really satisfying to work through. You will make 18 individual daisy motifs, join them into panels, then add a structured gusset that gives the tote real shape and depth. The flower centers pop up in a fun three dimensional way thanks to some clever front loop and back loop work.
I want to be honest with you about the skill level here. This pattern sits in that adventurous beginner to intermediate range. If you can work in the round, change colors cleanly, and sew pieces together, you can absolutely make this bag. The individual squares come together quickly once you get the rhythm down.
Why You Will Love This Pattern
This tote bag hits all the right notes for a practical handmade accessory. The finished size measures approximately 13.25 inches wide by 13.25 inches tall with a 3 inch depth. That is plenty of room for books, a small project bag, or everyday essentials.
The cheerful daisy motifs give this bag serious visual impact. Each square features a golden yellow center, white petals, and a sky blue granny square border. The color combination feels fresh and summery without being overwhelming.
Cotton yarn is the star here for good reason. It creates firm fabric that holds its shape beautifully. Your tote will stand up on its own rather than flopping over like a sad sack.
Materials You Will Need
Gather these supplies before you start:
Yarn: Worsted weight cotton or cotton blend in three colors
Hook: US G-6 / 4.0 mm, or the size needed to match gauge
Notions: Tapestry needle, stitch markers, scissors, blocking pins, and an optional 13 x 13 inch fabric lining
The pattern suggests Lion Brand 24/7 Cotton, Paintbox Yarns Cotton Aran, or Lily Sugar n Cream Solids. Any smooth worsted cotton that meets gauge will work well. I recommend avoiding very soft acrylics if you want that crisp structured tote shape.
Gauge Information
Getting gauge right matters for this project since you need all 18 squares to match up perfectly during assembly.
Single crochet gauge: 16 sc x 16 rows = 4 inches / 10 cm
Blocked square size: Each motif should measure 4.25 inches / 10.8 cm across after blocking
Take time to make a gauge swatch before diving in. Adjust your hook size up or down until your numbers match. A square that is too small or too large will throw off your entire bag.
Abbreviations and Stitch Guide
This pattern uses US crochet terms. If you typically work from UK patterns, remember that US single crochet (sc) equals UK double crochet (dc), and US double crochet (dc) equals UK treble (tr).
BLO: Back loop only, working into just the back loop of the stitch instead of both loops
Ch: Chain, the basic foundation stitch
Dc: Double crochet, yarn over, insert hook, pull up loop, yarn over and pull through two loops twice
FLO: Front loop only, working into just the front loop of the stitch
MR: Magic ring, an adjustable starting ring that closes tight with no hole
Rep: Repeat
Rnd: Round
RS: Right side
Sc: Single crochet, insert hook, pull up loop, yarn over and pull through both loops
Sl st: Slip stitch, insert hook, pull up loop and pull directly through loop on hook
Sp: Space
St/sts: Stitch or stitches
WS: Wrong side
Special Stitches
Magic ring: Wrap yarn into a ring, insert hook into the ring, pull up a loop, chain as instructed, work stitches into the ring, then pull the tail to close.
2-dc cluster petal: Yarn over, insert hook in indicated stitch, pull up a loop, yarn over and pull through 2 loops. Repeat once in the same stitch, then yarn over and pull through all 3 loops on hook. This creates the dimensional daisy petals.
Invisible join: Fasten off, thread tail on needle, insert under both loops of the first stitch of the round, then back into the top of the last stitch to mimic a stitch.
Whipstitch seam: Hold pieces with wrong sides together and sew through the outer loops only for a raised, tidy join.
Pattern Notes Before You Begin
The chain 2 at the start of double crochet rounds does not count as a stitch unless specifically stated. The chain 1 at the start of single crochet rounds does not count as a stitch either.
Join rounds with a slip stitch unless the step tells you to fasten off.
Block all motifs before assembly so the grid aligns cleanly. This step makes a huge difference in how professional your finished bag looks.
Daisy Square Pattern
Make 18 total squares. Use golden yellow for Round 1, white for Round 2, and sky blue for Rounds 3 through 5.
Round 1 (Golden Yellow)
With yellow, make a magic ring. Chain 2, work 12 dc in ring. Join to first dc, fasten off. (12 dc)
Round 2 (White)
Join white in FLO of any dc. In FLO of each dc around work: sl st, ch 3, 2-dc cluster, ch 3, sl st. Join, fasten off. (12 petals)
This round creates the raised daisy petals. Working in the front loops only leaves the back loops available for the next round.
Round 3 (Sky Blue)
Join sky blue in any unused BLO from Rnd 1. Ch 2, 3 dc in same BLO, ch 1. In each remaining BLO work 3 dc, ch 1. Join. (12 clusters, 36 dc, 12 ch-1 sps)
Round 4 (Sky Blue)
Sl st to next ch-1 sp. Ch 2, (3 dc, ch 2, 3 dc) in same sp for first corner, ch 1, 3 dc in next ch-1 sp, ch 1, 3 dc in next ch-1 sp, ch 1. Repeat from corner in next sp, ch 1, 3 dc in next sp, ch 1, 3 dc in next sp, ch 1 three more times, replacing final ch 1 with join. (48 dc, 12 ch-1 sps, 4 ch-2 corners)
Round 5 (Sky Blue)
Ch 1, sc in each dc and each ch-1 sp around, working (sc, ch 2, sc) in each corner ch-2 sp. Join with invisible join or sl st. Fasten off. (68 sc total: 17 sc per side plus ch-2 corners)
Blocking Your Squares
Pin each motif into a square shape, mist lightly with water, and let dry completely. Keep corners sharp and edges straight. This blocking step makes the tote look polished after seaming.
Checkpoint: Each square should measure 4.25 inches / 10.8 cm across after blocking, with 17 sc along each side plus ch-2 corners.
Assembly Instructions
Panel Layout
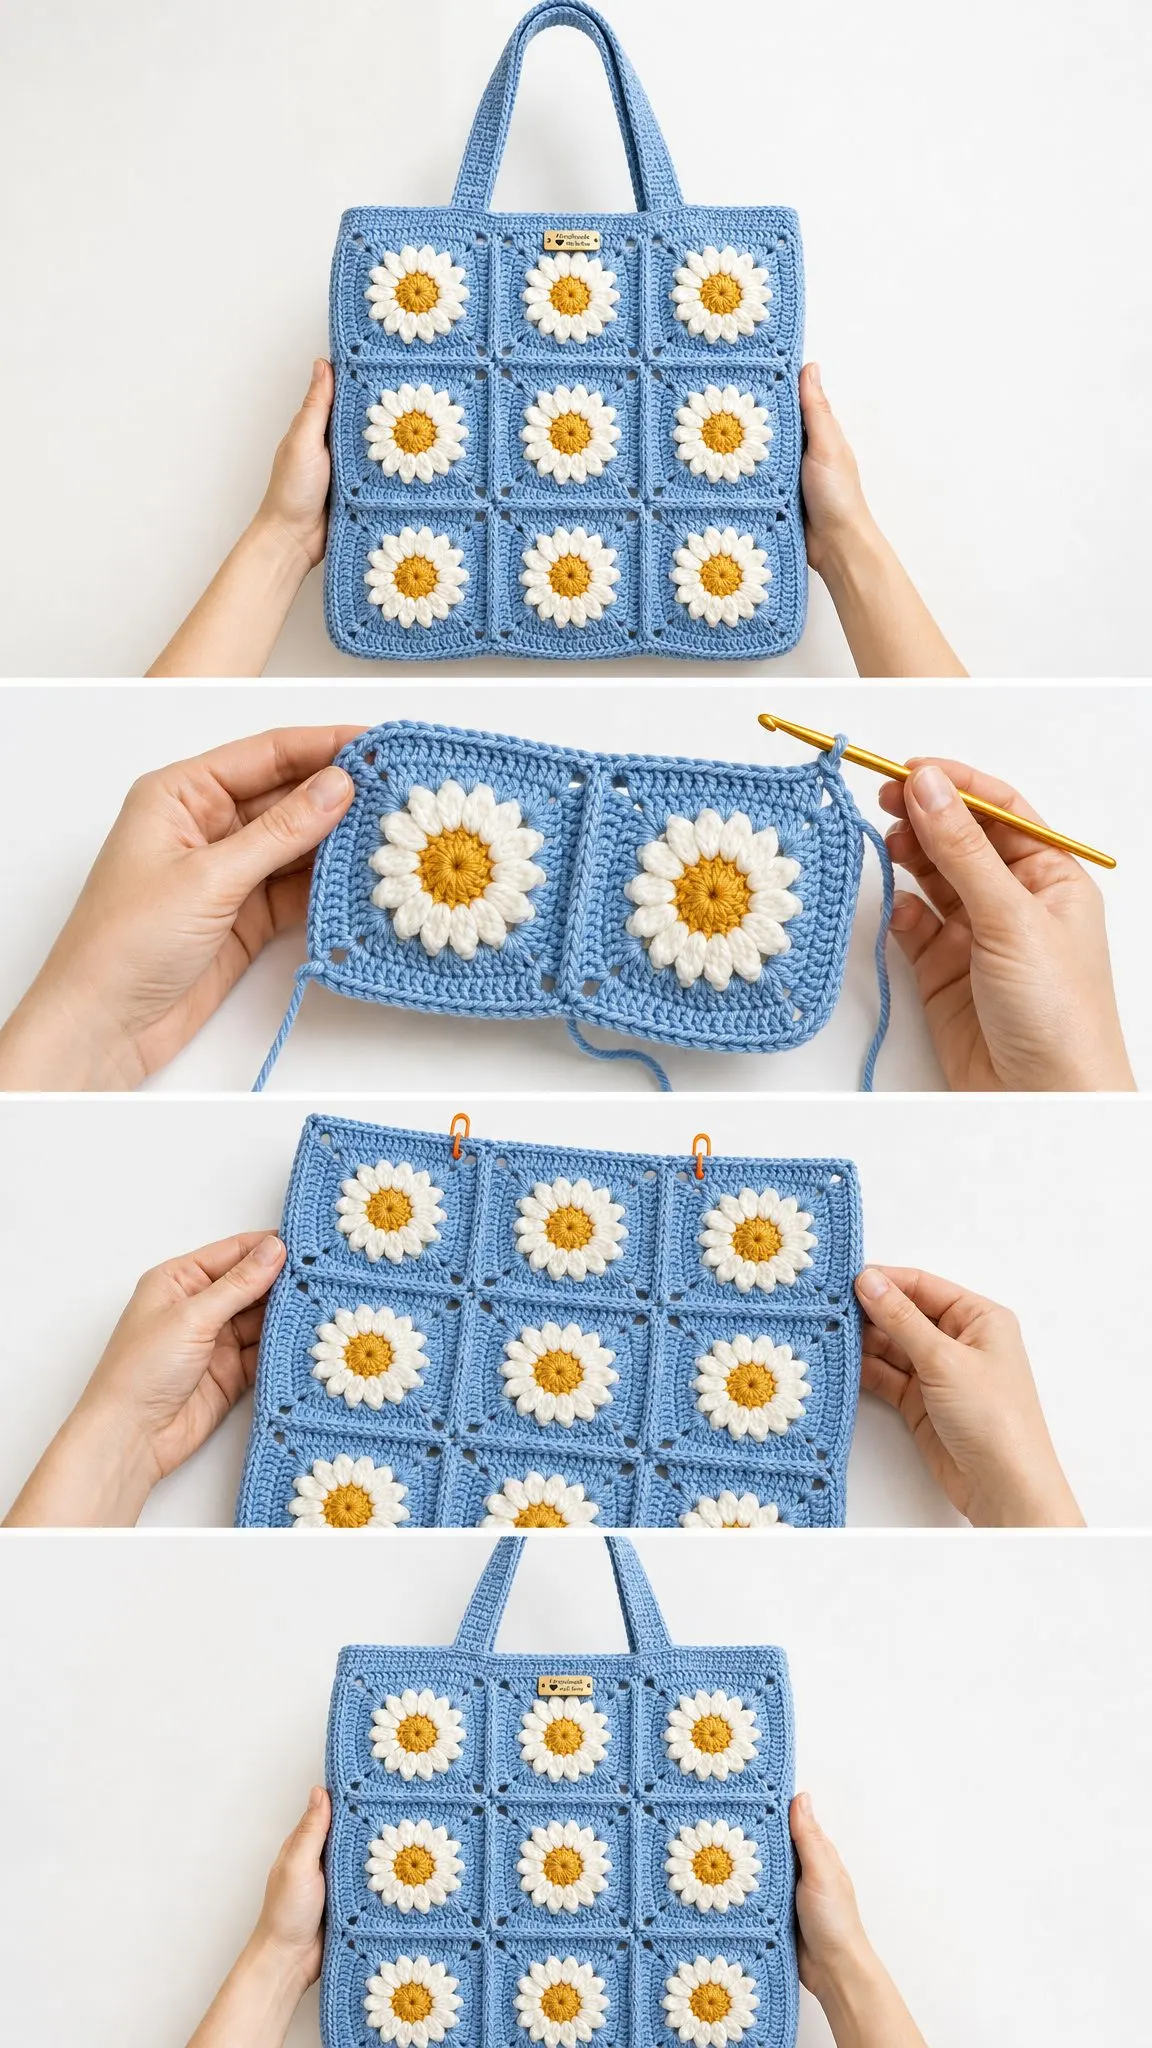
Arrange 9 squares in a 3 x 3 grid for the front panel. Repeat for the back panel. Rotate motifs so all petals face forward and the blue corner openings line up consistently.
Joining Each Panel
With sky blue and a tapestry needle, whipstitch through outer loops only. First join 3 squares into each horizontal row, then join the rows together. Each panel measures about 12.75 inches / 32.5 cm before top edging.
Panel checkpoint: Count 51 sc across the top edge of each panel. That is 17 sc per square times 3 squares. The two corner ch-2 spaces remain available for tidy edge joins.
Gusset (Make 1)
The gusset gives your tote its depth and structure.
With sky blue, ch 13.
Row 1: Sc in 2nd ch from hook and each ch across. (12 sc)
Rows 2 through 159: Ch 1, turn, sc in each st across. (12 sc)
Your strip measures approximately 3 inches / 7.5 cm wide by 39.75 inches / 101 cm long.
Attaching the Gusset
Starting at the top left corner of the front panel, pin the gusset down one side, across the bottom, and up the other side. Whipstitch evenly, matching 53 rows to each side edge and 53 rows to the bottom edge. Repeat to attach the back panel to the other edge of the gusset.
Shape checkpoint: The bag should stand as a soft rectangle with a 3 inch / 7.5 cm depth. If the gusset pulls, ease in one extra row at a lower corner. If it ripples, skip one gusset row near a lower corner.
Top Edge and Handles
Top Edging
Join sky blue at one side seam.
Round 1: Ch 1, sc evenly around the top opening as follows: 51 sc across front, 12 sc across side gusset, 51 sc across back, 12 sc across side gusset. Join. (126 sc)
Rounds 2 and 3: Ch 1, sc in each st around. Join. (126 sc)
Fasten off after Round 3.
Opening checkpoint: Top circumference is approximately 31.5 inches / 80 cm. The opening should lie flat without flaring.
Handles (Make 2)
With sky blue, ch 91.
Row 1: Sc in 2nd ch from hook and each ch across. (90 sc)
Rows 2 through 6: Ch 1, turn, sc BLO in each st across. (90 sc)
Optional edge: Sc evenly around the long rectangle, placing 2 sc in each corner. Fasten off, leaving a long sewing tail.
Attaching the Handles
On the front top edge, place one handle end over stitches 11 through 20 and the other end over stitches 32 through 41. Sew a secure rectangle with an X through each handle end for durability.
Repeat on the back panel with the second handle.
Handle drop is approximately 9.5 inches / 24 cm.
Optional Lining
For a more structured tote, sew a simple fabric lining slightly smaller than the bag dimensions. Slip it inside and hand stitch it just below the top edging.
Size Customization Tips
For a smaller tote: Use 2 x 2 squares per panel and shorten the gusset to match two sides plus the bottom.
For a larger tote: Use 4 x 3 squares per panel and add gusset rows until the strip matches the new side, bottom, side length.
Keep the gusset width at 12 sc for the same 3 inch / 7.5 cm depth. Add 4 sc for each extra inch of depth you want.
Finishing Your Tote Bag
Weave in all ends securely, especially at color changes and handles. These areas get stress during use, so take extra care here.
Steam gently or wet block the finished bag, shaping the corners square. Do not over steam acrylic blends if you substituted yarn.
Care Instructions
Hand wash in cool water, reshape, and dry flat. If you added a lining, follow the lining fabric care instructions as well. Store flat or lightly stuffed to preserve the tote shape between uses.
Troubleshooting Common Issues
Squares cup or ruffle: Check your hook size and blocking. Round 4 corners should be worked in every third Round 3 space.
Panel edges uneven: Block all motifs to the same 4.25 inch / 10.8 cm size before seaming.
Top edge flares: Keep the top edging at exactly 126 sc. Do not add extra stitches at the side seams.
Handles stretch: Use cotton yarn, sew large X-box anchors, or add fabric tape inside the straps for reinforcement.
Time Estimate
Plan for 8 to 12 hours total to complete this crochet tote bag pattern. The individual daisy squares work up fairly quickly once you establish a rhythm. Assembly and finishing take a bit more patience, but the results are absolutely worth the effort.
Make It Your Own
This daisy granny square crochet pattern adapts beautifully to different color combinations. Try warm sunset colors with orange and pink petals. Go classic with white daisies on a navy background. Or make each square a different background color for a rainbow effect.
The basic construction stays the same no matter what colors you choose. Just make sure your contrast is strong enough for those cheerful petals to pop.
I really hope you enjoy making this daisy granny square tote bag as much as I enjoyed putting this pattern together for you. It is one of those projects that looks impressive but breaks down into very manageable steps.
If you love this pattern, save it to your Pinterest boards so you can find it easily when you are ready to start. And please leave a comment below if you make one. I would absolutely love to see your finished tote and hear which colors you chose!
Want a Quick & Easy Printable Version?
Get a clean, beautifully formatted PDF of this pattern — easy to follow step by step, ready to print or save on any device. No scrolling, no distractions, just the pattern.
Get the Printable PDF →