
I’ve been searching for the perfect spring baby dress pattern for months now, and this one has become my absolute favorite. The combination of delicate daisy motifs, dimensional popcorn flowers, and that gorgeous lace hem hits every mark I was hoping for. This is the pattern I keep coming back to when I want to make something truly special for a baby shower gift or new arrival.
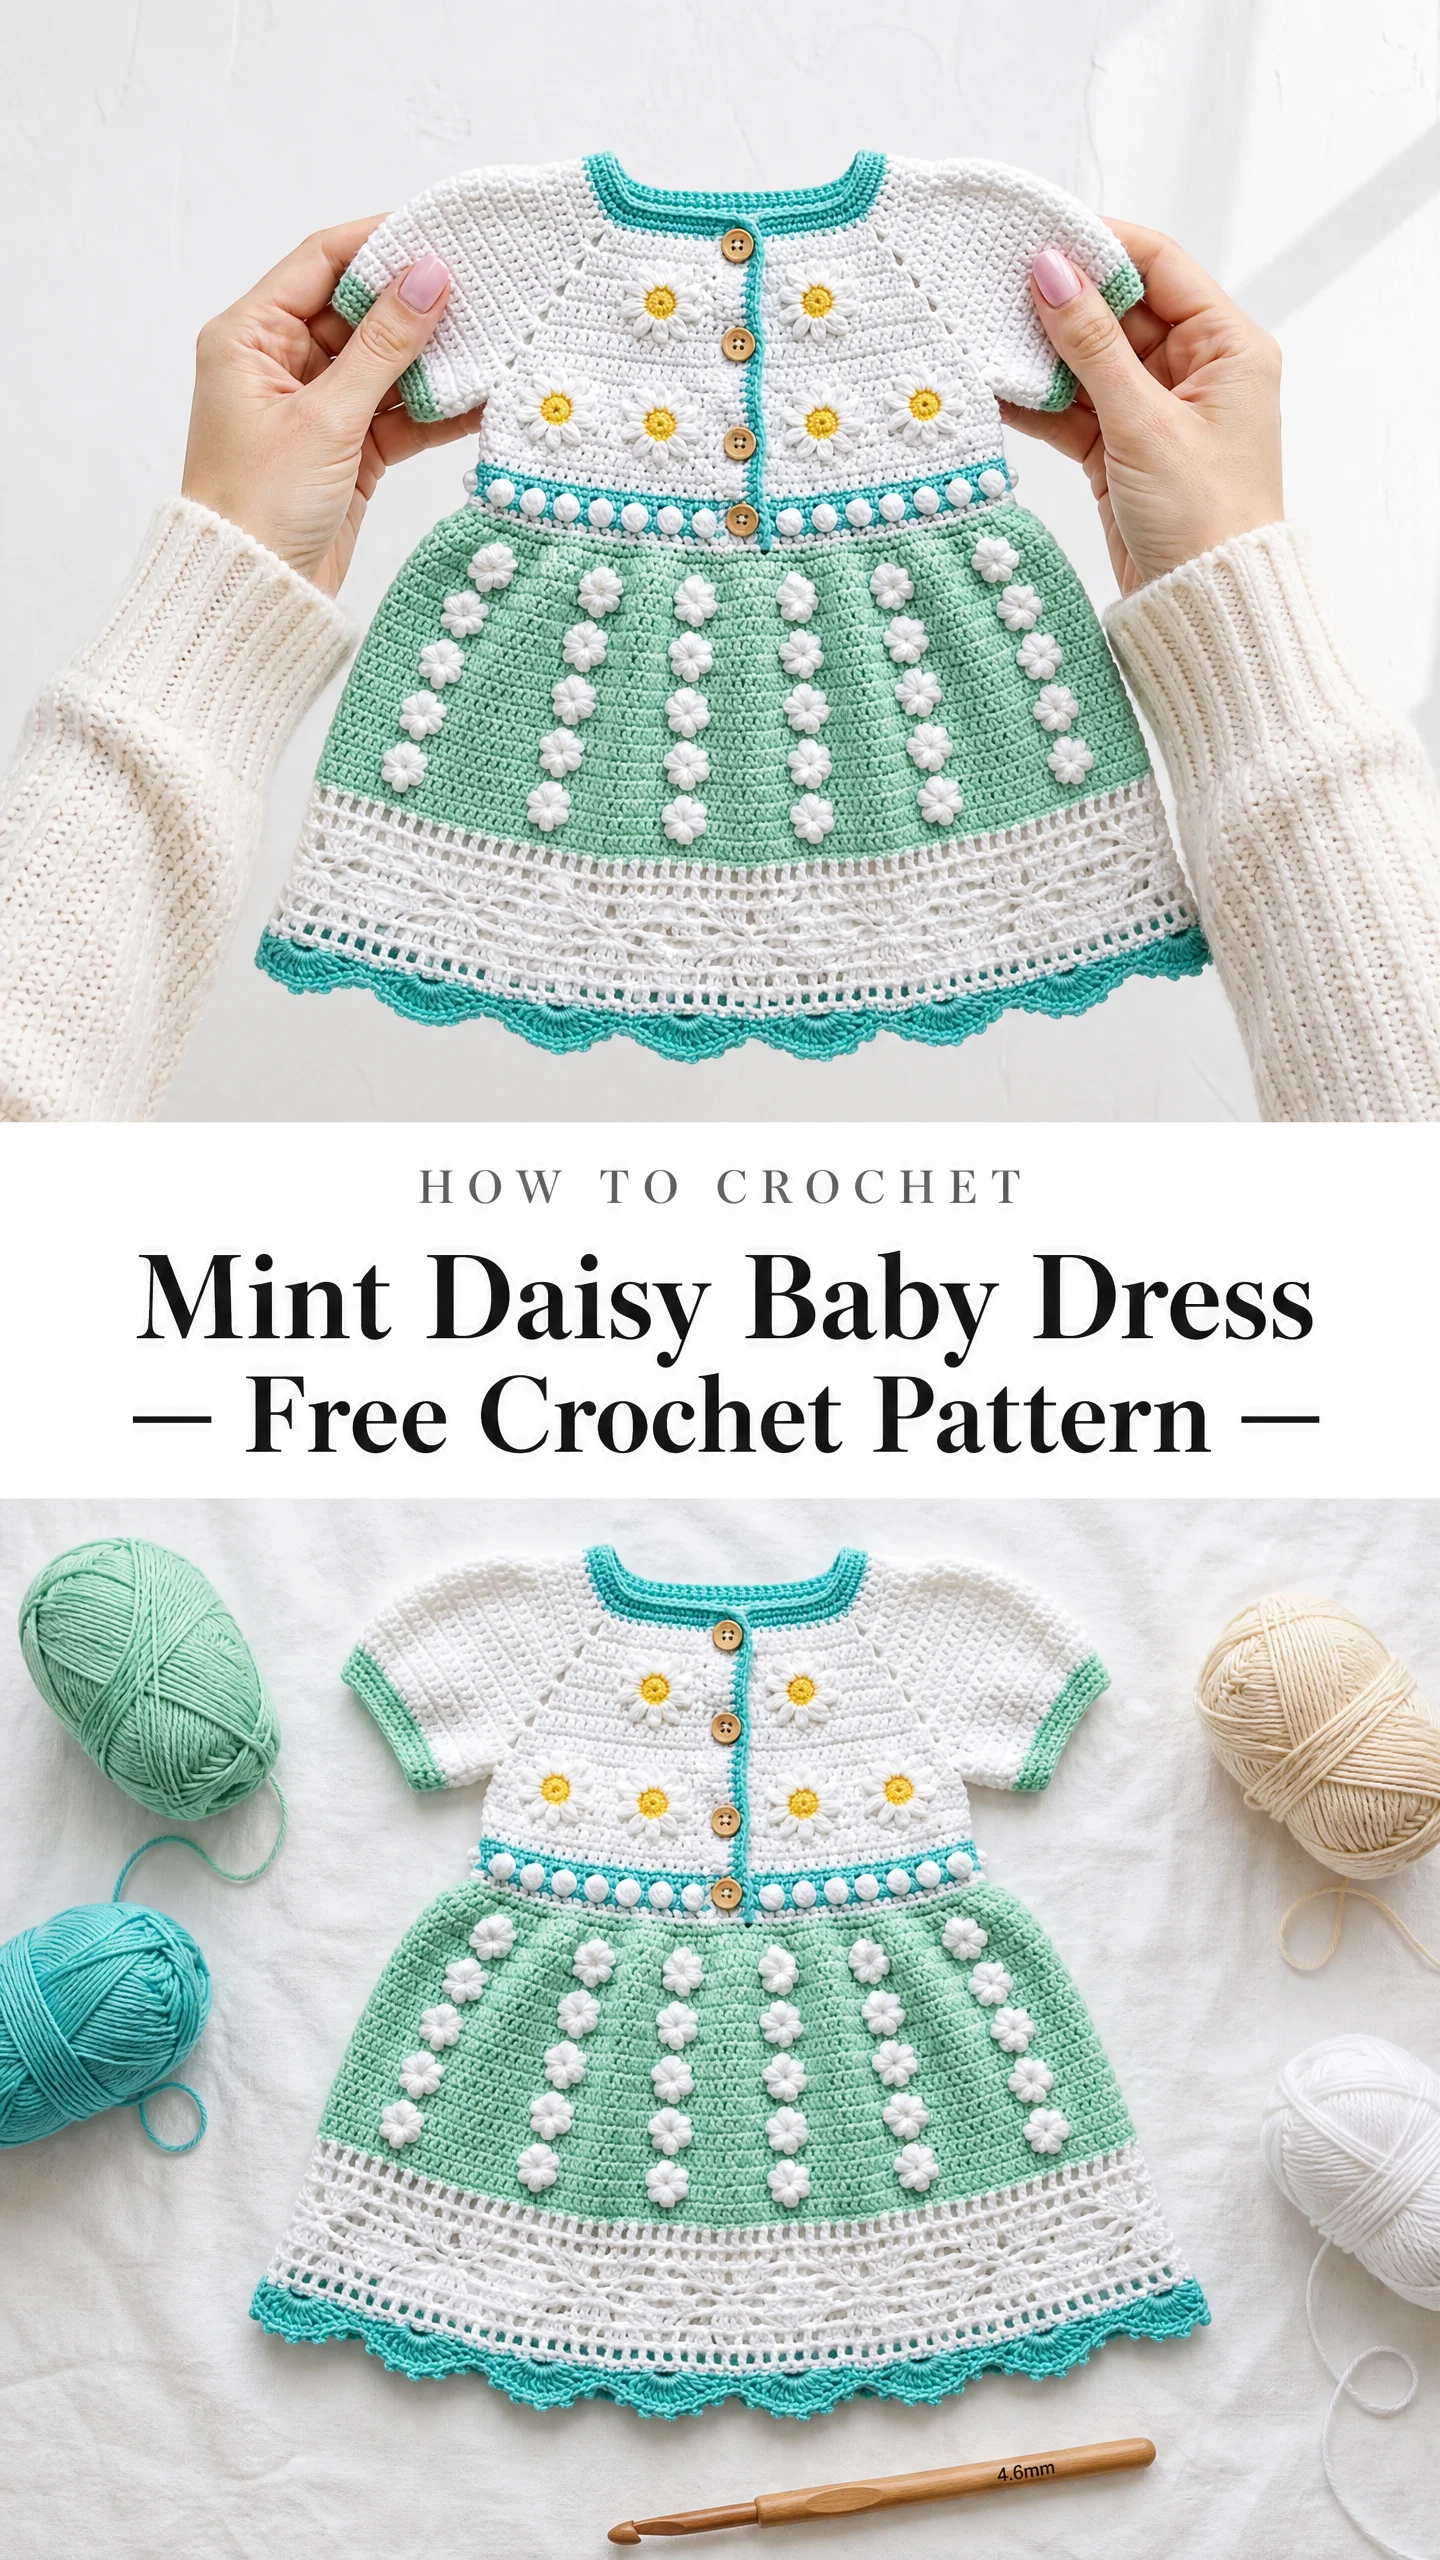
What drew me in first was the color palette. That soft mint green paired with crisp white and pops of aqua creates such a fresh, cheerful look. The wooden buttons running down the front placket add just the right touch of warmth and texture.
If you’ve been wanting to try a more advanced baby garment project, this dress is an excellent choice. Yes, it has multiple techniques. Yes, it takes some time. But every single section is explained clearly, and the finished result is absolutely worth the effort.
About This Baby Dress Crochet Pattern
This sweet dress is constructed top down in one seamless piece, starting at the neckline and working all the way to that beautiful scalloped hem. The bodice features a yoke with raglan increases and a front opening with a button placket. A bobble trimmed waistband separates the structured bodice from the flared skirt below.
The skirt showcases vertical columns of popcorn flowers worked directly into the fabric. These dimensional stitches create such lovely texture against the mint background. At the hem, an open lace border adds elegance before finishing with a delicate scallop edge in aqua.
Eight handmade daisy motifs with sunny yellow centers are sewn onto the bodice front as the finishing touch. These little flowers transform the dress from pretty to absolutely adorable.
Skill Level: Intermediate to Advanced
This pattern requires comfort with working in joined rounds with a front opening, raglan style yoke increases, reading stitch charts for lace, making popcorn stitches and surface appliques, and working a multi row lace border. If you’ve completed at least two garments before, you’ll find this achievable with careful attention to stitch counts.
Time Estimate: Approximately 18 to 24 hours total, depending on your experience level. Allow extra time for attaching daisy motifs and weaving ends.
Finished Measurements
This pattern is written for size 12 to 18 months.
Size Customization Tips
To size down to 6 to 9 months: Start with a foundation chain of 60 instead of 66 and reduce each raglan increase section by 2 stitches per raglan point. The total pre skirt stitch count will be approximately 112 instead of 128. Reduce skirt rounds by 4.
To size up to 2T: Start with a foundation chain of 72 and increase each raglan section by 2 stitches. Add 4 additional skirt rounds before the lace border.
Always verify gauge before resizing. One stitch per inch at gauge changes the chest by 2 inches over the full circumference.
Materials Needed for the Mint Daisy Baby Dress
Yarn (DK weight, 100% cotton or cotton acrylic blend):
Hooks:
Notions:
Recommended Yarn Options
Lion Brand 24/7 Cotton in White, Mint, and Turquoise. 186 yards per 100g skein. 100% mercerized cotton. Excellent stitch definition and machine washable. This yarn gives clean crisp texture on the popcorn flowers.
Paintbox Yarns Cotton DK in Pure White, Spearmint, and Kingfisher Blue. 273 yards per 100g skein. 100% cotton. Slight sheen enhances the lace border beautifully. Widely available and affordable.
WeCrochet Dishie in White, Mint, and Cyan. 190 yards per 100g skein. 100% cotton. Soft hand feel and excellent colorfastness through repeated washing, which is essential for baby garments.
Substitution Note: Use any DK weight cotton or cotton blend yarn that achieves the listed gauge. Avoid yarns with high acrylic content for this dress as they will not block flat and lace definition will be poor. Always wash and dry a swatch before beginning to account for cotton shrinkage.
Gauge
Using US size G-6 / 4.0 mm hook and Color A in single crochet (sc):
Gauge swatch instructions: Chain 24. Work single crochet in rows for 25 rows. Block swatch flat. Measure the center 4 inches by 4 inches only, avoiding edges.
Gauge is critical for this garment. A difference of even one stitch per inch will alter the chest circumference by 2 inches and the overall length noticeably. Please don’t skip the gauge swatch.
Abbreviations and Stitch Definitions
Before diving into the instructions, let’s cover all the abbreviations you’ll encounter. I know this list looks long, but most are stitches you already know.
Special Stitches for This Pattern
These are the techniques that give this dress its dimensional texture. Take your time learning them before you begin.
Popcorn Stitch (pc)
Work 5 double crochet stitches all into the same stitch or space. Remove hook from working loop. Insert hook from front to back through the top of the first dc of the group. Pick up the dropped loop and pull it through the first dc. Chain 1 to lock the popcorn. The popcorn will pop to the front (RS) of the work.
This stitch creates those lovely dimensional flowers that travel down the skirt in vertical columns.
Bobble Stitch (bo)
Yarn over, insert hook into stitch, yarn over and pull up a loop, yarn over and draw through 2 loops (1 loop remains). Repeat this 4 more times into the same stitch (6 loops on hook). Yarn over and draw through all 6 loops. Chain 1 to close.
The bobble stitch creates the textured trim at the waistband.
Daisy Motif
These are worked separately and sewn on. You’ll make 8 total.
With Color A and smaller hook:
Round 1: Magic ring, work 5 sc into ring, sl st to first sc to join. (5 sc)
Round 2: (Ch 5, sl st into next sc) 5 times. (5 petals)
Fasten off Color A. Join Color D to center ring.
Round 3: Work 1 sc into center of ring. Fasten off Color D, leaving a 6 inch / 15 cm tail for sewing.
Finished daisy is approximately 1 inch / 2.5 cm in diameter.
Shell Stitch
Work 5 dc all into the same stitch or space. Used in the lace border.
V-Stitch
Work (1 dc, ch 2, 1 dc) all into the same stitch or space. Used in the lace border.
Scallop Edging
Sl st into first st, (ch 3, 2 dc, ch 3, sl st) into same st, skip 2 sts, sl st into next st. Repeat across.
Raglan Increase Point
At each of the 4 raglan markers, work 1 sc in st before marker, 3 sc in marked st (raglan spine st), 1 sc in st after marker. Advance marker to center stitch of the 3-sc group after each round.
Important Pattern Notes
1. The dress is worked top down, beginning at the neckline and finishing at the hem.
2. The front opening runs the full length of the bodice from neckline to waist. The skirt is worked in full joined rounds with no opening.
3. Turning chains throughout the bodice count as 0 stitches. Only actual worked stitches are counted in stitch totals.
4. Color changes are made by drawing the new color through the last 2 loops of the last stitch before the color change.
5. Right side is always facing you during skirt rounds.
6. Stitch counts in parentheses at the end of each row or round reflect the total number of working stitches.
7. The buttonholes are created during the final left placket edging, not during bodice construction.
8. Block the finished dress before attaching daisy motifs.
9. Daisy motifs on the bodice are the dimensional applique daisies with yellow centers. The popcorn flowers on the skirt are worked in the round as part of the skirt construction.
10. All rounds begin with ch 1 (does not count as a stitch) unless otherwise noted.
Step by Step Crochet Instructions
Section 1: Neckline Foundation and Placket Setup
Using Color C and larger hook, work a foundation row.
Row 1 (RS): Ch 67. Sc in 2nd ch from hook and in each ch across. Turn. (66 sc)
Row 2 (WS): Ch 1, sc in first 3 sts (left placket), pm in 3rd st, sc in next 10 sts (left back), pm in last st worked, sc in next 2 sts (left raglan), pm in 2nd st of this section, sc in next 14 sts (left front), pm in last st worked, sc in next 2 sts (center front right side), pm in 2nd st, sc in next 14 sts (right front), pm in last st worked, sc in next 2 sts (right raglan), pm in 2nd st, sc in next 10 sts (right back), pm in last st worked, sc in last 3 sts (right placket). Turn. (66 sc)
Stitch distribution: 3 (left placket) + 10 (back left) + 2 (raglan) + 14 (left front) + 2 (center) + 14 (right front) + 2 (raglan) + 10 (back right) + 3 (right placket) = 66 total.
Fasten off Color C. Join Color A at right edge with RS facing.
Section 2: Yoke with Raglan Increases
The yoke is worked back and forth in rows. Each RS row adds 8 stitches total (2 at each of 4 raglan points). The placket stitches at each end are worked in sc throughout without increase.
Row 3 (RS, Color A): Ch 1, sc in first 3 sts (right placket), work to first raglan marker applying raglan increase point, work to second raglan marker applying raglan increase point, work to third raglan marker applying raglan increase point, work to fourth raglan marker applying raglan increase point, sc in last 3 sts (left placket). Turn. (74 sc)
Row 4 (WS): Ch 1, sc in each st across. Turn. (74 sc)
Row 5 (RS, raglan increase row): Apply 4 raglan increase points as established. (82 sc)
Row 6 (WS): Ch 1, sc in each st across. Turn. (82 sc)
Row 7 (RS): Apply 4 raglan increase points. (90 sc)
Row 8 (WS): Sc across. Turn. (90 sc)
Row 9 (RS): Apply 4 raglan increase points. (98 sc)
Row 10 (WS): Sc across. Turn. (98 sc)
Row 11 (RS): Apply 4 raglan increase points. (106 sc)
Row 12 (WS): Sc across. Turn. (106 sc)
Row 13 (RS): Apply 4 raglan increase points. (114 sc)
Row 14 (WS): Sc across. Turn. (114 sc)
Row 15 (RS): Apply 4 raglan increase points. (122 sc)
Row 16 (WS): Sc across. Turn. (122 sc)
Row 17 (RS): Apply 4 raglan increase points. (130 sc)
Row 18 (WS): Sc across. Turn. (130 sc)
CHECKPOINT: After Row 18, the bodice piece should measure approximately 3.5 inches / 9 cm from the neckline edge to the bottom of the yoke.
Section 3: Sleeve Separation
Row 19 (RS): Ch 1, sc in first 3 sts (placket), sc in next 28 sts (right front), ch 4 (underarm bridge), skip next 30 sts (right sleeve/raglan), sc in next 36 sts (back), ch 4 (underarm bridge), skip next 30 sts (left sleeve/raglan), sc in next 28 sts (left front), sc in last 3 sts (placket). Turn. (106 sts)
Row 20 (WS): Ch 1, sc in each sc and each ch across. Turn. (106 sc)
Row 21 (RS): Ch 1, sc in each st across. Turn. (106 sc)
Row 22 (WS): Ch 1, sc in each st across. Turn. (106 sc)
Change to Color B at end of Row 22.
Section 4: Waistband
Row 23 (RS, Color B): Ch 1, sc in each st across. Turn. (106 sc)
Row 24 (WS): Ch 1, sc in each st across. Turn. (106 sc)
Change to Color C.
Row 25 (RS, Color C): Ch 1, sc in each st across. Turn. (106 sc)
Change to Color A.
Row 26 (WS, Color A): Ch 1, sc in each st across. Turn. (106 sc)
BOBBLE BAND ROW:
Row 27 (RS, Color A): Ch 1, sc in first st, (bo in next st, sc in next st) repeat across to last st, sc in last st. Turn. (106 sts)
Row 28 (WS): Ch 1, sc in each st across (working into the top of each bobble and each sc). Turn. (106 sc)
Change to Color C.
Row 29 (RS, Color C): Ch 1, sc in each st across. Turn. (106 sc)
Change to Color B.
Row 30 (WS, Color B): Ch 1, sc in each st across. Turn. (106 sc)
CHECKPOINT: After Row 30, the piece from neckline to bottom of waistband should measure approximately 6 inches / 15 cm.
At the end of Row 30, join the front opening by working a sl st from the last st of Row 30 to the first st of Row 30 after a ch 1. From this point forward the dress is worked in joined rounds.
Section 5: Skirt Increases and Body
Begin joined rounds at the right side underarm position. Place a locking stitch marker at the join point of each round and move it up each round.
Rnd 31 (RS, Color B): Join with sl st at join point. Ch 1, (sc in next 9 sts, 2 sc in next st) 10 times, sc in last 6 sts, sl st to join. (116 sc)
Rnd 32: Ch 1, sc in each st around, sl st to join. (116 sc)
Rnd 33 (increase rnd): Ch 1, (sc in next 10 sts, 2 sc in next st) 10 times, sc in last 6 sts, sl st to join. (126 sc)
Rnd 34: Ch 1, sc in each st around, sl st to join. (126 sc)
Rnd 35 (increase rnd): Ch 1, (sc in next 11 sts, 2 sc in next st) 10 times, sc in last 6 sts, sl st to join. (136 sc)
Rnd 36: Ch 1, sc in each st around, sl st to join. (136 sc)
Change to Color B and begin popcorn flower placement rounds. Place locking markers at the 7th stitch of each 13 stitch section to mark popcorn spine positions.
Rnd 37 (Popcorn Round 1, Color B): Ch 1, (sc in next 6 sts, pc in next st, sc in next 6 sts) 10 times, sc in last 6 sts, sl st to join. (136 sts)
Rnds 38 to 39: Ch 1, sc in each st around, sl st to join. (136 sc) x 2 rounds
Rnd 40 (Popcorn Round 2): Same as Rnd 37. Work pc in the same column positions. (136 sts)
Rnds 41 to 42: Sc around. (136 sc) x 2 rounds
Rnd 43 (Popcorn Round 3): Same as Rnd 37. (136 sts)
Rnds 44 to 45: Sc around. (136 sc) x 2 rounds
Rnd 46 (Popcorn Round 4): Same as Rnd 37. (136 sts)
Rnd 47: Sc around. (136 sc)
Change to Color C.
Rnd 48 (Color C): Ch 1, sc in each st around, sl st to join. (136 sc)
Change to Color A.
Rnd 49 (Color A): Ch 1, sc in each st around, sl st to join. (136 sc)
CHECKPOINT: After Rnd 49, the skirt body should measure approximately 7 inches / 18 cm from waistband join.
Section 6: Lace Border
The lace border is worked in Color A on the RS in joined rounds over 8 rounds.
Rnd 50 (foundation for lace, Color A): Ch 3 (counts as dc), dc in next st, (ch 1, skip 1 st, dc in next 2 sts) repeat to last 2 sts, ch 1, skip 1, sl st to top of ch-3 to join. (91 dc + 45 ch-sp)
Rnd 51: Sl st into first ch-sp. Ch 4 (counts as dc + ch 1). (Dc in next ch-sp, ch 1) repeat around, sl st to 3rd ch of beg ch-4. (45 ch-sp, 45 dc)
Rnd 52 (shell placement): Sl st to first ch-sp. Ch 3 (counts as dc). Work 4 dc in same sp (first shell). Ch 2, skip next ch-sp. (5 dc in next ch-sp, ch 2, skip next ch-sp) repeat around, sl st to top of ch-3. (23 shells, 22 ch-2 sp)
Rnd 53: Ch 1, sc in first 5 dc of shell, (ch 3, sc in top of ch-2 sp, ch 3, sc in each of 5 dc of next shell) repeat around ending ch 3, sc in ch-2 sp, ch 3, sl st to first sc. (115 sc, 46 ch-3 sp)
Rnd 54: Ch 5 (counts as dc + ch 2). Dc in 3rd sc of 5-dc group, ch 2, dc in ch-3 sp, ch 2, dc in sc at top of prior ch-2 sp, ch 2, dc in next ch-3 sp, ch 2. Repeat from dc in 3rd sc around. Sl st to 3rd ch of beg ch-5.
Rnd 55: Ch 1, sc around working 1 sc in each dc and 2 sc in each ch-2 sp. (approximately 299 sc)
Rnd 56: Ch 3 (counts as dc), dc in each st around, sl st to top of ch-3. (299 dc)
Rnd 57: Ch 1, sc in each st around, sl st to join. Work 2 sc in final stitch to reach 300 total. (300 sc)
Change to Color C.
Rnd 58 (scallop edging, Color C, smaller hook): Sl st in first st. (Ch 3, 2 dc, ch 3, sl st) in same st, skip 2 sts, sl st in next st, repeat from opening to end. Sl st to join and fasten off. (100 scallops)
CHECKPOINT: After the scallop edging, the total dress length from neckline to hem tip should measure 16 to 17 inches / 40.5 to 43 cm.
Section 7: Sleeve Cap Finishing
Return to the 30 stitches held for each sleeve from the separation row.
Join Color C at underarm center with RS facing.
Sleeve Setup Rnd: Join, ch 1, sc in each of 30 held sleeve sts, sc in each of 4 underarm ch, sl st to join. (34 sc)
Sleeve Rnd 1 (Color C): Ch 1, sc in each st around, sl st to join. (34 sc)
Change to Color A.
Sleeve Rnd 2 (Color A): Ch 1, sc in each st around, sl st to join. (34 sc)
Sleeve Rnd 3: Ch 1, sc in each st around, sl st to join. (34 sc)
Change to Color B.
Sleeve Rnd 4 (Color B): Ch 1, sc in each st around, sl st to join. (34 sc)
Change to Color C.
Sleeve Rnd 5 (Color C, cuff edging): Ch 1, sc in each st around, sl st to join. (34 sc)
Fasten off. Repeat for second sleeve.
Section 8: Front Placket and Buttonhole Edging
With RS facing, smaller hook, and Color C, work along the full right front placket edge:
Row 1: Join Color C at neckline corner of right placket. Ch 1, work 1 sc in every row end across the full placket length (approximately 30 sc for 30 rows of bodice). Turn. (30 sc)
Row 2: Ch 1, sc in each st across. Fasten off. This is the plain placket side with no buttonholes.
For the buttonhole placket (left placket as worn), join Color C at bottom corner of left placket.
Row 1: Ch 1, work 1 sc in every row end across. Turn. (30 sc)
Row 2 (buttonholes): Ch 1, sc in first 2 sts, (ch 2, skip 2 sts, sc in next 4 sts) repeat for 5 buttonholes evenly spaced. Fasten off.
Finishing Your Mint Daisy Baby Dress
Attaching the Daisy Motifs
Block the finished dress completely before sewing on the daisies. This ensures accurate placement and flat lace.
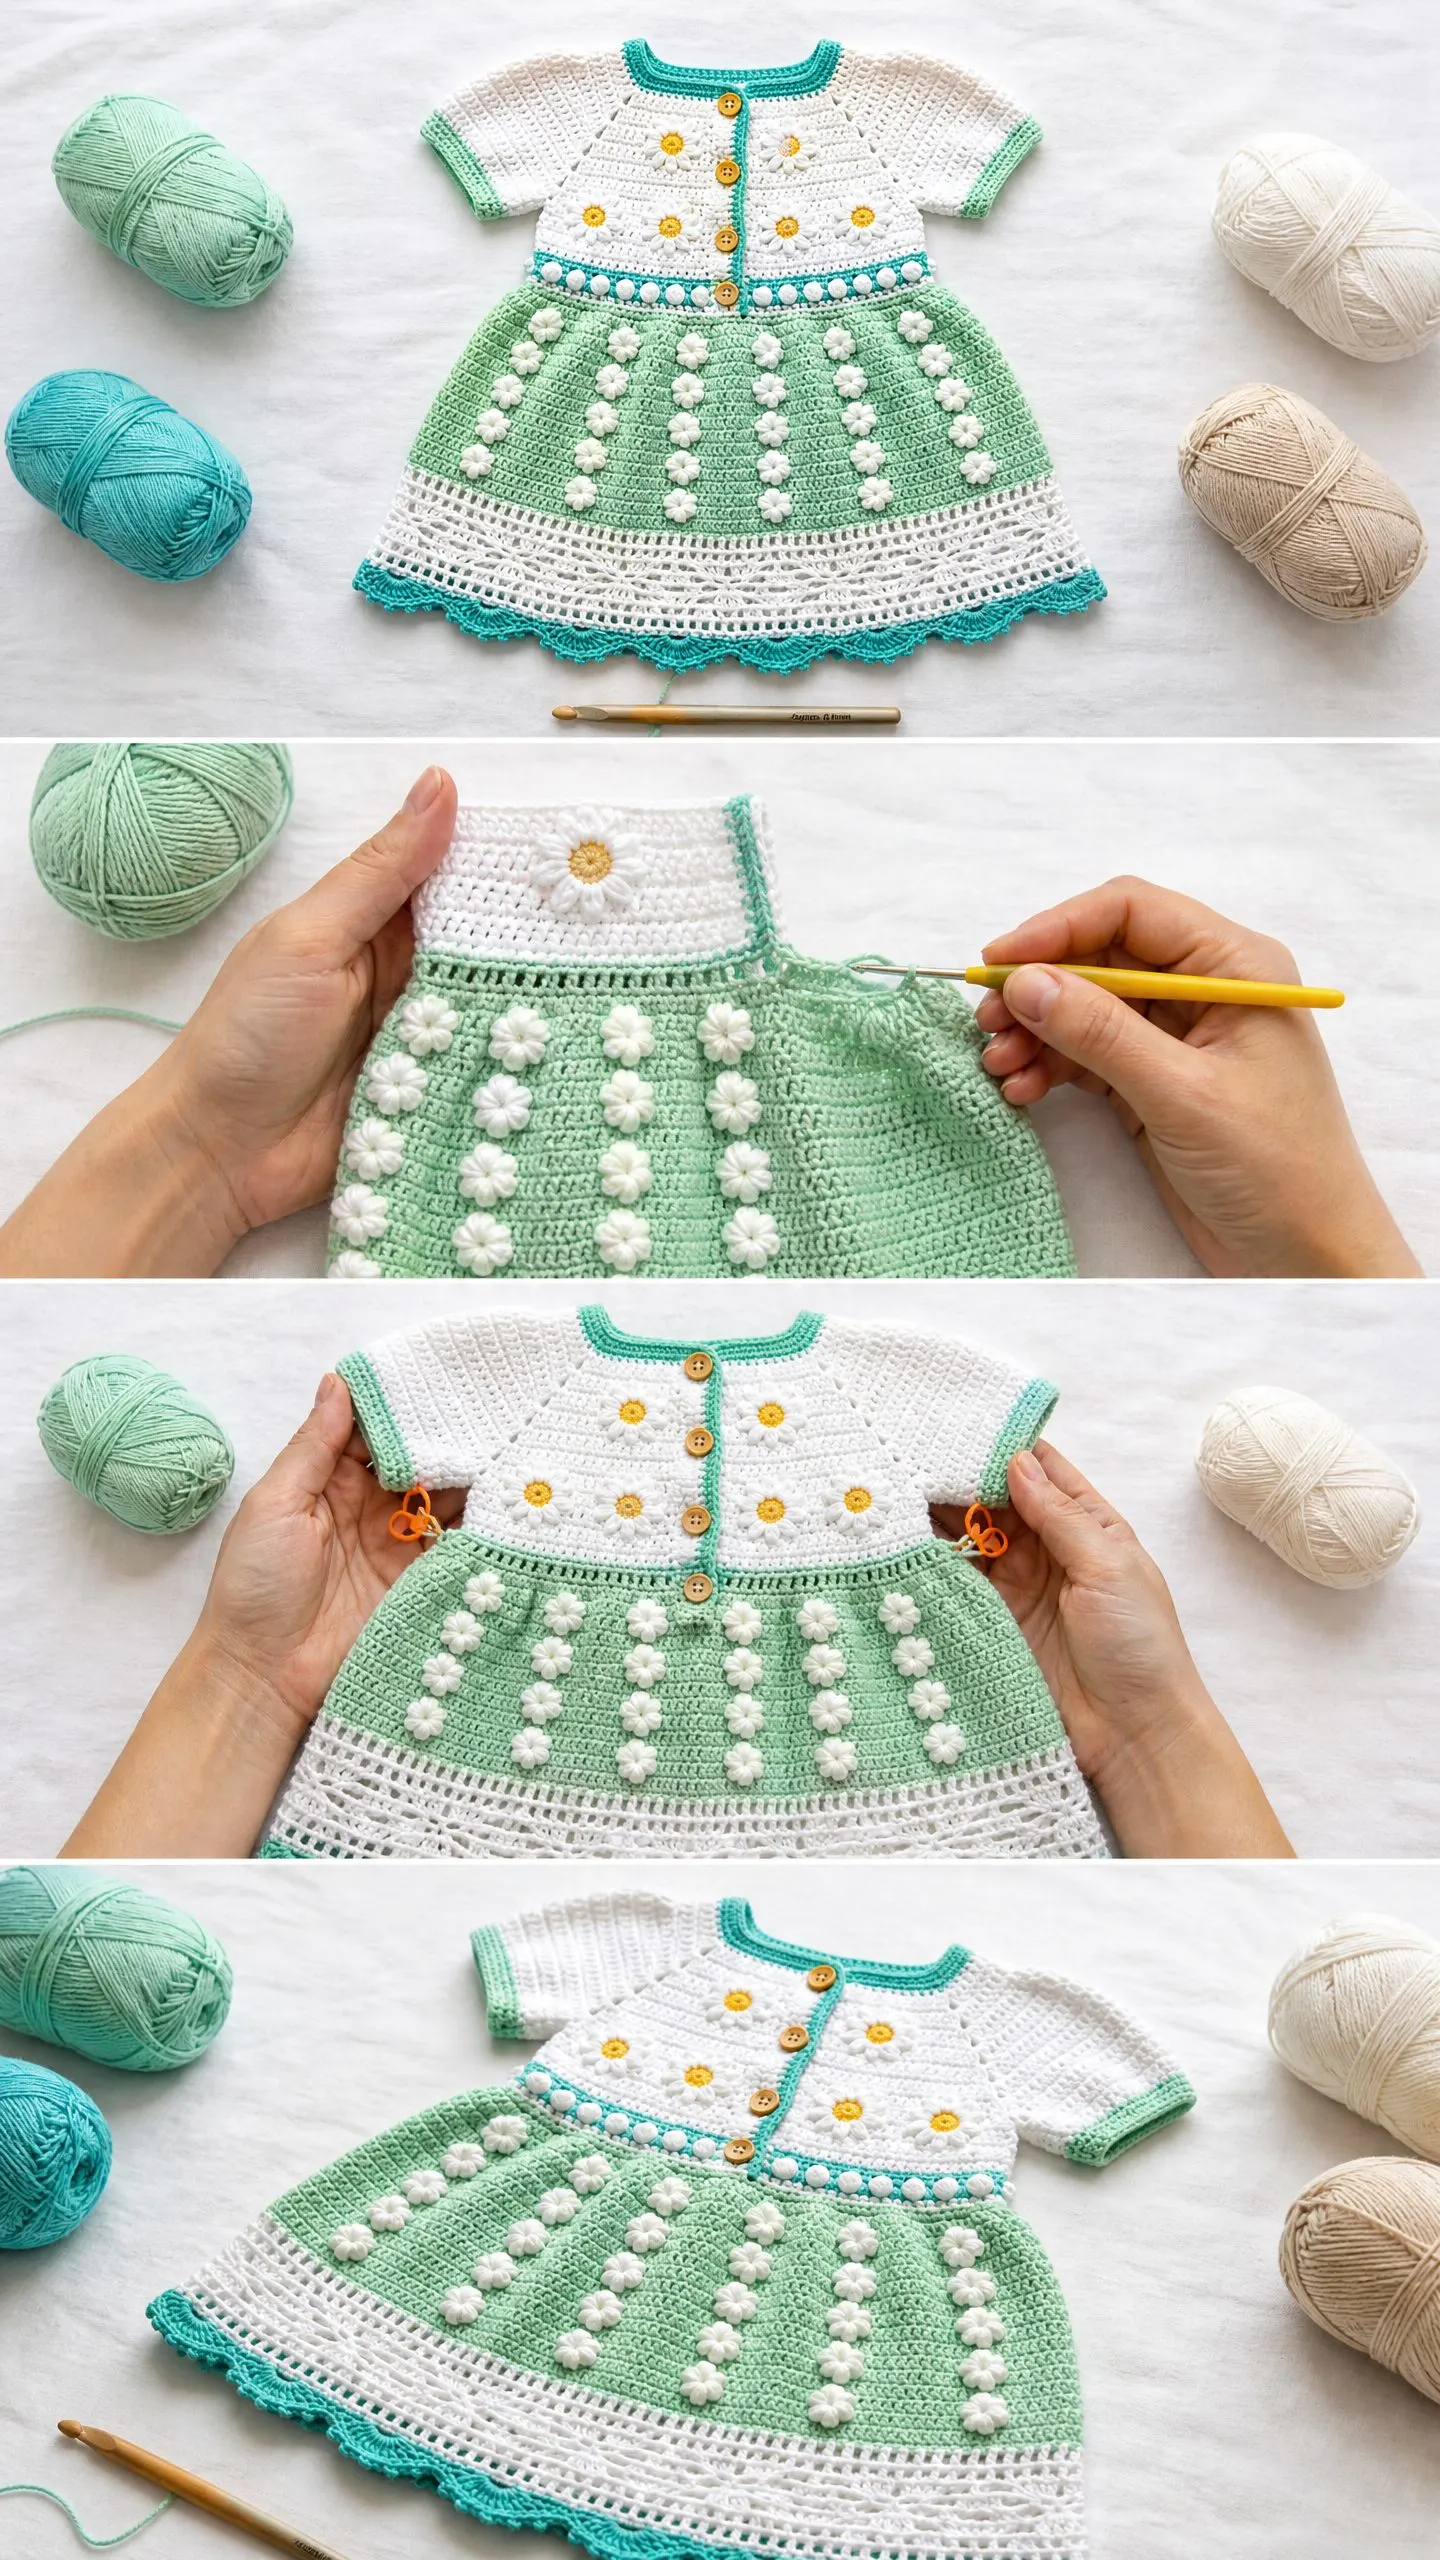
Position 8 daisy motifs on the bodice front, arranging them in a pleasing pattern across the yoke above the waistband. Use rustproof pins to hold them in place. With the yellow tail from each daisy, sew through the center and tack down 2 or 3 petals to secure. Weave in all ends.
Sewing on Buttons
Sew 5 wooden buttons to the right placket, aligning each button with a buttonhole on the left placket. Use matching thread and a tapestry needle or sewing needle.
Weaving in Ends
Take your time weaving in all remaining yarn tails. For baby garments, weave each tail through at least 2 inches of stitches and trim close to the fabric. Check both sides to ensure no loose ends remain.
Final Blocking
Give the dress one final light steam or wet block to set all stitches. Lay flat to dry completely before gifting or storing.
Tips for Success with This Baby Dress Pattern
Color changes: When switching colors, always draw the new color through the last 2 loops of the final stitch in the old color. This creates a cleaner transition.
Popcorn consistency: Keep your tension even on all 5 double crochets in each popcorn. If some pop more than others, your tension may be varying.
Lace border: This section requires careful counting. Mark every 10th stitch if you find yourself losing count.
Daisy placement: Take photos of different arrangements before sewing. What looks best flat may look different once the dress is worn.
Washing: Hand wash in cool water with gentle detergent. Lay flat to dry. Cotton may shrink slightly on first wash, which is why the pre wash gauge swatch is so important.
I really hope you enjoy making this beautiful baby dress as much as I enjoyed writing about it. The combination of techniques makes it a satisfying project that showcases your skills, and the finished result is an heirloom quality piece any little one would be lucky to wear.
If you found this pattern helpful, I’d love for you to save it to your Pinterest boards so you can find it easily when you’re ready to start. And please drop a comment below if you make one. I genuinely love seeing your finished projects and hearing about your experience with the pattern. Happy crocheting!
