Let me guess. You saw this gorgeous floor-length lace skirt and immediately thought, "I could never make that." Maybe you scrolled past it once already, convinced it was too advanced, too complicated, or required some kind of crochet sorcery you haven’t unlocked yet.
Here’s the truth. This bohemian lace maxi skirt is absolutely within your reach. Yes, even if you’ve never tackled a garment before. Yes, even if cable-style stitches make you nervous. The construction breaks down into manageable sections, the stitch patterns repeat predictably, and I’m going to walk you through every single detail. Intermediate crocheters will find this project satisfying and creative. Adventurous beginners who take their time will surprise themselves with what they can accomplish.
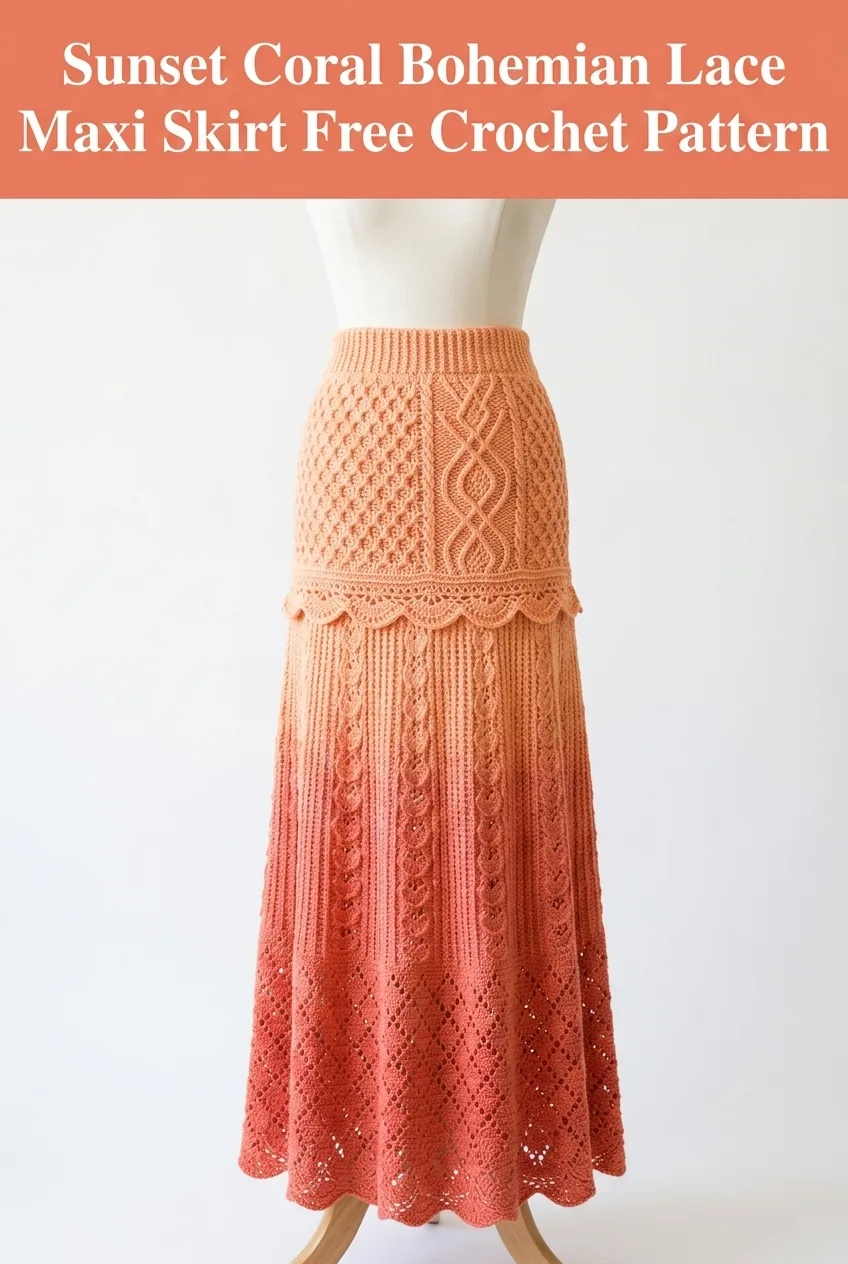
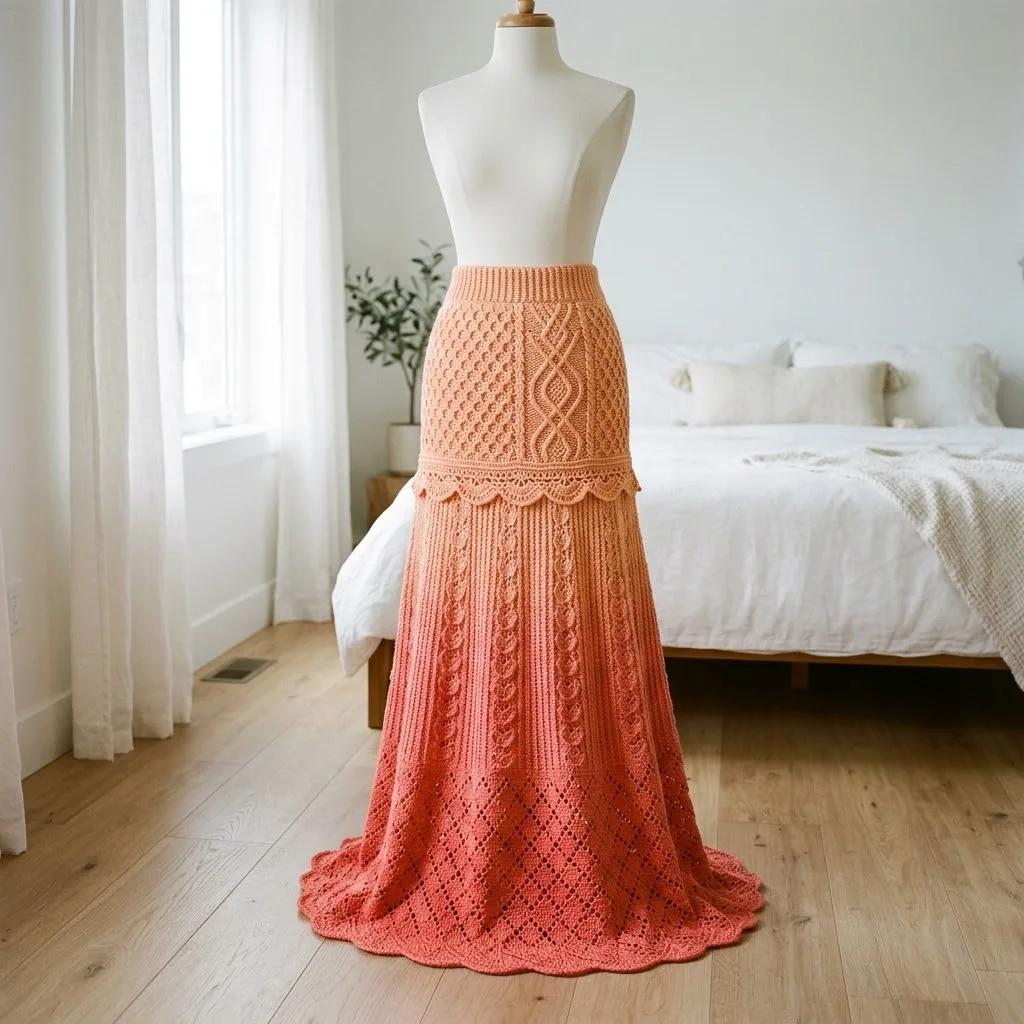
This stunning ombre skirt moves from soft peachy coral at the waist down to a rich sunset coral at the hem. The combination of textured cable-inspired panels, delicate lace sections, and that gorgeous scalloped edge creates a showstopper piece that looks like it belongs on a runway. But you’re going to make it at home, with your hook, one stitch at a time.
Why You’ll Love This Bohemian Lace Maxi Skirt Crochet Pattern
This skirt combines three distinct visual elements that work together beautifully. The fitted upper section features raised cable-style textures that provide structure and visual interest. A decorative scalloped peplum detail creates a flattering waistline transition. The flowing lower section opens up into airy lace panels that drape elegantly and move with every step.
The ombre effect happens naturally when you use gradient yarn or transition between coordinating colors as you work down the skirt. That peachy coral at the top warming into deeper sunset tones at the hem gives this piece serious artistic appeal.
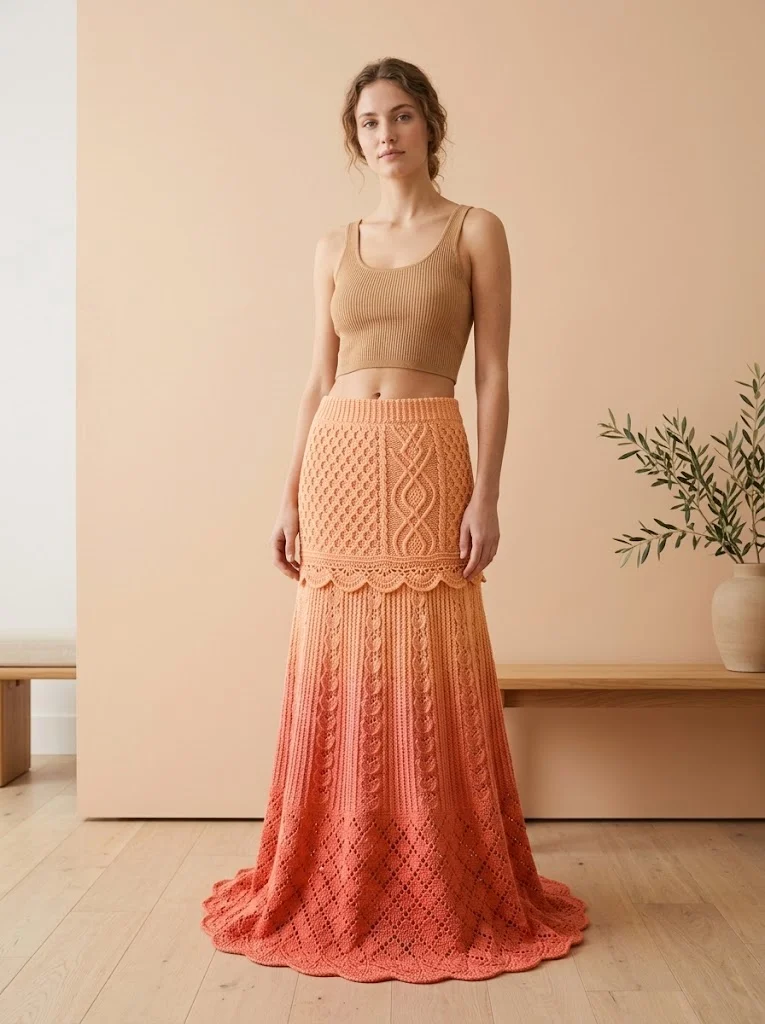
The silhouette flatters multiple body types. The fitted waistband sits comfortably at the natural waist. The slight A-line through the hips keeps things smooth without clinging. Then the dramatic flare through the lower skirt creates movement and flow that photographs beautifully.
Skill Level
Intermediate with detailed guidance for advancing beginners.
If you can work basic stitches confidently and you’re ready to learn something new, this pattern will stretch your skills in the best way. The cable-style sections use front post and back post stitches, which I’ll explain thoroughly. The lace sections rely on chain spaces and skip patterns that become intuitive after a few repeats.
Finished Measurements
This pattern is written for Size Medium with a fitted waistband.
I’ll include notes for adjusting width and length throughout the pattern.
Materials Needed
Yarn
– Color A (Light Peachy Coral): 600 yards for waistband and upper section
– Color B (Medium Coral): 700 yards for middle section
– Color C (Deep Sunset Coral): 800 yards for lower section and hem
Recommended yarn types: Look for mercerized cotton or a cotton-bamboo blend. These fibers provide excellent drape, beautiful stitch definition, and keep the skirt from becoming too heavy. Avoid acrylic for this project as it won’t drape properly and may feel too warm.
Hook
Notions
Gauge
With H/8 hook in double crochet:
16 stitches and 8 rows = 4 inches square
With G/6 hook in single crochet ribbing:
18 stitches and 20 rows = 4 inches square
Take time to check your gauge before starting. This garment needs proper fit, and gauge matters more here than in blankets or accessories.
Abbreviations and Stitch Definitions
Let me define every stitch before we begin. Read through this section even if you think you know these stitches, because my instructions will reference these exact definitions.
ch = chain: Yarn over, pull through loop on hook. Creates foundation or spacing.
sl st = slip stitch: Insert hook, yarn over, pull through stitch AND loop on hook in one motion. Used for joining and invisible movement.
sc = single crochet: Insert hook, yarn over, pull up loop (2 loops on hook), yarn over, pull through both loops.
hdc = half double crochet: Yarn over, insert hook, yarn over, pull up loop (3 loops on hook), yarn over, pull through all 3 loops.
dc = double crochet: Yarn over, insert hook, yarn over, pull up loop (3 loops on hook), yarn over, pull through 2 loops, yarn over, pull through remaining 2 loops.
tr = treble crochet: Yarn over twice, insert hook, yarn over, pull up loop (4 loops on hook), yarn over, pull through 2 loops three times until 1 loop remains.
FPdc = front post double crochet: Yarn over, insert hook from front to back to front around the post (vertical part) of the stitch below, complete as regular dc. Creates raised texture on the front.
BPdc = back post double crochet: Yarn over, insert hook from back to front to back around the post of the stitch below, complete as regular dc. Creates raised texture on the back.
sk = skip: Pass over the indicated number of stitches without working into them.
ch-sp = chain space: The gap created by chains in a previous row. Work into this space, not into individual chains.
dec = decrease: Work two stitches together to reduce stitch count by one.
inc = increase: Work two stitches into the same stitch to add one.
Special Techniques
Front Post and Back Post Stitches
These create the cable-style texture in the upper section. Don’t overthink them. You’re simply wrapping your hook around the post (the tall part) of a stitch instead of inserting through the top loops.
For FPdc, push your hook from the front of your work, go behind the post, and come out the front again. Then complete your double crochet normally.
For BPdc, push your hook from the back of your work, go in front of the post, and come out the back again.
When you alternate these stitches, you create ribbing. When you cross them over each other, you create cables.
Crossed Cable Stitch
This technique creates the diamond patterns in the upper section. You’ll skip stitches, work into later stitches, then go back and work into the skipped stitches. This crosses the stitches over each other.
I’ll walk you through each cable row step by step. Trust the process.
Pattern Instructions
This skirt is worked from the waist down in joined rounds. The construction has four main sections: waistband, textured upper body, peplum detail, and lace lower body with hem.
Waistband
Switch to smaller hook (G/6) for this section.
Using Color A, ch 121.
Row 1: Sc in 2nd ch from hook and each ch across. (120 sc)
Rows 2 through 20: Ch 1, turn. Working in back loops only (BLO), sc in each st across. (120 sc)
This creates a stretchy ribbed waistband. The BLO technique gives horizontal ridges that mimic knit ribbing.
Assembly: Fold the waistband in half lengthwise, wrong sides together. Sl st the short ends together to form a tube. Before closing completely, insert your elastic inside the fold. Sl st the long edges together, encasing the elastic. The elastic should be slightly stretched when sewn in, creating gentle gathering.
Joining round: Working along one long edge of the waistband tube, sc evenly around, placing approximately 144 sc around the entire circumference. Sl st to first sc to join. (144 sts)
Place a marker at the join. This is your round marker.
Textured Upper Body Section
Switch to larger hook (H/8).
Continue with Color A.
Round 1 (Setup): Ch 3 (counts as dc here and throughout), dc in each st around. Sl st to top of ch-3 to join. (144 dc)
Round 2 (Establish Texture Pattern): Ch 3, *FPdc around next st, BPdc around next st* repeat around. Sl st to join. (144 sts)
Round 3: Ch 3, *BPdc around FPdc, FPdc around BPdc* repeat around. Sl st to join. (144 sts)
This creates a reversible ribbed texture. Repeat Rounds 2 and 3 for two more repeats. (6 rounds total in texture pattern)
Cable Panel Setup (Round 7):
Place markers to divide your work into 8 equal sections of 18 stitches each. Each section will feature a cable panel.
Round 7: Ch 3, work 5 sts in established rib pattern, *work cable cross as follows: sk next 2 sts, FPdc around each of next 2 sts, FPdc around each of 2 skipped sts (crossing in front)*, work 6 sts in rib pattern, repeat cable cross, work 5 sts in rib. Repeat this 18-stitch pattern around all 8 sections. Sl st to join.
Rounds 8 through 14: Continue in established rib pattern, working cable crosses every 4th round to maintain the diamond cable effect.
Rounds 15 through 20: Continue pattern, beginning to incorporate Color B by working alternating rounds with each color for a gradual transition.
You should have approximately 20 rounds in the textured upper section. Total length from waistband: approximately 10 inches.
Peplum Detail
Still using a mix of Color A and Color B.
Round 21: Ch 4 (counts as dc plus ch-1), sk 1 st, *dc in next st, ch 1, sk 1* repeat around. Sl st to 3rd ch of ch-4. (72 dc, 72 ch-1 spaces)
Round 22: Ch 3, dc in ch-sp, dc in dc, *dc in ch-sp, dc in dc* repeat around. Sl st to join. (144 dc)
Round 23: Ch 3, dc in each of next 7 sts, 2 dc in next st, *dc in next 8 sts, 2 dc in next st* repeat around. Sl st to join. (160 dc)
Scallop Edge Round: *Sl st in next st, sc in next, hdc in next, 3 dc in next (scallop peak), hdc in next, sc in next, sl st in next, sk 1* repeat around. Sl st to join.
This creates the decorative scalloped peplum that adds feminine detail at the hip level.
Lace Lower Body Section
Switch fully to Color B, then transition to Color C as you work down.
Round 1 (Foundation): Working behind the scallop edge into Round 23, join yarn with sl st. Ch 3, dc in each st around. Sl st to join. (160 dc)
Round 2 (Begin Lace Pattern): Ch 5 (counts as dc plus ch-2), sk 2 sts, *dc in next st, ch 2, sk 2* repeat around. Sl st to 3rd ch of ch-5.
Round 3: Ch 3, 2 dc in ch-2 sp, *dc in dc, 2 dc in ch-2 sp* repeat around. Sl st to join. (160 dc)
Round 4: Ch 3, dc in each st around. Sl st to join.
Round 5 (Diamond Lace Start): Ch 3, dc in next 3 sts, *ch 3, sk 3, dc in next 5 sts, ch 3, sk 3, dc in next 5* repeat around, adjusting final repeat as needed. Sl st to join.
Continue diamond lace pattern for approximately 20 rounds, increasing gradually by adding stitches at each ch-3 space every 6th round. This creates the dramatic flare.
Transition to Color C around Round 10 of the lace section.
Final Lace Rounds (25 through 30): Work open mesh pattern: *dc, ch 2, sk 2* around, with scallop increases at the hem.
Scalloped Hem
Final Round: *Sc in dc, sk 1 ch-sp, 7 dc in next dc (shell), sk 1 ch-sp* repeat around. Sl st to first sc. Fasten off.
Finishing
1. Weave in all ends securely, following the direction of the stitches to keep them invisible.
2. Wet block your skirt by soaking it in lukewarm water for 15 minutes. Gently squeeze out excess water without wringing. Lay flat on blocking mats, pinning each scallop at the hem to open the lace and set the shape. Allow to dry completely.
3. Try on your skirt and admire your incredible work.
Customization Tips
For a longer skirt: Add additional rounds to the lace section before beginning the hem.
For a shorter midi length: Stop the lace section earlier and proceed directly to the scalloped hem.
For different sizes: Adjust your foundation chain in the waistband by multiples of 8 to maintain pattern symmetry in the cable sections.
Care Instructions
Hand wash in cool water with mild detergent. Lay flat to dry. Cotton garments may stretch slightly with wear but will return to shape after washing and blocking.
Final Thoughts on This Bohemian Lace Maxi Skirt Crochet Pattern
You just worked through a complex, multi-technique garment pattern. That’s no small thing. This bohemian lace maxi skirt crochet tutorial asked a lot of you, including cable stitches, lace construction, colorwork transitions, and precise finishing. And you did it.
Whether you made this for a special event, a photoshoot, or simply because you wanted to prove to yourself that you could create wearable art with your own two hands, I’m genuinely proud of you.
Thank you so much for trusting me with your time and your yarn. I hope this step by step crochet pattern gave you everything you needed to bring this gorgeous skirt to life. If you made it, I would absolutely love to see your finished piece. Tag me on Instagram or share in my Facebook group. Seeing your creations is honestly the best part of what I do.
If you loved this pattern, do me a favor and save it to your Pinterest boards so you can find it again later or share it with a crochet friend who needs their next big project. And please drop a comment below if you make this skirt. I want to hear which colorway you chose and how it turned out. Happy crocheting, friend.
