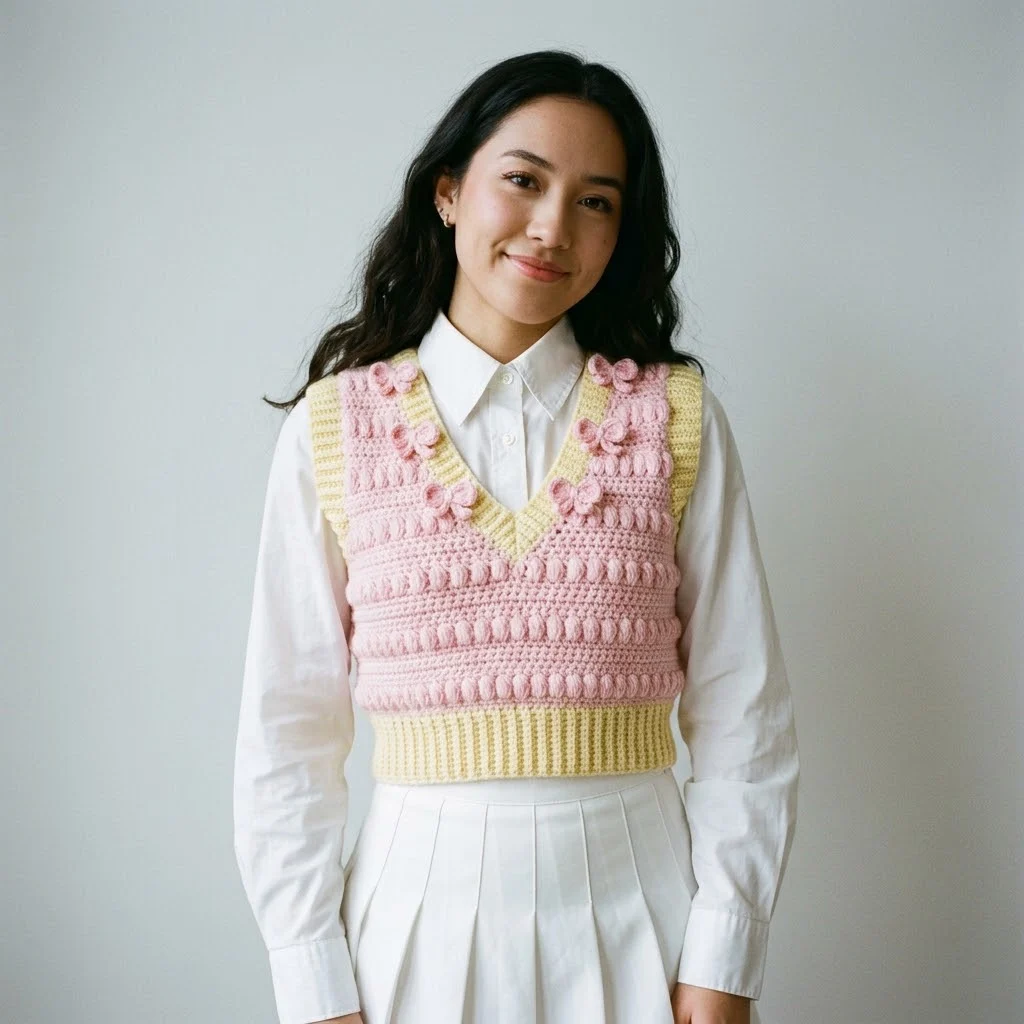
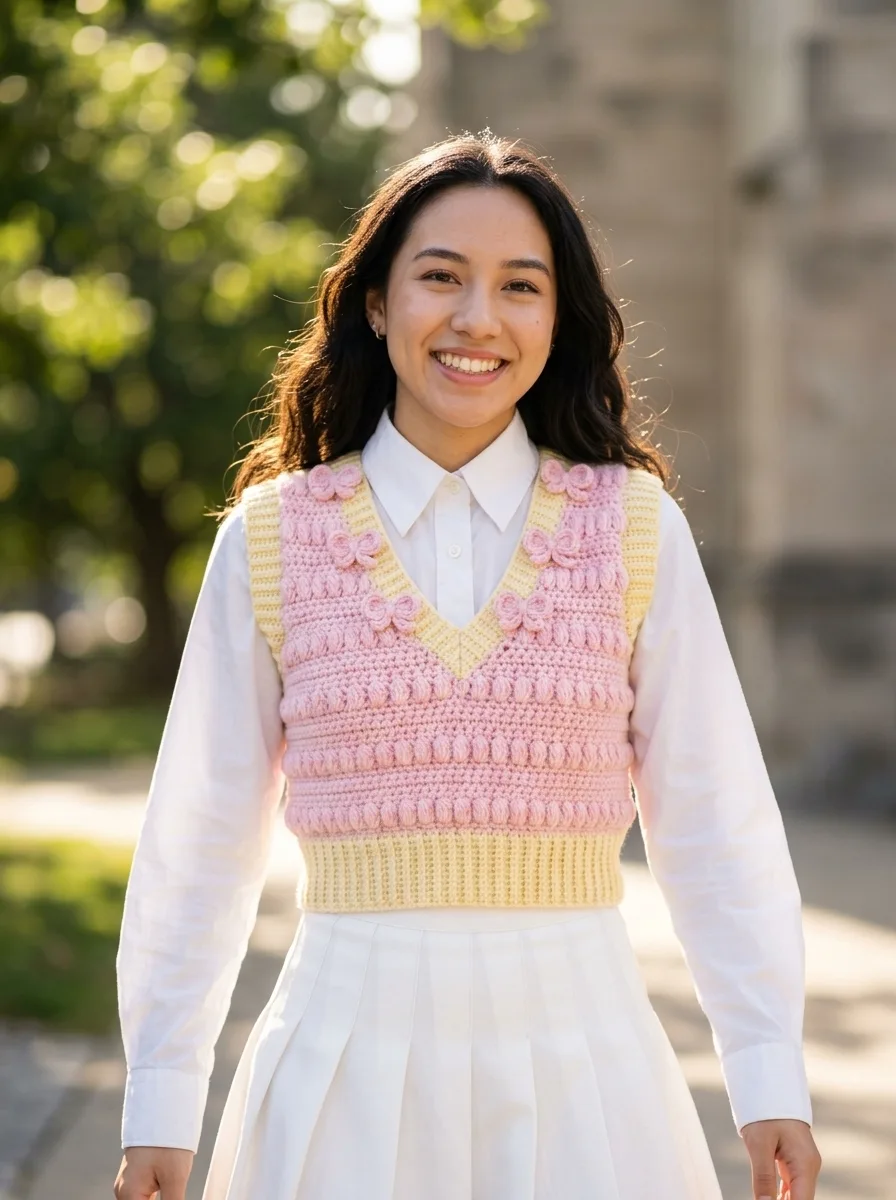
I don’t know about you, but I’ve been absolutely obsessed with sweater vests lately. All the cozy layering potential with none of the bulk that makes you feel like you’re wearing a sleeping bag. This Pink Bow Sweetheart Crochet Vest is everything I wanted in a transitional piece. It’s feminine, it’s playful, and those little bow details along the neckline? Total showstopper. Whether you’re layering it over a crisp white button-down or wearing it with a simple tee, this vest brings that sweet vintage energy that’s having a major moment right now.

About This Crochet Vest Pattern
This crochet sweater vest combines classic construction techniques with whimsical details that make it truly special. The body features rows of bobble stitches that create gorgeous texture, while the 3D bow appliqués cascading down the V-neckline add that extra touch of charm. The color blocking between soft butter yellow and blush pink gives it a fresh, modern feel while still feeling timeless.
The ribbed bottom band provides structure and a flattering fit at the waist, and the deep V-neck makes it incredibly versatile for styling. This is an intermediate level crochet pattern, but don’t let that scare you off if you’re a confident beginner. I’ll walk you through every single step.
Materials Needed for Your Crochet Vest
Yarn:
I recommend a yarn with good stitch definition like 100% cotton or a cotton blend. Acrylic works beautifully too and is easier on the budget. Look for something smooth rather than fuzzy so your bobbles and bows really pop.
Hook:
Notions:
Sizing and Measurements
This pattern is written for size Small/Medium with a finished bust measurement of approximately 34-36 inches. The vest is designed with 2-4 inches of positive ease for a relaxed fit.
Finished Measurements:
Gauge: 14 stitches and 12 rows = 4 inches in single crochet (sc). Always check your gauge before starting. If your gauge is off, adjust your hook size. Too many stitches per inch? Go up a hook size. Too few? Go down a hook size.
Abbreviations and Stitch Definitions
Let me break down every stitch you’ll need. If you’re newer to crochet, read through these before you start.
ch = chain. Wrap yarn over hook and pull through the loop on your hook. This is your foundation.
sl st = slip stitch. Insert hook, yarn over, pull through both the stitch and the loop on your hook in one motion. Used for joining and invisible movement.
sc = single crochet. Insert hook into stitch, yarn over and pull up a loop (2 loops on hook), yarn over and pull through both loops.
hdc = half double crochet. Yarn over, insert hook into stitch, yarn over and pull up a loop (3 loops on hook), yarn over and pull through all 3 loops.
dc = double crochet. Yarn over, insert hook into stitch, yarn over and pull up a loop (3 loops on hook), yarn over and pull through 2 loops (2 loops remain), yarn over and pull through remaining 2 loops.
BLO = back loop only. Instead of working under both loops of the stitch, you only work under the back loop. This creates a ribbed texture.
bobble = a cluster stitch that pops out from the fabric. For this pattern: yarn over, insert hook, pull up loop, yarn over, pull through 2 loops. Repeat this 4 more times in the same stitch (6 loops on hook), yarn over and pull through all 6 loops.
dec = decrease. Work 2 stitches together as one to reduce your stitch count.
inc = increase. Work 2 stitches into the same stitch to add stitches.
Step by Step Crochet Pattern Instructions
Back Panel
The back is worked flat from the bottom ribbing up to the shoulders.
Ribbing:
With Color A (yellow) and smaller hook, ch 12.
Row 1: Sc in 2nd ch from hook and in each ch across. (11 sc)
Row 2: Ch 1, turn. Sc in BLO of each st across. (11 sc)
Rows 3-62: Repeat Row 2. You’re creating a ribbed band that will stretch around half your body.
At the end of Row 62, ch 1, turn and work 62 sc evenly along the long edge of your ribbing. This picks up stitches to build upward. (62 sc)
Body:
Switch to larger hook and Color B (pink).
Row 1: Ch 1, turn. Sc in each st across. (62 sc)
Row 2: Ch 1, turn. Sc in each st across. (62 sc)
Row 3 (Bobble Row): Ch 1, turn. Sc in first 2 sts, *bobble in next st, sc in next 3 sts*. Repeat from * to last 4 sts, bobble in next st, sc in last 3 sts. (62 sts)
Row 4: Ch 1, turn. Sc in each st across. (62 sc)
Rows 5-8: Repeat Rows 1-4.
Rows 9-24: Continue in established pattern, alternating bobble rows every 4th row. (62 sts)
Armhole Shaping:
Row 25: Ch 1, turn. Sl st in first 5 sts, ch 1, sc in next 52 sts, leave last 5 sts unworked. (52 sc)
Row 26: Ch 1, turn. Sc2tog, sc to last 2 sts, sc2tog. (50 sc)
Rows 27-28: Repeat Row 26. (46 sc after Row 28)
Rows 29-42: Ch 1, turn. Sc in each st across, maintaining bobble pattern. (46 sc)
Fasten off and weave in ends.
Front Panel (Make 2)
Each front panel creates one side of the V-neck.
Ribbing:
With Color A and smaller hook, ch 12.
Work Rows 1-31 same as back ribbing. (11 sc per row)
Pick up 31 sc along the long edge of ribbing.
Body:
Switch to larger hook.
Row 1: Ch 1, turn. Sc in each st across. (31 sc)
Row 2: Ch 1, turn. Sc in each st across. (31 sc)
Row 3 (Bobble Row): Ch 1, turn. Sc in first 2 sts, *bobble in next st, sc in next 3 sts*. Repeat from * across. (31 sts)
Row 4: Ch 1, turn. Sc in each st across. (31 sc)
Continue in pattern for 24 rows total.
V-Neck Shaping (Right Front):
Row 25: At armhole edge, sl st in first 5 sts, ch 1, sc across remaining sts. At neck edge, sc2tog. (24 sc)
Row 26: At neck edge, sc2tog, sc across. At armhole edge, sc2tog. (22 sc)
Rows 27-42: Continue decreasing 1 st at neck edge every row while maintaining even armhole edge after initial shaping. (14 sc at Row 42)
For Left Front, reverse shaping.
Shoulder Seaming
Place back and front panels right sides together. Using yarn needle and matching yarn, whip stitch shoulder seams together. You should have approximately 14 stitches on each shoulder.
V-Neck Edging
With Color A and larger hook, join yarn at bottom of V-neck.
Round 1: Ch 1, sc evenly around entire neckline, working approximately 3 sc for every 2 rows. Place a stitch marker at the center bottom of the V. At the center point, work sc3tog to create a sharp V. Sl st to join.
Rounds 2-3: Continue in sc, decreasing at center V point each round. Fasten off.
Armhole Edging
Join Color A at underarm seam.
Round 1: Ch 1, sc evenly around armhole opening, approximately 60 sc total. Sl st to join.
Rounds 2-3: Ch 1, sc in each st around. Sl st to join.
Fasten off. Repeat for second armhole.
3D Bow Appliqués (Make 8-10)
These sweet little bows are what make this vest truly special. Don’t skip them!
With Color B and larger hook, ch 20.
Row 1: Sc in 2nd ch from hook and in each ch across. (19 sc)
Rows 2-4: Ch 1, turn. Sc in each st across. (19 sc)
Fasten off, leaving a long tail.
Assembly: Fold the rectangle so both short ends meet in the center, overlapping slightly. Using your yarn tail, wrap tightly around the center several times to cinch. Secure with a few stitches on the back. This creates the bow shape.
Bow Center Wrap: Ch 8. Sc in 2nd ch from hook and each ch across. Wrap this small strip around the pinched center and stitch in place on the back.
Attaching the Bows
Arrange your bows along the V-neckline, cascading from the shoulders down toward the center point. Space them evenly, approximately 1.5 to 2 inches apart. Pin in place before sewing to ensure you’re happy with the placement.
Using matching yarn and your yarn needle, stitch each bow securely to the vest. Take a few stitches through the back of each bow and through the vest fabric. Weave in all ends on the wrong side.
Finishing Your Crochet Vest
Blocking
For the best results, wet block your finished vest. Soak it in lukewarm water for about 15 minutes, then gently squeeze out excess water. Never wring or twist. Lay flat on a blocking mat or clean towels, shape to measurements, and allow to dry completely.
Side Seams
With right sides together, use a mattress stitch or whip stitch to join the side seams from the bottom of the ribbing to the underarm.
Weaving in Ends
Take your time here. Weave each tail through at least 2 inches of stitches on the wrong side, changing direction at least once. Trim close to the fabric.
Styling Tips for Your Sweater Vest
This crochet vest pattern works beautifully for so many occasions. Layer it over a long-sleeved button-down shirt for a preppy, polished look. Pair it with a simple white tee for casual weekends. The cropped length sits perfectly at the natural waist, making it flattering with high-waisted jeans, skirts, or trousers.
The soft color palette works year-round. Try it in different color combinations to suit your wardrobe. Navy and cream gives a classic nautical vibe. All one color creates a more subtle, sophisticated piece.
Helpful Tips for Success
If your bobbles feel flat: Make sure you’re completing all 5 partial double crochets before pulling through all loops at once. The more yarn you pack into that stitch, the puffier your bobble.
If your V-neck looks wonky: Check that you’re decreasing at the center point consistently. That sc3tog is essential for a crisp V shape.
If your bows won’t hold their shape: Try using a slightly stiffer yarn or add a small amount of fabric stiffener spray after completion.
If seaming feels intimidating: Watch a quick video tutorial on mattress stitch. It creates an invisible seam and is easier than it looks, I promise.
This crochet vest tutorial walks you through every step to create a garment you’ll reach for again and again. The combination of bobble texture, sweet bow details, and feminine colorwork makes this a truly special handmade piece. Once you’ve mastered this crochet pattern, you’ll have the skills to customize it in endless ways.
I hope you absolutely love making this Pink Bow Sweetheart Crochet Vest as much as I loved designing it. There’s something so satisfying about wearing a garment you made yourself, especially one this cute.
If this pattern is calling your name, go ahead and pin it to your crochet boards on Pinterest so you can find it when you’re ready to start. And please, if you make this vest, drop a comment below or tag me on social media. Seeing your finished projects is genuinely the best part of my day, and I can’t wait to see your color choices and styling ideas!
