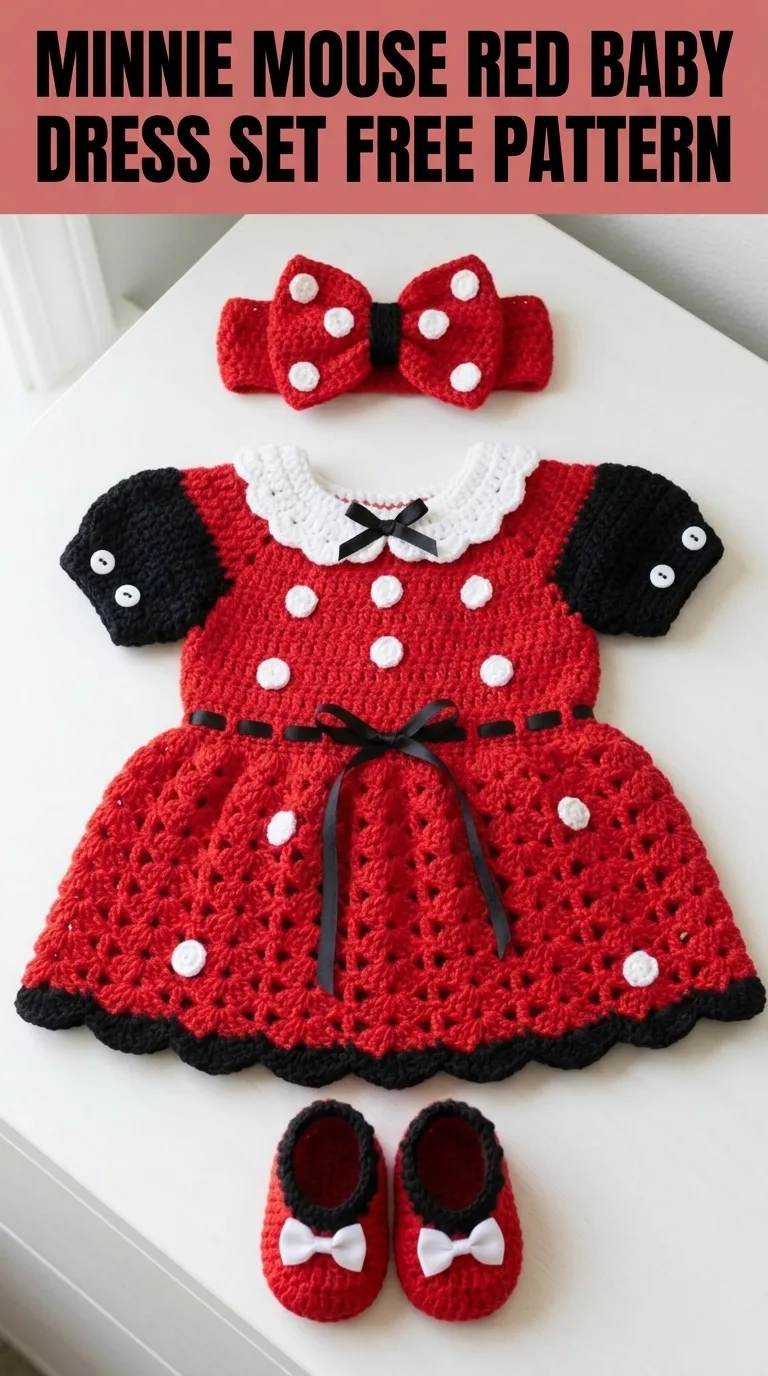
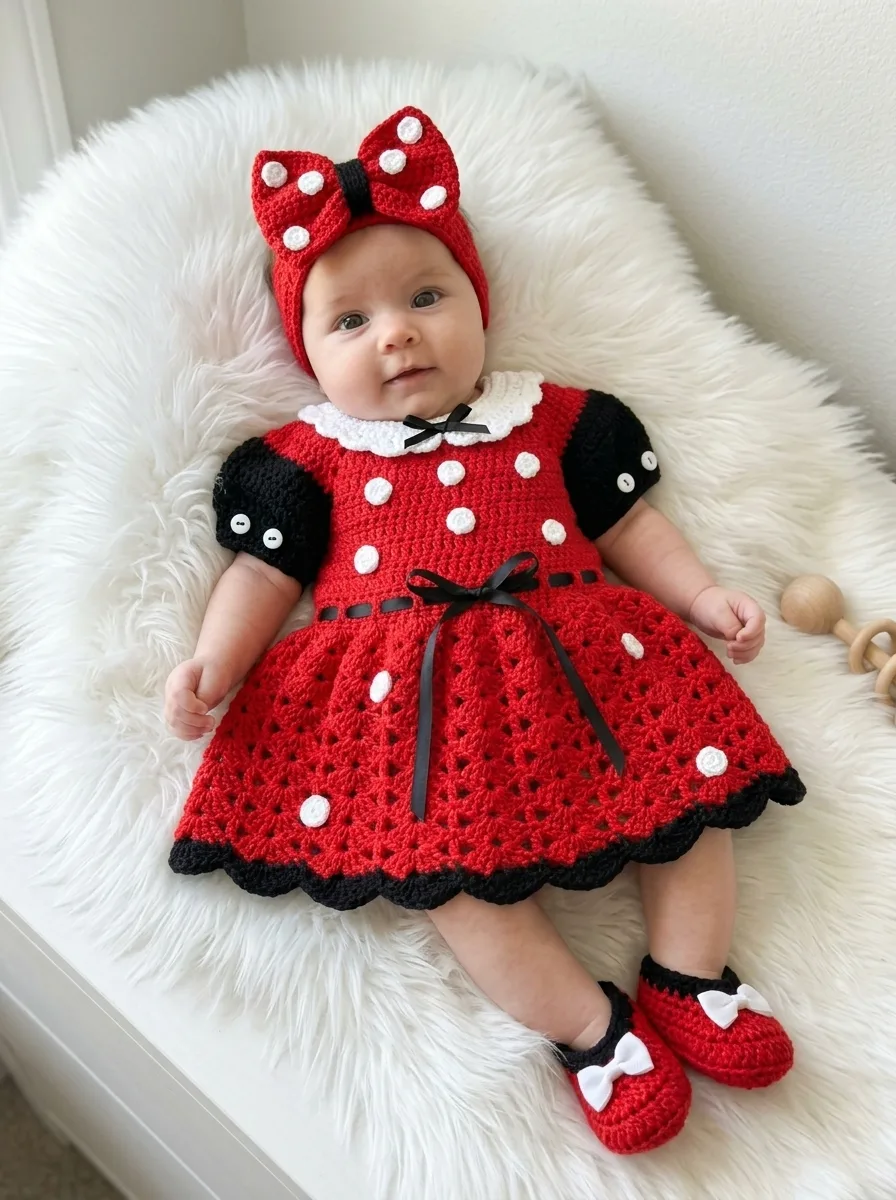
Oh my goodness, this little set! If you have been dreaming of creating the most adorable baby outfit inspired by everyone’s favorite polka dot wearing mouse, you are in the right place. This Minnie Mouse red baby dress set crochet pattern includes a sweet dress with puff sleeves and a lacy skirt, a matching polka dot bow headband, and the cutest little mary jane booties. The whole ensemble comes together beautifully and makes an unforgettable gift for baby showers, first birthdays, or photo sessions.
I designed this pattern for confident beginners and intermediate crocheters. If you can work basic stitches in the round and follow a simple stitch pattern, you can absolutely make this. I will walk you through every single step.
Why This Baby Dress Set Crochet Pattern Is So Special
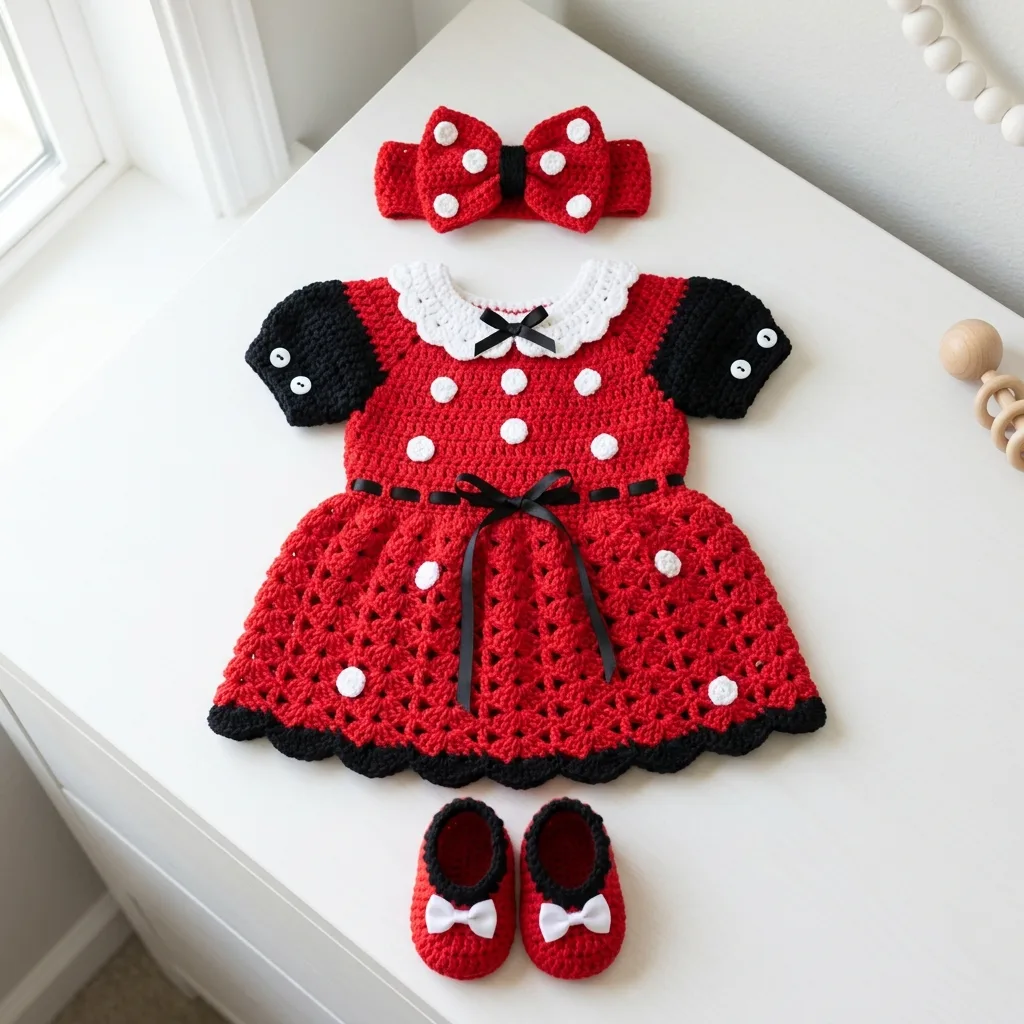
This set captures that classic red, black, and white color scheme we all love. The dress features a fitted bodice worked in rows, black puff sleeves with button details, a white Peter Pan collar with a tiny black ribbon, and a gorgeous shell stitch skirt with scattered polka dots. The black scallop edging along the hem ties everything together perfectly.
The matching bow headband uses the same polka dot technique as the dress. And those booties? Black mary janes with red insoles and sweet white bows. Together, this set is pure magic.
Skill level: Confident beginner to intermediate
Finished size: 6 to 12 months (dress length approximately 14 inches from shoulder to hem)
Materials You Will Need
Gather these supplies before you start. Having everything ready makes the process so much smoother.
Yarn:
I recommend a soft acrylic blend that holds up well to washing. Something like Red Heart Soft or Caron Simply Soft works beautifully for baby items.
Hook:
Notions:
Gauge
Gauge matters for fit, especially with garments. Take a few minutes to check yours.
With 4.0 mm hook in single crochet: 16 stitches and 18 rows equals 4 inches square.
If your gauge is off, adjust your hook size. Too many stitches per inch means you need a larger hook. Too few means you need a smaller one.
Abbreviations and Stitch Definitions
Let me explain every stitch before we begin. If you see an abbreviation you do not recognize, come back here.
Dress Pattern Instructions
This dress is worked in sections: bodice first, then sleeves are added, collar is worked separately and sewn on, and the skirt is worked downward from the bodice.
Bodice (Worked Flat)
Using red yarn and 4.0 mm hook.
Row 1: Ch 53, sc in 2nd ch from hook and in each ch across. (52 sts)
Row 2: Ch 1, turn, sc in each st across. (52 sts)
Rows 3 through 6: Repeat Row 2. (52 sts)
Now we divide for armholes.
Row 7 (RS): Ch 1, turn, sc in first 10 sts (right back), ch 2, sk next 6 sts (armhole), sc in next 20 sts (front), ch 2, sk next 6 sts (armhole), sc in last 10 sts (left back). (40 sc plus 2 ch-2 spaces)
Row 8: Ch 1, turn, sc in first 10 sts, 2 sc in ch-2 space, sc in next 20 sts, 2 sc in ch-2 space, sc in last 10 sts. (44 sts)
Rows 9 through 14: Ch 1, turn, sc in each st across. (44 sts)
Row 15: Ch 1, turn, sc in each st, working 2 sc in every 4th st for gentle increase. (55 sts)
Fasten off. This completes the bodice.
Puff Sleeves (Make 2)
Using black yarn and 4.0 mm hook. Sleeves are worked in joined rounds.
Round 1: Ch 24, sl st to first ch to form ring, ch 1, sc in each ch around, sl st to first sc. (24 sts)
Rounds 2 through 4: Ch 1, sc in each st around, sl st to join. (24 sts)
Round 5: Ch 1, sc in first st, sk next st, repeat around, sl st to join. (12 sts)
Round 6: Ch 1, sc in each st around, sl st to join. (12 sts)
Fasten off, leaving a long tail for sewing.
Button detail: Sew one small white button centered on the outer edge of each sleeve, about 2 rows up from the cuff.
Attach sleeves to armhole openings using whip stitch, easing fullness evenly around.
Peter Pan Collar
Using white yarn and 3.5 mm hook.
Row 1: Ch 40, sc in 2nd ch from hook and in each ch across. (39 sts)
Row 2: Ch 1, turn, sc in first st, *sk 1 st, 5 dc in next st (shell made), sk 1 st, sc in next st,* repeat from * across. You should have approximately 9 shells.
Row 3: Ch 3, turn, 2 dc in first sc, sc in center dc of shell, *5 dc in next sc, sc in center dc of next shell,* repeat across, ending with 3 dc in last sc.
Fasten off. Weave in ends.
Center collar along neckline edge of bodice and sew in place using white yarn. Thread a 6 inch piece of thin black ribbon through the center front of collar and tie in a small bow. Trim ends and secure with a few small stitches if desired.
Skirt (Worked in Rounds)
Join red yarn to bottom edge of bodice at center back.
Round 1: Ch 3 (counts as dc), dc in each st around bottom of bodice, sl st to top of ch-3. (55 sts)
Round 2: Ch 3, dc in same st, dc in next 2 sts, *2 dc in next st, dc in next 2 sts,* repeat around, sl st to join. (73 sts approximately)
Rounds 3 through 5: Ch 3, dc in each st around, sl st to join. (73 sts)
Round 6 (Shell Round): Ch 1, sc in first st, *sk 2 sts, 5 dc in next st, sk 2 sts, sc in next st,* repeat around, adjusting at end if needed, sl st to join.
Rounds 7 through 12: Continue shell pattern. Sc in center dc of shell below, 5 dc in sc below, repeat around.
Round 13 (Black Edging): Join black yarn, ch 1, work sc in each st around, sl st to join. (Count will vary slightly based on shells)
Round 14 (Scallop Edge): Ch 1, sc in first st, *sk 1 st, 5 dc in next st, sk 1 st, sc in next st,* repeat around, sl st to join.
Fasten off. Weave in all ends.
Polka Dots (Make 10 to 12)
Using white yarn and 3.5 mm hook.
Round 1: Magic ring, ch 1, 6 sc into ring, sl st to join, pull ring tight. (6 sts)
Round 2: Ch 1, 2 sc in each st around, sl st to join. (12 sts)
Fasten off, leaving a tail for sewing.
Arrange polka dots randomly across bodice and skirt. Refer to photo for placement. Sew securely using yarn needle.
Ribbon Belt
Thread remaining black ribbon through a row of stitches at the natural waistline (where bodice meets skirt). Tie in a bow at center front. Trim ends at an angle.
Bow Headband Pattern
Using red yarn and 4.0 mm hook.
Bow (Make 2 Pieces)
Row 1: Ch 16, sc in 2nd ch from hook and in each ch across. (15 sts)
Rows 2 through 10: Ch 1, turn, sc in each st across. (15 sts)
Fasten off. Make two identical rectangles.
Stack the two pieces. Pinch center tightly and wrap yarn around the middle several times to create bow shape. Secure with a knot.
Make 4 to 6 mini polka dots (Round 1 only of polka dot instructions) and sew randomly onto bow loops.
Headband
Row 1: Ch 41, sc in 2nd ch from hook and in each ch across. (40 sts)
Rows 2 through 4: Ch 1, turn, sc in each st across. (40 sts)
Fasten off. Sew short ends together to form a loop. Sew bow to front of headband, centered.
Mary Jane Booties Pattern (Make 2)
Using red yarn and 4.0 mm hook.
Sole
Round 1: Ch 8, sc in 2nd ch from hook, sc in next 5 ch, 3 sc in last ch, rotate and work along opposite side of foundation chain, sc in next 5 ch, 2 sc in last ch, sl st to join. (16 sts)
Round 2: Ch 1, 2 sc in first st, sc in next 5 sts, 2 sc in each of next 3 sts, sc in next 5 sts, 2 sc in each of last 2 sts, sl st to join. (22 sts)
Round 3: Ch 1, sc in each st around, sl st to join. (22 sts)
Upper
Switch to black yarn.
Rounds 4 through 6: Ch 1, sc in each st around, sl st to join. (22 sts)
Round 7 (Toe Shaping): Ch 1, sc in first 6 sts, sc2tog 5 times across toe, sc in remaining 6 sts, sl st to join. (17 sts)
Round 8: Ch 1, sc in first 5 sts, sc2tog 3 times, sc in remaining 6 sts, sl st to join. (14 sts)
Fasten off.
Strap
Join black yarn at side of bootie. Ch 10, sl st to opposite side. Fasten off.
Bow
Using white yarn. Ch 6, sl st to first ch to form ring. Ch 1, work 10 sc into ring, sl st to join. Fasten off. Pinch center and wrap to create tiny bow. Sew to center of strap.
Repeat for second bootie.
Finishing Tips
Block all pieces gently by misting with water and laying flat to dry. This evens out your stitches and gives a professional finish.
Weave in every end securely. Baby items get washed frequently, so you want those tails locked in tight.
Sew buttons firmly. If the outfit is for a very young baby, consider omitting buttons or using embroidered circles instead for safety.
Helpful Tips for Success
Tension matters. Keep your stitches consistent, especially on the bodice. Too tight and the dress will not fit. Too loose and it loses structure.
Count your stitches. Seriously. At the end of every row on the bodice, count. It takes three seconds and saves hours of frustration.
The shells can feel fiddly at first. If you have never worked a shell stitch before, practice on a swatch until it feels natural.
Polka dot placement is flexible. There is no wrong way. Scatter them however looks pleasing to you.
Wrapping Up This Adorable Crochet Tutorial
Creating this Minnie Mouse red baby dress set crochet pattern is such a rewarding project. Every piece comes together to form something truly memorable. Whether you are making it for your own little one, a grandchild, or a friend’s baby shower, this set will absolutely steal the show.
I hope this step by step crochet pattern gives you everything you need to bring this sweet outfit to life. You have got this, and I cannot wait to see what you create.
Thank you so much for choosing this pattern and spending your crafting time here with me. It truly means the world.
If you loved making this set, I would be so happy if you saved this pattern to your Pinterest boards so you can find it again later or share it with your crochet loving friends. And please, drop a comment below if you make one. I absolutely love seeing your finished projects and hearing how the pattern worked for you. Happy hooking!
