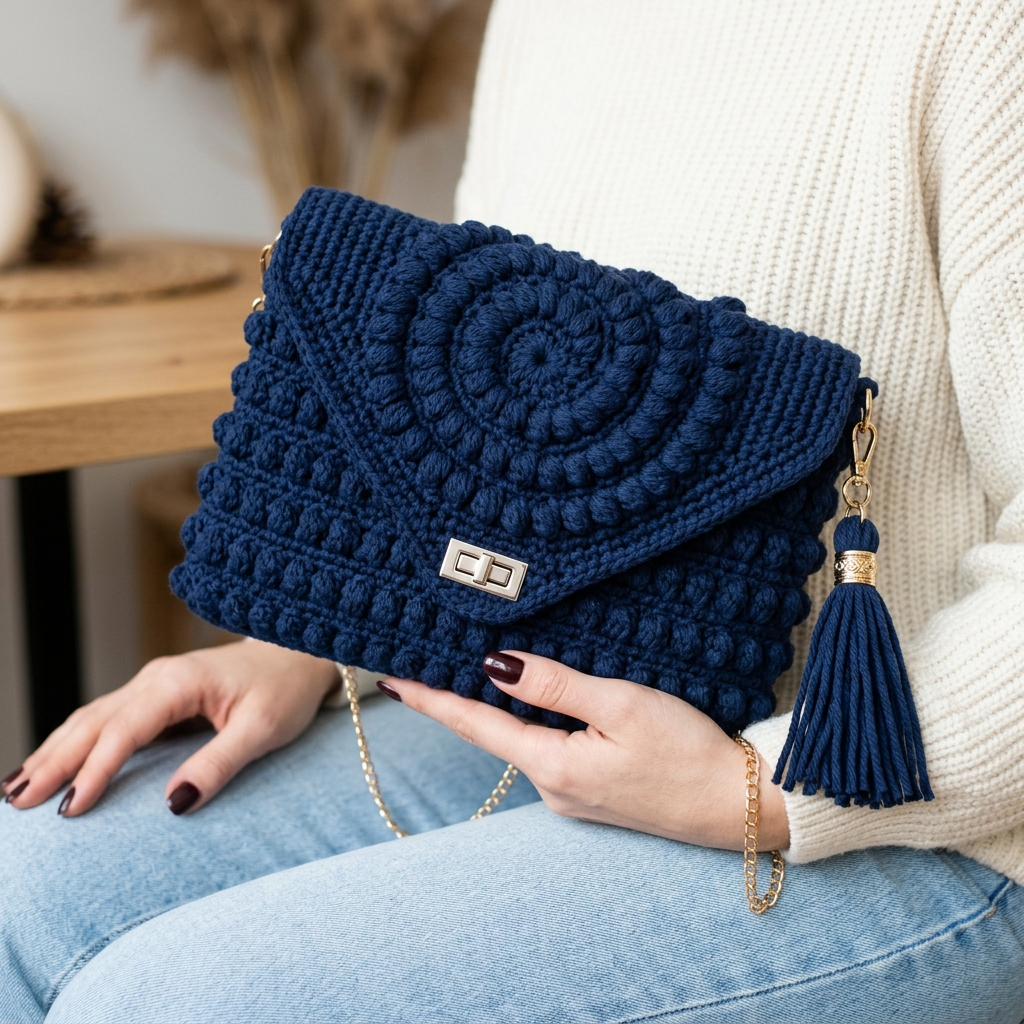
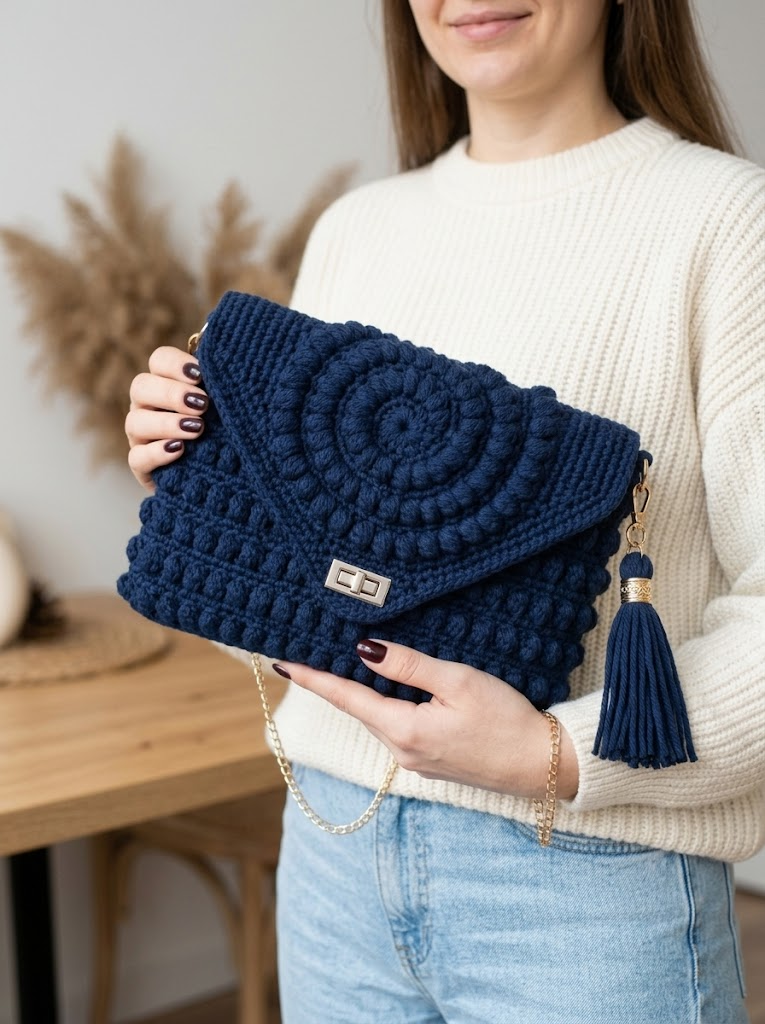
This stunning navy blue spiral clutch bag might just be my favorite accessory project to date. The combination of textured bobble stitches and that gorgeous spiral medallion on the flap creates something that looks straight off a boutique shelf. And here’s the thing: if you can work basic crochet stitches and follow a simple pattern, you can absolutely make this.
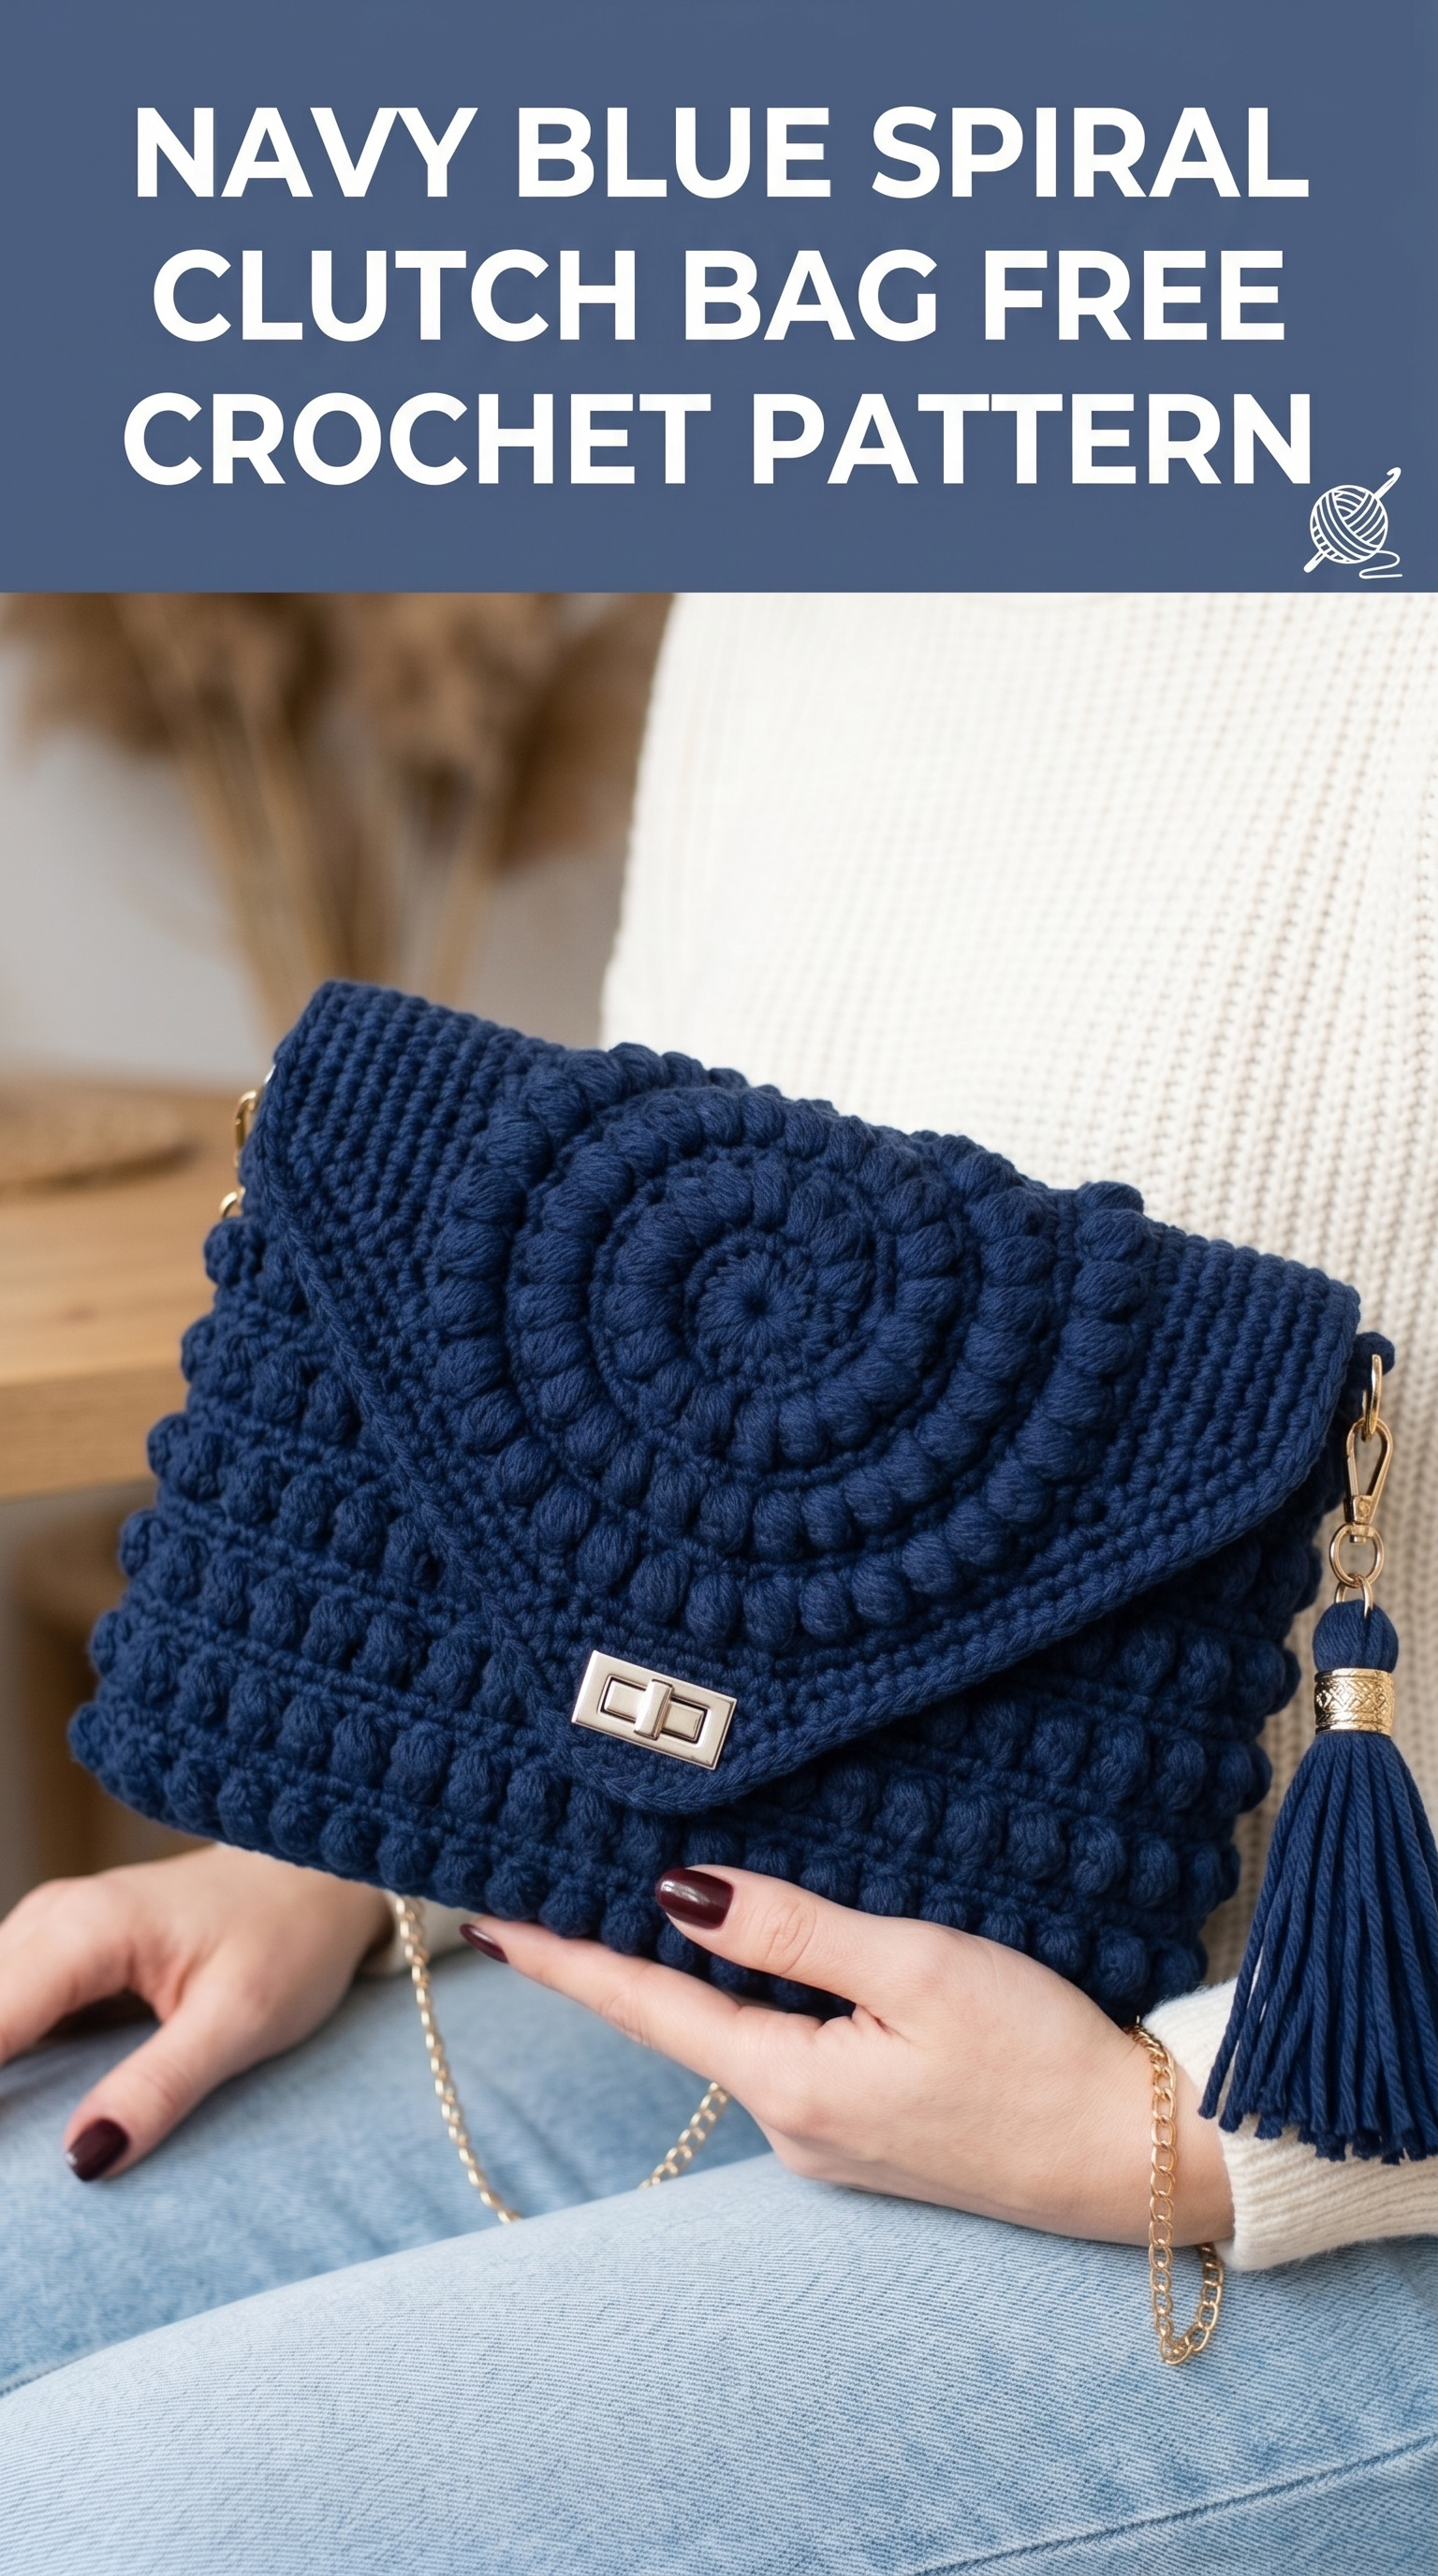
I designed this crochet pattern to give you that high-end look without the high-end price tag. The finished clutch measures approximately 10 inches wide by 7 inches tall when closed, making it the perfect size for an evening out or a day when you want to travel light.
Let me walk you through everything you need to recreate this crochet clutch bag pattern from start to finish.
Why This Spiral Clutch Bag Pattern Works
The magic of this design comes from three elements working together. First, you have the bobble stitch body that creates incredible texture and visual interest. Second, there’s that eye-catching spiral medallion on the flap that everyone will ask about. Third, the hardware elevates the whole piece from craft project to fashion accessory.
I consider this an intermediate level crochet pattern. If you’ve mastered single crochet and double crochet, you’re ready. The bobble stitch might be new to you, but I’ll explain it thoroughly. Promise.
Materials You Will Need
Yarn:
Hook:
Notions:
Optional:
Gauge
Work 14 single crochet stitches and 16 rows to create a 4-inch square. Check your gauge before starting. This matters for bags because you want the finished size to accommodate your belongings and hardware properly.
Abbreviations and Stitch Definitions
Let me explain every stitch you’ll encounter in this step by step crochet tutorial.
ch = chain: Wrap yarn over hook, pull through loop on hook. This creates the foundation for most crochet work.
sl st = slip stitch: Insert hook into stitch, yarn over, pull through both the stitch and the loop on your hook in one motion. Used for joining rounds.
sc = single crochet: Insert hook into stitch, yarn over and pull up a loop (two loops on hook), yarn over and pull through both loops.
dc = double crochet: Yarn over, insert hook into stitch, yarn over and pull up a loop (three loops on hook), yarn over and pull through two loops, yarn over and pull through remaining two loops.
hdc = half double crochet: Yarn over, insert hook into stitch, yarn over and pull up a loop (three loops on hook), yarn over and pull through all three loops at once.
bob = bobble stitch: Work 5 double crochet stitches into the same stitch, but stop each dc before the final yarn over (leaving 6 loops on hook after all 5 partial dc), then yarn over and pull through all 6 loops. This creates a raised “bump” on the fabric.
inc = increase: Work 2 stitches into the same stitch.
Special Techniques
The Bobble Stitch in Detail
This stitch intimidates people, but it shouldn’t. Here’s what’s actually happening:
1. Yarn over, insert hook into designated stitch
2. Yarn over, pull up loop, yarn over, pull through 2 loops (first partial dc done, 2 loops remain on hook)
3. Repeat steps 1-2 four more times in the SAME stitch (you’ll have 6 loops on hook)
4. Yarn over and pull through all 6 loops at once
5. Chain 1 to secure (some patterns skip this, but I find it helps)
The bobble “pops” to the back of your work. When working in rows, you’ll create bobbles on wrong side rows so they show on the right side.
The Pattern Instructions
Part One: Bag Body (Worked Flat)
You’ll create the body as one long rectangle, then fold and seam it.
Foundation: Ch 36
Row 1 (RS): Sc in 2nd ch from hook and in each ch across. (35 sts)
Row 2: Ch 1, turn. Sc in each st across. (35 sts)
Row 3: Ch 1, turn. Sc in first 2 sts, *bob in next st, sc in next 2 sts* repeat from * to end. (35 sts, 11 bobbles)
Row 4: Ch 1, turn. Sc in each st across. (35 sts)
Row 5: Ch 1, turn. Sc in each st across. (35 sts)
Row 6: Ch 1, turn. Sc in each st across. (35 sts)
Rows 7-10: Repeat Rows 3-6.
Rows 11-14: Repeat Rows 3-6.
Rows 15-18: Repeat Rows 3-6.
Continue this bobble pattern (bobble row, then 3 sc rows) until piece measures approximately 21 inches long. This creates enough fabric for the front, back, and flap of your clutch.
You should have approximately 84 rows total.
Fasten off and weave in ends.
Part Two: Spiral Medallion for Flap
This is where the magic happens. The spiral creates a stunning focal point.
Round 1: Make a magic ring. Ch 3 (counts as first dc), work 11 dc into ring. Sl st to top of ch-3 to join. Do NOT fasten off. (12 dc)
Round 2: Ch 3, dc in same st, 2 dc in each st around. Sl st to join. (24 dc)
Round 3: Ch 3, dc in same st, dc in next st, *2 dc in next st, dc in next st* around. Sl st to join. (36 dc)
Round 4: Ch 3, dc in same st, dc in next 2 sts, *2 dc in next st, dc in next 2 sts* around. Sl st to join. (48 dc)
Round 5: Ch 3, dc in same st, dc in next 3 sts, *2 dc in next st, dc in next 3 sts* around. Sl st to join. (60 dc)
Now we create the spiral texture:
Round 6: Working in front loops only, *sc in next st, hdc in next st, dc in next 2 sts, hdc in next st, sc in next st* repeat around. This creates a wave pattern. Sl st to join. (60 sts)
Round 7: Working in the unused back loops of Round 5, repeat the wave pattern: *sc in next st, hdc in next st, dc in next 2 sts, hdc in next st, sc in next st* repeat around. Sl st to join. (60 sts)
Round 8: Ch 1, sc in each st around in both loops. Sl st to join. (60 sts)
The medallion should measure approximately 4.5 inches in diameter.
Fasten off, leaving a long tail for sewing.
Part Three: Assembly
This is where your clutch comes together. Take your time here.
Step 1: Fold the Body
Lay your rectangle flat with the bobbles facing you (right side up). Measure 7 inches from the bottom and fold up to create the bag pocket. The remaining fabric becomes your flap.
Step 2: Side Seams
Using a tapestry needle and matching yarn, whip stitch or mattress stitch the side edges together. Work through both layers to close the bag sides. Reinforce the bottom corners with a few extra stitches.
Step 3: Attach the Spiral Medallion
Center the spiral medallion on the flap, approximately 1 inch from the bottom edge of the flap. Pin in place. Using the long tail, whip stitch around the entire medallion edge, securing it firmly to the flap.
Step 4: Install the Turn Lock Clasp
Position the clasp base on the front of the bag body, centered and about 1.5 inches from the top edge of the pocket. Mark the placement. Using sharp scissors, carefully cut small slits for the prongs. Push prongs through, fold them flat on the inside.
Fold the flap down and mark where the twist piece should go. Install following manufacturer instructions. Most turn locks have a back plate that secures the mechanism.
*Tip: Installing hardware can feel scary. Go slowly. Mark twice, cut once.*
Step 5: Attach D-Rings
Crochet two small tabs:
Ch 8, sl st in 2nd ch from hook and in each ch across. Fasten off.
Thread each tab through a D-ring, fold in half, and sew securely to the inside corners of the bag opening.
Step 6: Attach Chain Strap
Clip the chain strap to both D-rings using the lobster clasps. Adjust length as desired.
Step 7: Add the Tassel
Clip or tie the tassel to one D-ring for that finishing touch.
Finishing and Blocking
For a professional look, I recommend lightly steam blocking your finished clutch. Hold a steamer or iron (on steam setting) a few inches from the fabric. Do not press directly on the bobbles or you’ll flatten them.
If you want to add a fabric lining, cut fabric to match the inside dimensions, fold edges under, and hand stitch or glue in place. Lining isn’t required but does give a polished interior.
Customization Ideas
This crochet clutch bag pattern works beautifully in so many variations:
Troubleshooting Common Issues
Bobbles are flat: Make sure you’re working 5 double crochets into the same stitch. Pull that final yarn over snug.
Bag is too floppy: Use a smaller hook size or choose a stiffer yarn. Cotton holds structure better than acrylic.
Medallion curls: Block it before attaching. Pin it flat, spray with water, let dry.
Hardware shows through: Consider adding an interfacing or fabric backing behind the clasp area.
Final Thoughts on This Crochet Tutorial
I hope you love making this navy blue spiral clutch bag as much as I enjoyed designing it. There’s something deeply satisfying about creating an accessory you’ll actually use and love. The texture, the spiral detail, the gold hardware accents: it all comes together into something special.
This crochet pattern takes time, but every stitch is worth it. You’re building something beautiful, practical, and uniquely yours.
Thank you so much for choosing this pattern. Truly. I’d absolutely love to see your finished clutch. Tag me on Instagram or share in my Facebook group. Seeing your creations genuinely makes my day.
Happy crocheting, friend. You’ve got this.
