
When I sat down to design this dress, I had a very specific vision in mind. I wanted something dramatic and feminine with a fitted bodice that actually flatters the figure, paired with a skirt that moves beautifully when you walk. The tiered ruffle construction took some serious planning to get right, but I am absolutely thrilled with how it turned out.
Get the Ad-Free PDF Pattern
You can find the free pattern below, or you can purchase the ad-free printable PDF from my shop.
Get the Printable PDF →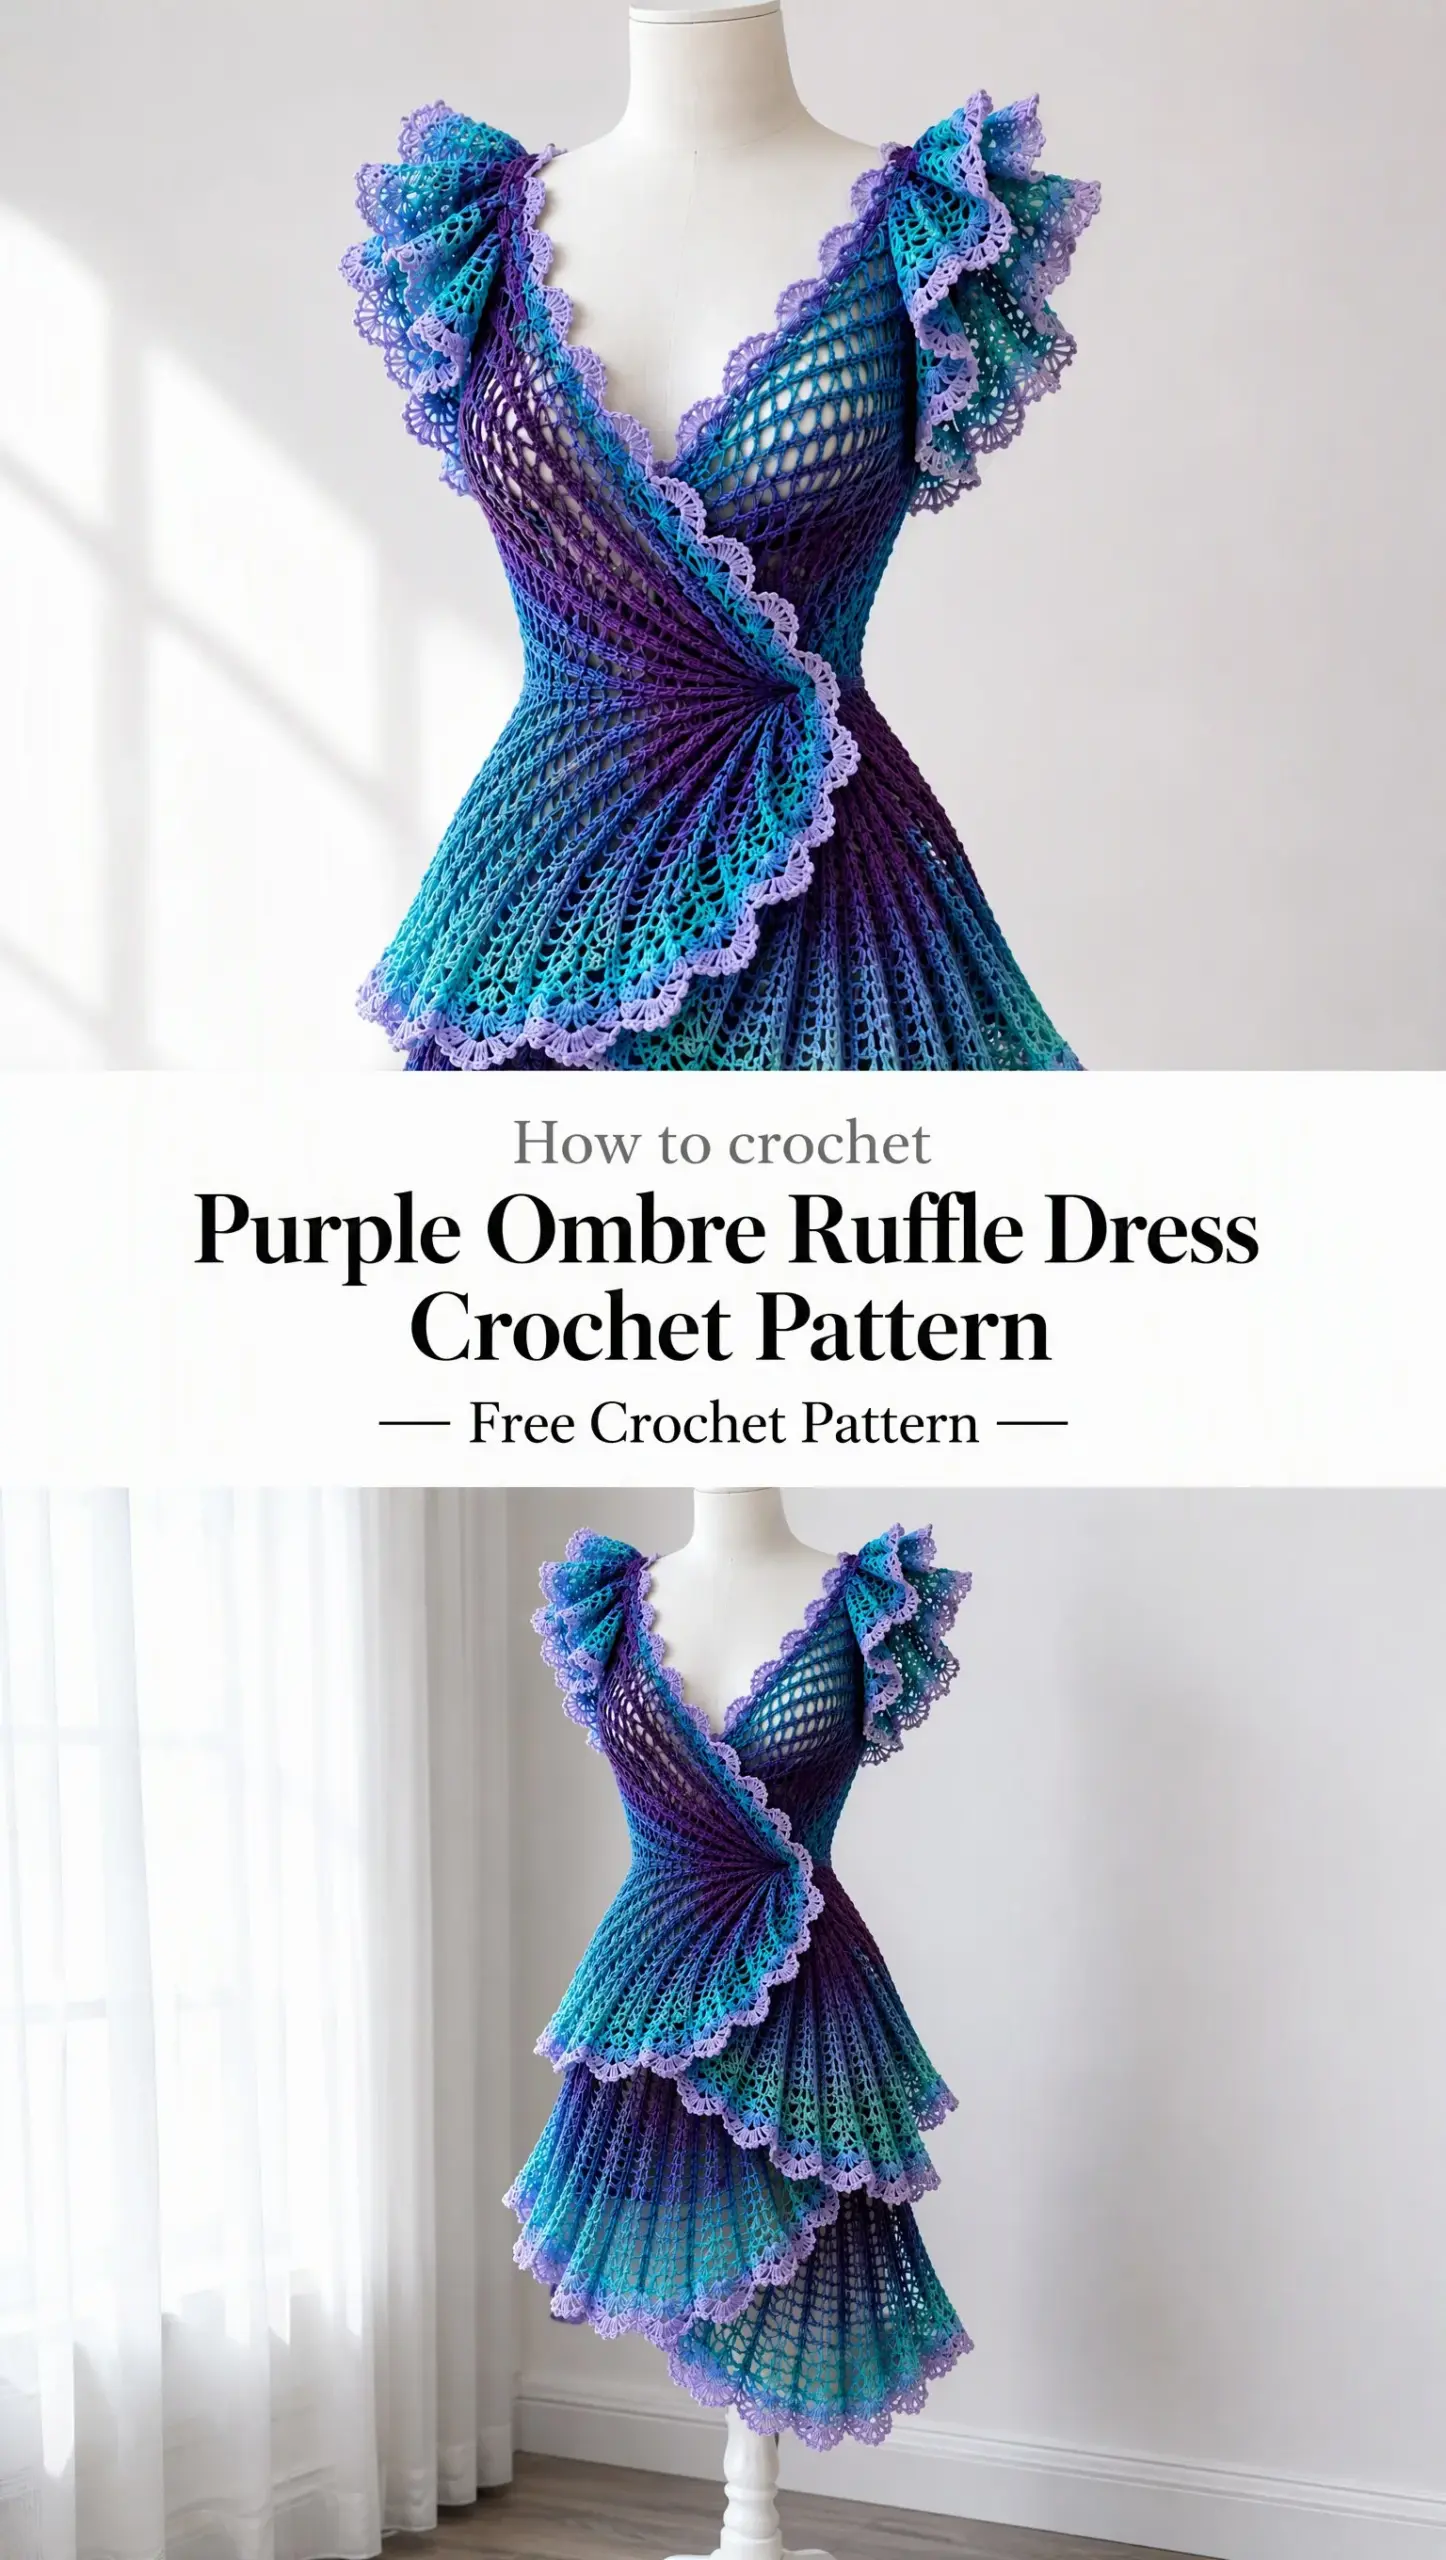
This pattern uses a measurement-based approach, which means you can customize it to fit your exact body. No more hoping a standard size will work for you. Whether you’re an XS or a 5XL, this dress will fit because you’re building it around your own measurements.
The purple ombre effect is what really makes this piece special. Starting with pale lavender at the top and graduating down through medium violet, rich purple, and finally deep plum at the hem creates such a stunning visual impact. Every time I look at the finished dress, I fall in love with it all over again.
About This Purple Ombre Ruffle Dress Pattern
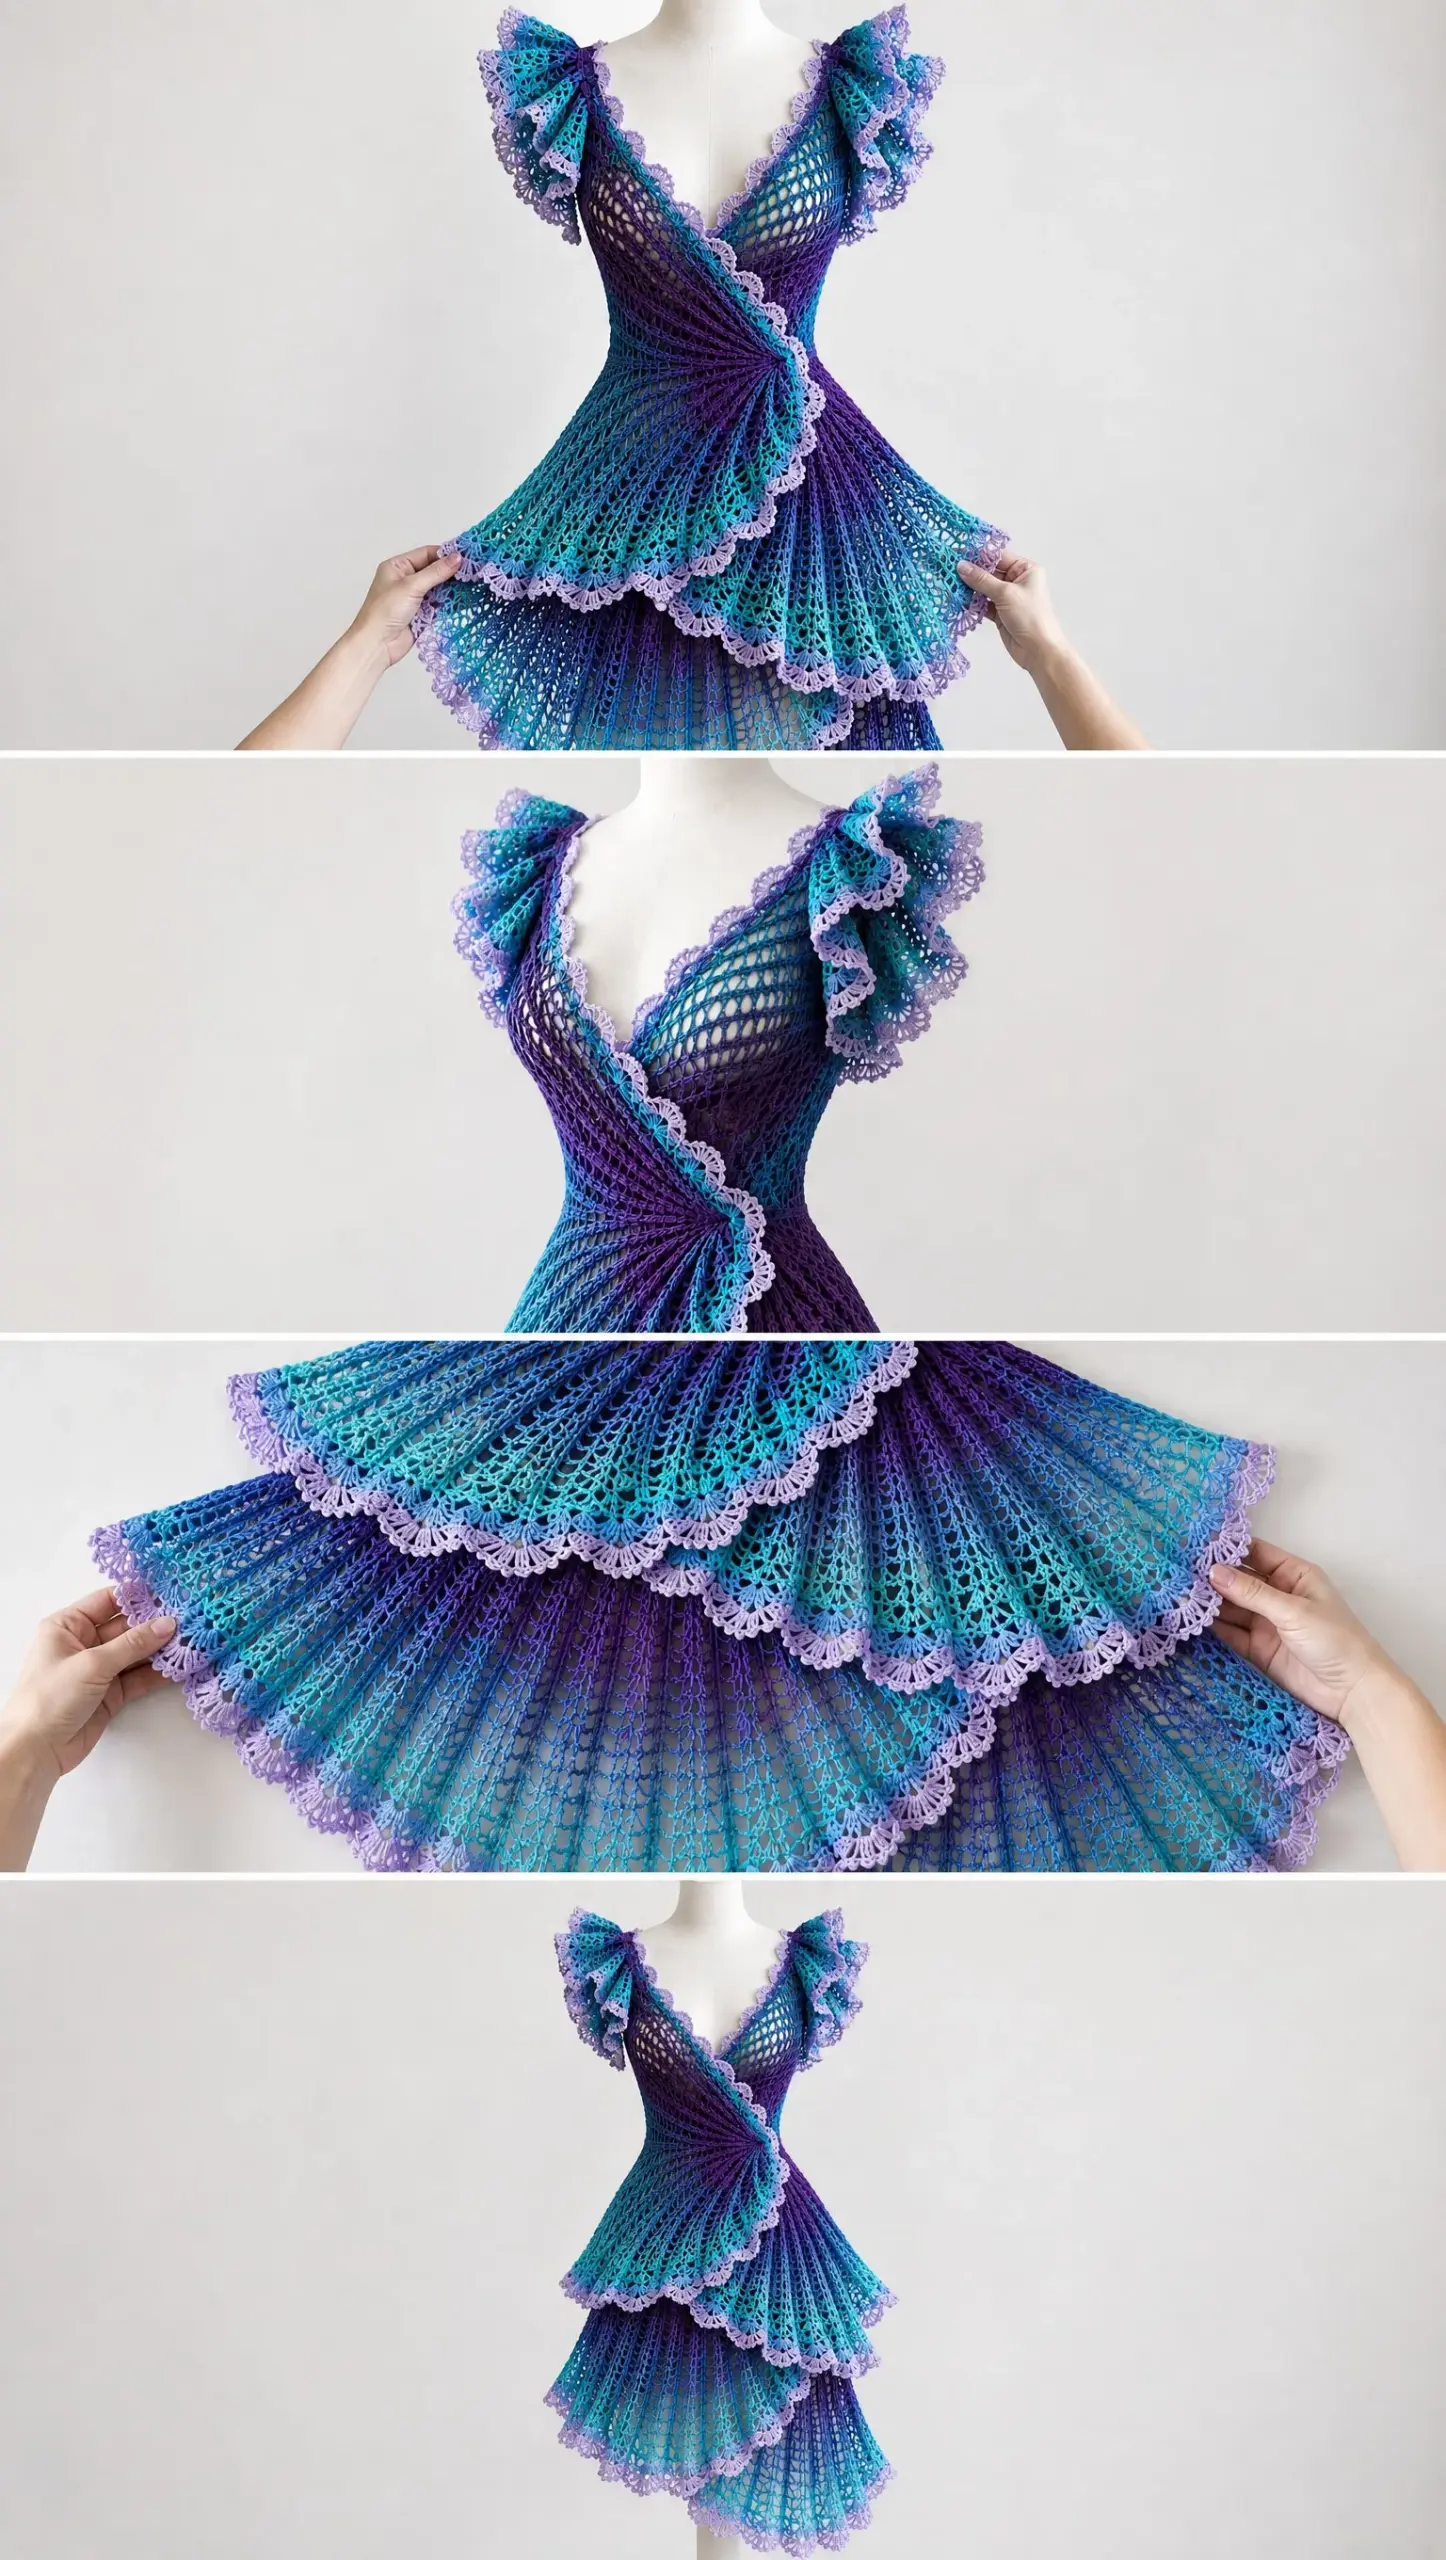
This crochet dress features a close-fitting sleeveless bodice worked from the bottom up in joined rounds, then separated for the upper body and worked in rows. The skirt attaches directly to the bodice and includes multiple tiers of cascading ruffles that create that gorgeous dramatic silhouette you see in the photos.
The construction is clever but not complicated. You’ll create a smooth base skirt first, then add the ruffles afterward by working into exposed front loops. This means the dress has beautiful movement without being bulky at the waist.
Skill level: Intermediate. You should be comfortable with basic stitches, working in the round, shaping, and following measurement-based instructions.
Materials You’ll Need
Yarn: DK weight or light worsted (#3) with good drape. Cotton-acrylic blends, bamboo blends, or soft acrylic all work beautifully for this project.
Approximate yardage by size:
Buy 10 to 15 percent extra if you’re making a maxi length or want very deep ruffles.
Colors: You’ll need four shades of purple:
Hook: 4.0 mm for the main fabric, or whatever size you need to achieve gauge. A 3.5 mm hook is optional for firmer neckline and armhole edging.
Notions: 6 stitch markers, tapestry needle, scissors, measuring tape, removable markers, and blocking mats. Optional items include a 20 to 25 mm button for a back neck opening, elastic thread for waist stabilization, and a lightweight slip or lining.
Gauge
16 double crochet stitches by 9 rows equals 10 cm by 10 cm (4 inches by 4 inches) after blocking.
Gauge matters most for the bodice. The skirt can tolerate small differences, but please swatch and block before starting. Your finished dress will thank you.
Abbreviations and Stitch Definitions
Let me walk you through every abbreviation used in this pattern:
ch = chain. Wrap yarn over hook and pull through the loop on your hook.
sl st = slip stitch. Insert hook, yarn over, pull through both the stitch and the loop on your hook in one motion.
sc = single crochet. Insert hook, yarn over, pull up a loop (2 loops on hook), yarn over, pull through both loops.
hdc = half double crochet. Yarn over, insert hook, yarn over, pull up a loop (3 loops on hook), yarn over, pull through all 3 loops.
dc = double crochet. Yarn over, insert hook, yarn over, pull up a loop (3 loops on hook), yarn over, pull through 2 loops, yarn over, pull through remaining 2 loops.
st(s) = stitch(es)
sp = space
inc = increase, which means working 2 dc in the same stitch
dc2tog = double crochet 2 together (a decrease). Yarn over, insert hook in next stitch, yarn over, pull up a loop, yarn over, pull through 2 loops. Repeat in the next stitch. Yarn over and pull through all 3 loops on hook.
BLO = back loop only. Instead of inserting your hook under both loops at the top of the stitch, insert it under only the back loop.
Taking Your Measurements
Before you start, take these measurements over the undergarments you plan to wear with the dress:
The bodice is designed with approximately 0 to 5 cm (0 to 2 inches) of negative ease, depending on your yarn’s stretch.
Size Chart
| Size | Body Bust | Finished Bodice Bust | Waist Guide |
|---|---|---|---|
| XS | 76-81 cm | 76 cm | 61-66 cm |
| S | 86-91 cm | 86 cm | 66-71 cm |
| M | 97-102 cm | 97 cm | 76-81 cm |
| L | 107-112 cm | 107 cm | 86-91 cm |
| XL | 117-122 cm | 117 cm | 97-102 cm |
| 2XL | 127-132 cm | 127 cm | 107-112 cm |
| 3XL | 137-142 cm | 137 cm | 117-122 cm |
| 4XL | 147-152 cm | 147 cm | 127-132 cm |
| 5XL | 157-163 cm | 157 cm | 137-142 cm |
Calculating Your Stitch Count
Here’s the formula: multiply your desired finished circumference in centimeters by 1.6, then round to the nearest multiple of 4.
For example, if you want a 97 cm bust: 97 × 1.6 = 155.2, so you would use 156 stitches.
This formula works because at gauge, you get 16 dc per 10 cm. Simple math, beautiful fit.
The Bodice: Step by Step Instructions
The bodice is worked from the lower edge upward in joined rounds to the underarm. Then the front and back are worked separately in rows. This construction gives you a clean, fitted shape and makes shoulder adjustment easy.
Step 1: Foundation
With Color A, chain the number calculated for your finished bust circumference. Make sure the chain is not twisted, then slip stitch to the first chain to join. Chain 2 (this does not count as a stitch throughout). Work 1 dc in every chain around. Join with a slip stitch.
Step 2: Lower Bodice
Chain 2, dc in each stitch around, join. Repeat this round until the piece measures from your lower waist to just below the bust, or until you’re about 5 to 7 cm (2 to 2.75 inches) below the underarm. Try on frequently as you work.
Step 3: Waist Shaping
If your waist is at least 8 cm (3 inches) smaller than your bust, you’ll decrease gradually over 3 to 5 rounds. Place 4 markers evenly around your work.
On a decrease round, work dc2tog immediately before each marker. Work 1 plain round between decrease rounds. Stop decreasing when the waist circumference matches your target without stretching tightly.
Step 4: Bust Shaping
From the waist to the underarm, you need to restore the stitches you decreased. On an increase round, work 2 dc in the stitch immediately after each of your 4 markers. Alternate between increase rounds and plain rounds until you return to your bust stitch count.
Step 5: Divide for Armholes
Lay the tube flat with the round join at center back. Mark equal front and back sections. Leave approximately 8% of your total stitches unworked at each side for the armholes.
For example, with 156 stitches, leave about 12 stitches at each side. This gives you about 66 stitches each for the front and back.
Step 6: Back Upper Bodice
Join yarn at one back armhole edge. Chain 2, dc across the back section. Turn. For the next 2 to 4 rows, work dc2tog at both ends to shape the armholes. Continue working even until the upper bodice reaches your shoulder level.
Step 7: Back Neck and Shoulders
Work across approximately the first 25% of back stitches for shoulder 1, leaving the center 50% unworked for the neckline. Work shoulder rows until your total shoulder-to-waist length matches your measurement. Fasten off. Repeat for shoulder 2.
Step 8: Front Upper Bodice
Work as for the back through armhole shaping. For a scoop neck, when the front is about 6 to 8 cm (2.5 to 3 inches) shorter than the back shoulder height, divide into two halves. At each neck edge, decrease 1 stitch every row 3 to 6 times, then work even to shoulder height.
Step 9: Join Shoulders
With right sides together, slip stitch or whipstitch the shoulder seams closed. Try on the bodice. Adjust shoulder length if needed before weaving in your ends.
Step 10: Neck and Armhole Edging
With Color A or B and the smaller hook, join at an inconspicuous point. Work 1 round of sc evenly around, using approximately 3 sc for every 2 row ends. Work a second round of reverse sc or slip stitch for a firm, polished edge. Do not pull tight.
The Ombre Ruffle Skirt: Step by Step
The skirt joins directly to the lower bodice. A smooth base skirt carries the ruffles, so the dress has beautiful movement without becoming bulky at the waist.
Color progression: Upper skirt in Color A, transitioning through A/B blend, then B, then B/C blend, then C, then C/D blend, with Color D at the deepest ruffles and hem. For a cleaner graphic ombre look, skip the blended rows and change colors directly at ruffle boundaries.
Step 11: Base Skirt Setup
Join Color A at the bodice lower edge. Chain 2 and work 1 dc in each foundation stitch. If you want more hip room immediately, increase evenly by 10 to 15% in this first round.
Step 12: Establish Flare
Work 2 plain dc rounds. On the next round, increase evenly by about 12.5% using this pattern: 7 dc, inc around, adjusting the repeat at the end as needed. Repeat this increase round every 4th to 6th round until the base skirt has your desired A-line fullness.
Step 13: Make Ruffle Attachment Ridges
At every planned ruffle level, work one round in BLO only. The unused front loops form a neat ridge where you’ll attach the ruffle later. Space your ridges about 7 to 10 cm (2.75 to 4 inches) apart. Continue the base skirt to your desired finished length.
Step 14: First Ruffle
Return to the first exposed front-loop ridge near the upper skirt. Join your yarn.
Round 1: Work 2 dc in each exposed loop around. Join.
Round 2: dc, inc around.
Rounds 3-4: dc in each stitch.
For a deeper ruffle, add 1 to 2 more plain rounds. Fasten off.
Step 15: Remaining Ruffles
Repeat Step 14 at each ridge. For lower tiers, make the ruffle slightly deeper: upper tiers get 4 rounds, middle tiers get 5 rounds, and lower tiers get 6 to 7 rounds. This creates the cascading silhouette.
Step 16: Stronger Wave Option
If you want very dramatic ruffles, work 3 dc in each exposed loop on Ruffle Round 1 instead of 2 dc. This uses considerably more yarn and creates a heavier skirt, but the effect is stunning.
Step 17: Color Changes
Change color on the final yarn-over of the last stitch before the new color begins. Do not carry yarn across whole tiers. Cut and weave ends instead.
Suggested sequence: Ruffle 1 in A, Ruffle 2 in A/B, Ruffle 3 in B, Ruffle 4 in B/C, Ruffle 5 in C, final ruffle in D.
Step 18: Hem
On the base skirt hem, work 1 round of sc followed by 1 round of reverse sc. Alternatively, leave the final ruffle as the visible hem. If the hem flips outward, steam or block it gently rather than adding a tight edging.
Optional True Ombre Blending Technique
For an even softer gradient, try using two strands of fingering-weight yarn held together instead of one DK strand. Work A+A, then A+B, then B+B, then B+C, then C+C, then C+D, then D+D.
Swatch first because holding two strands will change your gauge and drape.
Finishing Your Dress
Weave ends: Weave each end at least 5 cm (2 inches) through the wrong side, changing direction once. Ruffle ends should be secured into the attachment ridge rather than the loose outer edge.
Block: Wet block or steam lightly according to your fiber content. Shape the bodice to your measurements. Arrange the ruffles in smooth concentric waves and allow to dry completely.
Waist stabilization: If the skirt weight stretches the waist, thread clear elastic or matching elastic thread through the wrong side of one waist round. Adjust while wearing the dress.
Optional back opening: If the neckline is too small to pass comfortably over your head, leave the center back upper bodice open for 7 to 10 cm (3 to 4 inches) and add a chain-loop and button closure.
Fit Adjustments
Need more bust room? Add increase rounds between the waist and underarm, concentrating some increases at the center front.
Want a smaller waist? Add 1 to 2 extra decrease rounds before the waist, then restore stitches above the waist.
Need a longer torso? Add plain dc rounds between shaping sections.
Want less skirt volume? Increase the base skirt less often and use only 2 dc per attachment loop.
Want more skirt volume? Increase the base skirt every 3 to 4 rounds and use 3 dc per attachment loop.
Making it mini, midi, or maxi? Stop the base skirt at your desired length and keep ruffle spacing proportional.
Care Instructions
Follow your yarn label for laundering. For most crochet dresses, hand washing or a gentle cycle in cool water, then drying flat, helps preserve the shape. Store folded rather than on a hanger so the weight of the skirt doesn’t stretch the shoulders.
Construction Checklist
Use this list to track your progress:
1. Swatch, wash, block, and confirm gauge
2. Measure bust, waist, torso, armhole depth, and desired dress length
3. Crochet lower bodice in joined rounds with waist and bust shaping
4. Divide for armholes and work back and front separately
5. Shape neckline, join shoulders, and edge neckline and armholes
6. Join yarn at lower bodice and crochet flared base skirt
7. Create BLO attachment ridges at planned tier positions
8. Add ruffles from top to bottom while progressing through purple ombre
9. Finish hem, weave ends, block, and stabilize waist if needed
Thank you so much for choosing this pattern. I truly hope you love making this dress as much as I loved designing it. If you make one, I would absolutely love to see it. Tag me on Instagram or share a photo in my Facebook group.
If this pattern caught your eye, go ahead and save it to your Pinterest boards so you can find it when you’re ready to start. And please leave a comment below if you make this dress. I read every single one and your photos make my day.
Want a Quick & Easy Printable Version?
Get a clean, beautifully formatted PDF of this pattern — easy to follow step by step, ready to print or save on any device. No scrolling, no distractions, just the pattern.
Get the Printable PDF →