
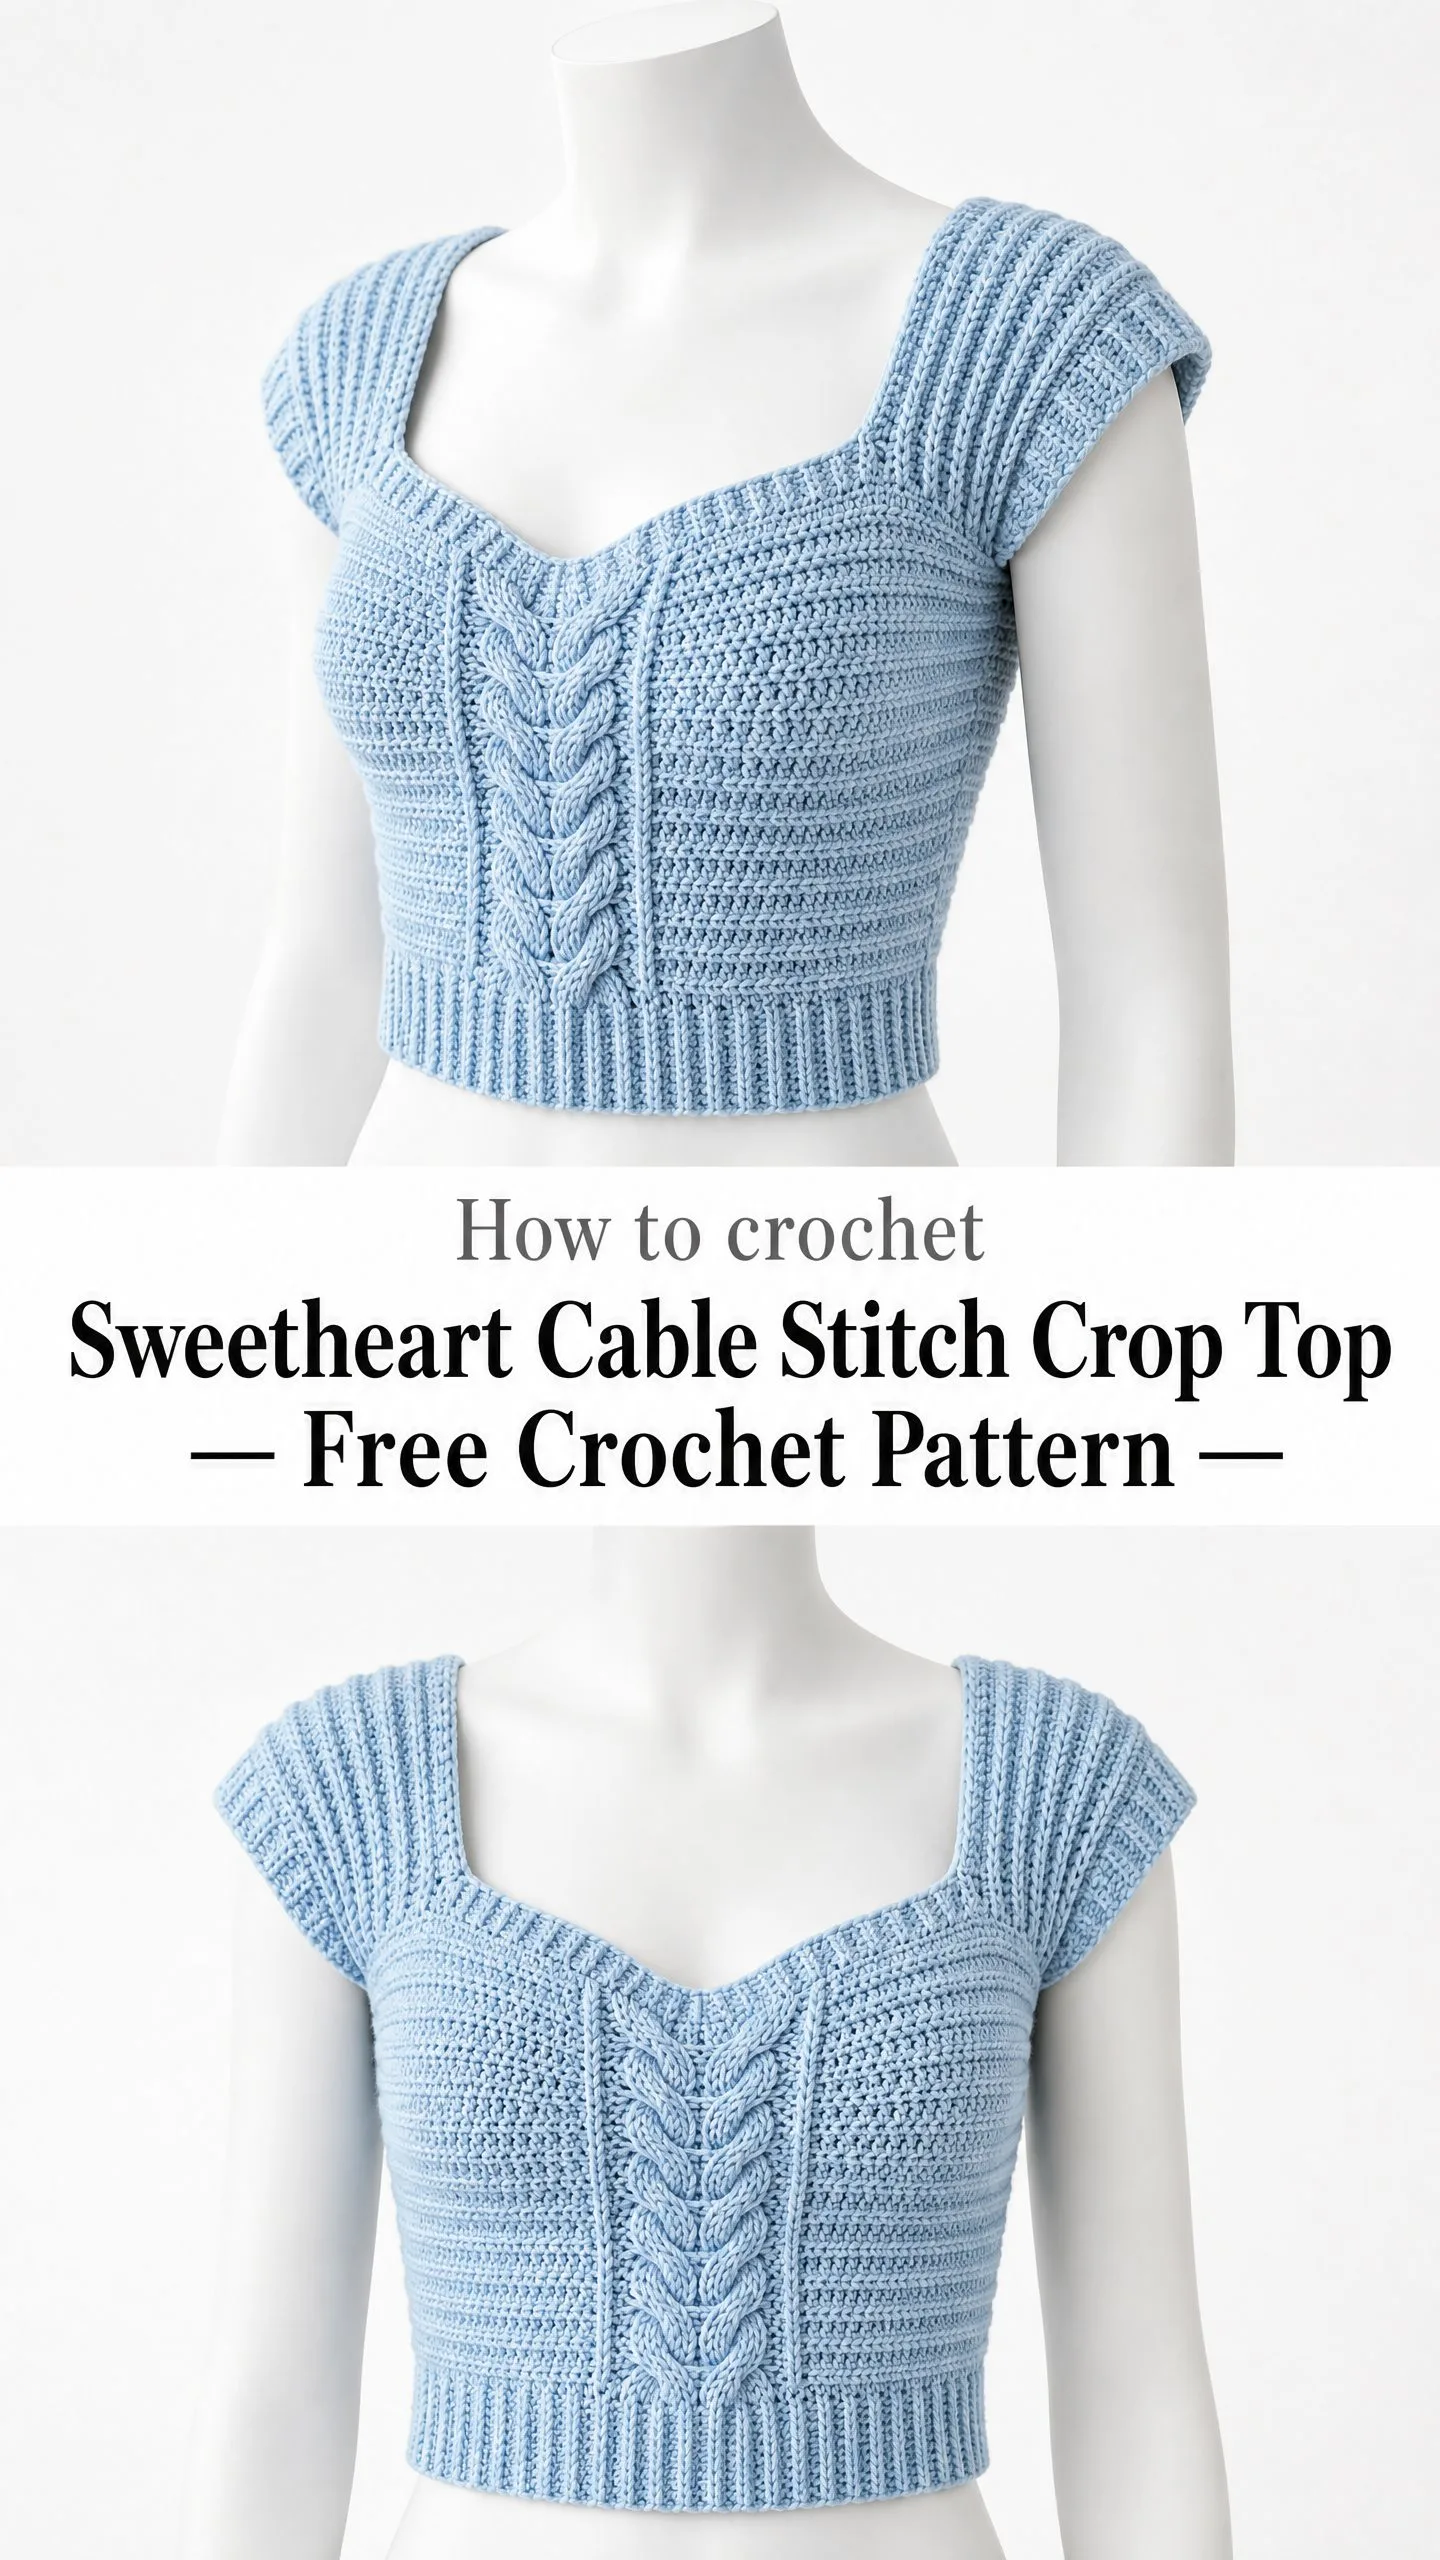
THIS is the crop top pattern you’ve been waiting for. I’m talking head-turning cable detail, a flirty sweetheart neckline, and the kind of fitted silhouette that makes people ask "wait, you MADE that?" The best part? Once you understand the cable repeat, this top works up faster than you’d expect for something this impressive.
I know cables can look intimidating. All those twisting stitches crossing over each other. But here’s the thing. This pattern breaks it down into simple four-row repeats, and by the third repeat, your hands will know exactly what to do. You’re going to feel like a crochet rockstar when you slip this on.
Whether you’re making this for a summer brunch, a date night, or just because you deserve something beautiful in your wardrobe, this sweetheart cable stitch crop top delivers. Let’s dive in.
What Makes This Crop Top Special
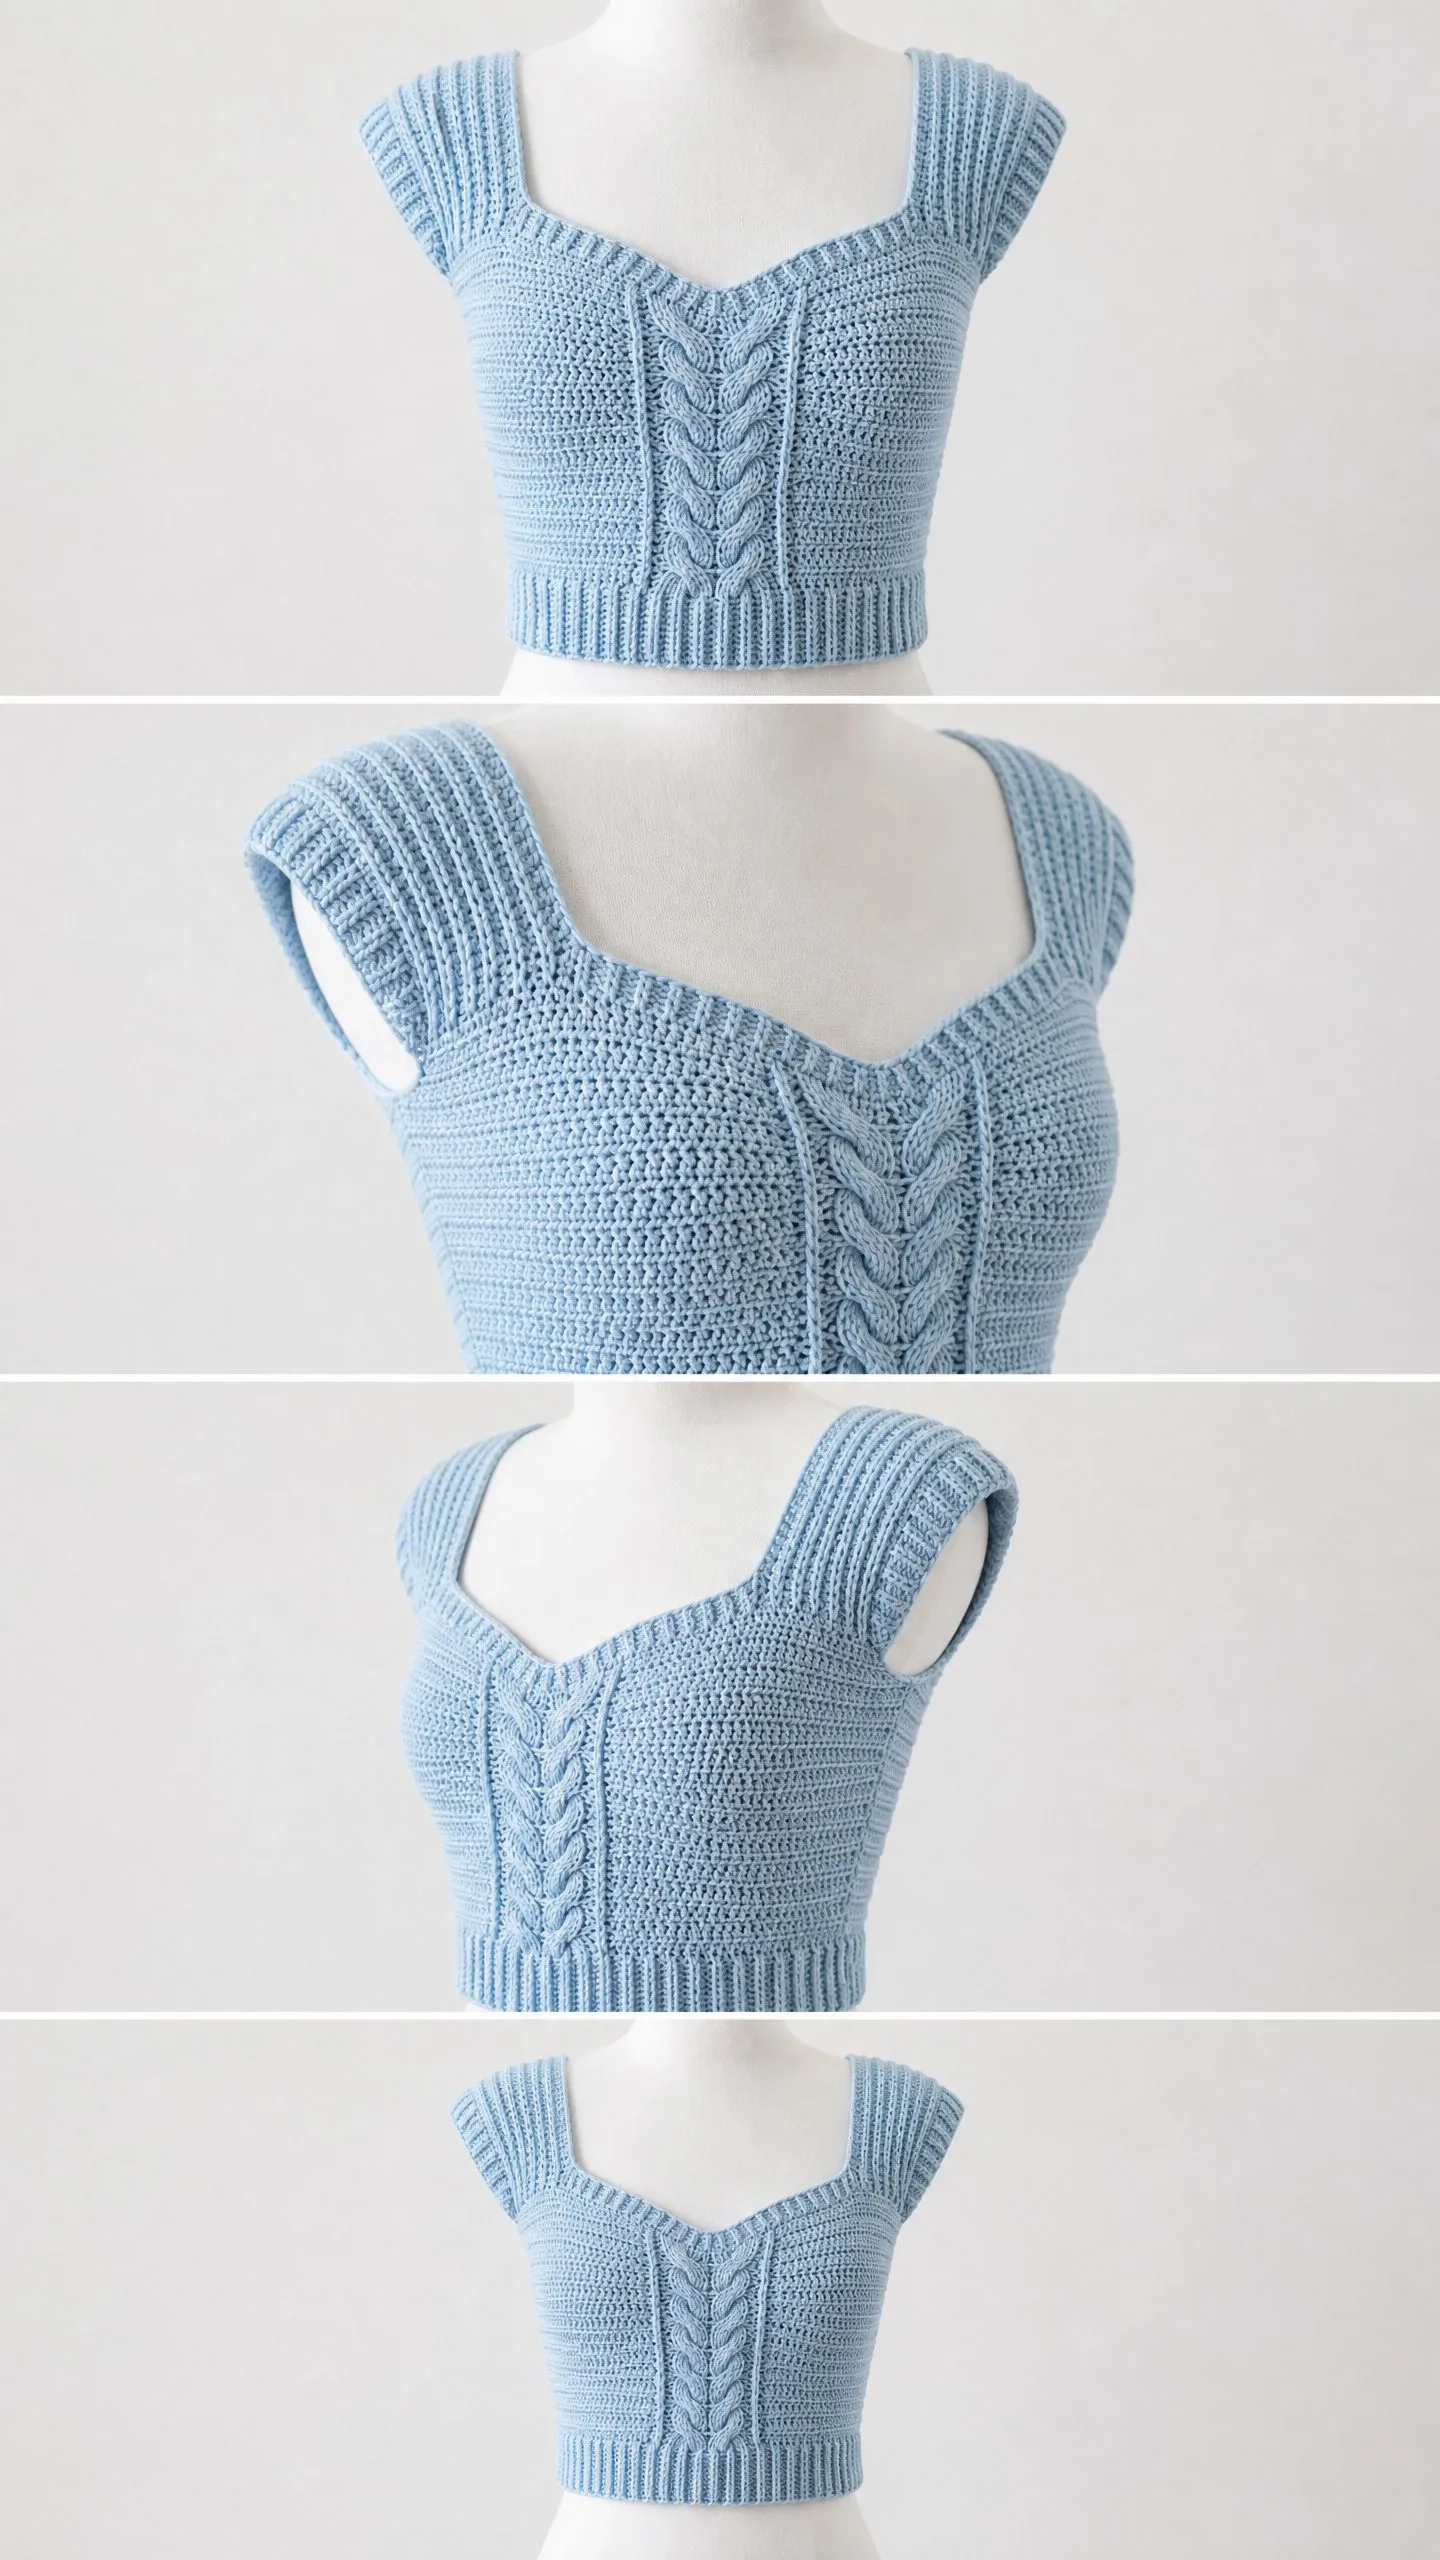
This crochet crop top combines several stunning design elements into one cohesive piece. The central cable panel runs vertically from the hem to the neckline, creating that classic braided look you usually only see in knitting. The sweetheart neckline at the front adds romantic shaping, while the back features a clean square neckline. Short cap sleeves give coverage without bulk, and the ribbed hem cinches everything in for a flattering fit.
The body is worked in half double crochet (hdc), which creates a dense, structured fabric perfect for a fitted garment. This stitch gives you warmth without heaviness and provides an excellent backdrop for the cable detail to really pop.
The construction is straightforward. You work the front and back as separate flat panels, seam them at the shoulders and sides, then add the sleeve trim and hem ribbing. No complicated colorwork. No magic rings. Just solid technique that builds into something gorgeous.
Skill Level
Intermediate. You’ll need to be comfortable with front post double crochet (FPdc) and back post double crochet (BPdc) stitches, which form the cable. You’ll also be shaping necklines, seaming pieces together, and working trim around armhole openings.
If you’re a confident beginner who has worked post stitches before, you can absolutely tackle this pattern. Take your time with the cable section, and don’t be afraid to use stitch markers liberally.
Finished Measurements
This pattern is written for a size Small with the following finished dimensions:
Size adjustments are covered in the customization section below.
Materials You’ll Need
Yarn: Approximately 600 to 700 yards / 550 to 640 meters of DK weight yarn (CYCA 3). Choose 100% cotton or a cotton blend for the best stitch definition. The cable detail requires crisp stitches, so avoid fuzzy or halo yarns.
Recommended Yarn Options:
Hook: US size E-4 / 3.5 mm crochet hook. Adjust as needed to meet gauge.
Notions:
Gauge (Do Not Skip This!)
Gauge matters so much for fitted garments. If your gauge is off, your top won’t fit properly.
Swatch in hdc, block it, then measure. If you have too many stitches per inch, go up a hook size. Too few? Go down.
Abbreviations and Stitch Definitions
Here are all the stitches and abbreviations you’ll need. I’ll explain each one so there’s no confusion.
Special Stitches: The Cable Crosses
The cable magic happens with two special techniques. Don’t panic. I’ll walk you through each one.
Cable Cross Left (CCL)
This creates a left-leaning twist over 4 stitches.
1. Skip the next 2 stitches.
2. Work a FPdc around each of the next 2 stitches. These will lean forward over the skipped stitches.
3. Go back to the 2 skipped stitches. Work a FPdc around each of them, inserting your hook behind the FPdc you just made.
Result: 4 FPdc crossing left over right. Your stitch count stays the same.
Cable Cross Right (CCR)
This creates a right-leaning twist over 4 stitches.
1. Skip the next 2 stitches.
2. Work a FPdc around each of the 2 stitches BEHIND the skipped stitches (insert hook from back to front, around each post).
3. Now go back and work a FPdc around each of the 2 originally skipped stitches, passing in front.
Result: 4 FPdc crossing right over left. Stitch count stays the same.
The 4-Row Cable Panel Repeat
The cable panel uses 16 stitches total: 2 BPdc border stitches on each side, plus 12 FPdc cable stitches in the center. Here’s the repeat:
Row A (plain): BPdc around st 1 and 2, FPdc around sts 3 through 14 (12 FPdc), BPdc around sts 15 and 16.
Row B (cross row): BPdc around st 1 and 2, CCR across sts 3 to 6, CCL across sts 7 to 10, CCR across sts 11 to 14, BPdc around sts 15 and 16.
Row C (plain): Same as Row A.
Row D (cross row): BPdc around st 1 and 2, CCL across sts 3 to 6, CCR across sts 7 to 10, CCL across sts 11 to 14, BPdc around sts 15 and 16.
Repeat these 4 rows for the braided effect.
Important Pattern Notes Before You Begin
1. The ch 2 turning chain does NOT count as a stitch in this pattern. Always work your first hdc into the first stitch at the base of the turning chain.
2. Mark the right side of your work on the first row. The cable looks different on each side, and you need to track this.
3. When working post stitches, always wrap around the post of the stitch in the row below, not the top of the stitch.
4. The front and back are worked flat, then seamed. The hem ribbing is worked sideways and attached afterward.
5. Keep your tension consistent. Cables can tighten up if you pull too firmly on your post stitches.
The Back Panel
The back has a simple square neckline. It’s worked entirely in hdc with no cable detail.
Foundation: Ch 92.
Row 1 (WS): hdc in 3rd ch from hook and in each ch across. Turn. (90 hdc)
Row 2 (RS): ch 2, turn, hdc in each st across. (90 hdc)
Row 3: ch 2, turn, hdc in each st across. (90 hdc)
Continue working even in hdc on all 90 stitches until the piece measures 10 inches / 25.5 cm from the foundation row.
Armhole Shaping (Back)
Next Row (RS): sl st across first 6 sts, ch 2, hdc in each st to last 6 sts, leave last 6 sts unworked. Turn. (78 hdc)
Next Row: ch 2, hdc2tog over first 2 sts, hdc to last 2 sts, hdc2tog. Turn. (76 hdc)
Next Row: ch 2, hdc2tog, hdc to last 2 sts, hdc2tog. Turn. (74 hdc)
Next Row: ch 2, hdc in each st across. Turn. (74 hdc)
Work even on 74 stitches for 8 more rows (approximately 2 inches), ending with a WS row.
Back Neckline Shaping
The back neckline is square with 14 stitches on each shoulder.
Next Row (RS): ch 2, hdc in first 14 sts. Turn, leaving remaining sts unworked. (14 hdc for left shoulder)
Work 2 more rows even on these 14 sts. Fasten off.
With RS facing, skip center 46 sts and join yarn to the 47th stitch.
ch 2, hdc in each of remaining 14 sts. Turn. (14 hdc for right shoulder)
Work 2 more rows even on these 14 sts. Fasten off.
The Front Panel
The front is where the magic happens. Same width and body length as the back, but with the central cable panel and sweetheart neckline shaping.
Foundation: Ch 92.
Row 1 (WS): hdc in 3rd ch from hook and in each ch across. Turn. (90 hdc)
Establishing the Cable Panel
The cable panel sits in the center 16 stitches (positions 38 through 53). You have 37 hdc stitches on each side.
Row 2 (RS) Cable Establishment Row: ch 2, hdc in first 37 sts, BPdc around st 38, BPdc around st 39, FPdc around sts 40 through 51 (12 FPdc total), BPdc around st 52, BPdc around st 53, hdc in last 37 sts. Turn. (90 sts total: 37 hdc + 16 cable panel sts + 37 hdc)
Row 3 (WS): ch 2, hdc in first 37 sts, work Row A of Cable Panel over center 16 sts, hdc in last 37 sts. Turn. (90 sts)
Row 4 (RS): ch 2, hdc in first 37 sts, work Row B of Cable Panel over center 16 sts, hdc in last 37 sts. Turn. (90 sts)
Row 5: ch 2, hdc in first 37 sts, work Row C of Cable Panel over center 16 sts, hdc in last 37 sts. Turn. (90 sts)
Row 6: ch 2, hdc in first 37 sts, work Row D of Cable Panel over center 16 sts, hdc in last 37 sts. Turn. (90 sts)
Continue repeating Rows 3 through 6 until front body matches back body length at 10 inches / 25.5 cm from foundation row.
Armhole Shaping (Front)
Work armhole shaping identically to the back while maintaining the cable panel in the center.
Next Row (RS): sl st across first 6 sts, ch 2, hdc across (maintaining cable panel) to last 6 sts, leave last 6 sts unworked. Turn. (78 sts)
Next Row: ch 2, hdc2tog, work in pattern to last 2 sts, hdc2tog. Turn. (76 sts)
Next Row: ch 2, hdc2tog, work in pattern to last 2 sts, hdc2tog. Turn. (74 sts)
Next Row: ch 2, work even in pattern. Turn. (74 sts)
Work 3 more rows even in pattern, ending on a WS row.
Sweetheart Neckline Shaping
Here’s where we create that beautiful dipped neckline. You’ll divide the front into two separate "cups" and shape each one individually.
At this point you have 74 stitches with the cable panel centered.
Division Row (RS): ch 2, hdc in first 29 sts, hdc in next 8 sts (through half the cable panel), sl st into the next st to anchor the center point.
Left Cup Shaping
Working on 37 stitches (29 body + 8 from half the cable panel):
Row 1 (RS): ch 2, hdc in first 29 sts, hdc in 7 sts of cable half (work as regular hdc since cable is discontinued), hdc2tog at inner edge. Turn. (36 sts)
Row 2 (WS): ch 2, hdc2tog at inner edge, hdc to end. Turn. (35 sts)
Row 3: ch 2, hdc to last 2 sts at inner edge, hdc2tog. Turn. (34 sts)
Continue decreasing at the inner (neckline) edge, working 1 hdc2tog every row until you reach 14 stitches at the shoulder. Work 2 rows even on 14 sts to match the back shoulder height. Fasten off.
Right Cup Shaping
Attach yarn at the center point and work the remaining 37 stitches. Mirror all shaping from the left cup, decreasing at the inner edge. End with 14 stitches at shoulder. Work 2 rows even. Fasten off.
Assembly
Shoulder Seams
Hold front and back with right sides together. Align the 14 shoulder stitches on each side. Using your tapestry needle, sew each shoulder seam using mattress stitch or whipstitch.
Side Seams
With right sides together, align front and back side edges. Sew from hem edge up to armhole shaping, leaving the armhole open. The armhole opening should measure approximately 7 to 7.5 inches around.
Sleeve Trim
The cap sleeve effect comes from this simple ribbed trim worked around each armhole.
With RS facing, join yarn at the underarm seam.
Round 1: ch 1, work sc evenly around the entire armhole opening. Place marker and sl st to join. Aim for approximately 52 sc. (52 sc)
Round 2: ch 1, sc-tbl in each st around, sl st to join. (52 sc)
Round 3: ch 1, sc-tbl in each st around, sl st to join. (52 sc)
Round 4: ch 1, sc-tbl in each st around, sl st to join. (52 sc)
Fasten off and weave in ends. Repeat for second armhole.
The trim should measure approximately 0.75 inches deep.
Hem Ribbing
The ribbing is worked sideways as a separate strip, then attached to the bottom of the garment.
Ribbing Strip:
Foundation: Ch 11.
Row 1: sc in 2nd ch from hook and in each ch across. (10 sc)
Row 2: ch 1, turn, sc-tbl in each st across. (10 sc)
Repeat Row 2 until you have 165 rows (or enough to match your garment’s bottom circumference).
Join short ends with sl st or a sewn seam to form a ring.
Attaching the Ribbing:
With RS of garment and RS of ribbing together, sew the long selvedge edge of the ribbing to the bottom of the garment using mattress stitch or whipstitch. Distribute stitches evenly. The ribbing should be approximately 1.75 inches deep.
Neckline Edging
With RS facing, join yarn at right shoulder seam at the front neck edge.
Round 1: ch 1, sc evenly around the entire neckline. At the center V point of the sweetheart, work 3 sc into the same point. Sl st to join. Approximately (120 sc)
Round 2: ch 1, sc-tbl in each st around to 1 st before the center V, sc3tog (to sharpen the V), continue sc-tbl to end, sl st to join. (118 sc)
Round 3: ch 1, sc-tbl in each st around, working sc3tog at the V center. Sl st to join. (116 sc)
Fasten off and weave in ends.
Size Customization Tips
To adjust the size, modify your foundation chain. Every 4 stitches added or removed from each panel equals approximately 1.5 inches of circumference change. Keep the cable panel at 16 stitches and adjust the body stitches on each side equally.
For length changes, add or subtract plain hdc rows before armhole shaping. Each 2 rows adds approximately 0.5 inches.
Always ensure your shoulder stitch counts match between front and back after any adjustments.
Finishing and Blocking
Weave in all ends securely, working each tail in two directions.
Wet blocking is strongly recommended for cotton yarn. Soak the finished garment in cool water, gently press out excess with a towel (don’t wring!), pin to measurements on a blocking mat, and let dry completely. This process evens out the stitches and makes the cable really pop.
For acrylic yarn, use steam blocking instead. Hold a steam iron 1 to 2 inches above the surface without pressing directly on the fabric.
You Did It!
Look at you with your gorgeous handmade sweetheart cable crop top! This is the kind of piece that makes people stop and compliment you, and then look genuinely shocked when you say you crocheted it yourself. Wear it with high-waisted jeans, linen trousers, or a flowy skirt. You’ve earned every admiring glance.
Thank you so much for making this pattern with me. I truly hope you love your finished top as much as I loved designing it.
If this crop top is calling your name, make sure to save it to your Pinterest boards so you can find it when you’re ready to cast on. And please, please leave a comment below if you make one! I would absolutely love to see your finished tops and hear which yarn you chose. Happy hooking!
