
This is a fitted crochet mini dress with a sweetheart bustier bodice, alternating dense and mesh stitch panels, a scrollwork hem border, and three dimensional spiral roses clustered on one shoulder. The construction uses single crochet, mesh stitch, and Irish crochet techniques. This is an advanced pattern requiring precise gauge and shaping skills.
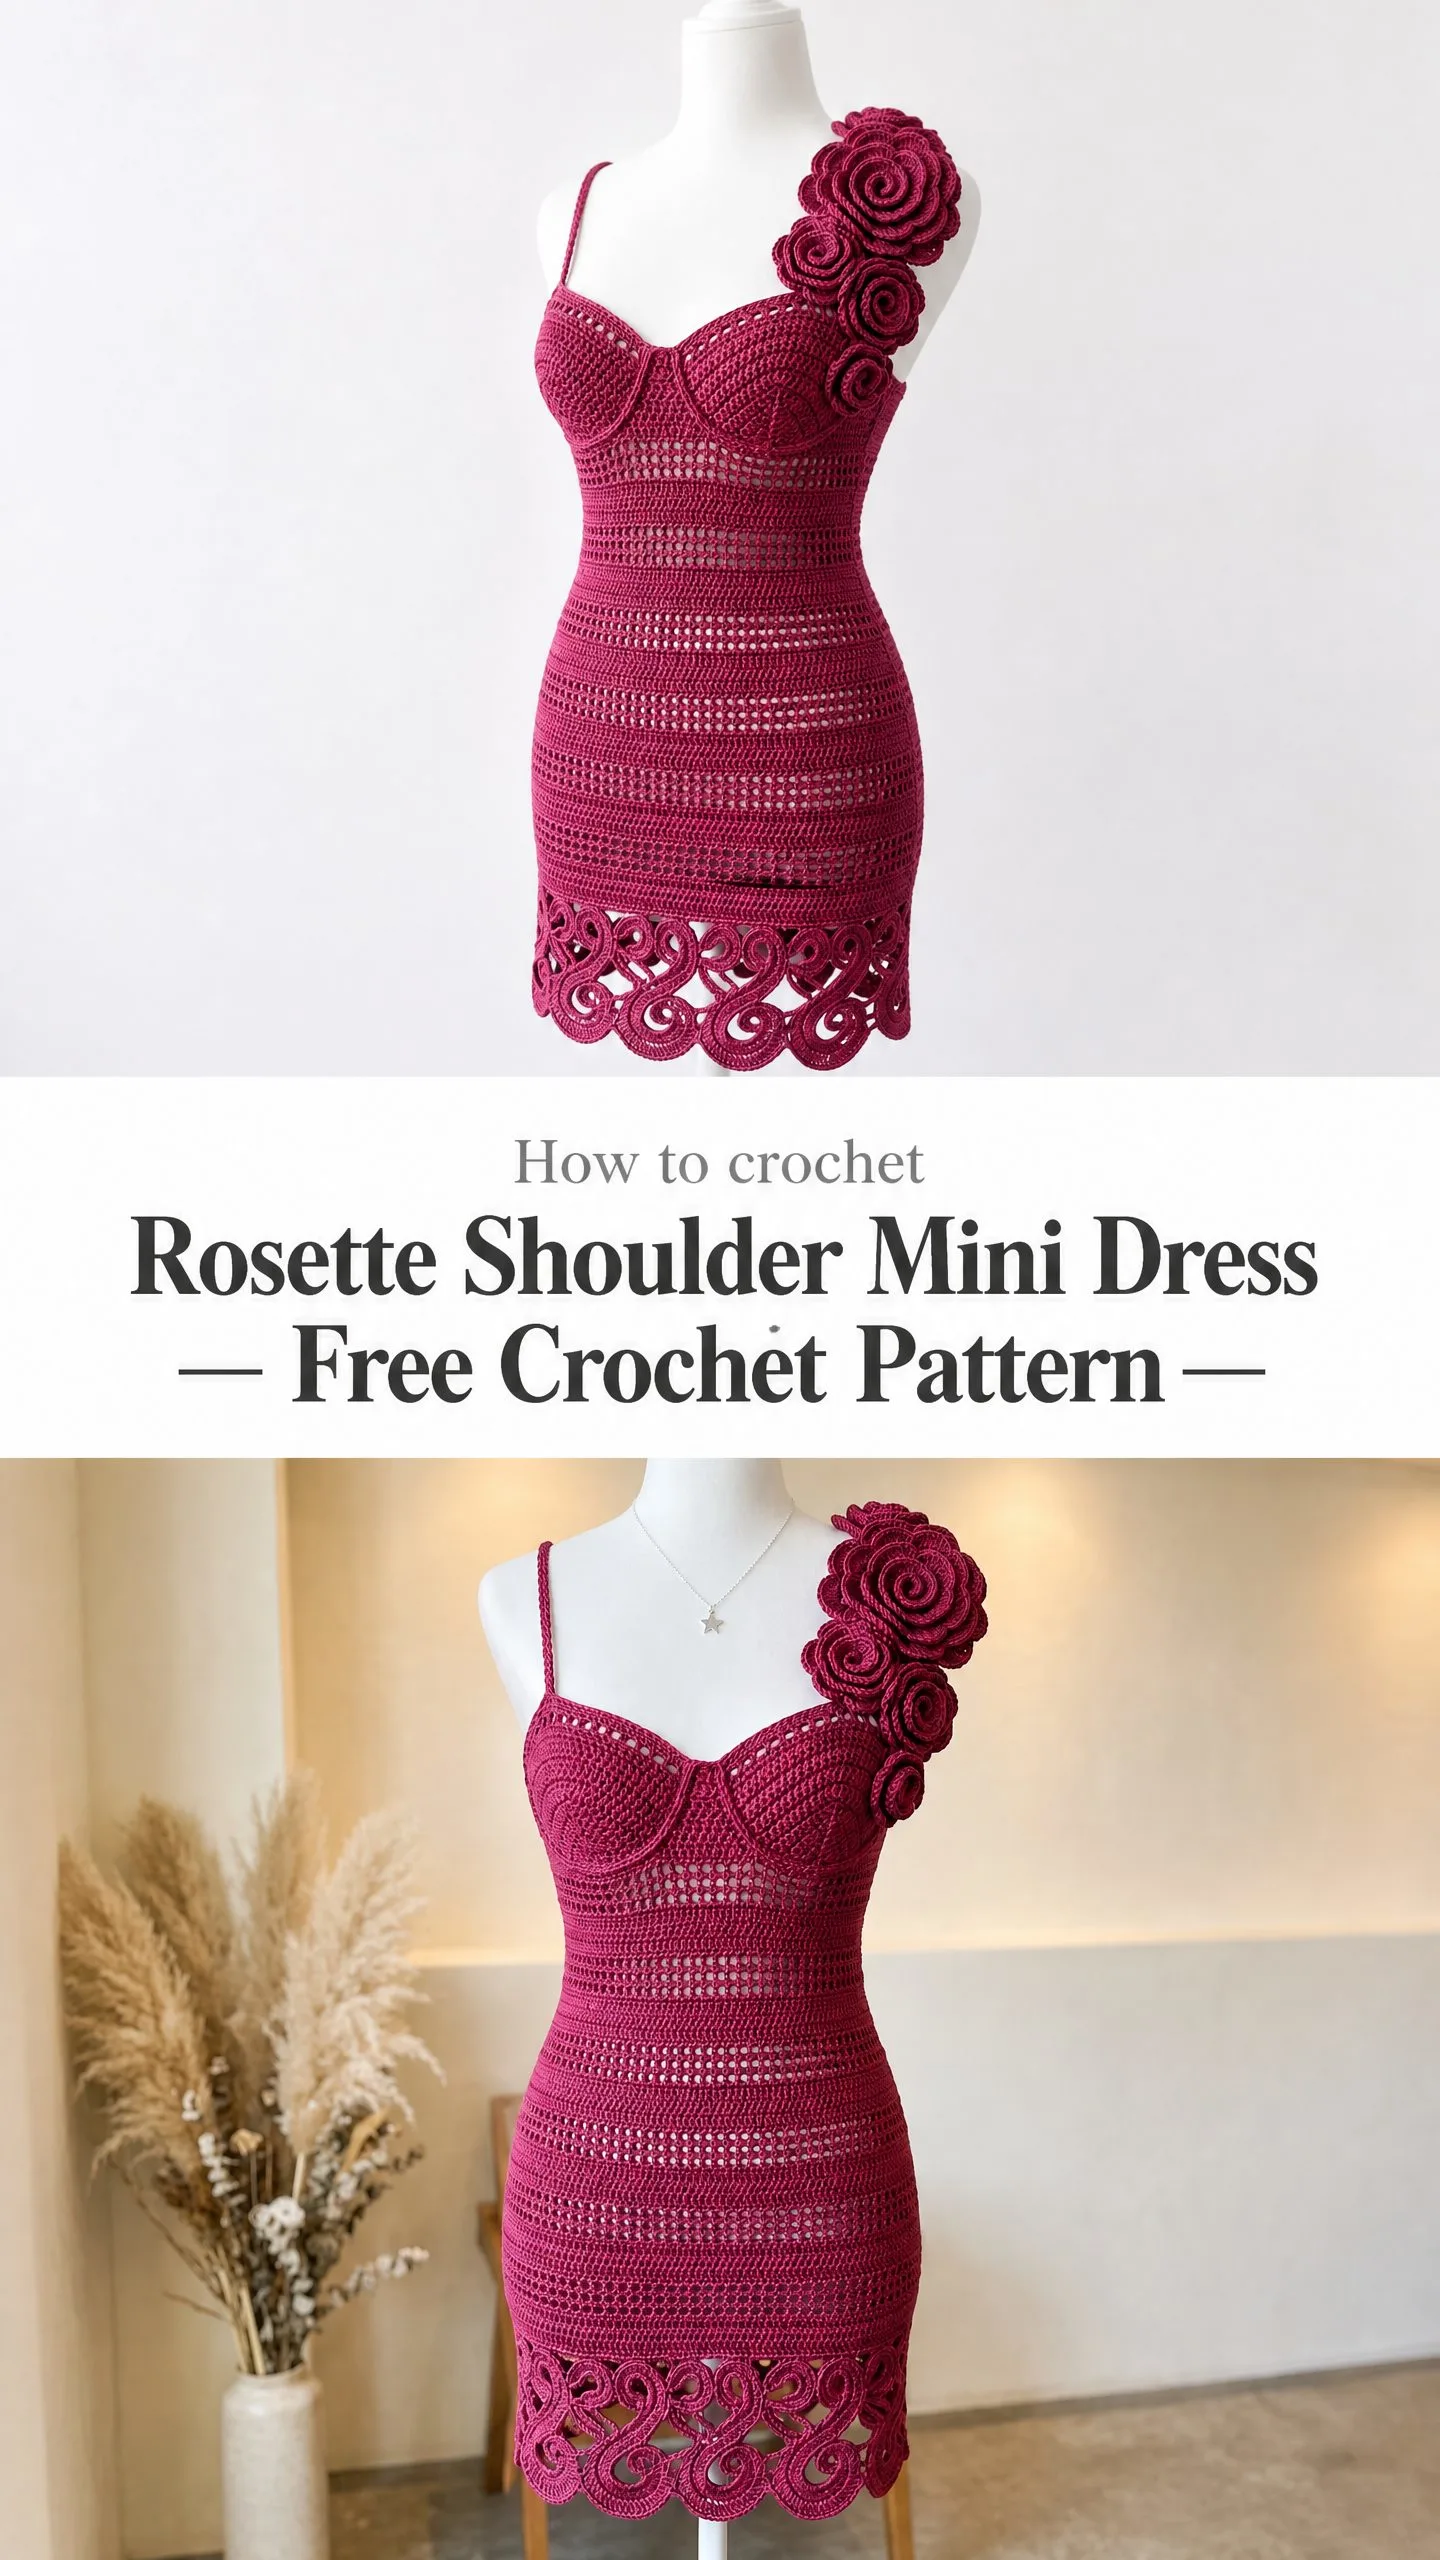
The dress works from the bottom up in the round, with the bodice split to work flat for the sweetheart neckline shaping. The decorative hem border is made separately using freeform scrollwork units and then attached. If you have been waiting for a statement piece that truly showcases your crochet abilities, this is that project.
Expect approximately 60 to 90 hours of work for this wearable art piece. The scrollwork hem and spiral roses take the most time, but the results are absolutely stunning.
About This Rosette Shoulder Mini Dress Crochet Pattern
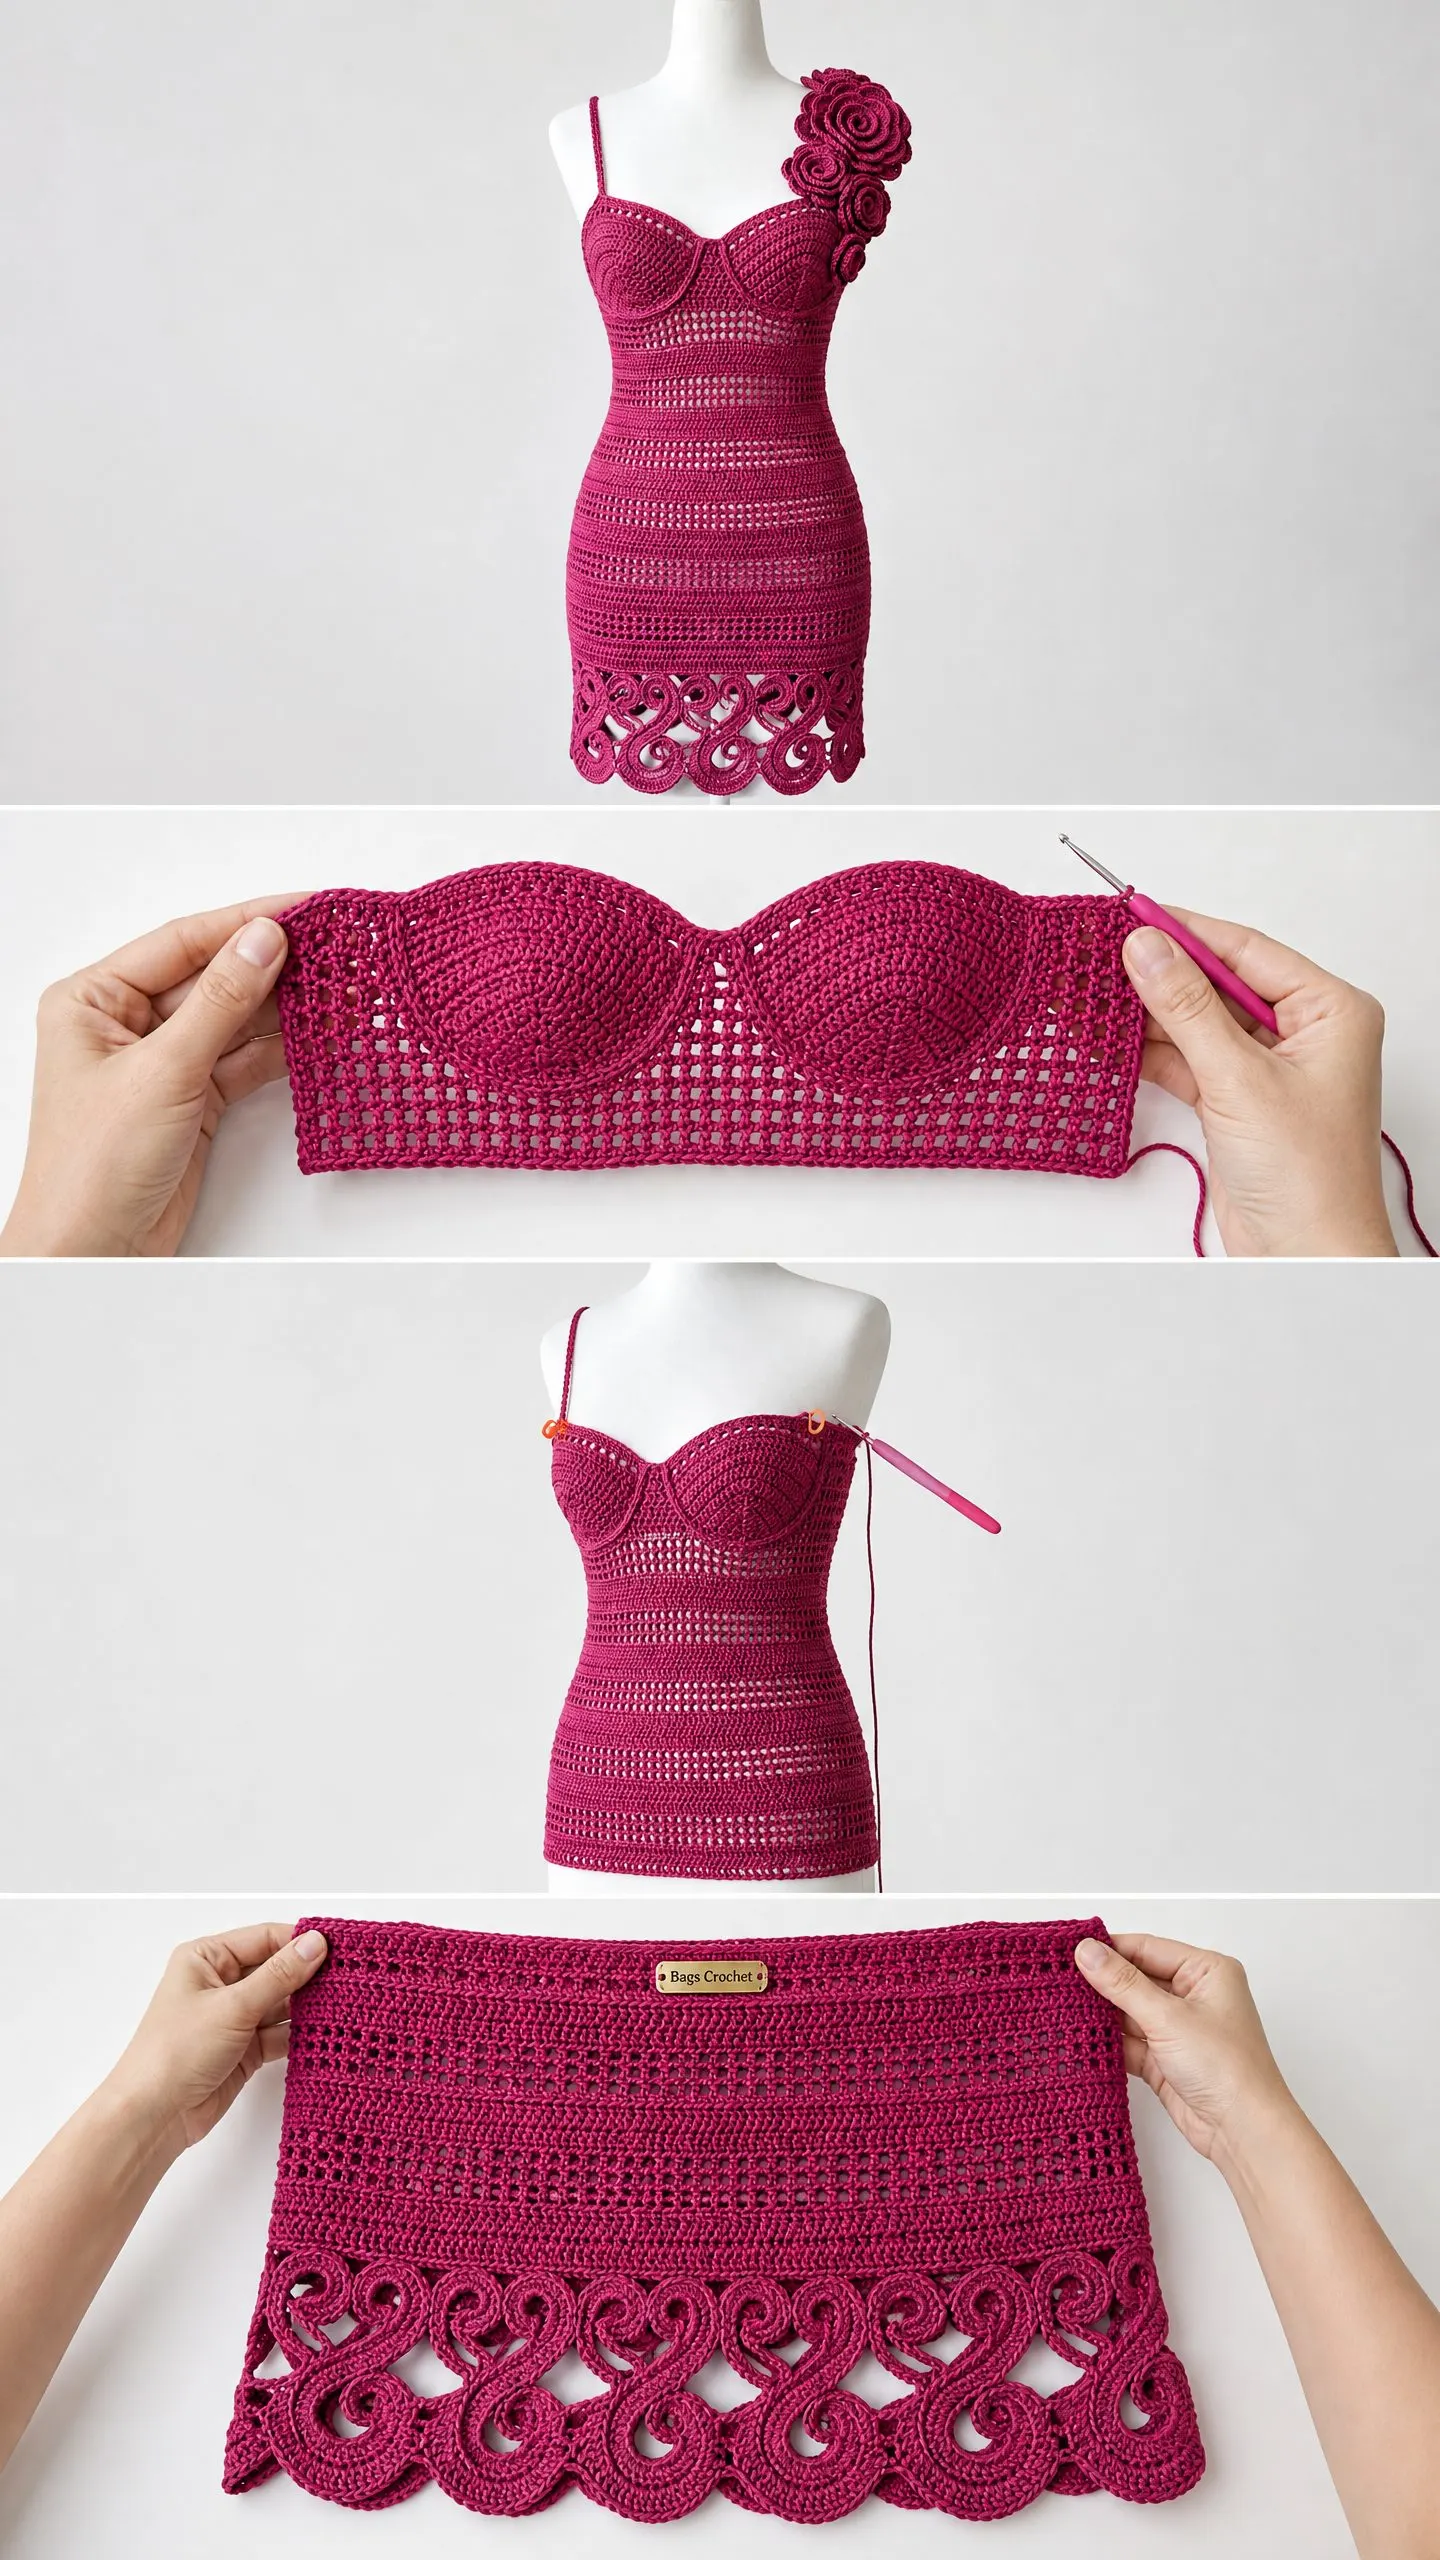
This body con mini dress combines several techniques that work together beautifully. The fitted skirt uses alternating rounds of dense single crochet and open mesh stitch to create horizontal stripe texture. Strategic decreases at four points shape the silhouette from hip to waist. The bustier bodice features separately worked cups with three dimensional shaping, joined to create that classic sweetheart neckline.
The showstopper details are the Irish crochet style scrollwork border at the hem and the cluster of spiral roses adorning one shoulder strap. These elements transform the dress from a simple garment into a true work of wearable art.
Skill level: Advanced. This pattern is rated advanced because the bustier cup shaping requires short rows and three dimensional increases. The scrollwork hem border uses freeform Irish crochet construction. The spiral roses require working in an unjoined continuous spiral with specific tension control. The dress body requires precise waist shaping across multiple gauge sensitive mesh and dense panels. Correct sizing depends on strict gauge throughout.
Time estimate: Approximately 60 to 90 hours for an experienced crocheter working at a steady pace.
Finished Measurements
This pattern is written for size Small/Medium.
Size customization tips are provided at the end of the pattern.
Materials Needed
Yarn: 1400 to 1600 yards (1280 to 1460 meters) of sport weight (CYCA 2) mercerized cotton yarn in deep magenta or raspberry. The dress shown uses a rich warm fuchsia berry color, similar to Pantone 7424 C.
Hooks:
Notions:
Yarn Suggestions
Drops Safran (50% cotton, 50% polyester, 175 yards / 160 m per 50 g ball): This yarn has a slight sheen from the polyester content that reproduces the polished appearance of the dress. Use approximately 8 to 9 balls. The tight twist holds stitch definition beautifully in mesh panels.
Paintbox Yarns Cotton DK used on a tighter than recommended gauge (100% cotton, 273 yards / 250 m per 100 g ball): Use approximately 5 to 6 balls. Cotton gives crisp stitch definition essential for the scrollwork border.
Lion Brand 24/7 Cotton in Magenta (100% mercerized cotton, 186 yards / 170 m per 100 g ball): Widely available, mercerized finish adds sheen. Use approximately 8 balls. This yarn blocks beautifully and retains shape.
Substitution note: Any sport or light DK weight mercerized or combed cotton yarn may be substituted, provided you achieve the stated gauge. Avoid fuzzy or textured novelty yarns as they obscure stitch definition in the mesh and scrollwork sections. A yarn with at least some cotton content is strongly recommended for drape and structural memory.
Gauge
Using B-1 / 2.25 mm hook:
In mesh stitch (ch-1, sc repeat):
Gauge is mandatory for this garment. Even a half stitch difference per inch will result in a dress that does not fit. Make a 6 x 6 inch swatch in both sc and mesh pattern and block before beginning.
Abbreviations
Special Stitches
Mesh Stitch (worked in rows, even stitch count)
Row setup: Ch 1 (does not count as st), sc in first st, (ch 1, sk 1 st, sc in next st) across. Turn.
Subsequent rows: Ch 1, sc in first sc, (ch 1, sk ch-1 sp, sc in next sc) across. Turn.
Each sc plus its following ch-1 space counts as one mesh unit. Total mesh units = half the working stitch count.
Mesh Stitch (worked in rounds)
Rnd: Ch 1, sc in first st, (ch 1, sk 1 st, sc in next st) around, ch 1, sl st to first sc to join. Do not count joining sl st as a stitch.
Spiral Rose
Foundation: Ch 36.
Row 1: Work 3 dc in 4th ch from hook, (4 dc in next ch) across. You will have a long ruffle strip.
Coil the strip tightly from one end, with RS facing out, and use a tapestry needle threaded with yarn to tack the base together as you coil, creating a layered rose shape. The innermost coil forms the tight center bud; outer loops form the petals. Weave in end securely through the base.
For the dress, make 3 roses:
Scrollwork Border Unit (used for hem)
This is a freeform Irish crochet element. Each scroll unit is made as follows:
Ch 20. Working back along the chain: sl st in 2nd ch from hook, sc in next 3 ch, hdc in next 3 ch, dc in next 3 ch, hdc in next 3 ch, sc in next 3 ch, sl st in last 3 ch. Do not fasten off; continue directly into the foundation of the next scroll. Scroll units are joined at their base loops to form the continuous border strip.
Bustier Cup (make 2)
Each cup is worked flat in increasing rows to form a triangular half dome.
Foundation: Ch 13. (12 working sts)
Row 1 (WS): Sc in 2nd ch from hook and in each ch across. Turn. (12 sc)
Row 2 (RS): Ch 1, inc in first st, sc across to last st, inc in last st. Turn. (14 sc)
Row 3: Ch 1, sc across. Turn. (14 sc)
Row 4: Ch 1, inc in first st, sc across to last st, inc in last st. Turn. (16 sc)
Row 5: Ch 1, sc across. Turn. (16 sc)
Row 6: Ch 1, inc in first st, sc across to last st, inc in last st. Turn. (18 sc)
Row 7: Ch 1, sc across. Turn. (18 sc)
Row 8: Ch 1, inc in first st, sc across to last st, inc in last st. Turn. (20 sc)
Row 9: Ch 1, sc across. Turn. (20 sc)
Row 10: Ch 1, inc in first st, sc across to last st, inc in last st. Turn. (22 sc)
Row 11: Ch 1, sc across. Turn. (22 sc)
Row 12: Ch 1, inc in first st, sc across to last st, inc in last st. Turn. (24 sc)
Row 13: Ch 1, sc across. Turn. (24 sc)
Fasten off, leaving a 12 inch tail for joining. The straight bottom edge of each cup will be sewn to the inside of the bodice front. The curved outer edges of the two cups meet at center front.
Pattern Notes Before You Begin
1. The dress is worked in the round from the hem upward. The scrollwork hem border is worked separately as a flat strip and joined to the base of the dress body after the skirt is complete.
2. The bodice is split at the underarm to work front and back flat, allowing for the sweetheart neckline shaping. The back is worked straight; the front is shaped with a center decrease to create the sweetheart dip.
3. All rounds are joined with a slip stitch unless otherwise noted. Chain 1 at the beginning of a round does NOT count as a stitch throughout this pattern.
4. Stitch markers should be placed at the beginning of every round and at the four side seam points (left side, right side, center front, center back) to track shaping.
5. The mesh panel rows create visual horizontal stripe banding. The alternation of dense sc rows and open mesh rows produces the striped texture visible on the skirt body.
6. Waist shaping is achieved by switching from a larger to a smaller mesh repeat interval combined with sc2tog decreases at four side points over eight rounds.
7. The hip to hem section is the widest part of the skirt. Work increases here to achieve the correct hip circumference.
8. All stitch counts refer to actual working stitches; chain spaces in mesh rounds are not counted as stitches unless specifically stated.
9. For the mesh rounds, when counting stitches, count only the sc stitches (not the ch-1 spaces). After joining each mesh round, the stitch count reflects the number of sc stitches in the round.
10. The scrollwork border strip length when flat should equal the circumference of the cast on round (approximately 35 inches / 89 cm). Pin and ease as needed before joining.
Crochet Pattern Instructions
Section 1: Hem Border Strip
The hem border is worked as a flat strip of scrollwork units, then joined into a ring and attached to the bottom of the dress body. Make this first so it is ready for attachment.
Using C-2 / 2.75 mm hook, ch 20.
Work Row 1 of Scrollwork Border Unit as described in Special Stitches. Do not turn, do not fasten off.
Continue to work Scrollwork Border Units end to end as follows: Ch 20 from the base of the last completed scroll, work the next Scrollwork Border Unit along this new chain. Repeat this process until you have 18 total scroll units.
After the 18th unit, join the strip into a ring by slip stitching the end of the last unit to the beginning of the first unit. The joining should be neat and invisible from the RS. Fasten off, leaving a 24 inch tail for sewing.
The completed border ring should have a top edge (which will be joined to the skirt body) and a decorative bottom scallop edge.
Checkpoint: The border ring should measure approximately 35 inches / 89 cm in circumference and approximately 2.5 inches / 6.5 cm in height. Set aside.
Section 2: Skirt Body
Using B-1 / 2.25 mm hook, ch 246. Join with sl st to first ch to form a ring, being careful not to twist. (246 ch)
This foundation chain will form the base of the skirt at the hip/hem join line. The scrollwork border attaches below this line.
Skirt Dense and Mesh Panel Section (Hip to Waist)
Rnd 1: Ch 1, sc in each ch around, sl st to first sc to join. (246 sc)
Rnd 2: Ch 1, sc in each st around, sl st to join. (246 sc)
Rnd 3 (mesh rnd): Ch 1, sc in first st, (ch 1, sk 1 st, sc in next st) around, ch 1, sl st to first sc. (123 sc + 123 ch-1 sps)
Rnd 4 (mesh rnd): Ch 1, sc in first sc, (ch 1, sk ch-sp, sc in next sc) around, ch 1, sl st to first sc. (123 sc + 123 ch-1 sps)
Rnd 5: Ch 1, working into both sc and ch-sps of previous rnd (work 1 sc into each sc and 1 sc into each ch-sp), sc around, sl st to join. (246 sc)
Rnd 6: Ch 1, sc in each st around, sl st to join. (246 sc)
Rnd 7 (mesh rnd): Rep Rnd 3. (123 sc)
Rnd 8 (mesh rnd): Rep Rnd 4. (123 sc)
Rnd 9: Rep Rnd 5. (246 sc)
Rnd 10: Ch 1, sc in each st around, sl st to join. (246 sc)
Checkpoint after Rnd 10: The skirt body should measure approximately 2.5 inches / 6.5 cm from the foundation chain. You should have clear alternating dense and open stripe texture.
Begin Hip Shaping (gradual taper toward waist)
Place markers at the following positions: st 1 (center back / beg of rnd), st 62 (right side), st 123 (center front), st 185 (left side). These are your 4 decrease points.
Rnd 11: Ch 1, sc to 1 st before right side marker, sc2tog over marked st and next st, sc to 1 st before center front marker, sc2tog, sc to 1 st before left side marker, sc2tog, sc to 1 st before beg of rnd marker, sc2tog, sl st to join. (242 sc)
Rnd 12: Ch 1, sc in each st around, sl st to join. (242 sc)
Rnd 13 (mesh): Ch 1, sc in first st, (ch 1, sk 1 st, sc in next st) around, end with ch 1, sl st to first sc. (121 sc)
Rnd 14 (mesh): Ch 1, sc in first sc, (ch 1, sk ch-sp, sc in next sc) around, ch 1, sl st to first sc. (121 sc)
Rnd 15: Ch 1, work 1 sc in each sc and each ch-sp around, sl st to join. (242 sc)
Rnd 16: Ch 1, sc to 1 st before each marker, sc2tog 4 times, sc to end, sl st to join. (238 sc)
Rnd 17: Ch 1, sc in each st around, sl st to join. (238 sc)
Rnd 18 (mesh): Ch 1, sc in first st, (ch 1, sk 1 st, sc in next st) around, ch 1, sl st to first sc. (119 sc)
Rnd 19 (mesh): Ch 1, sc in first sc, (ch 1, sk ch-sp, sc in next sc) around, ch 1, sl st to first sc. (119 sc)
Rnd 20: Ch 1, work 1 sc in each sc and each ch-sp around, sl st to join. (238 sc)
Rnd 21: Ch 1, sc to 1 st before each marker, sc2tog 4 times, sc to end, sl st to join. (234 sc)
Rnd 22: Ch 1, sc in each st around, sl st to join. (234 sc)
Rnd 23 (mesh): Ch 1, sc in first st, (ch 1, sk 1 st, sc in next st) around, ch 1, sl st to first sc. (117 sc)
Rnd 24 (mesh): Ch 1, sc in first sc, (ch 1, sk ch-sp, sc in next sc) around, ch 1, sl st to first sc. (117 sc)
Rnd 25: Ch 1, work 1 sc in each sc and each ch-sp around, sl st to join. (234 sc)
Rnd 26: Ch 1, sc to 1 st before each marker, sc2tog 4 times, sc to end, sl st to join. (230 sc)
Rnd 27: Ch 1, sc in each st around, sl st to join. (230 sc)
Rnd 28 (mesh): Ch 1, sc in first st, (ch 1, sk 1 st, sc in next st) around, ch 1, sl st to first sc. (115 sc)
Rnd 29 (mesh): Ch 1, sc in first sc, (ch 1, sk ch-sp, sc in next sc) around, ch 1, sl st to first sc. (115 sc)
Rnd 30: Ch 1, work 1 sc in each sc and each ch-sp around, sl st to join. (230 sc)
Checkpoint after Rnd 30: The skirt should measure approximately 9 inches / 23 cm from the foundation chain. Waist circumference at this round is approximately 33 inches / 84 cm, which will pull in on the body to roughly 26 to 28 inches.
Begin Waist Section (denser decreasing for fitted waist)
Rnd 31: Ch 1, sc to 1 st before each marker, sc2tog 4 times, sc to end, sl st to join. (226 sc)
Rnd 32: Ch 1, sc in each st around, sl st to join. (226 sc)
Rnd 33: Ch 1, sc to 1 st before each marker, sc2tog 4 times, sc to end, sl st to join. (222 sc)
Rnd 34: Ch 1, sc in each st around, sl st to join. (222 sc)
Rnd 35 (mesh): Ch 1, sc in first st, (ch 1, sk 1 st, sc in next st) around, ch 1, sl st to first sc. (111 sc)
Rnd 36 (mesh): Ch 1, sc in first sc, (ch 1, sk ch-sp, sc in next sc) around, ch 1, sl st to first sc. (111 sc)
Rnd 37: Ch 1, work 1 sc in each sc and each ch-sp around, sl st to join. (222 sc)
Rnd 38: Ch 1, sc to 1 st before each marker, sc2tog 4 times, sc to end, sl st to join. (218 sc)
Rnd 39: Ch 1, sc in each st around, sl st to join. (218 sc)
Rnd 40: Ch 1, sc to 1 st before each marker, sc2tog 4 times, sc to end, sl st to join. (214 sc)
Note on Rnd 40 marker positions: Recalculate markers after each decrease round to keep them evenly distributed. After Rnd 40, markers should be at approximately sts 1, 54, 107, and 161.
Checkpoint after Rnd 40: Waist circumference should be approximately 30 to 31 inches / 76 to 79 cm measured loosely around the round. The dress waist will have negative ease and pull in to the body.
Section 3: Upper Bodice Base (Underbust to Armhole Divide)
Rnd 41: Ch 1, sc in each st around, sl st to join. (214 sc)
Rnd 42 (mesh): Ch 1, sc in first st, (ch 1, sk 1 st, sc in next st) around, ch 1, sl st to first sc. (107 sc)
Rnd 43 (mesh): Ch 1, sc in first sc, (ch 1, sk ch-sp, sc in next sc) around, ch 1, sl st to first sc. (107 sc)
Rnd 44: Ch 1, work 1 sc in each sc and each ch-sp around, sl st to join. (214 sc)
Rnd 45: Ch 1, sc in each st around, sl st to join. (214 sc)
Now begin slight underbust expansion for bust ease:
Rnd 46: Ch 1, sc to each marker, inc in marked st 4 times, sc to end, sl st to join. (218 sc)
Rnd 47: Ch 1, sc in each st around, sl st to join. (218 sc)
Rnd 48: Ch 1, sc to each marker, inc in marked st 4 times, sc to end, sl st to join. (222 sc)
Rnd 49: Ch 1, sc in each st around, sl st to join. (222 sc)
Rnd 50 (mesh): Ch 1, sc in first st, (ch 1, sk 1 st, sc in next st) around, ch 1, sl st to first sc. (111 sc)
Rnd 51 (mesh): Ch 1, sc in first sc, (ch 1, sk ch-sp, sc in next sc) around, ch 1, sl st to first sc. (111 sc)
Rnd 52: Ch 1, work 1 sc in each sc and each ch-sp around, sl st to join. (222 sc)
Rnd 53: Ch 1, sc in each st around, sl st to join. (222 sc)
Checkpoint after Rnd 53: The total piece should measure approximately 16 to 17 inches / 40 to 43 cm from foundation chain. You are now at the underarm dividing row.
Divide for Front and Back
Mark the following: sts 1 through 111 = FRONT (111 sts), sts 112 through 222 = BACK (111 sts). The side seam points are at sts 1 and 112.
Section 4: Bodice Back (worked flat)
Join yarn at st 112 (start of back section) with RS facing.
Row 1 (RS): Ch 1, sc in each of the 111 back sts. Turn. (111 sc)
Row 2 (WS): Ch 1, sc across. Turn. (111 sc)
Row 3 (RS, mesh): Ch 1, sc in first st, (ch 1, sk 1 st, sc in next st) across. Turn. (56 sc + 55 ch-1 sps)
Row 4 (WS, mesh): Ch 1, sc in first sc, (ch 1, sk ch-sp, sc in next sc) across. Turn. (56 sc)
Row 5 (RS): Ch 1, work 1 sc in each sc and each ch-sp across. Turn. (111 sc)
Row 6 (WS): Ch 1, sc across. Turn. (111 sc)
Row 7 (RS): Ch 1, sc across. Turn. (111 sc)
Row 8 (WS, mesh): Ch 1, sc in first st, (ch 1, sk 1 st, sc in next st) across. Turn. (56 sc + 55 ch-1 sps)
Row 9 (RS, mesh): Ch 1, sc in first sc, (ch 1, sk ch-sp, sc in next sc) across. Turn. (56 sc)
Row 10 (WS): Ch 1, work 1 sc in each sc and each ch-sp across. Turn. (111 sc)
Row 11 (RS): Ch 1, sc across. Turn. (111 sc)
Row 12 (WS): Ch 1, sc across. Turn. (111 sc)
Fasten off, leaving a 12 inch tail. The back bodice is complete at 12 rows (approximately 1.5 inches / 3.8 cm of bodice height). The back is deliberately low; the sweetheart front rises higher.
Section 5: Bodice Front (sweetheart shaping)
Join yarn at st 1 (start of front section) with RS facing.
Row 1 (RS): Ch 1, sc in each of the 111 front sts. Turn. (111 sc)
Row 2 (WS): Ch 1, sc across. Turn. (111 sc)
Row 3 (RS, mesh): Ch 1, sc in first st, (ch 1, sk 1 st, sc in next st) across. Turn. (56 sc + 55 ch-sps)
Row 4 (WS, mesh): Ch 1, sc in first sc, (ch 1, sk ch-sp, sc in next sc) across. Turn. (56 sc)
Row 5 (RS): Ch 1, work 1 sc in each sc and each ch-sp across. Turn. (111 sc)
Row 6 (WS): Ch 1, sc across. Turn. (111 sc)
Begin Sweetheart Center Shaping
Row 7 (RS): Ch 1, sc in first 53 sts, sc2tog over sts 54 and 55, sc2tog over sts 56 and 57, sc in rem 54 sts. Turn. (109 sc)
The two center decreases begin forming the sweetheart dip.
Row 8 (WS): Ch 1, sc across. Turn. (109 sc)
Row 9 (RS, mesh): Ch 1, sc in first st, (ch 1, sk 1 st, sc in next st) across. Turn.
Note: 109 is odd, so the mesh will have 55 sc and 54 ch-sps with 1 final sc at the end. Work as: sc in first st, (ch 1, sk 1, sc in next) 54 times, sc in last st. Turn. (55 sc + 54 ch-sps)
Row 10 (WS, mesh): Ch 1, sc in first sc, (ch 1, sk ch-sp, sc in next sc) 54 times, sc in last sc. Turn. (55 sc)
Row 11 (RS): Ch 1, work 1 sc in each sc and each ch-sp across. Turn. (109 sc)
Row 12 (WS): Ch 1, sc across. Turn. (109 sc)
Split into Two Cups
Left Cup Front:
Row 13 (RS): Ch 1, sc in first 52 sts. Leave rem 57 sts unworked. Turn. (52 sc)
Row 14 (WS): Ch 1, sc2tog, sc across to last 2 sts, sc2tog. Turn. (50 sc)
Row 15 (RS): Ch 1, sc across. Turn. (50 sc)
Row 16 (WS): Ch 1, sc2tog, sc across to last 2 sts, sc2tog. Turn. (48 sc)
Row 17 (RS, mesh): Ch 1, sc in first st, (ch 1, sk 1, sc in next) across. Turn. (24 sc + 24 ch-sps)
Row 18 (WS, mesh): Ch 1, sc in first sc, (ch 1, sk ch-sp, sc in next sc) across. Turn. (24 sc)
Row 19 (RS): Ch 1, work 1 sc in each sc and each ch-sp across. Turn. (48 sc)
Row 20 (WS): Ch 1, sc across. Turn. (48 sc)
Fasten off.
Right Cup Front:
Skip the center 5 sts of Row 12 front (the sweetheart dip base), join yarn in the 6th st from center.
Row 13 (RS): Ch 1, sc in same st and in each rem st across. Turn. (52 sc)
Row 14 (WS): Ch 1, sc2tog, sc across to last 2 sts, sc2tog. Turn. (50 sc)
Row 15 (RS): Ch 1, sc across. Turn. (50 sc)
Row 16 (WS): Ch 1, sc2tog, sc across to last 2 sts, sc2tog. Turn. (48 sc)
Row 17 (RS, mesh): Ch 1, sc in first st, (ch 1, sk 1, sc in next) across. Turn. (24 sc + 24 ch-sps)
Row 18 (WS, mesh): Ch 1, sc in first sc, (ch 1, sk ch-sp, sc in next sc) across. Turn. (24 sc)
Row 19 (RS): Ch 1, work 1 sc in each sc and each ch-sp across. Turn. (48 sc)
Row 20 (WS): Ch 1, sc across. Turn. (48 sc)
Fasten off.
Edging the Sweetheart Neckline
Join yarn at the right underarm edge of the front bodice. Work
