
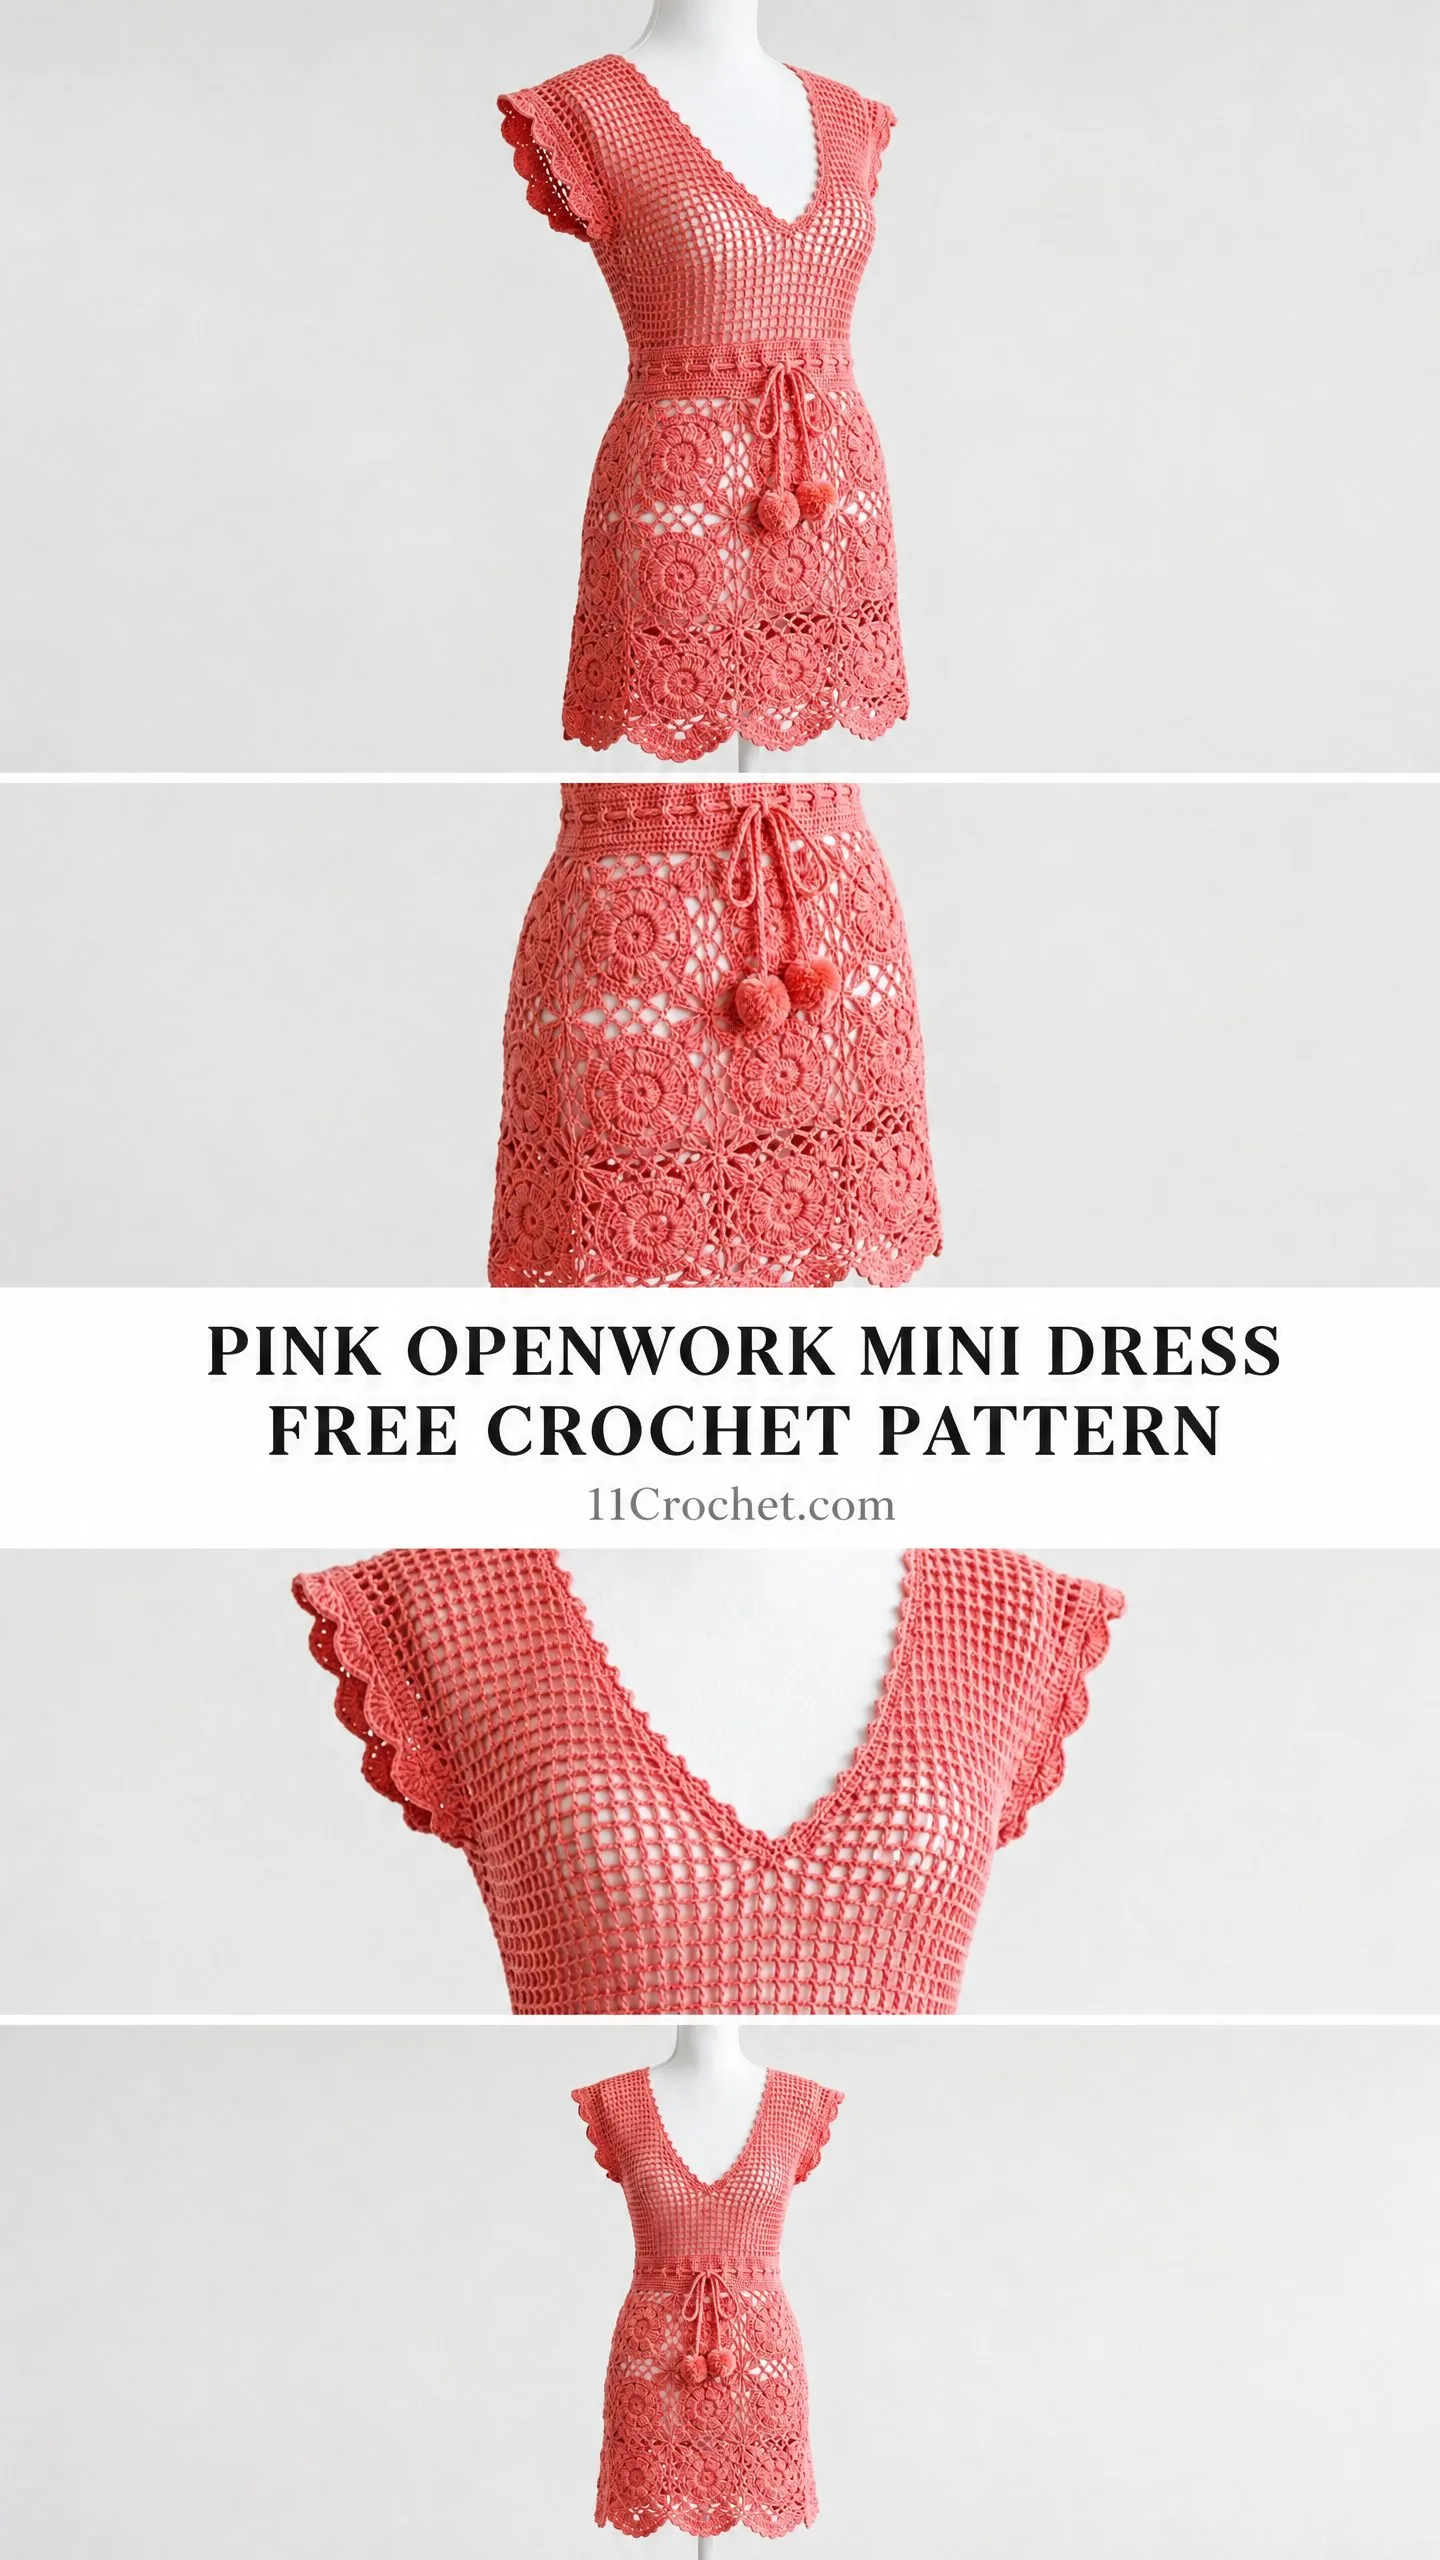
Looking for a stunning summer coverup or a lightweight mini dress that will turn heads at the beach? This coral pink openwork dress combines a fitted filet mesh bodice with gorgeous floral granny-style motifs in the skirt. The construction uses double crochet mesh, shell stitches, and join-as-you-go motifs. Perfect for intermediate to advanced crocheters ready for a rewarding challenge.
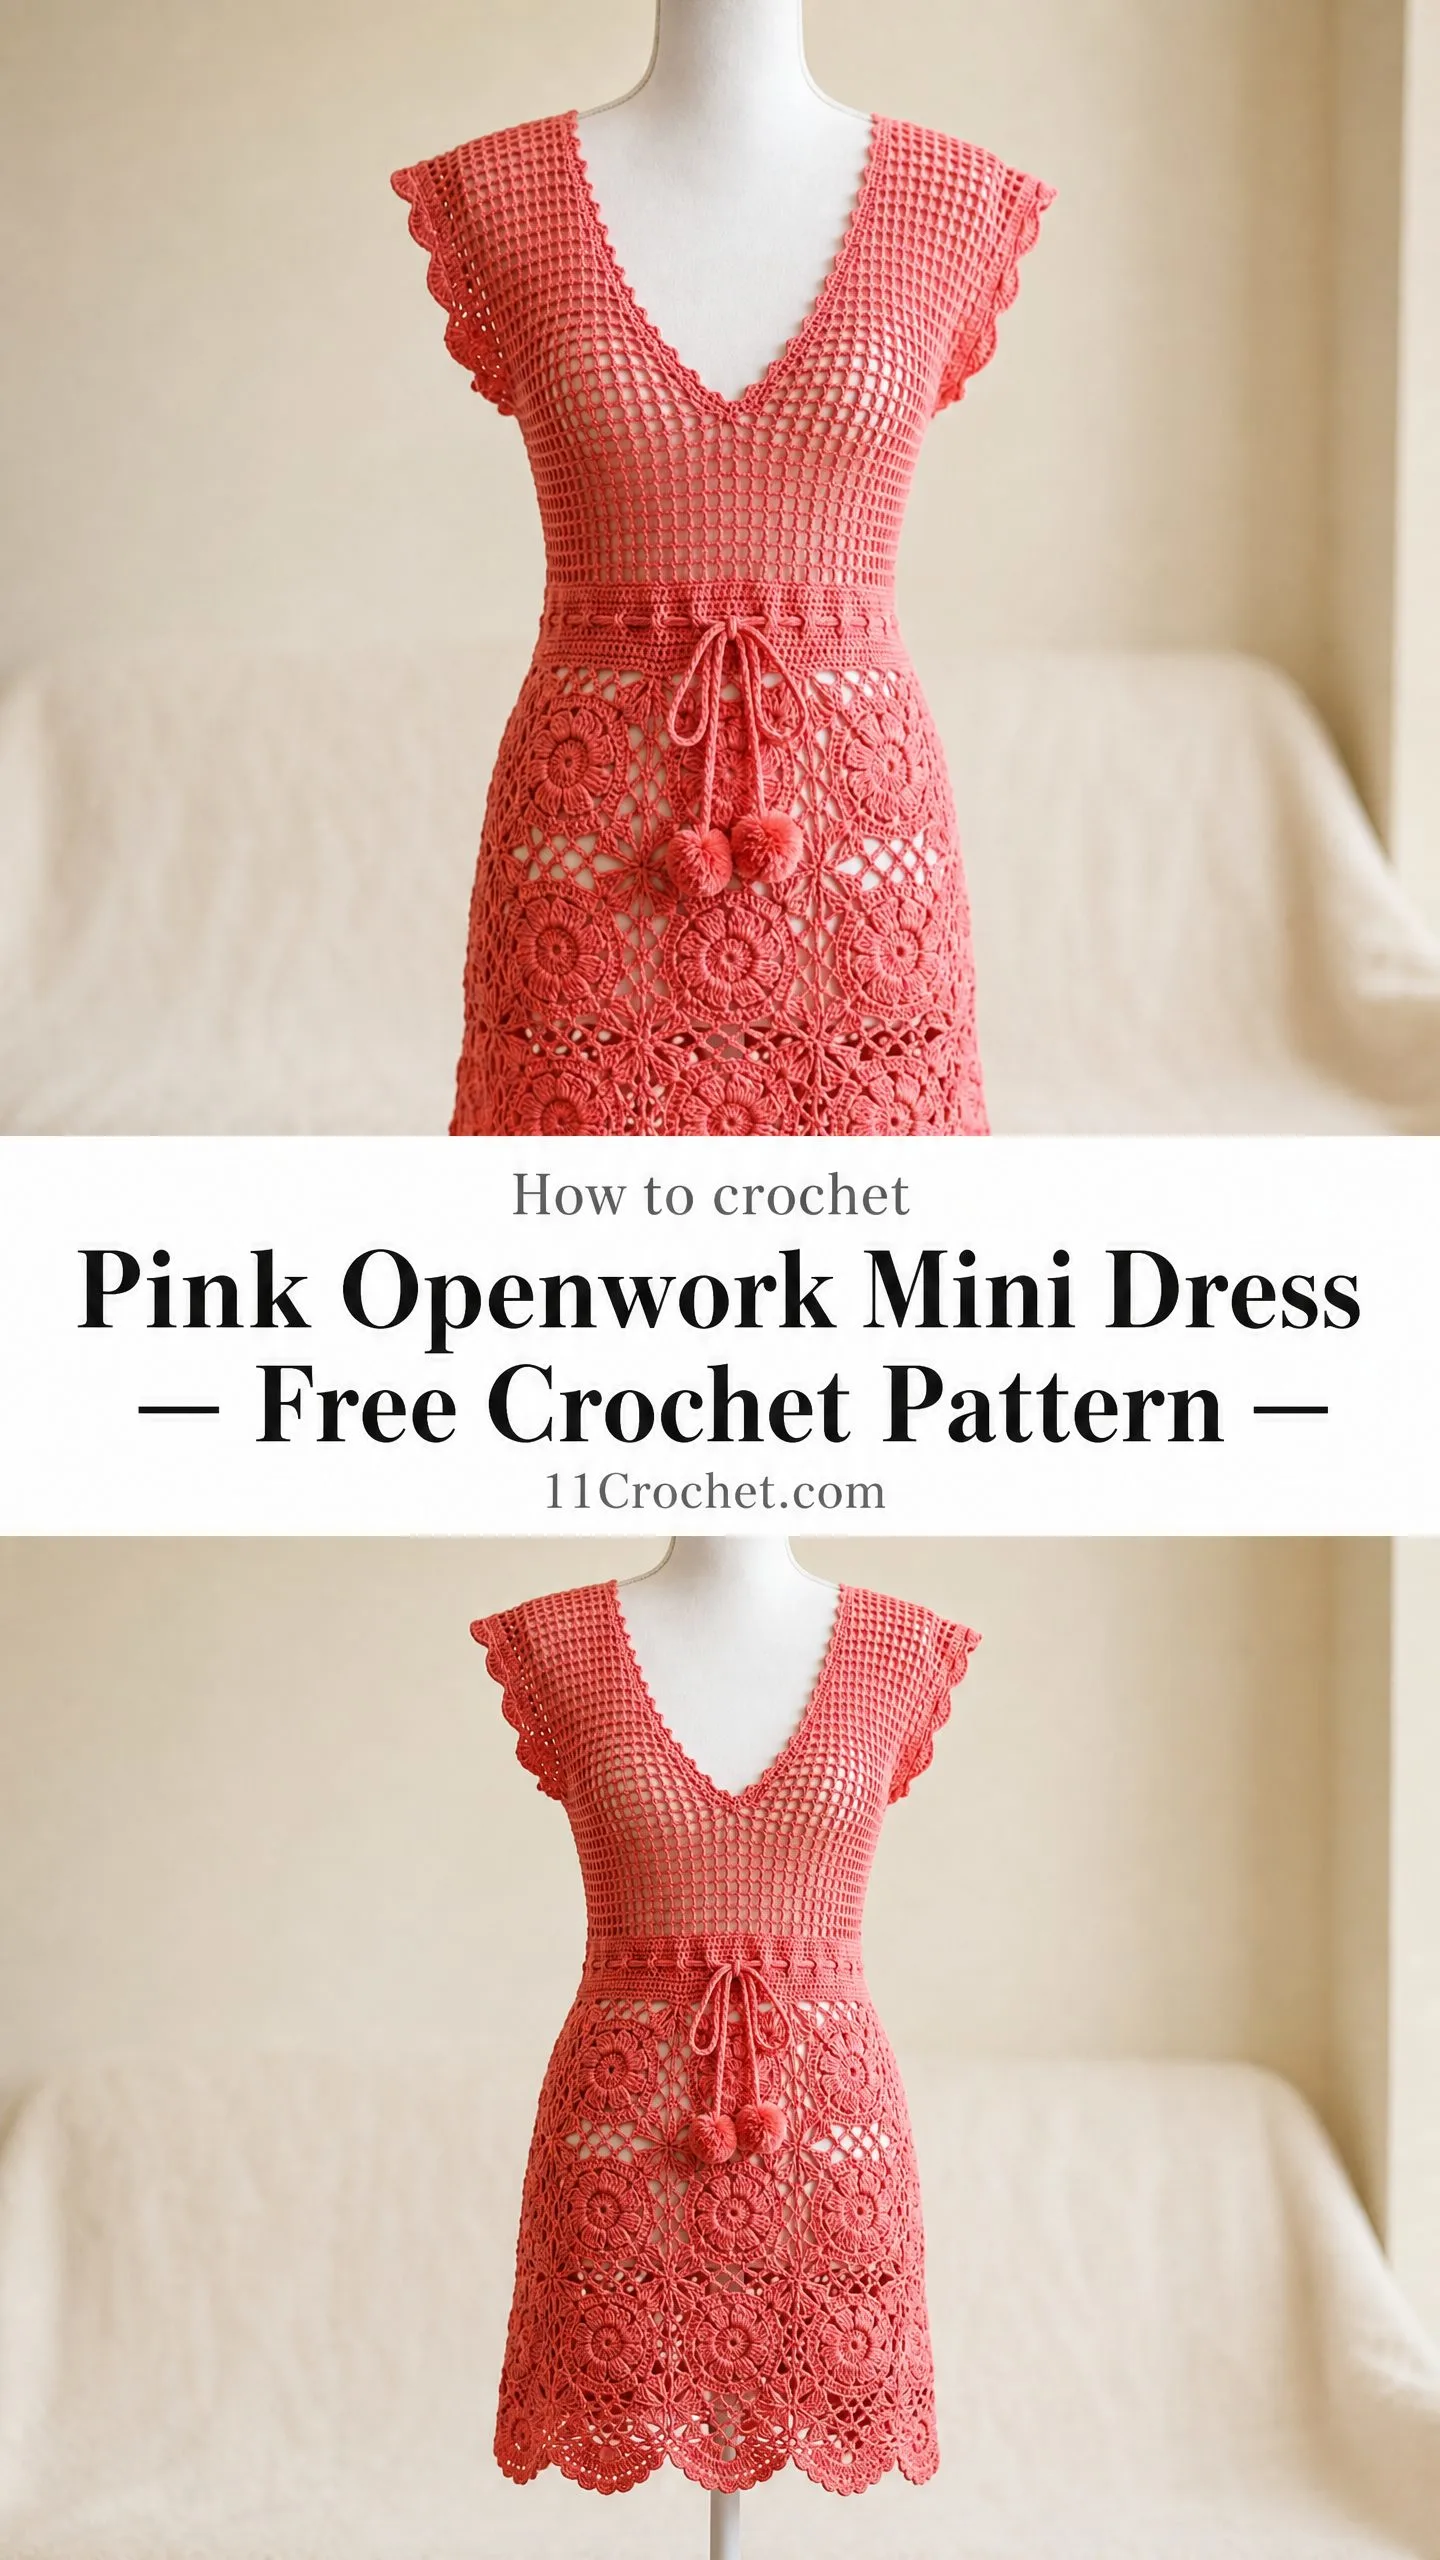
This dress works beautifully as a swimsuit coverup or a layering piece over a slip. The deep V-neckline at both front and back adds elegance, while the drawstring waist with pompom ties creates a flattering cinched silhouette. If you have been wanting to try garment construction with lace motifs, this is your project.
The finished piece measures approximately 28 inches from shoulder to hem, fitting a size Small (US 4/6) with a 34-inch bust. Plan for about 40 to 55 hours of focused crochet time. Yes, this is a commitment piece. But the result is absolutely worth every stitch.
Materials You Will Need
Before you begin, gather all your supplies. Having everything ready makes the process so much smoother.
Yarn: Approximately 650 yards (595 meters) of DK weight (CYCA 3) mercerized cotton or cotton-blend yarn in coral pink. The smooth finish of mercerized cotton produces the clean stitch definition you see in the finished dress.
Recommended Yarn Options:
Avoid fuzzy or textured yarns. The openwork mesh requires a smooth plied yarn for the lace holes to read clearly.
Hooks:
Notions:
Gauge
Gauge is mandatory for this garment. The mesh bodice circumference and all vertical measurements depend directly on hitting gauge.
Bodice Mesh (US E/4 hook, measured after blocking):
14 mesh squares x 14 rows = 4 inches x 4 inches (10 cm x 10 cm)
One mesh square = 1 dc + 1 ch-1 space
Motif (US D/3 hook, measured after blocking):
One completed flower motif = 3.5 inches x 3.5 inches (9 cm x 9 cm)
Work a gauge swatch of at least 20 mesh squares wide by 20 rows tall. Wash and block it before measuring.
Finished Measurements
Abbreviations
Here are all the abbreviations you will encounter. I am defining each one clearly so you can reference this section anytime.
Special Stitches and Techniques
Filet Mesh Square (mesh-sq)
One mesh square consists of 1 dc worked into a stitch or chain space, followed by ch 1, then skip 1 stitch or chain. When counting mesh squares, count only the dc posts, not the chain spaces.
Shell Stitch
Work 5 dc all into the same stitch or chain space. This creates a fan of 5 double crochets.
Picot
Chain 3, slip stitch into the first chain made. Used along the hem border for a decorative edge.
V-Stitch (V-st)
Work (dc, ch 2, dc) all into the same stitch or space.
Flower Motif Center
This is worked in seven steps. Take your time with each one.
Step 1: Make a magic ring (adjustable loop).
Step 2: Ch 3 (counts as first dc), work 11 dc into the ring. Pull tail to close ring. Sl st to top of ch-3 to join. (12 dc)
Step 3: Ch 5, skip 1 dc, sl st into next dc. Repeat around until you have 6 ch-5 loops. Sl st to base of first ch-5 to join. (6 petals in progress)
Step 4: Into each ch-5 loop work: sc, hdc, 3 dc, hdc, sc. Sl st to first sc to join. (6 petals complete)
Step 5: Working behind petals, sl st to back of any sl st between petals, ch 7, sl st to back of next inter-petal sl st. Repeat around for 6 ch-7 back loops. (6 back loops)
Step 6: Into each ch-7 back loop work: sc, hdc, dc, tr, dtr, tr, dc, hdc, sc. Sl st to first sc to join. (6 large outer petals complete)
Step 7: Ch 4, skip to corner of petal, sl st in tip of dtr, ch 4, sl st between petals. Repeat around to create 6 corner connection points. Fasten off.
Join-As-You-Go (JAYG)
When working the final step of a new motif, replace the sl st at the midpoint of the ch-4 with: ch 2, sl st into the corresponding ch-4 point of the adjacent motif, ch 2. This creates a shared join without sewing.
Pattern Instructions
Left Front Shoulder Panel
Foundation: Using US E/4 hook, ch 19.
Row 1 (RS): Dc in 5th ch from hook, (ch 1, skip 1 ch, dc in next ch) 7 times. Turn. (8 mesh squares)
Row 2 (WS): Ch 3, dc in first ch-1 sp, (ch 1, dc in next dc, ch 1, dc in next ch-1 sp) across, ending dc in top of t-ch. Turn. (8 mesh squares)
Rows 3 through 6: Work in mesh across. Turn. (8 mesh squares each row)
Row 7 (RS): Work in mesh across all 8 mesh squares. Turn. (8 mesh squares)
Do not fasten off. Set panel aside.
Right Front Shoulder Panel
Foundation: Ch 19.
Row 1 (RS): Dc in 5th ch from hook, (ch 1, skip 1 ch, dc in next ch) 7 times. Turn. (8 mesh squares)
Rows 2 through 6: Work in mesh across. Turn. (8 mesh squares each row)
Row 7 (RS): Work in mesh across. Turn. (8 mesh squares)
Join Front Panels and Shape V-Neckline
Joining Row 8 (RS): With RS of right panel facing, work in mesh across right panel (8 mesh squares), ch 3, skip 3 chains (this is the base of the V), work in mesh across left panel. Turn. (17 mesh squares total)
Row 9 (WS): Work in mesh across. When you reach the V-point ch-3 space, work dc into the space, ch 1, dc into same space. Continue in mesh across. Turn. (18 mesh squares)
Row 10 (RS): Work in mesh across. At the V-tip center space, work dc, ch 2, dc into that center ch-1 sp (V-st increase). Turn. (19 mesh squares)
Row 11 (WS): Work in mesh across. At V-tip ch-2 sp, work dc, ch 1, dc, ch 1, dc into the ch-2 sp (2-mesh-sq increase). Turn. (21 mesh squares)
Row 12 (RS): Work in mesh across. At V-center area, work 2 mesh squares across the 2 ch-1 spaces added last row. Turn. (21 mesh squares)
Rows 13 through 18: Work in mesh across without increase. Turn. (21 mesh squares each row)
Set front panel aside.
Bodice Back Panel
Work exactly as Bodice Front Panel through Row 18. The back V is identical in depth. (21 mesh squares after Row 18)
Join Front and Back Into the Round
With RS facing, place the front panel and back panel with RS together at the sides. Using a tapestry needle or sl-st crochet seam, join the last dc on the right side of the front panel to the last dc on the right side of the back panel, working 6 rows of seam stitches. Repeat for left side.
Checkpoint: After joining, the bodice circumference should measure approximately 34 inches (86 cm) when lightly stretched.
Bodice in the Round
With RS facing, join yarn at right underarm.
Rnd 1: Ch 3 (counts as dc), ch 1, (dc in next dc, ch 1, skip next ch-1 sp) around, sl st to top of ch-3 to join. (84 mesh squares)
Rnds 2 through 14: Work in mesh around, sl st to join each round. (84 mesh squares each round)
Waist Shaping
Place markers at 4 evenly spaced points: stitch 1 (right side seam), stitch 22 (center front), stitch 43 (left side seam), stitch 64 (center back).
Rnd 15: Work in mesh to 1 st before marker, dc2tog over current dc and next dc, ch 1, continue in mesh. Repeat decrease at each of 4 markers. (80 mesh squares)
Rnd 16: Work in mesh around. (80 mesh squares)
Rnd 17: Work decrease at 4 marked points. (76 mesh squares)
Rnd 18: Work in mesh around. (76 mesh squares)
Rnd 19: Work decrease at 4 marked points. (72 mesh squares)
Rnd 20: Work in mesh around. (72 mesh squares)
Drawstring Eyelet Round
Rnd 21: Ch 3 (counts as dc), ch 1, skip 1 st, (dc in next st, ch 1, skip 1 st) around, sl st to top of ch-3 to join. (72 eyelets)
Waistband
Rnd 22: Ch 1 (does not count as st), sc in each dc and each ch-1 sp around, sl st to first sc to join. (144 sc)
Rnd 23: Ch 1, sc in each sc around, sl st to join. (144 sc)
Rnd 24: Ch 1, sc in each sc around, sl st to join. (144 sc)
Cap Sleeve Finishing
Return to each sleeve opening. With RS facing and US E/4 hook, join yarn at the bottom of the sleeve opening.
Sleeve Rnd 1: Ch 1, work approximately 36 sc evenly around the sleeve opening edge, sl st to join. (36 sc)
Sleeve Rnd 2 (shell edging): Ch 1, sc in first sc, (skip 2 sc, 5 dc shell in next sc, skip 2 sc, sc in next sc) around, sl st to join. (6 shells)
Fasten off. Repeat for second sleeve.
Skirt Motif Construction
The skirt is made of 20 flower motifs total, arranged in 2 horizontal rows of 10 motifs each. Use US D/3 hook for all motifs.
Upper Motif Row (10 motifs):
Motif 1: Work through all 7 steps completely. Fasten off.
Motifs 2 through 9: Work through Step 6. On Step 7, use JAYG to join to the previously completed motif. Fasten off after each.
Motif 10: Work through Step 6. On Step 7, join to Motif 9 on one side and to Motif 1 on the other side, completing the ring. Fasten off.
Attach Upper Motif Row to Waistband:
With RS facing and US D/3 hook, join yarn at any top corner connection point. Sl st through the corresponding sc on the waistband to attach, spacing evenly around.
Lower Motif Row (10 motifs, offset):
Each lower motif sits between two upper motifs.
Motif 11: Work through Step 6. On Step 7, join top corners to the bottom corners of two adjacent upper motifs. Fasten off.
Motifs 12 through 19: Join top corners to bracketing upper motifs and one side to previous lower motif using JAYG.
Motif 20: Complete the ring by joining to Motif 19 and Motif 11.
Hem Border
With RS facing and US D/3 hook, join yarn at any bottom-center point of a lower motif.
Rnd 1: Ch 1, sc evenly around the entire bottom edge of the lower motif row, placing approximately 14 sc per motif = 140 sc total. Sl st to join. (140 sc)
Rnd 2: Ch 3 (counts as dc), (skip 2 sc, V-st in next sc, skip 2 sc, dc in next sc, skip 2 sc, V-st in next sc, skip 2 sc, dc in next sc) around. Sl st to join. (20 V-sts + 20 dc)
Rnd 3: Ch 1, (sc in dc, 7 dc in ch-2 sp of V-st, sc in next dc, 7 dc in ch-2 sp of next V-st, sc in next dc) around. (20 large shells)
Rnd 4: Ch 1, (sc in first dc of shell, ch 3, sc in 2nd dc, ch 3, sc in 3rd dc, ch 3, picot, sc in 4th dc, ch 3, picot, sc in 5th dc, ch 3, sc in 6th dc, ch 3, sc in 7th dc, sc in sc between shells) around. Fasten off.
V-Neckline Edge Finishing
With RS facing and US E/4 hook, join yarn at the right shoulder edge of the front V-neckline.
Rnd 1: Ch 1, sc evenly along the entire neckline edge, approximately 48 sc around. Sl st to join. (48 sc)
Rnd 2: Ch 1, sc in first sc, (skip 2 sc, 5-dc shell in next sc, skip 2 sc, sc in next sc) around. Sl st to join. Fasten off. (8 shells)
Drawstring and Pompoms
Cut or crochet a chain drawstring approximately 40 inches (102 cm) long. Thread it through the eyelet round beginning and ending at center front. Leave approximately 8 inches hanging at each end.
Attach one pompom to each drawstring end by threading the yarn tail through and knotting securely.
Blocking Your Pink Openwork Mini Dress
Blocking is essential for this dress. The motifs will not lie flat and the mesh will not open fully until blocked.
1. Soak the finished dress in cool water for 20 to 30 minutes until fully saturated.
2. Gently squeeze out excess water. Do not wring. Roll in a clean dry towel to remove most moisture.
3. Lay flat on blocking mats. Shape the bodice to the correct bust circumference.
4. Pin the hem border, stretching each fan scallop to its full width and pinning the picot points.
5. Pin each motif corner point outward so the flowers lay flat and the diamond gaps open fully.
6. Allow to dry completely (24 to 48 hours).
Care Instructions
Hand wash in cool water with gentle detergent. Lay flat to dry. Do not tumble dry. Do not iron directly on the mesh or motifs. Steam block if a refresh is needed. Store folded, not hung, to prevent stretching.
Size Customization Tips
To size up or down, adjust the number of mesh squares in the shoulder panels. Each mesh square equals approximately 0.28 inches (0.7 cm) at gauge. To add 2 inches to the bust, add approximately 7 mesh squares to each panel.
For the skirt, add or subtract motifs in pairs. Each motif adds approximately 3.5 inches to the circumference.
To lengthen the bodice, add additional rounds before waist shaping. Every 3.5 rounds adds approximately 1 inch of length.
For a size Medium (US 8/10), work 10 mesh squares per shoulder panel instead of 8, giving 22 mesh squares per panel when joined and 88 mesh squares in the round. Use 11 motifs per row in the skirt.
Thank you so much for choosing this pattern for your next project. I truly hope you love making this dress as much as I loved designing it. If you create one, I would absolutely love to see your finished piece. Tag me on Instagram or share a photo on Facebook.
If this pattern is calling your name but you are not quite ready to start today, go ahead and pin it to your favorite Pinterest board so you can find it when the time is right. And if you do make this dress, please drop a comment below. I read every single one and it makes my day to see your creations come to life.
