
Time to raid that stash drawer, my fiber-loving friends. You know that gorgeous sage green cotton thread you bought two years ago because the color was too beautiful to leave at the store? This is its moment. This butterfly bracelet combines delicate crochet lacework with macrame knotting to create a truly stunning piece of wearable art. The construction is genuinely interesting since you will work four separate wing pieces, assemble them around a crocheted body, add twisted antennae with gold bead tips, then mount the whole butterfly onto a hand-knotted adjustable band.
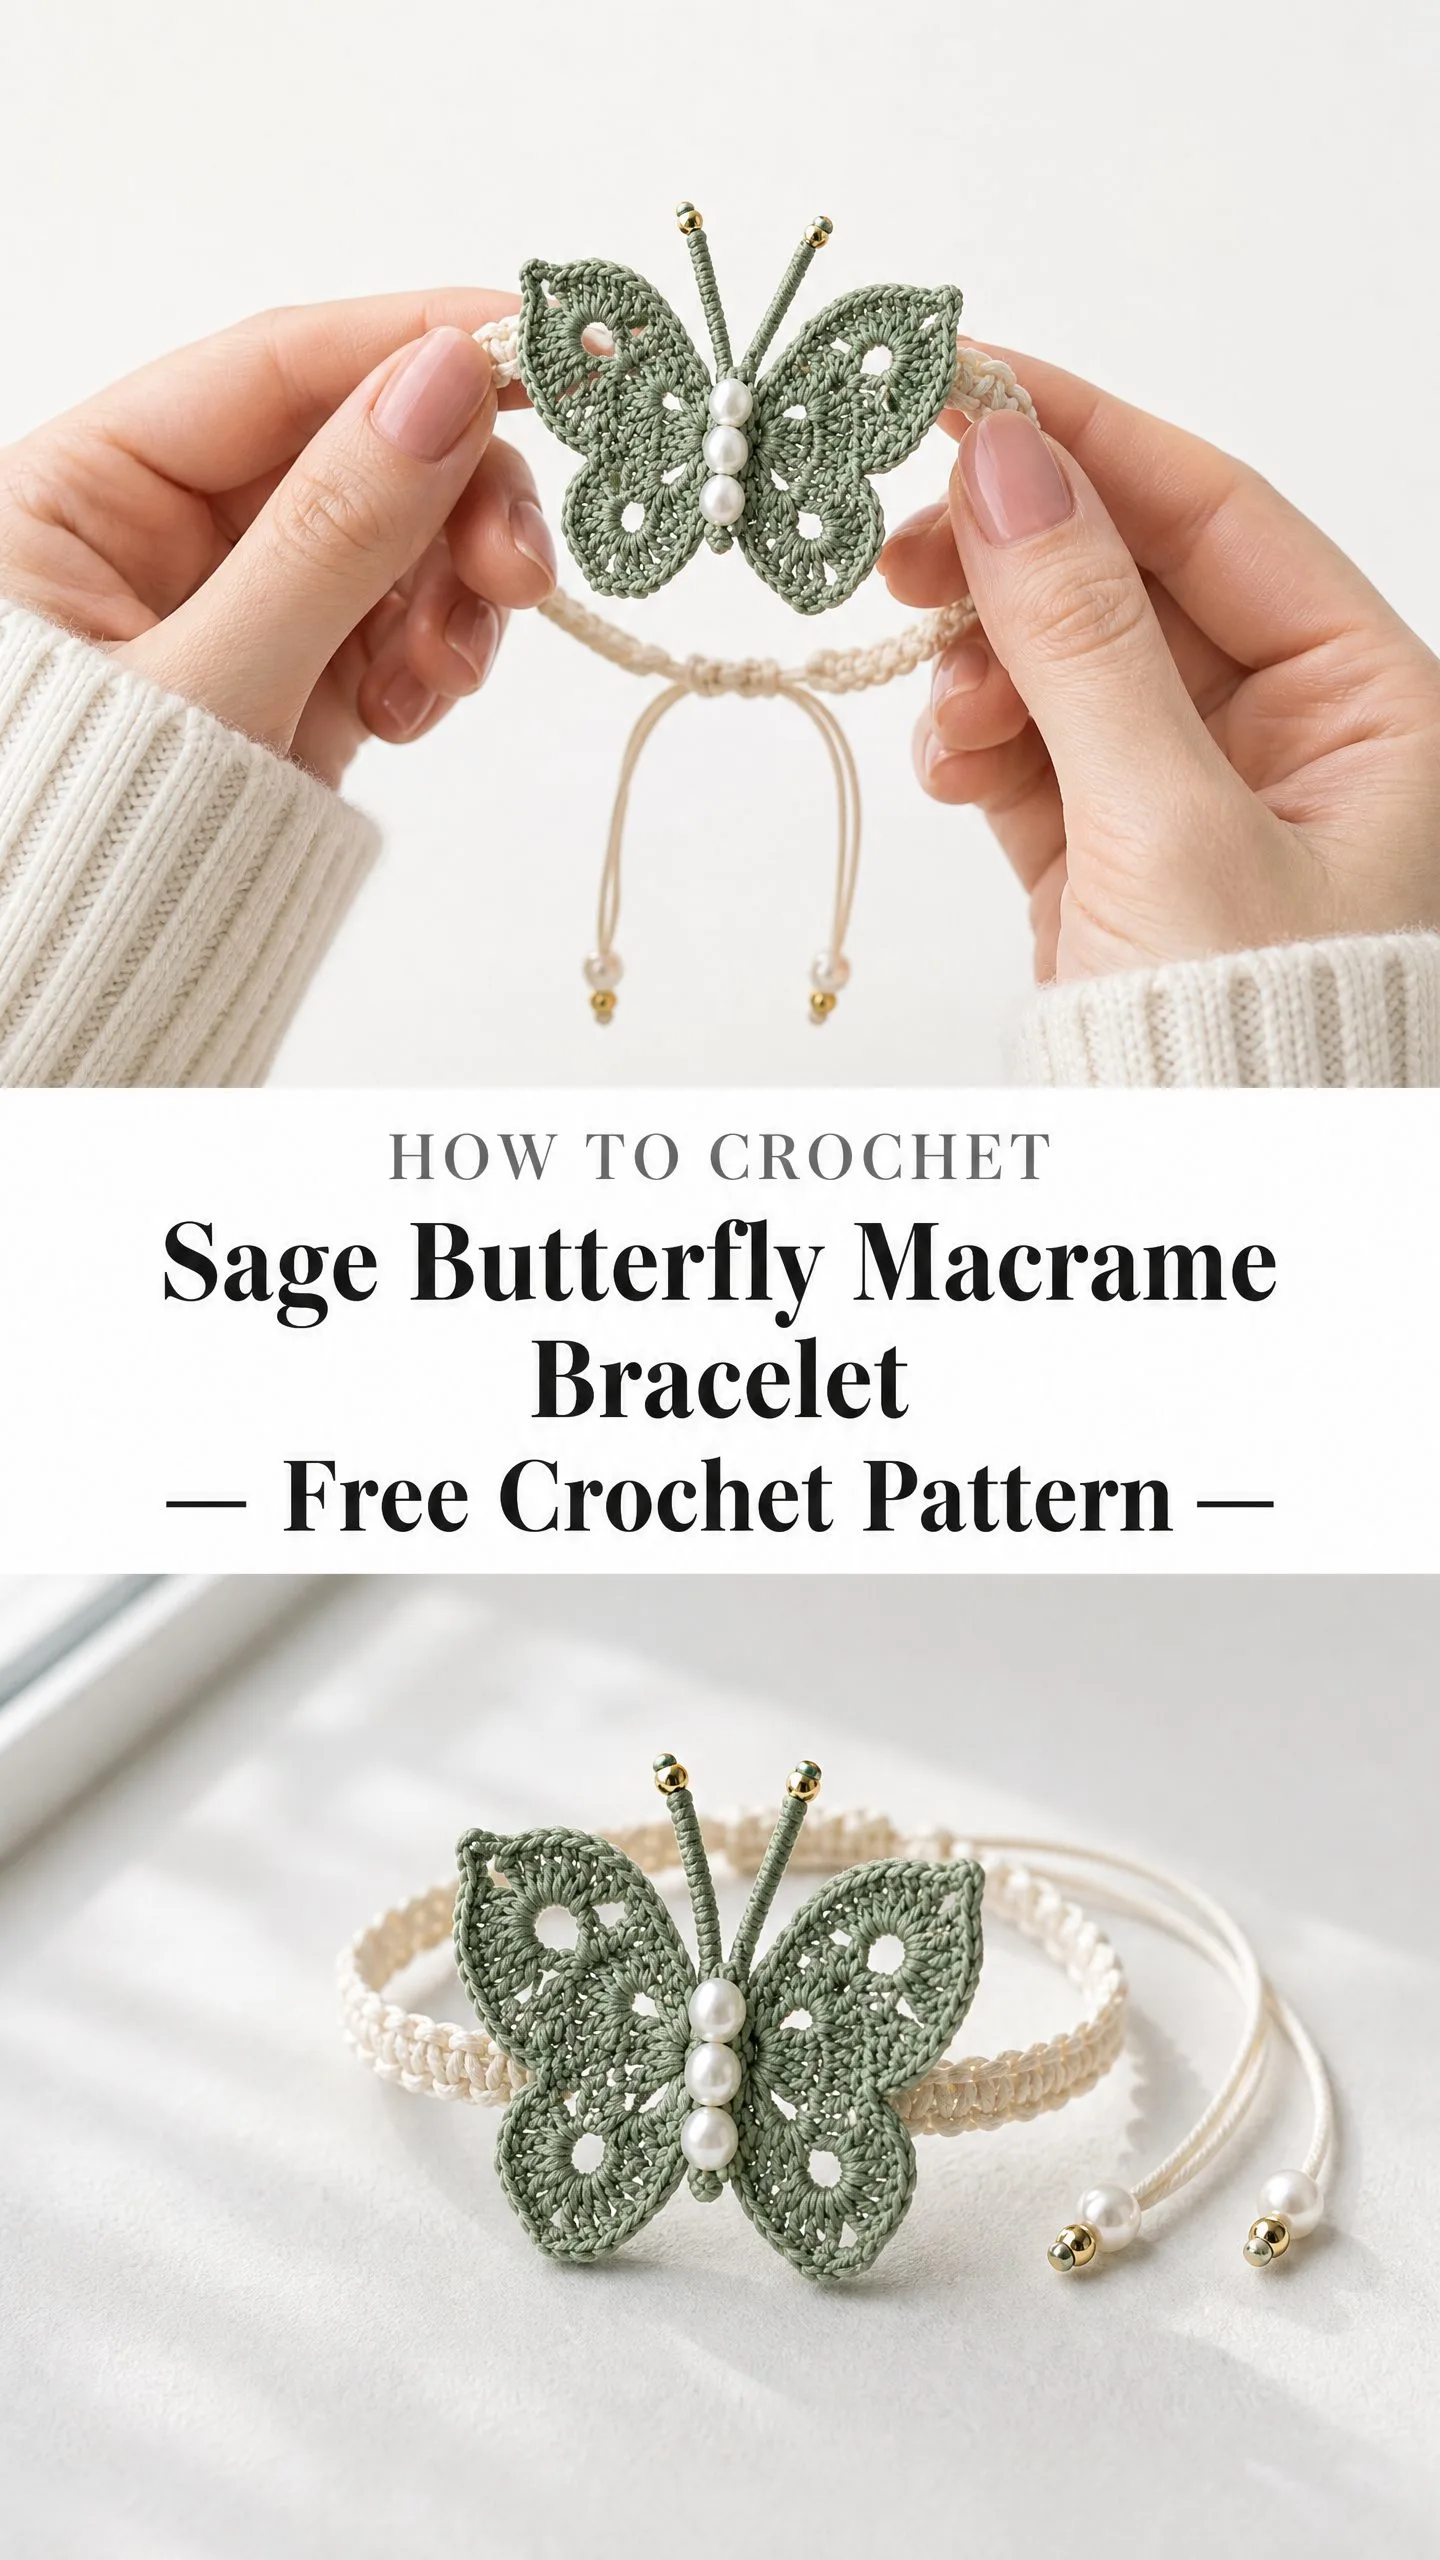
I will be honest with you. This is an intermediate project. You need to be comfortable working with fine size 10 cotton thread on a tiny steel hook, and you will learn some basic macrame square knots for the band. But if you have made doilies, worked with thread before, or simply enjoy a challenge that produces something jaw-droppingly beautiful, you can absolutely handle this.
The finished bracelet makes an incredible gift or a treat-yourself accessory that will have everyone asking where you bought it. Spoiler: you made it yourself, and it took about 3 to 5 hours total.
Why This Butterfly Bracelet Pattern Works
This crochet pattern creates a dimensional butterfly with visible open lacework holes in the wings, pearl bead accents along the body, and gold-tipped antennae. The wings have that classic lacy look you see in vintage thread crochet, but the modern sage green color and macrame band give it a fresh, boho feel.
The cream waxed cotton band uses an adjustable sliding knot closure, so one size fits most wrists. No fiddly clasps to deal with. No worrying about exact wrist measurements. The wearer simply pulls the beaded tails to loosen or tightens the sliding knot to secure.
The butterfly measures approximately 2.75 inches wide by 2 inches tall. The band adjusts from about 6 inches to 8 inches in circumference. This fits most adult wrists comfortably with room for adjustment.
Materials You Will Need
Gather everything before you start. Nothing derails a project faster than realizing you are missing beads halfway through assembly.
Thread and Cord:
Hook and Tools:
Beads and Embellishments:
Yarn Suggestions and Substitutions
Aunt Lydia’s Classic Crochet Thread Size 10 in Sage and Natural works beautifully. It is widely available and produces excellent stitch definition for lacework.
Lizbeth Premium Cotton Crochet Thread Size 10 has a tighter twist that makes particularly crisp open rings and chain spaces if you want extra-sharp detail in your wings.
DMC Petra Crochet Cotton Thread Size 3 can substitute if you prefer a slightly thicker wing. Adjust to a 1.9 mm hook and expect the butterfly to measure approximately 3.25 inches wide instead.
Important: Avoid acrylic or polyester thread. Cotton has the stiffness needed for the wings to hold their shape after blocking. Do not substitute embroidery floss either since it splits too easily on a steel hook.
Gauge
Using your size 7 (1.65 mm) steel crochet hook and size 10 cotton thread:
One finished upper wing measures approximately 1.75 inches wide by 1.25 inches tall after blocking.
One finished lower wing measures approximately 1.25 inches wide by 1 inch tall after blocking.
Gauge matters here. If your wings are too big or too small, they will not fit proportionally on the band. I recommend swatching one wing before committing to the full project.
Abbreviations
Let me walk you through every abbreviation you will encounter. I define each one with a plain-English explanation so nothing feels mysterious.
Special Stitches and Techniques
Picot
This creates a small decorative loop point along edges.
1. Work 3 ch.
2. Insert hook into the first of those 3 ch (the chain closest to the work).
3. Yarn over and pull up a loop.
4. Yarn over and draw through both loops on hook.
The picot adds a delicate scalloped finish to your wing edges.
Shell
A shell is a group of stitches worked into the same stitch or chain space. They fan out to create a shell shape.
Example: Shell = (2 dc, ch 2, 2 dc) in the same space.
Open Lace Ring Motif
This technique creates the circular open holes visible in the butterfly wings.
1. Ch 6, sl st to first ch to form a ring.
2. Work the specified number of stitches into the ring as directed.
Square Knot (Macrame)
You will use this for the band. Work with 4 strands of cord.
1. Identify the two center strands as filler cords and the two outer strands as working cords.
2. Take the left working cord and lay it over the two filler cords, then under the right working cord.
3. Take the right working cord and pass it under the two filler cords, then up through the loop formed on the left side.
4. Pull both working cords snug. This completes the first half.
5. Now take the right working cord and lay it over the two filler cords, then under the left working cord.
6. Take the left working cord and pass it under the two filler cords, then up through the loop formed on the right side.
7. Pull snug. This completes the full square knot.
Repeat for each subsequent knot.
Sliding Adjustable Knot (Macrame Closure)
This creates the adjustable closure at the back of the bracelet.
1. Overlap the two cord tails from opposite ends so they run parallel in opposite directions for approximately 2 inches.
2. Cut a separate 8-inch piece of cord.
3. Fold the separate piece in half and lay it perpendicular across both parallel tails.
4. Wrap the separate piece around both tails 4 to 5 times, working downward.
5. Pass the ends through the small loop formed at the top of the wrapping and pull snug.
6. Trim excess and secure with a tiny drop of fabric glue.
When the wearer pulls both tails outward, the bracelet opens. Pushing the sliding knot toward the wrist closes it.
Pattern Notes Before You Begin
The butterfly consists of five crocheted pieces: right upper wing, left upper wing, right lower wing, left lower wing, and the body. All four wings are worked flat, beginning with a foundation chain and shaped using increases and open lacework chain spaces.
Because the wings are worked flat, they have a right side and a wrong side. Always work with the right side facing up for the final round of each wing so picot edgings face outward.
Build the macrame band first. This allows you to attach the butterfly cleanly before finishing the beaded ends.
All ch-3 at the beginning of rows that replace a dc count as 1 dc throughout.
Macrame Band Instructions
Cut four lengths of cream waxed cotton cord, each 45 inches long. Fold all four lengths in half at the midpoint. You now have 8 working strands, each approximately 22.5 inches long.
At the folded midpoint, hold all 8 strands together and create a small overhand knot approximately 0.5 inch from the fold. This forms a temporary anchor loop.
Separate the 8 strands into two groups of 4 strands each.
Working with the first group of 4 strands:
Identify the 2 center strands as filler cords. Work 14 square knots in sequence. This produces a knotted segment approximately 2.75 inches long.
Working with the second group of 4 strands:
Work 14 square knots in sequence. This produces the second half of the band.
Join both knotted segments by holding the two ends together at the center. The butterfly body will cover this join. Secure temporarily with scrap thread.
Create the adjustable closure:
Bring the 4 free tail strands from the left segment and the 4 free tails from the right segment together at the back. Use the sliding adjustable knot technique to connect them.
Thread one pearl bead and one gold bead onto each pair of tail strands below the sliding knot. Tie an overhand knot below the beads to secure. Trim tails to approximately 0.5 inch below the final knot. Apply fabric glue to the cut ends.
Checkpoint: Your band should measure approximately 6 to 8 inches in circumference when at its tightest, with clean square knot texture on both sides and adjustable beaded tails at the back.
Right Upper Wing Instructions
The right upper wing is the larger of the two right-side wings. It is worked flat in rows, beginning at the inner edge near the body and widening toward the outer tip.
With sage green size 10 thread and size 7 steel hook, ch 14.
Row 1 (RS): Sc in 2nd ch from hook, sc in each ch across. Turn. (13 sc)
Row 2 (WS): Ch 3 (counts as dc), dc in next 2 sts, ch 3, sk 3 sts, sc in next st, ch 3, sk 3 sts, dc in last 3 sts. Turn. (6 dc, 1 sc, 2 ch-3 sps)
Row 3 (RS): Ch 3 (counts as dc), dc in next 2 sts, 5 dc in ch-3 sp (shell made), dc in sc, 5 dc in next ch-3 sp (shell made), dc in last 3 sts. Turn. (19 dc)
Row 4 (WS): Ch 1, sc in first dc, ch 3, sk 2 sts, sc in next st, ch 5, sk 5 sts, sc in next st, ch 5, sk 5 sts, sc in next st, ch 3, sk 2 sts, sc in last st. Turn. (4 sc, 2 ch-3 sps, 2 ch-5 sps)
Row 5 (RS): Ch 3 (counts as dc), 2 dc in first ch-3 sp, dc in next sc, 7 dc in ch-5 sp, dc in next sc, 7 dc in ch-5 sp, dc in next sc, 3 dc in ch-3 sp, dc in last sc. Turn. (24 dc)
Row 6 (WS): Ch 4 (counts as dc plus ch 1), sk first st, dc in next st, ch 1, sk 1 st, dc in next st, ch 3, sk 3 sts, sc in next st, ch 3, sk 3 sts, dc in next st, ch 1, sk 1 st, dc in next st, ch 1, sk 1 st, dc in last st. Turn. (6 dc, 1 sc, 4 ch-1 sps, 2 ch-3 sps)
Row 7 (RS): Ch 3 (counts as dc), dc in ch-1 sp, dc in dc, dc in ch-1 sp, dc in dc, 5 dc in ch-3 sp, dc in sc, 5 dc in ch-3 sp, dc in dc, dc in ch-1 sp, dc in dc, dc in ch-1 sp, dc in last dc. Turn. (22 dc)
Row 8 (WS): Ch 1, sl st in first 3 sts (begin taper on inner edge), ch 3 (counts as dc), dc in next 3 sts, ch 3, sk 3 sts, sc in next st, ch 3, sk 3 sts, dc in next 4 sts. Do not work last 3 sts. Turn. (8 dc, 1 sc, 2 ch-3 sps)
Row 9 (RS): Ch 3 (counts as dc), dc in next 3 sts, 5 dc in ch-3 sp, dc in sc, 5 dc in ch-3 sp, dc in last 4 sts. Turn. (18 dc)
Row 10 (WS): Ch 1, sc in first st, ch 3, sk 2 sts, sc in next st, ch 5, sk 5 sts, sc in next st, ch 5, sk 4 sts, sc in next st, ch 3, sk 2 sts, sc in last st. Turn. (4 sc, 2 ch-3 sps, 2 ch-5 sps)
Row 11 (RS): Ch 3 (counts as dc), dc in ch-3 sp, dc in sc, 6 dc in ch-5 sp, dc in sc, 6 dc in ch-5 sp, dc in sc, dc in ch-3 sp, dc in last sc. Turn. (18 dc)
Row 12 (WS): Ch 1, sl st in first 2 sts (taper), ch 3 (counts as dc), dc in next 4 sts, ch 3, sk 4 sts, dc in next st, ch 3, sk 4 sts, dc in last 5 sts. Do not work last 2 sts. Turn. (10 dc, 2 ch-3 sps)
Row 13 (RS): Ch 3 (counts as dc), dc in next 4 sts, 4 dc in ch-3 sp, dc in dc, 4 dc in ch-3 sp, dc in last 5 sts. Turn. (18 dc)
Row 14 (WS): Ch 1, sc in first st, ch 2, sk 2 sts, sc in next st, ch 3, sk 3 sts, sc in next st, ch 3, sk 3 sts, sc in next st, ch 2, sk 2 sts, sc in last st. Turn. (4 sc, 2 ch-2 sps, 2 ch-3 sps)
Row 15 (RS): Ch 1, sc in sc, 3 dc in ch-2 sp, sc in sc, 4 dc in ch-3 sp, sc in sc, 4 dc in ch-3 sp, sc in sc, 3 dc in ch-2 sp, sc in last sc. Turn. (14 dc, 5 sc)
Do not fasten off. Proceed directly to the edging round.
Edging Round (RS): Ch 1, work sc evenly along all outer edges of the wing: sc across the top edge of Row 15, work 3 sc in the outer corner point, sc down the outer side edge, work 3 sc in the lower corner, sc across the bottom foundation chain edge, sl st to first sc to join. Do not work along the straight inner edge (the body side).
Picot Edging Round: Sl st to first sc of edging round. (Ch 3, sl st in first ch of ch-3 just made, sl st in next 2 sc of edging round) rep around entire outer edge, ending sl st in last sc.
Fasten off, leaving a 6-inch tail for assembly.
Checkpoint: Your right upper wing should measure approximately 1.75 inches wide and 1.25 inches tall with visible open lace holes and a straight inner edge.
Left Upper Wing Instructions
Work Rows 1 through 15 identically to the right upper wing. When assembling, flip the left wing over so its wrong side faces up on the left side. This creates the mirror image. The picot edging is symmetric, so flipping produces a correct mirror wing.
Fasten off, leaving a 6-inch tail.
Right Lower Wing Instructions
The lower wings are smaller and more rounded.
With sage green size 10 thread and size 7 steel hook, ch 10.
Row 1 (RS): Sc in 2nd ch from hook, sc in each ch across. Turn. (9 sc)
Row 2 (WS): Ch 3 (counts as dc), dc in next st, ch 3, sk 3 sts, sc in next st, ch 3, sk 3 sts, dc in last 2 sts. Turn. (4 dc, 1 sc, 2 ch-3 sps)
Row 3 (RS): Ch 3 (counts as dc), dc in next dc, 5 dc in ch-3 sp, dc in sc, 5 dc in ch-3 sp, dc in last 2 dc. Turn. (15 dc)
Row 4 (WS): Ch 1, sc in first dc, ch 3, sk 2 sts, sc in next st, ch 4, sk 5 sts, sc in next st, ch 3, sk 2 sts, sc in last dc. Turn. (3 sc, 2 ch-3 sps, 1 ch-4 sp)
Row 5 (RS): Ch 3 (counts as dc), 3 dc in ch-3 sp, dc in sc, 5 dc in ch-4 sp, dc in sc, 3 dc in ch-3 sp, dc in last sc. Turn. (14 dc)
Row 6 (WS): Ch 1, sc in first dc, ch 2, sk 2 sts, sc in next dc, ch 3, sk 4 sts, sc in next dc, ch 2, sk 2 sts, sc in last dc. Turn. (3 sc, 2 ch-2 sps, 1 ch-3 sp)
Row 7 (RS): Ch 1, sc in sc, 3 dc in ch-2 sp, sc in sc, 4 dc in ch-3 sp, sc in sc, 3 dc in ch-2 sp, sc in last sc. Turn. (10 dc, 4 sc)
Row 8 (WS): Ch 1, sl st in first 2 sts (taper), ch 1, sc in next st, ch 2, sk 2 sts, sc in next st, ch 2, sk 2 sts, sc in next st, ch 2, sk 2 sts, sc in next st. Do not work last 2 sts. Turn. (4 sc, 3 ch-2 sps)
Row 9 (RS): Ch 1, sc in sc, 2 dc in ch-2 sp, sc in sc, 2 dc in ch-2 sp, sc in sc, 2 dc in ch-2 sp, sc in last sc. Turn. (6 dc, 4 sc)
Do not fasten off.
Edging Round (RS): Ch 1, sc evenly around all outer edges, working 3 sc in each outer corner and along the foundation chain edge. Do not work along the straight inner edge.
Picot Edging Round: (Ch 3, sl st in first ch of ch-3, sl st in next 2 sc) rep around entire outer edge.
Fasten off, leaving a 6-inch tail.
Checkpoint: The right lower wing should measure approximately 1.25 inches wide and 1 inch tall.
Left Lower Wing Instructions
Work identically to the right lower wing. Flip when assembling to create the mirror image. Fasten off, leaving a 6-inch tail.
Body Instructions
The body connects all four wings.
With sage green size 10 thread and size 7 steel hook, ch 8.
Round 1: Sc in 2nd ch from hook, sc in next 5 chs, 3 sc in last ch. Now working along opposite side of foundation chain: sc in next 5 chs, 2 sc in first ch (same as starting ch). Sl st to first sc to join. (16 sc)
Round 2: Ch 1, sc in same st as join, sc in next 5 sts, 2 sc in each of next 3 sts, sc in next 5 sts, 2 sc in each of last 2 sts. Sl st to first sc to join. (21 sc)
Round 3: Ch 1, sc in each st around. Sl st to first sc to join. (21 sc)
Fasten off, leaving a 12-inch tail for assembling wings and sewing to band.
Antennae Instructions
Cut two lengths of sage green thread, each 8 inches long. Cut two lengths of 1 mm macrame cord, each 2 inches long.
For each antenna: hold one length of thread and one length of cord together. Twist the thread tightly around the cord from one end to the other, covering the cord completely. Apply a tiny drop of fabric glue at each end. Thread one gold bead onto the free end, apply glue inside the bead if needed, and allow to dry.
The finished antenna should be approximately 1.75 inches long and slightly curved.
Assembly Instructions
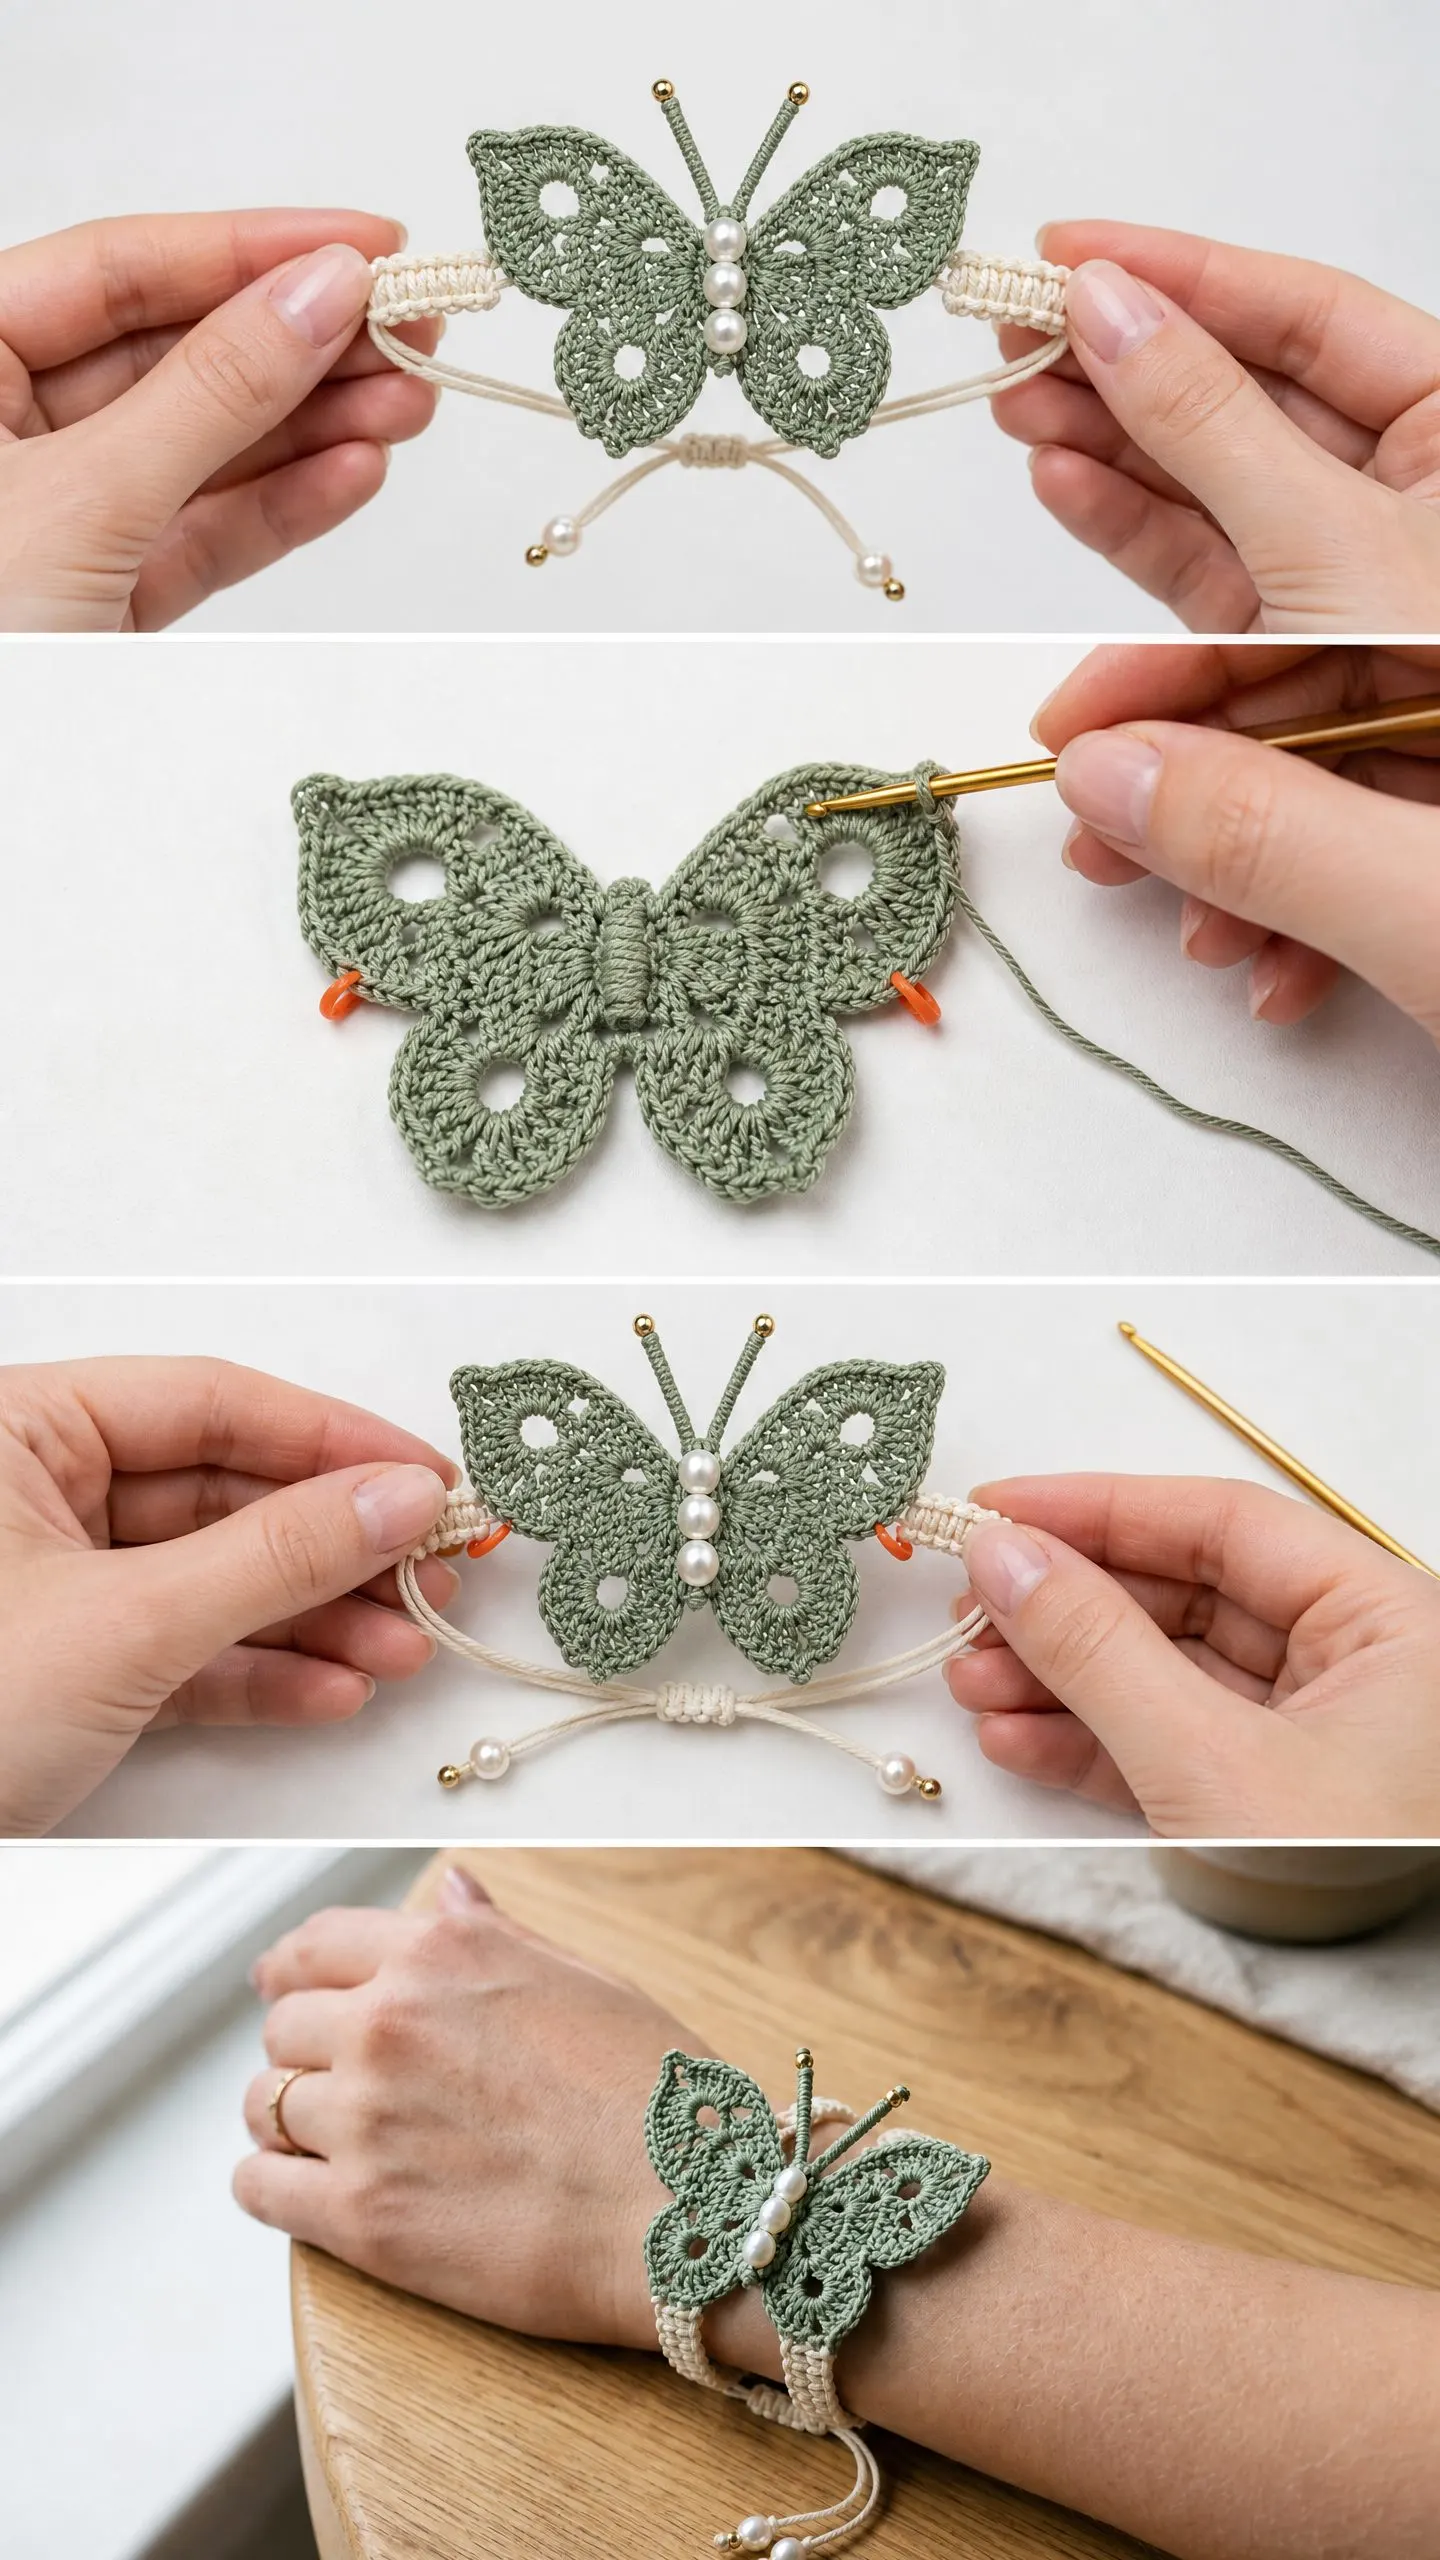
Step 1: Arrange wings.
Place the body at the center. Align the right upper wing with its straight inner edge along the right upper side of the body, right side facing up. Mirror the left upper wing on the left. Position lower wings slightly overlapping the inner corners of the upper wings, angled slightly downward and outward.
Step 2: Sew wings to body.
Using the long tail from the body and a tapestry needle, whipstitch the straight inner edge of each wing firmly to the outer edge of the body. Work in a figure-eight pattern across all four wings. Weave in and trim tails except the main assembly tail.
Step 3: Attach antennae.
Insert the base end of each antenna between the body and the upper wing at the top center. Wrap tightly around the antenna base several times and secure with a knot. Allow antennae to angle upward and slightly outward.
Step 4: Add pearl beads to body.
Thread a beading needle with cream thread. Sew 3 to 4 pearl beads in a vertical line along the center of the body, evenly spaced. Knot securely on the wrong side.
Step 5: Attach butterfly to band.
Center the assembled butterfly on the macrame band over the center join point. The body should run perpendicular to the band length. Using doubled sage green thread, whipstitch the back of the body firmly to the top of the band, catching macrame knots in the stitching. Stitch at least 6 to 8 times. Knot securely and weave in the tail.
Step 6: Add beads to tail ends.
If not already added, thread one pearl bead and one gold bead onto each pair of tail strands. Knot below the beads, trim to 0.5 inch, and secure with fabric glue.
Finishing and Blocking
Lightly mist the butterfly with water or spray starch for a crisper finish. Pin the wings flat on a blocking board, spreading each wing to full width and opening all chain spaces with pins. Allow to dry completely, approximately 2 to 4 hours.
Do not block the macrame band since the knotting will loosen.
Once dry, gently curve the wings upward along the center body line for a three-dimensional lift. Hold the butterfly between both hands and bend the wings slightly upward at the body join.
Weave in all remaining thread ends securely.
Size Customization Tips
For a narrower band, use 3 strands of cord folded in half (6 working strands) with 2 filler and 2 working strands. This produces a band approximately 0.35 inch wide.
For a wider band, add 4 more strands and work with 3 filler and 3 working strands per side. This produces a band approximately 0.65 inch wide.
To increase adjustable range, add 4 to 5 additional square knots per side.
To scale the butterfly up, use size 5 pearl cotton thread with a 1.5 mm steel hook. Expect approximately 3.5 inches wide.
To scale down for a child’s bracelet, use size 20 thread with a size 10 (1.30 mm) steel hook. The butterfly will measure approximately 2 inches wide.
Care Instructions
Hand wash only in cool water with mild soap. Gently squeeze without wringing. Lay flat to dry. Avoid prolonged direct sunlight to prevent fading. Keep away from moisture to prevent bead tarnishing. Do not machine wash or dry.
Thank you so much for choosing this butterfly bracelet pattern. I genuinely hope you love making it as much as I loved designing it. The first time you slip it on your wrist and see those delicate wings catch the light, you will feel that crafter’s pride that makes all the tiny stitches worth it.
If you found this crochet tutorial helpful, save it to your Pinterest boards so you can find it whenever you are ready to start. And please, if you make this bracelet, drop a comment below or tag me on Instagram. I would absolutely love to see your sage green butterflies out in the world.
