
Let me guess. You took one look at this delicate crocheted bracelet and thought, "There is no way I could ever make that." I get it. Micro-crochet with metallic thread, tiny beads, and a three-dimensional rose? It sounds intimidating. But here is the truth: if you can single crochet, you can make this bracelet.
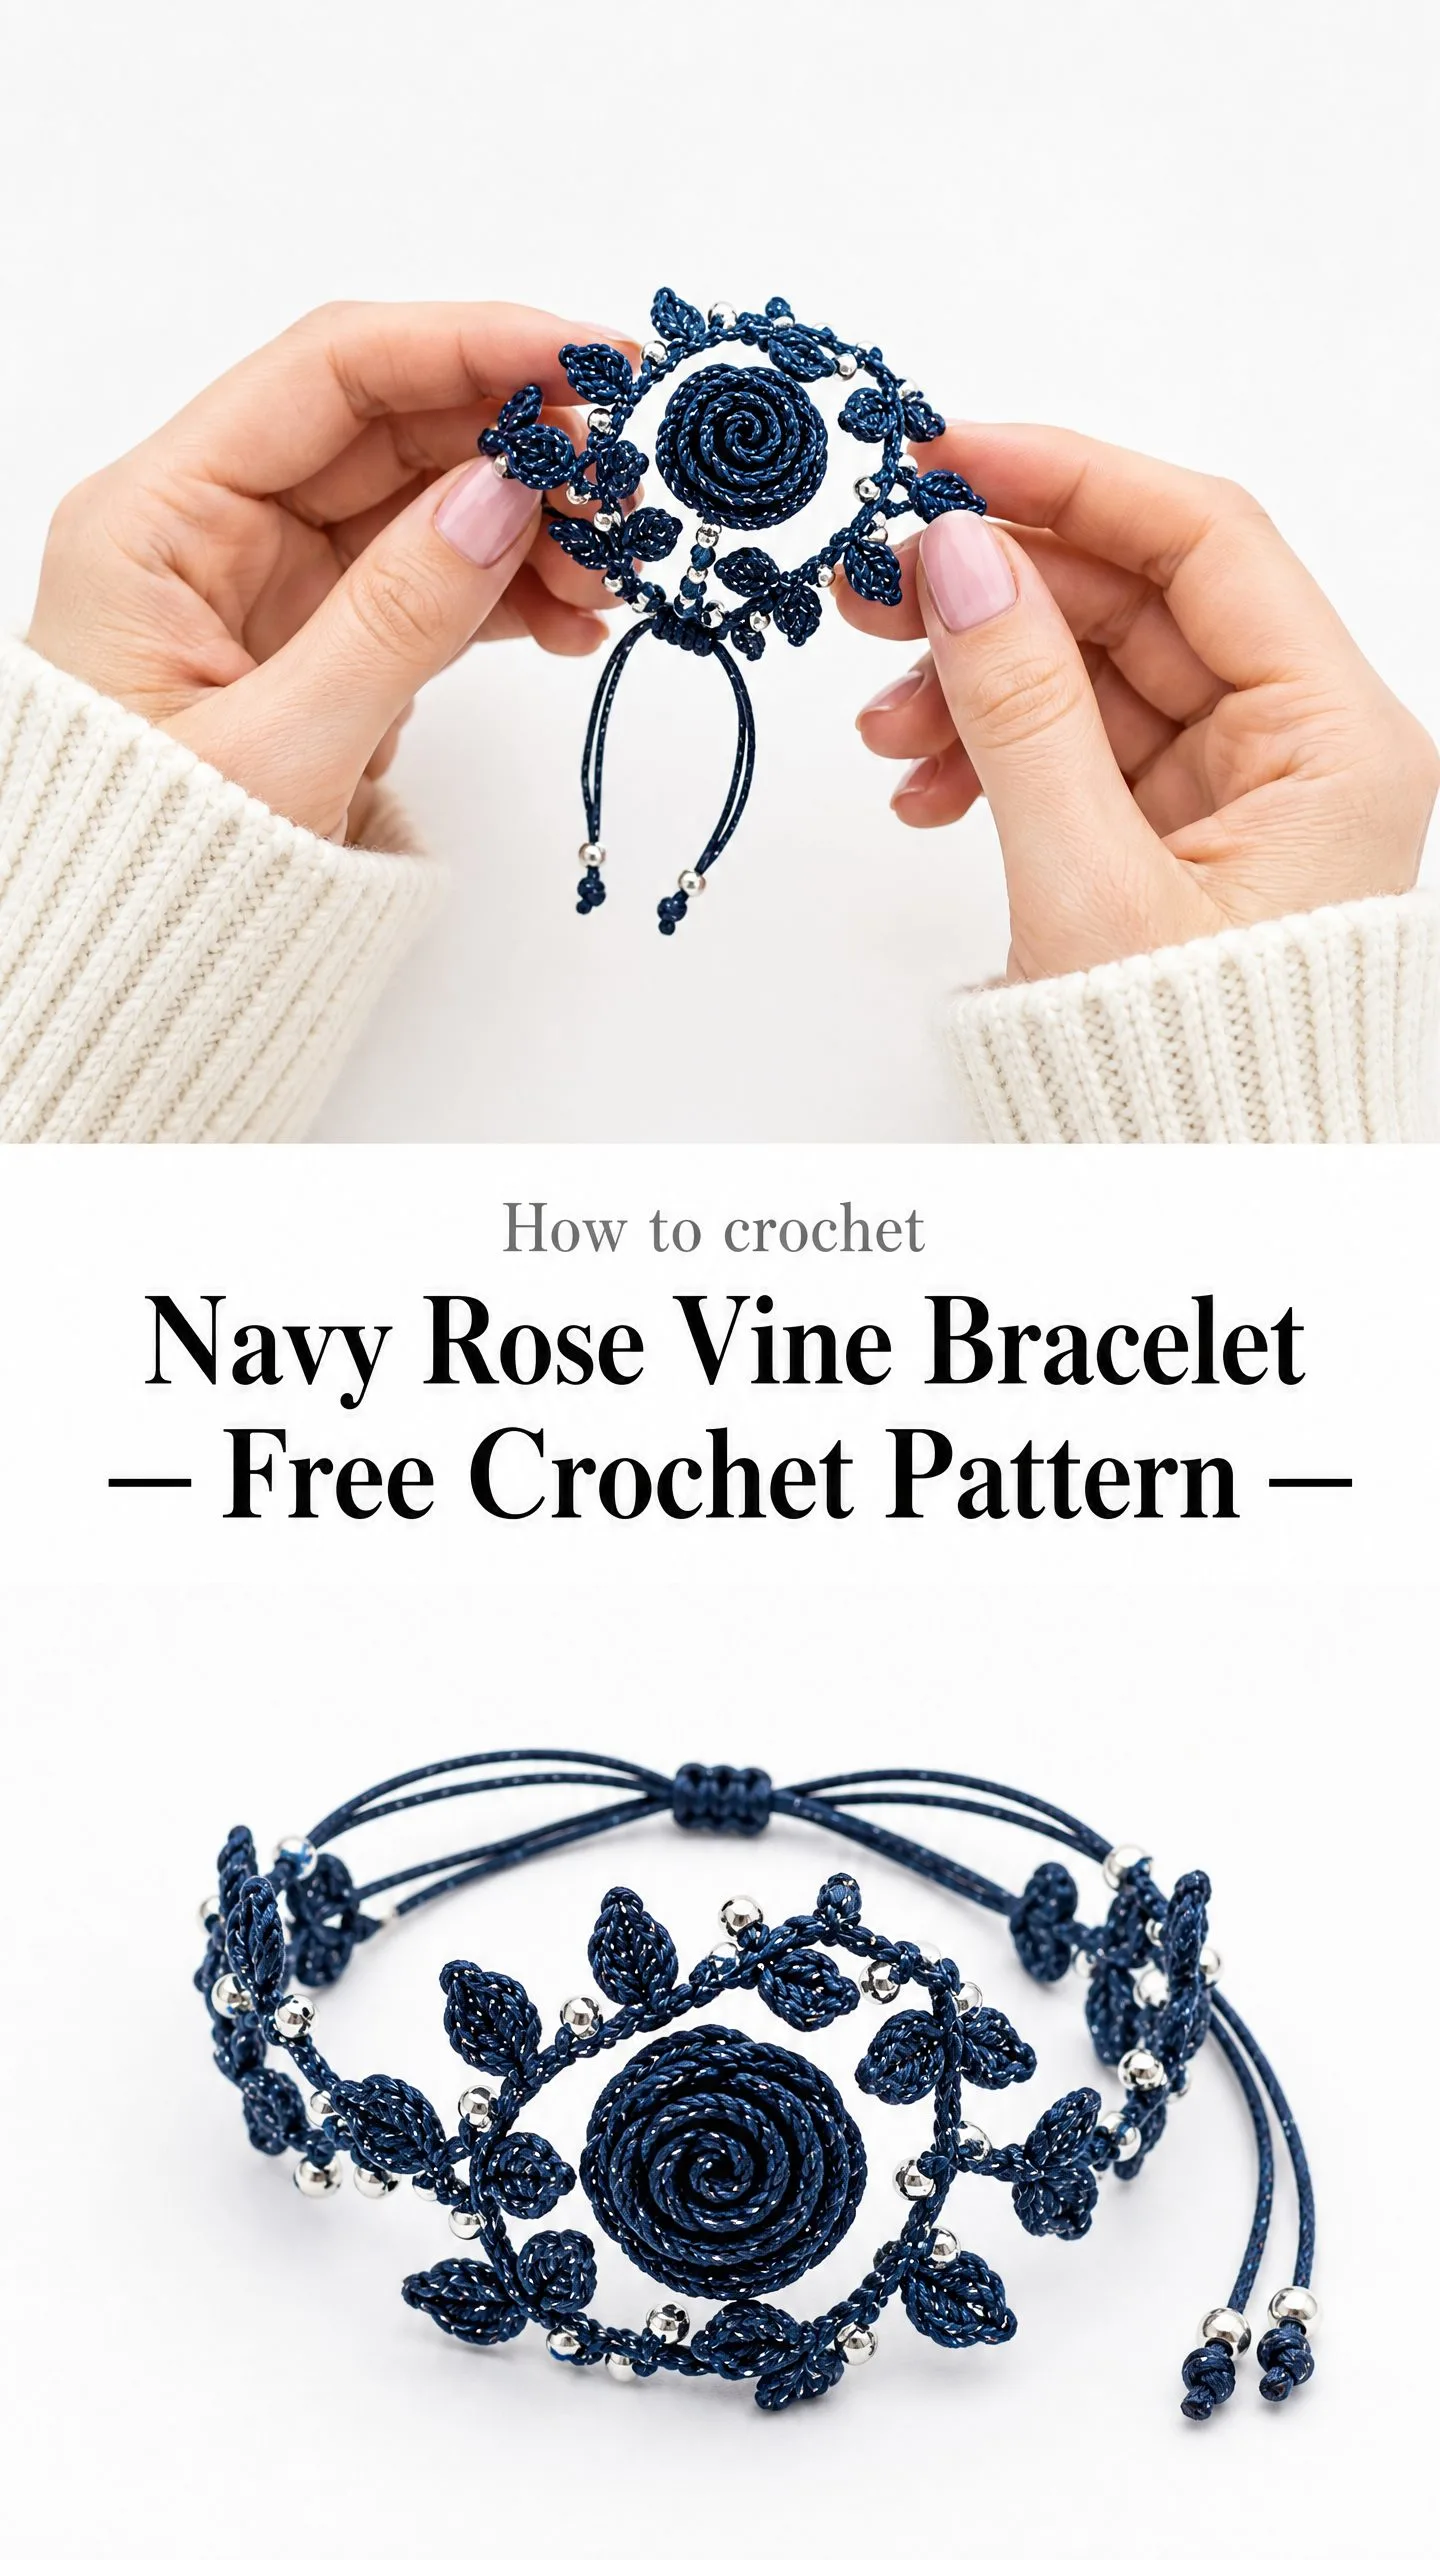
Yes, really. The rose is just a flat spiral worked in continuous rounds. The leaves are tiny individual motifs you can practice as many times as you need. The vine bands are basic single crochet rows with beads slid into place. Nothing here requires advanced wizardry. It requires patience, good lighting, and a willingness to work slowly.
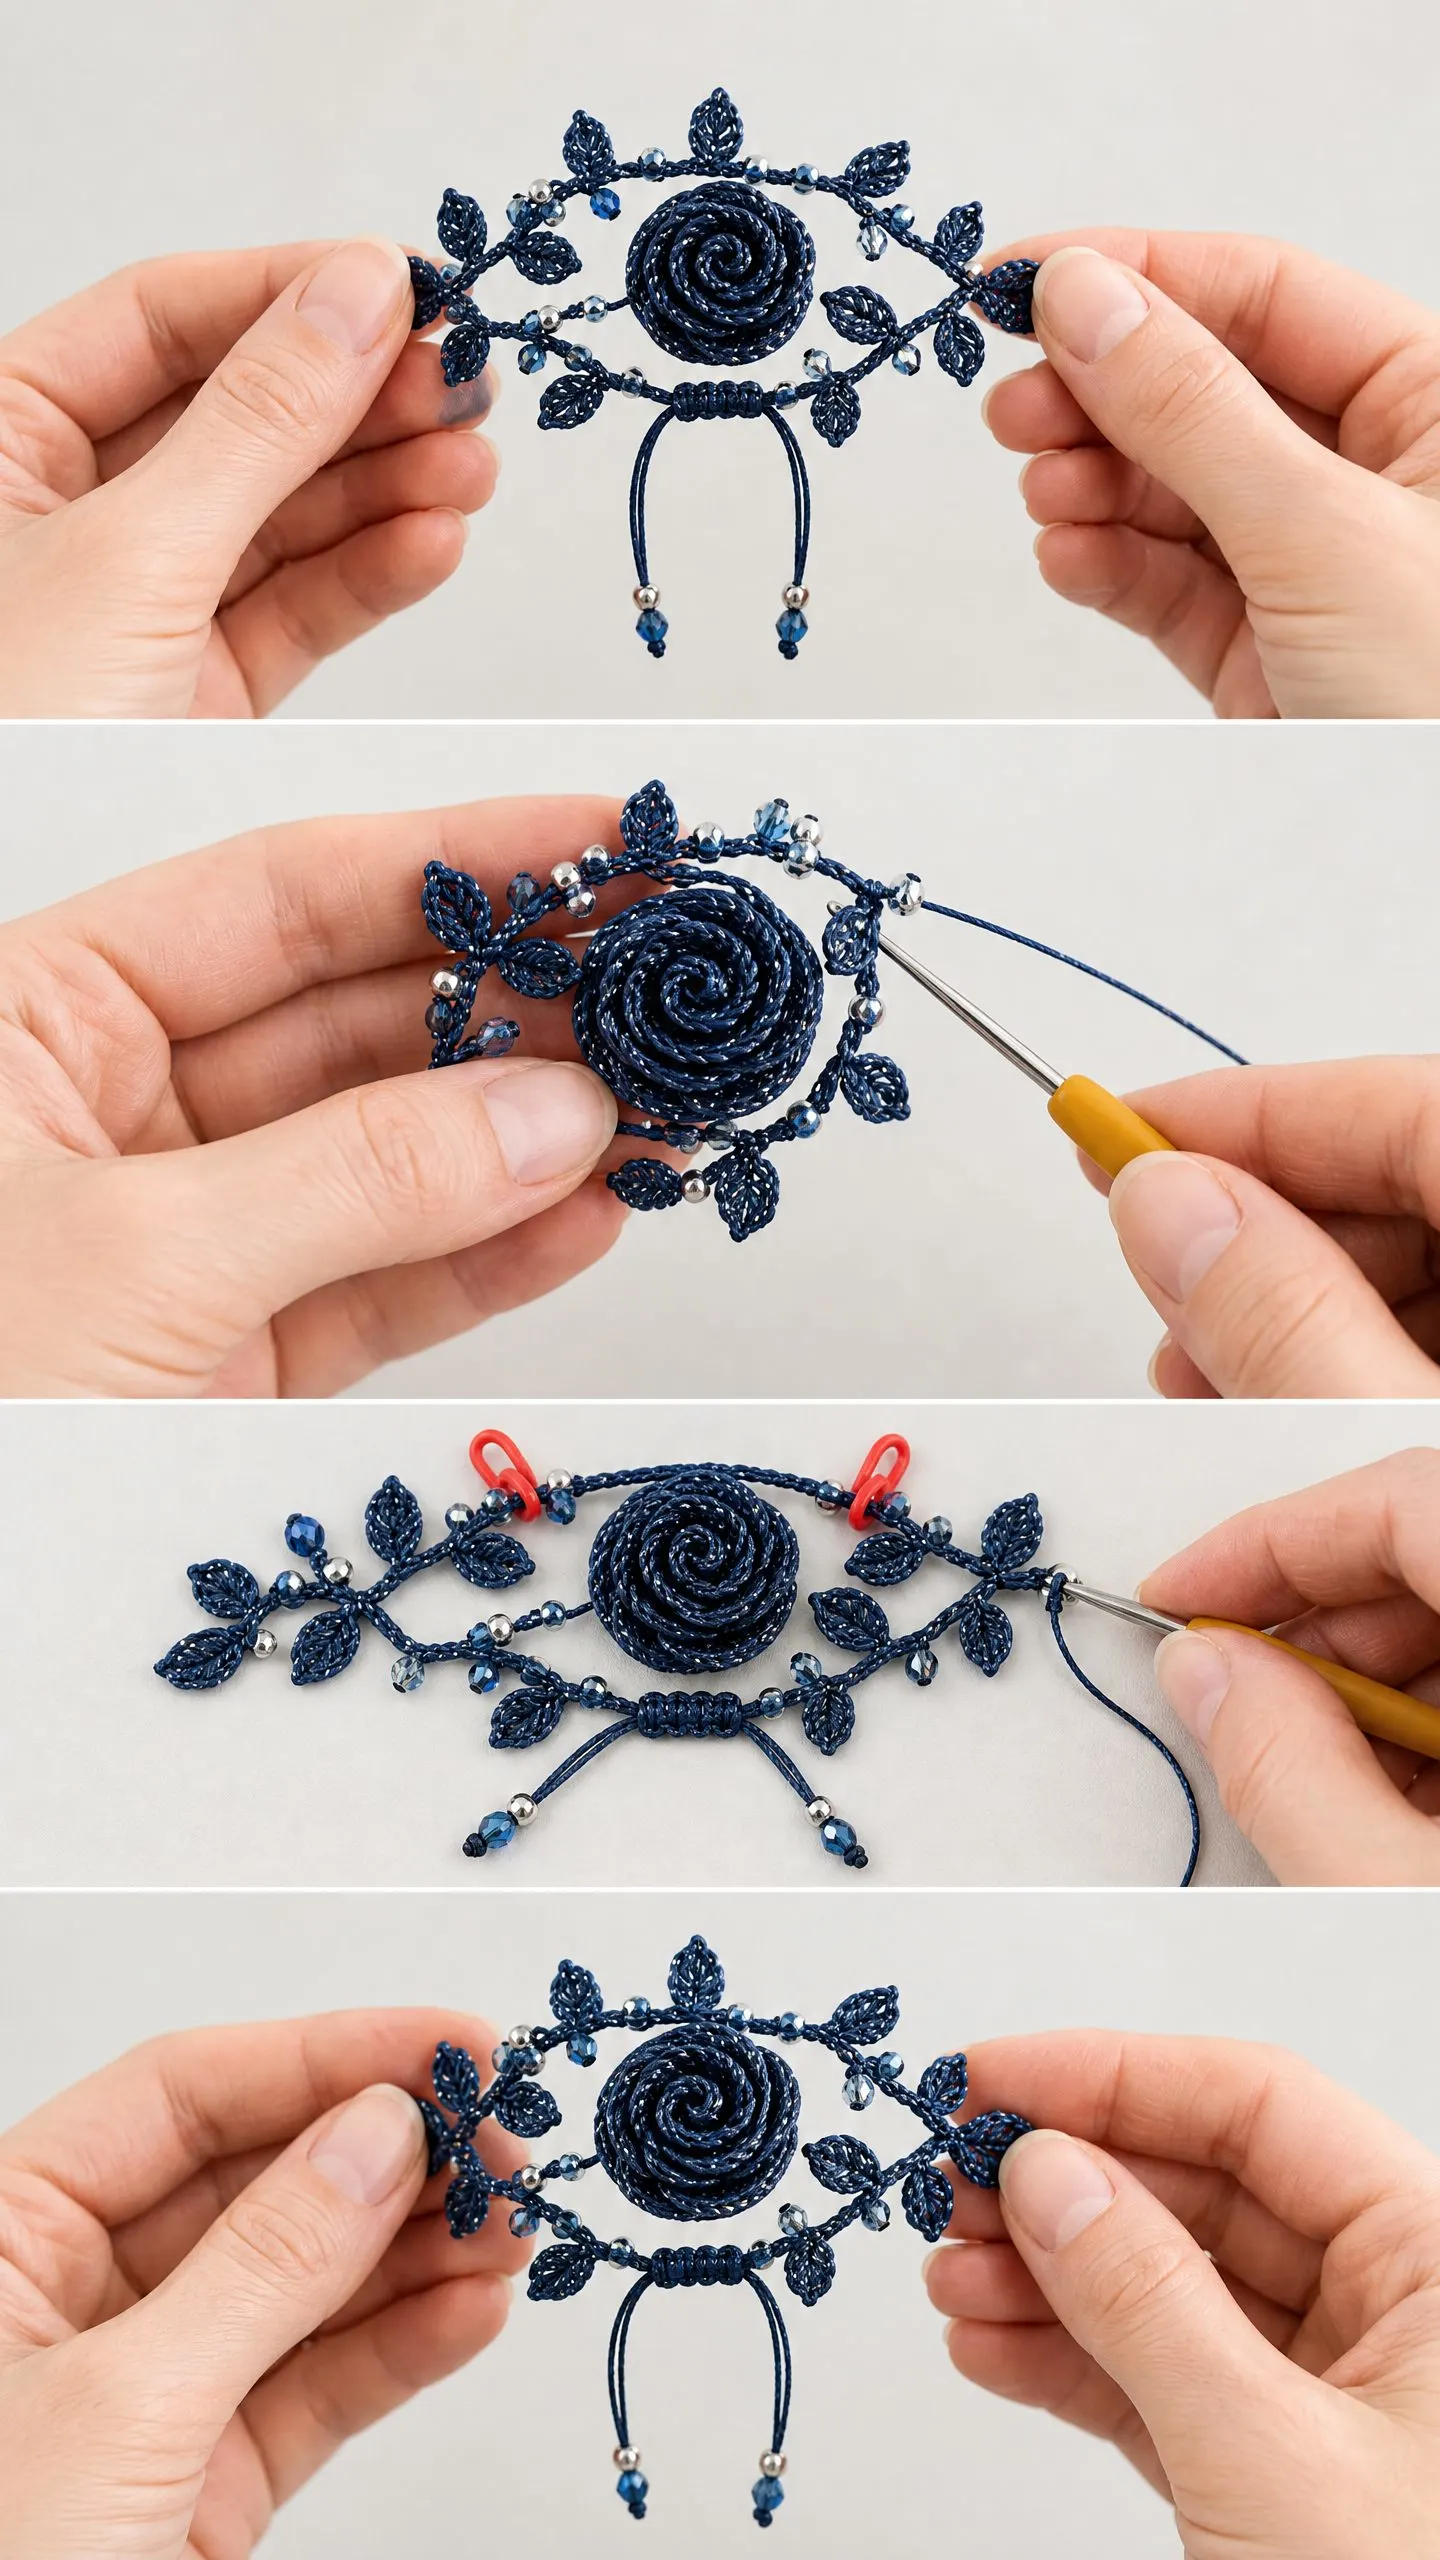
This Navy Rose Vine Bracelet crochet pattern breaks everything into manageable sections. You make the rose first. Then you make all 16 leaves. Then you crochet two simple beaded bands. Finally, you sew everything together. One step at a time, one tiny stitch at a time. By the end, you will have a piece of jewelry that looks like it belongs in a boutique. Let me walk you through exactly how to do it.
Why This Crochet Bracelet Pattern Works for Multiple Skill Levels
Advanced crocheters will fly through this project. But intermediate crocheters who have completed a few thread doily projects can absolutely tackle it. The key is accepting that micro-crochet moves slowly. Your first leaf might take 20 minutes. Your tenth leaf will take 8 minutes. That learning curve is normal.
If you are newer to thread crochet, I recommend practicing the leaf motif five or six times before committing to the bracelet. Use scrap thread. Get comfortable with the hook size and the tiny stitches. Once the leaf feels natural, the rest of this pattern will feel much more approachable.
The total time investment runs between 8 and 14 hours depending on your experience level. The rose takes about an hour. Each leaf takes 10 to 15 minutes. The beaded vine bands and assembly add another few hours. Spread it over several evenings and enjoy the meditative process.
Materials You Will Need
Gathering the right supplies makes this crochet tutorial much smoother. Here is everything required for one bracelet.
Thread: Size 20 crochet cotton thread with a fine metallic strand plied in, navy blue colorway. You will need approximately 80 yards or 73 meters total.
Hook: Steel crochet hook size 10 US, which measures 1.30 mm.
Beads, Type A: Silver-lined seed beads, size 11/0. You need approximately 40 beads.
Beads, Type B: Dark navy or Montana blue transparent glass seed beads, size 11/0. You need approximately 30 beads.
Beads, Type C: Dark navy faceted glass drop beads or small round beads, approximately 4 mm. You need 4 beads total for the tassel ends of the sliding closure.
Notions: Beading needle or fine wire needle for pre-stringing beads, tapestry needle with a fine eye, sharp scissors, beeswax or thread conditioner, pins for blocking small motifs, and a foam blocking mat.
Thread Suggestions
Finding the right navy metallic thread makes a huge difference in the finished look. Here are three excellent options.
DMC Diamant Fine Metallic Thread in D336 replicates the sparkle visible in the bracelet perfectly. This is a size 20 equivalent thread that is widely available and produces an authentic result.
Anchor Artiste Metallic size 20 in navy is slightly softer than DMC Diamant. It may be easier to work with if you are newer to metallic threads while still producing the correct gauge.
Lizbeth size 20 crochet cotton in Navy Blue Dark (693) held together with Kreinik Fine Braid 008 in navy gives you more control over the metallic intensity. This option works well if you want to customize the sparkle level.
Do not substitute with size 10 thread. Size 10 will produce motifs that are too large and thick for a jewelry-quality appearance. Stick with size 20 to match the finished dimensions.
Finished Size
The decorative front panel measures approximately 2.5 inches wide by 1.75 inches tall, or 6.5 cm by 4.5 cm. The bracelet is adjustable and fits wrists measuring 5.5 inches to 8 inches in circumference thanks to the sliding closure system.
The rose motif itself measures approximately 1.25 inches or 3.2 cm in diameter. Each leaf measures approximately 0.4 inches long by 0.25 inches wide, or 1 cm by 0.6 cm.
Gauge
Gauge matters enormously in this crochet pattern. The bracelet must fit against the wrist cleanly, and the motifs must remain delicate.
Using a size 10 steel hook and size 20 metallic thread:
10 single crochet stitches equals 0.5 inches or 1.3 cm.
10 rows of single crochet equals 0.5 inches or 1.3 cm.
Rose spiral check: After completing Round 5 of the rose, the motif should measure 0.75 inches or 1.9 cm in diameter.
Leaf check: One completed leaf should measure 0.4 inches or 1 cm in length.
Measure your gauge before beginning. If your stitches are too loose, try a smaller hook. If too tight, go up a hook size.
Abbreviations Used in This Pattern
Here are all the abbreviations you will encounter, written in US crochet terms.
ch (chain): Yarn over, pull through the loop on your hook. This creates one chain stitch.
sl st (slip stitch): Insert hook into stitch, yarn over, pull through both the stitch and the loop on your hook in one motion.
sc (single crochet): Insert hook into stitch, yarn over, pull up a loop (two loops on hook), yarn over, pull through both loops.
hdc (half double crochet): Yarn over, insert hook into stitch, yarn over, pull up a loop (three loops on hook), yarn over, pull through all three loops.
dc (double crochet): Yarn over, insert hook into stitch, yarn over, pull up a loop (three loops on hook), yarn over, pull through two loops (two loops remain), yarn over, pull through remaining two loops.
tr (treble crochet): Yarn over twice, insert hook into stitch, yarn over, pull up a loop (four loops on hook), [yarn over, pull through two loops] three times.
st/sts: stitch or stitches
sp: space
yo: yarn over
beg: beginning
rnd: round
rep: repeat
rem: remaining
tog: together
PB (place bead): Slide one bead up snugly against the hook before completing the stitch.
BL (back loop only): Work into only the back loop of the stitch, leaving the front loop unworked.
MK (make sliding knot): See Special Stitches section below.
Special Stitches Explained Step by Step
These techniques appear throughout the pattern. Read through them before you begin so nothing catches you off guard.
Bead Single Crochet (bsc)
Before beginning the stitch, slide one bead up the thread so it rests snugly against the work. Insert hook into stitch, yarn over, pull up a loop. The bead is now locked on the front side of the fabric. Yarn over, pull through both loops on hook. One bsc made with one bead secured on the right side.
Picot
Chain 3, then slip stitch into the first of those 3 chains. One picot made.
Leaf Motif
This is worked as a standalone piece. You will make 16 of these.
Step 1: Chain 8. This is the foundation chain.
Step 2: Starting in the 2nd chain from hook, work 1 sc, 1 hdc, 2 dc, 1 hdc, 1 sc into successive chains. You have now worked 6 stitches into 6 chains. The 7th chain is the turning point. (6 sts along first side)
Step 3: Work 3 sc into the last chain. This forms the tip of the leaf. (3 sts at tip)
Step 4: Now working along the other side of the foundation chain, work 1 sc, 1 hdc, 2 dc, 1 hdc into successive chains. (6 sts along second side)
Step 5: Slip stitch into the first sc at the base of the leaf to close. Fasten off, leaving a tail of 6 inches for attachment. One leaf made.
Total stitches around leaf: 15 sts plus closing slip stitch.
Rose Spiral
The rose is worked in a continuous outward spiral. Do not join rounds. Use a stitch marker to mark the beginning of each round.
Step 1: Make a magic ring, or chain 4 and join with a slip stitch to form a ring.
Step 2: Work in continuous spiral from the center outward as described in the rose instructions below.
Sliding Adjustable Knot (MK)
Cut a separate length of thread approximately 8 inches or 20 cm long. Lay this piece alongside the two bracelet cord tails so they run parallel. Using the separate piece, work 6 to 8 tight wrap knots around both cord tails, encasing them. Secure the wrap knot ends by threading them under the wraps with a tapestry needle. The two tails can now slide through the knot independently, adjusting the bracelet size. Thread one drop bead onto each cord tail and secure with an overhand knot below the bead. Trim excess.
Important Pattern Notes Before You Begin
Read these tips before starting. They will save you frustration later.
Pre-string all beads onto your thread before beginning the vine band sections. For each vine band, thread the beads in this order: alternate 1 Type B bead and 1 Type A bead, total 16 beads per band. Begin with a Type B bead first. Push the beads down the thread out of the way until the pattern calls for them.
Work in short lengths of thread, no longer than 18 inches at a time when possible. Metallic thread tangles and frays easily. Thread conditioner or beeswax helps enormously.
Make all 16 leaves before beginning the vine bands. This lets you sort them by size consistency and ensures you have enough before assembly.
The rose is constructed first, then all leaves are made individually, then the two vine bands are crocheted with beads, and finally everything is assembled using the joining method in the finishing section.
How to Crochet the Rose Motif
The rose is crocheted as a flat coiled spiral. Begin with a magic ring.
Round 1: Work 6 sc into magic ring, pull ring closed. Do not join. Place marker. (6 sc)
Round 2: Work 2 sc into each stitch around. (12 sc)
Round 3: Work (1 sc, 2 sc in next st) 6 times. (18 sc)
Round 4: Work (1 sc in each of next 2 sts, 2 sc in next st) 6 times. (24 sc)
Round 5: Work (1 sc in each of next 3 sts, 2 sc in next st) 6 times. (30 sc)
Round 6: Work (1 sc in each of next 4 sts, 2 sc in next st) 6 times. (36 sc)
Round 7: Working in BL only, work (1 hdc, 1 dc, 1 dc, 1 hdc) all into the first stitch of Round 7 to create the first petal fold, then slip stitch into the next stitch. Rep (1 hdc, 1 dc, 1 dc, 1 hdc all into next st, sl st into following st) around. This creates 18 petal folds. (18 petal folds, 36 sts consumed)
After Round 7, the rose should have a raised spiral coil appearance when viewed from the front. The back will be flat. The diameter should now be approximately 1.25 inches or 3.2 cm. This is your Checkpoint 1.
Fasten off leaving an 8-inch tail for sewing.
How to Crochet the Leaf Motifs
Using the Leaf Motif special stitch described above, make 16 leaves total. Fasten off each leaf with a 6-inch tail.
Group them as follows:
Group A: 8 leaves for the lower vine band
Group B: 8 leaves for the upper vine band
Set all leaves aside until assembly.
How to Crochet the Vine Bands
Both vine bands are worked identically. Before beginning each band, pre-string 8 Type A beads and 8 Type B beads onto the thread, alternating types. Begin with a Type B bead first.
Vine Band (make 2)
Foundation: Chain 71. This yields a working length of approximately 7 inches or 18 cm, accounting for the adjustable ends. The central decorative section will use approximately 40 chains. The two cord tails will each use approximately 15 chains for the sliding closure mechanism.
Row 1: Starting in the 16th chain from hook (this leaves 15 chains free as the first cord tail), work 1 sc into each chain across until 15 chains remain unworked (these become the second cord tail). Turn. (41 sc)
The 15 free chains at each end are the cord tails that feed through the sliding knot closure. Do not crochet into these tail chains. They remain as free cord strands.
Row 2: Chain 1, turn. Work as follows across the 41 sc of Row 1: Sc 3, (bsc with 1 Type B bead, sc 2, bsc with 1 Type A bead, sc 2) 5 times, bsc with 1 Type B bead, sc 2. (41 sc total, 11 beads placed)
You used 6 Type B and 5 Type A beads in Row 2. The remaining 5 beads (2 Type B, 3 Type A) will be placed in Row 3.
Row 3: Chain 1, turn. Work as follows: Sc 2, (bsc with 1 Type A bead, sc 2, bsc with 1 Type B bead, sc 3) 3 times, bsc with 1 Type A bead, sc 2. (41 sc total, 7 beads placed)
Beads on Row 2 and Row 3 create the two-row bead ladder effect visible in the finished bracelet. Row 2 beads sit on the lower edge and Row 3 beads sit slightly above, giving dimension.
After completing both rows, do not fasten off. Slip stitch along the short edge of the band once to reinforce the turning point.
Fasten off, leaving a 6-inch tail for weaving in.
Make second Vine Band identically, pre-stringing new beads before beginning.
Checkpoint after Vine Bands: Each completed band should measure approximately 2 inches or 5 cm in crocheted width between the two cord tail sections. Each cord tail should extend approximately 2.5 inches or 6.5 cm beyond the decorative section on each side. The two rows of the band should lie flat and parallel.
Assembly Instructions
Step 1: Lay Band 1 and Band 2 parallel to each other, wrong sides down, with the bead rows facing up. Align both bands so their cord tails match at both ends.
Step 2: Using the rose tail thread and a tapestry needle, position the rose centered between the two bands at the midpoint. The rose should bridge both bands so its lower edge rests on Band 1 and its upper edge rests on Band 2. Sew the rose to both bands using small whip stitches through the edge of the rose base and through both band layers, using 4 to 6 stitches per side. Pull snugly. Knot and weave in ends.
Step 3: Attach leaves. Using each leaf’s tail and a tapestry needle, distribute 8 leaves evenly along Band 1 (lower band) and 8 leaves evenly along Band 2 (upper band). Space them as follows: position 1 leaf on each side of the rose on each band (4 leaves close to center, 2 per band per side), then place 2 leaves toward the outer edges of each band, 1 per side. Each leaf should angle slightly outward and downward from the band to mimic natural vine growth. Sew each leaf through its base stitches to the corresponding band edge using 2 to 3 tight stitches. Knot and weave in each tail.
Checkpoint after Assembly: Lay the bracelet flat. The two bands should run parallel with the rose centered and elevated between them. The leaves should alternate facing directions (some angling up, some angling down) along both bands. The piece should look symmetrical.
Step 4: At each end of the bracelet, gather the two cord tails from Band 1 and Band 2 together (so you have 2 tails at each end, 4 tails total across the bracelet). These will feed through the sliding knots.
Step 5: Bring both groups of tails toward the center so the bracelet can loop around a wrist. At the point where the tails cross and overlap, apply one MK (sliding adjustable knot) to each crossing point following the MK special stitch instructions above. You will make 2 sliding knots total.
Step 6: Thread one Type C drop bead onto each of the 4 cord tail ends. Tie a firm overhand knot below each drop bead. Trim excess thread to approximately 0.25 inches or 0.6 cm below each knot. Apply a tiny drop of clear jewelry adhesive to each knot if desired for security.
Size Customization Tips
To make the bracelet smaller: Reduce the foundation chain in each Vine Band by 2 chains per 0.25 inch or 0.6 cm of reduction desired. Maintain the same 15-chain cord tails at each end. Reduce the decorative stitch count proportionally. Recalculate bead placement so beads remain evenly distributed.
To make the bracelet larger: Add 2 chains per 0.25 inch or 0.6 cm of additional length. Add 1 Type A and 1 Type B bead per additional 4-chain increment to maintain bead density.
To add extra leaves: Make up to 24 leaves total (12 per band) for a fuller vine appearance. Reduce spacing between leaves accordingly.
To make the rose larger: Work 1 additional round before Round 7, increasing by 6 stitches as established. Work Round 7 with (1 hdc, 1 dc, 1 tr, 1 dc, 1 hdc all into next st, sl st into following st) to accommodate the larger circumference.
Finishing and Blocking
Lightly mist each leaf with cool water and pin flat on a foam blocking mat. Use 2 pins per leaf, one at the tip and one at the base, to define the leaf shape. Allow to dry completely before removing pins, approximately 2 hours.
Lightly mist the rose and press very gently with your fingertips to settle the spiral layers. Do not pin the rose flat. It should retain its dimensional coil. Allow to air dry.
Once all motifs are dry, proceed with assembly as described above.
After assembly, do not steam block or press the finished bracelet. The metallic thread can be damaged by heat.
Weave in all ends securely using a tapestry needle, threading each tail through 3 to 4 stitches in alternating directions before trimming close.
Care Instructions
Hand wash only in cool water with a drop of mild liquid soap. Do not wring or twist. Press gently between two clean towels to remove water. Lay flat to dry away from direct sunlight. Metallic thread can tarnish or fray with rough handling. Store flat in a small zip bag or jewelry pouch. Do not machine wash or dry.
You Can Absolutely Make This Bracelet
I know this crochet pattern looks complicated at first glance. But remember: it is just single crochet, a few increases, and some beads slid into place. The magic comes from working small and taking your time. Trust the process, work through one section at a time, and you will end up with a stunning piece of wearable art.
Thank you so much for choosing this pattern. I would absolutely love to see your finished Navy Rose Vine Bracelet. Tag me on Instagram or share a photo in our Facebook group. Seeing your creations is genuinely the best part of designing.
If this pattern inspired you, go ahead and save it to your Pinterest boards so you can find it when you are ready to start. And if you make one, please drop a comment below. I would love to hear how it turned out for you!
