
I’ve been looking for the perfect statement piece that transforms a simple sweater into something extraordinary. This ivory floral lace collar necklace is my favorite find, and I’m thrilled to share it with you today.
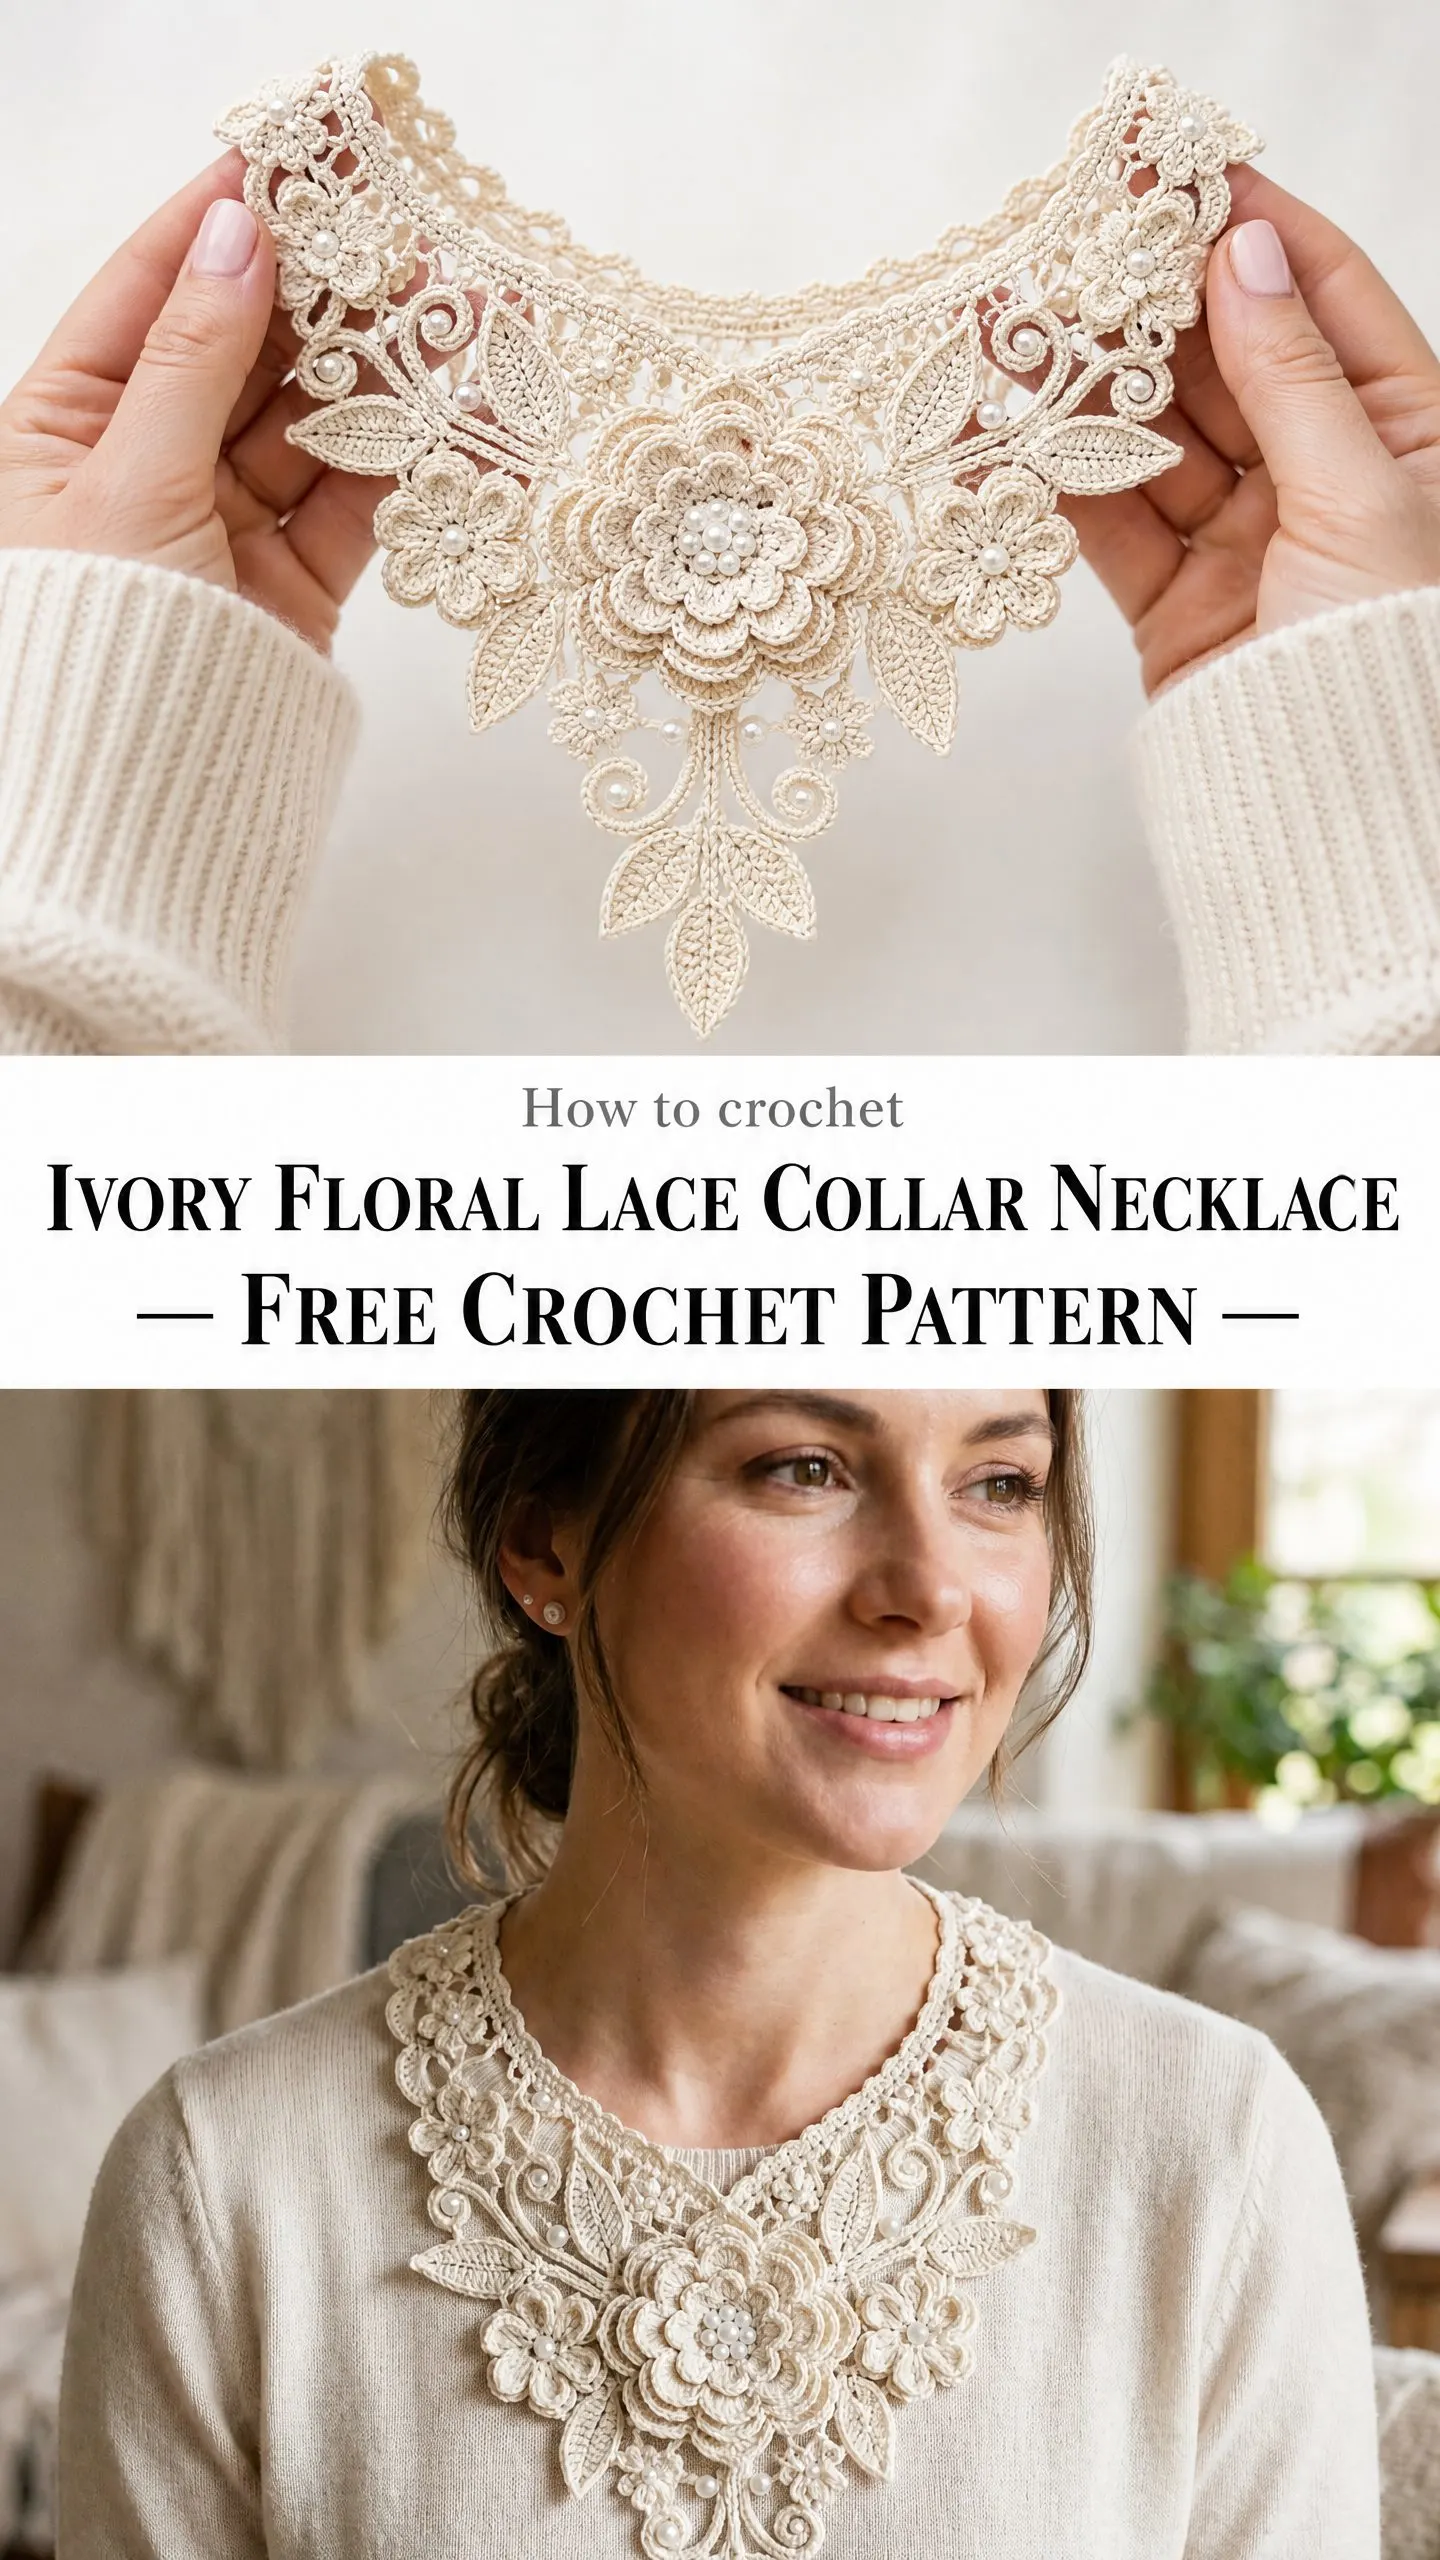
This wearable art piece combines delicate thread crochet with dimensional flowers, creating a stunning accessory that drapes beautifully against your neckline. Whether you’re dressing up a casual outfit or adding elegance to a special occasion look, this collar delivers major impact with timeless sophistication.
The pearl bead embellishments scattered throughout give it that heirloom quality we all love. If you’ve ever wanted to try thread crochet or create something truly unique, this is your project.
Why This Lace Collar Necklace Pattern Works
This crochet pattern breaks down what looks like an intimidating piece into manageable components. You’re not crocheting one massive complicated item. Instead, you’re making individual motifs and then assembling them like a beautiful puzzle.
The neckband is straightforward rows of basic stitches. The roses build up round by round. The leaves are simple two-sided strips. Each piece on its own is totally achievable, even for someone who’s never worked with thread before.
The magic happens during assembly when all those separate pieces come together into something breathtaking.
Skill Level
This pattern sits comfortably at Advanced Beginner to Intermediate level. The neckband itself is genuinely easy. The floral motifs require you to work in the round and make increases for flat circles.
If you’ve successfully completed simple flower motifs or flat medallions before, you have all the skills you need. No complex colorwork. No garment shaping math. Just patience and attention to detail.
Time Estimate
Plan for 8 to 12 hours total, depending on your pace and experience with thread crochet.
Here’s the breakdown:
This is a wonderful project to work on across several evenings. The individual motifs make perfect portable projects too.
Finished Size
These measurements fit an average adult neck circumference of 14 to 15 inches (35.5 to 38 cm). Size adjustment tips appear later in the pattern.
Materials You’ll Need
Thread: Size 10 crochet cotton thread, also called bedspread weight. You’ll need approximately 350 yards (320 meters) total in ivory or natural ecru.
Hook: US Steel hook size 7 (1.65 mm). Adjust as needed to achieve gauge.
Notions:
Yarn Suggestions
Option 1: Aunt Lydia’s Classic Crochet Thread, Size 10, in Ecru or Ivory. Widely available, inexpensive, and produces a firm, well-defined stitch that holds its shape beautifully after blocking. One ball of 350 yards is sufficient.
Option 2: Coats and Clark South Maid Crochet Cotton Thread, Size 10, in Cream or Natural. Similar weight and fiber content with a slightly softer hand. One ball of 400 yards covers the project with yardage to spare.
Option 3: DMC Traditions Crochet Thread, Size 10, in Ecru. This mercerized cotton has a subtle sheen that makes the finished piece look polished, which complements the pearl bead embellishment perfectly.
Substitution note: Any size 10 mercerized cotton crochet thread in the stated yardage range will work. Avoid size 3 or size 5 thread for this project, as the resulting collar will be too large and floppy. Always check your gauge swatch before proceeding.
Gauge
17 double crochet stitches = 2 inches (5 cm)
8 rows of double crochet = 2 inches (5 cm)
For floral motifs: the large rose measures 2.5 inches (6.5 cm) in diameter after blocking.
For leaves: each leaf measures 1.25 inches (3.2 cm) in length.
Gauge matters here. Work a gauge swatch before beginning the main piece to ensure your finished collar fits properly.
Abbreviations
Let me walk you through every abbreviation you’ll encounter. I’ll define each one so you’re never guessing.
Special Stitches and Techniques
Picot: Chain 3, then slip stitch into the first chain of that ch-3. This creates a small decorative knot used along the neckband edge. It’s easier than it sounds, I promise.
Shell Stitch: Work 5 double crochet stitches all into the same stitch or space. This creates a fan-shaped cluster used in the neckband border.
Bobble (used in rose centers): Yarn over, insert hook into stitch, pull up a loop, yarn over, pull through 2 loops. Without completing the stitch, repeat this process 4 more times into the same stitch. You now have 6 loops on your hook. Yarn over and pull through all 6 loops at once. Chain 1 to close.
Pre-stringing Beads: Before beginning any component that uses beads, thread the required number of pearl beads onto your ball of thread. Here’s how: fold a 6-inch length of fine sewing thread in half, pass the crochet thread through the folded loop, thread both sewing thread ends through the bead hole, and slide the bead down onto the crochet thread. Repeat for all beads needed. Beads sit on the thread facing the wrong side during crocheting and are pushed to the right side when indicated.
Bead Placement: When a bead needs to be placed, bring the bead up snugly to the base of the hook, work the next stitch as specified, and the bead will lock in position on the right side.
Leaf Stitch: Chain 10. Starting in the second chain from hook: sc in 2nd ch, hdc in next ch, dc in next 3 ch, hdc in next ch, sc in next ch, ch 1 (this is the leaf tip), then work back along the opposite side of the foundation chain: sc in next ch, hdc in next ch, dc in next 3 ch, hdc in next ch, sc in next ch. Slip stitch to close. This forms one complete pointed leaf.
Pattern Notes Before You Begin
All floral motifs are worked in rounds unless otherwise stated. The neckband is worked in rows, turning at the end of each row.
When joining motifs, always join right side facing right side (wrong sides together) so any seam hides on the back of the collar.
The centerpiece layout is roughly symmetrical. The large rose sits at center front bottom. One medium rose goes to the upper left and one to the upper right. Small blossoms fill the gaps. Leaves radiate outward and downward around all flowers.
This collar is open at the back like a bib necklace. The 15-inch inner neckband length suits an open neckline. You’ll attach a closure at each end during finishing.
Read the entire pattern before beginning. Pre-string beads onto your thread ball before starting each component as indicated.
Step by Step Crochet Pattern Instructions
Part One: Neckband
Pre-string 0 beads for this component. Beads are only used on the floral components.
Foundation chain: Chain 128.
Row 1 (RS): Single crochet in 2nd chain from hook and in each chain across. Turn. (127 sc)
Row 2: Chain 3 (counts as dc here and throughout), dc in each st across. Turn. (127 dc)
Row 3: Chain 1, sc in first st, (ch 3, skip 2 sts, sc in next st) across, ending sc in last st. Turn. You will have 42 ch-3 spaces across.
Row 4: Chain 5 (counts as dc + ch 2), dc in next sc, (ch 2, dc in next sc) across. Turn. (43 dc, 42 ch-2 spaces)
Row 5: Chain 1, sc in first dc, (2 sc in next ch-2 sp, sc in next dc) across. Turn. (127 sc)
Row 6: Chain 1, sc in first sc, picot, (skip 2 sc, sc in next sc, picot) across, ending sc in last sc. Fasten off. (43 picots along the lower edge)
Checkpoint: The neckband should measure approximately 15 inches (38 cm) along the Row 1 foundation edge and approximately 0.75 to 1 inch (2 to 2.5 cm) in depth. The Row 6 picot edge becomes the lower front decorative border and the attachment row for the centerpiece.
Part Two: Large Rose Motif (make 1)
Pre-string 9 pearl beads onto the thread ball before starting.
This rose is worked in rounds, beginning at the center and building outward through 5 rounds of petals.
Foundation: Make a magic ring.
Round 1: Chain 2 (counts as hdc), work 11 hdc into the magic ring. Slip stitch to top of beginning ch-2 to join. Pull ring closed. (12 hdc)
Round 2: Chain 1. (Sc in next st, ch 3, skip 1 st) 6 times. Slip stitch to first sc to join. (6 sc, 6 ch-3 loops)
Round 3 (first petal layer): Work into the ch-3 loops only. (Sl st into loop, ch 1, sc, hdc, 3 dc, hdc, sc, ch 1, sl st into same loop) 6 times. (6 petals, each petal contains: 1 sc, 1 hdc, 3 dc, 1 hdc, 1 sc)
Round 4 (raise stitches for second petal layer): Working behind the petals of Round 3, locate the skip stitches of Round 2. (Ch 4, sc around the post of the next Round-2 sc, ch 4) 6 times. Slip stitch to base of first ch-4. (12 ch-4 loops, 6 working arcs between petals)
Round 5 (second, larger petal layer): Work into the ch-4 loops. (Sl st into loop, ch 1, sc, hdc, 5 dc, hdc, sc, ch 1, sl st) 12 times. (12 petals)
Round 6 (third petal layer, outermost): Working behind the Round-5 petals, (ch 5, sc around the post of the nearest visible Round-4 sc) 12 times. Slip stitch to base of first ch-5. (12 ch-5 loops)
Round 7: Work into the ch-5 loops. (Sl st into loop, ch 1, sc, hdc, 2 dc, tr, 2 dc, hdc, sc, ch 1, sl st) 12 times. (12 larger petals)
Finishing the rose: At the center, use a sewing needle and thread to sew 1 large pearl bead at the very center and 8 smaller pearl beads evenly spaced around the inner ring. Alternatively, if beads were pre-strung and positioned during Round 1, push beads to RS as each stitch completes. Fasten off and leave a 12-inch tail for joining.
The large rose should measure approximately 2.5 inches (6.5 cm) in diameter.
Part Three: Medium Rose Motif (make 2)
Pre-string 5 pearl beads per medium rose (10 total for both).
Foundation: Make a magic ring.
Round 1: Chain 2 (counts as hdc), work 9 hdc into the ring. Slip stitch to top of beginning ch-2. Pull ring closed. (10 hdc)
Round 2: Chain 1. (Sc in next st, ch 3, skip 1 st) 5 times. Slip stitch to first sc. (5 sc, 5 ch-3 loops)
Round 3 (first petal layer): (Sl st into ch-3 loop, ch 1, sc, hdc, 3 dc, hdc, sc, ch 1, sl st) 5 times. (5 petals)
Round 4: Working behind Round-3 petals. (Ch 4, sc around the post of the next Round-2 sc) 5 times, sl st to base of first ch-4. (5 ch-4 loops)
Round 5 (second petal layer): (Sl st into loop, ch 1, sc, hdc, 5 dc, hdc, sc, ch 1, sl st) 5 times. (5 larger petals, worked into each ch-4 loop)
Round 6: Working behind Round-5 petals. (Ch 5, sc around post of nearest Round-4 sc) 5 times. Sl st to base of first ch-5. (5 ch-5 loops)
Round 7 (third petal layer): (Sl st into loop, ch 1, sc, hdc, 2 dc, tr, 2 dc, hdc, sc, ch 1, sl st) 5 times. (5 large outer petals)
Sew or position 1 bead at center and 4 beads around inner ring. Fasten off, leave a 10-inch tail.
Each medium rose measures approximately 1.75 inches (4.5 cm) in diameter.
Part Four: Small Blossom Motif (make 4)
Pre-string 1 pearl bead per blossom (4 total for all blossoms).
Foundation: Make a magic ring.
Round 1: Chain 1, work 6 sc into the ring. Sl st to first sc to join. Pull ring closed. (6 sc)
Round 2: (Ch 4, sl st in next sc) 6 times. (6 ch-4 loops)
Round 3: Work into each ch-4 loop: (sl st, sc, 3 dc, sc, sl st) in each loop across all 6 loops. (6 petals)
Position 1 pearl bead at center. Fasten off, leave an 8-inch tail.
Each small blossom measures approximately 0.75 inch (2 cm) in diameter.
Part Five: Leaf Motif (make 12)
No beads in this component.
Work each leaf using the Leaf Stitch described in Special Stitches above.
Chain 10.
Starting in the 2nd chain from hook:
Row 1: Sc in 2nd ch from hook, hdc in next ch, dc in next 3 ch, hdc in next ch, sc in next ch. (7 sts worked down one side of foundation chain, 1 ch remains for tip)
At leaf tip: Ch 1 (this forms the tip point).
Row 2: Working back along the other side of the foundation chain: sc in next ch, hdc in next ch, dc in next 3 ch, hdc in next ch, sc in last ch. Slip stitch into the very first sc of Row 1 to close the leaf. (7 sts on return side)
Total leaf stitches (both sides plus tip ch): 15 working sts, 1 tip ch. Each leaf equals one complete motif.
Fasten off, leave an 8-inch tail.
Each leaf measures approximately 1.25 inches (3.2 cm) in length and 0.5 inch (1.3 cm) at widest point.
Part Six: Spiral Tendril (make 6)
No beads. Tendrils add the curling vine details visible around the flowers.
Chain 25.
Work 3 sc into the 2nd chain from hook, then 3 sc into each remaining chain across.
This causes the strip to naturally curl into a tight spiral. Do not block out the curl. Fasten off, leave a 6-inch tail.
Each tendril equals one curled spiral approximately 1 inch (2.5 cm) long after the curl sets.
Part Seven: Lace Edging Border (optional accent strip, make 1)
This strip runs along the lower edge of the neckband to create a second decorative layer visible at the back of the neck. It’s approximately 15 inches long and 0.5 inch wide.
Attach thread to the right end of the Row 1 foundation chain of the neckband (the top/neck edge), RS facing.
Row 1: Chain 1, sc in first st, (ch 2, skip 2 sts, sc in next st) across to end. Turn. (43 ch-2 spaces)
Row 2: Sl st into first ch-2 sp, (ch 3, sc in next ch-2 sp) across. Turn. (42 ch-3 loops)
Row 3: Chain 1, (sc, picot, sc) in each ch-3 loop across. Fasten off. (42 picot sets)
Checkpoint: Before assembly, lay the neckband flat. It should measure 15 inches (38 cm) along the long axis. All floral motifs, leaves, and tendrils should be blocked and dry before assembly begins.
Assembly Instructions
Step 1: Block all components separately before joining. See Blocking section below.
Step 2: Lay the neckband flat on your blocking board, RS up. Mark the center front of the neckband along the lower (picot) edge with a stitch marker. This is the attachment anchor for the large rose.
Step 3: Position the large rose at center front, approximately 2 inches (5 cm) below the neckband lower edge. The top of the large rose will overlap the lower portion of the neckband center. Using the long tails and a tapestry needle, whipstitch the large rose to the neckband at several anchor points through the lower lace edge. Do not pull tight. Allow slight dimensional lift.
Step 4: Position one medium rose to the upper left of the large rose, overlapping the bottom-left area of the neckband. Position the second medium rose to the upper right, mirroring the left. Each medium rose center should sit approximately 1.5 inches (3.8 cm) to the left or right of the large rose center and approximately 0.75 inch (2 cm) higher than the large rose center. Whipstitch each in place through the neckband and through overlapping edges of adjacent motifs.
Step 5: Tuck two small blossoms into the gaps between the large rose and each medium rose. Tuck the remaining two small blossoms below the large rose on either side of the lower stem area. Whipstitch each in place.
Step 6: Distribute 8 leaves around the arrangement. Place 2 leaves pointing downward beneath the large rose, 2 leaves pointing outward to the far left and far right of the medium roses, and the remaining 4 leaves angled between the flowers to fill gaps. Stitch each leaf at its base only, leaving the tip slightly free for dimension.
Step 7: Place the remaining 4 leaves along the upper sides of the arrangement where the centerpiece meets the neckband, pointing slightly upward toward the neckband edge. Stitch at their bases.
Step 8: Tuck 6 tendrils into the spaces between flowers and leaves, arranging them so the curl is visible at the front. Stitch at the base of each tendril only.
Step 9: If any pearl beads were not pre-strung, sew them in place now using sewing needle and thread: 1 to 2 beads at each small blossom center, 3 to 4 beads scattered among the leaf tips, and 2 beads tucked near the tendrils.
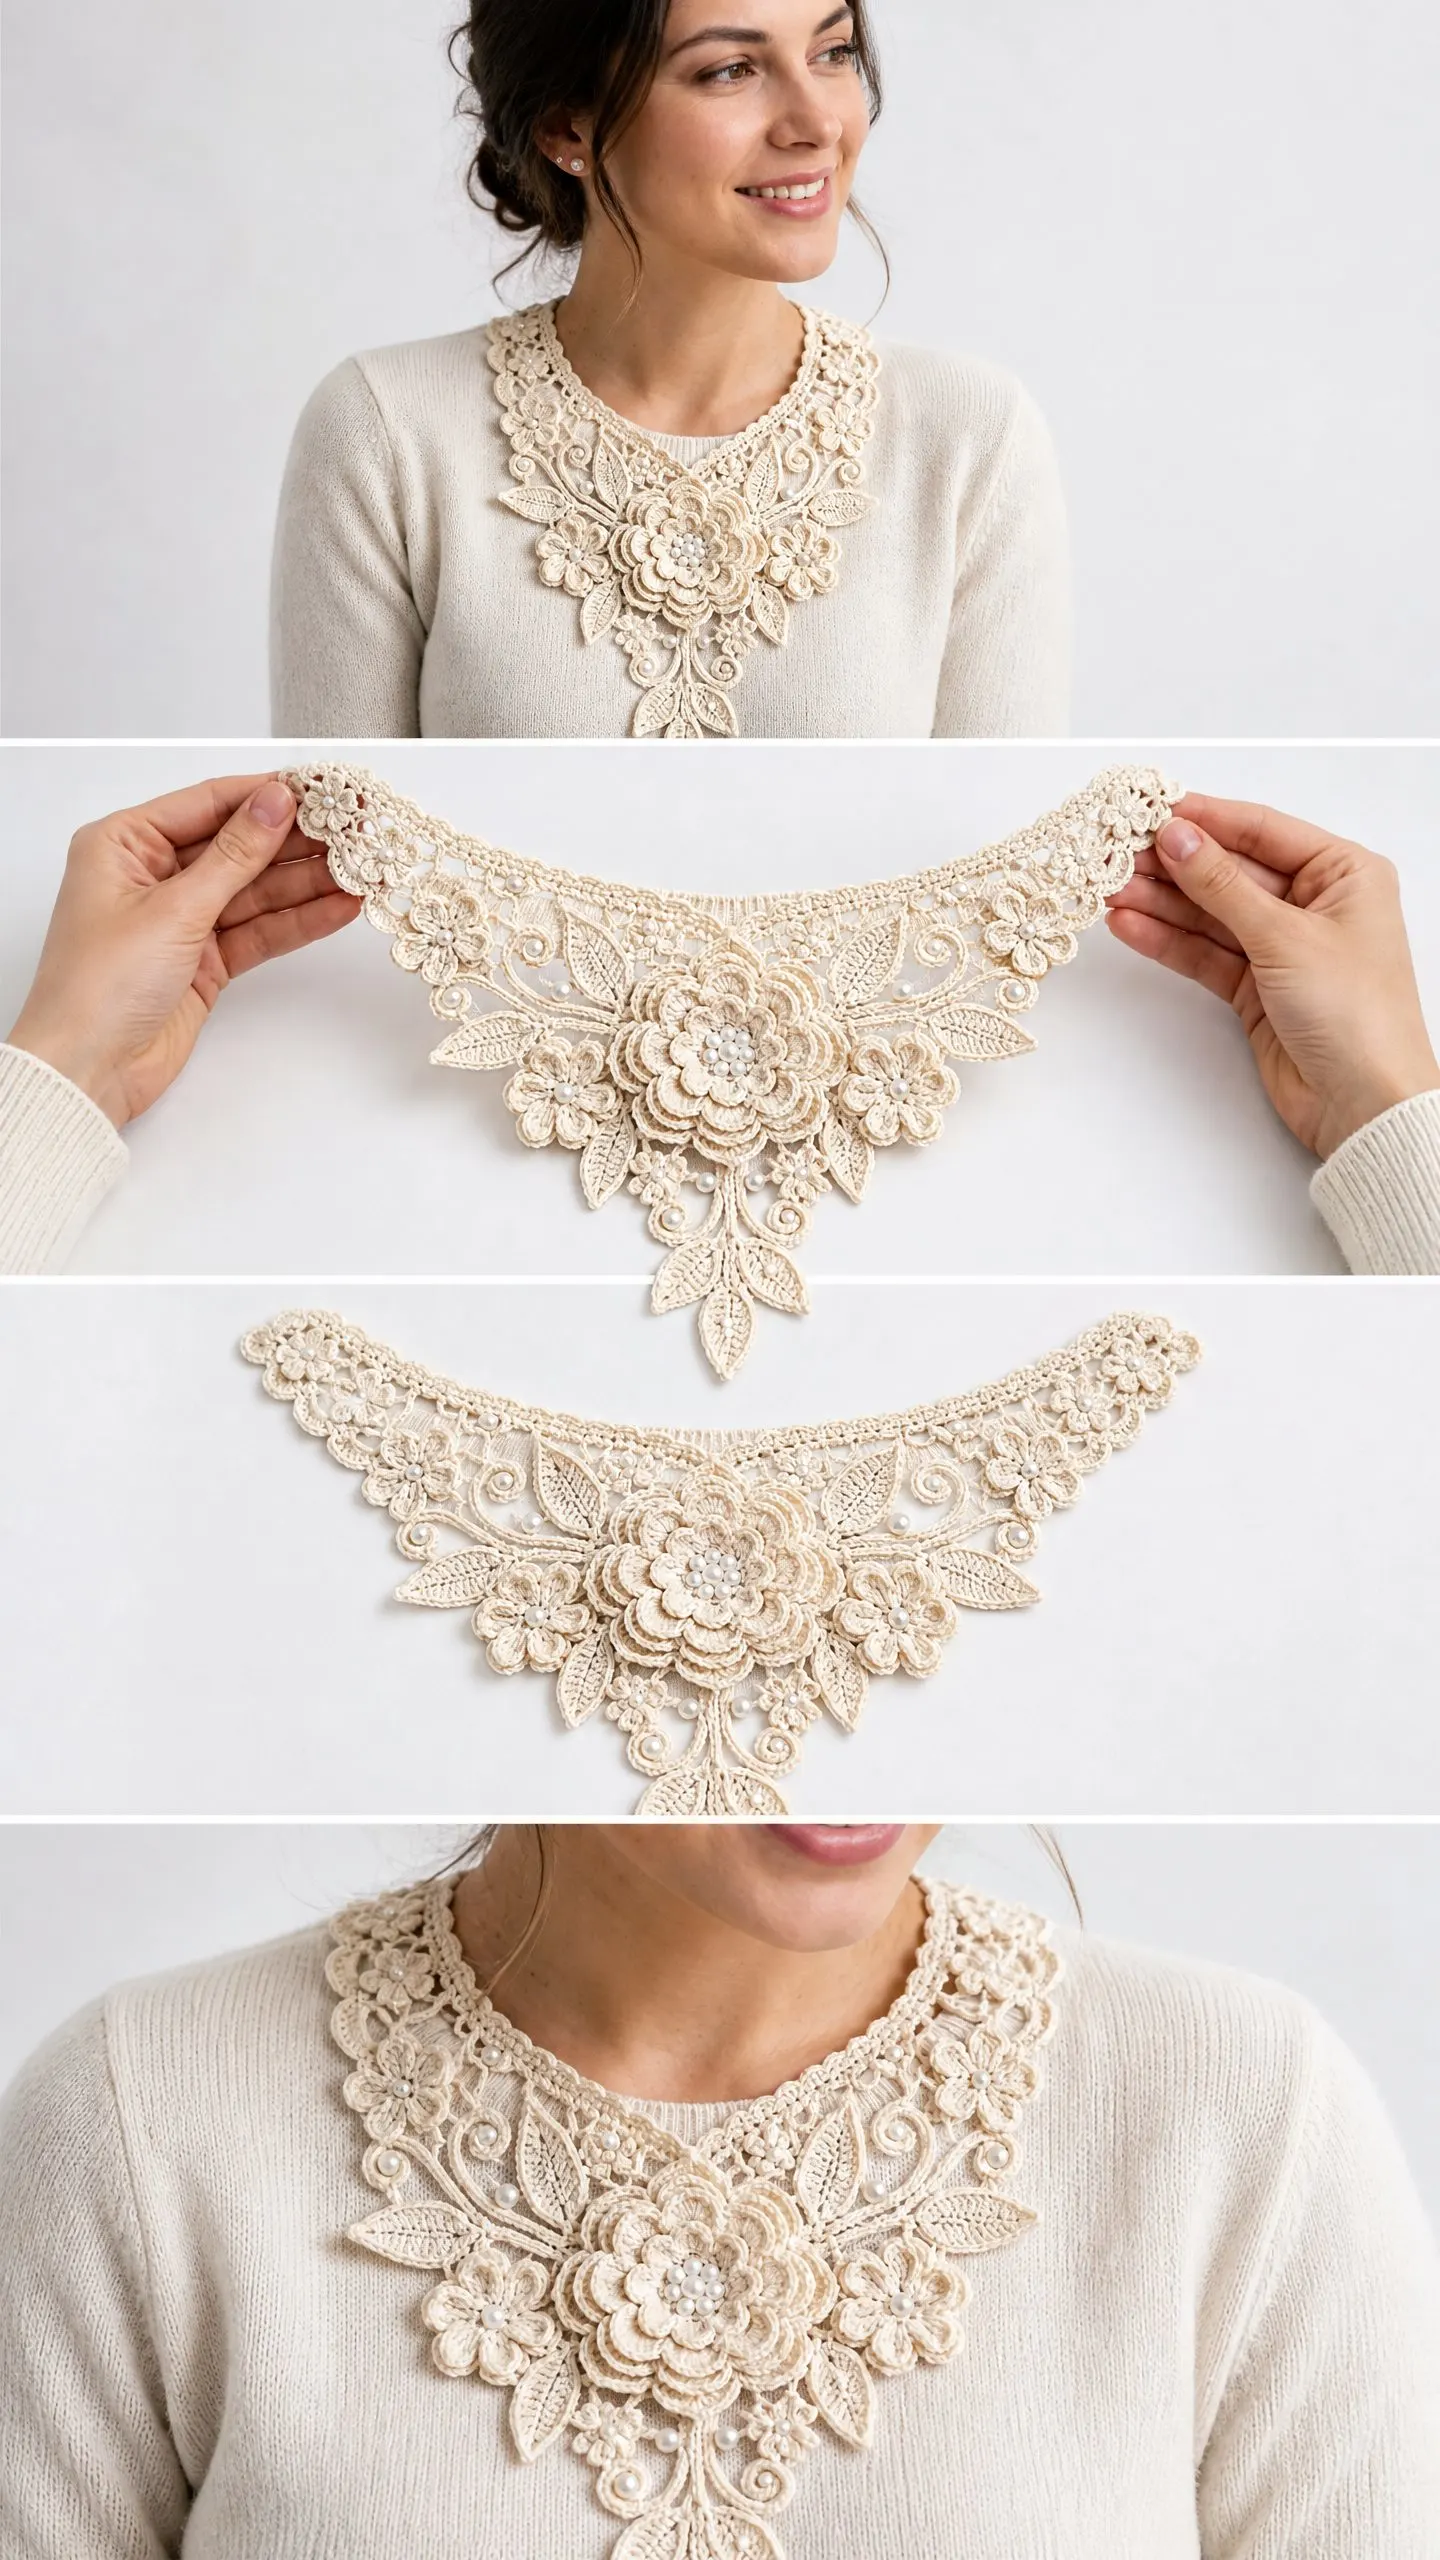
Assembly Checkpoint: The assembled collar should measure approximately 9 inches (23 cm) wide and approximately 7 inches (18 cm) from the neckband top edge to the lowest leaf tip. The centerpiece should be dimensional but lie reasonably flat when placed on a table.
Adding the Closure
Sew one half of a hook-and-eye set to the right side of each short end of the neckband. Position them so that when fastened, the inner edge of the collar fits snugly but comfortably around the neck. Alternatively, sew a small button to the right end and create a thread loop on the left end. Test the fit around your neck before permanently attaching the closure.
Size Customization Tips
For a larger neck circumference: Add 3 chains to the foundation chain for each additional 0.35 inch (0.9 cm) of neckband length needed. Every 9 additional chains adds approximately 1 inch (2.5 cm) to the neckband. Adjust the number of ch-3 and ch-2 repeat spaces in Rows 3 and 4 accordingly, keeping the pattern repeat divisible by 3.
For a longer centerpiece drop: Work Round 7 of the large rose with triple treble crochet (yarn over 3 times) instead of treble crochet, or add an additional round of longer petals. Each additional petal round adds approximately 0.5 inch (1.25 cm) to the diameter.
For a shallower centerpiece: Omit Round 7 from both the large and medium roses, leaving the outermost petal layer as the Round 5 layer. The piece will be slightly less dimensional but still recognizable.
For a child size: Use size 20 thread and a size 10 steel hook. Begin with a foundation chain of 96 instead of 128 for a neckband of approximately 11 inches (28 cm).
Blocking and Finishing Your Lace Collar
Blocking is essential for thread crochet lace. Your collar will not drape correctly until it has been properly wet-blocked or starch-blocked.
Option 1, wet blocking: Soak the completed collar in cool water for 10 minutes. Gently press out excess water between two clean towels. Do not wring. Pin the neckband flat and straight to the blocking board, using multiple pins along both long edges. Shape each petal and leaf and pin its tip. Allow to dry completely (12 to 24 hours) before removing pins.
Option 2, starch blocking: Lightly spray the collar with diluted fabric starch (50 percent starch, 50 percent water). Pin as above. The starch helps the piece hold its shape more firmly between wearings, which is especially desirable for a collar that’s handled often.
Weave in all ends securely after blocking. Thread ends through at least 1 inch (2.5 cm) of stitches in two directions before trimming.
Care Instructions
Hand wash only in cool water with a small amount of gentle laundry soap. Lay flat to dry. Do not put in the dryer. Do not dry clean. If the collar becomes misshapen with wear, a light spritz of water and a gentle re-pinning session of 1 to 2 hours will restore the shape. Store flat or rolled loosely, not folded, to preserve the dimensional floral motifs.
Final Thoughts on This Crochet Tutorial
This ivory floral lace collar necklace is one of those projects that looks incredibly impressive but is actually quite manageable when you break it into pieces. The individual roses, blossoms, and leaves are all achievable on their own. Assembly is where your creativity shines as you arrange everything just so.
Take your time with this one. Enjoy the meditative quality of thread crochet. And when you’re done, you’ll have a wearable piece of art that transforms any outfit.
Thank you so much for choosing this pattern. I genuinely hope you love making it as much as I loved designing it. If you create one, I’d be thrilled to see your finished collar. Tag me on Instagram or share a photo in our Facebook group.
If this crochet pattern spoke to you, go ahead and save it to your Pinterest boards so you can find it when you’re ready to start. And please leave a comment below if you make one. I love seeing your creations and hearing how the pattern worked up for you.
