This is HANDS DOWN one of the most stunning crochet bikini sets you will ever make! I’m talking a project that looks like it belongs in a boutique but works up faster than you’d expect. The shell-shaped cups with pearl embellishments? GORGEOUS. Whether you’re planning a tropical vacation, a mermaid-themed photo shoot, or just want to feel like a sea goddess at the pool, this bikini set delivers serious wow factor. And here’s the best part: if you can crochet basic stitches and follow a simple increase pattern, you can absolutely make this.
About This Mermaid Shell Bikini Crochet Pattern
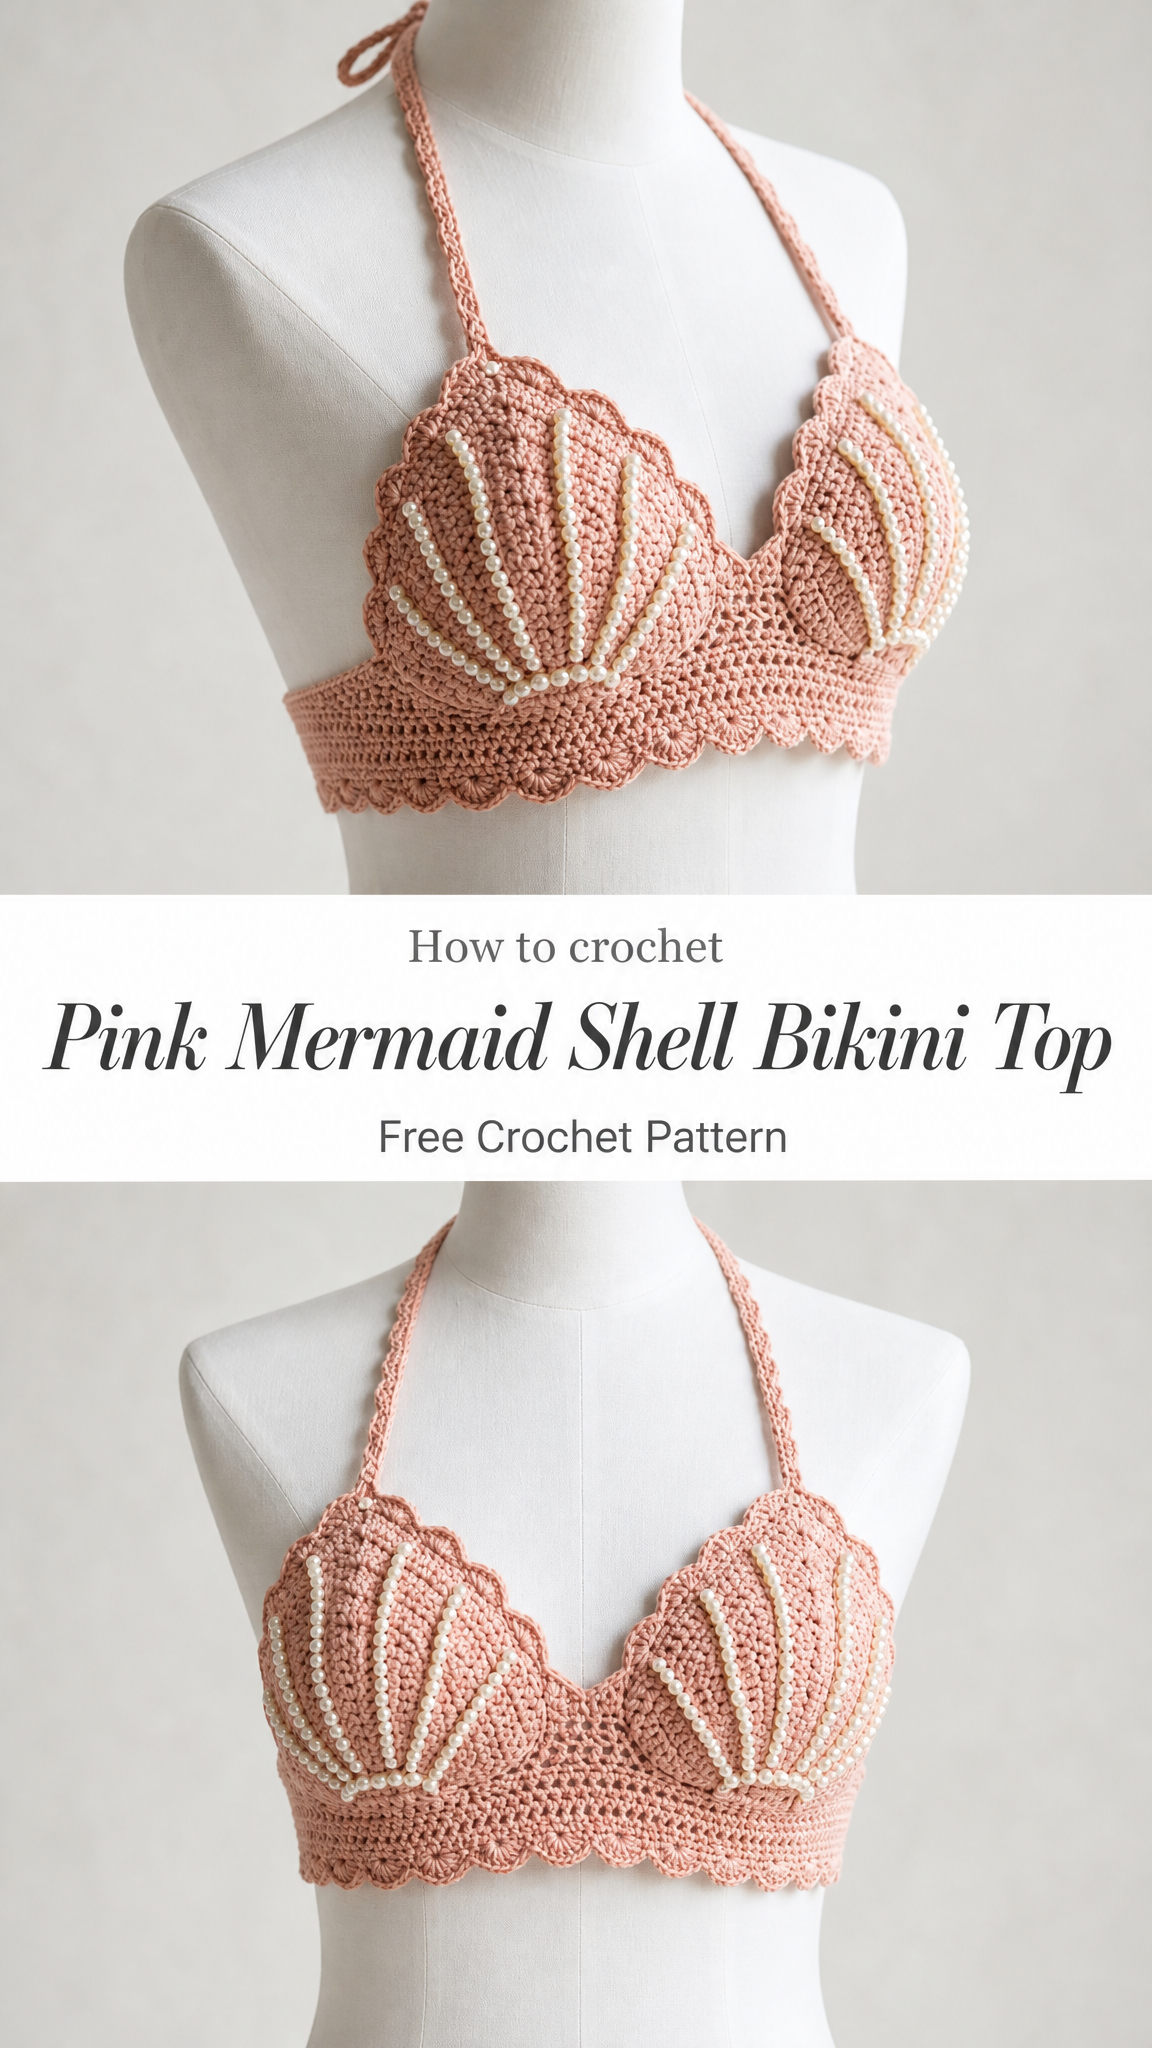
This romantic dusty pink bikini set features shell-shaped triangle cups adorned with faux pearl beads, a scalloped band, coordinating high-waisted bottoms with crocodile stitch ruffle accents at the hips, and delicate halter ties. The entire look channels serious mermaid vibes while remaining completely wearable.
The construction combines several techniques that create that beautiful layered shell texture on the cups. You’ll work the cups from the bottom point upward using increases and strategic stitch placement to create those ridged lines radiating from the center. The pearl beads get sewn on after the cups are complete, so no fiddly bead crochet required.
Skill Level: Intermediate
This pattern requires comfort with basic stitches plus the crocodile stitch for the hip ruffles. If you’ve never tried crocodile stitch before, don’t panic. I’ll walk you through it completely. It looks complicated but it’s really just double crochets worked around post stitches.
Materials You’ll Need
Yarn:
Hook:
Notions:
Gauge:
18 stitches and 20 rows = 4 inches in single crochet
Check your gauge before starting. This matters especially for fitted garments.
Abbreviations and Stitch Definitions
Before we dive in, let me explain every stitch you’ll encounter:
Ch = Chain: Wrap yarn over hook, pull through loop on hook. This creates a foundation or adds height.
Sl st = Slip stitch: Insert hook, yarn over, pull through both loops at once. Used for joining or moving yarn position.
Sc = Single crochet: Insert hook in stitch, yarn over, pull up a loop (2 loops on hook), yarn over, pull through both loops. A short, tight stitch.
Hdc = Half double crochet: Yarn over, insert hook, pull up a loop (3 loops on hook), yarn over, pull through all 3 loops. Slightly taller than single crochet.
Dc = Double crochet: Yarn over, insert hook, pull up a loop, yarn over, pull through 2 loops, yarn over, pull through remaining 2 loops. A taller stitch that creates nice drape.
Inc = Increase: Work 2 stitches into the same stitch to add width.
Sk = Skip: Pass over a stitch without working into it.
Fpdc = Front post double crochet: Yarn over, insert hook from front to back to front around the post of the stitch below, complete as regular dc. Creates raised texture.
Crocodile stitch = A technique where you work 5 dc down one side of a post stitch, then 5 dc up the other side to create a scale-like petal.
Size Information
This pattern is written for size Small with notes for adjusting.
Small fits:
To size up: Add additional increase rows to the cups before the scallop edging. For the band and bottoms, add chains to your foundation in increments of 4.
To size down: Work fewer increase rows on the cups. Reduce foundation chains on band and bottoms.
I always recommend making a gauge swatch and measuring against your own body as you work. Crochet swimwear should fit snugly since it will stretch slightly when wet.
Shell Bikini Top Pattern Instructions
Cup (Make 2)
The cups work from the bottom point upward. The shell texture comes from strategic placement of increases and the natural lines they create.
Row 1: Ch 2. Work 3 sc in the second ch from hook. Turn. (3 sts)
Row 2: Ch 1. Inc in first st, sc in next st, inc in last st. Turn. (5 sts)
Row 3: Ch 1. Inc in first st, sc across to last st, inc in last st. Turn. (7 sts)
Rows 4-6: Repeat Row 3, increasing at each end. You should have 13 sts after Row 6.
Now we start creating the shell ridge lines:
Row 7: Ch 1. Inc in first st, sc in next 2 sts, fpdc around the post of the stitch 2 rows below, sc in next 5 sts, fpdc around the post of the stitch 2 rows below, sc in next 2 sts, inc in last st. Turn. (15 sts plus 2 fpdc)
Row 8: Ch 1. Inc in first st, sc across working into the tops of the fpdc stitches, inc in last st. Turn. (19 sts)
Row 9: Ch 1. Inc in first st, sc in next 3 sts, fpdc around next fpdc from 2 rows below, sc in next 3 sts, fpdc around the center stitch, sc in next 3 sts, fpdc around next fpdc from 2 rows below, sc in next 3 sts, inc in last st. Turn. (21 sts plus 3 fpdc)
Row 10: Ch 1. Inc in first st, sc across, inc in last st. Turn. (25 sts)
Row 11: Ch 1. Inc in first st, sc in next 4 sts, *fpdc around next fpdc, sc in next 4 sts*, repeat from * to * across, adjusting final sc count as needed, inc in last st. Turn. (27 sts plus fpdc columns)
Continue in this manner, adding fpdc columns radiating from the center point outward for 4 more rows, increasing at each end every row.
Final cup measurement: Approximately 6 inches wide at top edge, 5 inches tall from point to top edge.
Scallop Edging for Cups
With right side facing, join yarn at top right corner of one cup.
Scallop Row: *Sk 1 st, 5 dc in next st (shell made), sk 1 st, sl st in next st*, repeat from * to * across the top edge. Fasten off.
This creates the beautiful scalloped edge you see at the top of each cup.
Band
The band connects both cups and wraps around the ribcage.
Row 1: Ch 71 (or adjust for size). Sc in second ch from hook and across. Turn. (70 sts)
Rows 2-4: Ch 1. Sc across. Turn. (70 sts)
Row 5 (Scallop Edge): *Sk 1 st, 5 dc in next st, sk 1 st, sl st in next st*, repeat across. Fasten off.
Attaching Cups to Band
Lay the band flat. Mark the center point. Position each cup on either side of center, leaving approximately 1 inch gap between cups at center.
Using yarn needle and matching yarn, whip stitch the bottom edge of each cup to the top edge of the band. The scalloped edge of the band should face downward toward your ribcage when worn.
Halter Ties (Make 2)
Ch 120 (or longer for adjustable ties).
Sl st in second ch from hook and across entire chain. Fasten off.
Attach one tie to the top outer point of each cup. These will tie behind your neck.
Back Ties (Make 2)
Ch 80.
Sl st in second ch from hook and across. Fasten off.
Attach one tie to each end of the band. These will tie at your back.
Adding Pearl Embellishments
Thread your beading needle with matching thread. Sew pearls along each raised fpdc ridge line on the cups. Space them approximately half an inch apart.
I used 5-6 pearls per ridge line, with about 4-5 ridge lines per cup. Adjust based on your cup size and personal preference.
Secure each pearl with several stitches and knot your thread on the wrong side.
High-Waisted Bikini Bottoms Pattern Instructions
Front Panel
Row 1: Ch 41. Sc in second ch from hook and across. Turn. (40 sts)
Rows 2-25: Ch 1. Sc across. Turn. (40 sts)
This creates a rectangle approximately 9 inches wide and 5 inches tall.
Shaping for Crotch
Row 26: Ch 1. Sc2tog (decrease by inserting hook in next st, pull up loop, insert hook in following st, pull up loop, yarn over, pull through all 3 loops), sc across to last 2 sts, sc2tog. Turn. (38 sts)
Rows 27-35: Repeat Row 26, decreasing at each end every row. (20 sts remain after Row 35)
Rows 36-40: Ch 1. Sc across without decreasing. Turn. (20 sts)
This narrow section is the crotch gusset.
Back Panel
Now work increases to widen back to match front.
Row 41: Ch 1. Inc in first st, sc across to last st, inc in last st. Turn. (22 sts)
Rows 42-50: Repeat Row 41, increasing at each end every row. (40 sts after Row 50)
Rows 51-75: Ch 1. Sc across. Turn. (40 sts)
Fasten off.
Waistband
Join yarn at top edge of front panel.
Round 1: Sc evenly around entire top edge of bottoms, working approximately 70-80 sts total. Sl st to first sc to join.
Rounds 2-4: Ch 1. Sc in each st around. Sl st to join.
Fasten off.
Leg Openings
Join yarn at leg opening.
Round 1: Sc evenly around leg opening. Sl st to join.
Round 2: Ch 1. Sc around. Sl st to join. Fasten off.
Repeat for second leg opening.
Crocodile Stitch Hip Ruffles (Make 2)
This is where the magic happens! The ruffles at the hips add that beautiful mermaid scale texture.
Foundation Row: Ch 22. Dc in 6th ch from hook. *Ch 1, sk 1 ch, dc in next ch*, repeat across. Turn. You should have a row of dc posts with ch-1 spaces between them.
Crocodile Stitch Row: Ch 2. Work 5 dc down the left side of first dc post (inserting hook under the post, not into the top). Now work 5 dc up the right side of the next dc post. This creates one "scale." Continue across, working scales around each pair of dc posts.
Row 2: Ch 4. Turn work. Dc in first ch-1 space from previous foundation row. *Ch 1, dc in next ch-1 space*, repeat across.
Crocodile Stitch Row 2: Repeat crocodile stitch row, creating scales offset from the first row.
Repeat for 3-4 rows of scales total, or until ruffle measures approximately 3 inches deep.
Fasten off, leaving long tail for attaching.
Attaching Hip Ruffles
Position one ruffle at each hip, centered on the side seam area of the bottoms. The ruffles should sit at the high hip, where the bottoms naturally curve.
Whip stitch in place using yarn needle and matching yarn.
Finishing Your Mermaid Bikini Set
Weave in all ends securely. For swimwear, I recommend weaving ends through several inches of stitches and doubling back for extra security.
Blocking: Wet block your finished pieces by soaking in cool water, gently squeezing out excess water (never wring), and laying flat to dry. Pin cups into rounded shape while drying.
Optional lining: For additional coverage and support, hand sew removable bra cup inserts inside each cup. You can also sew a thin cotton jersey lining to the inside of the bottoms if desired.
Care instructions: Hand wash in cool water with mild detergent. Lay flat to dry. Avoid wringing or twisting. Store flat or rolled to prevent stretching.
Tips for Crochet Swimwear Success
Yarn choice matters. Cotton is ideal because it doesn’t stretch out when wet the way acrylic does. Look for mercerized cotton for extra sheen, or try a cotton/bamboo blend for silky drape.
Make it snug. Crochet fabric will relax slightly over time and stretch when wet. Your finished bikini should fit snugly when dry.
Test before wearing. Try your bikini on before heading to the beach. Walk around, sit down, bend over. Make sure everything stays in place.
Reinforce stress points. Add extra stitching where ties attach and where cups meet the band. These areas bear the most tension.
Consider a lining. While crochet swimwear is gorgeous, it may be more sheer when wet. A nude lining gives confidence.
Styling Your Mermaid Shell Bikini
This bikini set is perfect for:
Pair it with a flowy crochet coverup, high-waisted shorts, or a sarong. Add shell jewelry and tousled waves for full mermaid energy.
The dusty pink color shown here is universally flattering, but this pattern works beautifully in any color. Try ocean blues and teals for classic mermaid, crisp white for a bridal look, or bold coral for tropical vibes.
Thank you so much for choosing this mermaid shell bikini crochet pattern for your next project! I absolutely loved designing this one and I hope you enjoy making it as much as I did. The finished result is truly show-stopping.
If you make this bikini set, I would LOVE to see it! Tag me on Instagram or share a photo in my Facebook group. Seeing your creations honestly makes my entire week.
Don’t forget to save this pattern to your Pinterest boards so you can find it easily when you’re ready to start! And if you have any questions or want to share your finished bikini, drop a comment below. I read every single one and I’m always happy to help. Happy crocheting!
