This is hands down one of the CUTEST beach bags you will ever make, and I am SO excited to share it with you! We’re talking a SUPER EASY tote with the most adorable sea turtle appliqués that look way more impressive than the effort required. You can whip up the main bag body in a weekend, add those sweet turtles in an evening, and have yourself a showstopper beach bag that everyone will ask you about. This makes an INCREDIBLE gift for the ocean lover in your life, and trust me, you’re going to want to make one for yourself too!
About This Sea Turtle Crochet Tote Bag Pattern
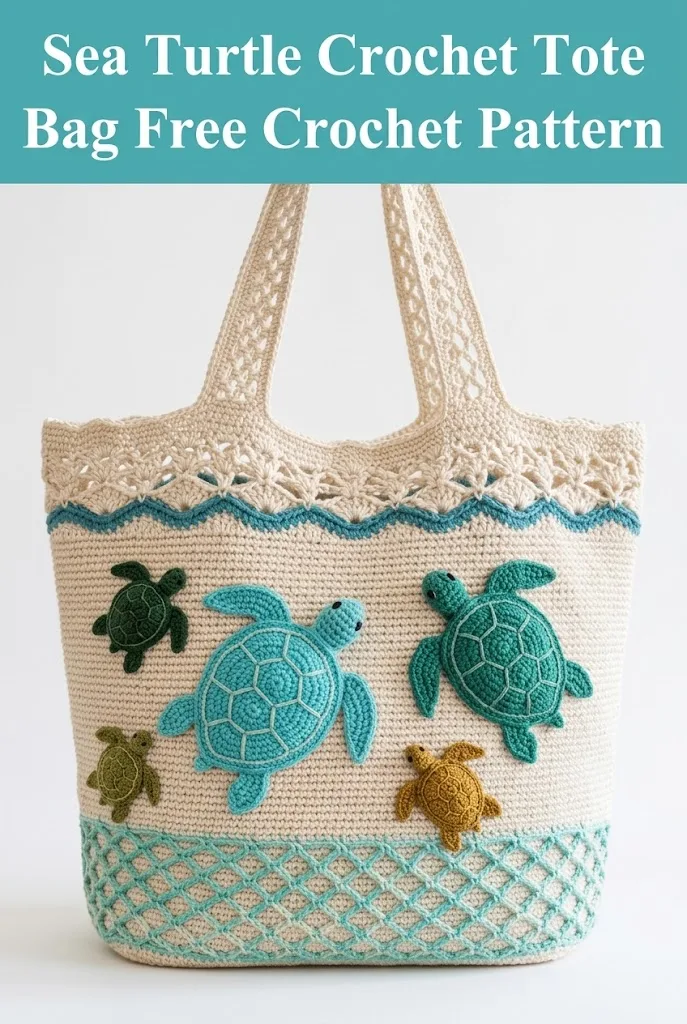
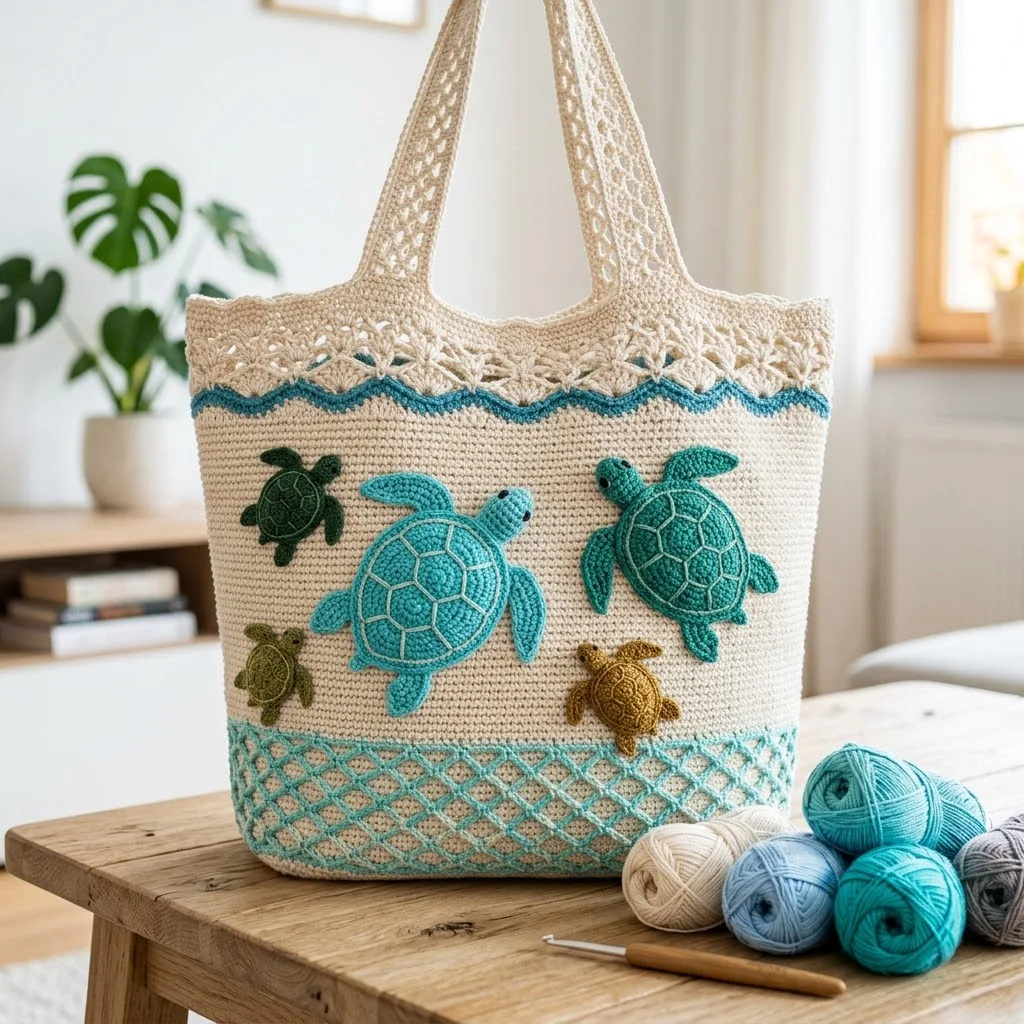
This gorgeous crochet tote bag combines simple construction with stunning decorative elements. The bag features a sturdy single crochet body in a natural cream color, a beautiful wave border detail in teal, an openwork lattice section at the bottom, a delicate lacy trim at the top, and five charming sea turtle appliqués in various ocean-inspired colors.
The turtles are the real stars here. Each one is made separately and sewn onto the finished bag, which means you have total creative control over placement. You can make as many or as few as you like. The lattice section at the bottom adds visual interest and also provides some stretch, which is perfect for a beach tote that needs to hold towels, sunscreen, and all your summer essentials.
Skill level: Intermediate. If you’re comfortable with basic stitches and have made a few amigurumi pieces before, you can absolutely handle this project.
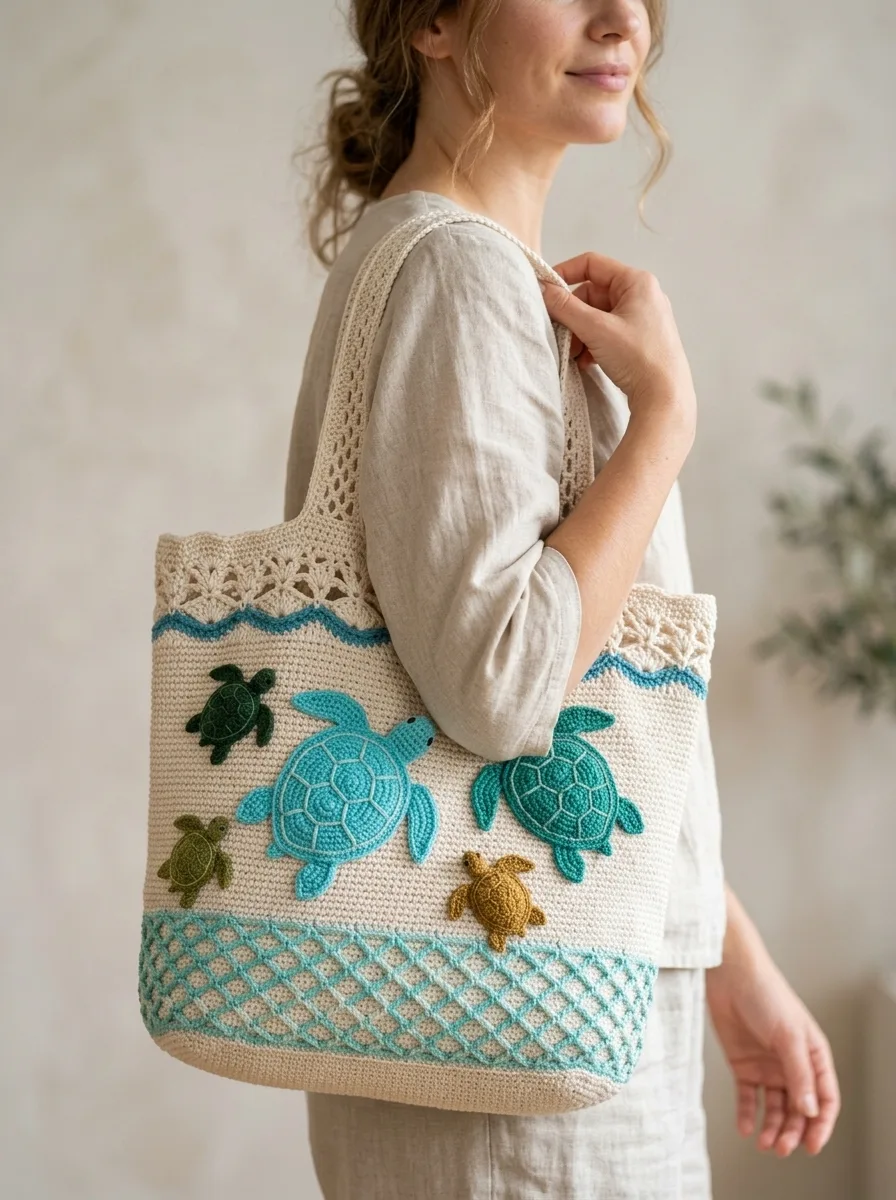
Finished dimensions: Approximately 16 inches wide by 14 inches tall, not including handles. Handles add an additional 10 inches.
Materials Needed for Your Crochet Tote Bag
Yarn:
Tools:
Abbreviations and Stitch Definitions
Let me break down every stitch you’ll need. If you’re newer to reading patterns, bookmark this section so you can refer back easily.
Ch = Chain. Wrap yarn over hook, pull through loop on hook. This creates your foundation.
Sl st = Slip stitch. Insert hook, yarn over, pull through stitch AND loop on hook in one motion. Used for joining and moving across work invisibly.
Sc = Single crochet. Insert hook into stitch, yarn over and pull up a loop (2 loops on hook), yarn over and pull through both loops. Your most basic, sturdy stitch.
Hdc = Half double crochet. Yarn over, insert hook into stitch, yarn over and pull up a loop (3 loops on hook), yarn over and pull through all 3 loops. Slightly taller than single crochet.
Dc = Double crochet. Yarn over, insert hook into stitch, yarn over and pull up a loop (3 loops on hook), yarn over and pull through 2 loops (2 loops remain), yarn over and pull through remaining 2 loops. Creates a taller, more open fabric.
Inc = Increase. Work 2 stitches into the same stitch.
Dec = Decrease. Work 2 stitches together as one.
Sk = Skip. Pass over the indicated stitch without working into it.
Ch-sp = Chain space. The gap created by chains in previous rows. You’ll work into this gap, not into the chain itself.
Magic ring = An adjustable starting ring for working in the round. Pull tail to close center completely.
Gauge
With 5.0mm hook and worsted weight cotton:
14 sc and 16 rows = 4 inches in single crochet
Gauge matters here because you want your bag to hold its shape. If your stitches are too loose, the bag will stretch and sag. Too tight, and it won’t have any give. Make a small swatch first and adjust your hook size if needed.
Crochet Tote Bag Pattern Instructions
Bag Body (Make 2)
You’re making two identical flat panels, then joining them. This is so much easier than working in the round for this shape.
Foundation: With MC and 5.0mm hook, ch 57.
Row 1: Sc in 2nd ch from hook and in each ch across. (56 sts)
Row 2: Ch 1, turn. Sc in each st across. (56 sts)
Rows 3-12: Repeat Row 2. (56 sts each row)
At the end of Row 12, you’ll have a rectangle about 16 inches wide and 3 inches tall. This is your base section before the lattice.
Lattice Section
This is where things get fun. The lattice creates that gorgeous diamond mesh pattern you see at the bottom of the bag.
Row 13: Ch 1, turn. Sc in first st, *ch 3, sk 2 sts, sc in next st*. Repeat from * to * across. End with sc in last st. (19 ch-3 spaces)
Row 14: Ch 4 (counts as dc plus ch 1), turn. Sc in first ch-3 sp, *ch 3, sc in next ch-3 sp*. Repeat from * to * across. End with ch 1, dc in last sc. (18 ch-3 spaces plus end stitches)
Row 15: Ch 1, turn. Sc in dc, ch 1, sc in first ch-3 sp, *ch 3, sc in next ch-3 sp*. Repeat from * to * across. End with ch 1, sc in 3rd ch of turning ch. (17 ch-3 spaces)
Rows 16-20: Continue alternating the pattern, maintaining the mesh structure. Each row should have one fewer ch-3 space as you shift the pattern.
Row 21: Ch 1, turn. Sc in first st, *3 sc in ch-3 sp, sc in next sc*. Repeat from * to * across, filling in all spaces to create solid fabric again. (56 sts)
Don’t panic if your lattice section looks a little wonky at first. It will even out beautifully once you block the finished bag. The key is keeping your tension consistent.
Main Body Continued
Rows 22-45: With MC, ch 1, turn. Sc in each st across. (56 sts each row)
At Row 45, your panel should measure approximately 11 inches tall.
Wave Border
Change to Color A (teal) for this section. This creates that lovely ocean wave effect.
Row 46: With Color A, ch 1, turn. Sc in each st across. (56 sts)
Row 47: Ch 1, turn. *Sc in next 4 sts, hdc in next 2 sts, dc in next st, hdc in next 2 sts*. Repeat from * to * across, adjusting last repeat as needed. (56 sts)
Row 48: Ch 1, turn. Working in back loops only, sc in each st across. (56 sts)
This creates a subtle ridge that mimics a wave crest. It’s a small detail that makes a big difference.
Lacy Top Border
Switch back to MC for the decorative top edge.
Row 49: With MC, ch 1, turn. Sc in each st across. (56 sts)
Row 50: Ch 4 (counts as dc plus ch 1), turn. Sk 1 st, dc in next st, *ch 1, sk 1 st, dc in next st*. Repeat from * to * across. (28 dc, 27 ch-1 spaces)
Row 51: Ch 1, turn. Sc in first dc, *ch 3, sk ch-1 sp, sc in next dc*. Repeat from * to * across.
Row 52: Ch 1, turn. *5 dc in ch-3 sp (shell made), sc in next ch-3 sp*. Repeat from * to * across. This creates the scalloped shell border you see at the top of the bag.
Fasten off and weave in ends.
Make a second panel identical to the first.
Joining the Panels
Place both panels with wrong sides together. Using MC and your 5.0mm hook, join with sl st through both layers.
Sc evenly around three sides (both long sides and the bottom), leaving the top open. Work 3 sc in each corner to keep them square. Sl st to first sc and fasten off.
Handles (Make 2)
The handles need to be sturdy. You’ll work these in rows to create a thick, comfortable strap.
Foundation: With MC and 5.0mm hook, ch 81.
Row 1: Sc in 2nd ch from hook and in each ch across. (80 sts)
Rows 2-5: Ch 1, turn. Sc in each st across. (80 sts)
Your handle strip should measure approximately 23 inches long and about 1.5 inches wide.
Fold the strip in half lengthwise and sc the long edges together to create a tube. This doubles the thickness and makes the handle much more comfortable to carry.
Position handles about 4 inches from each side edge on the inside of the bag. Sew securely using yarn needle and matching yarn. Reinforce with multiple passes because the handles will bear weight.
Sea Turtle Appliqué Pattern
Now for the adorable part! Each turtle is made in several pieces and assembled.
Turtle Shell (Make 5, in various colors)
Using 3.5mm hook and your choice of Color B, C, D, or E:
Rnd 1: Make a magic ring. Ch 1, 6 sc in ring. Pull tight to close. (6 sts)
Rnd 2: Inc in each st around. (12 sts)
Rnd 3: *Sc in next st, inc in next st*. Repeat around. (18 sts)
Rnd 4: *Sc in next 2 sts, inc in next st*. Repeat around. (24 sts)
Rnd 5: *Sc in next 3 sts, inc in next st*. Repeat around. (30 sts)
For the larger turtles, continue increasing:
Rnd 6: *Sc in next 4 sts, inc in next st*. Repeat around. (36 sts)
Sl st to first st and fasten off, leaving a long tail for sewing.
Using a contrasting yarn color, surface crochet or embroider the hexagonal shell pattern. I like to use chain stitch on the surface to create those characteristic turtle shell sections.
Turtle Head (Make 5)
Rnd 1: Make a magic ring. Ch 1, 6 sc in ring. (6 sts)
Rnd 2: Inc in each st around. (12 sts)
Rnd 3: Sc in each st around. (12 sts)
Rnd 4: *Sc in next st, dec*. Repeat around. (8 sts)
Stuff lightly if desired, or leave flat for appliqué purposes. Fasten off, leaving a tail for sewing.
Add black French knots or tiny bead eyes.
Turtle Flippers (Make 20, 4 per turtle)
Ch 6. Sc in 2nd ch from hook, hdc in next ch, dc in next 2 ch, 5 dc in last ch (this creates the flipper tip curve), working on opposite side of foundation ch, dc in next 2 ch, hdc in next ch, sc in last ch. Sl st to first sc. Fasten off.
Assembling Each Turtle
Position the head at the top edge of the shell, overlapping slightly. Sew in place.
Attach two front flippers at approximately 10 and 2 o’clock positions on the shell.
Attach two back flippers at approximately 7 and 5 o’clock positions.
Make turtles in varying sizes by stopping at different rounds on the shell. The image shows turtles ranging from about 2 inches to 4 inches across.
Finishing Your Sea Turtle Crochet Tote Bag
Blocking: Wet block your bag by soaking it in lukewarm water for 15 minutes. Squeeze out excess water (don’t wring), then lay flat on a towel and shape to dimensions. Let dry completely.
Attaching Turtles: Arrange your turtles on the front panel of the bag, playing with placement until you’re happy. The image shows a pleasing asymmetrical arrangement with turtles appearing to swim in different directions. Pin in place, then sew securely using matching yarn and a yarn needle.
Optional Lining: For added durability and to prevent items from poking through the lattice section, cut fabric lining to size and hand sew inside the bag.
Tips for Success
Cotton yarn is your best friend for this project. It’s sturdy, machine washable, and holds up to sand and sun exposure.
If your lattice section curls, don’t stress. A good blocking will fix this completely.
The turtle shells look best with surface crochet details, but embroidery works too. Use a lighter or darker shade of the same color family for the shell pattern lines.
Make extra turtles! They’re so quick and cute that you’ll want to add them to everything.
Wrapping Up Your Crochet Tutorial
I really hope you love making this sea turtle crochet tote bag as much as I enjoyed designing it. The combination of textures, from the solid body to the lattice section to those sweet appliqués, creates such a special finished piece. This step by step crochet pattern walks you through everything, but remember that your version will be uniquely yours.
This makes an unforgettable gift for anyone who loves the ocean, turtles, or just beautiful handmade things. I can already picture it stuffed with beach towels and a good book.
Thank you so much for choosing this pattern for your next project. It means the world when you trust me with your crafting time. If you make this bag, I would absolutely love to see it! Tag me on Instagram or share in my Facebook group so I can cheer you on.
If this pattern made you smile or sparked some creative ideas, go ahead and save it to your Pinterest boards so you can find it when you’re ready to start. And please drop a comment below if you make one. I read every single comment and love hearing how your projects turn out!
