I’ve been looking for the perfect crochet backpack pattern for months, and honestly, this one checks every box. The floral granny squares give it that vintage charm I adore, while the structured construction makes it actually functional for everyday use. This is my favourite kind of project: one that looks impressive but builds on skills you probably already have.
Why You’ll Love This Crochet Backpack Pattern
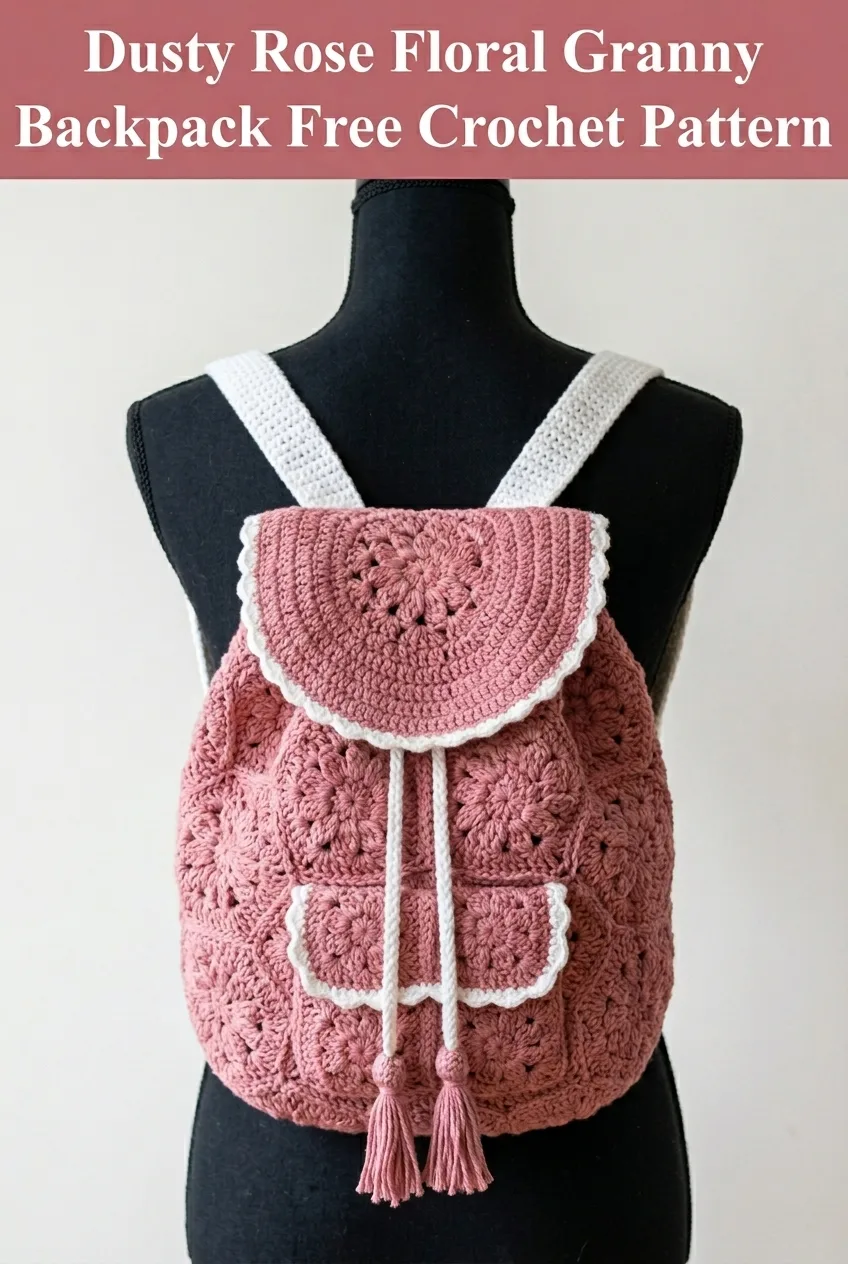
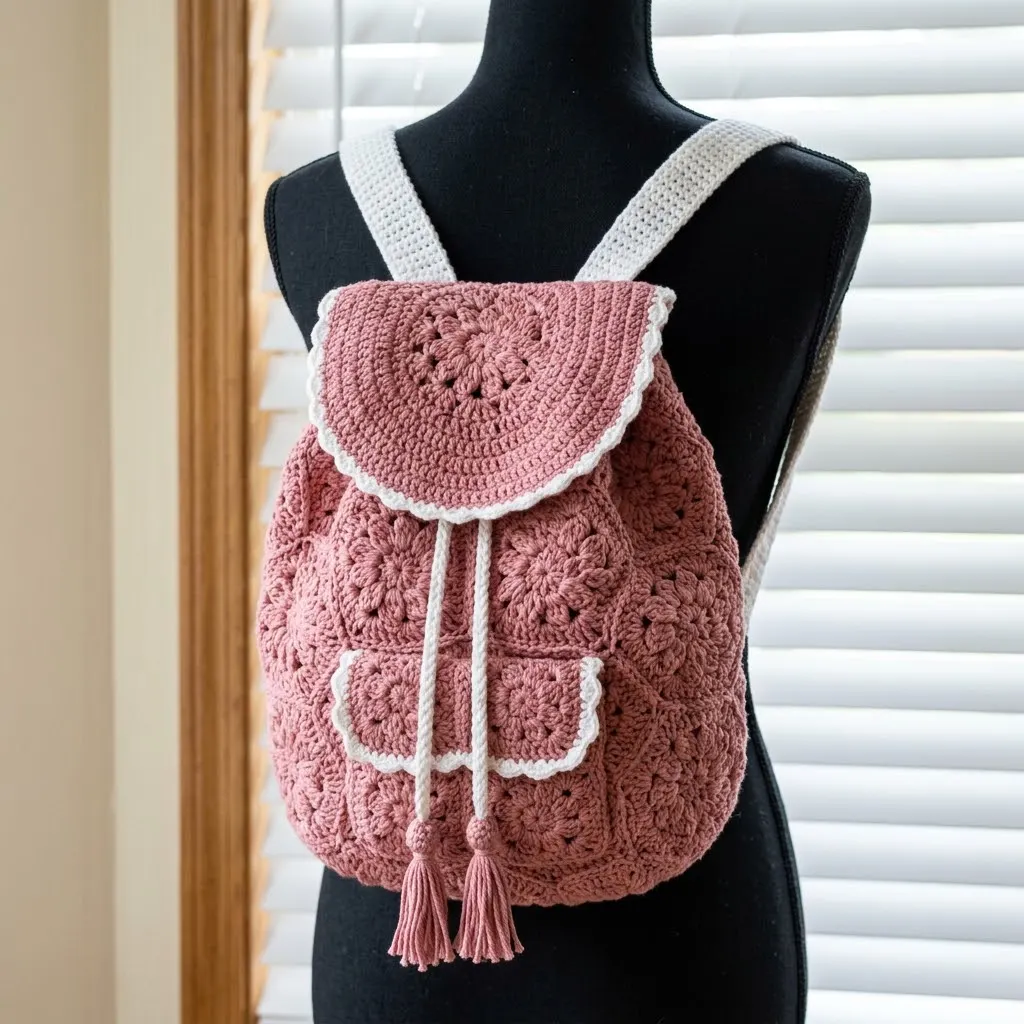
This crochet backpack combines classic granny square construction with thoughtful design details that elevate it from craft project to fashion accessory. The dusty rose color paired with cream accents creates a sophisticated palette that works with almost any outfit.
What makes this pattern special is the variety of techniques you’ll practice. You’ll work floral granny squares, a beautiful semicircle flap, scalloped edging, twisted cord drawstrings, and handmade tassels. Each element teaches you something different while coming together into one cohesive, stunning piece.
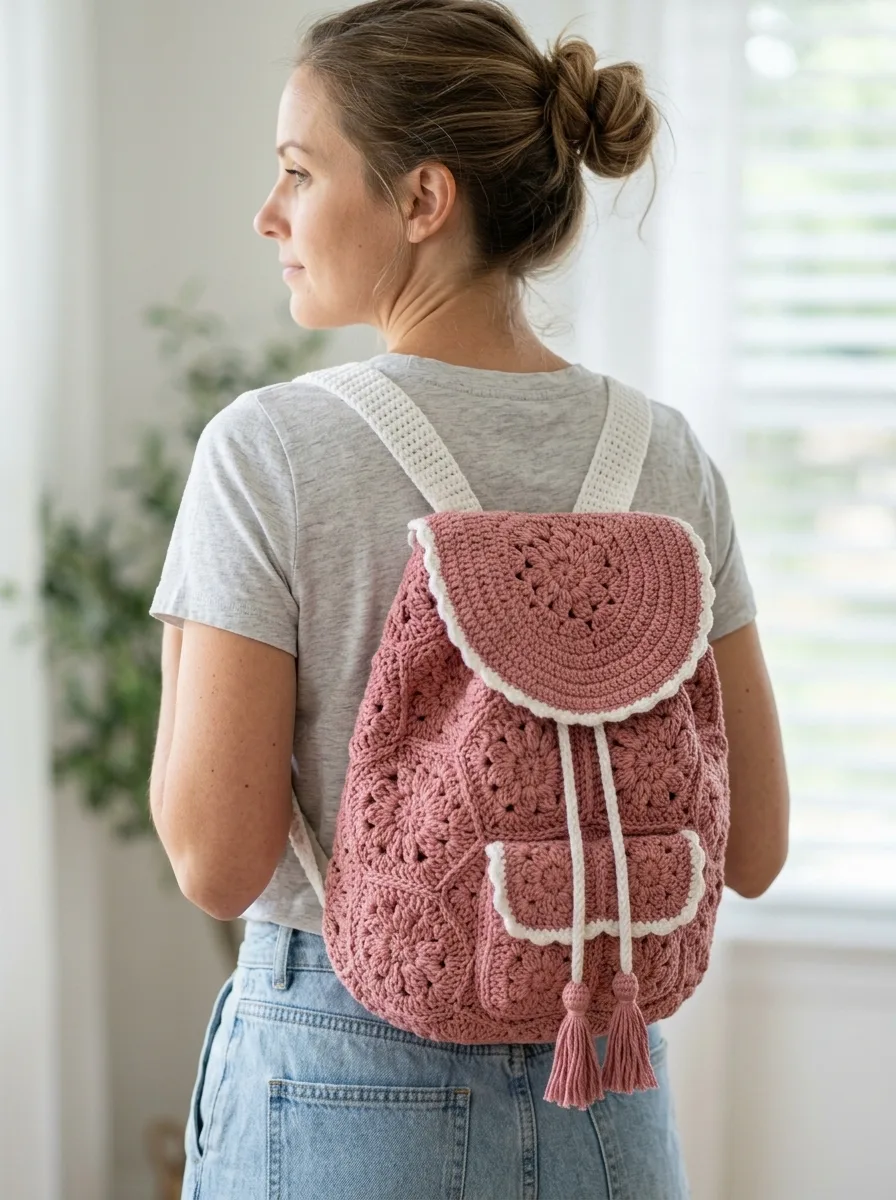
The bag sits comfortably against your back, and the adjustable drawstring closure keeps your belongings secure. Whether you’re heading to a farmer’s market, going for a weekend brunch, or just need a cute hands-free option, this backpack delivers.
Skill Level
This pattern is intermediate level. You should be comfortable with basic crochet stitches and reading patterns before starting. If you’ve made granny squares before, you’re already halfway there.
Don’t let the word "intermediate" scare you off if you’re an ambitious beginner. I’ll walk you through each component step by step. The individual pieces are quite straightforward on their own. The challenge comes in assembling everything neatly.
Finished Measurements
Backpack Body: Approximately 11 inches wide by 12 inches tall (not including flap)
Flap: Approximately 9 inches diameter semicircle
Straps: Approximately 28 inches long (adjustable based on preference)
Pocket: Approximately 5 inches wide by 5 inches tall
Materials Needed
Yarn:
I recommend a cotton or cotton blend yarn for this project. Cotton holds its shape beautifully for bags and won’t stretch out over time like acrylic might. Look for yarn with good stitch definition so your floral centers really pop.
Hook:
Notions:
Gauge
Granny Square: Each completed floral granny square should measure approximately 4 inches by 4 inches after blocking.
Gauge Swatch: Work one complete granny square and measure. Adjust hook size up if your square is too small, down if it’s too large.
Gauge matters here. If your squares are different sizes, your backpack won’t assemble correctly and may end up misshapen.
Abbreviations and Stitch Definitions
Let me define every stitch and term you’ll encounter in this crochet tutorial.
Ch = Chain: Yarn over, pull through loop on hook. This creates the foundation for your work.
Sl st = Slip stitch: Insert hook, yarn over, pull through both loops at once. Used for joining rounds.
Sc = Single crochet: Insert hook, yarn over, pull up a loop (2 loops on hook), yarn over, pull through both loops.
Hdc = Half double crochet: Yarn over, insert hook, yarn over, pull up a loop (3 loops on hook), yarn over, pull through all 3 loops.
Dc = Double crochet: Yarn over, insert hook, yarn over, pull up a loop (3 loops on hook), yarn over, pull through 2 loops (2 remaining), yarn over, pull through last 2 loops.
Tr = Treble crochet: Yarn over twice, insert hook, yarn over, pull up a loop (4 loops on hook), [yarn over, pull through 2 loops] three times.
Puff st = Puff stitch: [Yarn over, insert hook in indicated stitch, yarn over, pull up a loop] 3 times in same stitch (7 loops on hook), yarn over, pull through all 7 loops, ch 1 to close. Creates a puffy, rounded texture.
Sk = Skip: Pass over the indicated stitch without working into it.
Sp = Space: The gap or opening, usually a chain space.
RS = Right side: The front or public-facing side of your work.
WS = Wrong side: The back side of your work.
Pattern Notes
Step by Step Crochet Pattern Instructions
Floral Granny Square (Make 20)
These gorgeous squares form the body of your backpack. The center floral motif uses puff stitches to create dimension and texture.
With MC, make a magic ring.
Round 1: Ch 3 (counts as dc here and throughout), 2 dc in ring, ch 2, *3 dc in ring, ch 2* three times, sl st to top of beginning ch-3 to join. (12 dc, 4 ch-2 spaces)
Round 2: Sl st to first ch-2 corner space, ch 3, 2 dc in same space, ch 1, *[3 dc, ch 2, 3 dc] in next ch-2 corner space, ch 1* three times, 3 dc in first corner space, ch 2, sl st to top of beginning ch-3 to join. (24 dc, 4 corners, 4 ch-1 spaces)
Round 3: Sl st to first ch-2 corner space, ch 3, 2 dc in same space, ch 1, 3 dc in ch-1 space, ch 1, *[3 dc, ch 2, 3 dc] in corner space, ch 1, 3 dc in ch-1 space, ch 1* three times, 3 dc in first corner space, ch 2, sl st to top of beginning ch-3 to join. (36 dc, 4 corners)
Round 4: Sl st to first ch-2 corner space, ch 3, 2 dc in same space, ch 1, [3 dc in next ch-1 space, ch 1] twice, *[3 dc, ch 2, 3 dc] in corner space, ch 1, [3 dc in next ch-1 space, ch 1] twice* three times, 3 dc in first corner space, ch 2, sl st to top of beginning ch-3 to join. Fasten off. (48 dc, 4 corners)
Each finished square should measure approximately 4 inches. Set aside all 20 squares.
Floral Center Overlay (Make 20)
This creates the dimensional flower center on each square. You’ll attach these after completing all base squares.
With MC, make a magic ring.
Round 1: Ch 1, work 8 puff sts in ring with ch 1 between each puff, sl st to first puff to join. (8 puff stitches)
Fasten off, leaving a 6-inch tail for sewing.
Assembly: Center one floral overlay on each granny square. Using your yarn needle, stitch through the magic ring center to secure, then tack down a few puff stitches to the square for stability. The flower should sit slightly raised from the square surface.
Semicircle Flap
This beautiful flap covers the opening of your backpack and features the same floral motif as the body.
With MC, make a magic ring.
Row 1 (RS): Ch 3, 5 dc in ring, turn. (6 dc including ch-3)
Row 2: Ch 3, dc in first dc, 2 dc in each dc across, 2 dc in top of turning ch, turn. (12 dc)
Row 3: Ch 3, dc in first dc, *dc in next dc, 2 dc in next dc* across, ending with dc in turning ch, turn. (18 dc)
Row 4: Ch 3, dc in each dc across, turn. (18 dc)
Row 5: Ch 3, dc in first dc, *dc in next 2 dc, 2 dc in next dc* across, turn. (24 dc)
Row 6: Ch 3, dc in each dc across, turn. (24 dc)
Row 7: Ch 3, dc in first dc, *dc in next 3 dc, 2 dc in next dc* across, turn. (30 dc)
Row 8: Ch 3, dc in each dc across, turn. (30 dc)
Row 9: Ch 3, dc in first dc, *dc in next 4 dc, 2 dc in next dc* across, turn. (36 dc)
Rows 10-11: Ch 3, dc in each dc across, turn. (36 dc)
Do not fasten off. Continue to edging.
Scalloped Edging:
Change to CC.
Working along the curved edge only, *sk 1 st, 5 dc in next st, sk 1 st, sl st in next st* repeat around the curved portion. Fasten off.
Floral Center for Flap: Make one additional floral overlay (same as before) and attach to the center of the semicircle flap.
Front Pocket
With MC, make 4 floral granny squares following the instructions above.
Join these 4 squares in a 2×2 configuration using the flat slip stitch join method:
Hold two squares with RS facing each other. Working through back loops only, sl st through both layers across one edge. Open flat. Repeat to create a 2×2 square.
Pocket Edging:
With CC, join to any corner. Sc evenly around the top edge only (approximately 32 sc). Work one row of scalloped edging along the top: *sk 1, 5 dc in next st, sk 1, sl st* across. Fasten off.
Backpack Body Assembly
Arrange your remaining 16 squares in a 4 wide by 4 tall grid.
Join squares using the flat slip stitch join method. Work in rows, joining horizontal seams first, then vertical seams. Press seams flat.
Form the bag: Fold the joined rectangle in half, bringing the bottom edge up to meet the top. Slip stitch the side seams closed, working through both layers.
Base shaping: The bottom naturally forms as you close the sides. For additional structure, you can work a row of sc around the bottom edge on the inside.
Drawstring Channel
With MC, join to the top edge of the backpack body.
Round 1: Sc evenly around the entire top opening, placing approximately 2 sc per square edge. Join with sl st. (Approximately 64 sc)
Round 2: Ch 4 (counts as dc + ch 1), sk 1 st, *dc in next st, ch 1, sk 1* around, sl st to 3rd ch of beginning ch-4 to join.
Round 3: Ch 1, sc in each dc and each ch-1 space around, sl st to first sc. Fasten off.
Twisted Cord Drawstrings (Make 2)
Cut 6 strands of CC, each approximately 80 inches long. Hold all strands together and fold in half. Secure the folded end to a stationary object.
Twist the strands tightly in one direction until they begin to kink. Keeping tension, fold the twisted cord in half and allow it to twist back on itself. Knot both ends to secure.
Final cord length should be approximately 36 inches.
Thread each cord through the drawstring channel, entering and exiting at opposite sides. Pull to gather.
Shoulder Straps (Make 2)
With CC, ch 8.
Row 1: Sc in 2nd ch from hook, sc in each ch across, turn. (7 sc)
Rows 2-90: Ch 1, sc in each sc across, turn. (7 sc)
Adjust length as needed for your preference. Fasten off.
Attachment: Sew the top end of each strap to the top corners of the backpack body (where the side seams meet the top edge). Sew the bottom ends to the bottom corners.
Pocket Attachment
Position the completed pocket on the front center of the backpack, approximately 1 inch up from the bottom edge. Using MC and your yarn needle, whipstitch the sides and bottom of the pocket to the backpack body, leaving the top open.
Add scalloped edging to the top with CC to match the flap.
Tassels (Make 2)
Cut approximately 20 strands of MC, each 8 inches long. Bundle together and fold in half. Using a separate strand, wrap tightly around the bundle about half an inch below the fold. Knot securely and trim the ends evenly.
Attach one tassel to each drawstring end.
Flap Attachment
Position the straight edge of the semicircle flap along the back top edge of the backpack, centered. Whipstitch securely in place. The flap should fold over the front opening.
Finishing Touches
Weave in all remaining ends carefully. Block the entire backpack using the spray blocking method, shaping it over a rolled towel to maintain the bag structure. Allow to dry completely.
Optional lining: For added durability, cut cotton fabric to fit the interior dimensions plus seam allowance. Sew into a simple bag shape and hand-stitch to the inside of the crochet backpack.
Tips for Success with This Crochet Pattern
Consistency is key. Try to maintain the same tension throughout all your squares. Mismatched tension creates squares of different sizes, which makes assembly frustrating.
Block before assembling. This step takes patience but transforms your finished piece. Blocking evens out stitches and helps squares lay flat.
Don’t rush the seaming. Neat, even seams make your backpack look polished and professional. Take your time here.
Consider a button closure. If you want extra security beyond the drawstring, sew a button to the backpack body and create a simple chain loop on the flap underside.
Make It Your Own
This pattern works beautifully in so many color combinations. Try navy and white for a nautical vibe, mustard and cream for boho style, or soft sage and ivory for a natural look.
You could also experiment with the pocket placement or skip it entirely for a cleaner silhouette. The straps can be made wider by adding more stitches to the foundation chain if you prefer a chunkier look.
Thank you so much for choosing this crochet backpack pattern for your next project. I truly hope you enjoy making it as much as I enjoyed designing it. If you complete your backpack, I’d absolutely love to see it. Tag me on Instagram or share in my Facebook group.
If this pattern inspires you, go ahead and save it to your Pinterest boards so you can find it when you’re ready to start. And please drop a comment below if you make one. I always love hearing how your projects turn out and seeing the color combinations you choose.
