
Let me guess. You saw a gorgeous coordinated crochet home décor set and thought, "That looks way too complicated for me." I hear this all the time. The truth is, this stunning pink lace sofa cover set uses one main stitch repeated over and over again. If you can double crochet, you can absolutely make this.
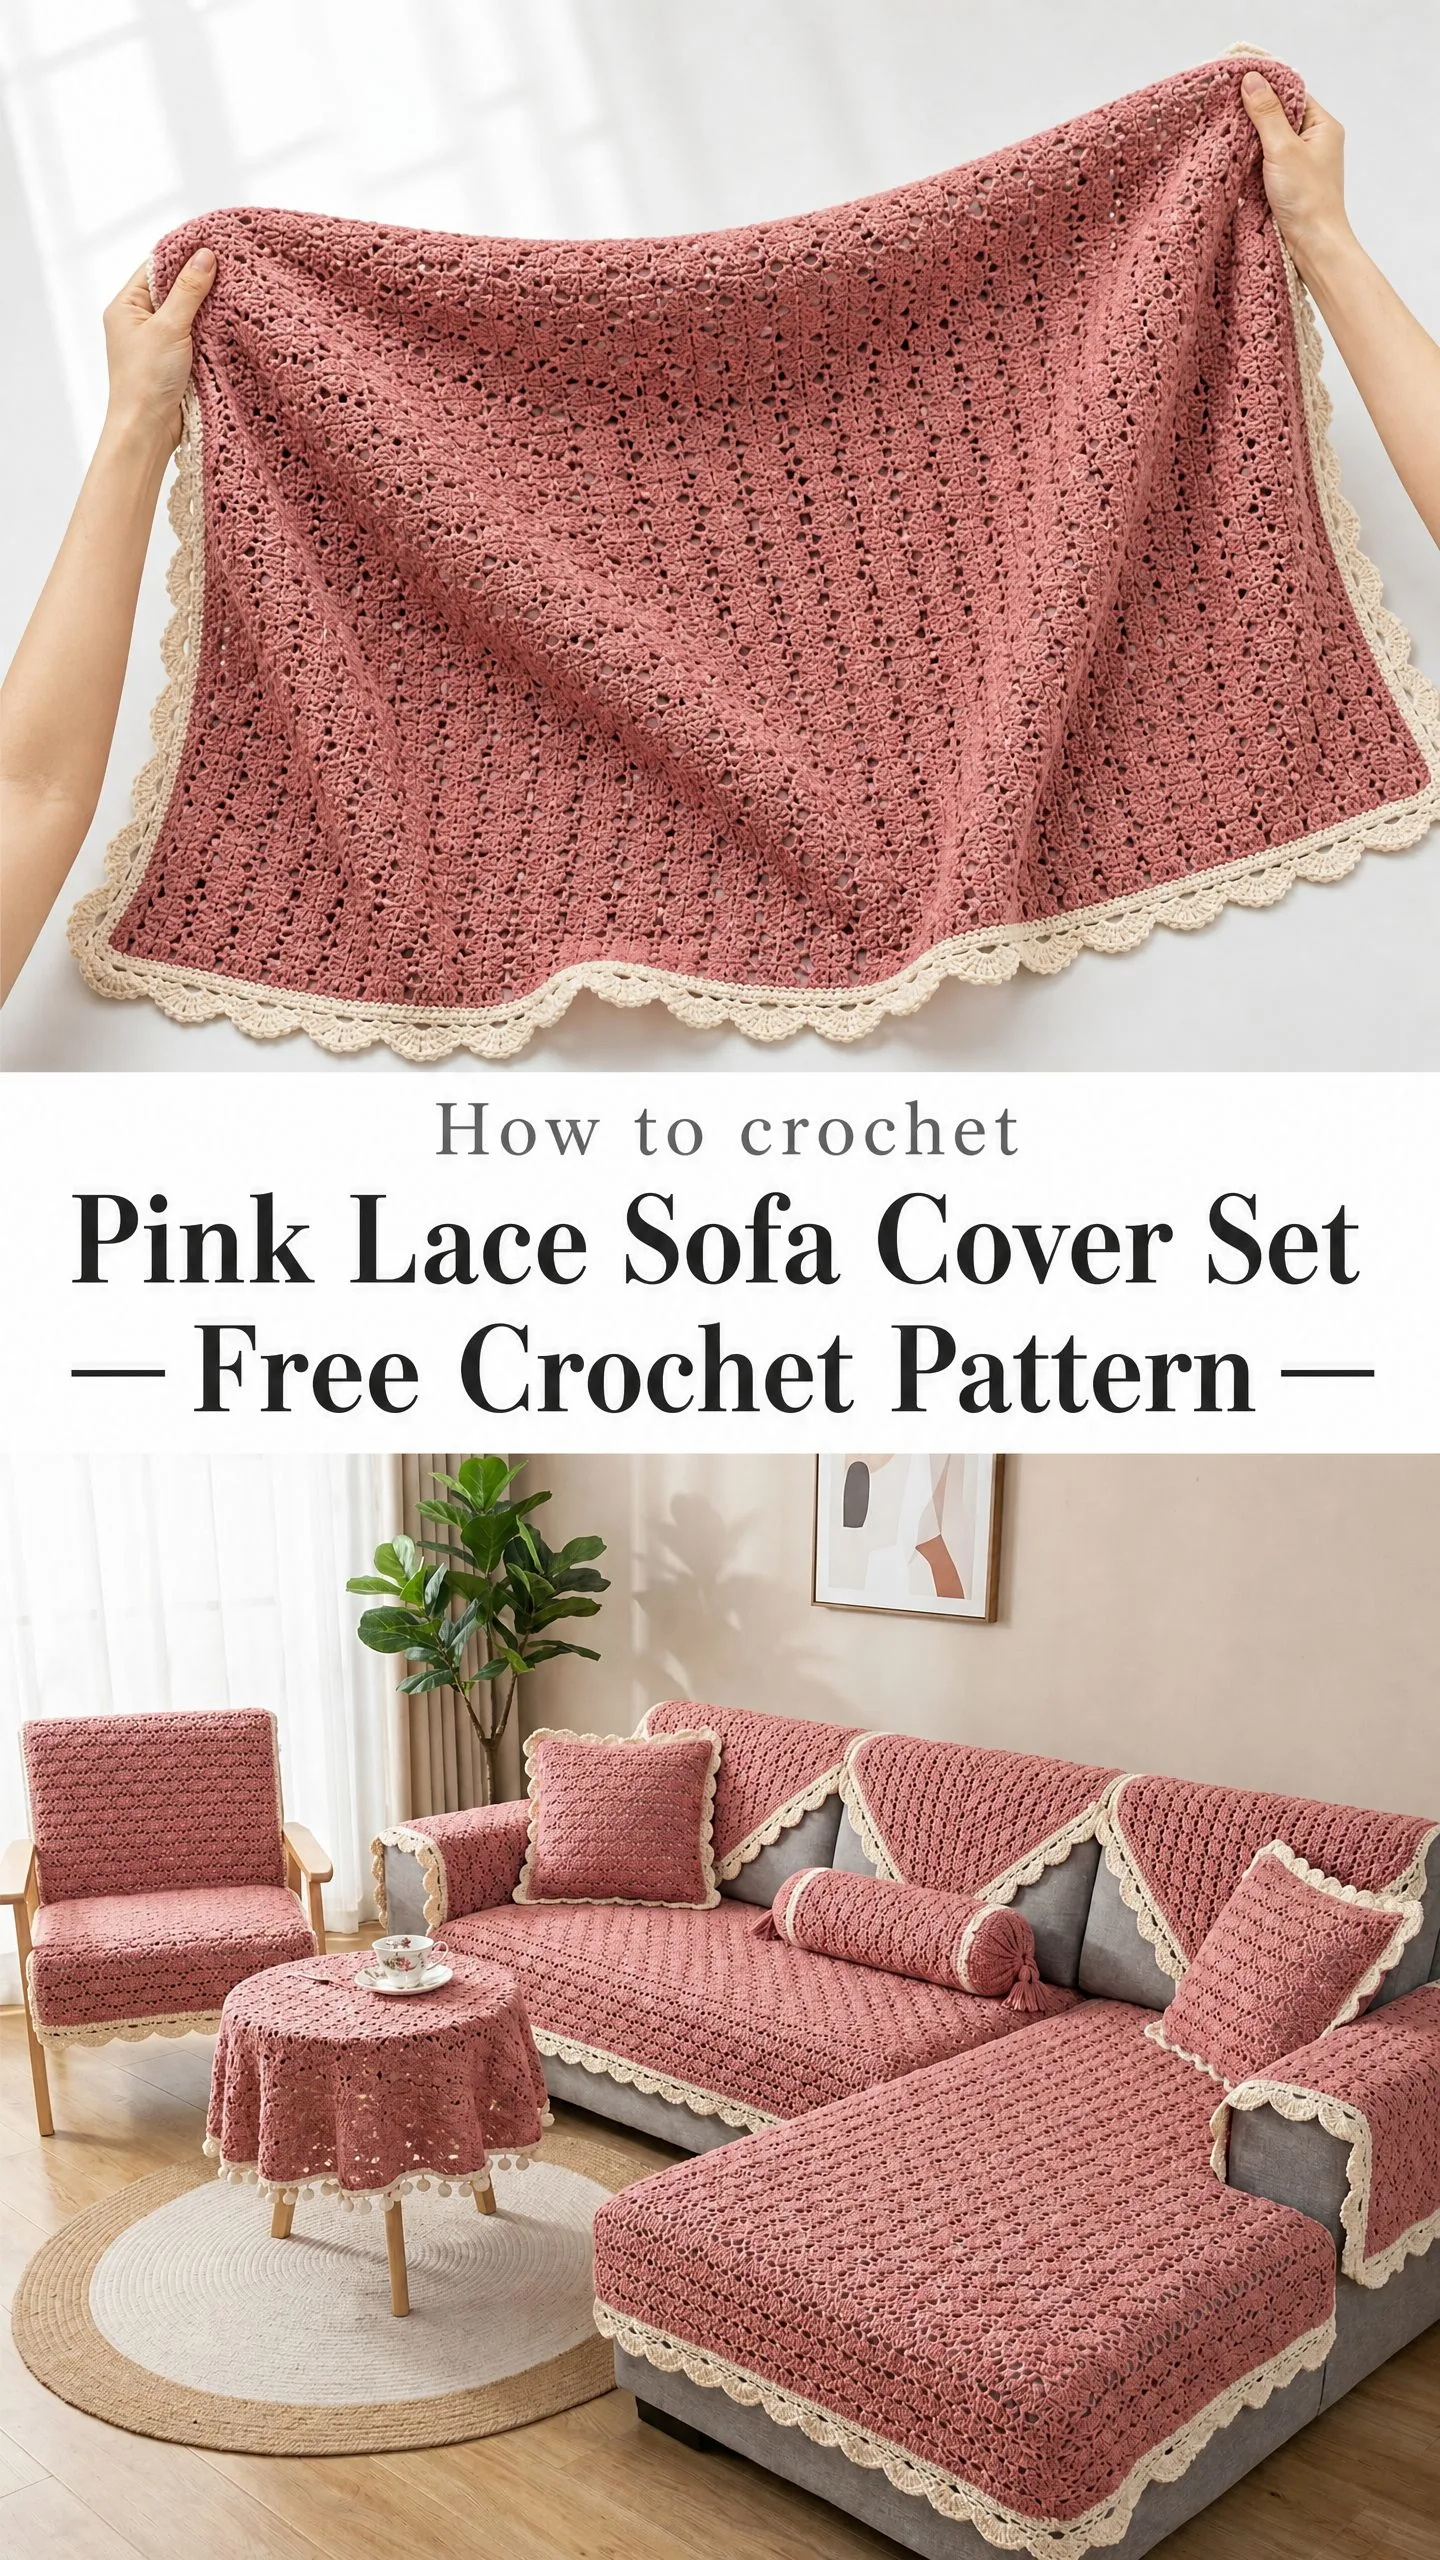
The secret is that large home projects are not actually harder than small ones. They just take more time. The V-stitch mesh that creates this beautiful textured fabric is rhythmic and meditative. Once you get the hang of it, you will be crocheting on autopilot while watching your favorite shows.
Whether you are an ambitious beginner ready for your first big project or an experienced crocheter looking for something impressive yet relaxing, this pattern breaks everything down step by step. I will walk you through every panel, every border row, and every finishing detail. By the end, you will have a complete living room transformation that looks like it came from a high-end home goods store.
What You Will Be Making
This complete crochet sofa cover set includes everything you need to create a cohesive, designer look for your living room. The dusty rose colorway with cream scallop borders gives it that romantic, cottage-style aesthetic that photographs beautifully and feels incredibly cozy.
The full set includes:
Every single piece uses the same V-stitch mesh pattern and the same cream scallop border. This means you learn one technique and repeat it across the entire set. The consistency creates that pulled-together look that makes your living room feel intentionally designed.
Skill Level
This pattern is rated Advanced Beginner to Intermediate. The main stitch is simple and highly repetitive, making large panels completely manageable. The scallop border requires counting and rhythm but uses only chains, single crochet (sc), and shells. Assembling multiple panels and matching borders requires organizational skill, but no complex shaping, colorwork, or garment construction is involved.
Time Estimate
The full set requires approximately 60 to 90 hours depending on your pace. Here is a breakdown by piece:
I recommend tackling this set one piece at a time. Start with a pillow cover to practice the stitch pattern on a smaller scale before committing to the larger panels.
Finished Sizes
All sizes are designed for a standard L-shaped sectional with a chaise. You can adjust panel dimensions using the gauge information below.
| Piece | Imperial | Metric |
|---|---|---|
| Main Sofa Seat Panel (3-seat section) | 90 in x 28 in | 229 cm x 71 cm |
| Chaise Seat Panel | 60 in x 40 in | 152 cm x 102 cm |
| Sofa Back Panel | 90 in x 20 in | 229 cm x 51 cm |
| Armchair Seat Cover | 28 in x 28 in | 71 cm x 71 cm |
| Armchair Back Cover | 28 in x 36 in | 71 cm x 91 cm |
| Round Table Topper | 20 in diameter | 51 cm diameter |
| Square Pillow Cover (x2) | 18 in x 18 in | 46 cm x 46 cm |
| Bolster Cover | 20 in x 7 in diameter | 51 cm x 18 cm diameter |
Materials
Yarn
Main Color (MC): Dusty rose or antique rose, worsted weight (4), 100 percent cotton or cotton-acrylic blend. Total estimated yardage: 5,500 yards / 5,030 meters for the full set.
Contrast Color (CC): Cream or off-white, worsted weight (4), same fiber content. Total estimated yardage: 900 yards / 823 meters for borders across the full set.
Recommended Yarn Options
Option 1: Lion Brand 24/7 Cotton (100 percent mercerized cotton, worsted weight, 186 yards per 3.5 oz skein). This yarn has excellent stitch definition, washes beautifully, and the cotton weight gives the drape needed for furniture covers. In MC: approximately 30 skeins. In CC: approximately 5 skeins.
Option 2: Paintbox Yarns Simply DK Cotton (100 percent cotton). Use US Size J-10 / 6.0 mm hook as written. Excellent color range including shades close to the dusty rose shown. In MC: approximately 32 skeins. In CC: approximately 6 skeins.
Option 3: Premier Yarns Basix Worsted (80 percent acrylic, 20 percent wool, 220 yards per 3.5 oz skein). For a softer, slightly stretchy hand with the same visual result. In MC: approximately 25 skeins. In CC: approximately 4 skeins.
Substitution Note: Any smooth worsted weight yarn will work. Avoid fuzzy or textured novelty yarns as they obscure the V-stitch mesh pattern. Cotton or cotton-blend is strongly preferred for furniture covers because it is washable, does not pill under friction, and lies flat without curling.
Hooks
Notions
Gauge
Main fabric, US J-10 / 6.0 mm hook, V-stitch mesh pattern:
16 stitches (8 V-stitches) x 10 rows = 4 in x 4 in / 10 cm x 10 cm, measured after light steam blocking.
Border scallop, US I-9 / 5.5 mm hook:
One scallop repeat (11 stitches across the working edge) = approximately 2.75 in / 7 cm wide.
Gauge swatch instructions: Chain 35. Work V-stitch mesh pattern for 12 rows. Block lightly. Measure center 4 in x 4 in area only, not edges. Adjust hook size if needed.
Always swatch before beginning any panel. This is especially important for a furniture cover where fit matters.
Abbreviations
Special Stitches
V-Stitch (V-st)
Work (dc, ch 1, dc) all into the same stitch or space. This creates a small V shape. The ch-1 space at the center of the V is the landing point for the next row’s V-stitches.
Here is exactly how to work it:
1. Insert hook into designated stitch or ch-sp
2. Yarn over, pull up a loop, yarn over, pull through 2 loops (first dc made)
3. Chain 1
4. Yarn over, insert hook into the same stitch or space
5. Yarn over, pull up a loop, yarn over, pull through 2 loops (second dc made)
The V-st is complete: 2 dc with 1 ch between them, sharing the same base.
Scallop Border Shell
Work (dc, ch 1, dc, ch 1, dc, ch 1, dc, ch 1, dc) all into the same stitch. This is a 5-dc fan used in the border scallop row.
Picot
Chain 3, slip stitch into the first chain made. Creates a small loop accent between scallops.
Pattern Notes
1. All main panels are worked flat in rows using the V-stitch mesh. The turning chain at the start of every row counts as the first dc of the first V-st of that row.
2. The V-stitch mesh has a right side and wrong side. The RS shows a cleaner, more defined V texture. Mark the RS on your first row with a locking stitch marker.
3. The cream border is worked after all main panels are complete and blocked. Do not attach the border before blocking or it will distort the panel shape.
4. Panels are not seamed to each other. They are laid onto furniture separately and overlap at the corner of the sectional.
5. For the round table topper, work begins from the center ring outward in joined rounds.
6. When counting V-stitch rows, each ch-3 turning chain counts as 1 dc, so the turning ch-3 plus 1 dc into the same base stitch forms the first V-st of the row.
7. Steam block all panels before attaching borders. Pin to finished dimensions on blocking mats.
Pink Lace Sofa Cover Set Crochet Pattern Instructions
Section 1: Main Sofa Seat Panel (90 in x 28 in)
Foundation: Chain 182.
Row 1 (RS): Starting in 4th ch from hook (skipped 3 chs count as first dc of first V-st), work 1 dc into same ch (first V-st made), skip 1 ch, work V-st into next ch, continue across: (V-st into next ch, skip 1 ch) across to last ch, work 1 dc into last ch (edge dc). Turn. (90 V-sts, plus 1 edge dc each side = 92 total dc)
Row 2 (WS): Ch 3, turn (counts as first dc of first V-st). Work 1 dc into the base of the turning ch (completing first V-st), then work V-st into each ch-1 sp across all 90 V-sts, ending with 1 dc into the top of the turning ch-3 from the previous row. Turn. (90 V-sts plus 2 edge dc)
Rows 3 through 70: Rep Row 2. Each row is identical. (90 V-sts plus 2 edge dc per row)
At gauge of 10 rows per 4 in, 70 rows equals 28 in deep.
Checkpoint: After Row 70, your panel should measure approximately 90 in wide and 28 in deep before blocking.
Fasten off MC. Block to finished dimensions. Set aside for border.
Section 2: Chaise Seat Panel (60 in x 40 in)
Foundation: Chain 122.
Row 1 (RS): Starting in 4th ch from hook, work 1 dc into same ch (first V-st), (skip 1 ch, V-st into next ch) across to last ch, 1 dc into last ch. Turn. (120 V-sts plus 2 edge dc)
Rows 2 through 100: Rep Row 2 of Section 1. (120 V-sts plus 2 edge dc per row)
At gauge, 100 rows equals 40 in deep.
Checkpoint: Panel should measure 60 in wide and 40 in deep after Row 100.
Fasten off MC. Block to finished dimensions. Set aside for border.
Section 3: Sofa Back Drape Panel (90 in x 20 in with pointed lower edge)
The back drape hangs over the sofa back and has three pointed triangles hanging down at the lower edge.
Foundation: Chain 182.
Row 1 (RS): Same as Section 1 Row 1. (90 V-sts plus 2 edge dc)
Rows 2 through 50: Rep as before. (90 V-sts plus 2 edge dc)
At gauge, 50 rows equals 20 in.
Checkpoint: Panel measures 90 in wide and 20 in tall.
Pointed Lower Edge Triangles
Divide the 90 V-stitches into three equal sections of 30 V-stitches each. Place markers at V-sts 30 and 60 to mark divisions.
Triangle 1 (leftmost, 30 V-sts wide):
Row 1 of Triangle: Attach MC at left edge. Ch 3, 1 dc into same st (first V-st), work V-st across next 29 ch-1 sps (30 V-sts total), 1 dc into top of V-st 30 edge. Turn. (30 V-sts plus 2 edge dc)
Row 2: Ch 3, turn. 1 dc into base of ch-3 (first V-st), work V-st across 28 ch-1 sps, skip the last ch-1 sp (decrease at right edge), 1 dc into last edge dc. Turn. (29 V-sts plus 2 edge dc)
Row 3: Ch 3, turn. 1 dc into base (first V-st), work V-st across 27 ch-1 sps, skip last ch-1 sp (decrease), 1 dc into edge dc. Turn. (28 V-sts)
Continue decreasing 1 V-st at the right edge every row until 1 V-st remains.
Final Triangle Row: Ch 3, 1 dc into base (1 V-st), 1 dc into edge dc. Fasten off. (1 V-st)
Triangle 2 (center): Attach MC at the ch-1 sp of V-st 31. For a symmetrical point, decrease 1 V-st at each end every row.
Row 1 of Triangle 2: (30 V-sts plus 2 edge dc)
Row 2: Sl st across first V-st, ch 3, work V-st across 27 ch-1 sps, skip last ch-1 sp, 1 dc into edge dc. Turn. (28 V-sts)
Row 3: Sl st across first V-st, ch 3, work V-st across 25 ch-1 sps, skip last ch-1 sp, 1 dc into edge dc. Turn. (26 V-sts)
Continue decreasing 2 V-sts per row until 2 V-sts remain.
Final row: V-st into single remaining ch-sp. Fasten off.
Triangle 3 (rightmost): Work identically to Triangle 1, mirrored (decrease at left edge instead of right edge).
Block the full back drape panel with triangles.
Section 4: Armchair Seat Cover (28 in x 28 in)
Foundation: Chain 58.
Row 1 (RS): Work as established. (56 V-sts plus 2 edge dc)
Rows 2 through 70: Rep as established. (56 V-sts plus 2 edge dc per row)
Checkpoint: Panel measures 28 in x 28 in.
Fasten off MC. Block. Set aside for border.
Section 5: Armchair Back Cover (28 in x 36 in)
Foundation: Chain 58.
Row 1 (RS): Work as established. (56 V-sts plus 2 edge dc)
Rows 2 through 90: Rep as established. (56 V-sts plus 2 edge dc per row)
Checkpoint: Panel measures 28 in wide x 36 in tall.
Fasten off MC. Block. Set aside for border.
Section 6: Round Table Topper (20 in diameter)
Foundation Ring: Make a magic ring (or ch 4, sl st to first ch to form ring).
Round 1: Ch 3 (counts as first dc), work 11 dc into ring, sl st to top of ch-3 to join. (12 dc)
Round 2: Ch 3, 1 dc into same base st (V-st 1), work 2 V-sts into each of the 12 dc. Sl st to top of beg ch-3 to join. (24 V-sts)
Round 3: Ch 3, 1 dc into base (first V-st), V-st into each ch-1 sp around, placing 2 V-sts into every 4th ch-1 sp (12 increases). Sl st to join. (36 V-sts)
Round 4: V-st into each ch-1 sp around, placing 2 V-sts into every 3rd ch-1 sp (12 increases). Sl st to join. (48 V-sts)
Round 5: V-st into each ch-1 sp around, placing 2 V-sts into every 4th ch-1 sp (12 increases). Sl st to join. (60 V-sts)
Round 6: V-st into each ch-1 sp, placing 2 V-sts into every 5th ch-1 sp (12 increases). Sl st to join. (72 V-sts)
Round 7: V-st into each ch-1 sp, placing 2 V-sts into every 6th ch-1 sp (12 increases). Sl st to join. (84 V-sts)
Round 8: V-st into each ch-1 sp, placing 2 V-sts into every 7th ch-1 sp (12 increases). Sl st to join. (96 V-sts)
Round 9: V-st into each ch-1 sp, no increases. Sl st to join. (96 V-sts)
Round 10: V-st into each ch-1 sp, placing 2 V-sts into every 8th ch-1 sp (12 increases). Sl st to join. (108 V-sts)
Round 11: V-st into each ch-1 sp, placing 2 V-sts into every 9th ch-1 sp (12 increases). Sl st to join. (120 V-sts)
Round 12: V-st into each ch-1 sp, no increases. Sl st to join. (120 V-sts)
Round 13: V-st into each ch-1 sp, placing 2 V-sts into every 10th ch-1 sp (12 increases). Sl st to join. (132 V-sts)
Checkpoint: After Round 13, the table topper should be approximately 20 in in diameter when pinned flat.
Fasten off MC. Block pinned flat to 20 in diameter circle. Set aside for border.
Section 7: Square Pillow Cover (18 in x 18 in, make 2)
Pillow Front Panel:
Foundation: Chain 38.
Row 1 (RS): Work as established. (36 V-sts plus 2 edge dc)
Rows 2 through 45: Rep as established. (36 V-sts plus 2 edge dc)
Checkpoint: Panel measures 18 in x 18 in.
Fasten off MC.
Pillow Back Panel: Work a second identical panel. Fasten off MC.
Assembly: Block both panels. Hold RS together (WS facing out). With tapestry needle and MC, mattress stitch or slip stitch seam three sides together. Turn RS out. Insert 18 in pillow form. Seam fourth side.
Section 8: Bolster Pillow Cover (20 in long, 7 in diameter)
Foundation: Chain 46. Sl st to first ch to join into a ring, being careful not to twist.
Round 1: Ch 3, 1 dc into base of ch-3 (first V-st), skip 1 ch, V-st into next ch around, ending sl st to top of beg ch-3. (44 V-sts)
Rounds 2 through 50: Ch 3, 1 dc into base (first V-st), V-st into each ch-1 sp around. Sl st to join. (44 V-sts per round)
Checkpoint: Tube measures 22 in in circumference and 20 in long.
End Caps (make 2):
Round 1: 12 dc into magic ring. Sl st to join. (12 dc)
Round 2: 2 dc into each dc. Sl st to join. (24 dc)
Round 3: (2 dc into next dc, 1 dc into next dc) around. Sl st to join. (36 dc)
Round 4: (2 dc into next dc, 1 dc into next 2 dc) around. Sl st to join. (48 dc)
Seam one end cap to the tube. Insert bolster form. Attach second end cap.
Tassel: Cut 20 lengths of MC each 10 in long. Fold in half. Tie a separate 12-inch length around the fold tightly. Trim ends to 4 in. Attach to center of each end cap.
Border Instructions for All Panels
The cream scallop border is applied to all finished and blocked panels. Use CC yarn and US I-9 / 5.5 mm hook throughout.
Border Row 1: Foundation Single Crochet
Join CC with sl st to any corner.
Corner treatment: Work 3 sc into each corner stitch.
Along row-end edges (vertical sides): Work 1 sc into each dc row-end, approximately 1 sc per row end dc.
Along top and bottom edges: Work 1 sc into the ch-1 sp of each V-st, and 1 sc into each dc. This gives approximately 3 sc per V-st along horizontal edges.
Important: The scallop in Border Row 2 uses a repeat of 11 sc. Adjust your sc count during Border Row 1 to reach the nearest multiple of 11 along each edge.
Border Row 2: Scallop Shell Row
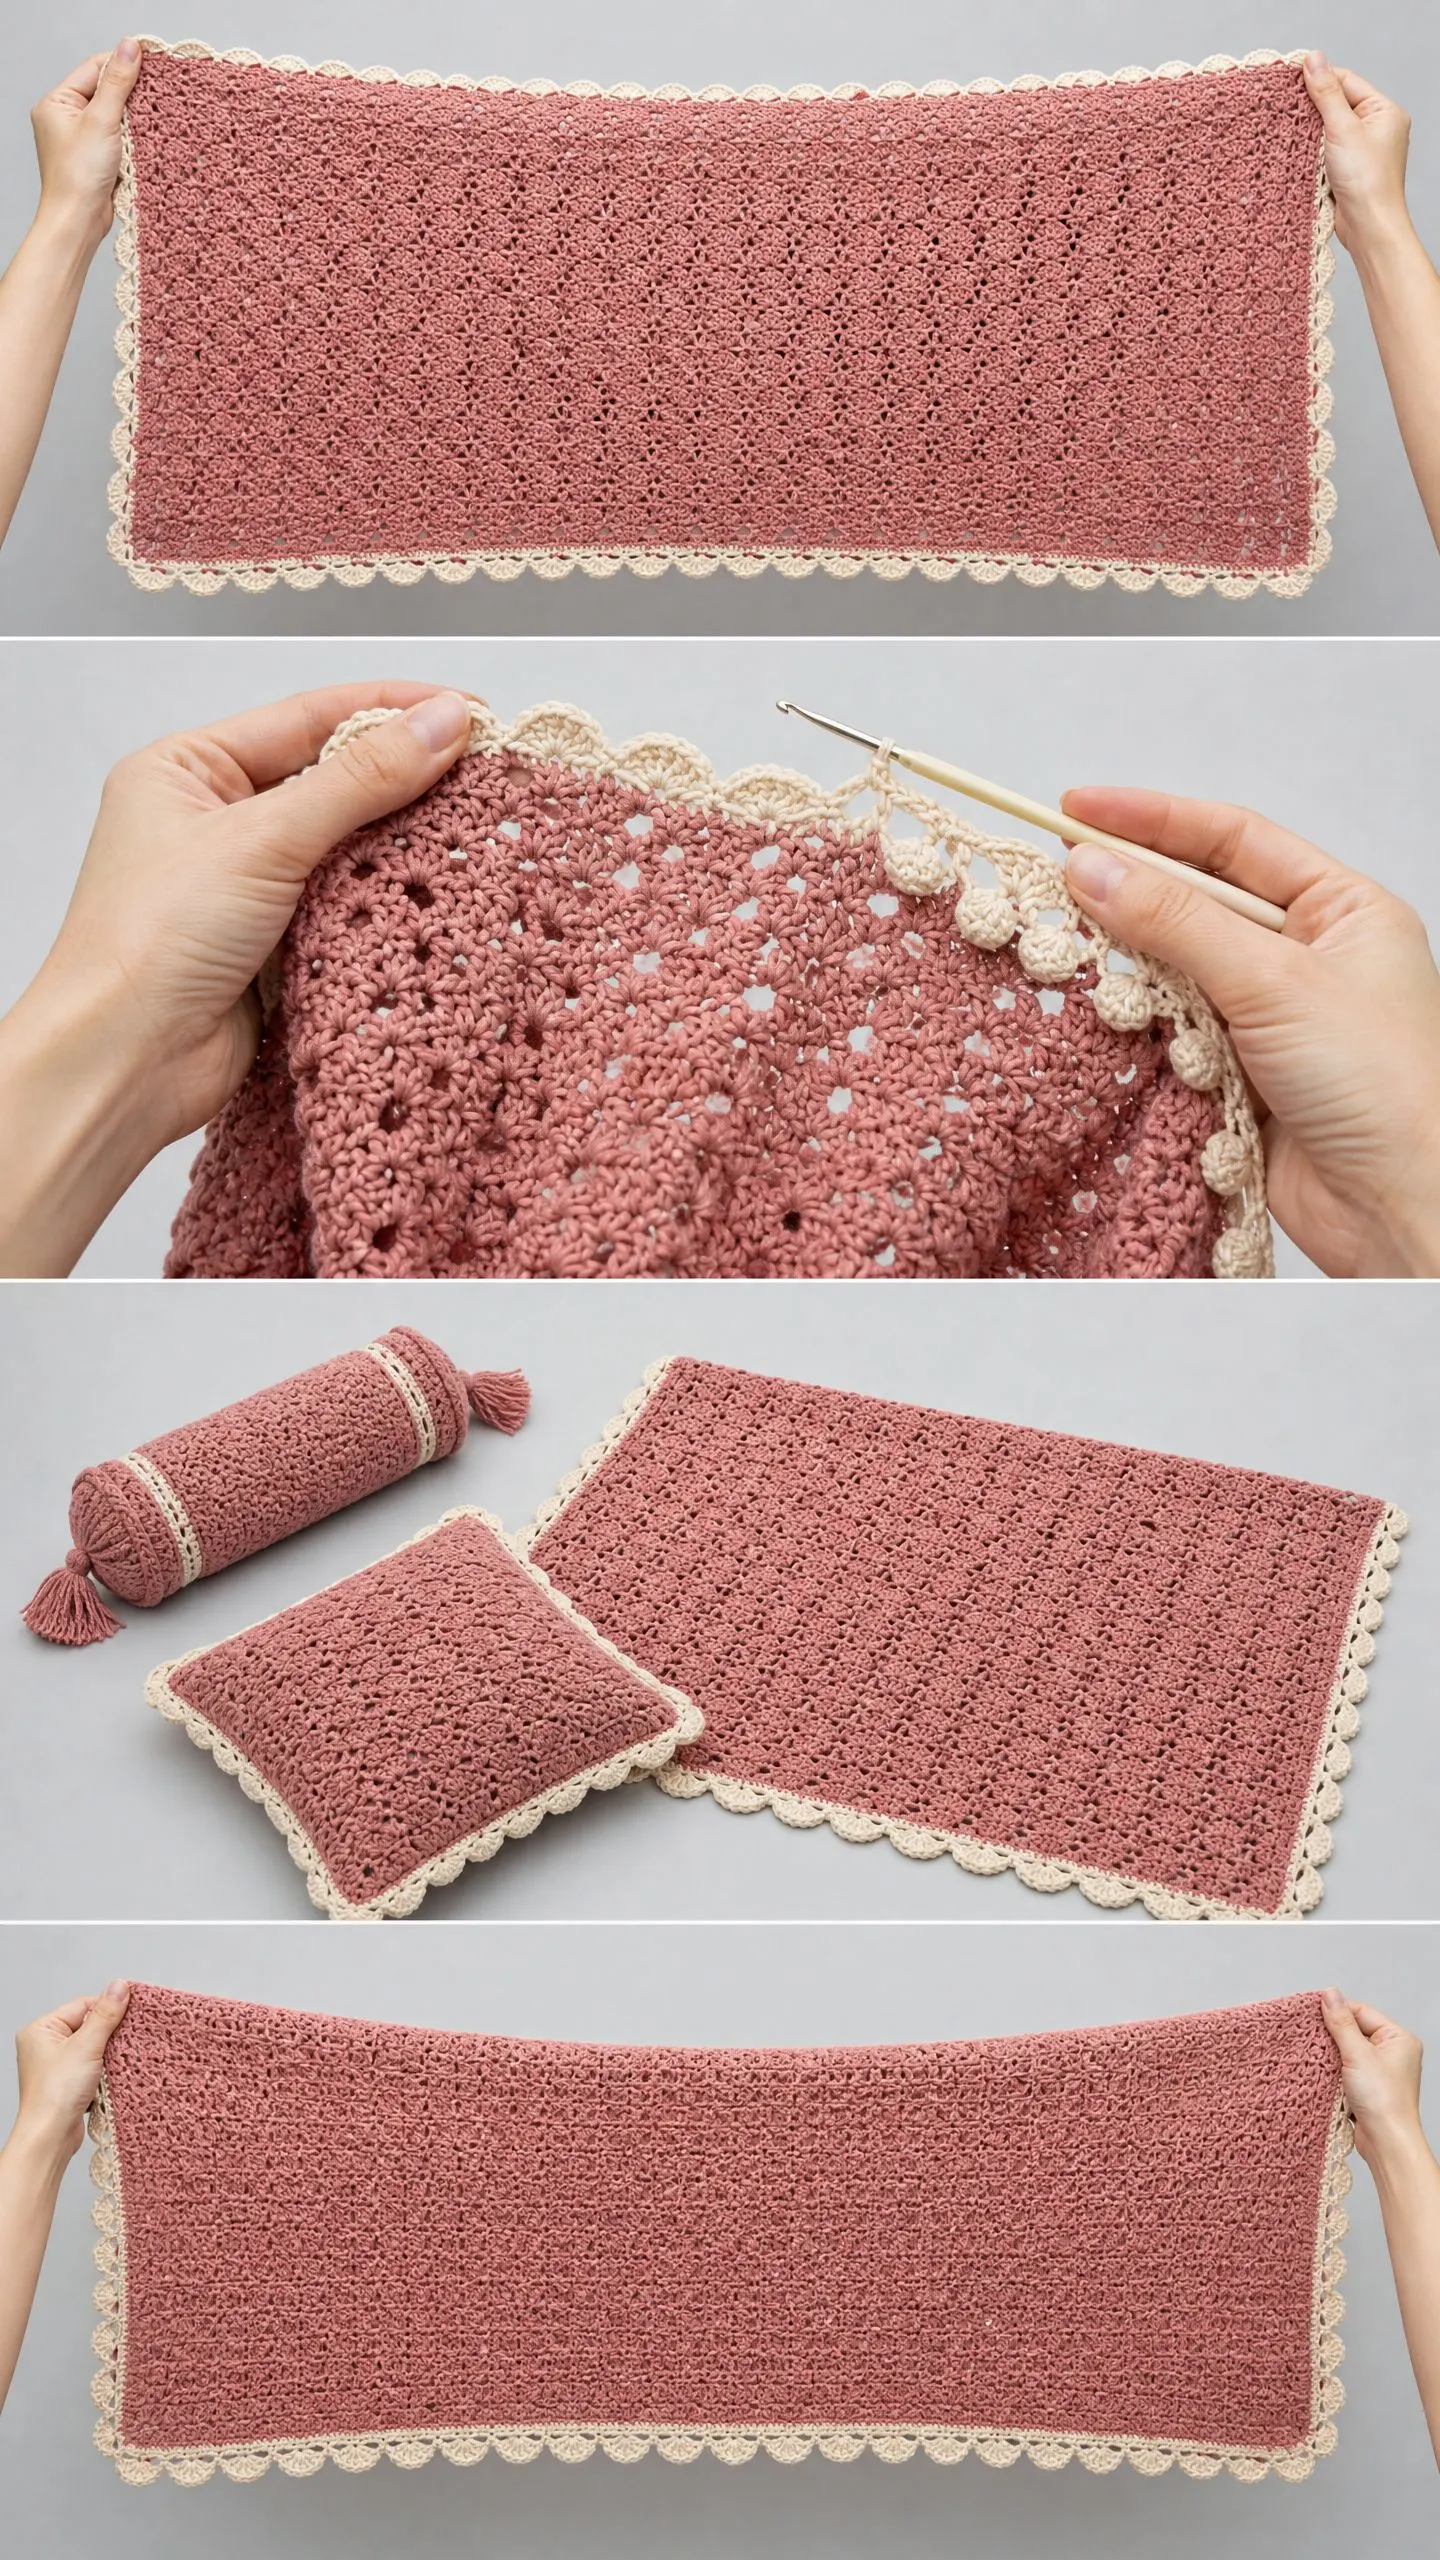
Work shell into every 6th sc, with sc between shells to create the scallop effect. Work picots between each scallop for the decorative finish shown in the image.
Border Row 3: Final Edge
Work 1 sc into each dc of each shell, with picot at the center of each shell for the finished lace look.
Finishing
Weave in all ends securely. Steam block all bordered panels one final time. Optional: attach non-slip furniture pad backing to the underside of each panel to prevent sliding.
Arrange panels on your furniture. The main sofa seat panel and chaise panel overlap at the sectional corner. The back drape hangs over the sofa back with triangles visible from behind.
I hope you absolutely love making this pink lace sofa cover set. It is such a satisfying project to watch come together, and the finished result is truly stunning. You have got this!
If you found this crochet tutorial helpful, I would love for you to save it to your Pinterest boards so you can find it easily when you are ready to start. And please drop a comment below if you make this set. I cannot wait to see your beautiful creations!
