
I call this one the "Maple Dress" because I designed the first version on a crisp October afternoon when the maple tree outside my window was turning that exact shade of burnt orange. That original sketch sat in my notebook for almost two years before I finally worked out the math for the filet mesh skirt panels.
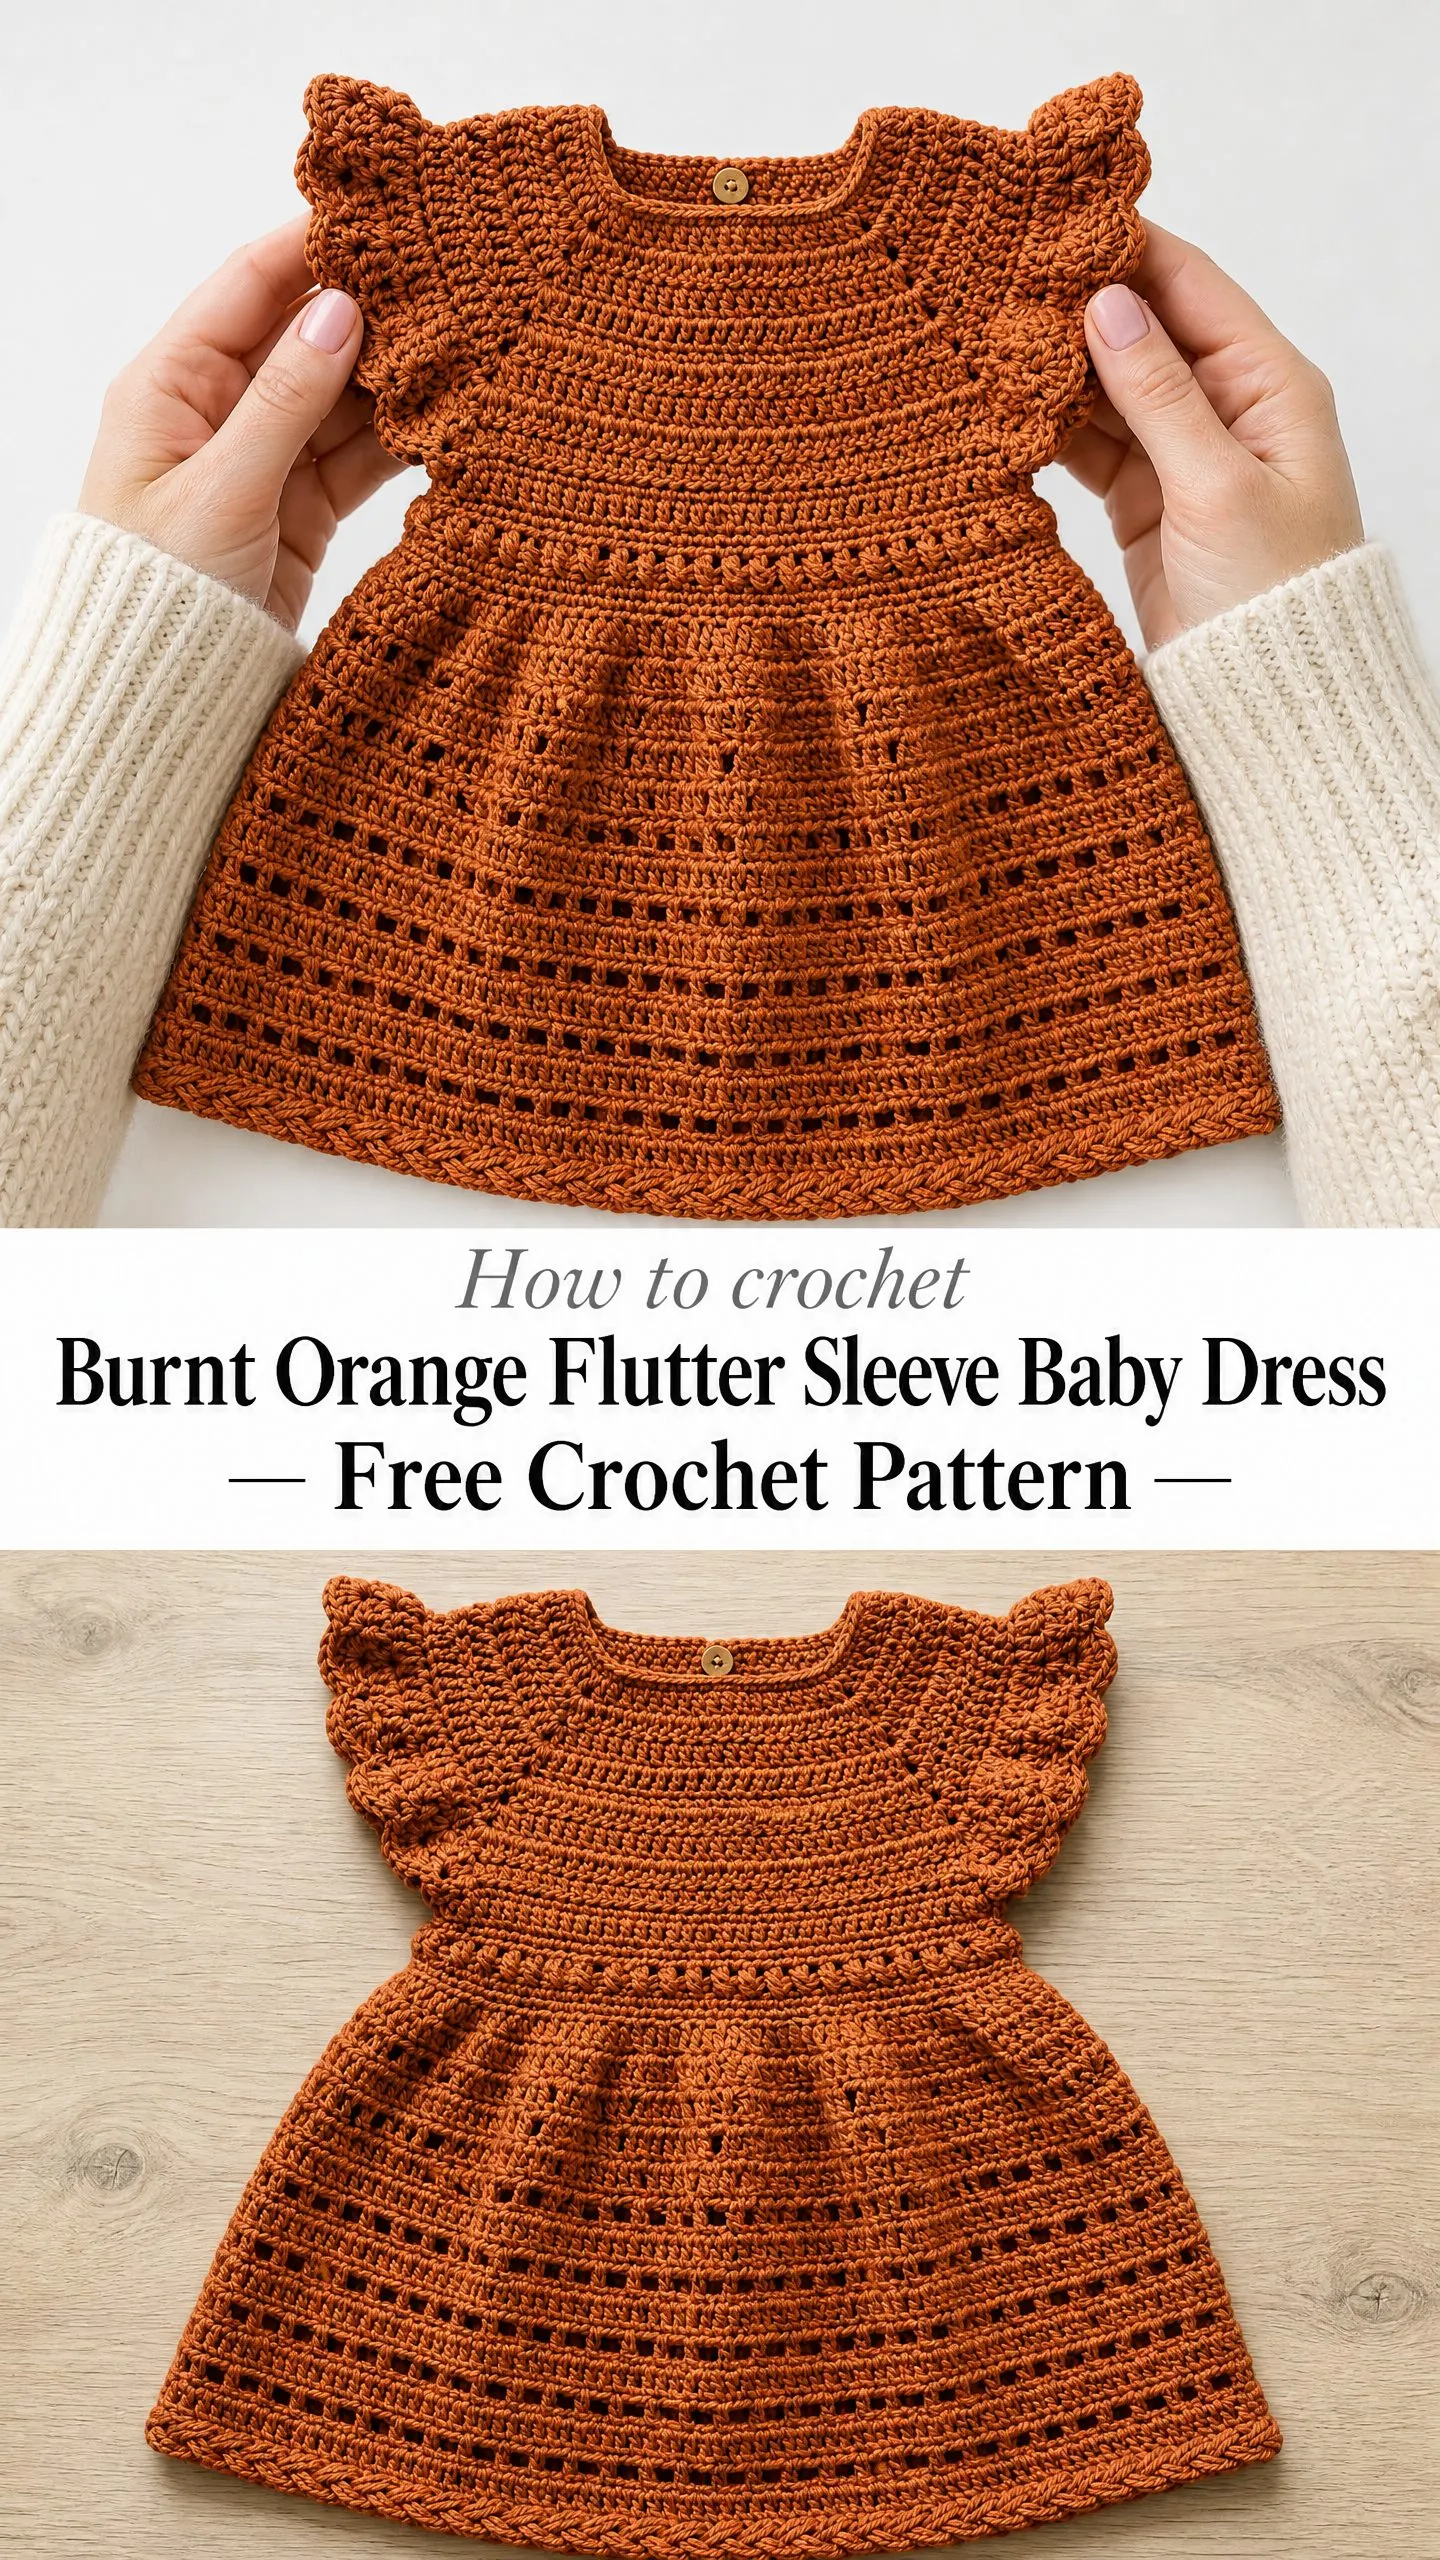
The dress was originally made for my niece’s first birthday party. She wore it with little white tights and stole the show. Since then, I have made seven more in different colors for friends, baby showers, and one very special NICU donation.
Today I am sharing the complete pattern with you. It is an intermediate level project that teaches you top down yoke construction, flutter sleeve shaping, and a gorgeous braided hem border. If you have made a granny square but never tackled a garment, this is your stretch goal project. If you have made a top down sweater before, you will feel right at home.
Why This Baby Dress Pattern Works
This crochet baby dress combines several techniques that create a professional looking finished piece. The fitted yoke is worked seamlessly from the neckline down using raglan style increases. This means no seaming at the shoulders and a smooth, comfortable fit across baby’s chest and back.
The flutter sleeves add a sweet, feminine touch without the bulk of full sleeves. They are worked separately and attached to the armhole openings, which gives you complete control over the ruffle size and shape.
The A-line skirt uses alternating solid rounds and filet mesh panels to create visual interest and beautiful drape. Cotton yarn is perfect here because it has enough weight to hang nicely while staying breathable for baby’s comfort.
The braided hem border is the showstopper detail. It looks complex but is actually a simple three strand braid that you attach to the finished hem. This technique adds structure to the hem edge and creates that polished, heirloom quality look.
Skill Level and Time Estimate
This pattern is rated intermediate. You should be comfortable with working in the round, increasing and decreasing, and following a multi section pattern.
The techniques that might be new to you include top down yoke construction with raglan shaping, filet mesh stitch patterning, and the three dimensional braided border. I walk through each of these in detail below.
Time estimate: 8 to 12 hours for an experienced intermediate crocheter working the 6 to 12 month size. If this is your first top down garment, add 3 to 4 extra hours for learning the construction method.
Finished Measurements
The pattern includes two sizes. The primary instructions are for 6 to 12 months, with 12 to 18 month measurements in parentheses where numbers differ.
Size 6 to 12 months:
Size 12 to 18 months:
Materials Needed for This Crochet Baby Dress
Yarn: DK weight, also called Light Worsted (CYCA 3). Choose 100% cotton or a cotton blend for the best drape and breathability.
Yardage:
Color: Single color in burnt orange or terracotta. This deep rust shade photographs beautifully and works for all seasons.
Hook: US size E-4 (3.5 mm)
Notions:
Yarn Suggestions
Lion Brand 24/7 Cotton in Terracotta is my top recommendation. It has consistent twist, excellent stitch definition for the filet mesh sections, and it is machine washable. This is widely available at most craft stores.
Paintbox Yarns Simply DK in Burnt Terracotta is a budget friendly alternative with rich color saturation. The smooth texture shows the braid border beautifully.
Drops Safran in Rust contains 60% cotton and 40% viscose. The viscose adds subtle sheen and lovely drape. Note that this yarn runs slightly lighter, so swatch carefully and adjust your hook size if needed.
Substitution tip: Any DK weight yarn that achieves gauge will work. I strongly recommend cotton or cotton blend over acrylic for infant garments because cotton breathes better and holds stitch definition. Always wash and dry your gauge swatch before measuring because cotton yarns can grow with washing.
Gauge
Gauge is critical for a fitted garment. Please swatch before beginning.
Single crochet gauge: 18 stitches x 22 rows = 4 inches (10 cm) in single crochet worked in the round, blocked
Double crochet gauge: 14 dc x 8 rows = 4 inches (10 cm) in standard double crochet, blocked
Filet mesh panel gauge: One mesh repeat (chain 1, double crochet) = approximately 0.57 inches (1.45 cm) wide
How to swatch: Chain 24. Work single crochet back and forth for 24 rows. Block your swatch, then measure an interior 4 inch (10 cm) square. If your swatch is too small, go up one hook size. If it is too large, go down one hook size.
Abbreviations (US Terms)
Let me define every stitch abbreviation you will encounter in this pattern:
Reading the pattern:
Special Stitches and Techniques
Scallop Edging (Flutter Sleeves)
This creates the pretty ruffled edge on the flutter sleeves. Each scallop uses 6 stitches total.
1. Skip 2 stitches
2. Work 5 dc into the next stitch (this creates the fan shape)
3. Skip 2 stitches
4. Slip stitch into the next stitch
Repeat these 4 steps across or around.
Mesh Stitch (Skirt Body)
The mesh stitch creates the open, lacy panels in the skirt. It is worked as follows:
Chain 1, then work [dc in next stitch, ch 1, skip 1 stitch] across, ending with dc in last stitch.
Each repeat is 2 stitches wide. On following rounds, you will either continue the mesh pattern or fill it in with solid double crochet depending on the instructions.
Braid Border (Hem)
This creates the beautiful braided rope edging at the hem. Do not worry, it looks much harder than it is.
Step 1: Cut 6 lengths of yarn, each measuring 3 times the circumference of the hem. For 6 to 12 months, cut each length approximately 54 inches (137 cm).
Step 2: Divide the 6 strands into 3 groups of 2 strands each.
Step 3: Attach the bundle to the hem at your join point using a lark’s head knot through the last row of the skirt.
Step 4: Braid the three groups in a standard 3 strand braid with moderate tension for the full hem circumference.
Step 5: Secure the braid end with a slip knot. Thread onto your yarn needle and sew invisibly to the starting point, creating a continuous braid loop.
Step 6: Using matching yarn and your yarn needle, tack the braid to the hem edge at every 1 inch (2.5 cm) interval to keep it flat and even.
Alternative method: If braiding feels awkward, you can create three separate crochet chains equal in length to the hem circumference, braid them together, and sew to the hem edge.
Pattern Instructions
Section 1: Neckband and Yoke Setup
The neckline circumference is 11 inches (28 cm) for size 6 to 12 months, or 12 inches (30.5 cm) for 12 to 18 months.
Foundation chain: Ch 51 (57).
The neckband is worked flat for 2 rows first to create the back opening, then joined.
Row 1 (neckband, RS): Ch 1, sc in each ch across. Turn. [50 sc (56 sc)]
Row 2 (button loop row, WS): Ch 1, sc in first 2 sts, ch 4, sk 1 st (button loop made), sc in each remaining st across. Turn. [49 sc + 1 ch-4 loop = 50 sts worked (55 sc + 1 ch-4 loop = 56 sts worked)]
Joining round: Ch 1, sc in each st and ch across row, then sl st to first sc to form ring. From this point, all work is in the round. [50 sc (56 sc)]
Checkpoint: Your neckband should measure approximately 11 inches (28 cm) in circumference and 0.5 inches (1.3 cm) tall.
Section 2: Raglan Yoke
The yoke is worked in the round with 4 raglan increase points. Place your markers to divide the round as follows:
For 6 to 12 months (50 stitches):
For 12 to 18 months (56 stitches):
Raglan increase round: Each increase round adds 8 stitches total. You work 1 increase on each side of each of the 4 markers.
How to work the raglan increase: Work to 1 stitch before marker, 2 dc in next stitch (increase before marker), slip marker, 2 dc in next stitch (increase after marker), continue around.
Work this increase round for:
Stitch count after each yoke round (6 to 12 months):
Stitch count after each yoke round (12 to 18 months):
Checkpoint: After completing all yoke rounds, the yoke should measure approximately 4.5 inches (11.5 cm) deep from the neckband for 6 to 12 months, or 5 inches (12.7 cm) for 12 to 18 months. The 4 increase lines should be clearly visible as diagonal ridges.
Section 3: Separate Sleeves from Body
Now you will place the sleeve stitches on hold and continue working the body only.
Separation round (6 to 12 months):
Dc across the Back 40 sts. Place the next 25 sts (Left sleeve panel) on waste yarn. Ch 2 (underarm bridge). Dc across the Front 40 sts. Place the next 25 sts (Right sleeve panel) on waste yarn. Ch 2 (underarm bridge). Sl st to top of first dc of back to join. [84 dc]
Separation round (12 to 18 months):
Back 44 sts, place 28 on hold, ch 2, Front 44 sts, place 28 on hold, ch 2. [92 dc]
Checkpoint: Measure across the widest point of the body when folded flat. It should be approximately 9 inches (23 cm) for 6 to 12 months, or 10 inches (25.5 cm) for 12 to 18 months.
Section 4: Bodice
Work even in rounds of dc with no increases or decreases.
6 to 12 months: Work 4 rounds of dc. (84 dc each round)
12 to 18 months: Work 5 rounds of dc. (92 dc each round)
Each round: Ch 3, dc in each st around, sl st to top of ch-3.
Section 5: Waist Transition Round
This single round creates a visual and structural waist.
Waist Rnd: Ch 1, sc BLO in each st around, sl st to first sc. (84 sc / 92 sc)
Working in the back loop only draws the fabric inward slightly, creating definition at the waist before the skirt expands.
Section 6: Skirt
The skirt alternates solid rounds with mesh rounds and includes strategic increase rounds for the A-line shape.
Skirt Rnd 1 (Increase Setup, 6 to 12 months): Ch 3, [dc in next st, 2 dc in next st] around. (126 dc)
Skirt Rnd 1 (Increase Setup, 12 to 18 months): Ch 3, [dc in next st, 2 dc in next st] around. (138 dc)
Skirt Rounds Sequence (6 to 12 months):
Skirt Rnd 2 (Solid): Ch 3, dc in each st around, sl st to top of ch-3. (126 dc)
Skirt Rnd 3 (Mesh): Ch 4, sk 1, [dc in next st, ch 1, sk 1] x 62 times, sl st to 3rd ch of ch-4. (126 positions)
Skirt Rnd 4 (Solid): Ch 3, dc in each dc and each ch-1 sp around. (126 dc)
Skirt Rnd 5 (Increase Solid): Ch 3, [dc in next 5 sts, 2 dc in next st] x 21 times. (147 dc)
Skirt Rnd 6 (Solid): Ch 3, dc in each st around. (147 dc)
Skirt Rnd 7 (Mesh): Ch 4, sk 1, [dc in next st, ch 1, sk 1] x 73 times, dc in last st. (147 positions)
Skirt Rnd 8 (Solid): Ch 3, dc in each dc and each ch-1 sp around. (147 dc)
Skirt Rnd 9 (Mesh): Repeat Rnd 7. (147 positions)
Skirt Rnd 10 (Solid): Repeat Rnd 8. (147 dc)
Skirt Rnd 11 (Increase Solid): Ch 3, [dc in next 6 sts, 2 dc in next st] x 21 times. (168 dc)
Skirt Rnd 12 (Mesh): Ch 4, sk 1, [dc in next st, ch 1, sk 1] x 83 times, sl st. (168 positions)
Skirt Rnd 13 (Solid): Ch 3, dc in each dc and ch-1 sp. (168 dc)
Skirt Rnd 14 (Mesh): Repeat Rnd 12. (168 positions)
Fasten off after Rnd 14 for 6 to 12 months.
For 12 to 18 months: Follow the same pattern progression, continuing through Rnd 16. Your final stitch count will be 184 stitches.
Section 7: Hem Finishing Round
Hem Rnd (6 to 12 months): Join yarn to any st. Ch 1, sc in each dc and sc in each ch-1 sp around. Sl st to first sc. (168 sc)
Hem Rnd (12 to 18 months): (184 sc)
Now add the braid border following the special stitch instructions above.
Section 8: Flutter Sleeves
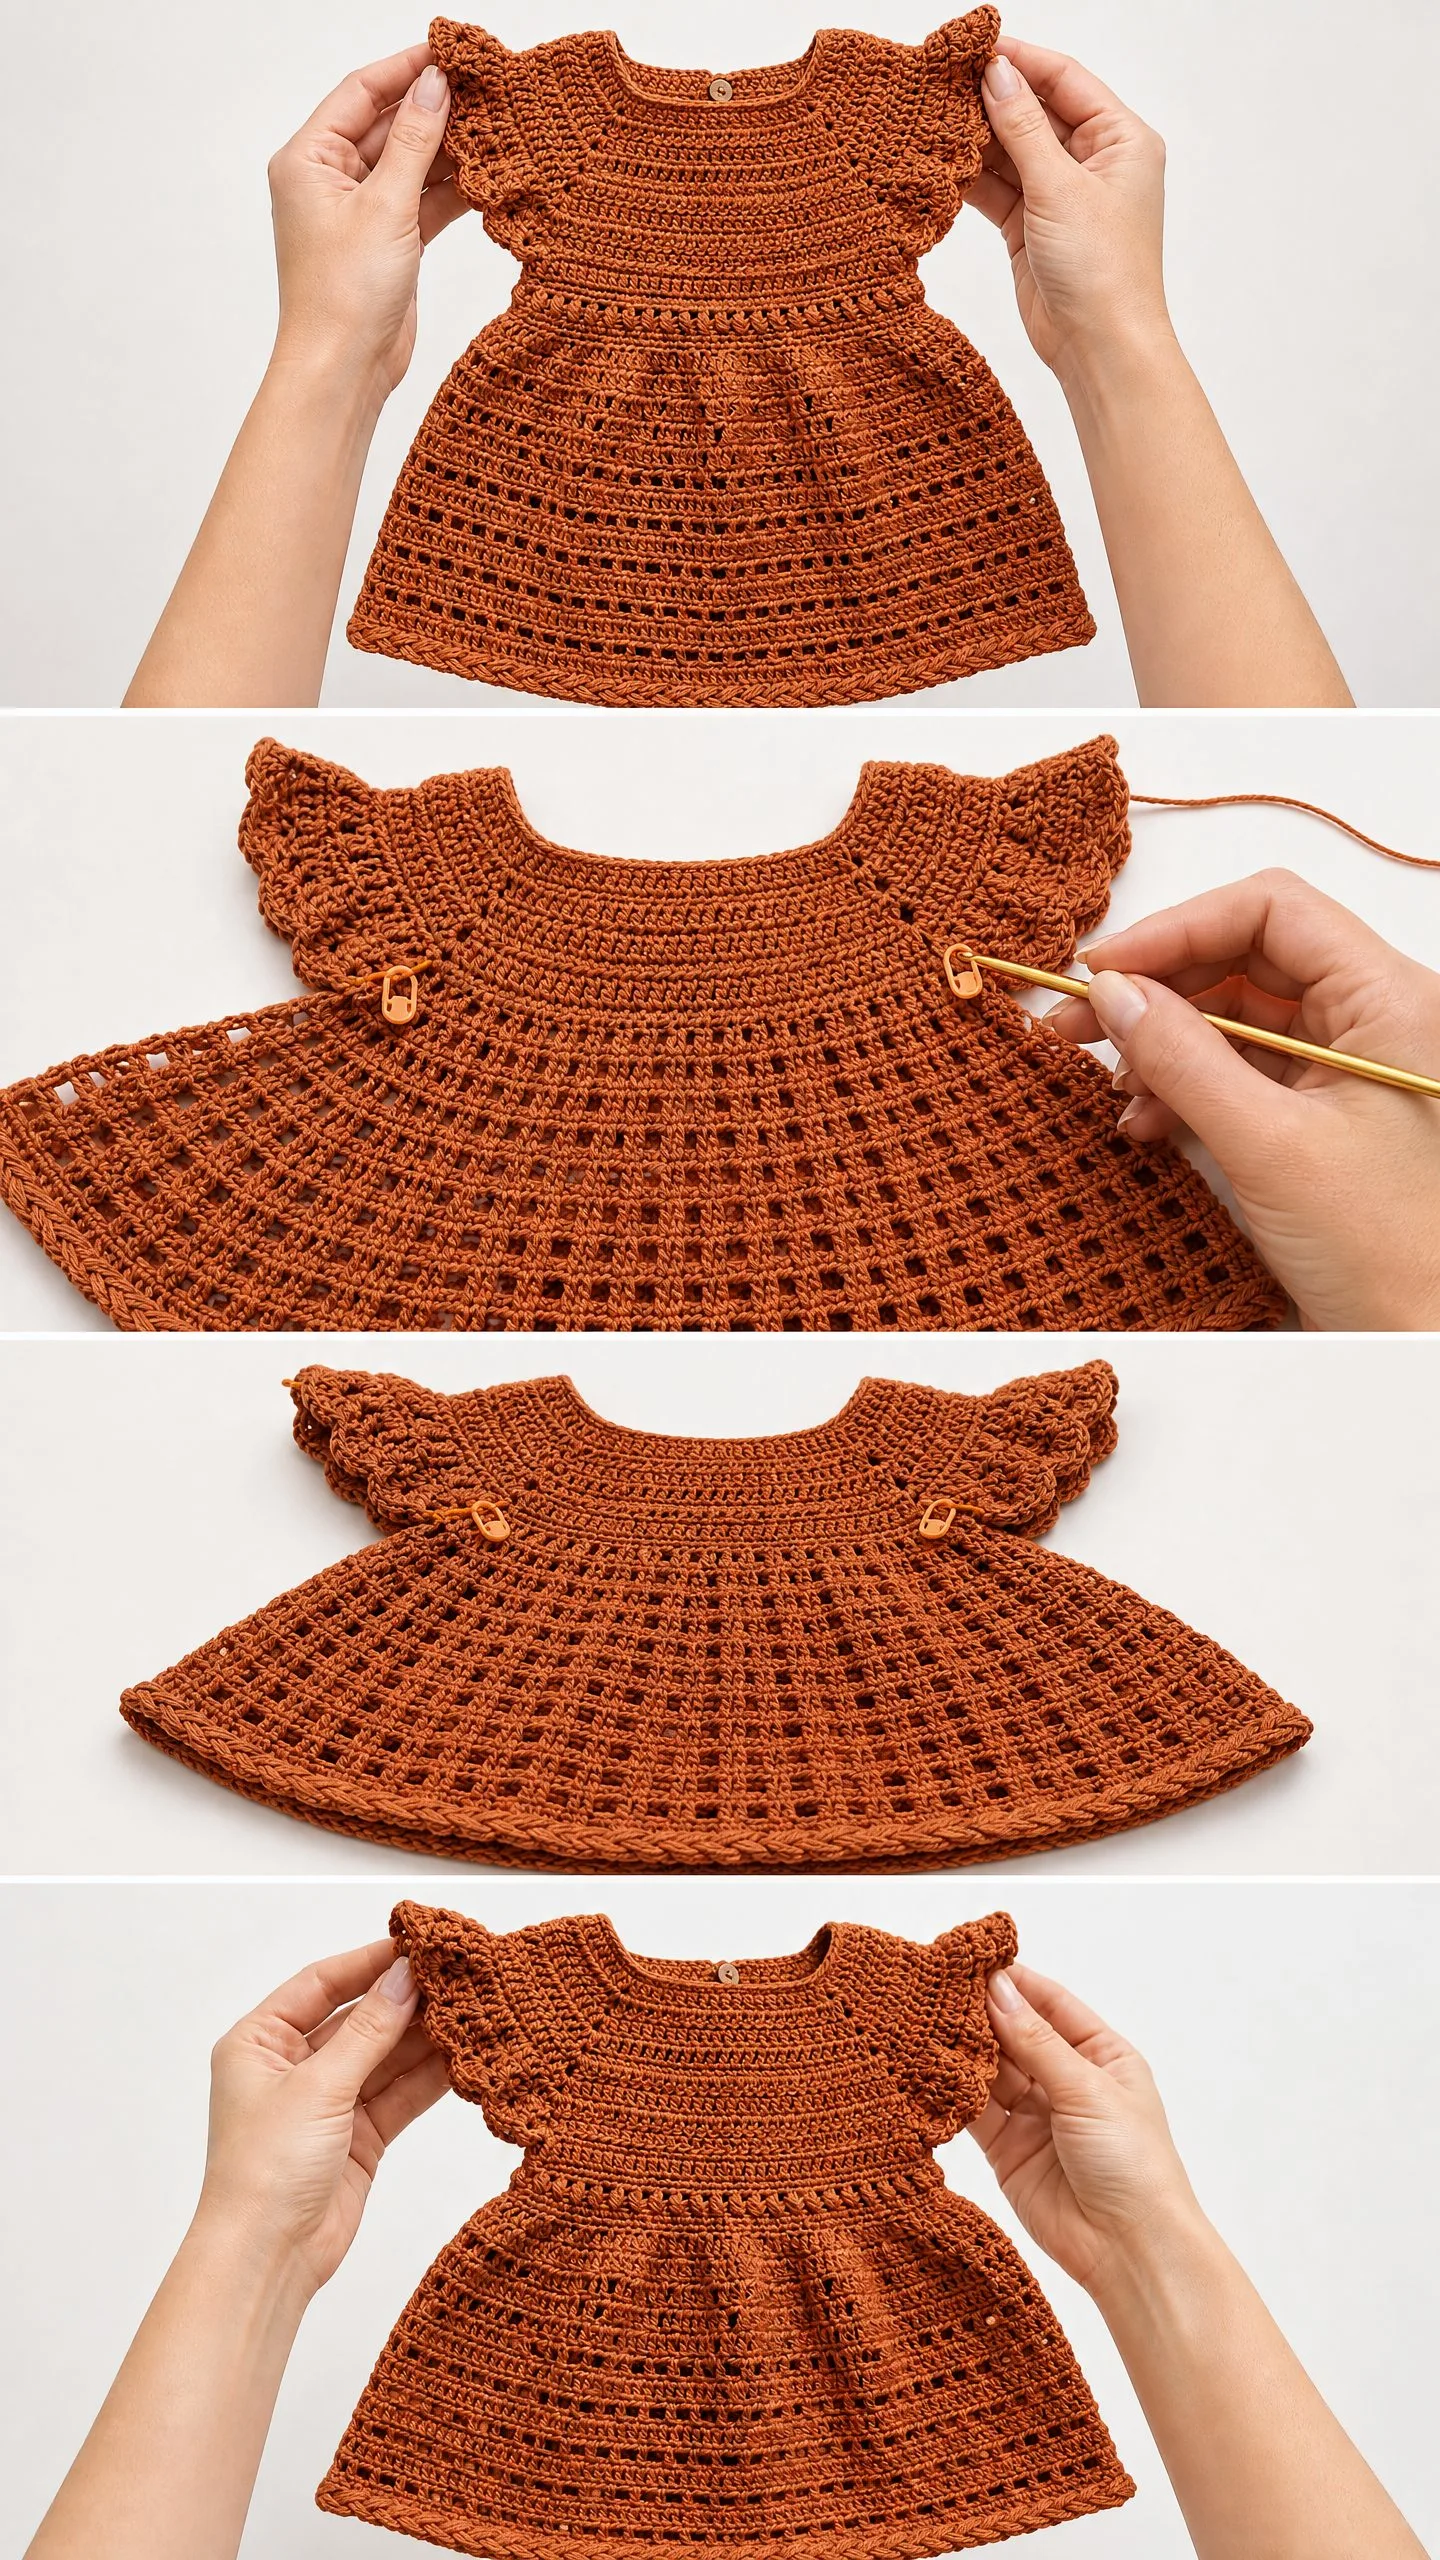
The flutter sleeves are worked separately and attached to the armhole openings. Work them flat in rows to create a fan shape, then join the straight edge to the armhole.
Remove the held sleeve stitches from waste yarn. Join yarn at the center of the underarm. Work the scallop edging around the entire armhole opening, including the underarm chain stitches.
Work the scallop pattern: [sk 2, 5 dc in next st, sk 2, sl st in next st] around the armhole.
Repeat for the second sleeve.
Finishing
Button placement: Sew the wooden button to the left back neckline, aligned with the ch-4 button loop on the right back neckline.
Weaving ends: Weave in all yarn tails securely. For baby garments, weave each tail through at least 2 inches of stitches to prevent loosening with wear and washing.
Blocking: Wet block your finished dress by soaking in lukewarm water for 15 minutes. Gently squeeze out excess water (do not wring). Lay flat on a blocking mat or towel and shape to measurements. Allow to dry completely.
Care Instructions
This cotton baby dress is machine washable. Wash on a gentle cycle with cold water. Lay flat to dry or tumble dry on low heat. Cotton may shrink slightly with the first wash, which is why blocking to measurements is important before gifting or using.
Tips for Success with This Crochet Tutorial
Count your stitches. This is especially important during the yoke section where you are increasing every round. Use stitch markers at each raglan point and count after every round.
Try it on as you go. If you have access to the baby (or a similarly sized doll), slip the dress over their head after completing the yoke to check the fit before continuing.
Block your swatch. Cotton yarn behaves differently after washing. Your gauge swatch tells you how the finished dress will measure after its first wash.
Take photos of your progress. This helps you troubleshoot if something goes wrong, and it is fun to look back at later.
Thank You for Making the Maple Dress
I hope you enjoy making this little dress as much as I enjoyed designing it. Every time I see that burnt orange color, I think of fall afternoons and tiny birthday girls twirling in handmade dresses.
If you make this pattern, I would absolutely love to see your finished dress. Tag me on Instagram or share in our Facebook group. Your photos make my day and inspire other crocheters to try new projects.
This pattern makes a wonderful baby shower gift, first birthday present, or special occasion outfit. The braided hem border elevates it from everyday to heirloom quality, and the flutter sleeves photograph beautifully.
Happy crocheting, friend. You have got this.
If you love this crochet baby dress pattern, save it to your Pinterest boards so you can find it when you are ready to start. And please drop a comment below if you make one. I read every single comment and love hearing which colors you choose.
